💞HOLA MI LINDA COMUNIDAD💞
💞HELLO MY BEAUTIFUL COMMUNITY💞
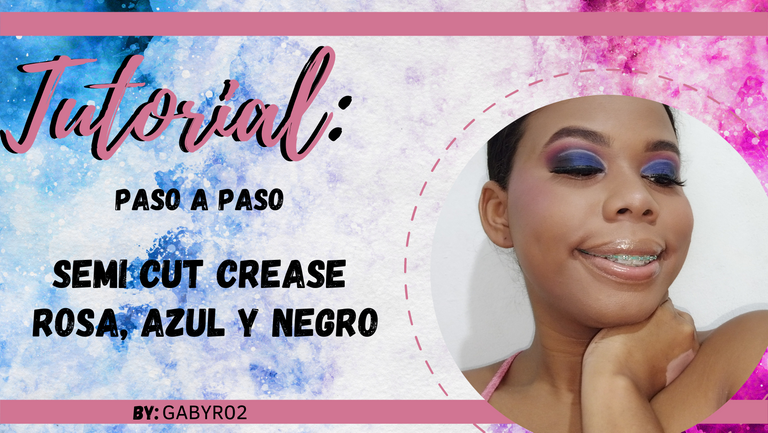
Cómo ya sabe, el maquillaje es una de mis pasiones, y a pesar de no ser una profesional en el área, soy amante de este lindo arte y lo practico cada vez que se me da la oportunidad, hace ya un mes me puse como meta usar combinaciones más atrevidas o técnicas que por miedo, no había probado, el día de hoy decidí hacer un semi cut crease (mi técnica favorita) pero usando una combinación de colores llamativa. Hace un tiempo había intentado hacer este look y no me gustó el resultado, el día de hoy hice un nuevo intento y amé todo 😂🤷🏽. Así que aquí les dejo mi tutorial paso a paso.
As you know, makeup is one of my passions, and despite not being a professional in the area, I am a lover of this beautiful art and I practice it every time I am given the opportunity, a month ago I set as a goal to use more daring combinations or techniques that for fear, I had not tried, today I decided to do a semi cut crease (my favorite technique) but using a combination of striking colors. Some time ago I had tried to do this look and I didn't like the result, today I made a new attempt and I loved everything 😂🤷🏽. So here I leave you my step by step tutorial.
PASO A PASO | STEP BY STEP
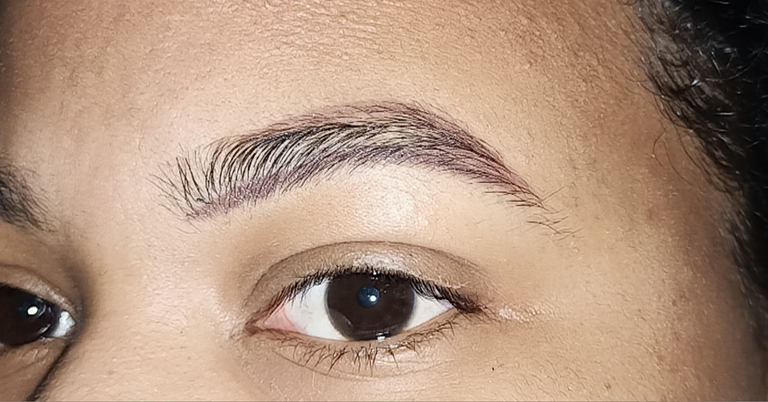
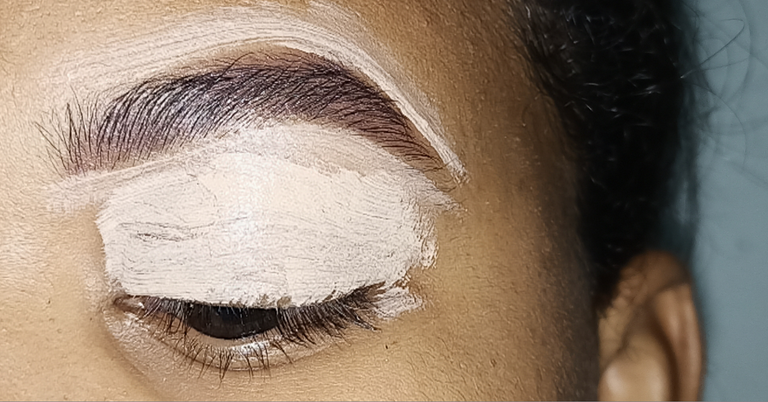
Con nuestro rostro ya limpio e hidratado, comienzo a maquillar mis cejitas, como siempre rellenando y dando forma. Luego voy a corregirlas y extender un poco de ese mismo corrector por mi párpado para prepararlo. Recuerda que ese corrector debes difuminarlo bien para poder comenzar a aplicar las sombras en el ojo.
With our face already clean and moisturized, I start to do my eyebrows makeup, as always filling and shaping. Then I'm going to correct them and spread some of the same concealer on my eyelid to prepare it. Remember to blend the concealer well to be able to start applying eye shadow.
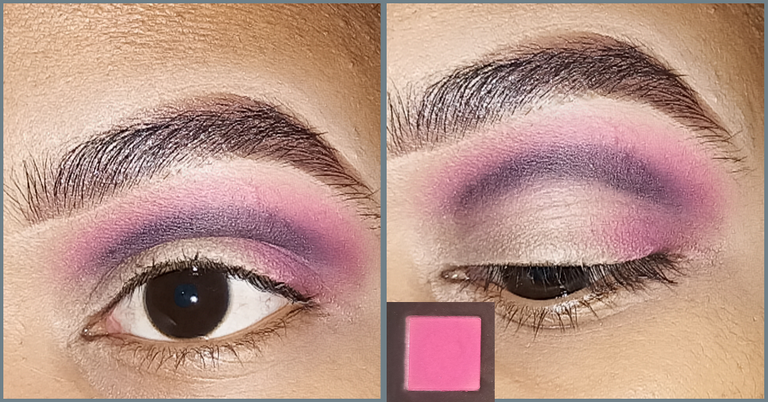
Ahora que ya estamos conformes con nuestras cejas y nuestro párpado está preparado, colocaremos a toquecitos una sombra negra por toda nuestra cuenca, la idea es saturar muy bien el color. Luego lo difuminaremos usando un tono rosa, usando nuestra brocha en movimientos circulares.
Now that we are satisfied with our eyebrows and our eyelid is ready, we will dab a black shadow all over our eye socket, the idea is to saturate the color very well. Then we will blend it using a pink shade, using our brush in circular movements.

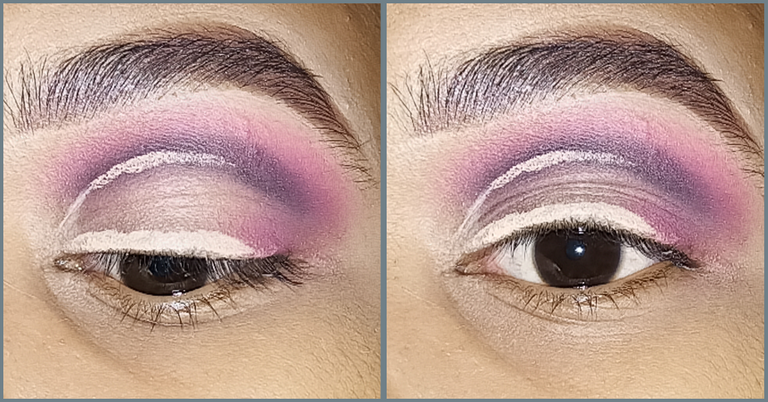
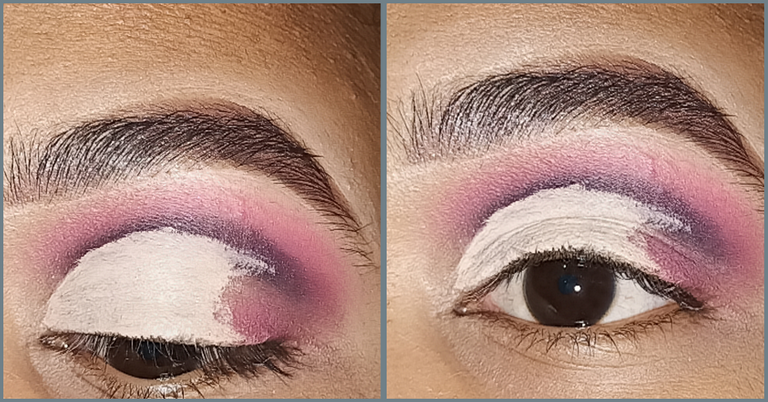
Ahora haremos el corte de cuenca, cómo les comenté hace algunos post, actualmente hago mi corte delineando con un corrector liquido la línea de mis pestañas, luego miro hacia arriba y así marcó las líneas guía, que luego rellenaré con el mismo corrector. Creando un corte de cuenca fácil y limpio.
Now we'll do the lash line, as I told you a few posts ago, I actually do my lash line by outlining my lash line with a liquid concealer, then I look up and mark the guiding lines, which I will then fill in with the same concealer. Creating an easy and clean socket cut.
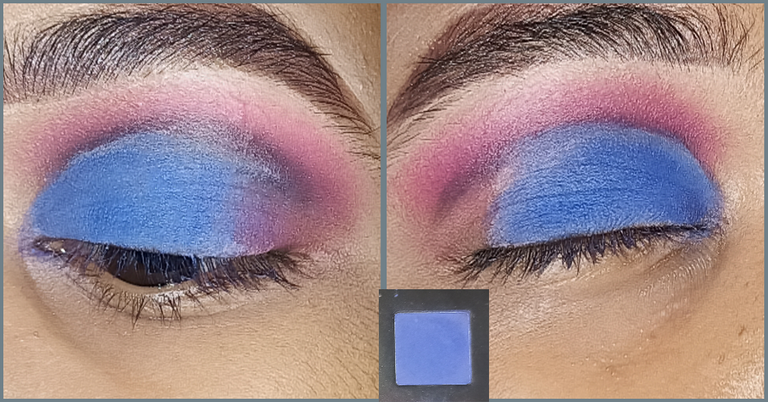
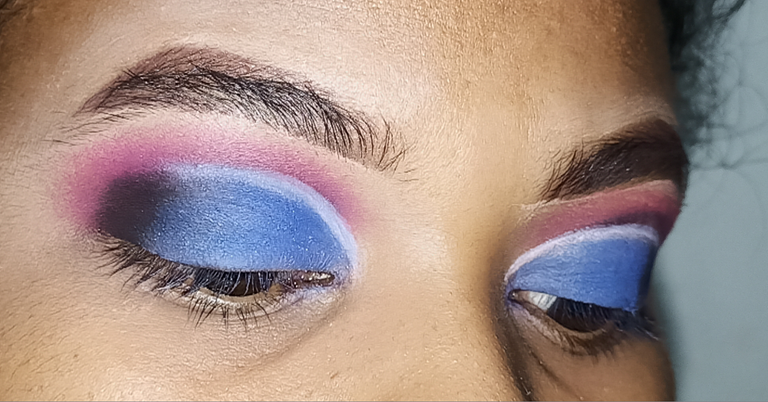
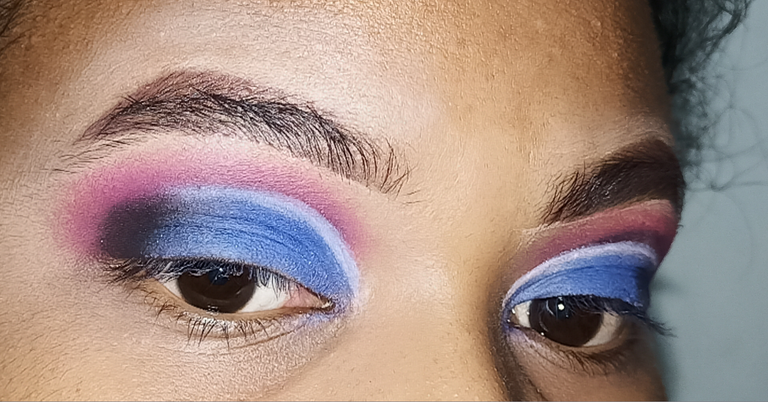
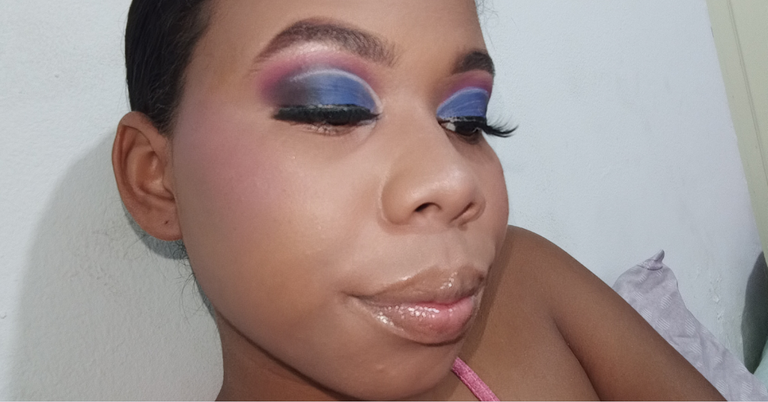
Ahora solo nos queda aplicar el color azul para rellenar el corte de cuenca que hicimos con el corrector. Ahora tenemos que colocar un poco del negro que usamos al principio en la esquina externa del ojo e integrarlo con el azul. Puedes aplicar un poco de rosa para que difumine el borde del negro. Parece un poco complicado. Pero en la imágenes te enseño un poco mejor lo que hice.
Now we just need to apply the blue color to fill in the socket cut we made with the concealer. Now we need to place a little of the black we used at the beginning on the outer corner of the eye and integrate it with the blue. You can apply a little pink to blend the edge of the black. It looks a bit complicated. But in the images I show you a little better what I did.
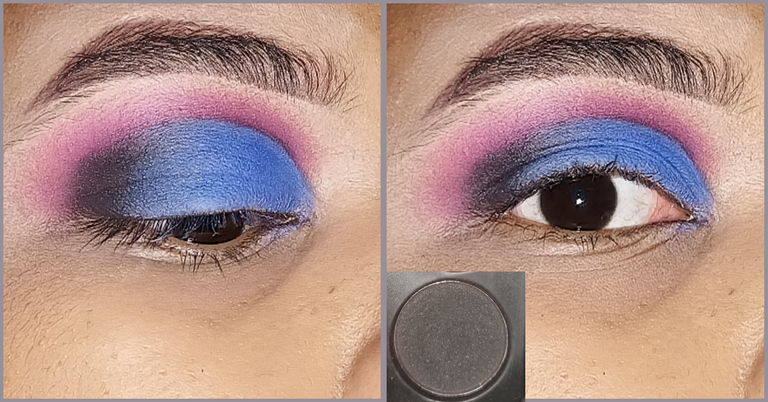
Por último, se me ocurrió colocarle un pequeño delineado con sombra blanca en el corte de cuenca, entre el azul y el negro, eso es opcional.
Lastly, I thought to put a little white shadow liner in the eye socket cut, between the blue and the black, that's optional.
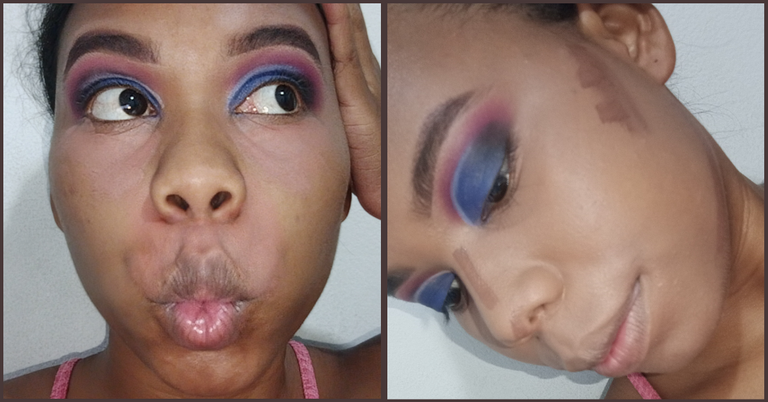
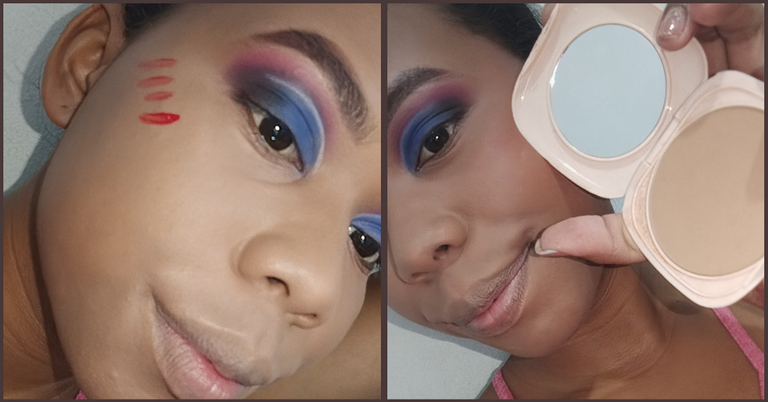
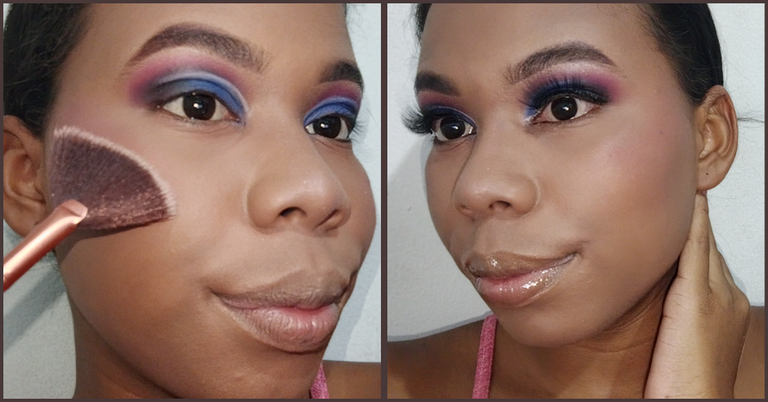
Ahora maquillo mi rostro. Por lo que inicio disimulando mis imperfecciones con ayuda de un corrector naranja. Luego aplico base y comienzo con mi contorno en mejillas, barbilla y nariz. Luego de eso aplico mi tinta de labios como rubor liquido y sello todo con los respectivos productos en polvo
Now I make up my face. So I start by concealing my imperfections with the help of an orange concealer. Then I apply foundation and start with my contouring on my cheeks, chin and nose. After that I apply my lip tint as a liquid blush and seal everything with the respective powder products.
Por último aplico iluminador, labial y pestañas. Listo, tenemos nuestro maquillaje.
Lastly I apply highlighter, lipstick and lashes. That's it, we have our makeup.
Fotos finales | Final photos
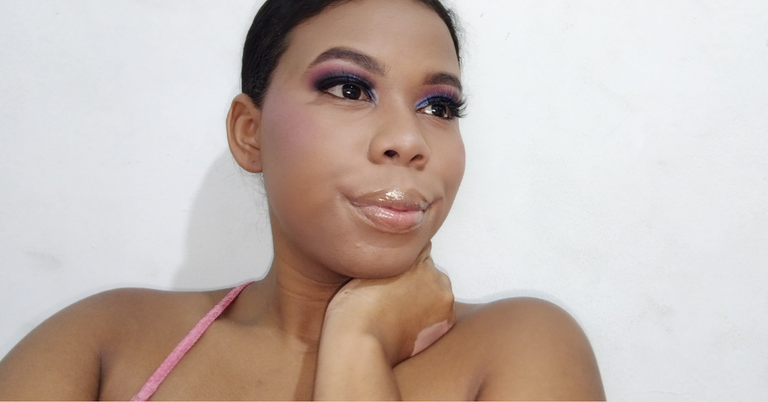
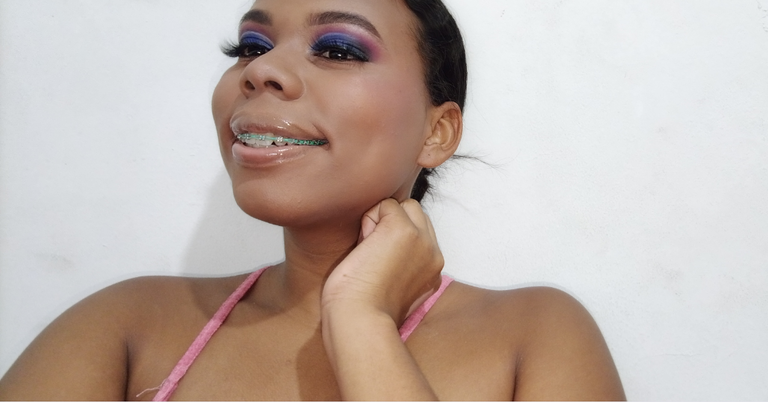
Sin más que agregar, este fue mi propuesta de un semi cut crease usando azul, rosa y negro. Espero que los resultados les hayan gustado tanto como a mí💞🥰
Without further ado, this was my proposal for a semi cut crease using blue, pink and black. I hope you liked the results as much as I did💞🥰.
Gracias por leerme y hasta un próximo post
Thanks for reading and see you in a future post
Traducción: Deepl. // Traslation: Deepl.

¡Felicitaciones!
1. Invierte en el PROYECTO ENTROPÍA y recibe ganancias semanalmente. Entra aquí para más información.
3. Suscríbete a nuestra COMUNIDAD, apoya al trail de @Entropia y así podrás ganar recompensas de curación de forma automática. Entra aquí para más información sobre nuestro trail.
4. Creación de cuentas nuevas de Hive aquí.
5. Visita nuestro canal de Youtube.
Atentamente
El equipo de curación del PROYECTO ENTROPÍA
Wow!! Quedó buenísimo! El efecto es excelente, y además lo hiciste con tremenda delicadeza! Muy bueno!
Jaja gracias @belug de verdad intenté hacerlo lo más limpio que pude. Me alegro de que te guste el resultado. Gracias por leerme y por tu lindo comentario 🥰
Está hermoso, se ve muy elegante ✨
Gracias por leerme y por tu comentario!! Me alegro de que te haya gustado 🥰💕