You should know by now it is going to be a good time when @bozz starts busting out the power tools! Actually only three major tools were used for this build: A battery drill, miter saw, and brad nailer.
I will apologize in advance for the lack of pictures, I honestly didn't think this was going to turn out as good as it did.
My oldest niece is graduating from high school in just under a week. Given that fact, my wife sent me a message about a month ago with the picture below:
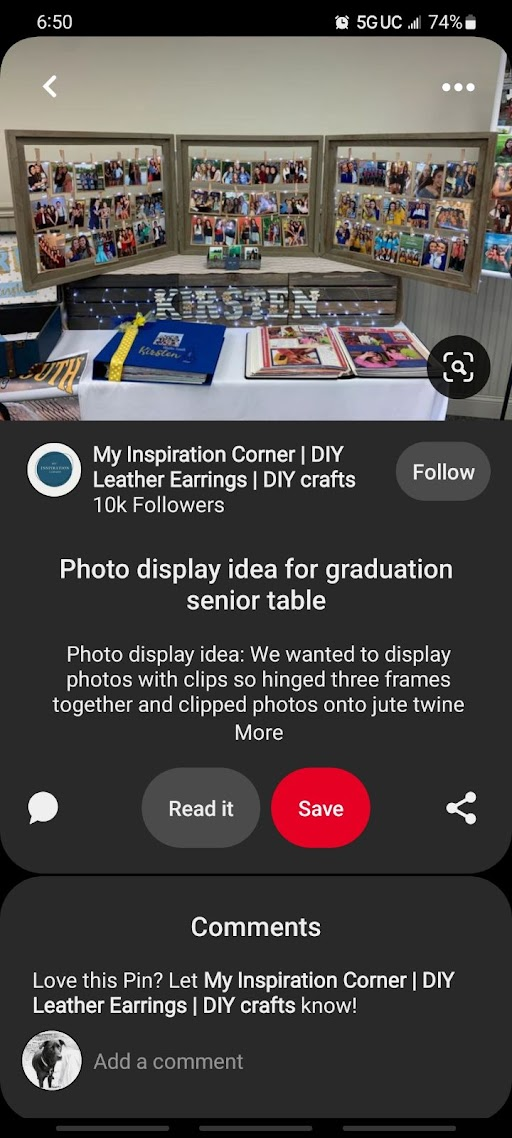
She asked me if we could make something like the three fold picture frame at the top of the image. I did a little investigation and I decided that yes it should be pretty easy to accomplish. Like I was going to say no anyway...
Upon further inspection, it appeared that they had used three store-bought picture frames and attached them together. That seemed far too easy and cheap, so I decided to build the thing from scratch myself.
Looking back, it probably would have been cheaper to purchase the frames, but after a trip to the lumber yard and about $50 later, I was ready to start work.
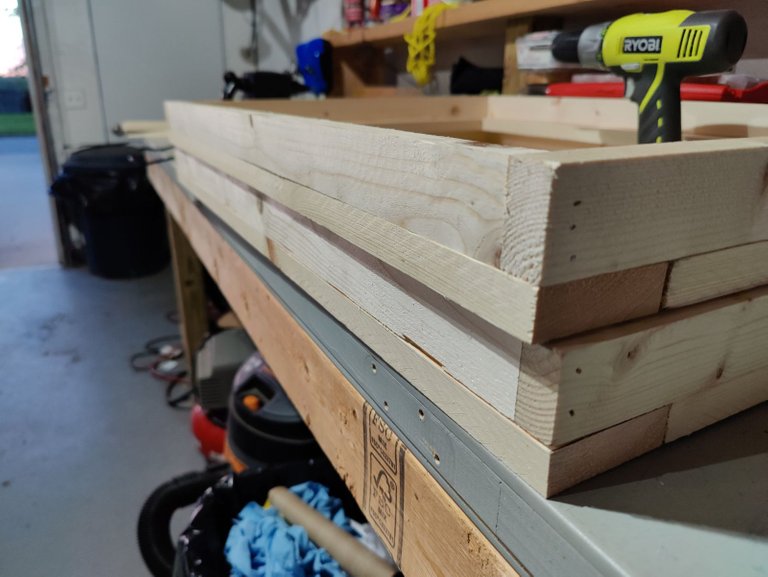
Honestly, the hardest part was making sure I cut all of the boards the proper length. I didn't want to end up with one frame being obviously larger or smaller than the other one. It probably would have been better if I had bought some more premium quality lumber, but that could have easily bumped the price up to $100.
Instead, I just inspected the pieces of wood really closely for knots and warping before I purchased them. Of course building a project requires a new tool purchase as well. I picked up a nice set of nail punches since I didn't already own a set.
After the front part of the frame was assembled and fastened in place with the brad gun I flipped it over and started attaching the back pieces. My brads were a little shorter than I needed them to be, so I used some wood glue on the back piece to ensure it would stay fastened. I also adjusted the brad gun so it would shoot the brads a little deeper into the wood.
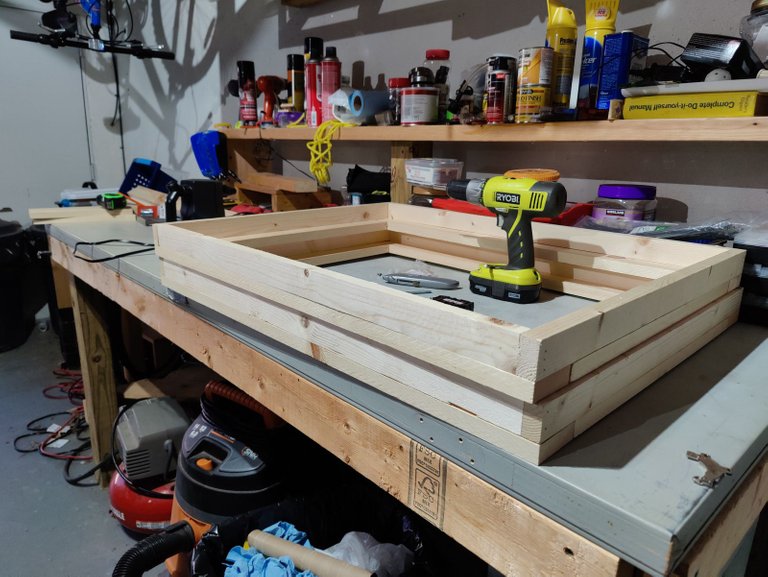
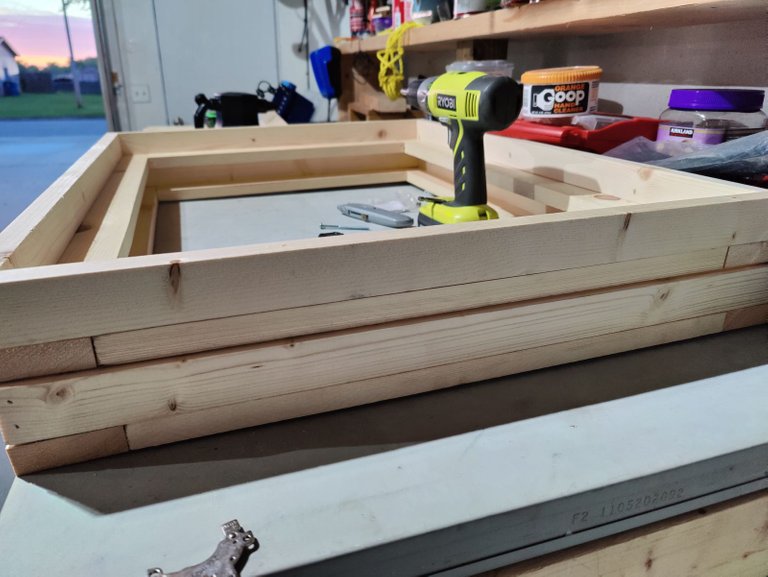
Again, looking back I probably should have sanded the pieces before or after I assembled them, but I was kind of looking for a rustic look. If you look at them in the picture above, they really don't look like much. It wasn't until I added the stain that they really started to come alive.
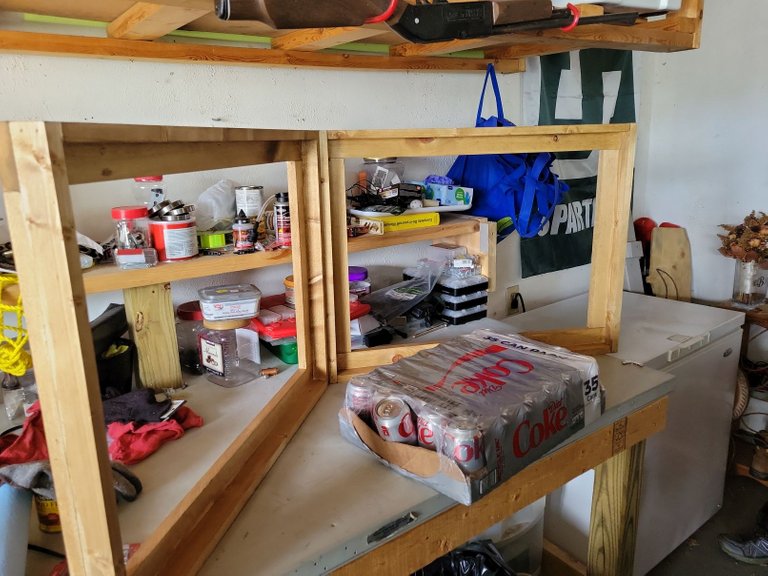
Don't mind the case of Diet Coke, but you can see in the background that the frame came together really nicely. We decided on a dark walnut stain for the frames and although I think they (my niece and her mom) may have wanted it to come out a little darker, it still looks really good. I added two coats of stain just to make sure I didn't miss any spots and to make the finish a little deeper.
After the stain was dried, I used my hand chisels to carve out pockets for two hinges to be attached between the two of them. That allows the frames to fold up nicely and support each other so they don't fall over when you have the whole thing opened up.
That same day I added the hinges @mrsbozz came out and helped me attache the twine to the back with a staple gun and my nail punches to make the staples flush.
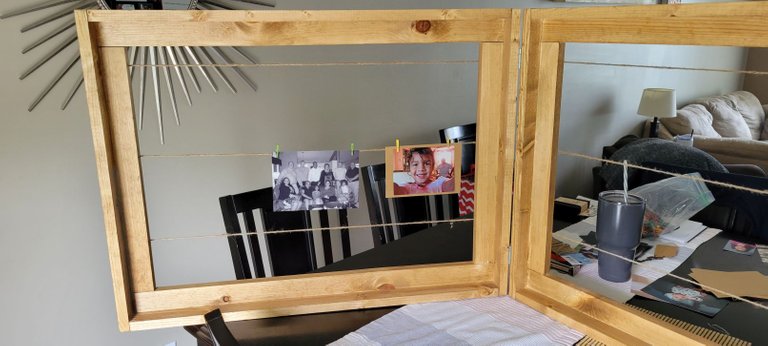
Here you can see the finished product and some sample pictures that my wife attached to see how they would look. She is playing with the idea of adding a background to each one as she thinks it makes them "pop" a bit more. I would have to agree, but it might be too time consuming to add the background to each one.
I am pretty hard on myself and although every time I look at the frames I see all of the flaws and things I could have done better, I still think they turned out pretty dang good.
It is also sturdy enough that this could be used in the future for the rest of my nieces and nephews when they graduate from high school. Or other occasions too. It's crazy to think what started out as a small/simple project could turn into a multi-generational heirloom.
Or it falls apart in transit to Ohio...
Who knows!
Sports Talk Social - @bozz.sports

Dang, that's like an entire wall.
It's gotta sit on a table. Like a big banquet table.
Yeah, I like that you built it from scratch, too. Using premade frames for this seems like cheating. Nicely done!
A very original photo frame, hopefully it will arrive intact to give it as a gift to the niece 😊 regards.
I hope so too! Thanks for the stopping by!
It was a pleasure 😉
Fue un gusto 😉
Nice! I love custom designs, I truly hope that I can also find the space in our new home in Spain to get more custom-made things to decorate our walls.
Woodwork like this would be a bridge too far because we probably end up in an apartment and not a house with a shed but it's still cool to see this kind of designs. I would hang this up instantly!
I love having my garage to be able to tinker around on stuff like this. I was telling my wife the other day that I hope to have a proper work bench one day, but we will see if that ever happens. Chances are we will downsize more than we will upsize!
Yeah we had that years ago, but both of us long for having one room for this purpose to be honest. My dream is to have one room filled with cabinets and crafting supplies and everything I need to make whatever I want lol. But bf's dream is to be have a shed or something with a proper work bench and bigger tools.
Both of these things will probably not happen at the first place we end up as our next home, but once we are ready to buy, it has to happen :) lol
I built my wife a desk down in the basement that she can use for crafting and scrapbooking. Turns out I use it more than she does! I have basically taken it over with my computer stuff and records.
Haha that's how these things go sometimes :)
I was truly happy as I finally had all my crafting/drawing/painting supplies sorted in nice boxes with lids and it all was organized so well. Just three months later I'm selling them for pennies. just can't take them. I will fit a few in the suitcases though the tiny ones to keep some smaller items together and not loose them all, but it sucks as now I have to start all over.
That does suck. I am sorry.
Let's just think I will find better items there, which is not unlikely :) it took me ages to find them here so.. I'm confident I will be happier with what I have there. At least there's sun, sea and beaches!
Excellent work! I do love playing with wood and power tools. You've done a great job there. Although it could have been cheaper to buy, where is the fun in that!?
For sure! I did have a good time putting this together. It actually came to fruition rather quickly.
😆
Oh that was gold! LOL!
Also, that frame turned out awesome! You sound just like my husband when he makes something, I'm standing over it oohing and ahhhing about its awesomeness and he's pointing out a flaw so tiny that I didn't even notice it. lol!
Seriously amazing frame though, I am sure everyone will love it, especially your niece!
Thanks, I appreciate that. I could probably make some really amazing things if I had all the right tools and I splurged for the high quality wood. This works as intended though and it has a rustic feel that I like. I'm honestly 95% happy with it. :)
I like your picture frames. They are unique. A picture frame to hang pictures. Maybe you could just put a background on the frame rather than each picture. Thanks for sharing.
That part was my wife's job! I think she got it figured out. She showed me the general layout the other day and it looked really great.
the best part of any DIY 😁👍
I like that frames are not flush, nice work! I would not do more than two coats myself.
Thanks for the advice! It turned out pretty nice I think.
It is fabulous that you did this frame - DIY at its best. It will be the talk of the family for a very long time - a multi-generational heirloom indeed.
Thanks, I hope so!
A self crafted present has the highest value! For my taste. Because it has a soul.
Very good job. And be careful 😉, you seem to turn into an artist, as I can read your perfectionism.
1UP
Pretty cool stuff, man! I have a little shed with power tools, but don't have a lot of room to work these days. I like the house I'm living in right now, being that it is walking distance to the beach, but we really don't have a lot of space for working on wood.
I have been thinking about building something cool to display my Garbage Pail Kids cards and other collectibles but haven't come up with a good idea yet. One of these days!
Thanks for your support @nuthman.
I really appreciate
No problem, you've got some good sewing skills!
Yeah, I hear you! Any little space you can make your own is with it! Good luck with the card display. Make sure you write a post about it if you ever figure something out. Our house has been good for several years, but I think we are both getting ready for a change.
The rewards earned on this comment will go directly to the people(@bozz) sharing the post on Twitter as long as they are registered with @poshtoken. Sign up at https://hiveposh.com.