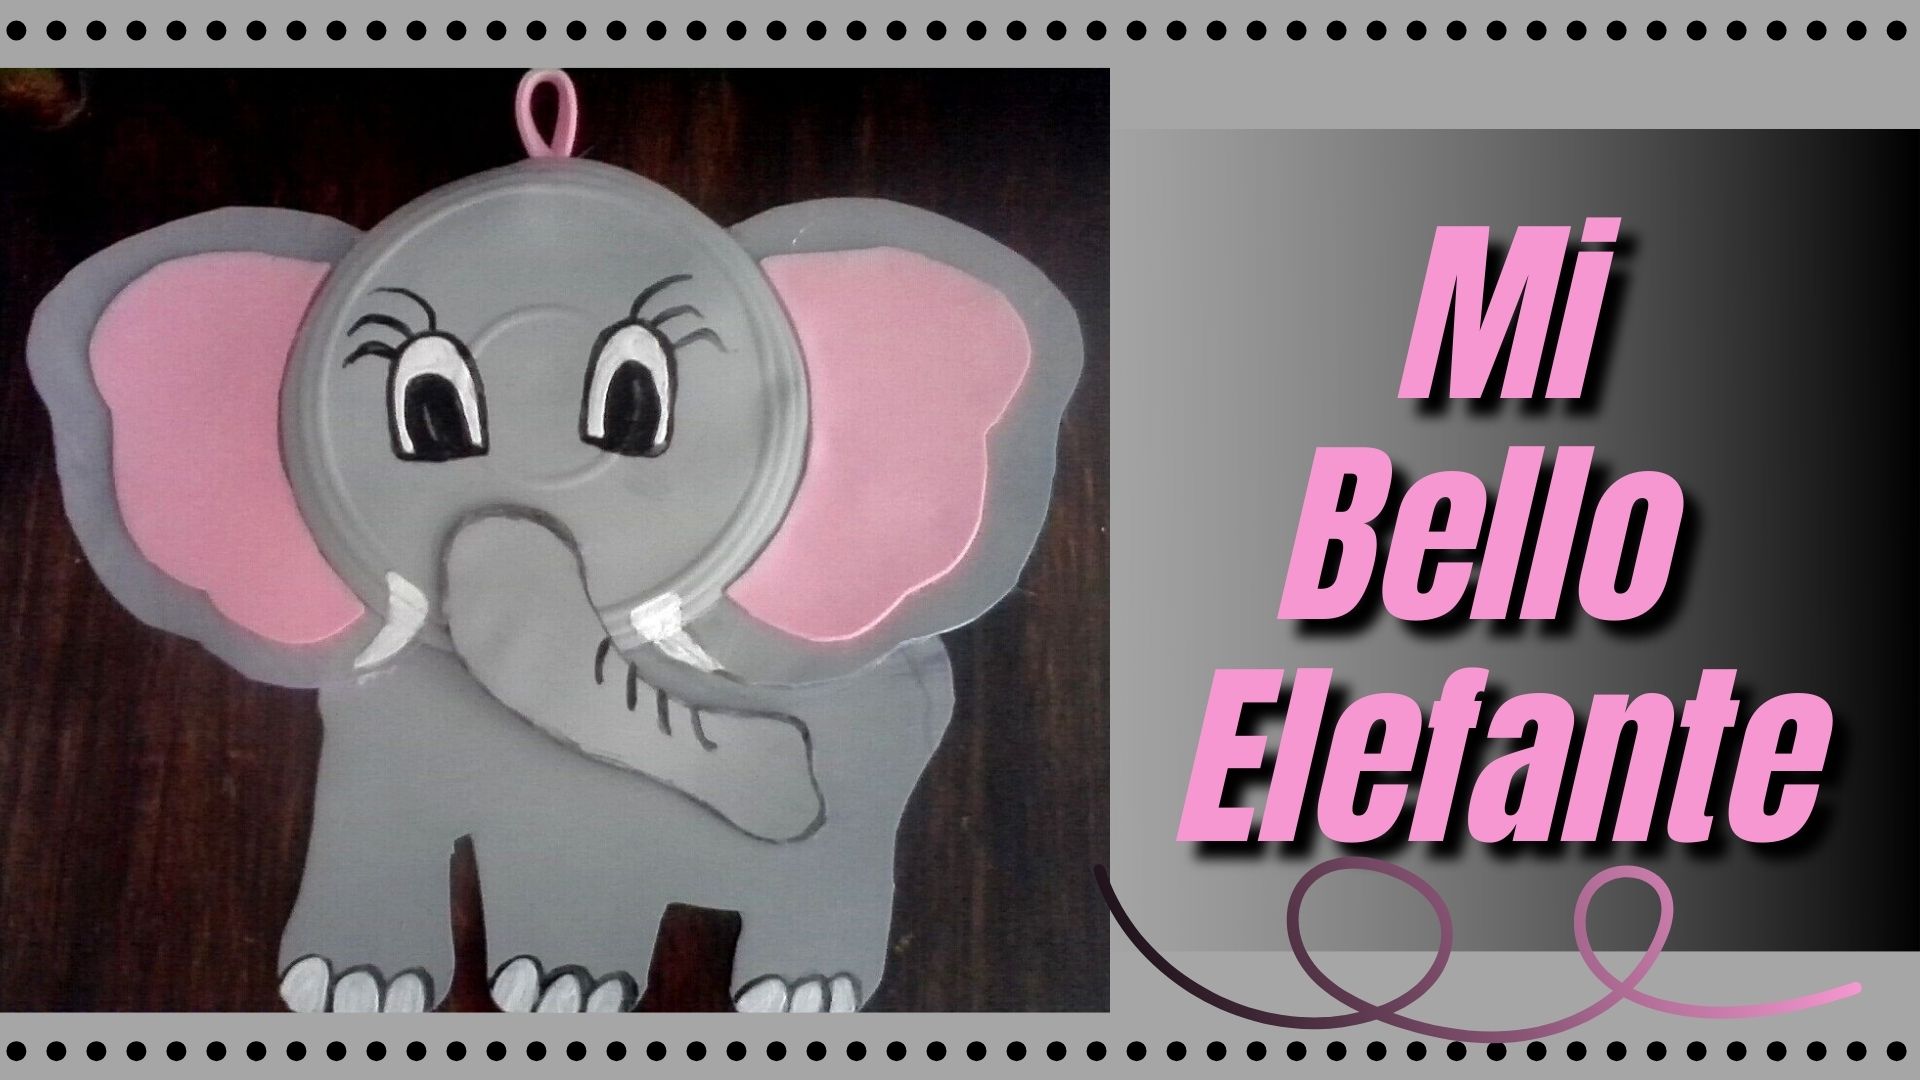
How are you today my excellent Hive family, I hope very well. I am going to show you today how to make a cute elephant made with foami and a disposable plastic plate, it is a nice detail to decorate your wall anywhere in your home.
Español
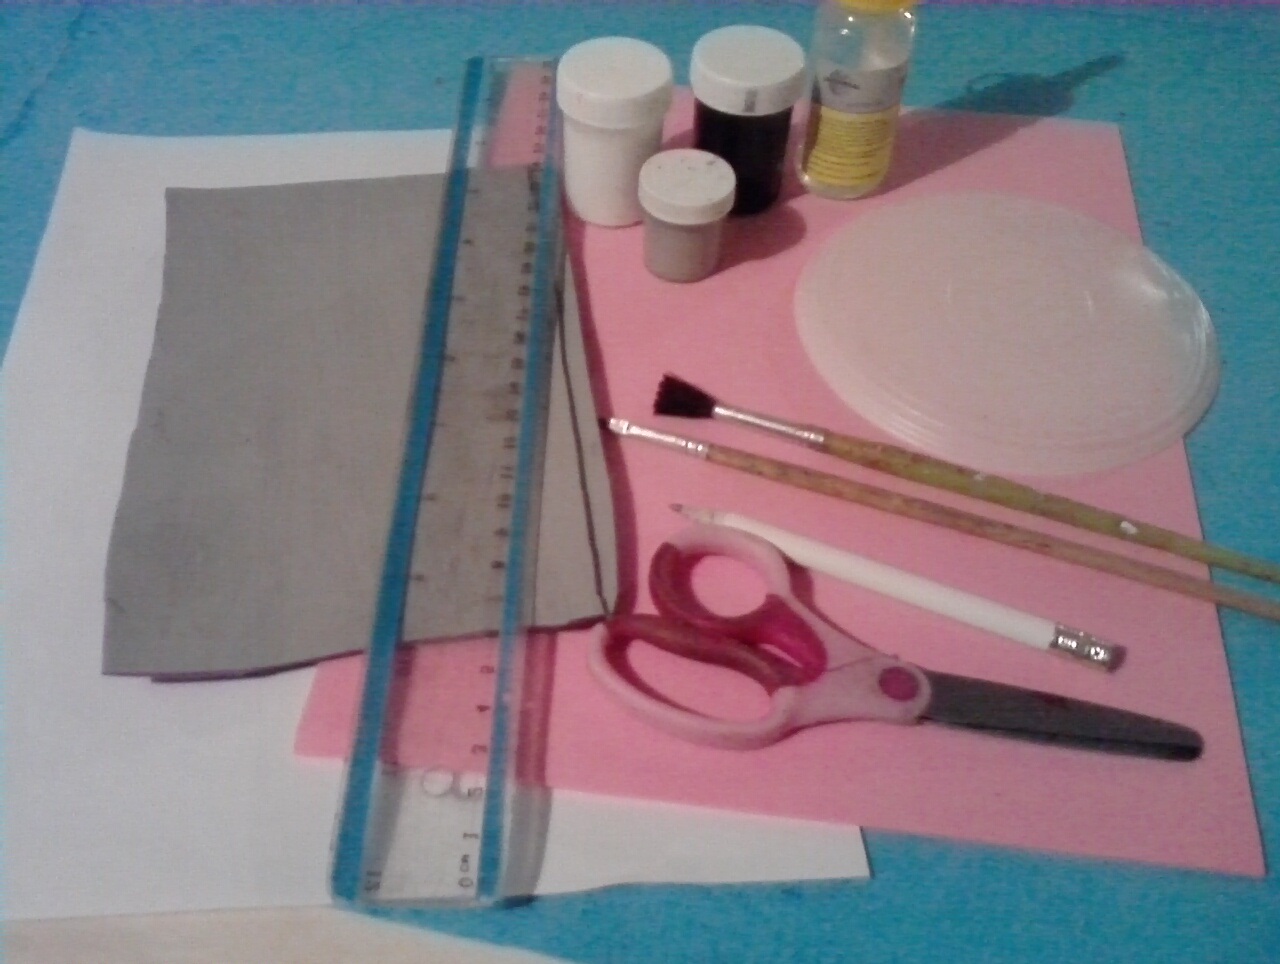
Materiales:
- Foami (rosado y gris).
- (1) plato plástico desechable.
- Lápiz.
- Pincel.
- Tijera.
- Silicon liquido.
- Pintura (negra, blanca y gris).
- (1) hoja blanca.
English
Materials:
- Foami (pink and gray).
- (1)** disposable plastic plate.
- Pencil.
- Paintbrush.
- Scissors.
- Liquid silicon.
- Paint (black, white and gray).
- (1) white sheet.

Español
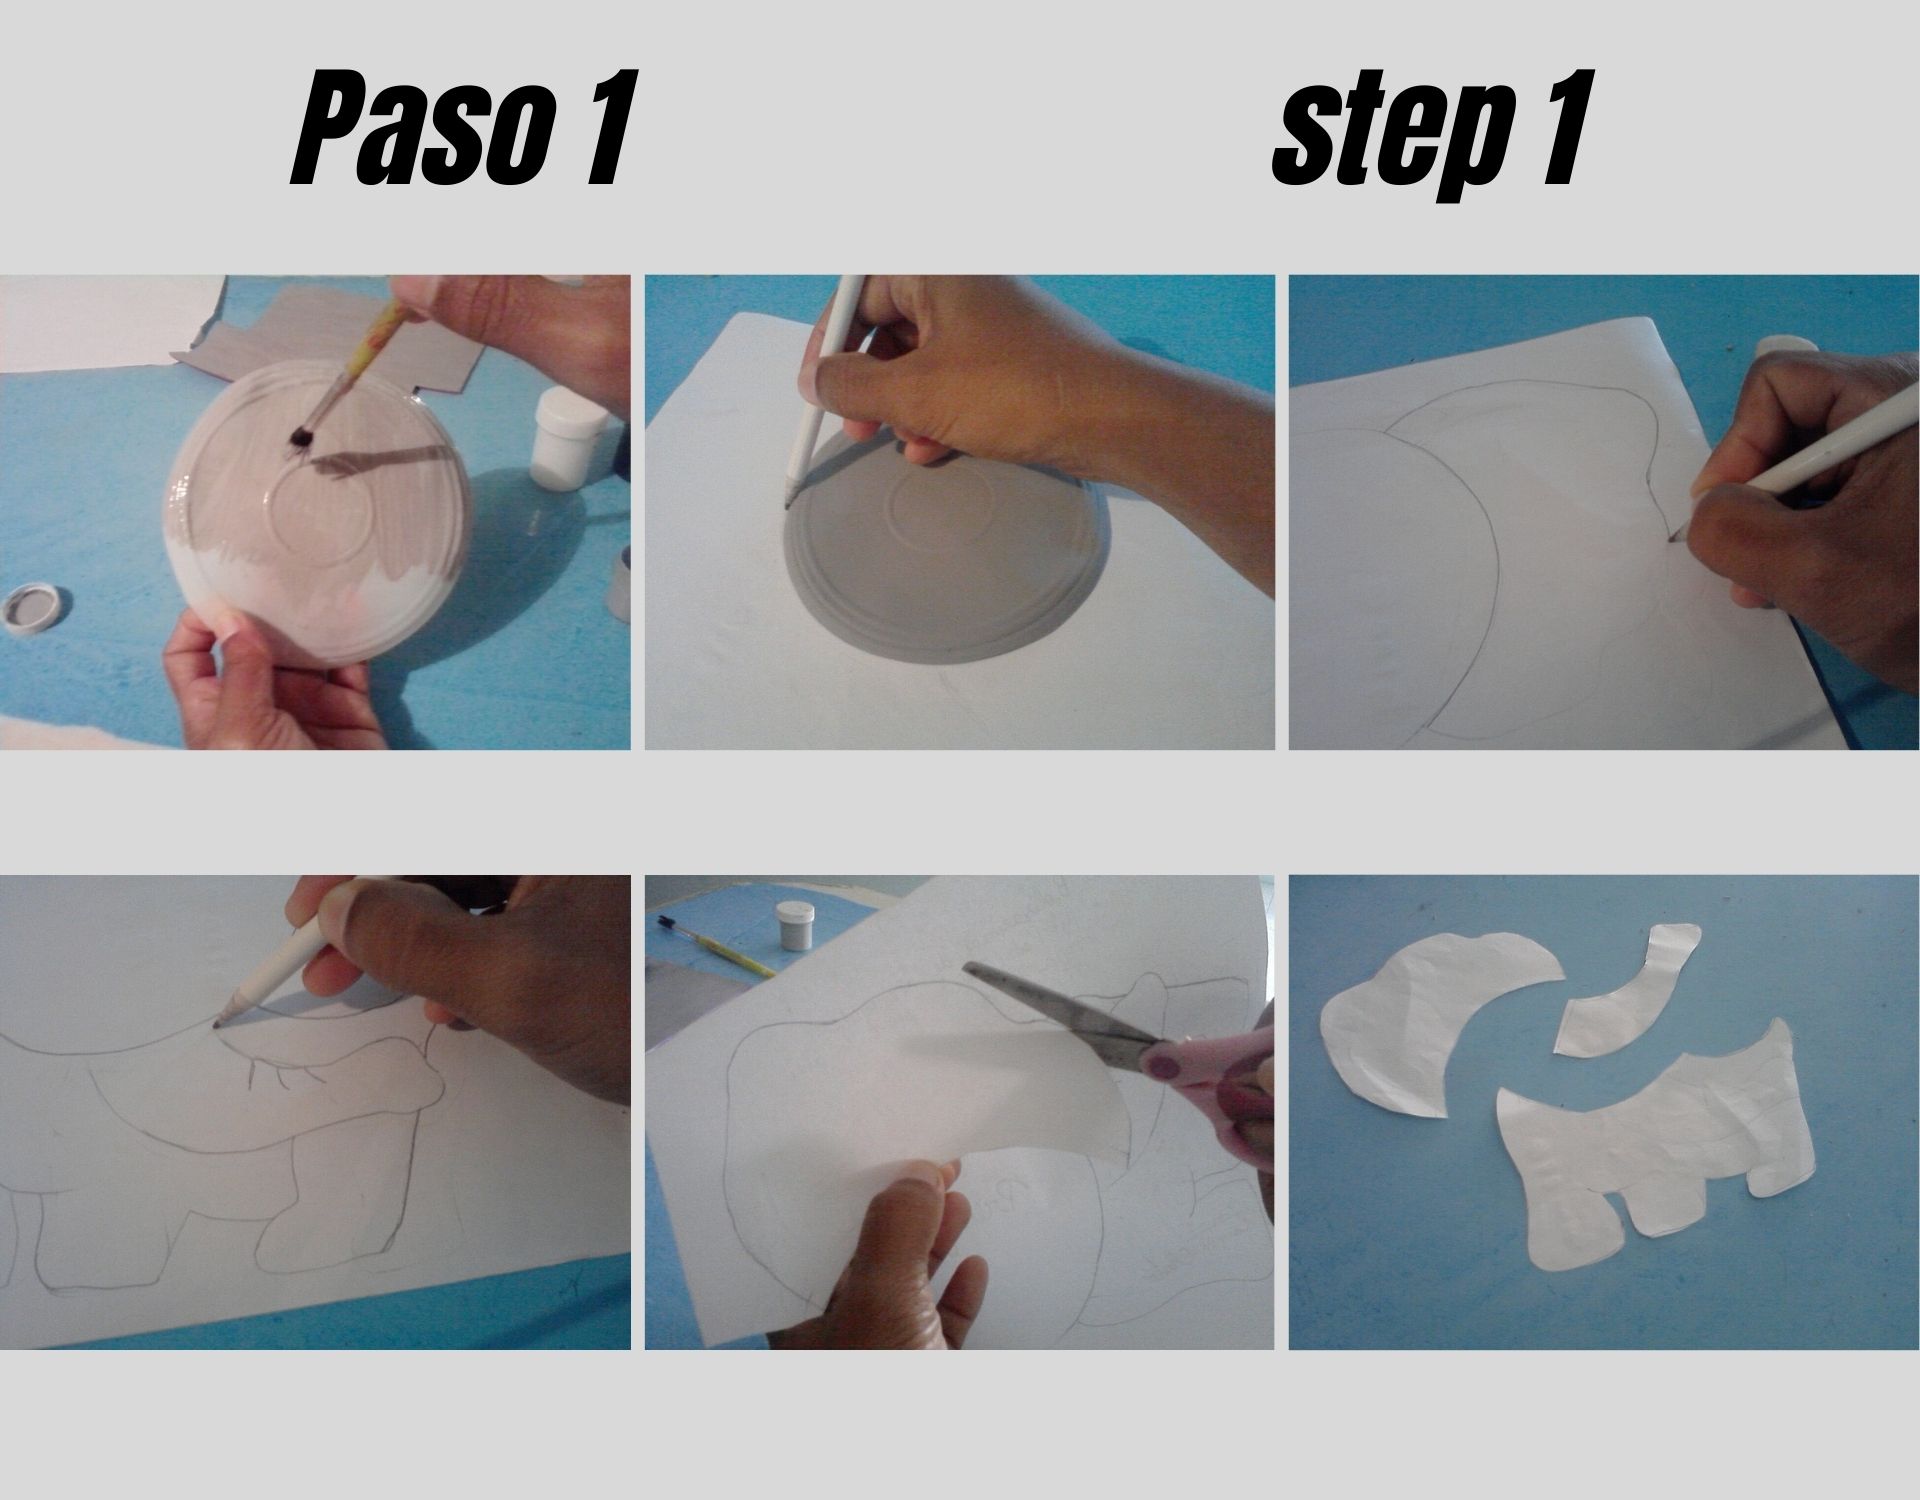
Paso 1:
- Comienzo pintando el plato plástico con el color gris, espero que la pintura este seca y lo marco en la hoja blanca, luego comienzo dibujando las orejas y el resto del cuerpo del elefante para recortarlo y sacar por partes el patrón del elefante.
English
Step 1:
- I start by painting the plastic plate with the gray color, I wait for the paint to be dry and mark it on the white sheet, then I start drawing the ears and the rest of the elephant's body to cut it out and draw the elephant pattern in parts.
.jpg)
Español
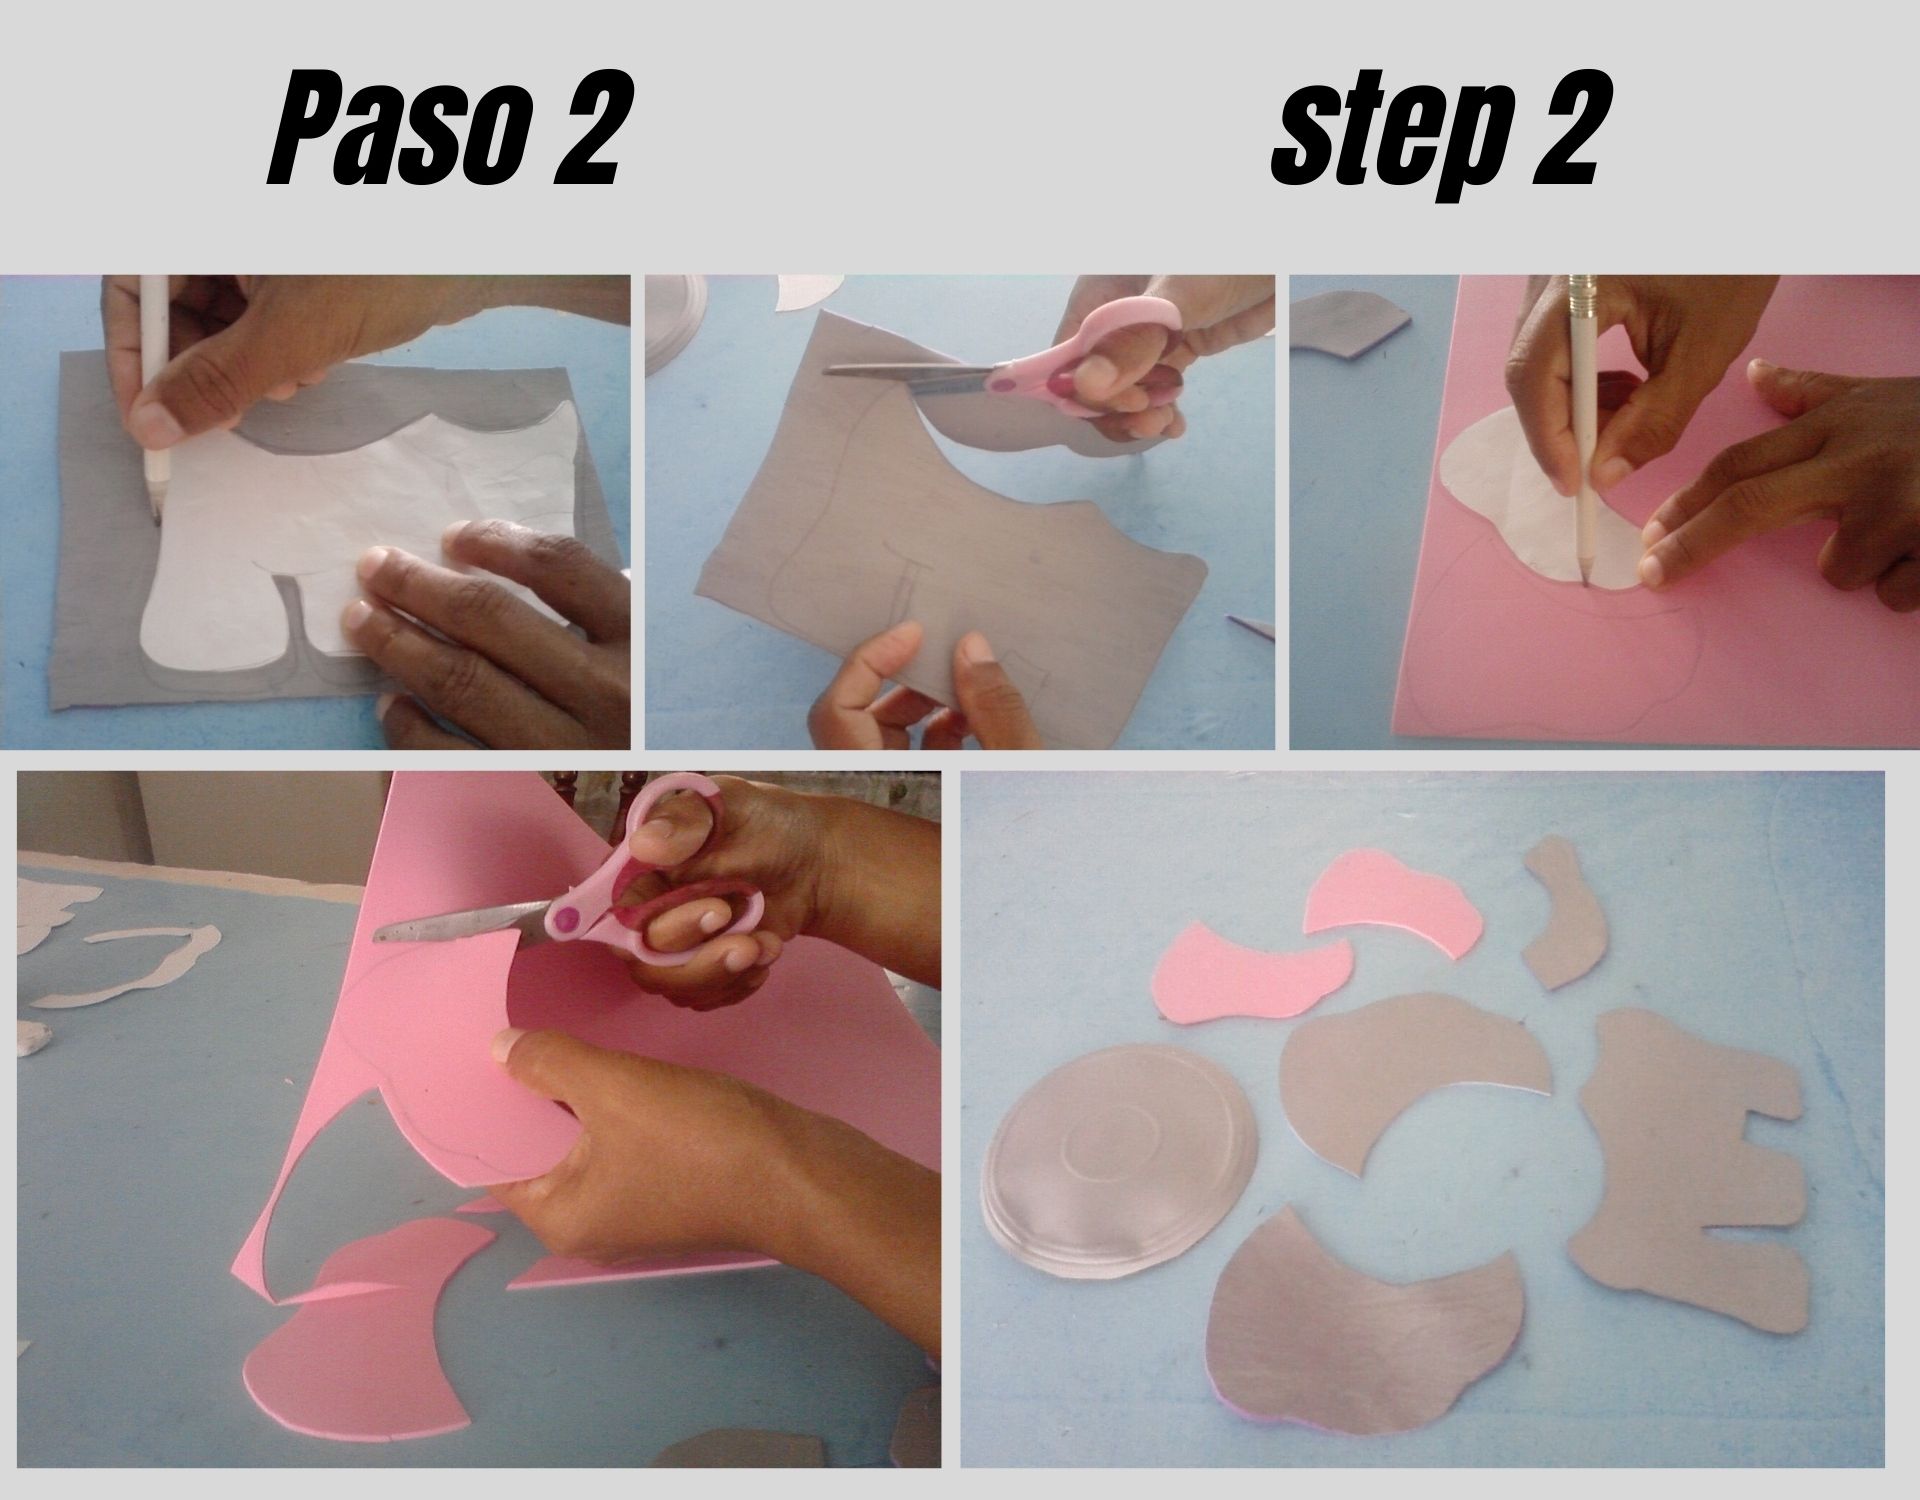
Paso 2:
- Después que tengo el patrón comienzo a marcarlo en el foami , para recortarlo.
English
Step 2:
- After I have the pattern I start marking it on the foami, to cut it out.
.jpg)
Español
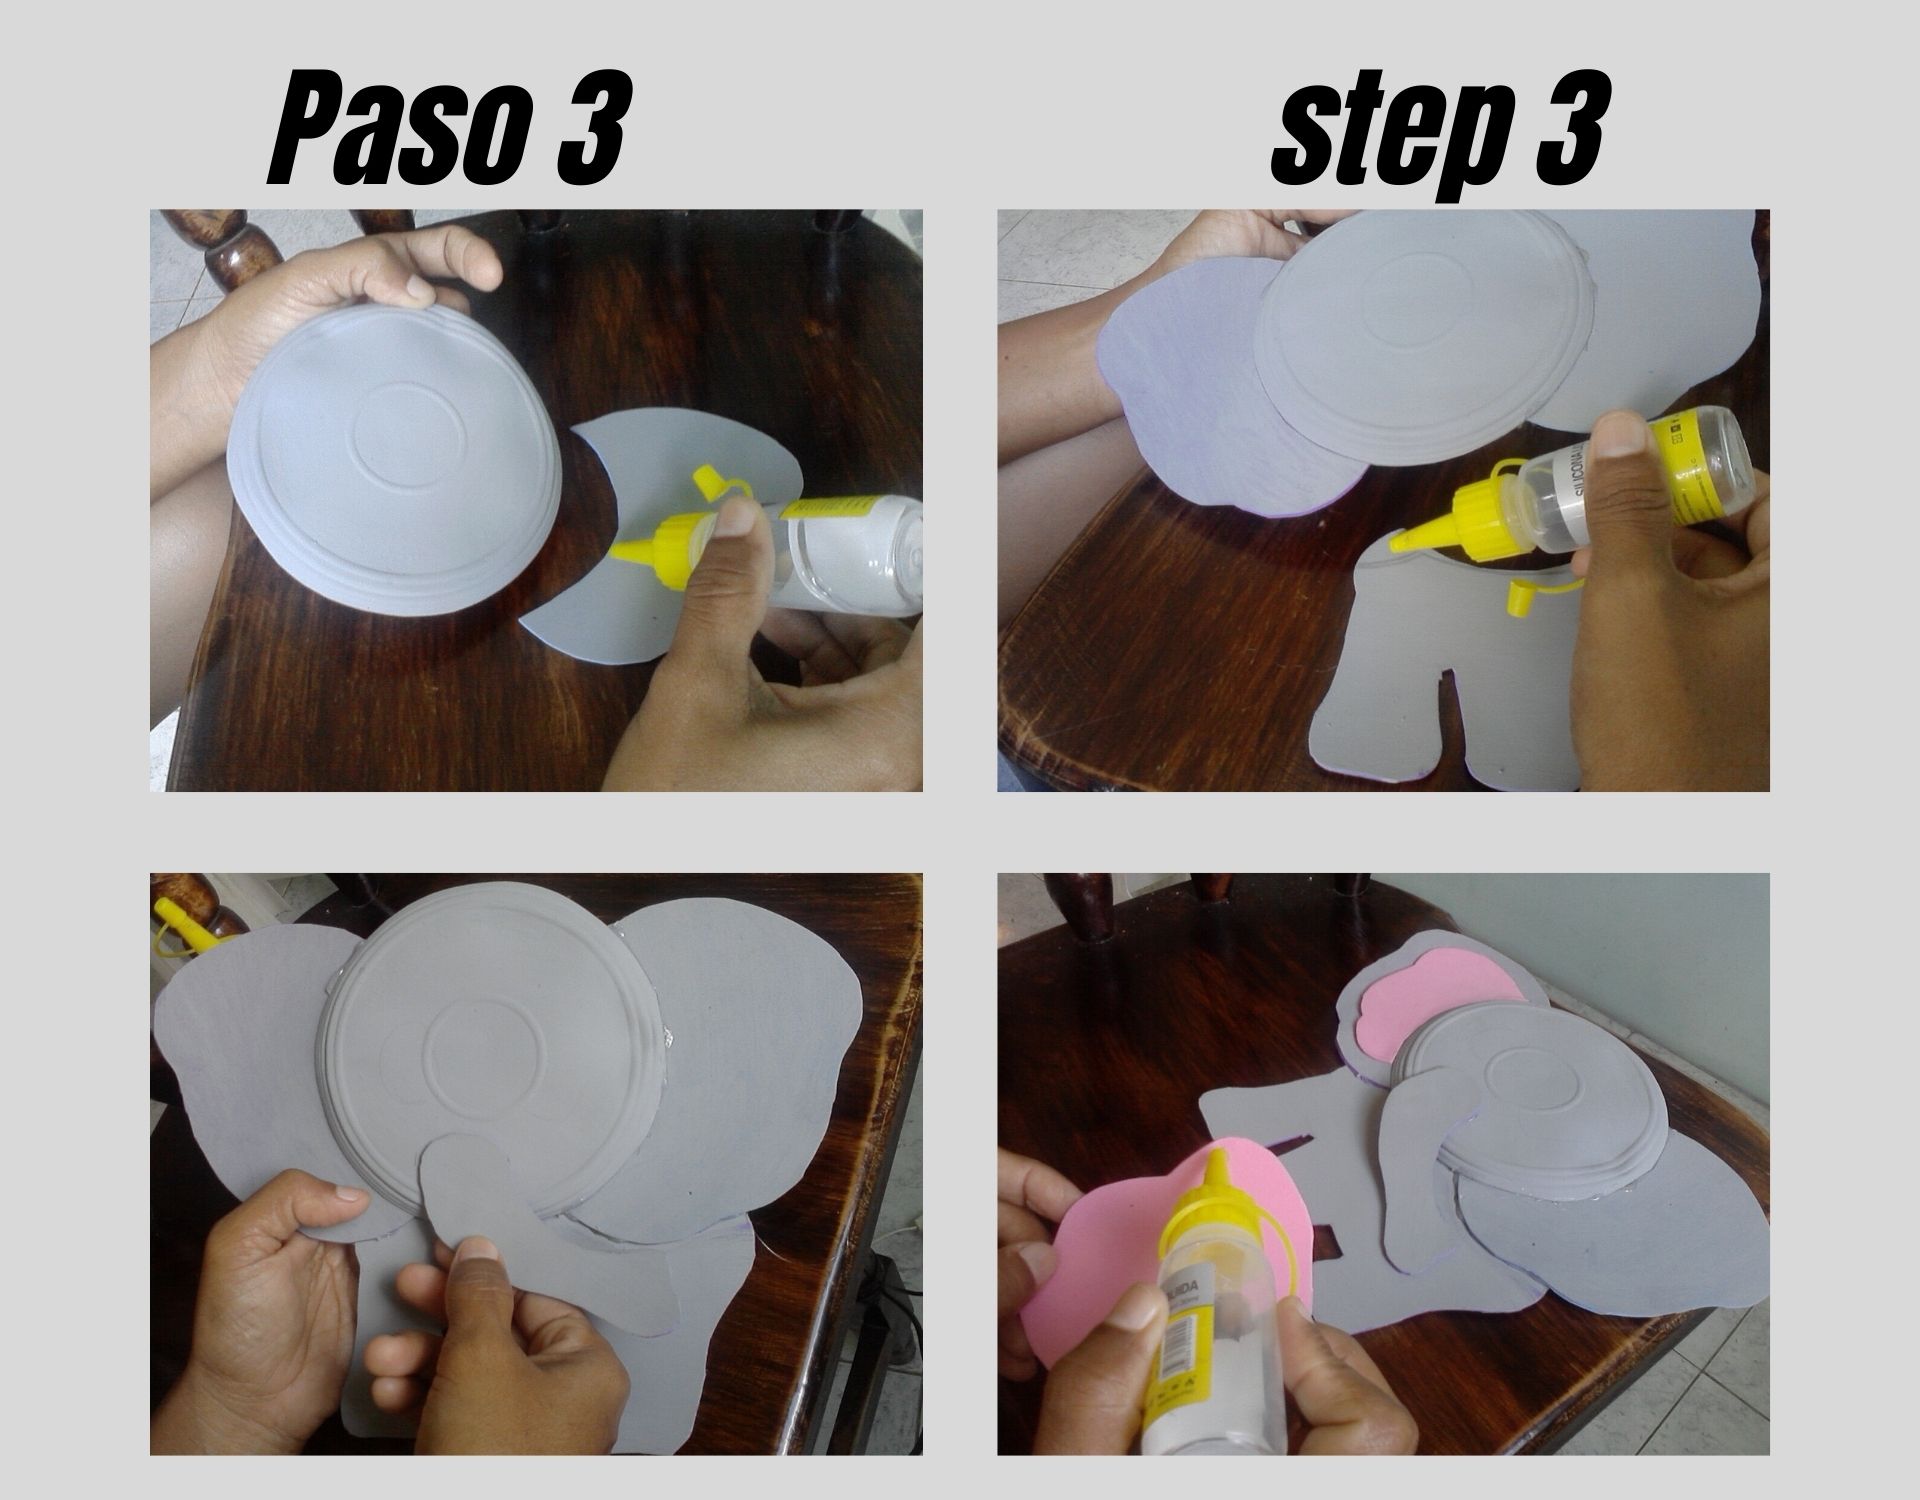
Paso 3:
- Ahora comienzo pegando las orejas del plato que vendría siendo la cabeza del elefante, y así procedo pegando el cuerpo, la trompa y por ultimo la parte de adentro de la oreja con el foami rosado.
English
Step 3:
- Now I start gluing the ears of the plate that would be the head of the elephant, and so I proceed by gluing the body, the trunk and finally the inside of the ear with the pink foami.
.jpg)
Español
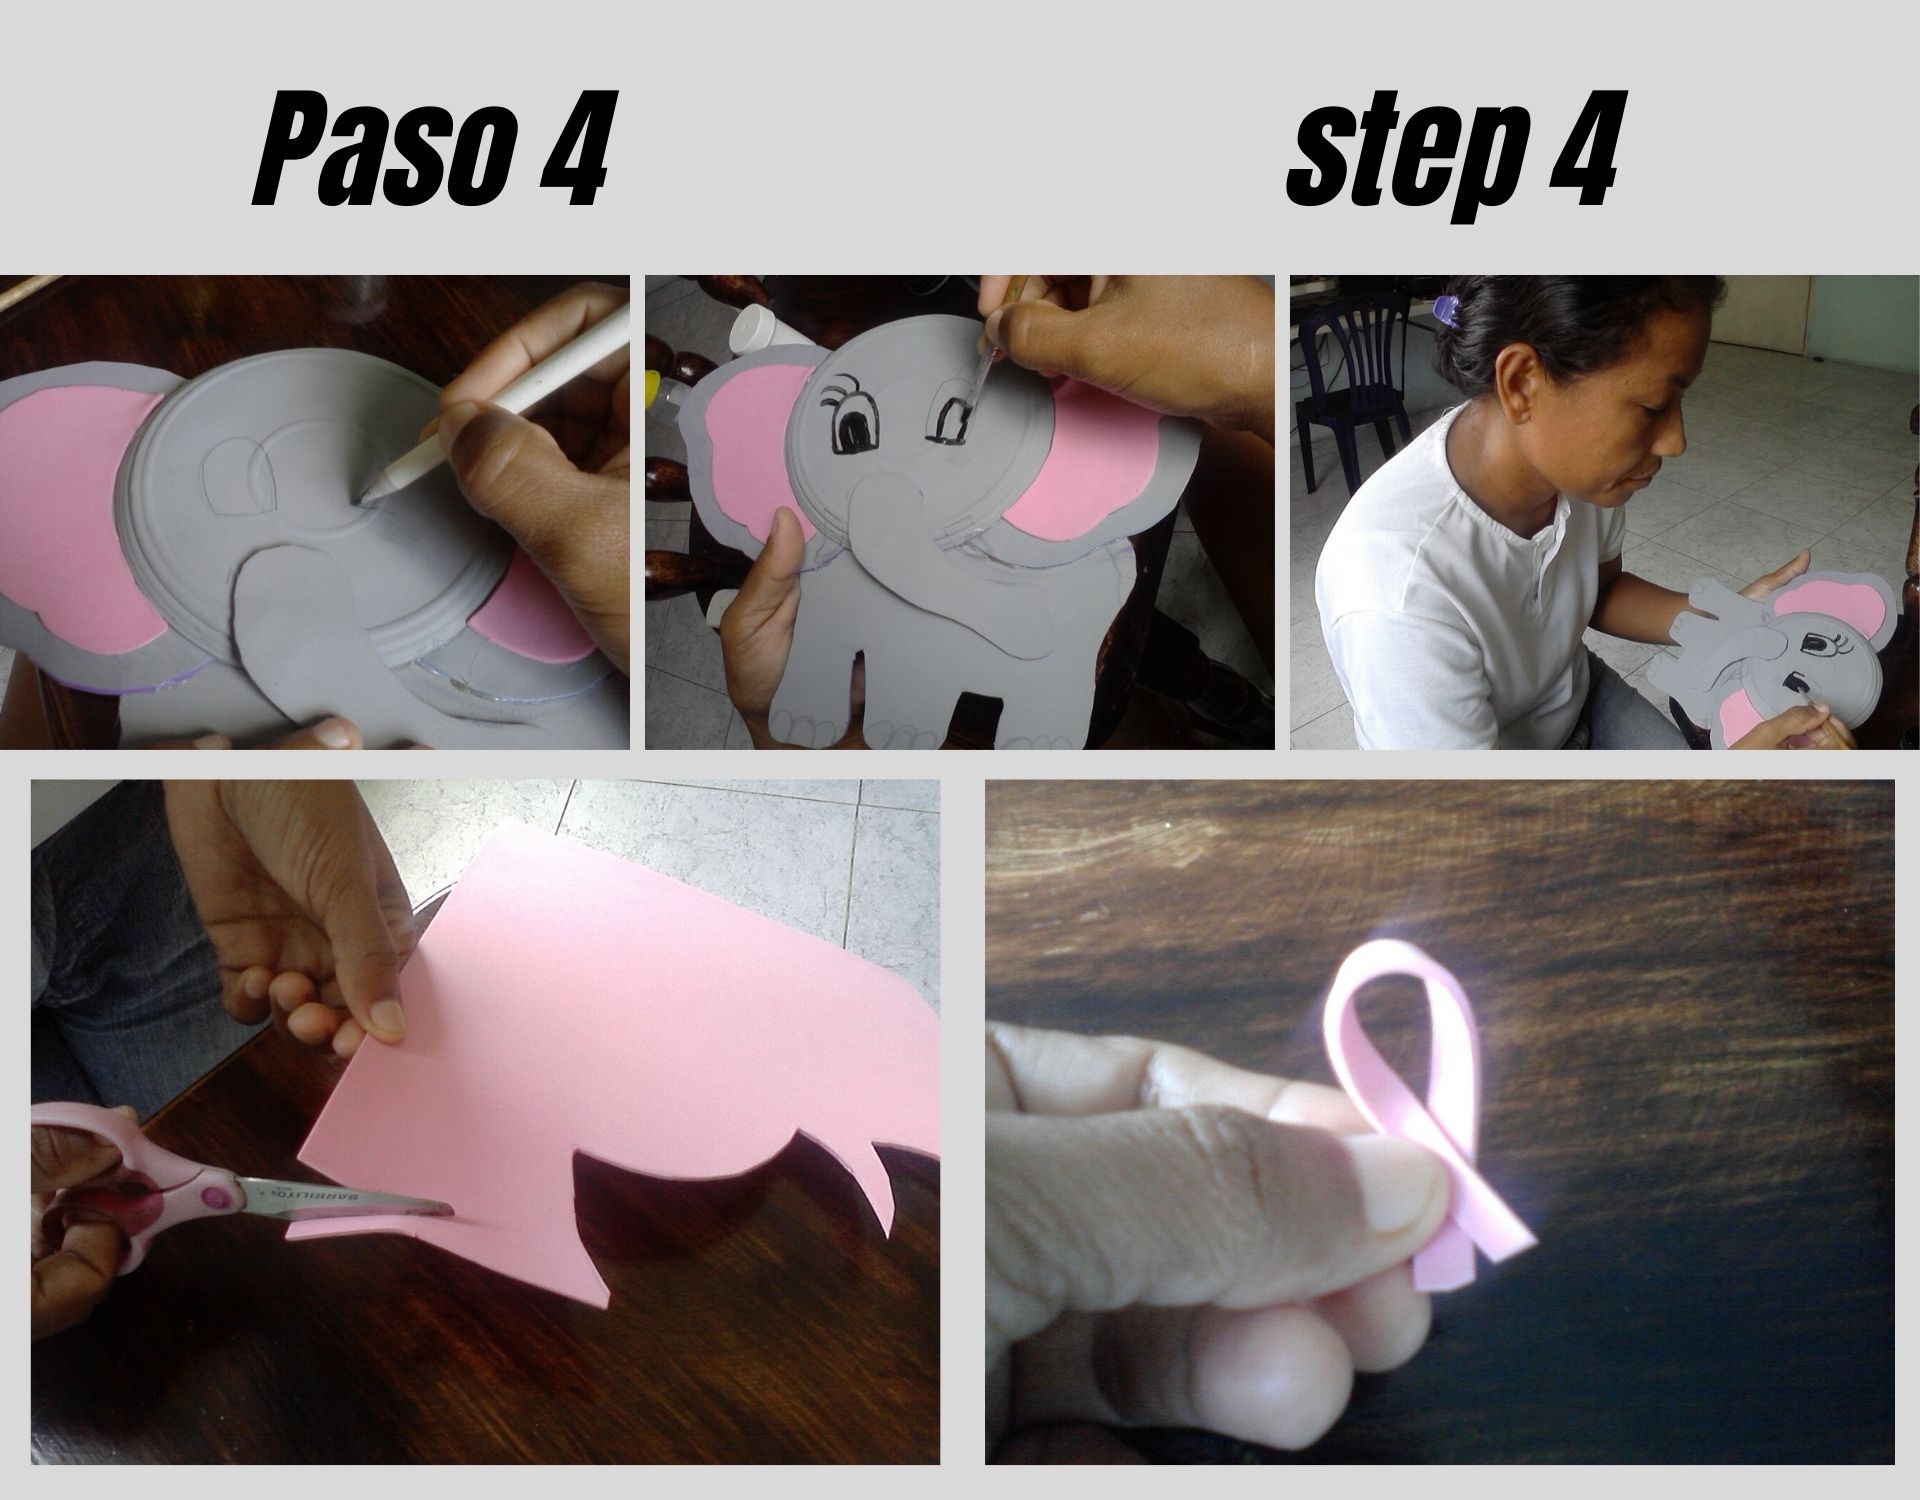
Paso 4:
- Y por último pintamos los ojos, los colmillos y uñas del elefante y lo coloreamos. Luego recorto una tira de foami rosado de 9 cm lo uno en las 2 puntas y lo pegamos detrás de la cabeza del elefante, para poder colgarlo en la pared.
English
Step 4:
- And finally we paint the elephant's eyes, tusks and nails and color it. Then I cut a strip of pink foami of 9 cm I join it at the 2 ends and glue it behind the elephant's head, so I can hang it on the wall.
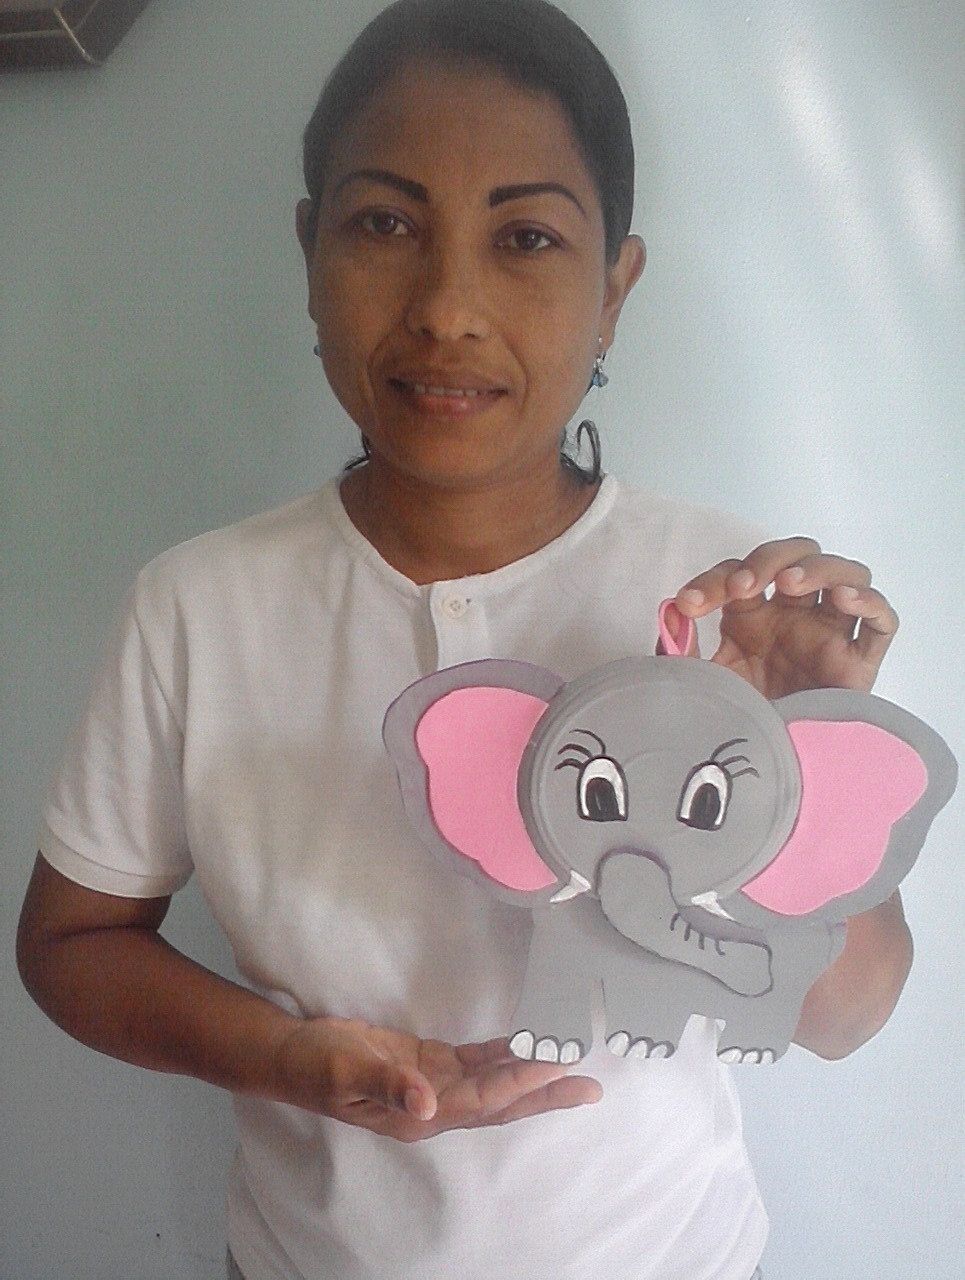
Es muy sencillo de elaborar y con poco material, espero les haya gustado el resultado final.
It is very simple to make and with little material, I hope you liked the final result.
.jpg)
.jpg)

Todas las fotos son de mi autoria y editadas con Canva.
All photos are my own and edited with Canva.
Congratulations @meurys80! You have completed the following achievement on the Hive blockchain and have been rewarded with new badge(s) :
Your next target is to reach 20 posts.
Your next target is to reach 1750 upvotes.
You can view your badges on your board and compare yourself to others in the Ranking
If you no longer want to receive notifications, reply to this comment with the word
STOPCheck out the last post from @hivebuzz:
Support the HiveBuzz project. Vote for our proposal!