It's time to make our girls fall in love, beautiful necklace with sea snails
Hola amigos espero se encuentren bien hoy es un hermoso día para regalar un detalle a las chicas ya que ellas son muy coquetas y se sentirán queridas por eso les traigo un tutorial de cómo hacer un collar con caracoles del mar y un poco de alambre de cobre y mucho creatividad y amor es muy fácil de hacer, los caracoles los encontre an la playa un día que salí a compartir en familia avían muchos de ellos y de muchas formas así que tome unos y me propuse hacer un collar con ellos, les cuento que en mi pueblo es muy conocido por los animalitos echos con conchas del mar también hacen pulseras,collares, sarcillos y muchas cosas más, bueno sin más que decir pasaremos a relizar nuestro collar con caracoles del mar.
Hello friends, I hope you are well, today is a beautiful day to give a gift to the girls since they are very flirtatious and will feel loved, that is why I bring you a tutorial on how to make a necklace with sea snails and a little copper wire and a lot of creativity and love is very easy to do, I found the snails on the beach one day I went out to share with the family there were many of them and in many ways so I took some and decided to make a necklace with them, I tell you that in my town it is well known for the animals made with shells from the sea, they also make bracelets, necklaces, earrings and many more things, well, without further ado, we will go on to make our necklace with sea snails.
What do we need.
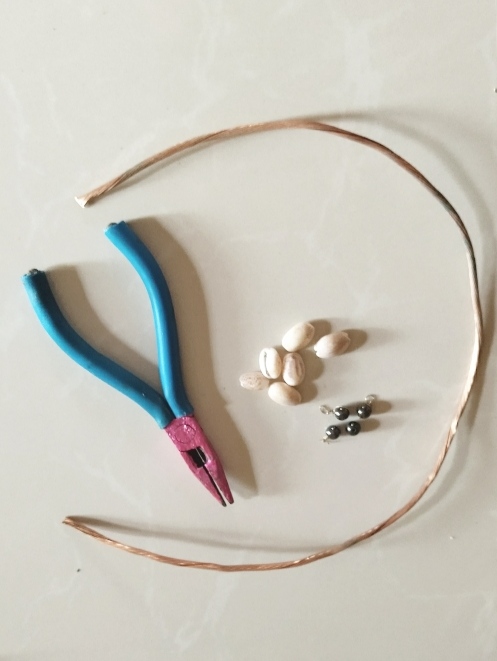
- caracoles de playa
- piedras de bisutería
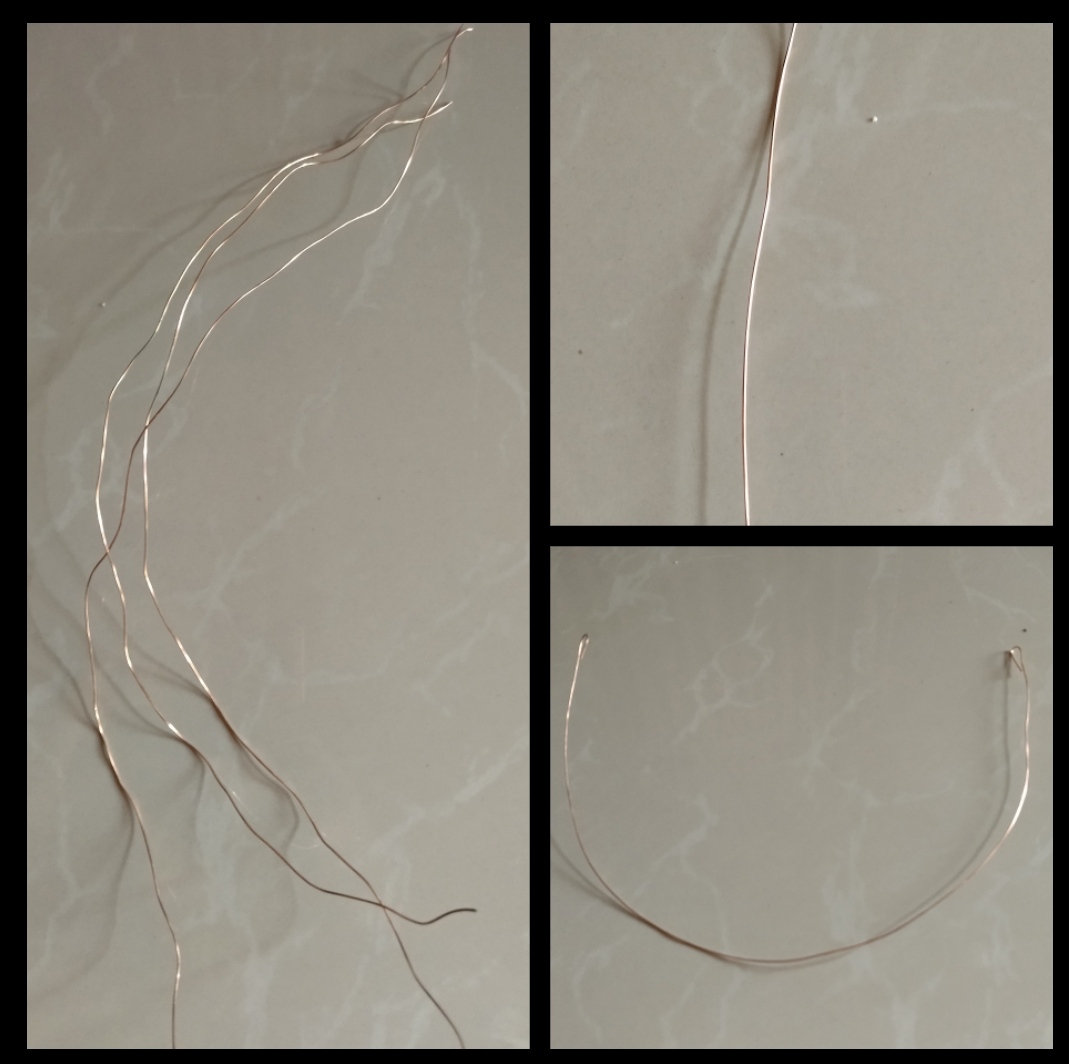
- alambre de cobre gruesa y fina
- pinzas
beach snails
jewelry stones
coarse and fine copper wire
tweezers
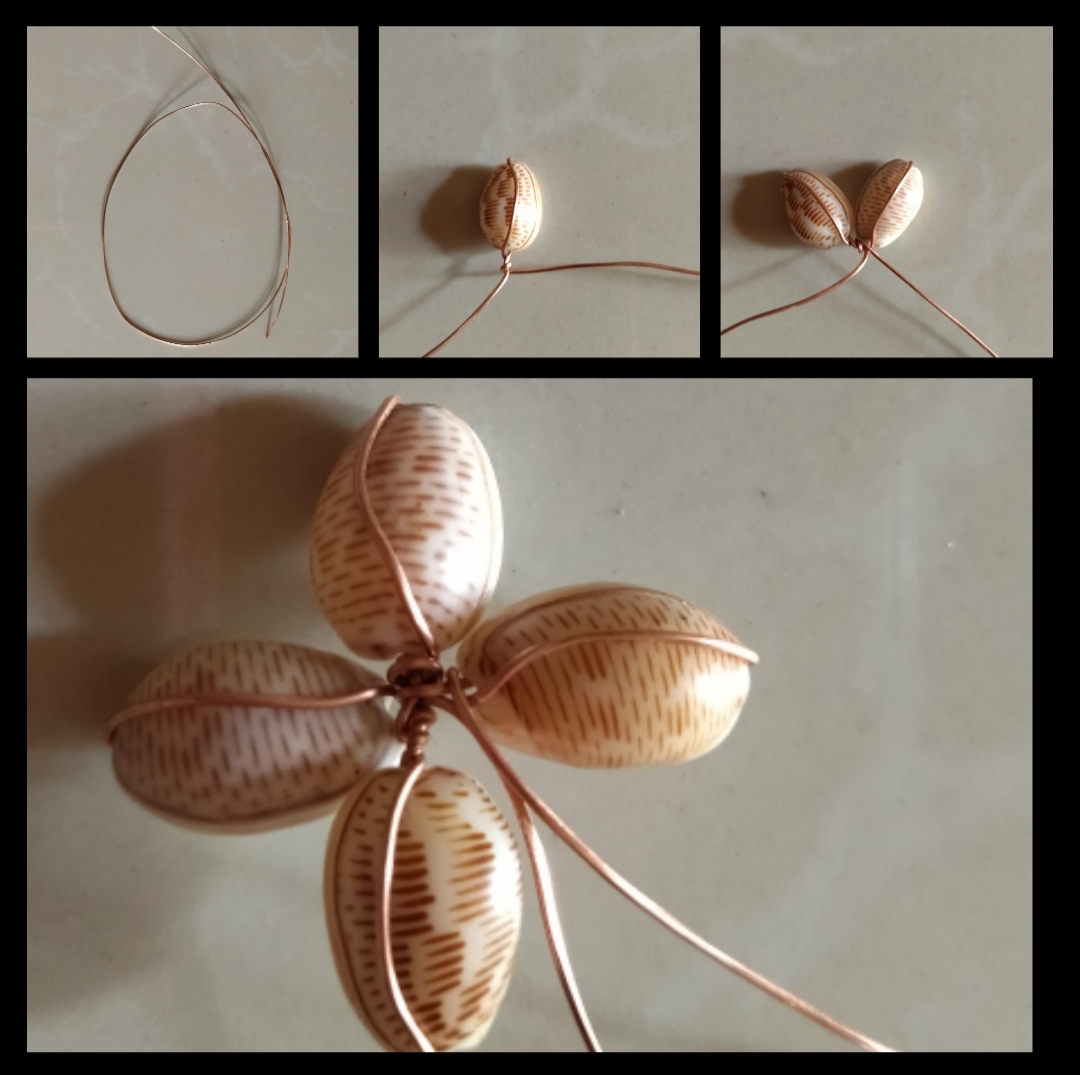
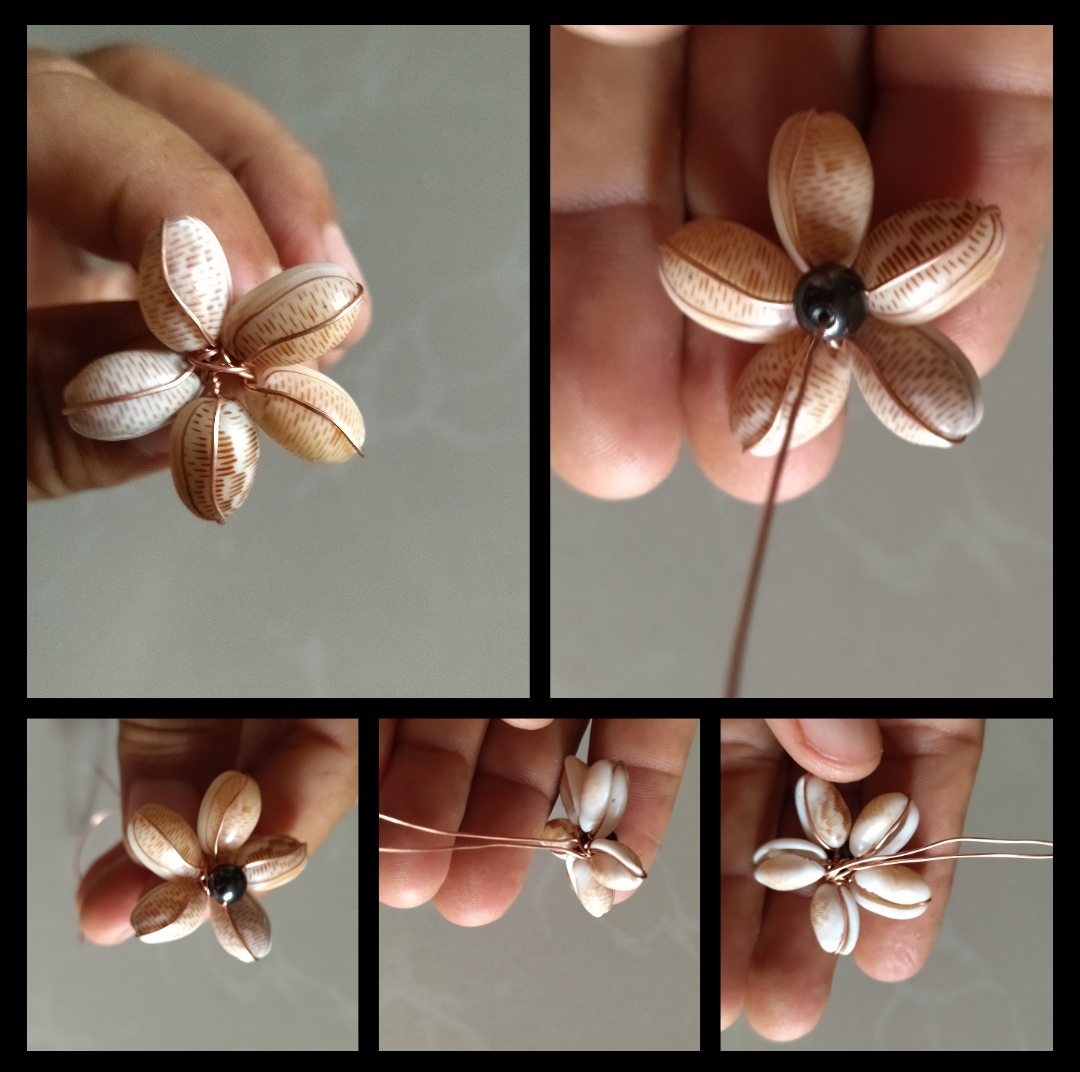
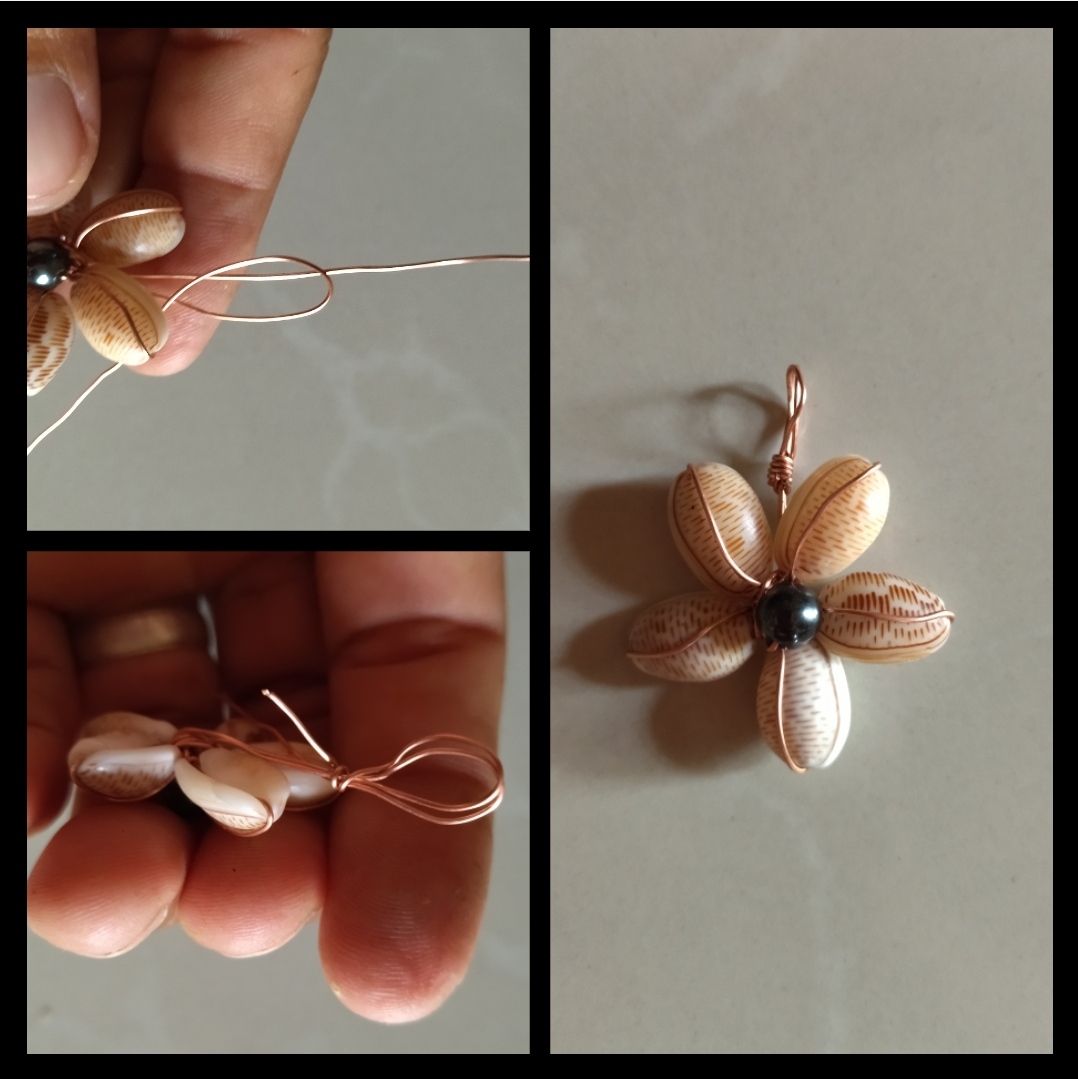
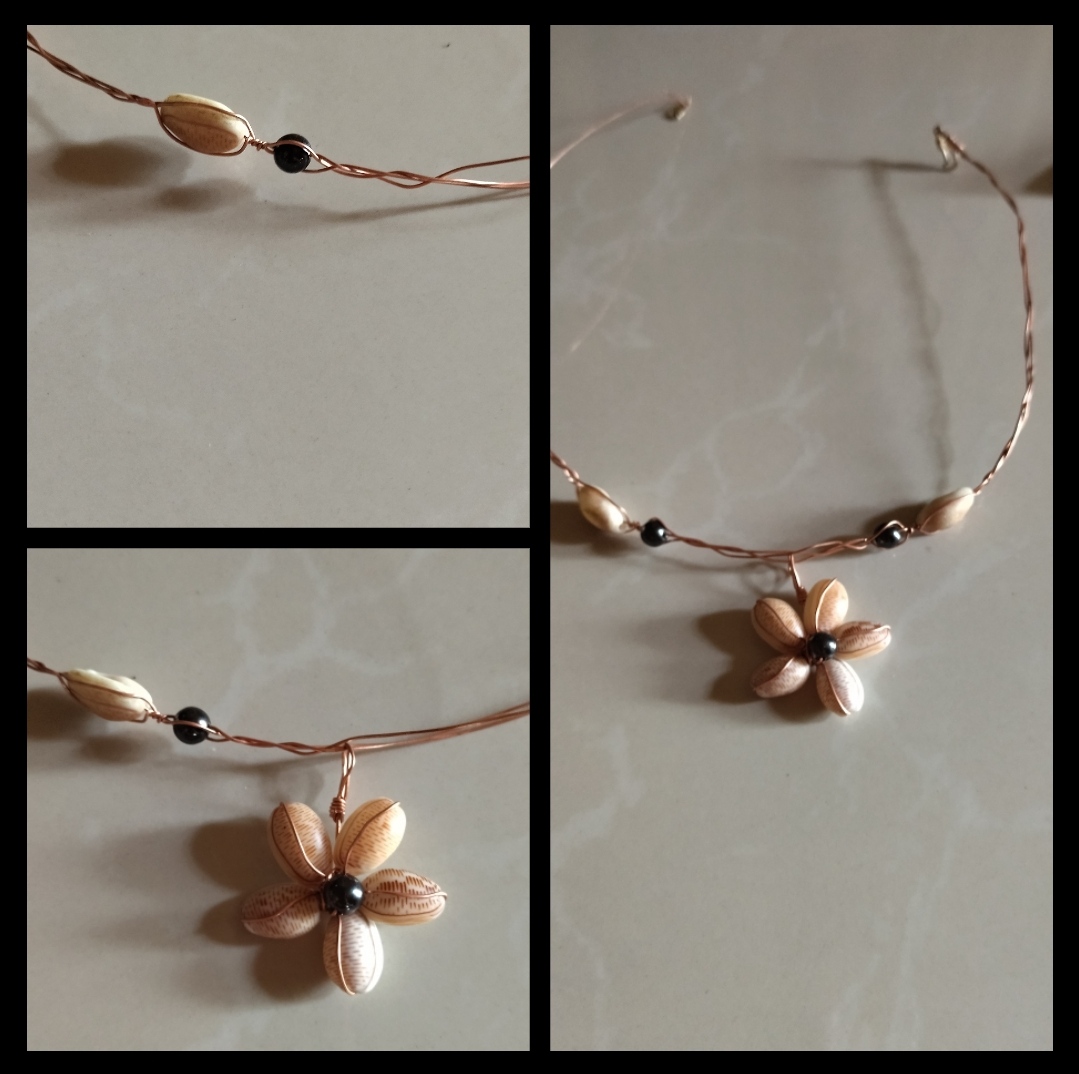
Paso 1: Para empezar con nuestro primer paso tomaremos una hebra de alambre y nuestros caracoles en este paso aremos una flor con los caracoles como la aremos tomamos un caracol y r le daremos una vuelta con el alambre y le daremos vuelta en la punta debemos dejar un trozo de alambre más largo que el otro para poder darle vuelta a los sinco caracoles entonces así como hicimos el primero aremos con los otros cuatro el último se nos ara más difícil cuando ya estemos listo le daremos una vuelta al rededor de la flor con el alambre largo como pueden ver los dos alambre quedan en la parte de atrás de la flor entonces la punta que emos utilizado la pasaremos a la parte de adelante de la flor tomaremos la piedra de bisutería y meteremos el alambre en la hueco de la piedra la pegamos lo más que podamos de nuestro flor y pasaremos el alambre al rededor de la flor dos veces más para asegurar que no se desarme ya para terminar tomaremos los dos trozos de alambre y los doblaremos hacia arriba aremos una argollitas con los dos trozos de alambre ya así solo entorcharemos un poco al rededor de ella para asegurar que no se desarme y ya tenemos nuestra flor.
Step 1: To start with our first step we will take a strand of wire and our snails in this step we will make an outcrop with the snails how we will make it we take a snail and we will give it a turn with the wire and we will turn it at the tip We must leave a piece of wire longer than the other to be able to turn the five snails, so just as we did the first one, we will plow the other four, the last one will be more difficult when we are ready, we will turn it around the flower. With the long wire, as you can see, the two wires are in the back of the flower, so we will pass the tip that we have used to the front of the flower, we will take the jewelry stone and put the wire in the hole in the stone. we glue it as much as we can of our flower and we will pass the wire around the flower twice more to ensure that it does not come apart and to finish we will take the two pieces of wire and bend them upwards We will make a little hoop with the two pieces of wire and then we will only twist a little around it to ensure that it does not come apart and we already have our flower.
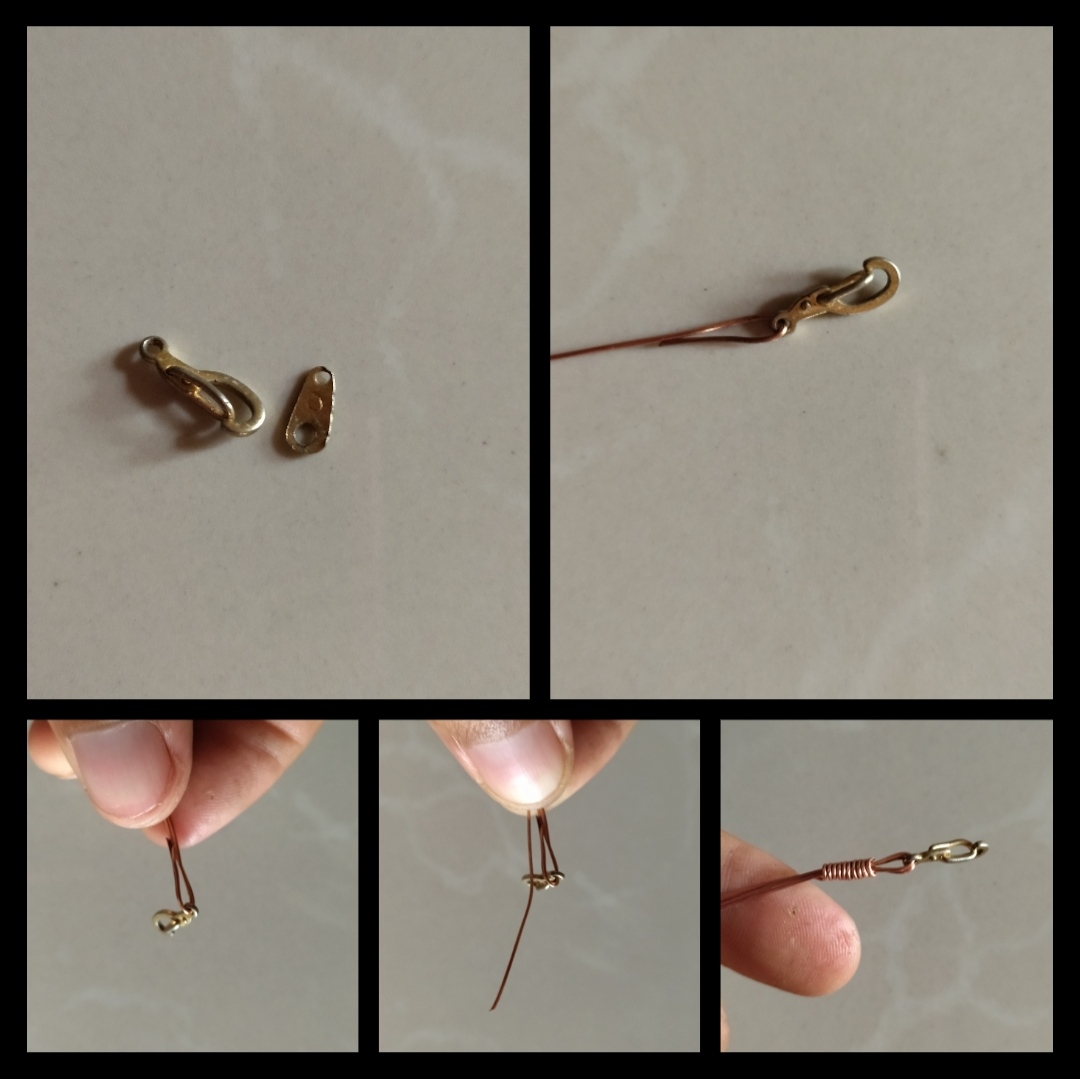
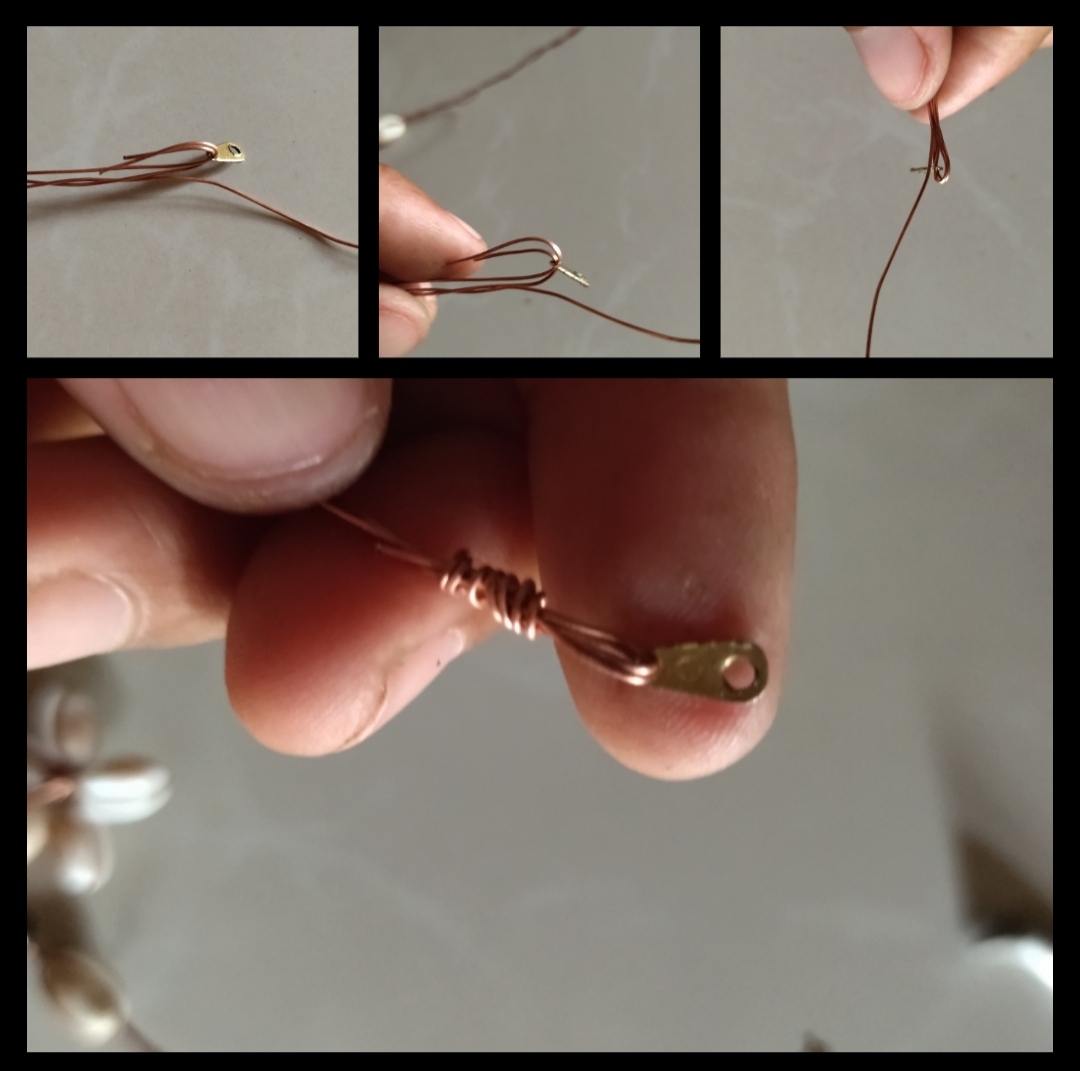
Paso 2: Para nuestro segundo paso ya las cosas serán un poco más fáciles para este paso tomaremos tres trozo de alambre y dos de ellos le doblaremos un poco las punta yo conseguí unos ganchitos no los puse en los materiales porque la verdad no los avía conseguido pero ustedes pueden utilizar el que tengan o puedan conseguir, bueno ya teniendo la puntas dobladas le pondremos los ganchitos pero primero pondremos uno el otro lo dejaremos para el final , con el trozo de alambre que nos queda lo entorcharemos en la punta de los otros dos y así nos aseguramos que no se salga si lo podemos apretar con las pinzas sería bueno .
Step 2: For our second step things will be a little easier for this step we will take three pieces of wire and two of them we will bend the ends a little I got some hooks I did not put them in the materials because the truth is not I already got them but you can use the one you have or can get, well now that we have the ends bent we will put the hooks but first we will put one the other we will leave it for last, with the piece of wire that we have left we will twist it on the point of the other two and thus we make sure that it does not come out if we can tighten it with the tweezers it would be good .
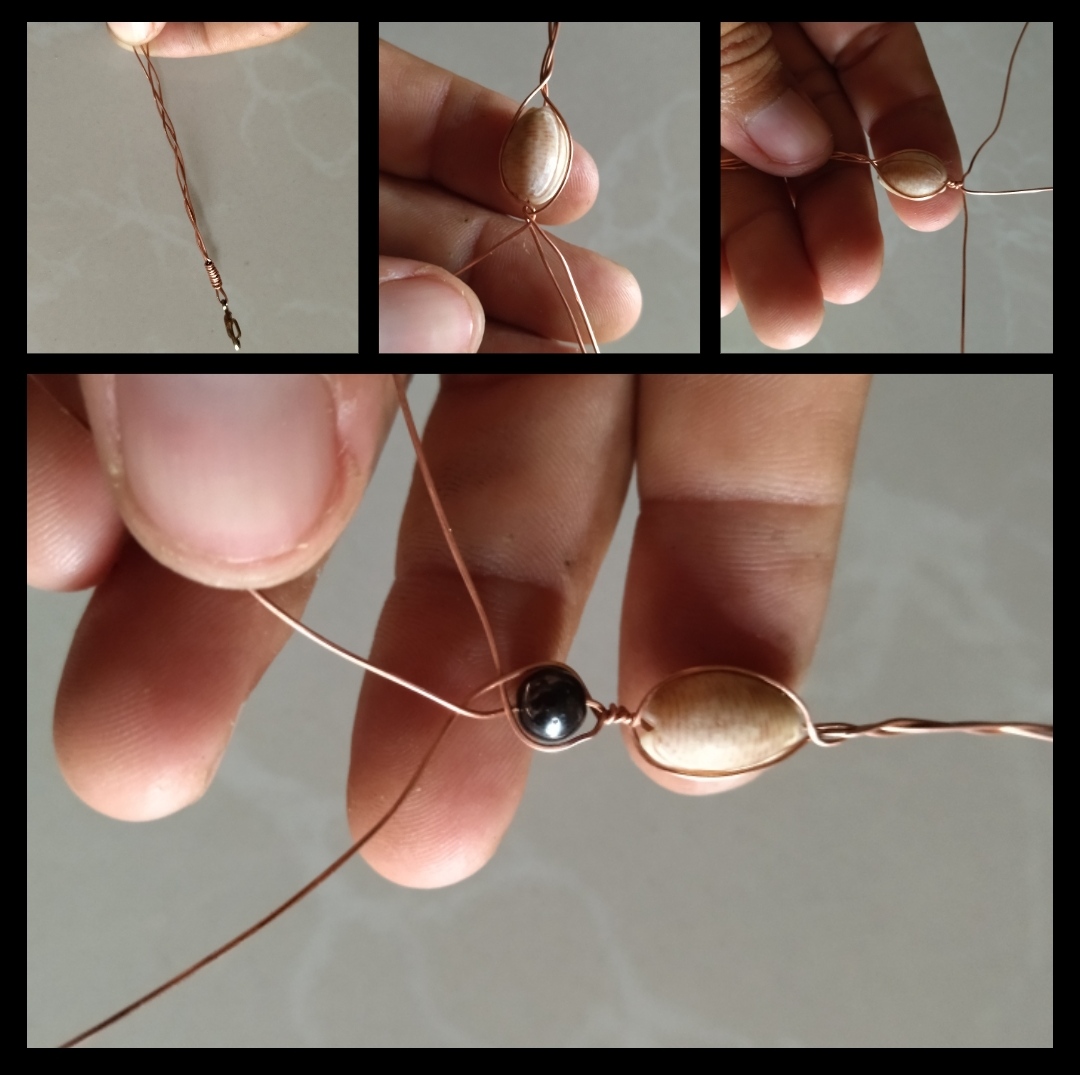
Paso 3: En este paso nos dedicaremos adornar nuestro collar ya teniendo la punta lista empezaremos a tejer un poco no tiene que ser perfecto el tejido lo podemos dejar separado cuando tengamos un pedazo tejido paramos y colocaremos un caracol debemos apretar muy bien para que no se salga después que lo pongamos le daremos un poco de vuelta a los alambre para asegurar el caracol seguido de eso dondremos una piedra de bisutería y seguimos con el tejido.
Step 3: In this step we will dedicate ourselves to decorating our necklace, having the point ready, we will begin to weave a little, the weave does not have to be perfect, we can leave it separated when we have a piece of weaving, we stop and we will place a snail, we must press very well to so that it does not come out after we put it on, we will turn the wires a little to secure the snail, followed by that where we will place a jewelery stone and continue with the fabric.
Paso 4: Bueno ya estamos llegando al final, cuando ya tengamos el caracol y la piedra tejemos un poco no mucho porque pondremos nuestra flor que realizamos en el primer paso después de poner la flor tejemos otro poquito pondremos la piedra de bisutería seguida del caracol y luego seguiremos con el tejido al llegar a la punta de nuestro alambre tendremos las dos puntas dobladas y una que no está doblada tomaremos la otra pieza del gancho y la pondremos en los dos alambres doblado y el otro alambre lo entorcharemos al rededor de los otros dos asegurando la pieza que colocamos cortaremos un poco el exceso de albre y listo.
Step 4: Well we are reaching the end, when we already have the snail and the stone we weave a little not much because we will put our flower that we made in the first step after putting the flower we weave another little bit we will put the jewelry stone next of the snail and then we will continue with the fabric when we reach the end of our wire we will have the two ends bent and one that is not bent we will take the other piece of the hook and we will put it on the two double wires and the other wire we will wrap it around the other two, securing the piece that we placed, we will cut a little the excess of white and that's it.
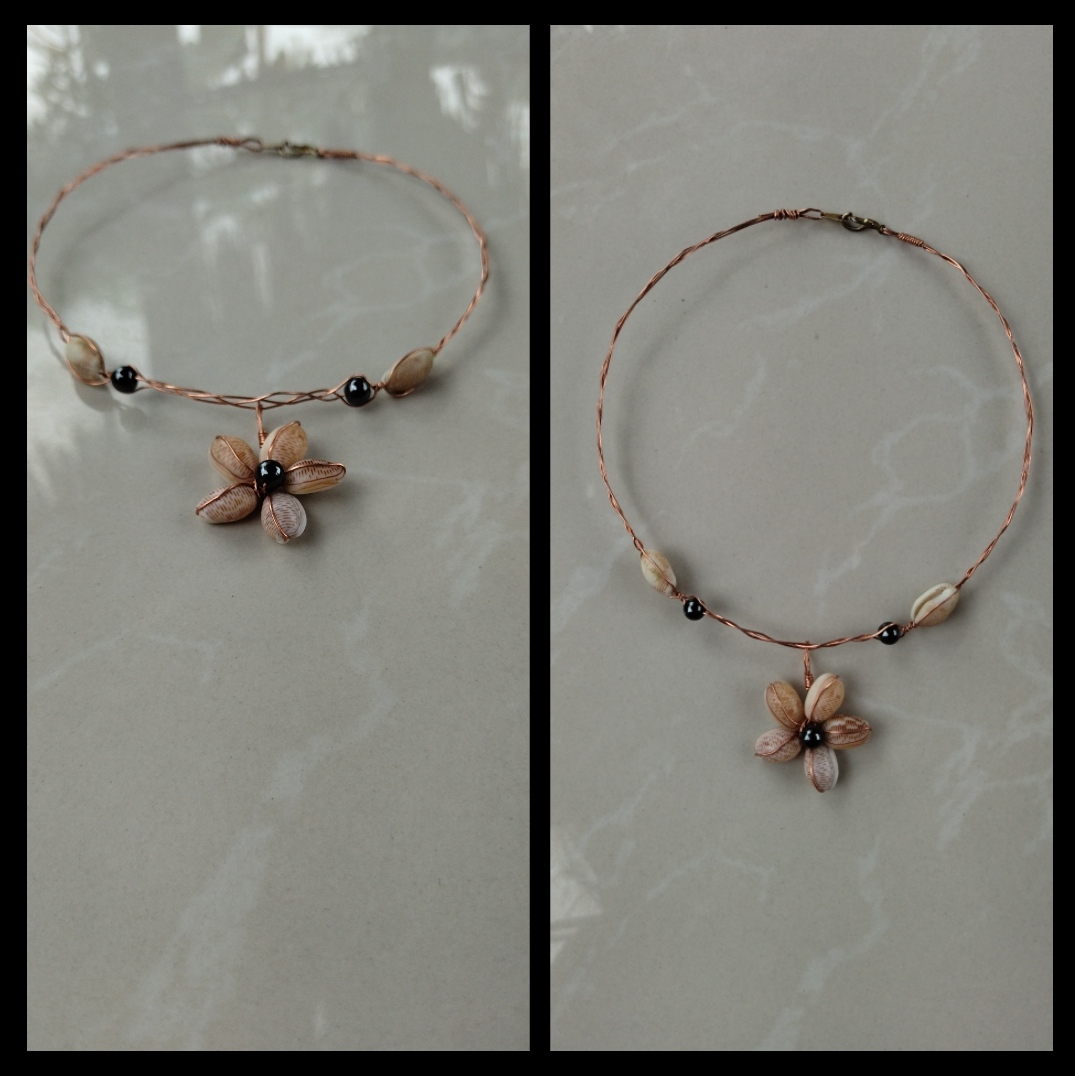
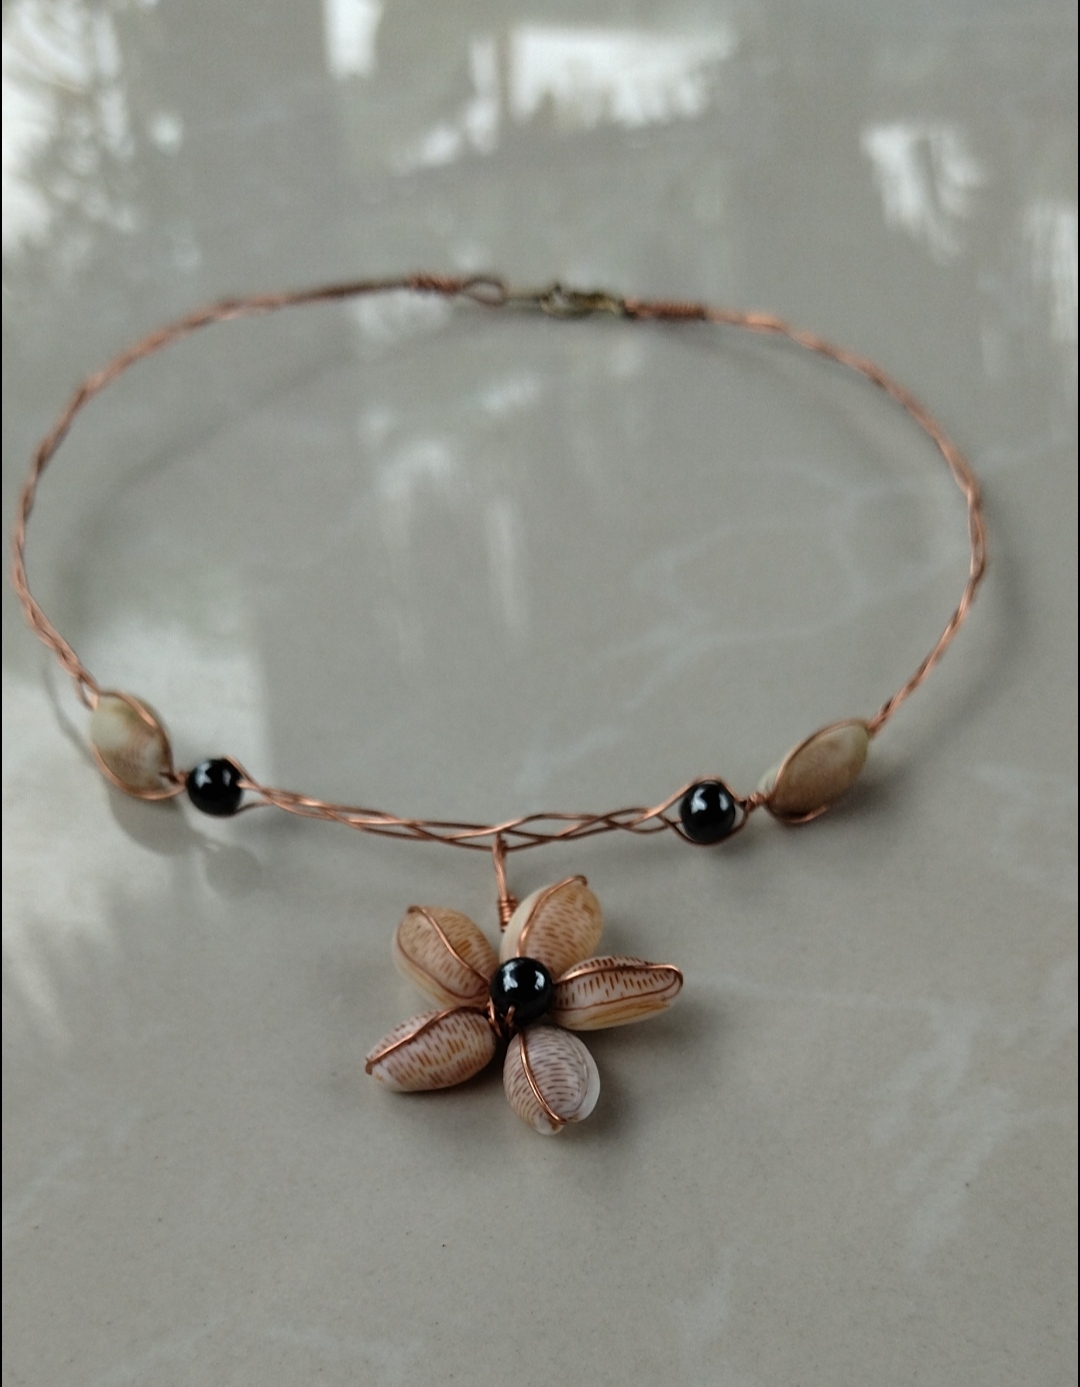
lista nuestras hermoso collar con caracoles del mar , espero que a las damas les guste, fue un gusto compartir con ustedes .
list our beautiful necklace with sea snails, I hope the ladies like it, it was a pleasure to share it with you.
Todas las Fotos son de mi autoría y fueron tomadas con mi Celular Redmi 9T
All Photos are my authorship and were taken with my Redmi 9T Cellphone
Congratulations @alexanderflx! You have completed the following achievement on the Hive blockchain and have been rewarded with new badge(s):
Your next target is to reach 2750 upvotes.
You can view your badges on your board and compare yourself to others in the Ranking
If you no longer want to receive notifications, reply to this comment with the word
STOPCheck out the last post from @hivebuzz:
Support the HiveBuzz project. Vote for our proposal!