Se corta un rectagunlo de 16 x 24 pulgadas , posteriormente se dobla a la mitad, de tal forma que quede un rectangulo de 16 x 12 pulgadas y se vuelve a doblar para obtener un rectangulo de 16 x 6 .Se traza una linea inclinada de 1,5 pulgadas x 1,5 pulgadas y se corta ese triangulo formado en ambas esquinas
Segundo paso
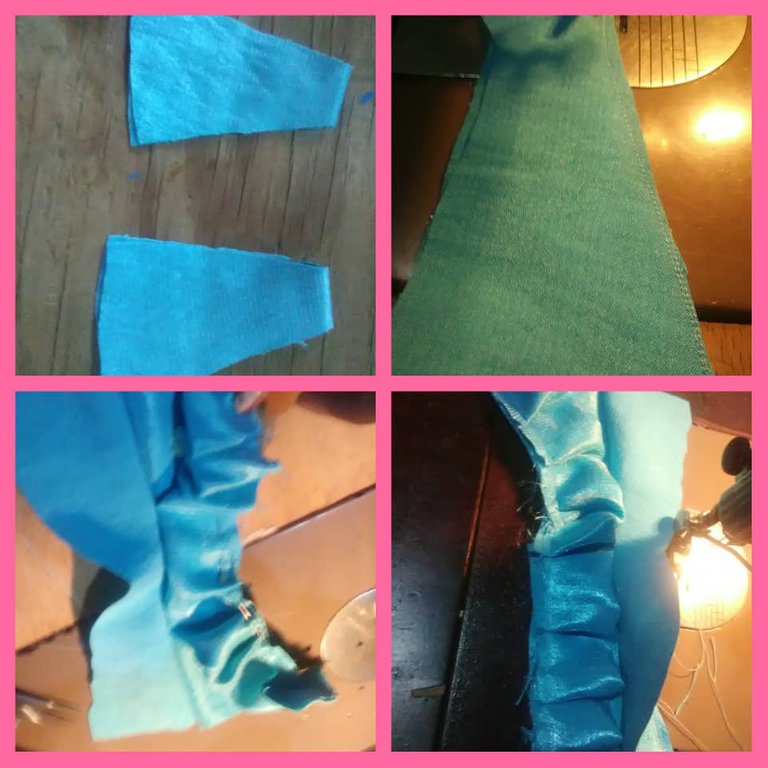
- Para formar los tirantes se marcan 2 pulgadas sobre la tela, luego se mide 3 pulgadas hacia abajo en los externos de la linea principal de dos pulgadas. posteriormente se unen ambas lineas y se recortan.
Tercer paso
- Corte de los flecos de los tirantes:
Se mide sobre la tela un ancho de 1,5 pulgadas. desde ese punto se traza 6 pulgadas de largo hacia la derecha e izquierda del punto central. se unen las lineas y se recorta para obtener las tiras que se muestran en la imagen.
Cuarto Paso
- Corte de la falda del Vestido y costura del borde inferior.
Se mide y corta un rectagulo de 23 pulgadas de ancho x 12 pulgadas de largo. Luego se procede a unir ambas puntas del rectangulo y a doblar y coser el borde de la falda en la maquina de coser.
Quinto paso
- Costura de la pieza superior del vestido:
Se procede a realizar un dobles en la zona de las axilas y se procede a coser.
Sexto Paso
Union de las piezas:
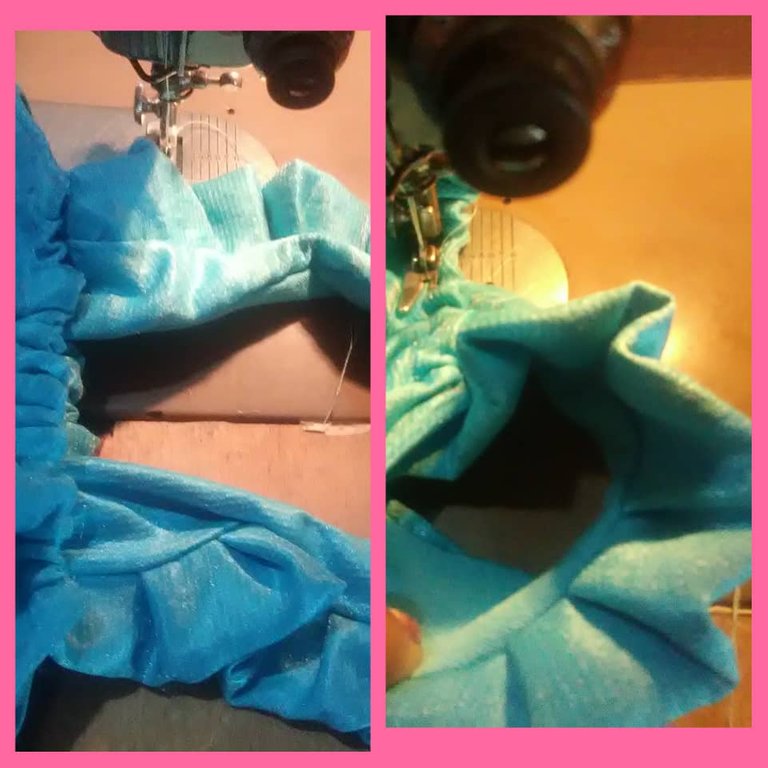
para unir las piezas se deben interponer las costura traseras de ambas piezas con la ayuda de un alfiler, de esta manera se van realizando los dobles de la falda y se van sujetando con los alfileres , la prenda se ajusta y se cose la elástica en la unión que se ha formado con los alfileres.
Séptimo Paso
- Costura de los tirantes y flecos
Las dos tiras que se cortaron se doblan a la mitad a lo largo y se cosen en la maquina de coser.
Luego se toman los tirantes y se colocan cara con cara y se cose solo un borde de los tirantes a lo largo, posterirmente con la ayuda de los alfileres se toman las tiras que se cosieron al principio y se van colocando en forma de pliegues sobre el otro borde de los tirantes. Los pliegues deben quedar hacia dentro de la costura. Luego se voltea la pieza por el lado derecho de manera que la costura quede hacia dentro de la pieza y se verá ese resultado.
se repite el procedimiento para formar ambos tirantes y se cosen en el vestido.
Octavo Paso
Lazo del vestido:
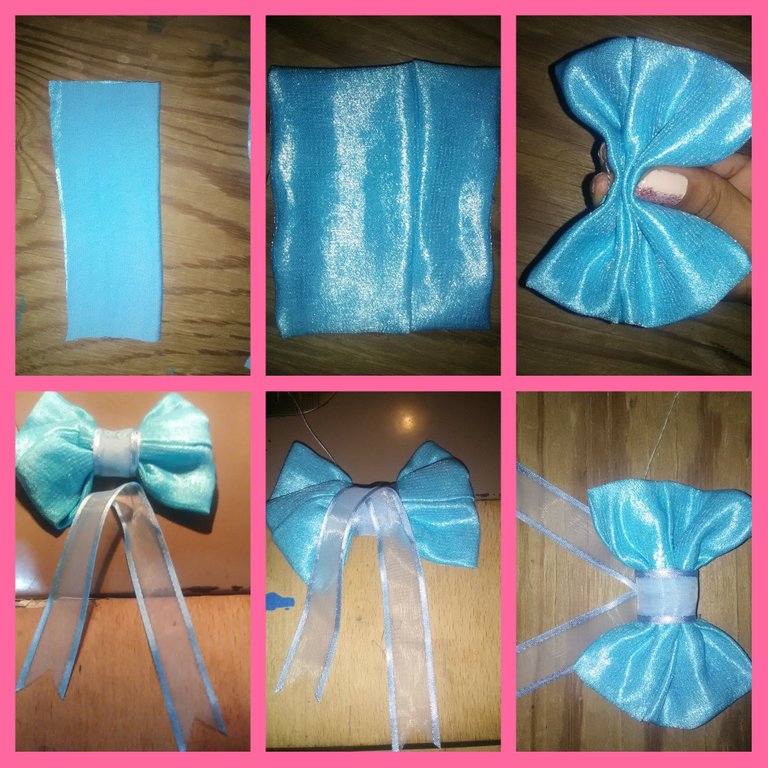
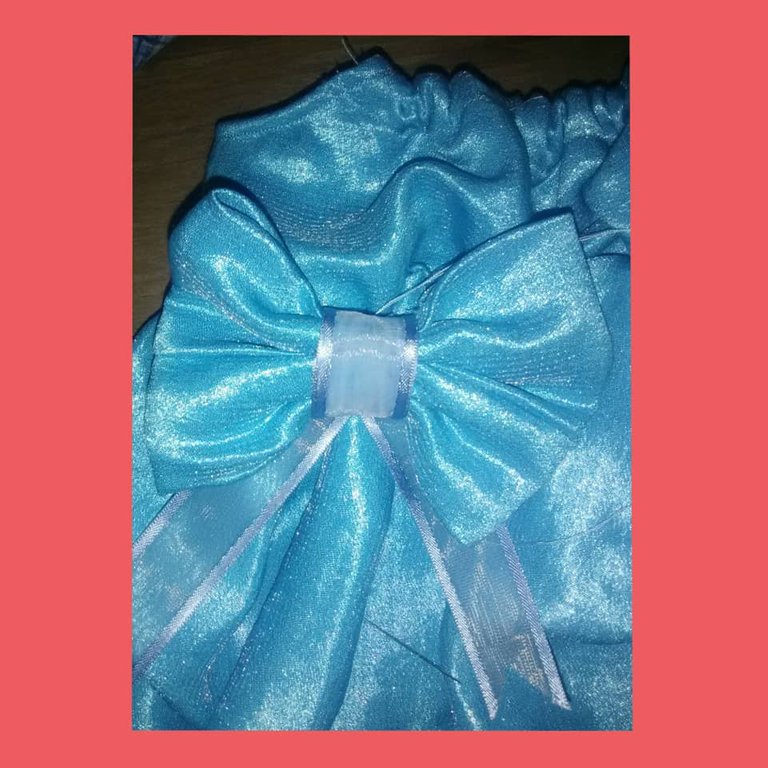
Se corta y se cose un rectángulo de 5 pulgadas x 3,5 pulgadas , se moldea y se le da la forma del lazo oprimiendo con los dedos en el medio y luego se coloca la cinta como se muestra en las imágenes. se ajusta en el vestido a través de la costura.
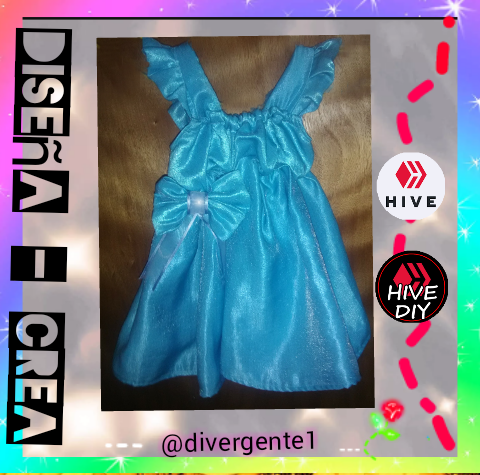
Hemos terminado!
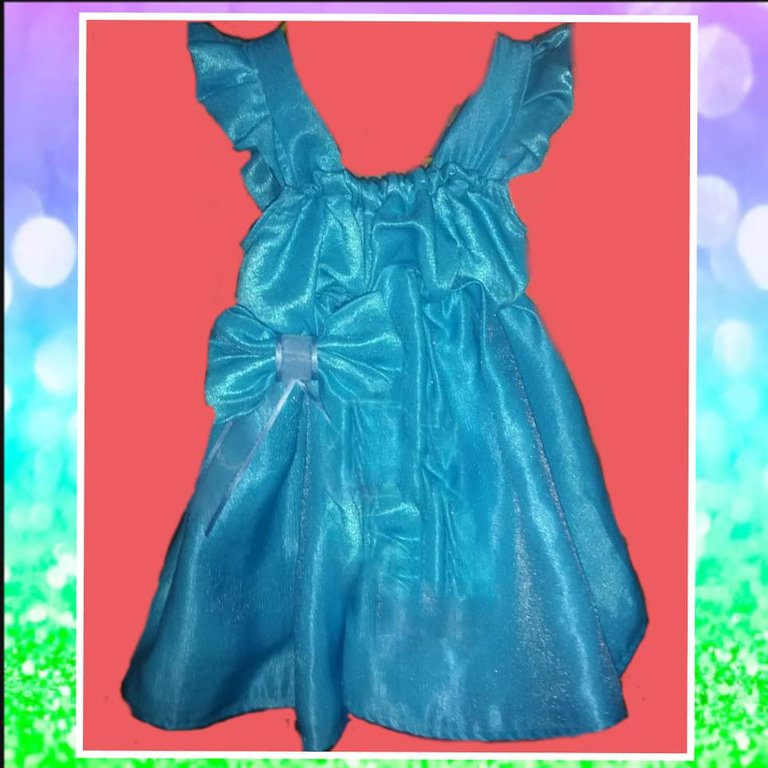
¡Se ha creado este lindo vestido para una bebe! ¡ Espero les guste!
Creditos:
- Las imagenes son de mi autoria y fueron Tomadas a traves de un Telefono ZTE BLADE.
- Traductor utilizado: Deepl
- La edicion de las fotos la realicé mediante la aplicaciones Editor de Fotos Polish.
English
Hello my friends from Hive and Hive Diy. The birth of a beautiful baby deserves to be pampered with love and also with details that welcome a new being. That is why I want to share with you the design and creation of this beautiful dress for my new neighbor. I hope you like it! here the step by step:
Materials used:
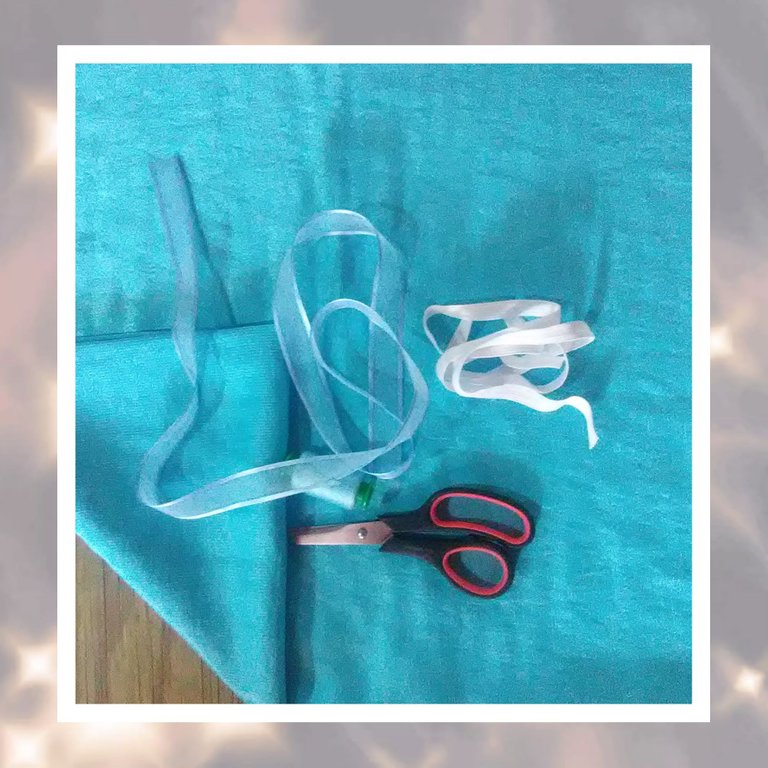
- 1 meter of fabric or 39.5 inches approximately
- Scissors
- elastic
- Blue ribbon
- First step
Step by step
First step
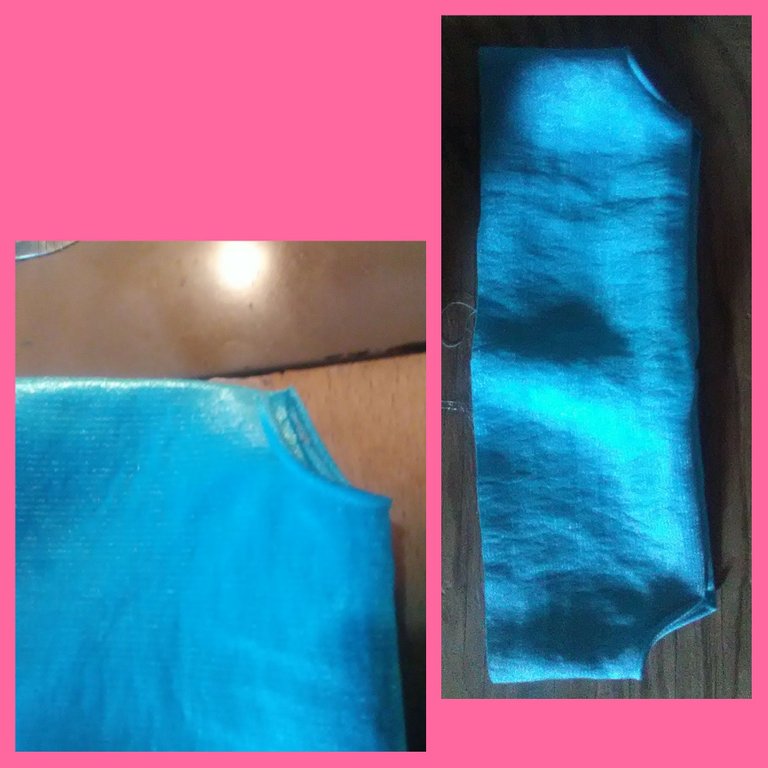
- Cut of the upper part of the dress

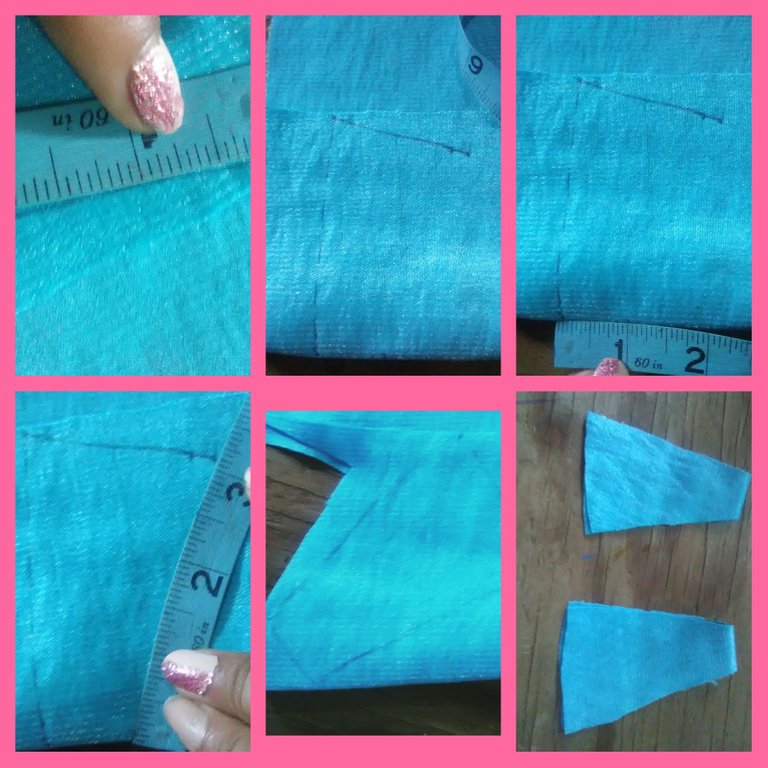
A 16 x 24-inch rectangle is cut, then it is folded in half, leaving a 16 x 12-inch rectangle, and it is folded again to obtain a 16 x 6 rectangle. A slanted line of 1 .5 inches x 1.5 inches and cut that triangle formed at both corners
Second step
To form the straps, mark 2 inches on the fabric, then measure 3 inches down at the ends of the two-inch main line. Later, both lines are joined and cut.
Third step
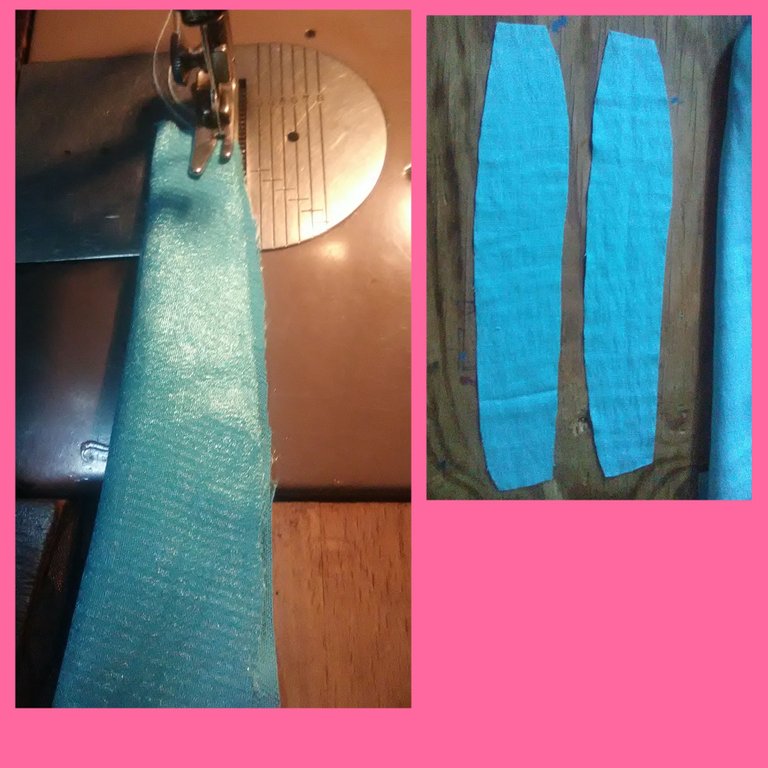
Cut of the fringes of the straps:
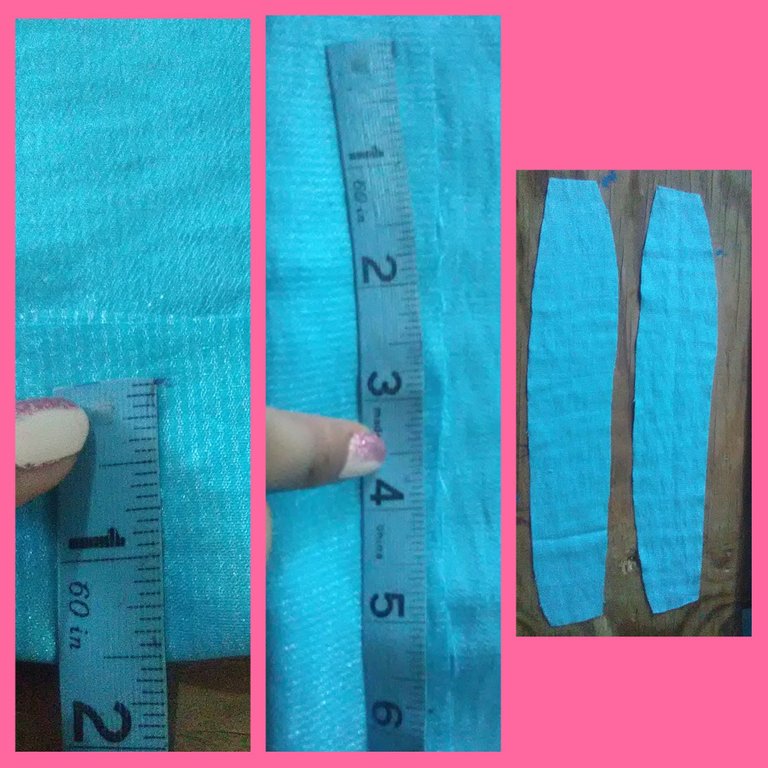
A width of 1.5 inches is measured on the fabric. from that point it is drawn 6 inches long to the right and left of the center point. the lines are joined and cut to obtain the strips shown in the image.
Fourth step
- Dress skirt cut and bottom edge seam.
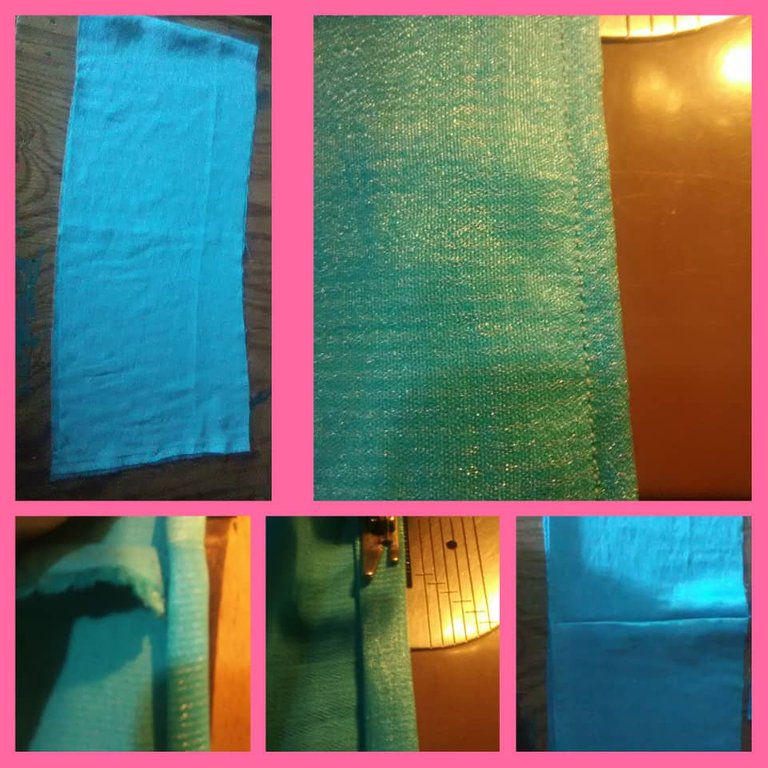
Measure and cut a rectangle 23 inches wide x 12 inches long. Then proceed to join both ends of the rectangle and fold and sew the edge of the skirt on the sewing machine.
Fifth step
- Seam of the upper part of the dress: (
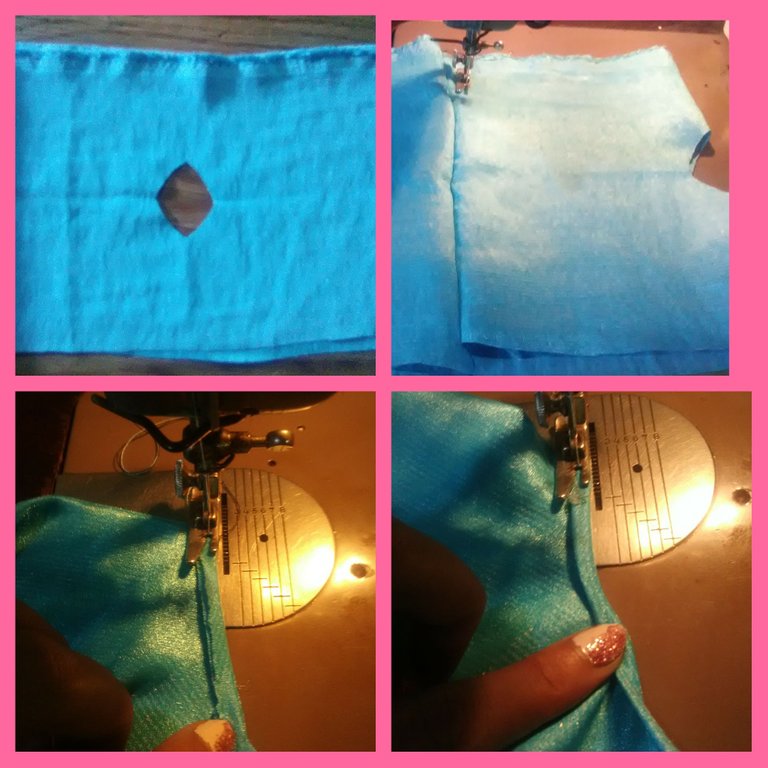
We proceed to make a double in the area of the armpits and proceed to sew.
Sixth step
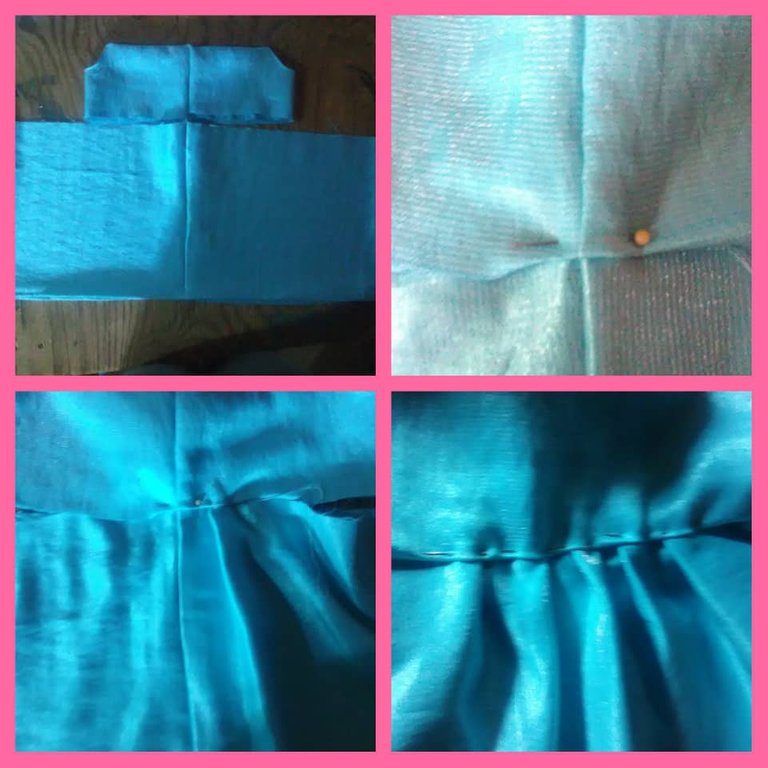
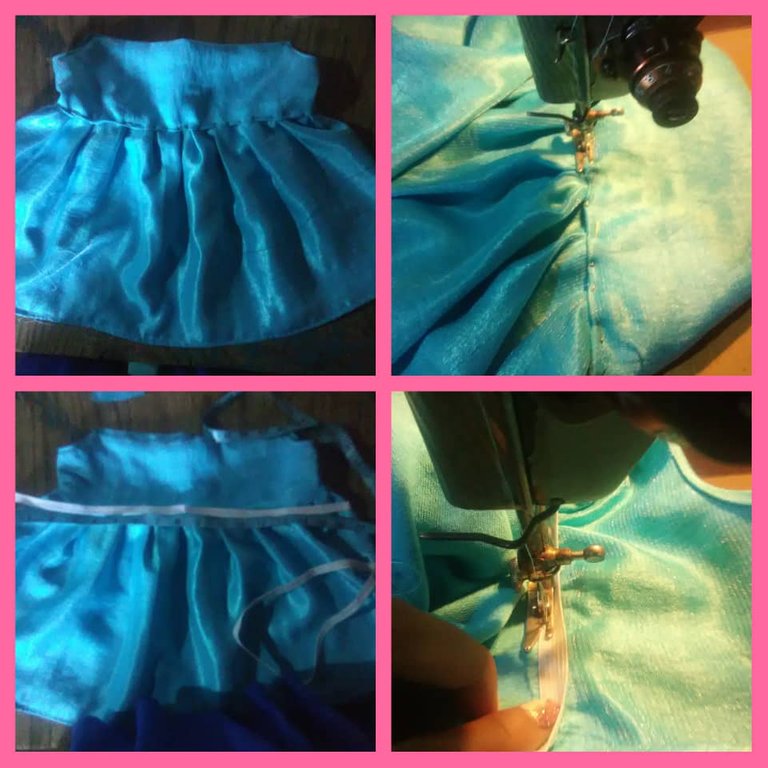
Union of the pieces:
To join the pieces, the back seams of both pieces must be interposed with the help of a pin, in this way the doubles of the skirt are made and they are fastened with the pins, the garment is adjusted and the elastic is sewn on the union that has been formed with the pins.
Seventh Step
Sewing straps and fringes
The two strips that were cut are folded in half lengthwise and sewn on the sewing machine.
Then the straps are taken and placed face to face and only one edge of the straps is sewn lengthwise, later with the help of the pins the strips that were sewn at the beginning are taken and placed in the form of folds on the other edge of the braces. The pleats should be inside the seam. Then the piece is turned on the right side so that the seam is inside the piece and that result will be seen.
the procedure is repeated to form both straps and they are sewn onto the dress.
Eighth Step
Dress Bow:
Cut and sew a 5 inch x 3.5 inch rectangle, mold it into the shape of the bow by pressing with your fingers in the middle and then place the ribbon as shown in the images. It fits on the dress through the seam.
We're done!
This cute dress has been created for a baby girl! I hope you like it!
Credits:
This dress looks great and it looks the same size as what my little daughter can wear. Well, maybe if I may request on her behalf. Nice dress my good freind.
Woww, this is really great, I really want to learn more so I will follow you and your post.
Congratulations @divergente1! You have completed the following achievement on the Hive blockchain and have been rewarded with new badge(s):
Your next target is to reach 1750 upvotes.
You can view your badges on your board and compare yourself to others in the Ranking
If you no longer want to receive notifications, reply to this comment with the word
STOPCheck out the last post from @hivebuzz:
Support the HiveBuzz project. Vote for our proposal!
Que gran trabajo y cuanta creatividad, he visto pocas publicaciones referentes al diseño de ropa, y menos para bebés. Te felicito por tu gran dedicación y mostrar detalladamente todo el proceso. Saludos!
Gracias amigo. 🤗
Que hermoso vestido, me recordó mucho a mi madre, sus trabajos de costuras no le pueden faltar los moños y los pliegues.
Me gustó mucho, parece un vestido de princesa, y el color es muy hermoso.
me encanta ... hermoso el color.
That looks pretty cute! is there any particular reason you'd pick blue?
Hello. I used the color blue because I like the different shades of it. and especially this light blue color will look great on the baby. In addition, it is necessary to break with the stereotypes of the pink color in girls, the pink color is beautiful, but there are more colors. And this blue color in particular I feel that it is suitable to highlight the beauty and innocence of the baby.
Ay que belloo...me encanta el color y el estilo en general, pero el color sobre todo me llama mucho la atención. Eres muy talentosa y sabes transmitir tus conocimientos.
Gracias. 🤗
De nada, cariño.
Esta hermoso, me encanto felicidades 😘
Gracias @dayanita2
🤗
Está genial todo ese proceso. Sin duda que hacer esta clase de regalos tiene un valor mucho más grande que ir a comprar una cosa. Seguro que le va a encantar a la madre de la niña.
Me gusta mucho la distribución de las fotos y cada paso está muy bien detallado. Voy a tomar algunas cosas del formato para mis publicaciones.
Gracias por compartir. ✨
Muchas Gracias @bertrayo
De nada, @divergente1
Nice
¡Qué lindo vestido! te felicito, le debe quedar muy lindo a la beba.