
Happy Monday have all my creative friends in this wonderful #Hivediy community. I hope you had a restful and great weekend. I wish you lots of positive energies and lots of health to all of you and to live life.
Tonight I want to show you the step by step of how I converted an old office sign into a nice and practical cell phone holder, I tell you that those signs had voted them from a center that were remodeling some offices and as my mind is always flying I saw them fast one of the utilities or their second chance to convert them into a practical cell phone holder. This cell phone holder is quite simple and inexpensive to make and best of all is that the base can be decorated with the theme you like, you can also make it to give away on those special dates and the closest is Father's Day or you can give it to that special person in your life. So my creative friends, don't miss the step by step to make this cute and practical cell phone holder with useful material, let's get to work!

Feliz Lunes tengan todos mis amigos creativos de esta maravillosa comunidad de #Hivediy. Espero que hayan descansado y pasado un estupendo fin de semana. Les deseo muchas energías positivas y mucha salud para todos ustedes y a vivir la vida.
En esta noche les quiero enseñar el paso a paso de como convertí un viejo letrero de oficina en un lindo y practico porta celular, les cuento que esos letreros los habían votado de una centro que estaban remodelando unas oficinas y como mi mente siempre esta volando les vi rápido una de las utilidades o su segunda oportunidad de convertirlas así en unos prácticos porta celulares. Este porta celular es bastante sencillo y económico de realizar y lo mejor de todo es que la base la puedes decorar con la temática que mas te guste, ademas lo puedes realizar para regalar en esas fechas especiales y la mas próxima es el día del padre o lo pueden obsequiar a esa persona especial en tu vida. Entonces mis amigas creativas no se pierdan el paso a paso para realizar este lindo y practico porta celular con material de provecho ¡¡Manos a la obra!!


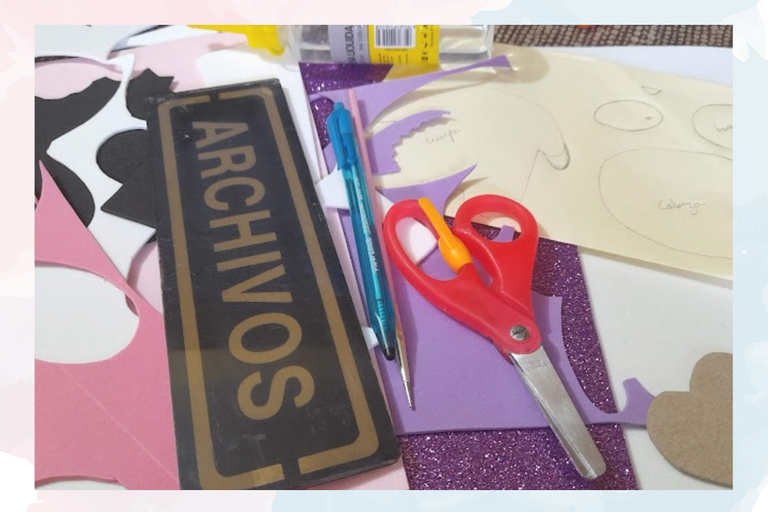
- EVA rubber (purple, white, black, frosted purple, silver, blue and green)
- Recycled office sign
- Teddy bear mold
- Heart shape
- Silicon
- Scissors
- Ruler
- Heat gun
- Goma eva (Morado, blanco, negro,morado escarchado,plateado, azul y verde)
- Letrero de oficina reciclado
- Molde de osito
- Figura de corazón
- Silicon
- Tijera
- Regla
- Pistola de calor

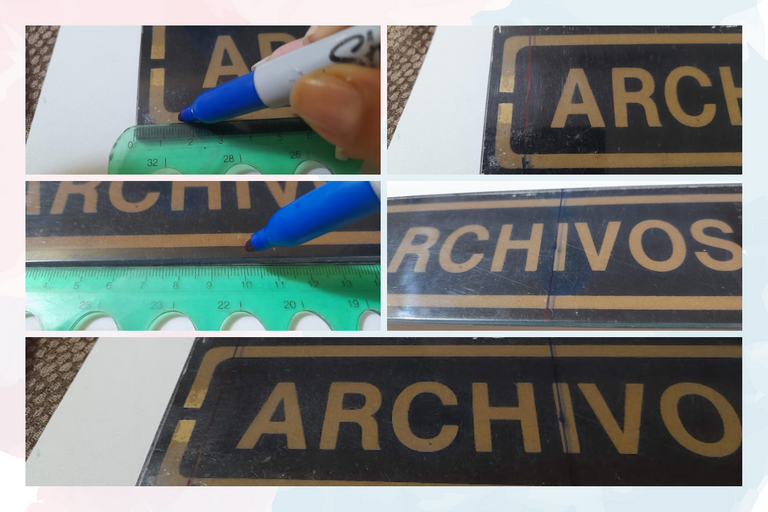
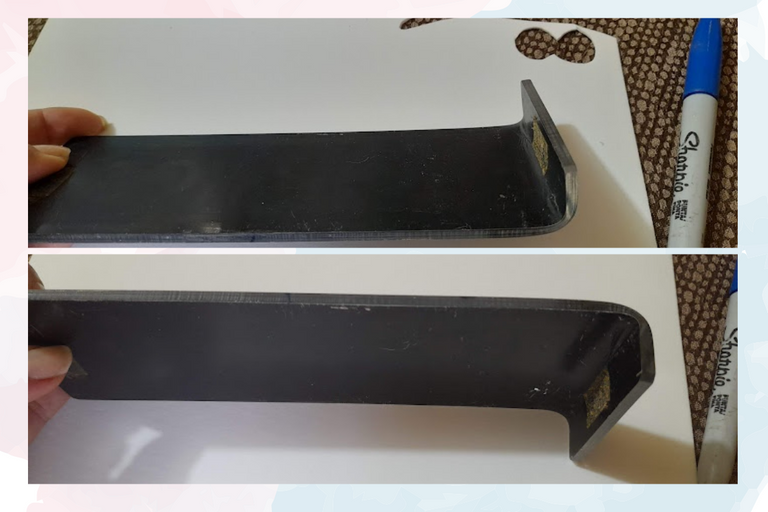
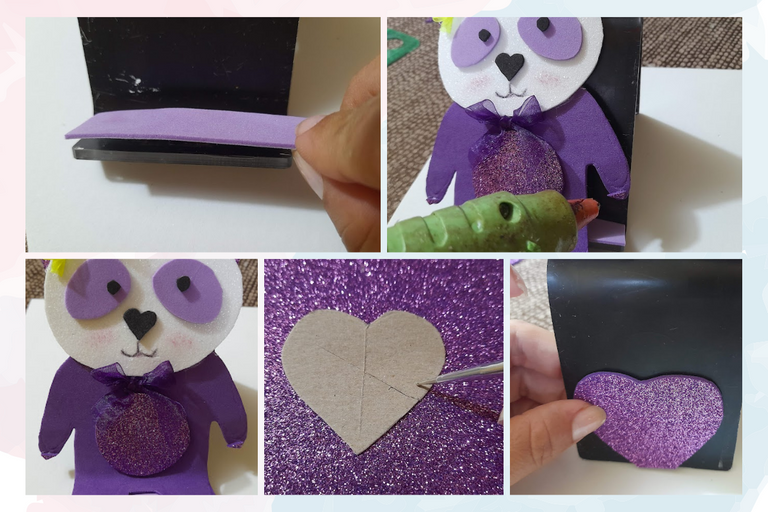
1: We start by making our cell phone holder base, for it we take the office sign and measure at one end of the sign 1.50 centimeters wide and mark with a marker, then from that mark we measure 10 centimeters more and mark.
1: Iniciamos realizando nuestra base del porta celular,para ella tomamos el letrero de oficina y medimos en una de las puntas del letrero 1,50 centímetros de ancho y marcamos con un marcador, luego desde esa marca medimos 10 centímetros mas y marcamos.
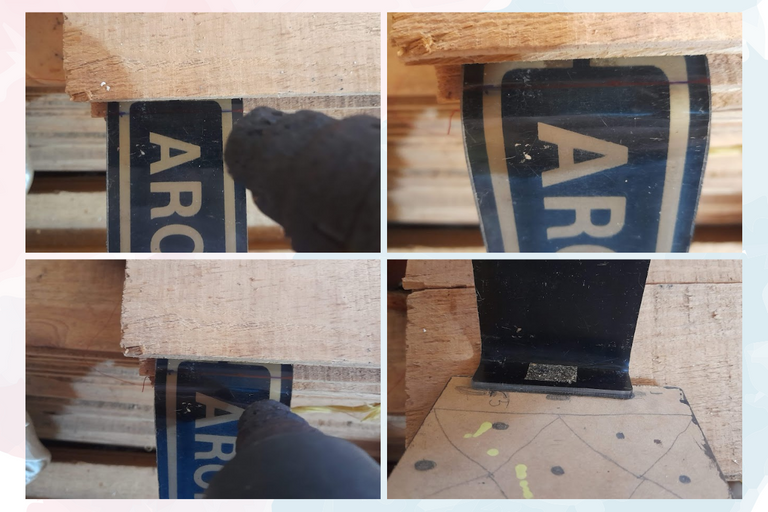
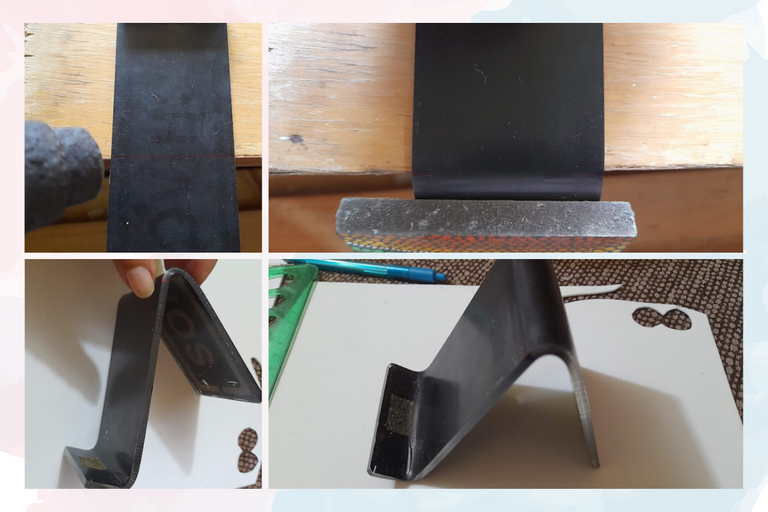
2: Once we have marked our measurements, we proceed to place our sign on a base that can hold it and with the heat gun we proceed to heat little by little one by one the marks we made in the previous step, when the plastic is a little loose with the help of a small piece of wood we help it to give shape as you can see in the images.
2: Una vez marcada nuestras medidas, procedemos a colocar nuestro letrero en una base que lo pueda sujetar y con la pistola de calor procedemos a calentar poco a poco una por una las marcas que realizamos en el paso anterior, cuando el plástico este un poco flojo con la ayuda de una maderita la ayudamos a dar forma como pueden observar en las imágenes.
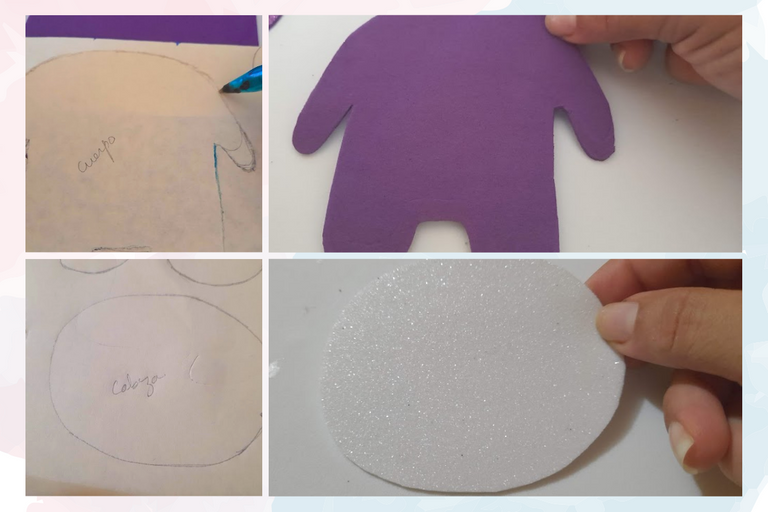
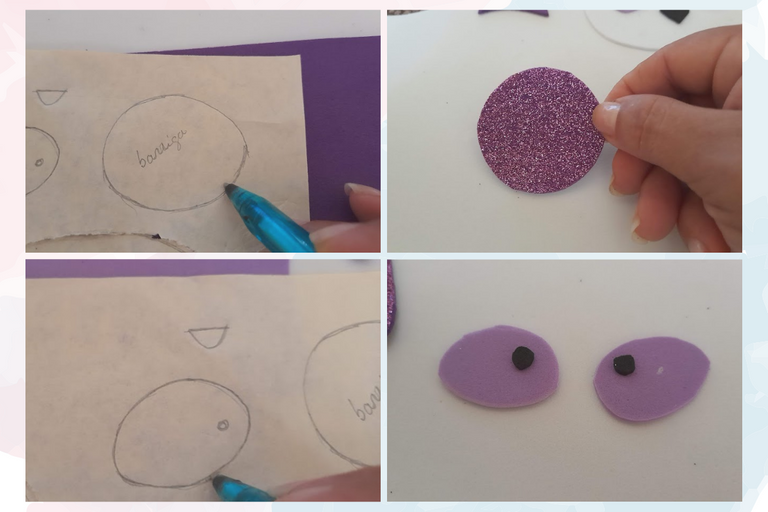
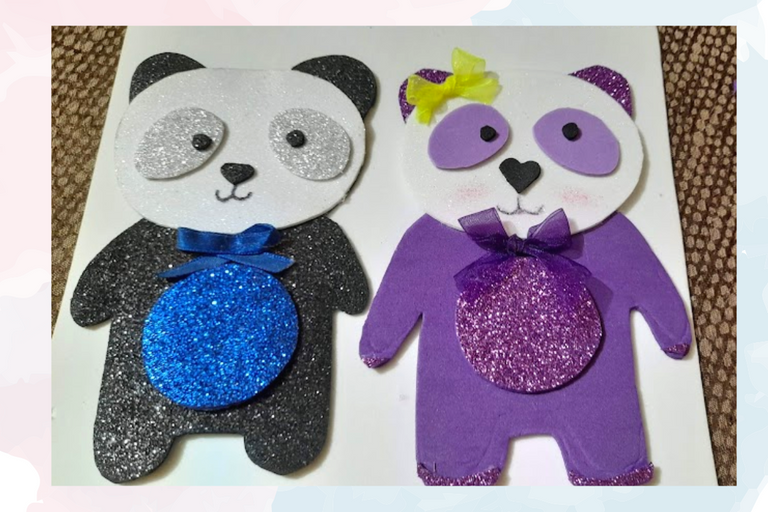
3: Now we proceed to make our bears, we start making the bear, for her we mark the body in the purple eva rubber, in the white eva rubber we mark the head, then in the frosted purple we mark the ears and the belly, then the eyes we mark them in the purple eva rubber and the nose in black, the same procedure is applied for the teddy bear.
3: Ahora procedemos a realizar nuestros ositos, iniciamos realizando la osita para ella marcamos el cuerpo en la goma eva morada, en la goma eva blanco marcamos la cabeza, seguidamente en el morado escarchado marcamos las orejitas y la barriga, luego los ojitos los marcamos en la goma eva morado y la nariz en el negro, el mismo procedimiento lo aplicamos para el osito.
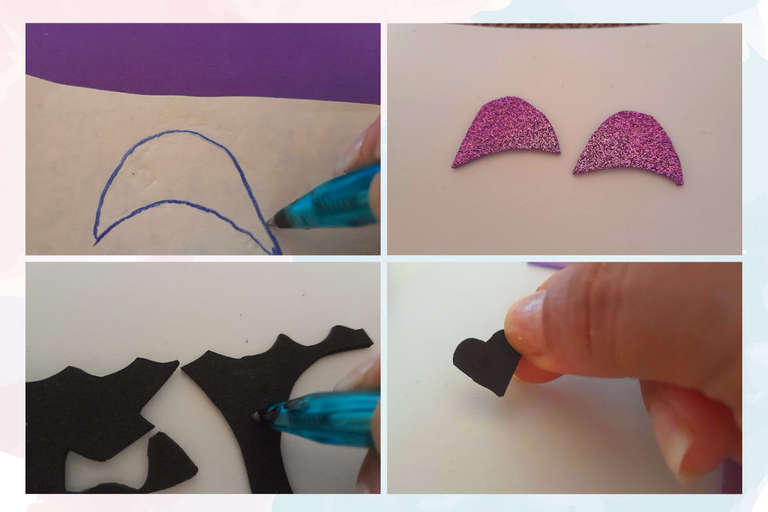
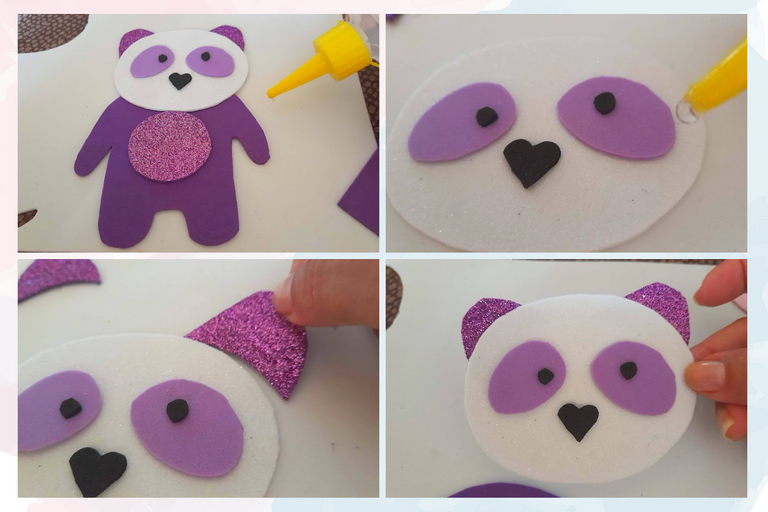
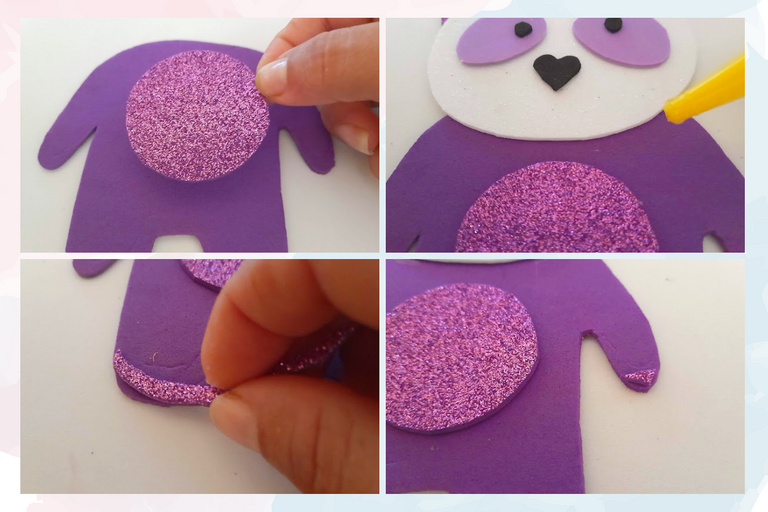
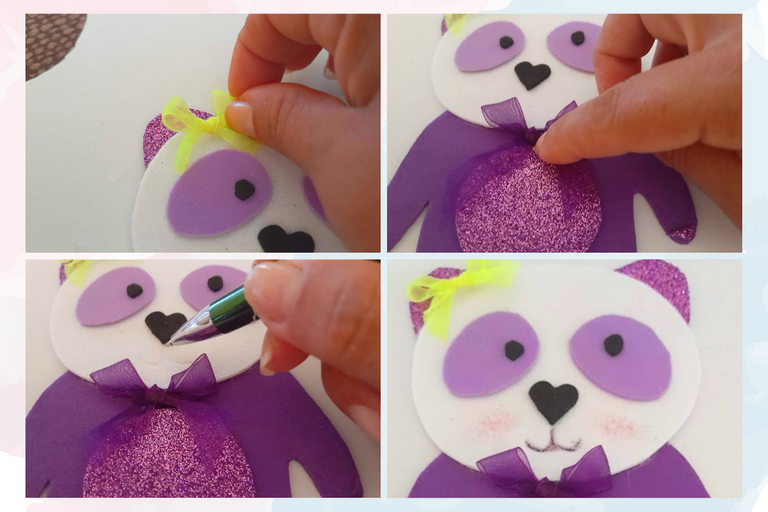
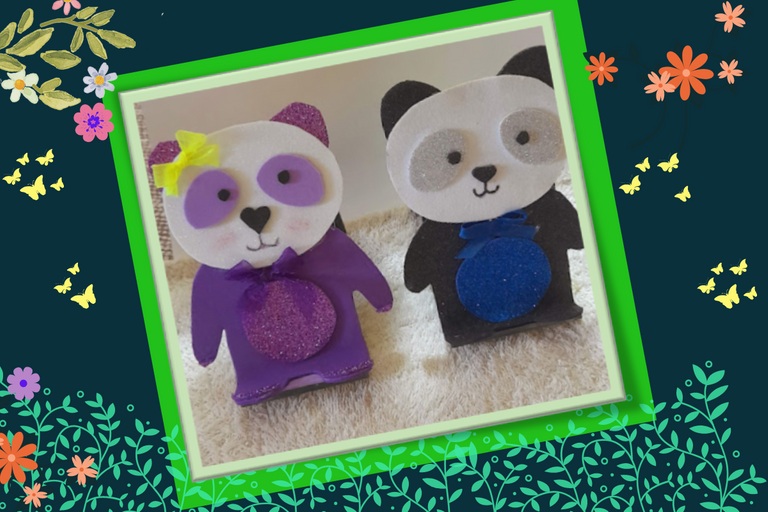
4: We present how we are going to glue each of the pieces, then we proceed to glue them one by one, the little bear we decorate with two cute little bows, one green on his head and the other purple on his neck and for the teddy bear we decorate it with a blue bow.
4: Presentamos como vamos a pegar cada una de las piezas, luego procedemos a pegarlas una a una, la osita le decoramos con dos lindo lacitos uno verde en su cabeza y el otro morado en su cuello y para el osito lo decoramos con un lacito azul.
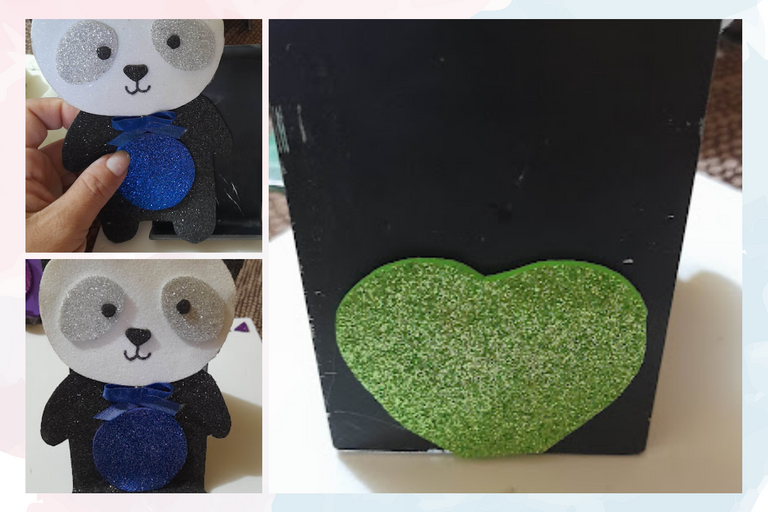
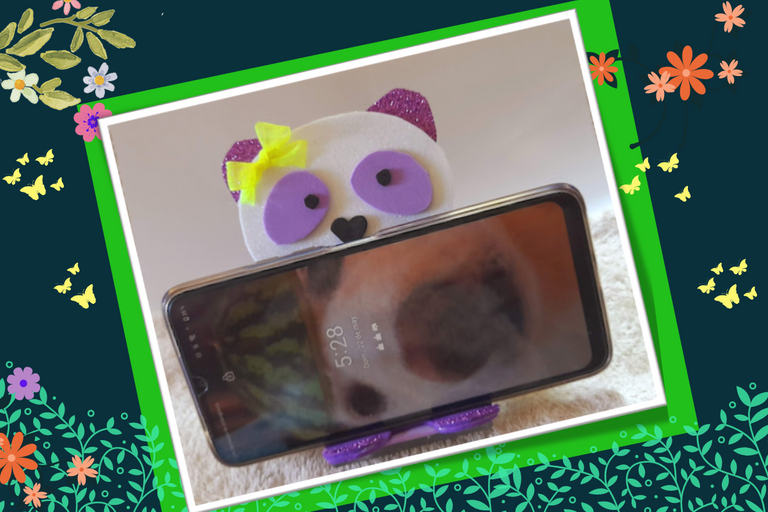
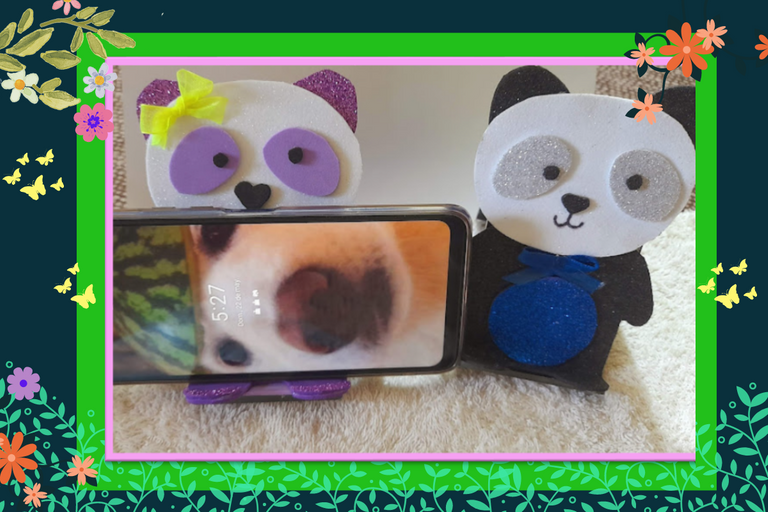
5: Then we proceed to glue each of the bears to their corresponding bases, as you can see and to decorate the back we make a heart on each base and that's it.
5: Seguidamente procedemos a pegar cada uno de los ositos a sus correspondientes bases, como pueden observar y para decorarlo por la parte de atrás le realizamos un corazón a cada base y listo.
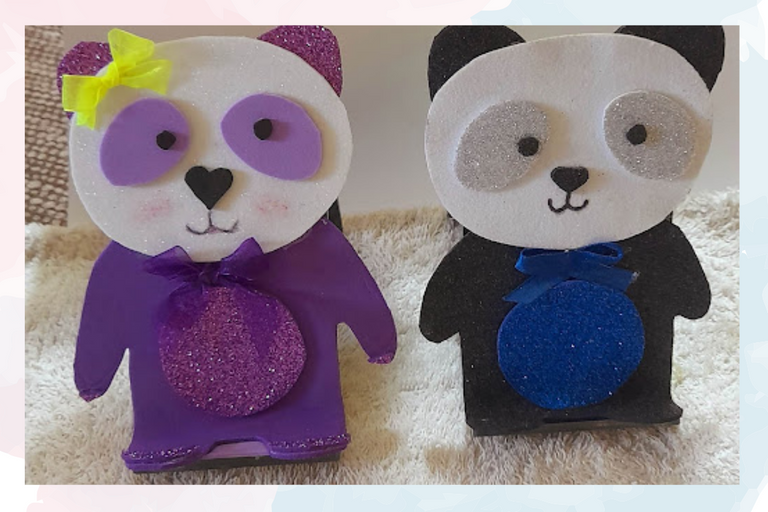
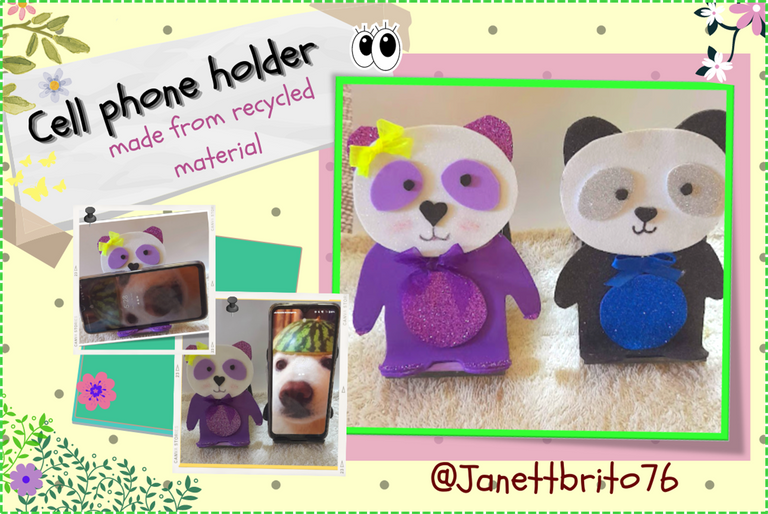
My dear creative ones, this is the final result of my beautiful cell phone holder made with recycled material, with only an office sign, I hope you liked my project today and I encourage you to make this beautiful and practical cell phone holder!
See you next time!
Mis queridas creativas este es el resultado final de mis lindos porta celular elaborado con material de reciclaje, con solo un letrero de oficina. ¡Espero les haya gustado mi proyecto de hoy y se animen a realizar este hermoso y practico porta celular!
¡ Hasta una próxima publicación!

Portada y plantillas elaboradas en canva
Separador


The pictures were taken with a Samsung A12 smartphone, the text was translated into English with the deepl translator link
The banner was designed on canvas link
Las fotografías fueron tomadas con un teléfono inteligente Samsung A12, el texto fue traducido al ingles con el traductor deepl link
El banner fue diseñado en canvas link
Te quedó hermoso este trabajo amiga.... Me encantó es muy original. Gracias por compartir 😊
🎆🎇🎉🎊🌧️💐✨🌾🌱🌹🌙🌿🍃🥀⚡🌺☘️🍀🌈🌷⭐🪴🌵🌸🌟💮🌴🌳💫☀️💮☔🌲🌳🌍🌌🌠☄️🏵️🐝🌻🌼🍄🐞🦋💙☕💜🍍🎆🎇🎉🎊
Hola @chacald.dcymt, que bueno que te gustara mis porta celulares. Gracias por siempre leer y comentar mis post. Saludos
Uhy que hermoso, feliciddaes querida amiga.😊
Gracias amiga katiuska, por leer y comentar. Saludos
Eso es tener agilidad mental. Muy ingenioso, aprovecho el material de reciclaje de una forma que no habría imaginado. Excelente siga así, por favor.
Hola, gracias😊
Thank you for sharing this amazing post on HIVE!
Your content got selected by our fellow curator @rezoanulvibes & you just received a little thank you via an upvote from our non-profit curation initiative!
You will be featured in one of our recurring curation compilations and on our pinterest boards! Both are aiming to offer you a stage to widen your audience within and outside of the DIY scene of hive.
Join the official DIYHub community on HIVE and show us more of your amazing work and feel free to connect with us and other DIYers via our discord server: https://discord.gg/mY5uCfQ !
If you want to support our goal to motivate other DIY/art/music/homesteading/... creators just delegate to us and earn 100% of your curation rewards!
Stay creative & hive on!