
Español
Feliz y bendecido viernes mis estimados lectores,
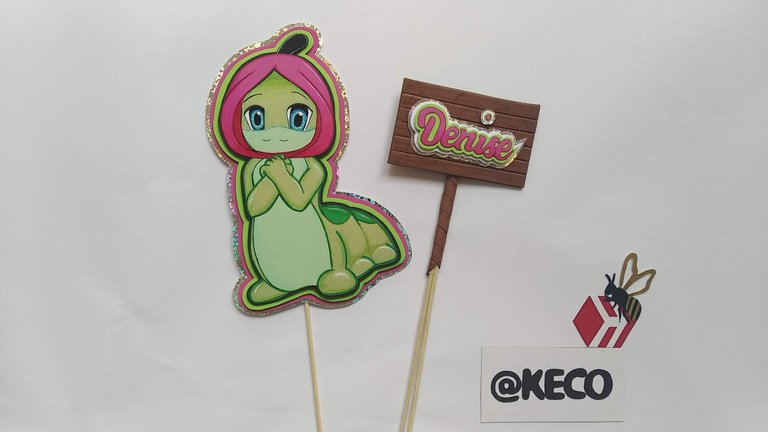
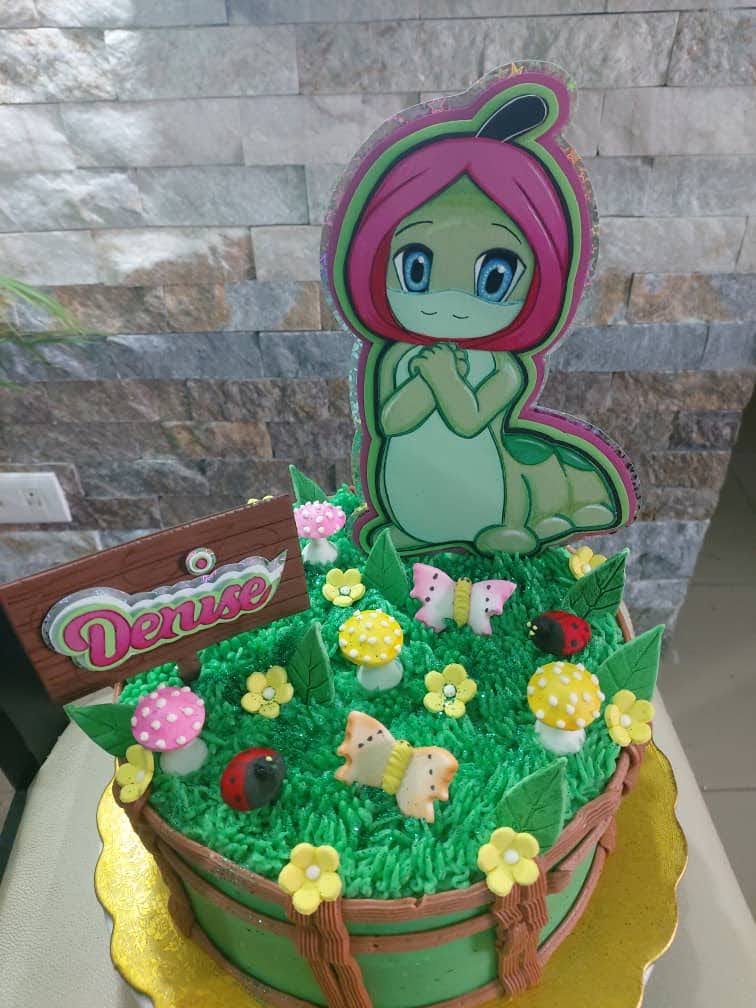
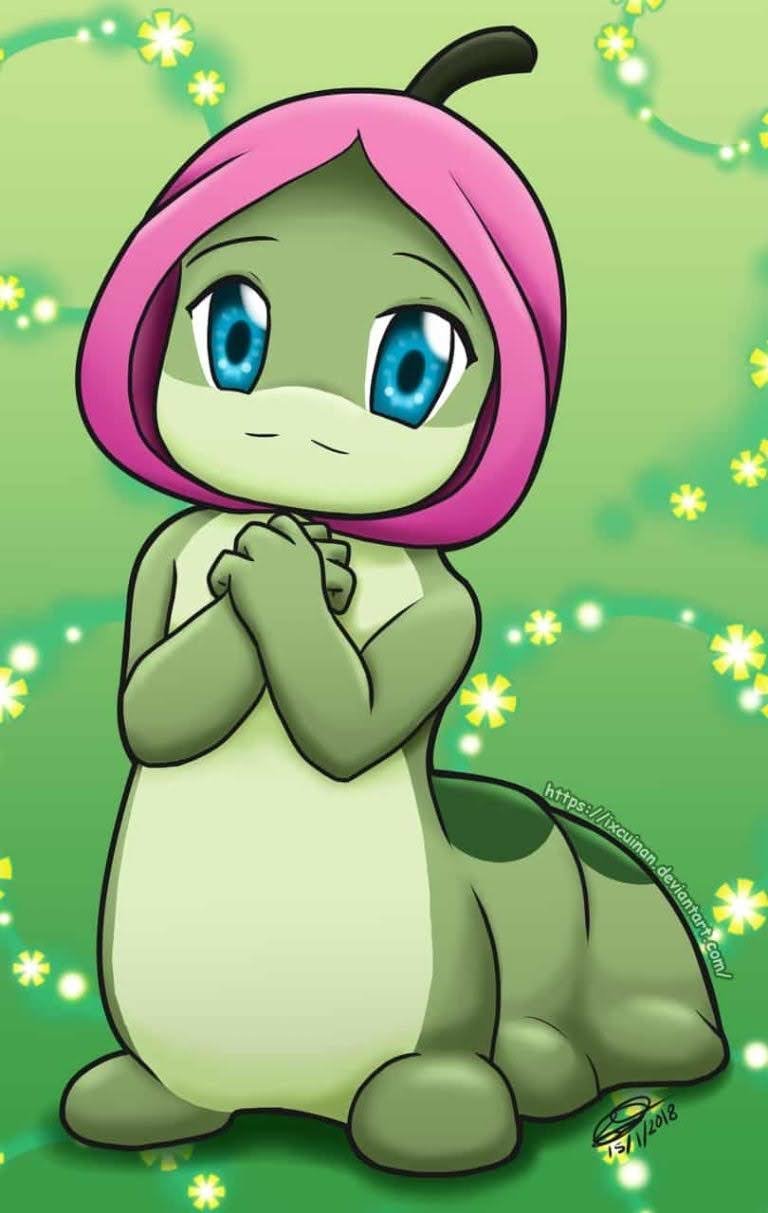
Esta semana cierro con una decoración súper, súper especial para celebrar los 40 y tantos años de Denise, una mujer que ama las caricaturas y sobretodo aquella que recuerda con cariño, “La Oruga Katy” , un dibujo animado del año 1983 que cuenta la historia de una oruga dulce y aventurera que explora la naturaleza antes de su hermosa transformación.
Espero puedan apreciar la mágia de recrear recuerdos y lo mejor de tenerlo en un hermoso y delicioso pastel de cumpleaños, por supuesto pastel realizado por la mejor repostera de mi ciudad, la hermosa Mayda.
Sin más y esperando disfruten del trabajo realizado con amor, les dejo los materiales utilizados, el proceso y las imágenes del trabajo.
- Cartulina de color verde aceituna.
- Cartulina de color verde pastel.
- Cartulina de color verde grama.
- Cartulina de color verde manzana.
- Cartulina de color blanca.
- Cartulina de color fucsia.
- Cartulina plateada holográfica
- Foami de color marrón.
- Pintura al frío color negro.
- Pintura al frio color azul.
- Pintura al frio color blanco.
- Pincel fino.
- Palito de madera.
- Tiza de colores.
- Marcadores de colores.
- lapices de colores.
- Silicón frio.
- Silicón caliente.
- Cutter.
- Tijera.
- Lápiz.
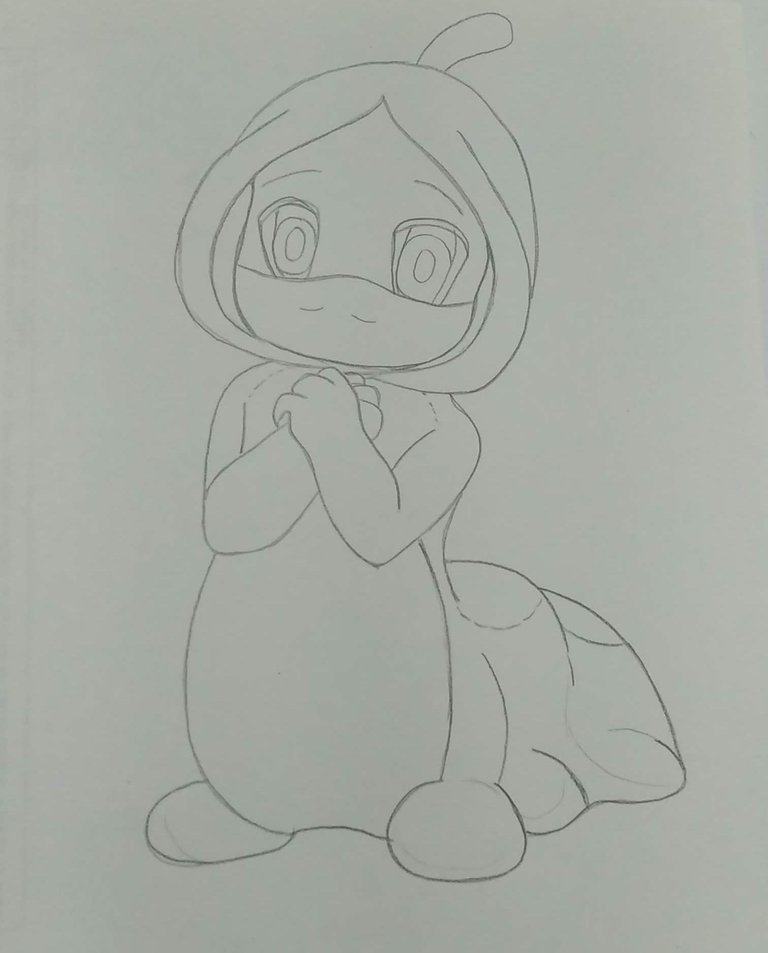
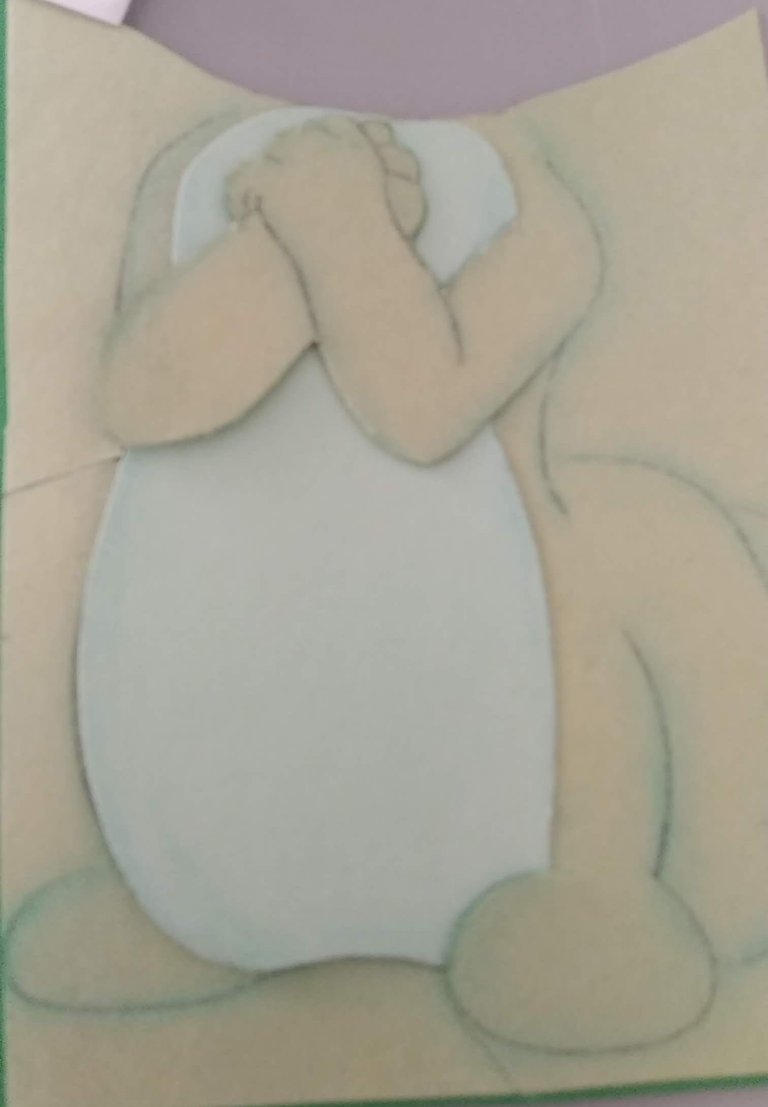
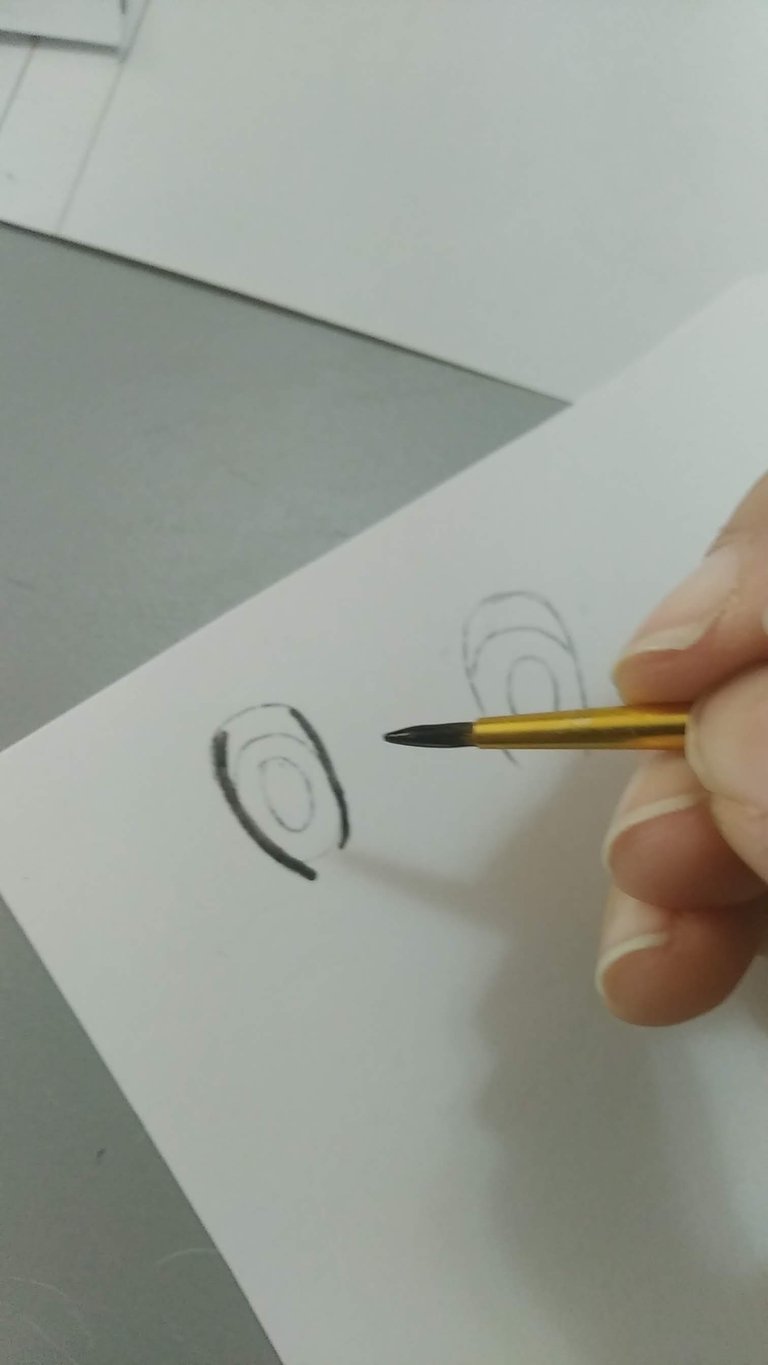
- Siguiendo la imagen de referencia, sacar el diseño en una hoja blanca en el tamaño deseado de acuerdo al diámetro que será el pastel.
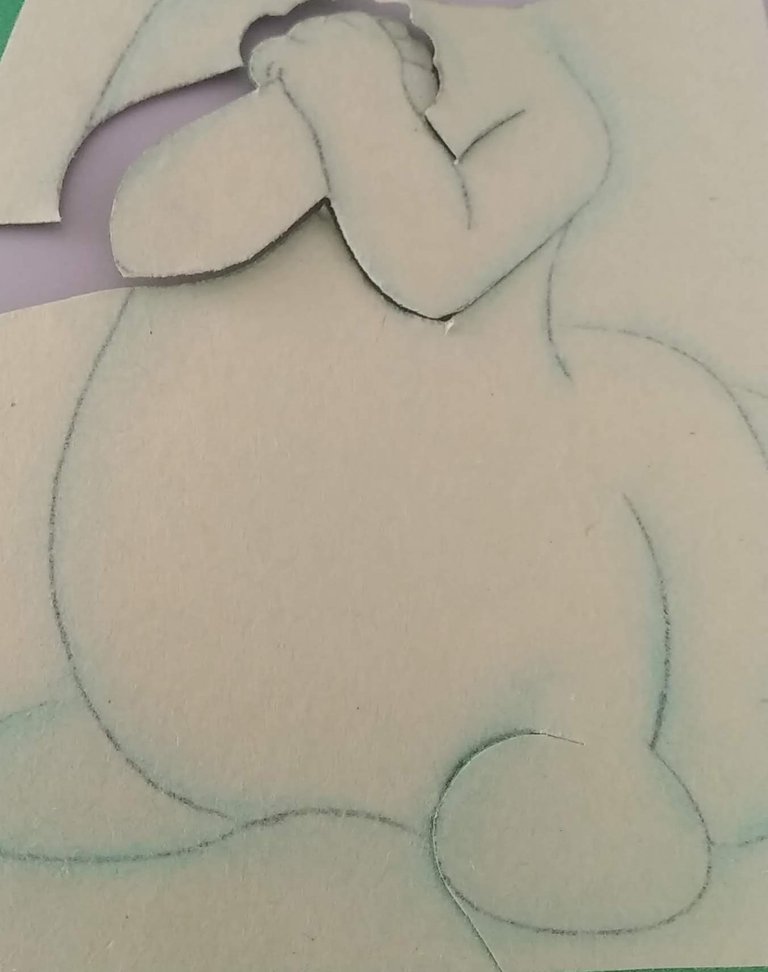
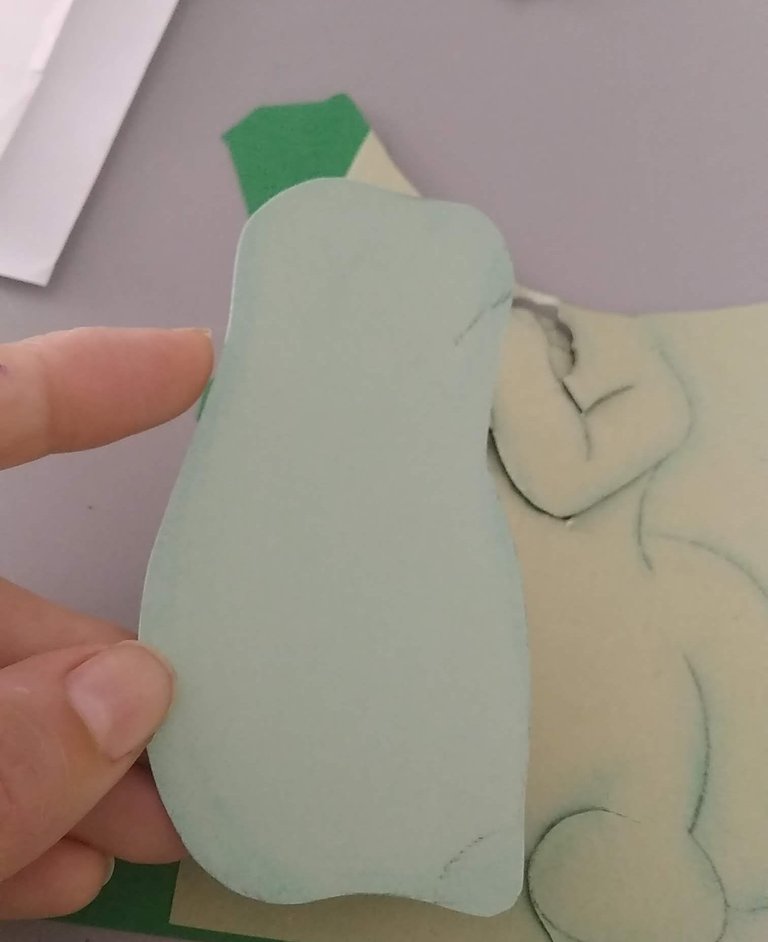
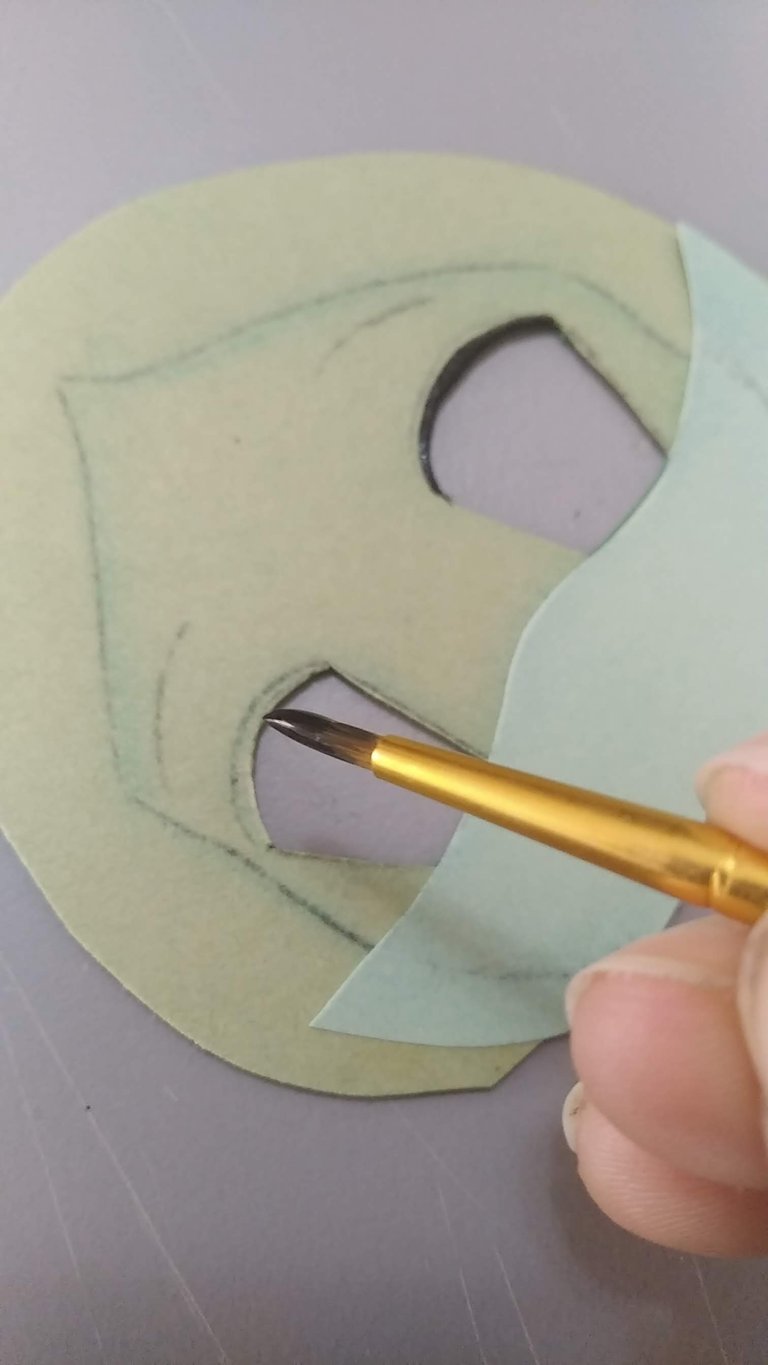
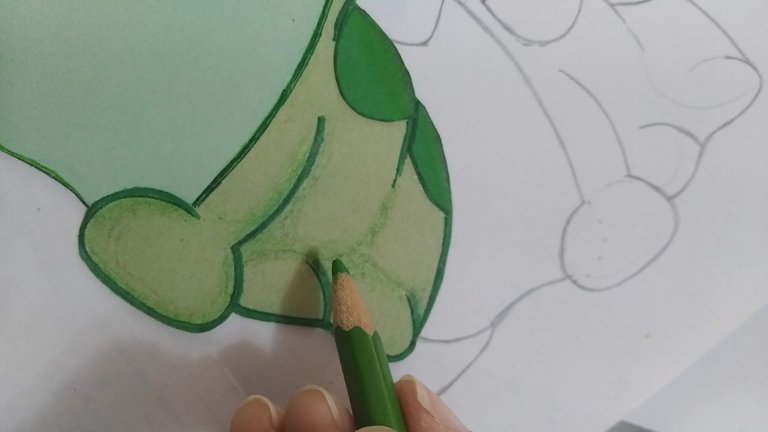
- Marcar y recortar en en la cartulina las piezas correspondiente a cada color. La pieza de la cara, el área de los ojos recortarla con el cutter ya que nos mismos se pintarán aparte en cartulina blanca.
- Los bordes de las piezas sombrearlos con tiza de color y luego resaltar con marcadores de colores, intentando los tonos sean mas oscuros para dar contraste.
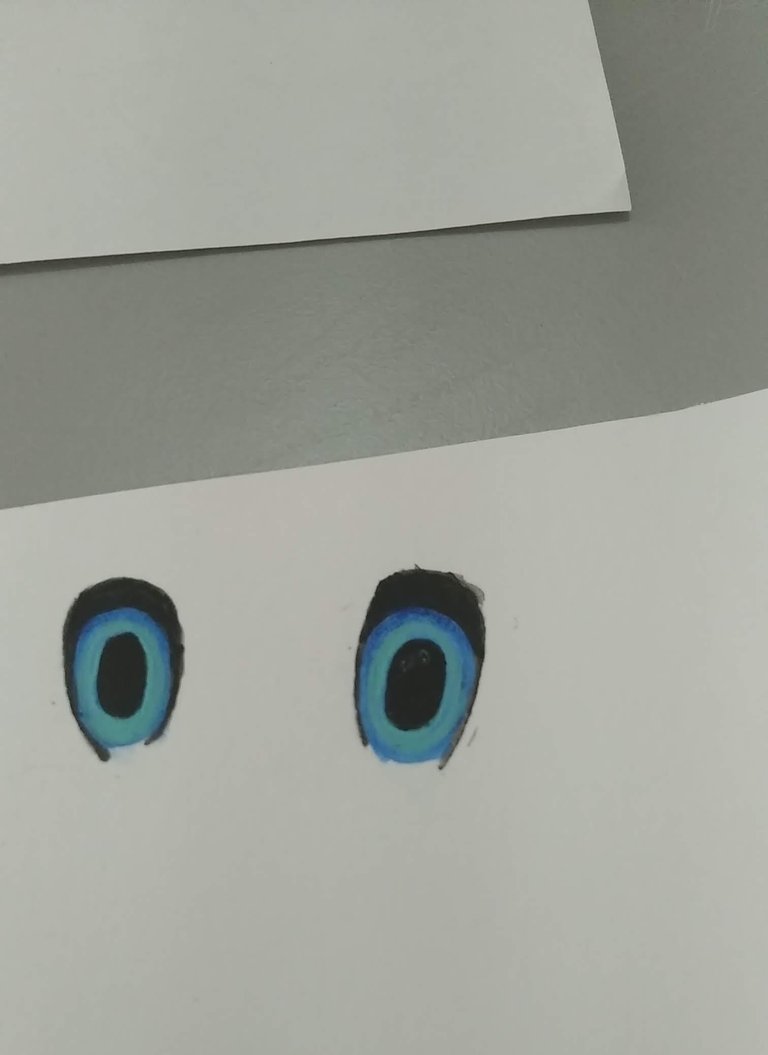
- Pintar los ojos en cartulina blanca y dejar secar bien. Puede aplicarse esmalte para darle brillo especial a la mirada (OPCIONAL)
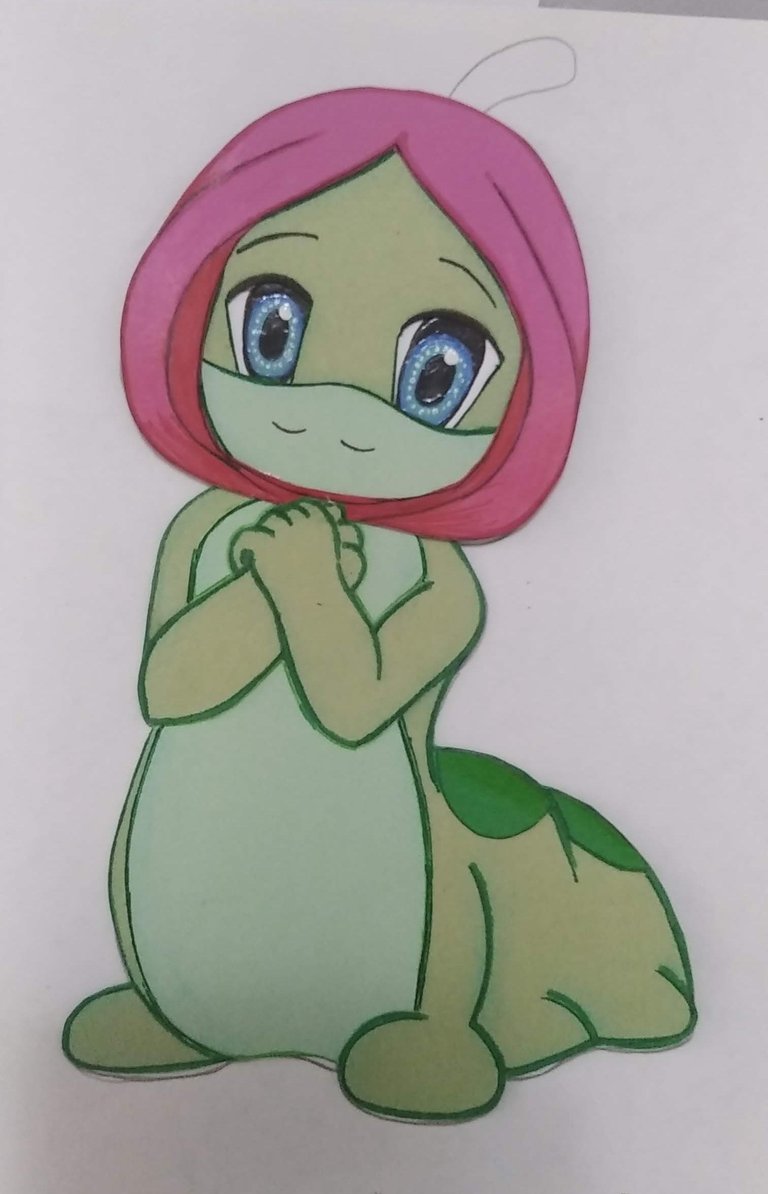
- Ensamblar las piezas y terminar de decorar dando efectos de luz y sombra a la oruga. Para el efecto, utilizar lapices de colores y pintura blanca al frío.
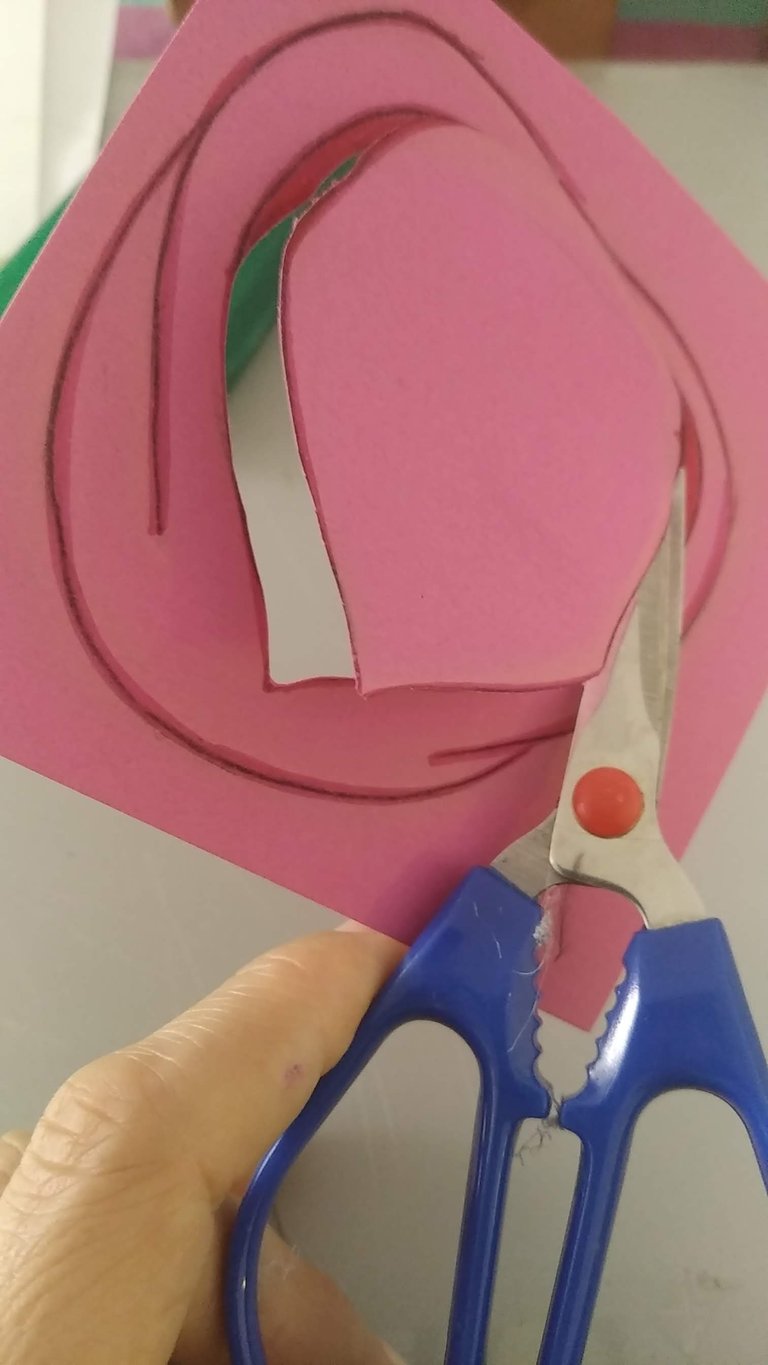
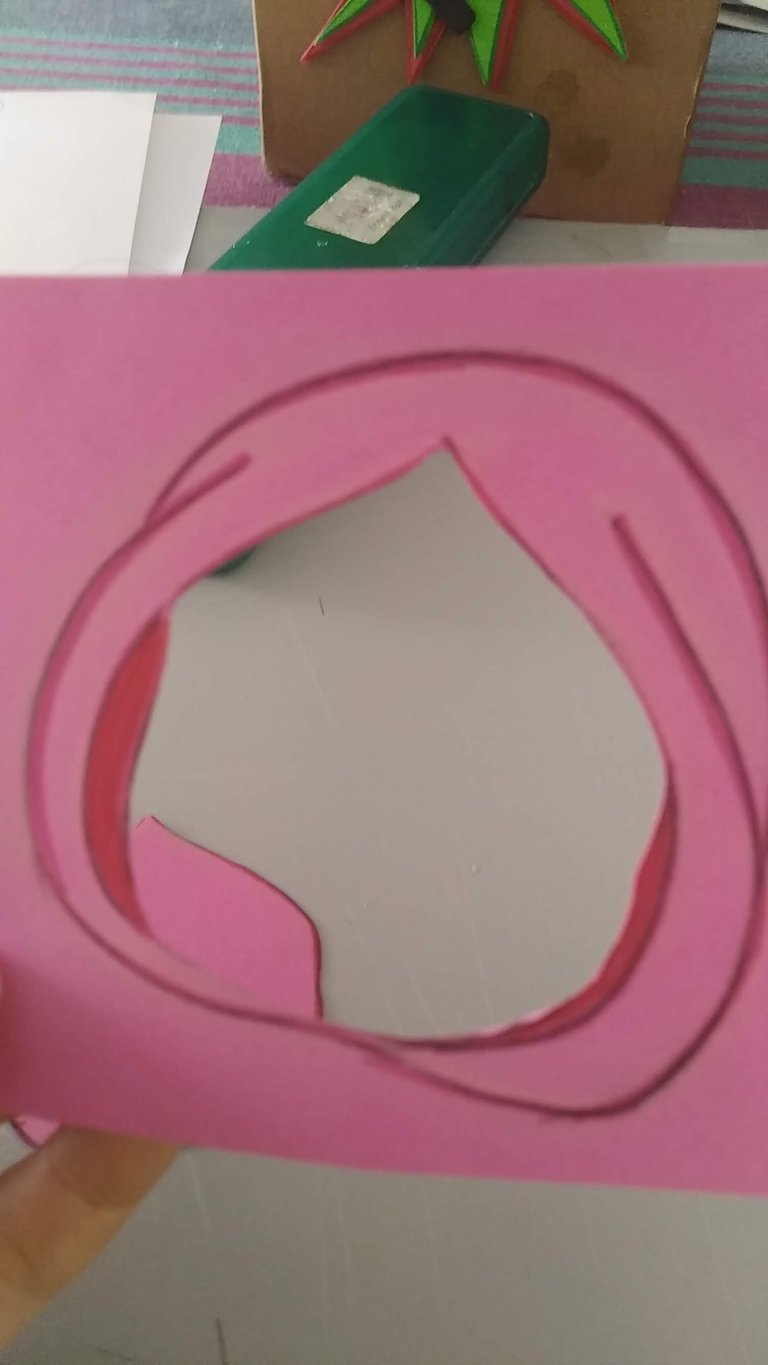
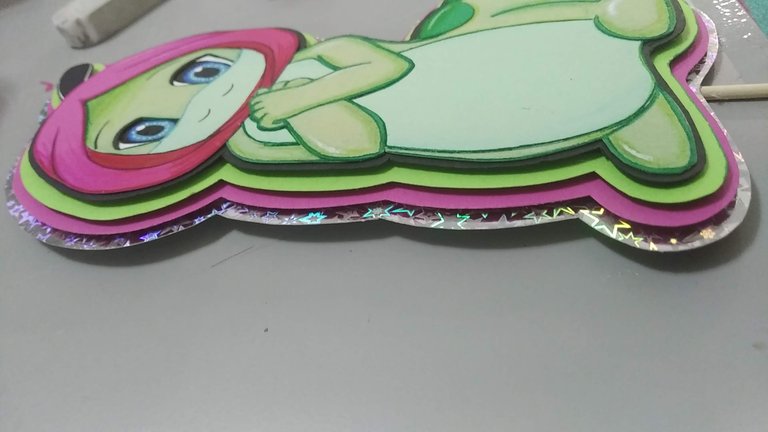
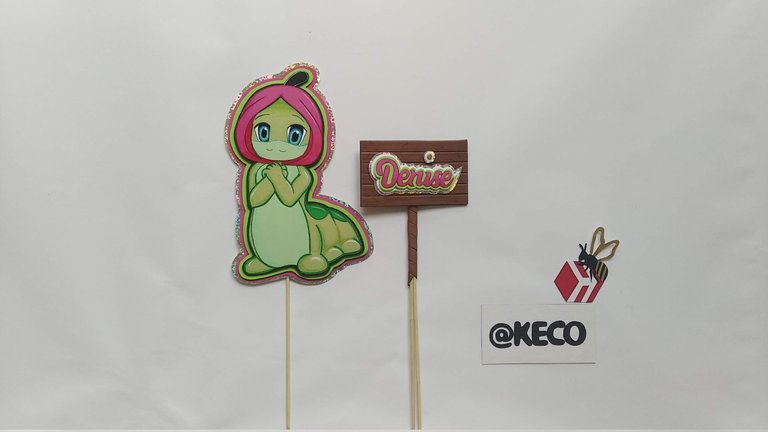
- Cortar siluetas de cartulina en negro, verde, rosado y plateado y pegar en capas, separado por pequeños pedazo de foami, entre capa y capa.
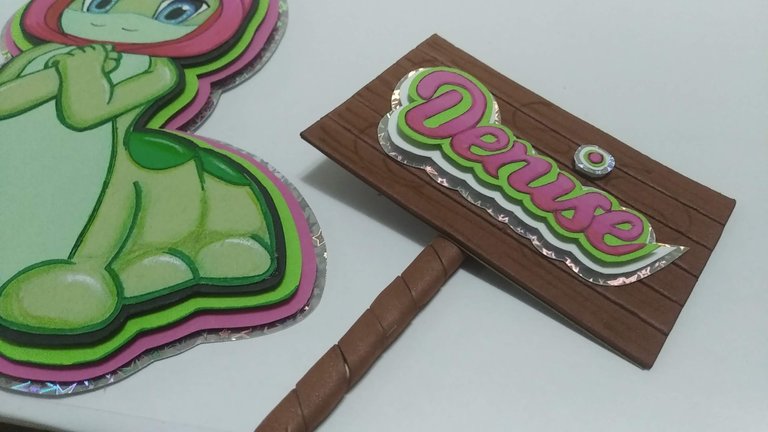
- Pegar en palito de madera con silicón caliente por la parte trasera.
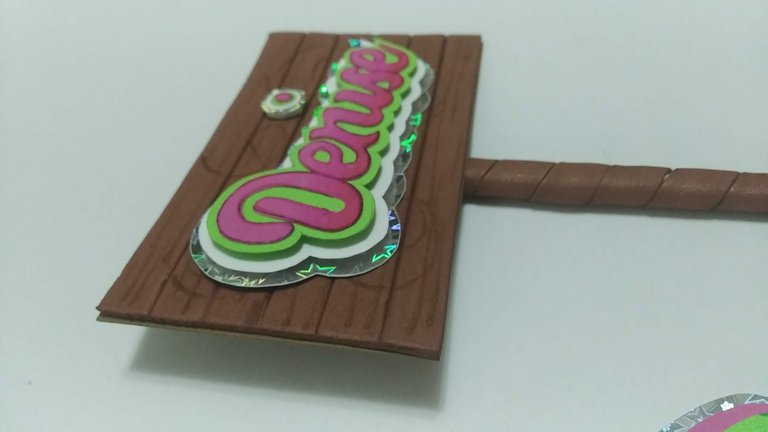
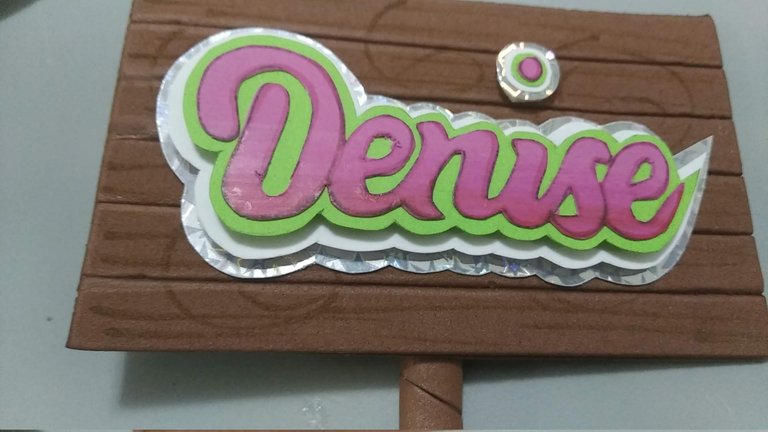
- Para crear el nombre sacar el diseño y recortar sobre las cartulinas de colores y pegar en capas para un efecto lindo.
- Para crear el cartel con efecto de madera, recortar un cuadro de foami marrón y hacerle pequeños canales en horizontal, para que la abertura de cada franja creada se note aplicar calor con la plancha o un cuchillo caliente.
- Pegar los palitos de madera al cuadro,previamente forrado con foami marrón. Hacer marcas características de la madera con marcador marrón o negro.
- Pegar el nombre al cuadro marrón de foami y ¡Listo!, a disfrutar de la magia de lo creado en casa.
English
Happy and blessed Friday my dear readers,
This week I close with a super, super special decoration to celebrate Denise's 40th birthday, a woman who loves cartoons and especially the one she remembers fondly, "Katy the Caterpillar ", a cartoon from 1983 that tells the story of a sweet and adventurous caterpillar who explores nature before her beautiful transformation.
I hope you can appreciate the magic of recreating memories and the best of having it in a beautiful and delicious birthday cake, of course cake made by the best pastry chef in my city, the beautiful Mayda.
Without further ado and hoping you enjoy the work done with love, I leave you the materials used, the process and images of the work.
- Olive green colored cardboard.
- Pastel green cardboard.
- Cardboard of green color grama.
- Cardboard of green color apple.
- White cardboard.
- Cardboard of color fuchsia.
- Cardboard of holographic silver color.
- Foami of brown color.
- Paint to the cold black color.
- Cold paint blue color.
- Paint to the cold white color.
- Fine brush.
- Wooden stick.
- Chalk of colors.
- Colored markers.
- Colored pencils.
- Cold silicone.
- Hot silicone.
- Cutter.
- Scissors.
- Pencil.
- Following the reference image, draw the design on a white sheet of paper in the desired size according to the diameter that will be the cake.
- Mark and cut out on the cardboard the pieces corresponding to each color. The face piece, the area of the eyes should be cut out with the cutter since they will be painted separately on white cardboard.
- Shade the edges of the pieces with colored chalk and then highlight them with colored markers, trying to use darker tones to give contrast.
- Paint the eyes on white cardboard and let them dry well. Enamel can be applied to give a special shine to the eyes (OPTIONAL).
- Assemble the pieces and finish decorating giving light and shadow effects to the caterpillar. For the effect, use colored pencils and cold white paint.
- Cut cardboard silhouettes in black, green, pink and silver and glue in layers, separated by small pieces of foami, between layers.
- Glue on wooden stick with hot silicone on the back side.
- To create the name, cut out the design and cut it out on the colored cardboard and glue in layers for a nice effect.
- To create the wood effect sign, cut out a square of brown foami and make small channels horizontally, so that the opening of each strip created is noticeable, apply heat with an iron or a hot knife.
- Glue the wooden sticks to the frame, previously lined with brown foami. Make characteristic marks on the wood with a brown or black marker.
- Glue the name to the brown foami frame and that's it, enjoy the magic of what you have created at home.
Translated with www.DeepL.com/Translator (free version)
IMÁGENES / IMAGES


SALUDOS / REGARDS
Todas las Fotos fueron tomadas con mi teléfono Redmi 7A.
Contenido original de @keco (fotos y texto) - Todos los derechos reservados Publicado en HIVE así como en mi instagram : http://instagram.com/carton_pintura_algo_mas
All Photos were taken with my Redmi 7A phone.
Original content from @keco (photos and text) - All rights reserved Posted on HIVE as well as on my instagram: http://instagram.com/carton_pintura_algo_mas
Que lindo topper, me encantan las tortas con ellos, gracias por compartir, saludos
Gracias @karbea por comentar, un fuerte abrazo.
Saludos, bendiciones y éxitos.
Toda una cuchitura 😍
Hola @dojeda muchas gracias por tu apoyo, siempre es bueno leerte. Un fuerte abrazo.
Saludos, bendiciones y éxitos.
Gracias @mayvileros tu apoyo es siempre súper bien recibido, realizan un gran trabajo. Un fuerte abrazo.
Saludos, bendiciones y éxitos.
quedo demasiado genial. Una hermosa decoración.. No esperaba menos de ti que siempre haces estas bellezas con mucha pulcritud, dedicación y delicadeza!
Gracias mi estimado @fixie por tus lindas palabras, viniendo de ti, un gran artista, no puedo decir sino solo gracias …
Saludos, bendiciones y éxitos.