English
🎇 The creation of the year 👊🏿
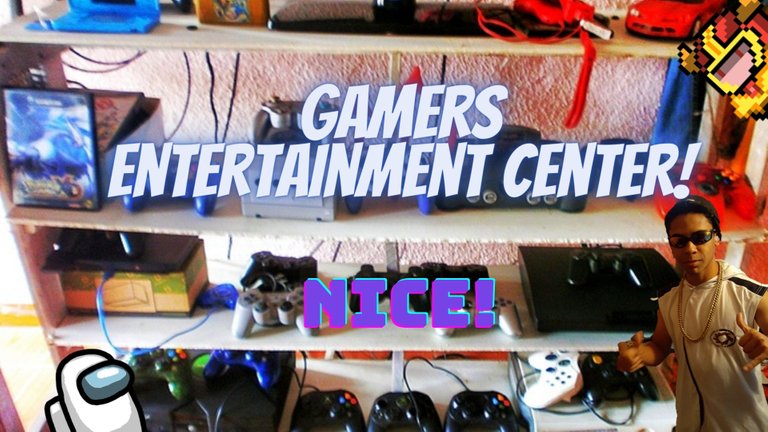
Hello Hive family and Gamers of the community, I hope you are having an excellent week, it is a pleasure to present you one of my biggest achievements as a gamer that I have done this year of 2021.
When I was a little kid, I watched a lot of youtube videos, especially videos of the most famous YouTubers of that time like HolaSoyGerman, Fernanfloo, Vegetta777, Willyrex,ElRubios, etc. These YouTubers marked an era on the internet video platform par excellence, they shaped the childhood of many young children, including yours truly.
The particular thing about these YouTubers is that they usually had their setup well-armed, their rooms and recording areas were impressive, especially in the eyes of a child, I always wanted to have a room like that, but thanks to my inexperience and immaturity I never found a way to have a room for me alone with all my consoles and my laptop to play in quiet.
I spent several years dreaming of a setup for me alone where I have at my disposal all my video games and my TV, it was not until after my graduation when I saw a video of ElRubios this YouTuber was making a video where he criticized the setup of his followers, I remember he said that the best setup would win an amount of 10.000mil euros, the point is that in that video I saw too many ideas to form my gamer room.
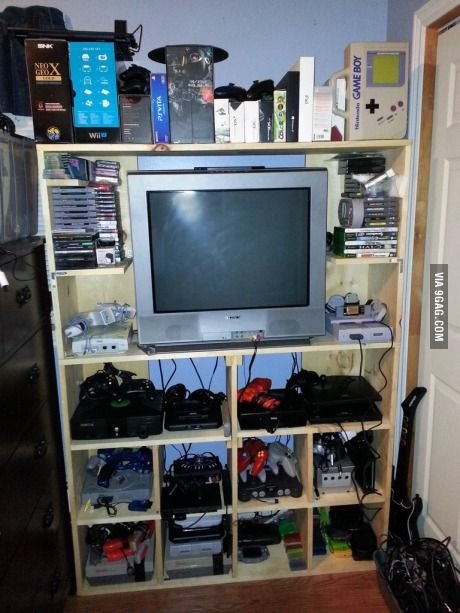
Days later I used Pinterest to look for ideas that are at my disposal, a little simpler ways to create a setup that is according to my expectations with the resources I could have, after days of searching and searching I found an entertainment center (module) that had 5 floors including the base.

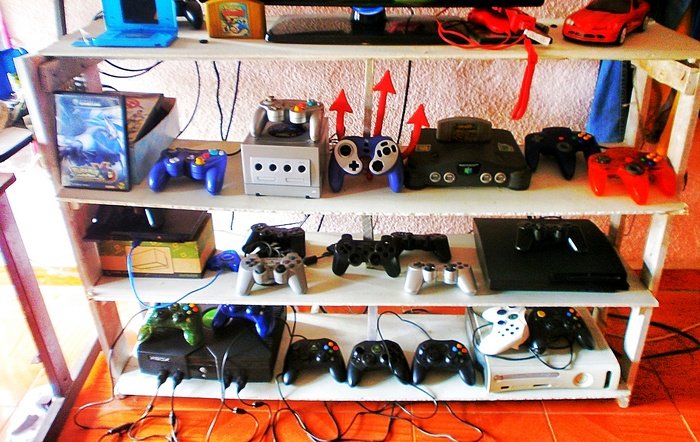
The image I saw the person who uploaded it had classified their consoles by brands, Nintendo consoles were on the fourth floor Nintendo 64 and Gamecube, on the third floor the Dream Cast and Nintendo Wii consoles, on the second floor the Sony consoles PlayStation 1, PlayStation 2 and PlayStation 3, on the base the Microsoft consoles Xbox classic and Xbox 360, and on the fifth floor the TV.
Then I thought it would be nice to emulate this entertainment center in my room, which means I have to build my setup, so with the help of my mom and my uncle I managed to build an entertainment center that I'm sure you have seen several times, as it appeared a lot in different photos and video, but I never talked about it as such, so without further ado, I will tell you how was my experience building this great piece of furniture haha.

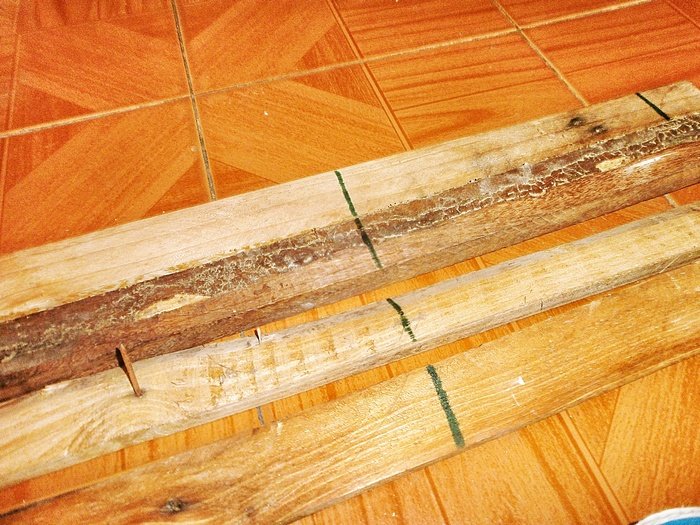
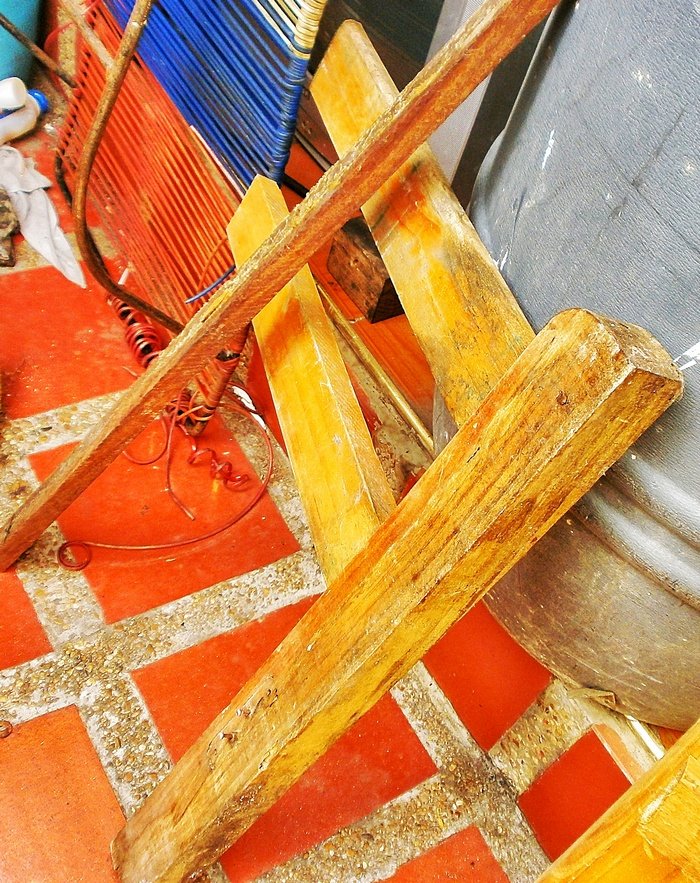
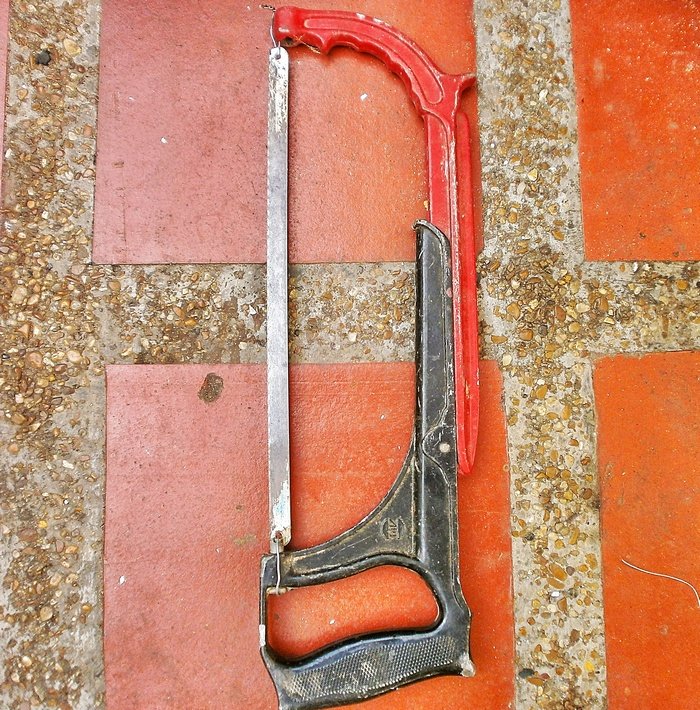
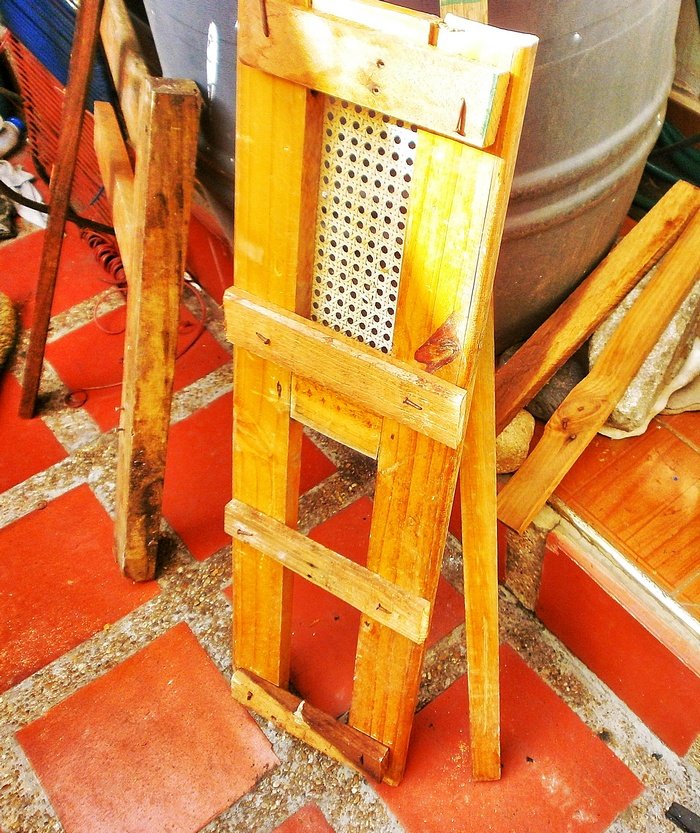
To build the furniture I used recyclable materials, specifically we used some wooden boards that were going to be used for construction that never happened, half of an old and unused bed top, but in good condition and hardness, marble slabs that were given to my mom as payment for a work of art she did in a foundation, white paint that had years without use, boards and more wooden boards, a saw, and finally a termite remedy.
The first step was to mark the measures for each of the floors of the furniture, I was wrong many times, to measure the distance on each of the floors I used my PlayStation 2 console to measure the height, but well sometimes I don't pay attention I marked wrong my first measures, I marked them with a green marker on the wood, this was for the legs that would serve as support.
After that I marked the measurements of the two marble boards to divide them in half, which would be 4 boards, that is, 4 floors of furniture, then I helped my uncle to cut the wood and marble boards, I got a splinter in my big toe, but that's another topic haha, we looked for the old top of the bed and also cut it in half on the top side of the wood.
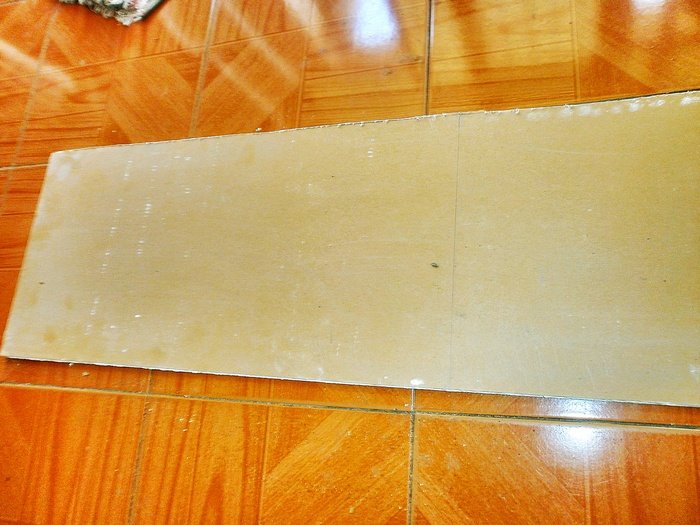
The boards that hold the marble floors were cut with the measurements of the PlayStation 2, those little boards were attached with a hammer and nails, I had never hammered in my life but my uncle told me to do it because sometimes you had to apply pressure on one of the screws so it could enter two boards at the same time, we also placed nails in the marble so they would not fall by a strong gust of wind.
It was the first time I hammered individually, I thought I would take out a finger or something, fortunately, nothing happened to me, I also didn't have so much strength to break a bone or something, I was able to screw things well while my uncle held the woods with the necessary positions, the easiest to nail were the marble slabs, believe it or not, this marble was not as hard as I expected.
The hardest thing to hammer was undoubtedly the legs, specifically the right leg or right support, since they were all loose boards that we had cut because of my measuring mistakes, we made a rectangle to hold the right side of the furniture and after 300 thousand hammerings, it worked.
Shortly after assembling the piece of furniture we realized that it was unstable, especially in the central part, the marble boards were noticeable at first glance that if we placed a heavy thing in the center they would split in two, so we went back to cut wooden boards to make the supports in the middle, this was much more complicated than we thought, the nails that we had left were crooked, besides if the nails were not well placed the board would deviate from its straight line and perhaps would not hold the center of the boards well.
Then we realized that it didn't matter the position of the boards in the middle, the important thing was that both ends were well supported so that the marble boards would not leave their position, I must admit that we made a mistake when we installed the last marble board, the one on top, my uncle and I didn't pay attention and we had to take out the nails and hammer them again, I learned a lot about furniture construction that day.
When we finally got the perfect entertainment center figure, I started to paint my masterpiece that will accompany me for many years, at first, I did not know how to do it, I had to stir the paint several times to acquire its original color, then I painted for 2 hours, I thought I was doing well until my cousin @epilatero arrived and saw the aberration of nature that I was doing.
He explained to me how to paint things like this, I had to apply force and a specific rhythm to make it look decent and uniform, in a few words he told me: "paint like a man", after an hour more he said: "Paint like a man". After spending another hour of my life painting, I got the gamer entertainment center to look great, and we took it to a warehouse to dry and get rid of the paint smell.

After 6 months of having my entertainment center I can say that it is one of the best things I have done in the last years, I finally had an idea and I was able to take advantage of it in the best way.
Today I have my favorite desktop consoles in my room with my entertainment center for gamers, some people tell me that it looks like a museum, my friends have told me that they want to stay in my house just for my gamer entertainment center, I have set up that meets my expectations and impresses people.

To finish the consoles, I have in my room are, the Nintendo 64, the Gamecube, the Wii, the PlayStation 2, the PlayStation 3, the Xbox Classic, and the Xbox 360 which unfortunately has no fix because of the death rings, you know what I mean.
Well Gamers I hope you liked my post today; I hope to contribute to the creativity of this community that I love so much, this entertainment center is very special to me because it means a before and after in my life, from being a student to do what I like, live what I like.
😁Well without further ado, see you soon dear family.😁
Thank you very much!!

Translated with www.DeepL.com/Translator

🎇 La Mejor creación del año.👊🏿
Hola familia de Hive y Gamers de la comunidad, espero que estén pasando una excelente semana, es un placer presentarles uno de mis mayores logros como gamer que he hecho este año de 2021.
Cuando era un niño pequeño, veía muchos vídeos de youtube, sobre todo vídeos de los youtubers más famosos de aquella época como: HolaSoyGerman , Fernanfloo, Vegetta777, Willyrex,ElRubios, etc. Estos youtubers marcaron una época en la plataforma por excelencia de vídeos en internet, formaron la infancia de muchos niños pequeños, incluyendo a su servidor.
Lo particular de estos youtubers es que normalmente ellos tenían sus setup bien armados, su habitaciones y zonas de grabación eran impresionantes, sobre todo a los ojos de un niño, siempre quise tener una habitación así, pero gracias a mi inexperiencia e inmadurez nunca encontraba una forma de tener una habitación para mi sólo con todas mis consolas y mi laptop para poder jugar en paz y tranquilo.
Pasé varios años soñando con un setup para mi sólo donde tenga a disposición todos mis videojuegos y mi televisor, no fue si no hasta después de mi graduación cuando vi un vídeo de ElRubios este youtuber estaba haciendo un vídeo donde criticaba los setup de sus seguidores, recuerdo que él dijo que el mejor setup se ganaría una cantidad de 10.000mil euros, el punto es que en ese vídeo vi demasiadas ideas para formar mi habitación gamer.
Días después usé Pinterest para buscar ideas que estén a mi disposición, formas un poco más sencillas de crear un setup que esté acorde a mis expectativas con los recursos que podía disponer, después de días de buscar y de buscar encontré un centro de entretenimiento (modulo) que tenía 5 pisos incluyendo la base.
La imagen que vi la persona que lo subió tenía clasificadas sus consolas de sobremesa por marcas, las consolas de Nintendo las tenía en el cuarto piso Nintendo 64 y Gamecube, en el tercero las consolas Dream Cast y Nintendo Wii, en el segundo piso las consolas de Sony PlayStation 1, PlayStation 2 y PlayStation 3, en la base las consolas de Microsoft Xbox clásica y Xbox 360, y en el quinto piso el televisor.
Entonces pensé que sería bueno emular este centro de entretenimiento en mi habitación, lo que significa que tengo que construir mi propio setup, así que con ayuda de mi mamá y de mi tío logré construir un centro de entretenimiento que de seguro han visto varias veces, ya que salió mucho en diferentes fotos y vídeo, pero jamás hable de él como tal, así que sin más preámbulo les contaré como fu mi experiencia construyendo este gran mueble jaja.
Para construir el mueble usé materiales reciclables, en especifico usamos unas tablas de madera que iban a usarse para una construcción que jamás se dio, la mitad de un copete de cama ya viejo y sin uso, pero en buen estado y dureza, tablas de mármol que se las dieron a mi mamá como pago de una obra de arte que hizo en una fundación, pintura blanca que tenía años sin uso, tablas y más tablas de madera, un serrucho, y al final remedió para las termitas.
El primer paso fue marcar las medidas para cada uno de los pisos del mueble, me equivoque muchas veces, para medir la distancia en cada uno de los pisos use mi consola PlayStation 2 para medir la altura, pero bueno como a veces no presto atención marqué mal mis primeras medidas, las marcaba con un marcador verde en la madera, esto lo hacia para las patas que servirían de soporte.
Después de eso marqué las medidas de las dos tablas de mármol para dividirlas por la mitad, lo cual serían 4 tablas, es decir, 4 pisos de mueble, luego ayudé a mi tío a cortar las tablas de madera y de mármol, me clavé una astilla en mi dedo gordo, pero esa es otro tema jaja, buscamos el copete viejo de la cama y también lo cortamos por la mitad del lado de superior de la madera.
Las tablas que sostienen los pisos de mármol fueron cortadas con las medidas de la PlayStation 2 , esos pequeños tablones los adherimos con un martillo y clavos, jamás había martillado en mi vida pero me tío me dijo que lo hiciera porque en ocasiones había que aplicar presión en uno de los tornillos para que pudiera entrar en dos tablas al mismo tiempo, también colocamos clavos en el mármol para que no se cayeran por una ráfaga fuerte de viento.
Era la primera vez que martillaba de forma individual, pensé que me sacaría un dedo o algo así, afortunadamente no me pasó nada, tampoco tenía tanta fuerza para romperme un hueso o algo, pude atornillar bien las cosas mientras mi tío sostenía las maderas con las posiciones necesarias, lo más fácil de clavar eran las tablas de mármol, aunque no lo crean este mármol no era tan duro como esperaba.
Lo más difícil de martillar sin duda fueron las patas, concretamente hablando de la pata derecha o soporte derecho, ya que eran todas tablitas sueltas que habíamos cortado por mis los errores de medición que cometí, hicimos un rectángulo para que sostuviera la parte derecha del mueble y funciono después de 300mil martillazos funcionó.
Pocos después de armar el mueble nos dimos cuenta que era inestable, sobre todo por la parte central, las tablas de mármol se notaban a simple vista que en el centro si colocábamos una cosa pesada se partirían en dos, así que volvimos a cortar tablas de madera para hacer los soportes de en medio, esto fue mucho más complicado de lo que pensamos, los clavos que nos quedaron estaban torcidos, aparte si no se colocaba bien el clavos la tabla se desviaría de su recta y tal vez no sostendría bien el centro de las tablas.
Luego nos dimos cuenta que no importaba la posición de las tablitas en el medio lo importante era que en ambos extremos se sostenga bien para que las tablas de mármol no abandonaran su posición, es de admitir que cometimos un error cuando instalamos la última tabla de mármol, la que está más arriba, mi tío y yo no nos fijamos y tuvimos que volver a sacar los clavos y volverlos a martillar, aprendí mucho de construcción de muebles ese día jejeje.
Cuando por fin conseguimos la figura del centro de entretenimiento perfecta me puse yo a pintar mi obra maestra que me acompañará por muchos años, al principio no sabía cómo hacerlo, tuve que revolver la pintura varias veces para que adquiriera su color original, entonces me puse a pintar por 2 horas, creí que lo estaba haciendo bien, hasta que llego mi primo @epilatero y vio la aberración de la naturaleza que estaba haciendo.
El me explico bien de como era pintar cosas como estas, tenía que aplicar fuerza y un ritmo especifico para que se viera decente y uniforme, en pocas palabras el me dijo: “pinta como hombre” , luego de pasar una hora más de mi vida pintando, logré que el centro de entretenimiento gamer se viera de maravilla, y lo llevamos a un almacén para que se secará y se le quitara el olor a pintura.
Luego de 6 meses de haber tenido mi centro de entretenimiento puedo decir que es una de las mejores cosas que he hecho en los últimos años, al fin tuve un a idea y la pude aprovechar de la mejor manera.
Hoy en día tengo mis consolas de sobremesa preferidas en mi habitación con mi centro de entretenimiento para gamers, hay gente que me dice que parece un museo, mis amigos me han dicho que se quieren quedar en mi casa sólo por mi centro de entretenimiento gamer, tengo setup que cumple con mis expectativas e impresiona a la gente.
Para finalizar las consolas que tengo en mi habitación son, la Nintendo 64, la Gamecube, la Wii, el PlayStation 2, el PlayStation 3, el Xbox Clásico y el Xbox 360 que lamentablemente no tiene arreglo por los anillos de la muerte, ustedes saben de qué hablo.
Bueno Gamers espero que les haya gustado mi post de hoy, espero aportar a la creatividad de esta comunidad que tanto amo, este centro de entretenimiento es muy especial para mi porque significa un antes y un después en mi vida, de ser estudiante a hacer lo que me gusta, vivir de lo que me gusta.
😁Bueno sin más nos vemos pronto querida familia.😁
¡¡Muchas Gracias!!
Translated with www.DeepL.com/Translator
Muy buen el Set-Up hermano, una propia creacion siempre sera un proyeco maravilloso, quisiera tener algo asi, pero algunas cosas de videojuegos que tenia los he ido vendiendo o reglando👍. Saludos!!
Gracias, la verdad me costó mucho tiempo y esfuerzo conseguirlo y construirlo, me alegra que te haya gustado mucho. Saludos para ti también querido amigo.