
Image owned by Astrocreator

Hello everyone, a few days ago my wife and I went to visit some friends, after a nice lunch, some chat and lots of laughs we decided to improvise a creative workshop to spend a few hours together doing something different. So we decided to create artistic stamps.
To create an artistic stamp you need rubber blocks to be engraved and excavated with "gouges" or tools that allow you to work this rubber. First you have to draw the subject you want to create on a sheet of paper, you have to take some precautions into account, do not create too small details and create thick enough lines, I decided to draw a raccoon for my rubber stamp.
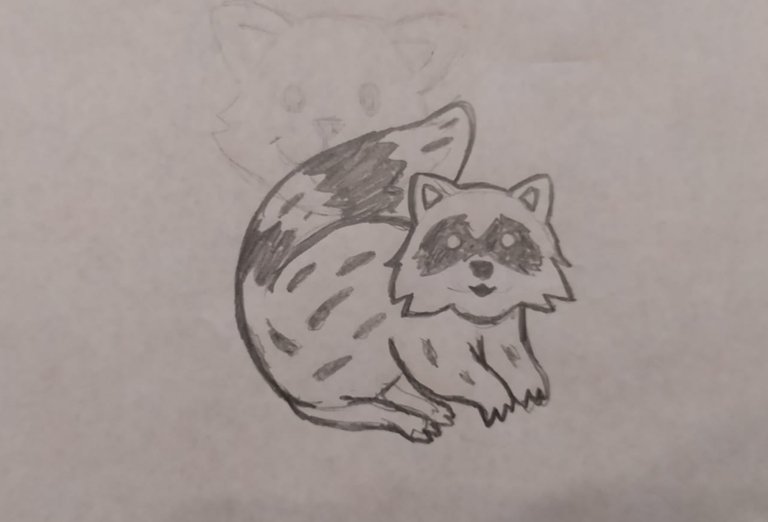
My drawing on paper
Rubber block on which to transfer the drawing
Once the drawing has been made with a pencil, it must be transferred to the rubber block, to do this just place the rubber on the sheet and press on the entire surface, the sheet will transfer the image on the rubber.
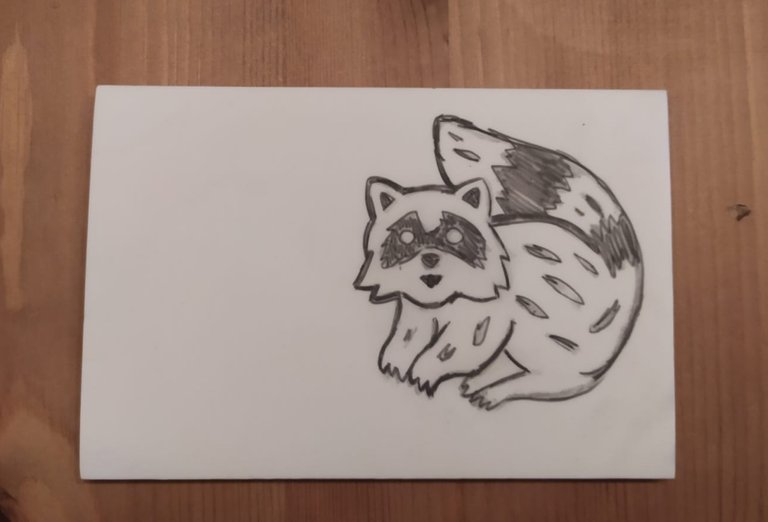
Rubber block with design
When our design is imprinted on the rubber we can move on to "sculpting" the rubber, emptying all the white parts, in doing so all the drawn parts will remain in relief and can be inked during the last step.
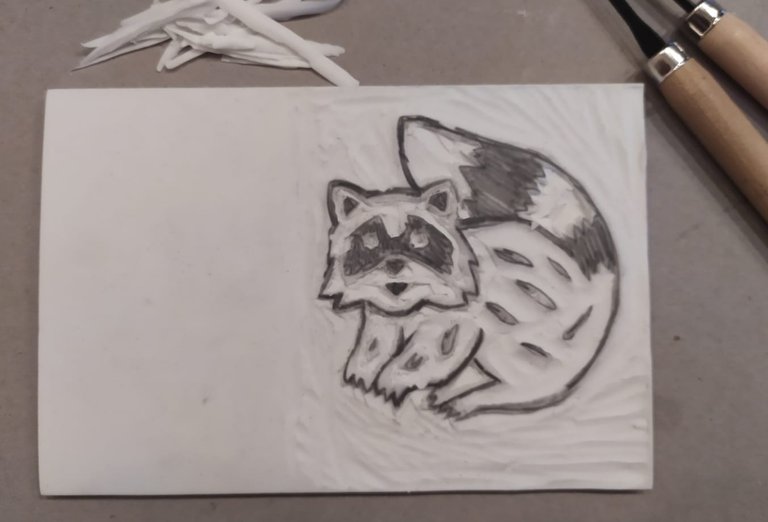
Rubber sculpted
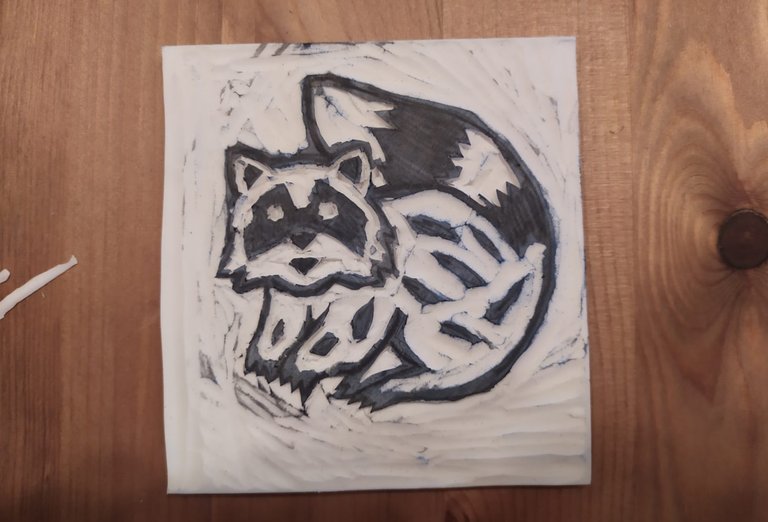
The embossed parts have been inked
After inking the embossed parts of the rubber, you have to turn it over on a sheet and apply pressure to the entire surface, in doing so the image will remain imprinted on the sheet.
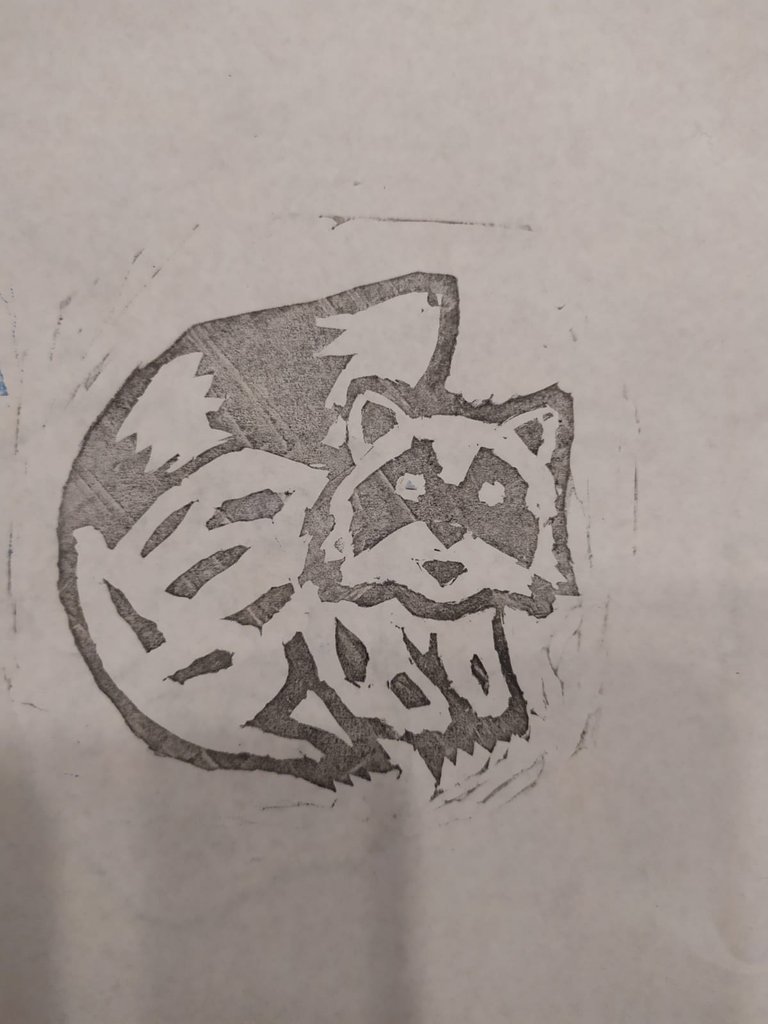
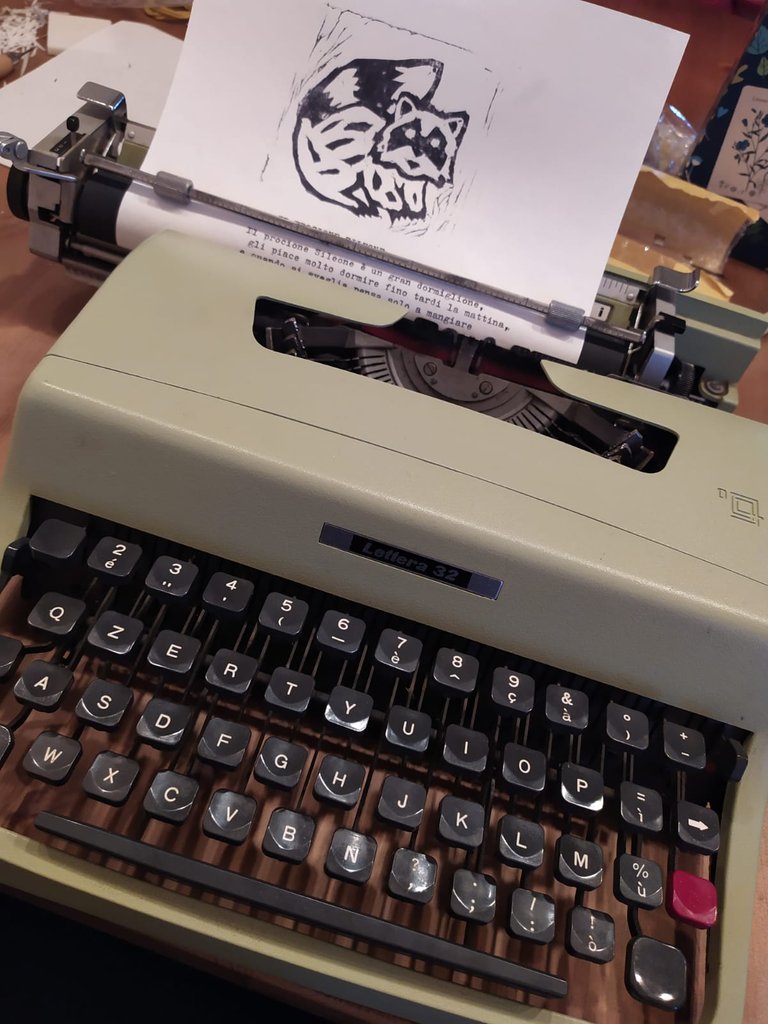
The result, despite all its small imperfections, is very fascinating, and each mold is unique and unrepeatable. To conclude, I wanted to write under the press, thanks to an old typewriter, a small story to contextualize the topic. This experience was a lot of fun and fun, doing things with your own hands is always very satisfying.
I hope you enjoyed this work, as always, I invite you to let me know what you think below in the comments.

Immagine di proprietà di Astrocreator

Ciao a tutti, qualche giorno fà io e mia moglie siamo andati a trovare degli amici, dopo un bel pranzetto, qualche chiacchera e tante risate abbiamo abbiamo deciso di improvvisare un laboratorio creativo per passare qualche ora insieme facendo qualche cosa di diverso. Quindi abbiamo deciso di creare dei timbri artistici.
Per creare un timbro artistico servono dei blocchetti di gomma da incidere e scavare con delle "sgorbie" ovvero degli strumenti che permettono di lavorare questa gomma. Come prima cosa bisogna disegnare su un foglio il soggetto che si vuole creare, bisogna tenere conto di alcuni accorgimenti, non creare particolari troppo piccoli e creare line abbastanza spesse, io ho deciso di disegnare un procione per il mio timbro.
Il mio disegno su carta
Blocco di gomma dove trasferire il disegno
Realizzato il disegno con una matita, bisogna trasferirlo sul blocco di gomma, per farlo basta appoggiare la gomma sul foglio e fare pressione su tutta superficie, il foglio traferirà l'immagine sulla gomma.
Blocco di gomma con il disegno
Quando il nostro disegno è impresso sulla gomma possiamo passare a "scolpire" la gomma, scavando tutte le parti bianche, facendo così tutte le parti disegnate rimarranno in rilievo e potranno essere inchiostrate durante l'ultimo passaggio.
Gomma scolpita
Le parti in rilievo sono state inchiostrate
Dopo aver inchiostrato le parti in rilievo della gomma, bisogna capovolgerla su un foglio e fare pressione su tutta la superfice, così facendo l'immagine rimarrà impressa sul foglio.
Il risultato grazie a tutte le sue piccole imperfezioni risulta molto affascinante, e ogni stampo è unico ed irripetibile. Per concludere ho voluto scrivere sotto la stampa, grazie una vecchia macchina da scrivere, una piccola storia per contestualizzare il soggetto. Questa esperienza è stata molto divertente e piacevole, creare cose con le proprie mani è sempre molto soddisfacente.
Spero che questo lavoro vi sia piaciuto, come sempre vi invito a farmi sapere cosa ne pensate qua sotto nei commenti.

The rewards earned on this comment will go directly to the person sharing the post on Twitter as long as they are registered with @poshtoken. Sign up at https://hiveposh.com.
Ma che carino, !LUV
Grazie sono contento ti piaccia
!PGM
100 PGM token to send 0.1 PGM three times per day
500 to send and receive 0.1 PGM five times per day
1000 to send and receive 0.1 PGM ten times per day
Discord
Support the curation account @ pgm-curator with a delegation 10 HP - 50 HP - 100 HP - 500 HP - 1000 HP
Get votes from @ pgm-curator by paying in PGM, here is a guide
Create a HIVE account with PGM from our discord server, here is a guide
I'm a bot, if you want a hand ask @ zottone444
@tipu curate molto bello soprattutto per l'idea della macchina da scrivere che rende il disegno ancora più unico.
Upvoted 👌 (Mana: 32/42) Liquid rewards.
Grazie del supporto, si è stato molto particolare usarlo come strumento.
!PGM
100 PGM token to send 0.1 PGM three times per day
500 to send and receive 0.1 PGM five times per day
1000 to send and receive 0.1 PGM ten times per day
Discord
Support the curation account @ pgm-curator with a delegation 10 HP - 50 HP - 100 HP - 500 HP - 1000 HP
Get votes from @ pgm-curator by paying in PGM, here is a guide
Create a HIVE account with PGM from our discord server, here is a guide
I'm a bot, if you want a hand ask @ zottone444