This is a new kind of post I want to try because we needed to fill our department and If you want to have something nice or different and save some money, you need to do it yourself. This is kind of DYI project I had and did during the pandemic.
This started many years ago with my grandma sewing machine, every time I saw that old machine just laying around in a corner disappearing in time, getting older and turning to ashes I thought I could repurpose the base as some hind of table.
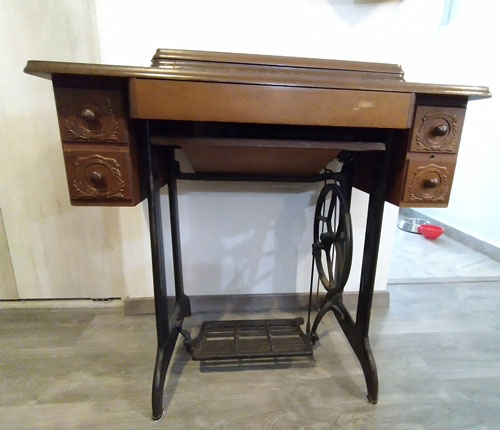
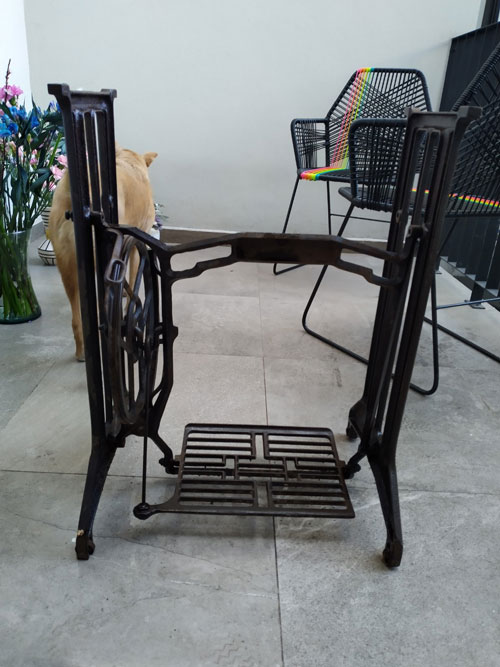
If you don’t know how an old sewing machine looks like, it was something like this. This is another sewing machine we have, and it is very well cared. This one is actually from my mother-in-law, and we will refurbish it and use it as a side table.
The one from my grandmother didn’t look anything like the last one, it was very damaged and just accumulating rust and dust. I couldn’t find a picture of it, but believe me, it was bad. And even in that condition I always said that I wanted that sewing machine. When the time came that my family thought they want to trash it, I offered to do it. But an uncle claimed he wanted the machine, so I talked to him and he just wanted the actual sewing machine, he didn’t care about the base. I just gave him the machine, kept the base and dispose the old damaged tabletop.
I save that old base for years, and it kept rusting and finally when they gave us our apartment, I just knew it would make a fantastic terrace table. But we needed to get some other stuff done before I embark on this project, so it had to wait a few months.
When we finally bought a couple of chairs for the terrace, it was the time to do it. I brought the base to the department and got to work.
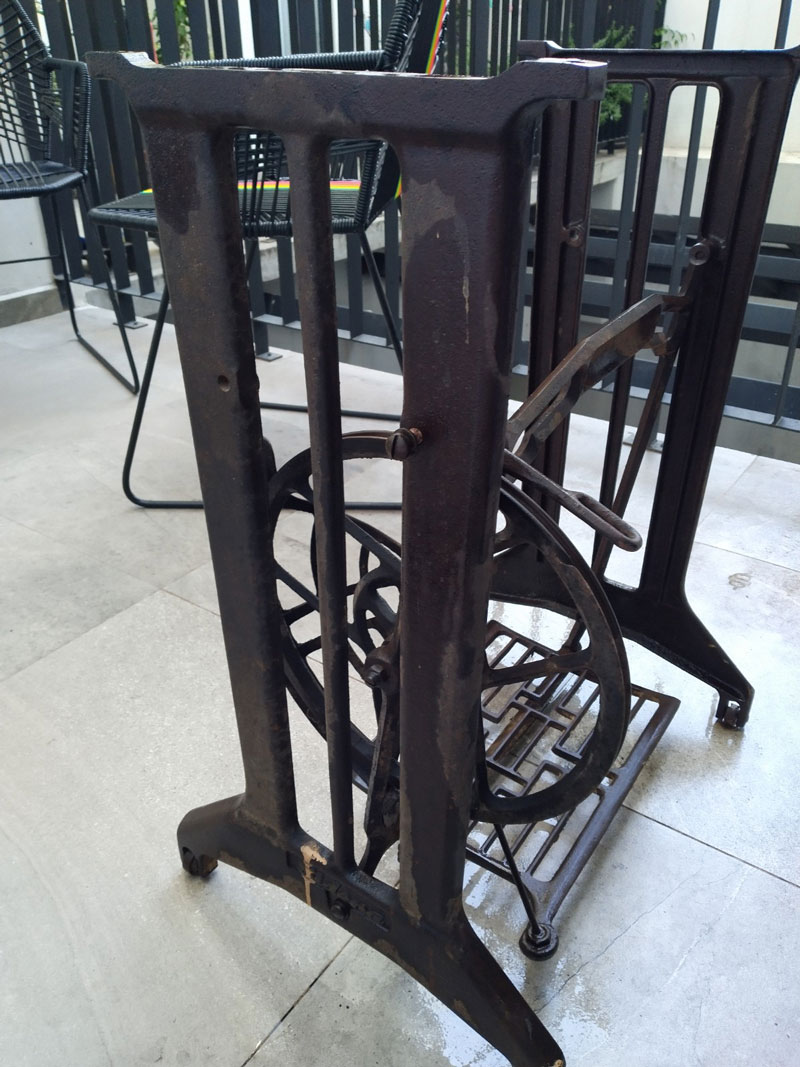
The first thing I had to do was to clean the base of rust, so I used an oil spray called WD-40 and a metal brush to scrub all the surface.
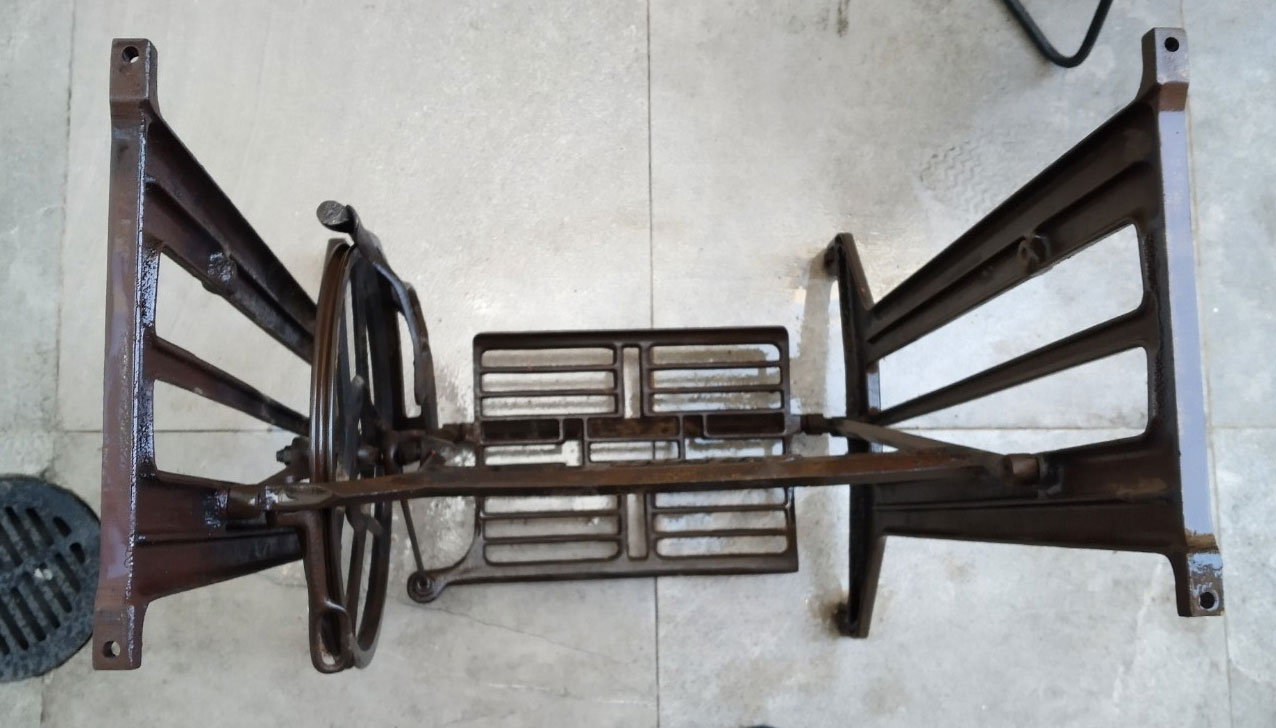
Then I took all these photos because I dismantle all the base. Sorry I didn’t have all the pictures of the step by step process, but at that time I wasn’t thinking of posting it.
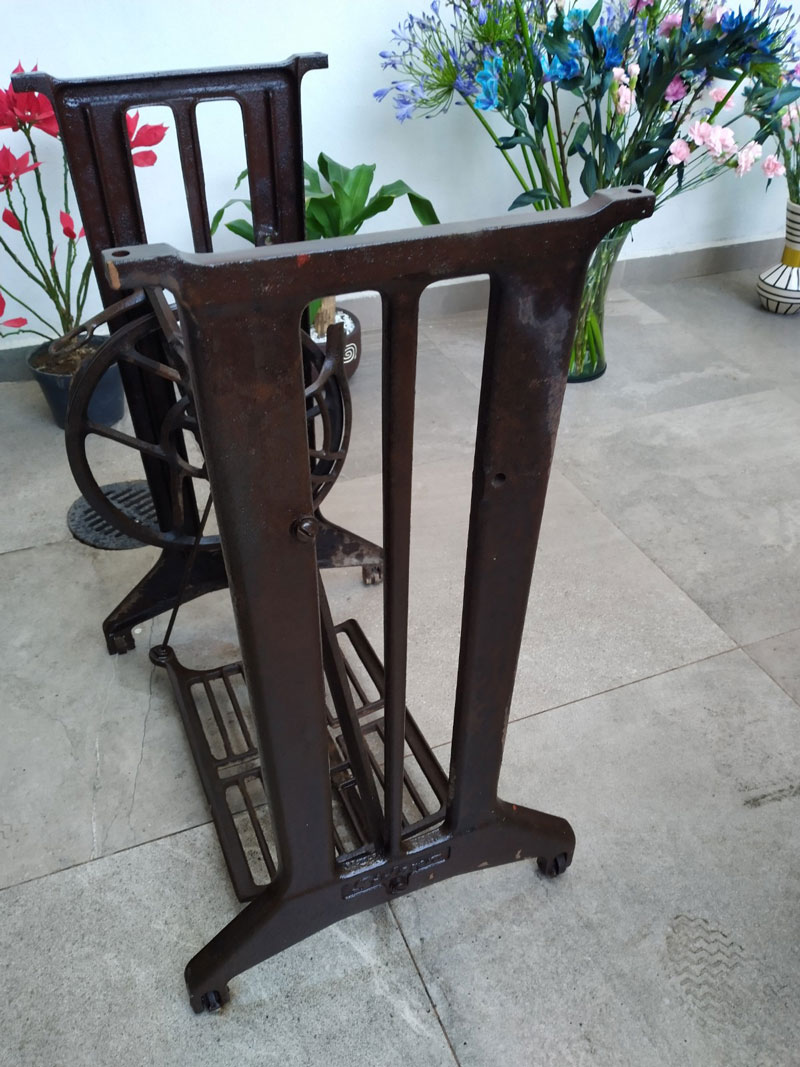
When it was totally clean and dry I painted it with two coats of metal primer and then with another two or maybe tree coats of oil based paint with a brush. I know that if I paint it with and air brush it would have been more refined, but I aimed for a more rustic finish, so it looked more as I remember it at my grandmother house.
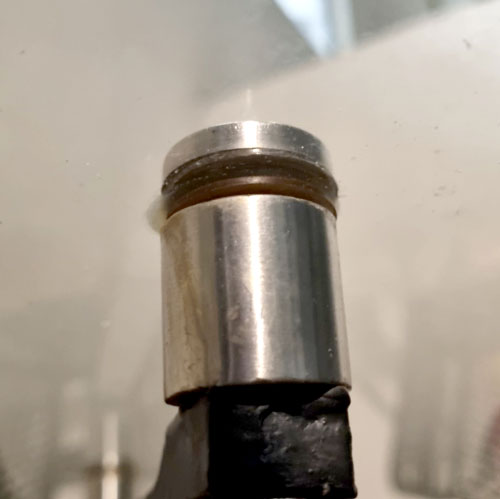
Then with the base painted and ready I had to think how I can attach a glass top to the base. And I had 2 ways. To glue it or to get some kind of metal device that helped me to screw the tabletop to the base. I went for this device, here is called a spacer and I frequently saw this at cinemas, they use it to attach glass to a wall and display movie posters.
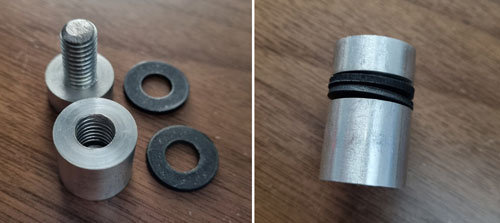
I chose this way because I thought it would be easier than use a special glue, because I really have never used it and I didn't want to spoil the glass, because that it expensive.
I wanted to use glass because I wanted to see the base, those stuff were made when people wanted thing to last for years and many of them are beautiful and didn’t want to hide it. I knew it was something I couldn’t DYI but I really wanted to look this way.
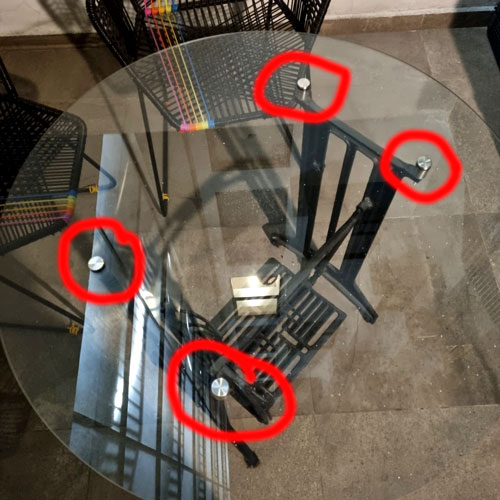
With the base and the spacers attached I just made a template in cardboard of the where the holes needed to be and went to a glass shop. I asked for a 4 hole round tempered glass piece and gave them the template I made. And that was it. It’s important to ask for tempered glass just for safety. Tempered glass is more resistant to shocks and temperature changes. And being a table, you might put a hot plate or a very cold glass with ice and that could break the glass. Tempered glass could break to, but the pieces are harmless, and they can't cut you.
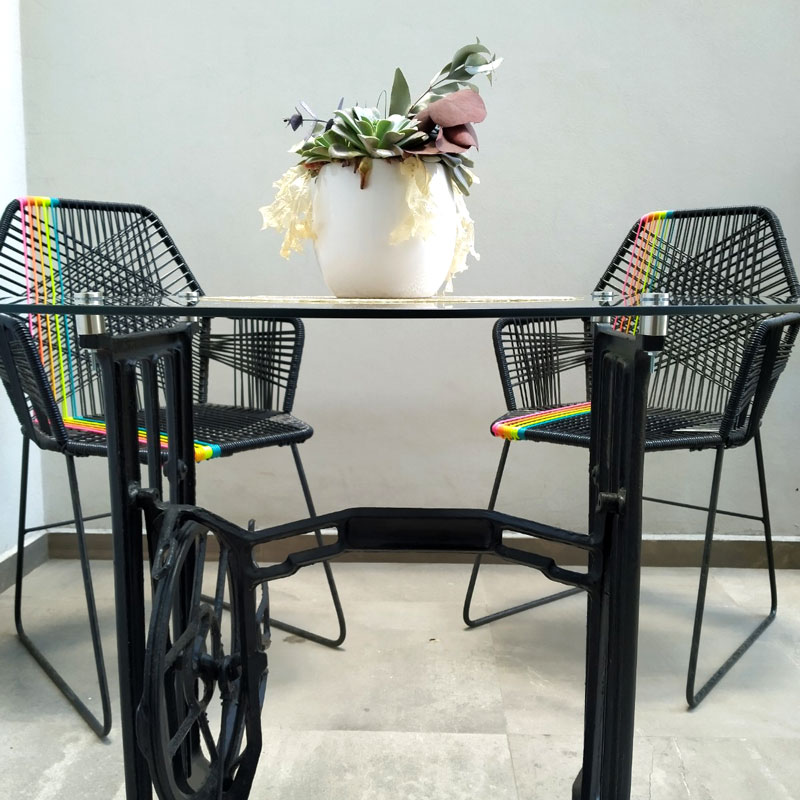
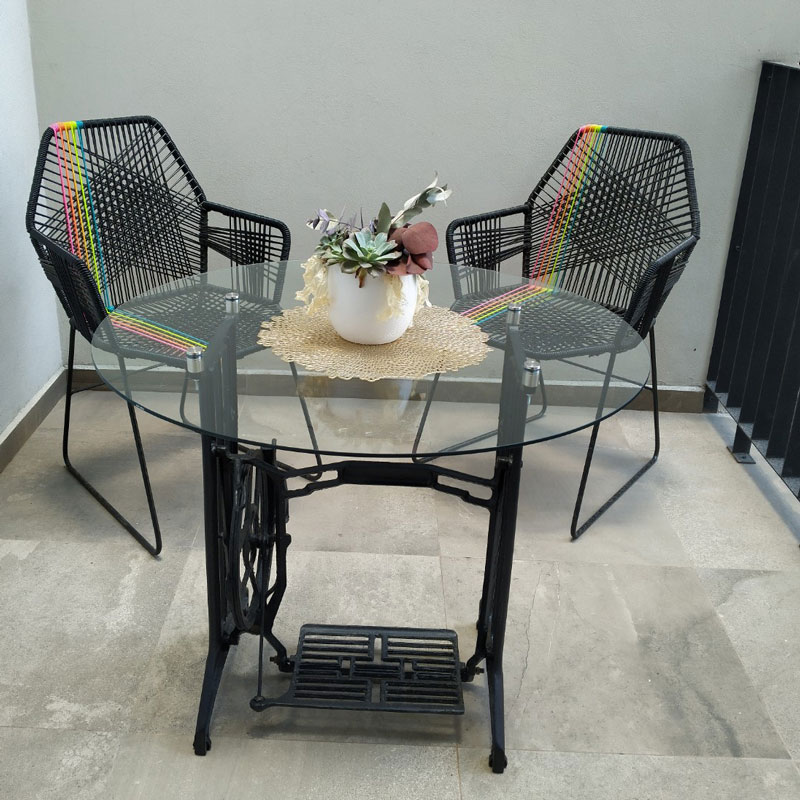
When I finished this table, I thought I would be a nice piece to remember my grandmother, she was alive when I finished the table, but a couple of months ago she passed away. Now I feel that it is a tribute, and it makes me feel closer to her.
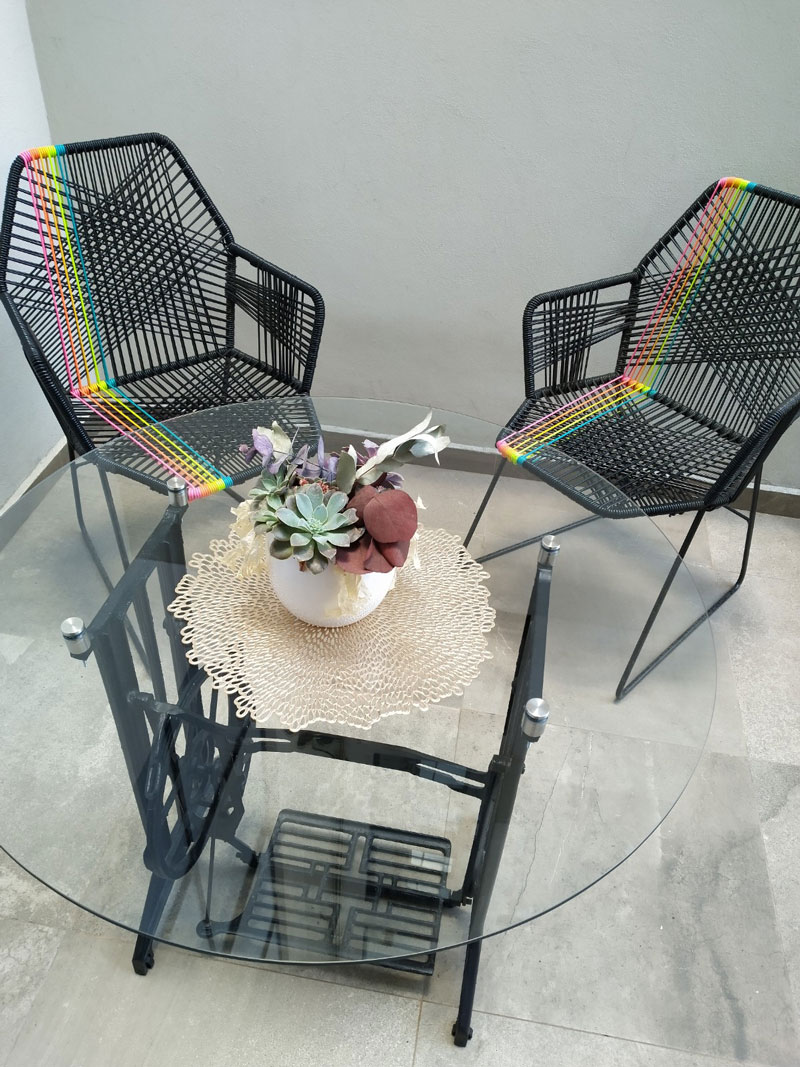
What do you think? Lots of wins with this project. I calculate this could cost me in a store more than $500 USD easily, maybe much more. And I spend less than $100 USD. I also had lots of fun doing it, plus it a great way to remember my grandmother, and I think it looks great.
Tell me what do you think about this kind of post and see you soon.
Eduardo from @elteamgordo
They must have sold those machines by the bazillions, because both my grandmas had the exact same model and we live on the other side of the globe. Old bases like that are kind of expensive here for the very reason: people want them for tables. Awesome result you've got there. Now I'm curious to see what the hell your uncle will do with the other half.
Yes, they were very popular all around the world and yes those bases are very popular here also. He claims he uses it, but I don't really believe him. But I'm happy with my table and he is happy with the machine, it's a win-win.
Wow-wow, the result looks so stylish!
Thanks!!
so nicely you reused your old sewing machine as central table of your house, i really appreciate your idea and initiative behind it... thanks for sharing...
keep hiving...
Thanks! I will! hive to the moon!!
This is a brilliant idea! My mom have an old sewing machine back home. I will show this to my father to have it repurposed. Very nice! Thanks for the idea.
It would be awesome that you repurpose it as well and show us the result. Can't wait to see it done.
Once I get home. Hehehehe. That will be next yearz
@elteamgordo! The Hive.Pizza team manually curated this post.
PIZZA Holders sent $PIZZA tips in this post's comments:
Join us in Discord!