
Español
Hola querida familia de HIVE 💋 Hoy les traigo un divertido paso a paso donde les mostrare como elaborar un lindo y llamativo loro recetario, para que nunca más pierdan sus recetas, de tus postres y comidas favoritas. Recuerden verle el lado positivo a está cuarentena, y no dejen de aprender algo nuevo ni un solo día. Disfruten tomando notas y aprendiendo a hacer las más deliciosas y fáciles comidas. No me queda más, que invitarlos a disfrutar de este divertido momento, ideal y perfecto para el desarrollo de la creatividad tanto de niños como adultos. Además es una idea perfecta para pasar un rato agradable con nuestros pequeños en casa e incentivarlos, ya que, pueden ir, de a poco, desarrollando su ingenio y acercándose un poco más al trabajo artístico.
English
Hello, Dear HIVE family 👄Today I bring you a fun step by step where I will show you how to make a cute and eye-catching recipe parrot so that they never lose their recipes, your favorite desserts, and foods. Remember to see the positive side of this quarantine, and do not stop learning something new for a single day. Enjoy taking notes and learning how to make the most delicious and easy meals. I have no choice but to invite you to enjoy this fun moment, ideal, and perfect for the development of creativity for both children and adults. It is also a perfect idea to spend a pleasant time with our little ones at home and encourage them, since they can, little by little, develop their ingenuity and get a little closer to artistic work.
¿Qué están esperando?
Utilizar estos hermosos materiales para transformarlos en un hermoso loro recetario es una idea muy original, perfecta y económica para decorar nuestras carpetas y cuadernos especiales donde atesoramos nuestras más preciadas recetas. Antes de comenzar no olvidemos lavarnos nuestras manos.
What are they waiting for?
Using these beautiful materials to transform them into a beautiful recipe parrot is a very original, perfect, and inexpensive idea to decorate our special folders and notebooks where we treasure our most precious recipes. Before we start, let's not forget to wash our hands.
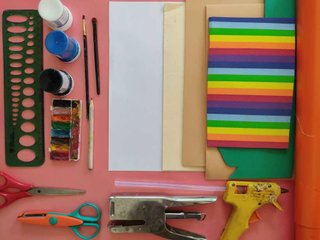
[Materiales | Materials]
Para hacer esta hermosa diosa necesitaremos:
- Moldes.
- Retazos de Foami o goma eva.
- Papel vegetal o calco.
- Marcador negro de pinta fina.
- Papel lustrillo.
- Lápiz.
- Tijera.
- Hojas blancas.
- Grapadora.
- Pincel o brocha.
- Pinturas.
- Silicona caliente o Pegamento.
To make this beautiful goddess we will need:
- Molds.
- Pieces of Foami or eva gum.
- Vegetable paper or tracing.
- Fine-looking black marker.
- Luster paper.
- Pencil.
- Scissors.
- White sheets.
- Stapler.
- Brush or brush.
- Paintings.
- Hot silicone or Glue.
Procedimiento (paso a paso)
Process (step by step)
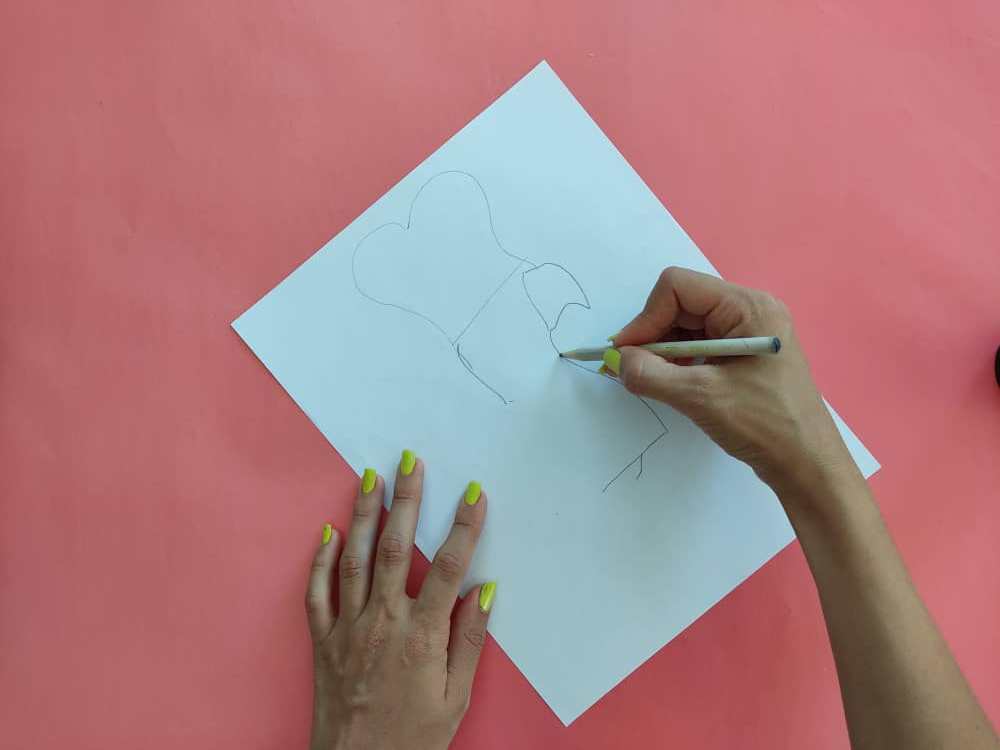
Primero, dibujamos un hermoso loro con ropa de cocinero, podemos agregarle los detalles que más nos gusten, en este caso, yo le agregué una cuchara llena de sopa y unas pequeñas gotas salpicando, mientras más amor le pongamos podremos obtener un trabajo hermoso y exitoso.
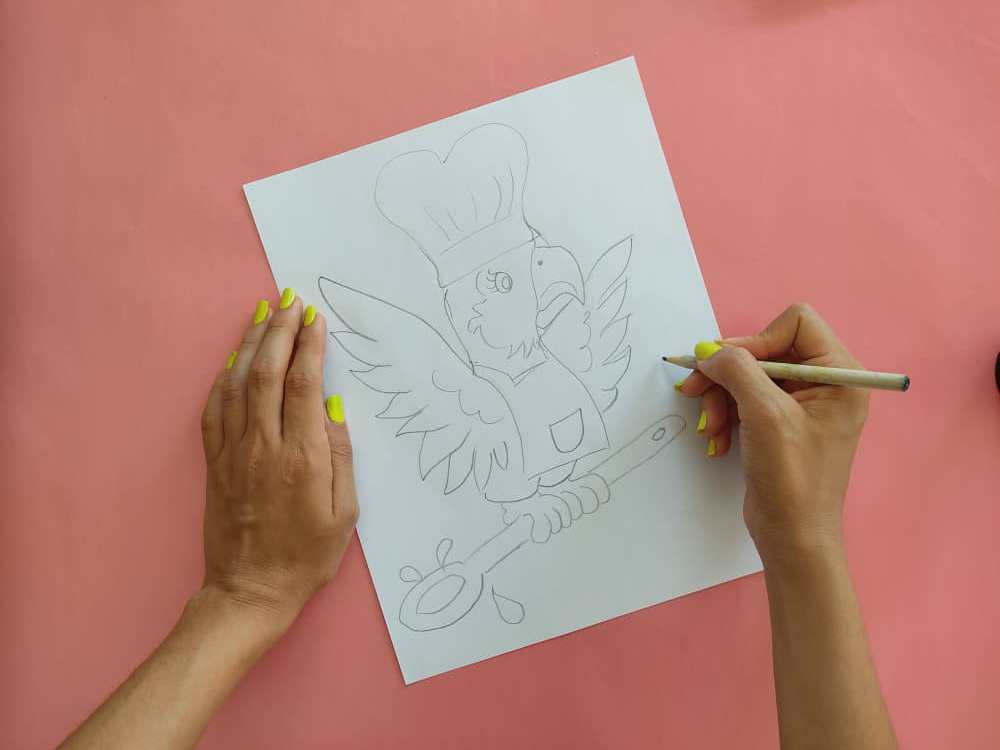
First, we draw a beautiful parrot in chef's clothes, we can add the details that we like the most, in this case, I added a spoon full of soup and a few small drops splashing, the more love we put on it we can get a beautiful and successful job.
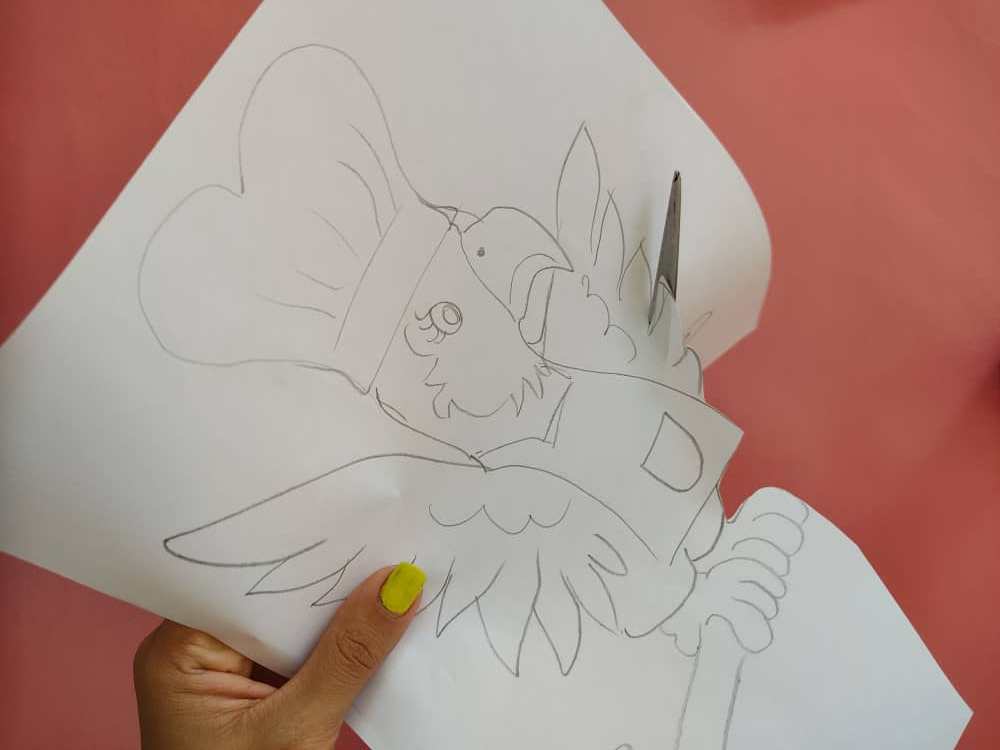
Una vez que hayamos terminado nuestro hermoso dibujo, recortamos separando el gorro, cabeza, delantal, alas y cuchara. Debemos tener sumo cuidado para evitar arruinar las medidas de nuestro dibujo.
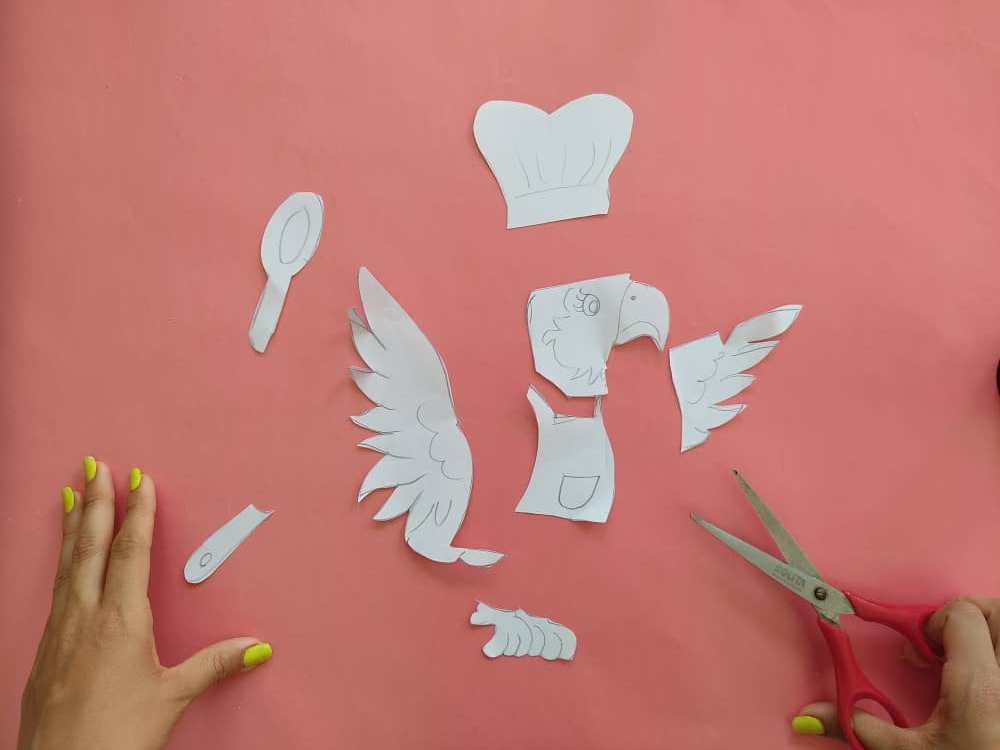
Once we have finished our beautiful drawing, we cut out separating the hat, head, apron, wings, and spoon. We must be very careful to avoid ruining the measurements of our drawing.
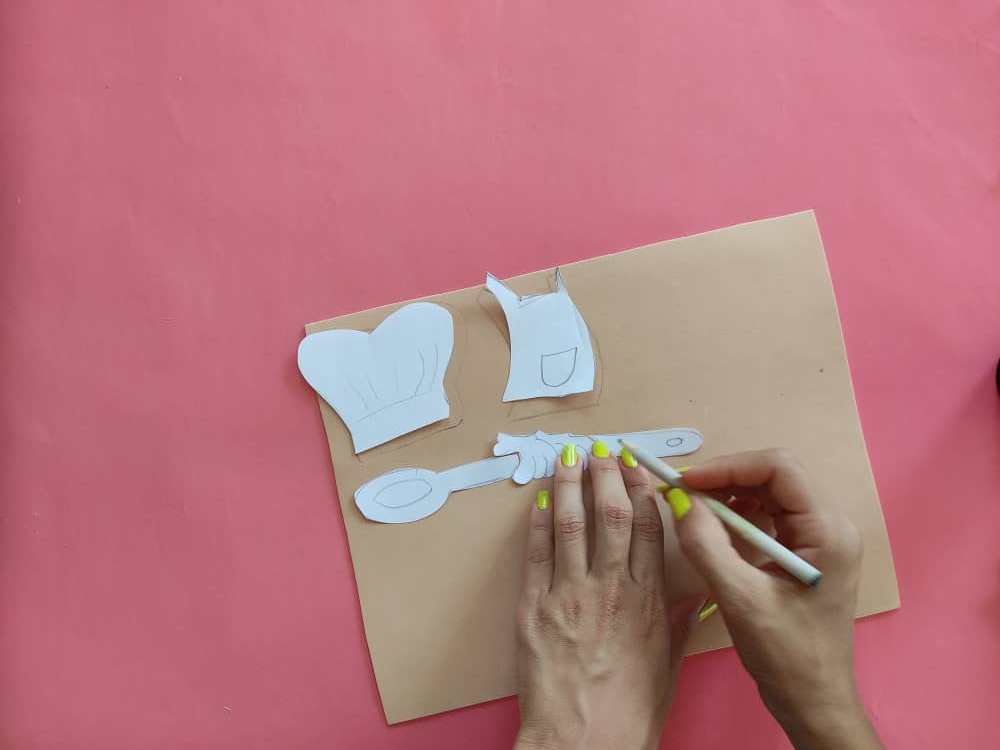
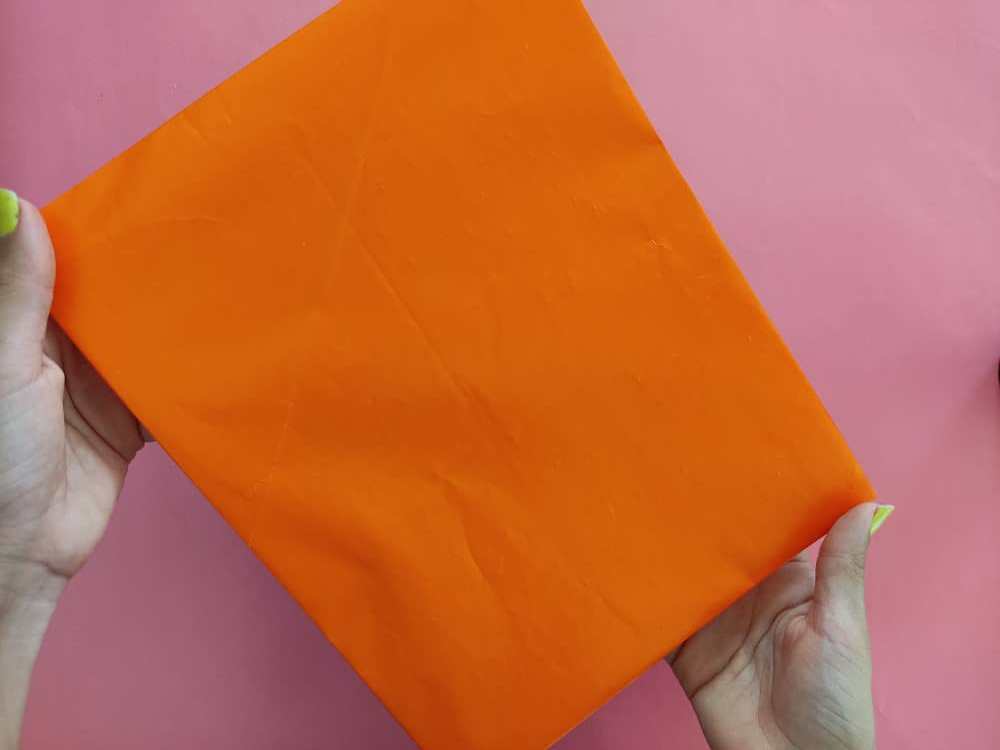
Seguidamente, transferimos nuestros moldes a retazos de foami de color que más nos gusten o tengamos. Debemos tener mucho cuidado para conservar las medidas de nuestro dibujo principal y evitar accidentes al utilizar la tijera.

Next, we transfer our molds to pieces of colored foamy that we like or have the most. We must be very careful to preserve the measurements of our main drawing and avoid accidents when using scissors.
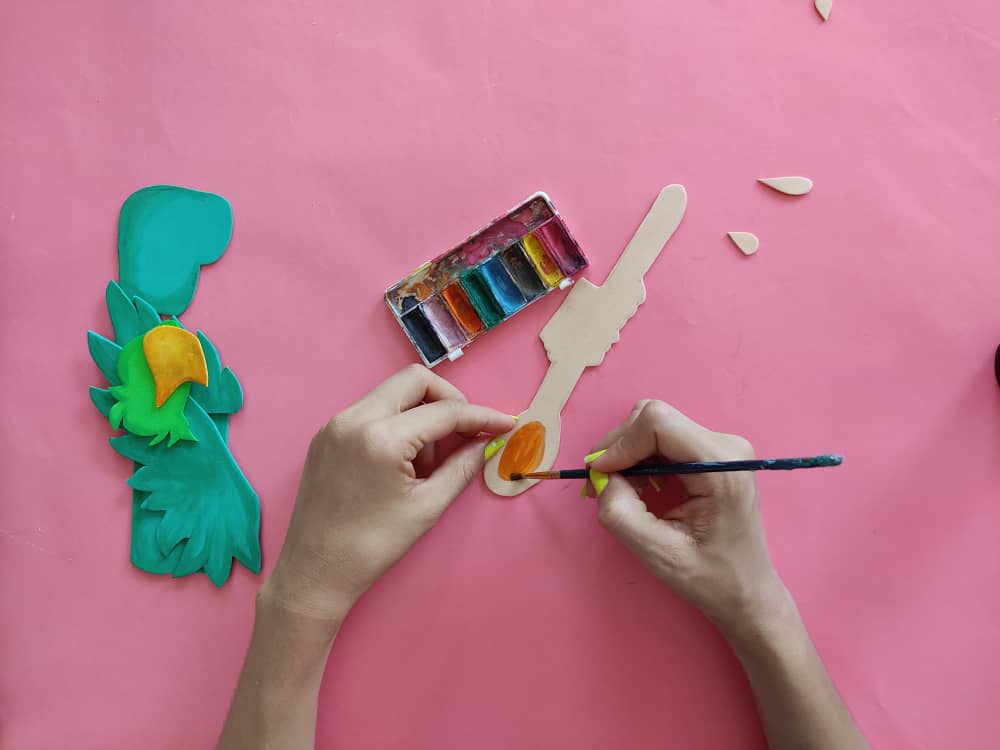
Ahora, el paso más divertido y esperado, llenar de color, amor y alegría a nuestro hermoso dibujo, si lo hacemos con mucho amor lograremos que llame tanto, pero tanto, la atención que dejaremos a todos sorprendidos.
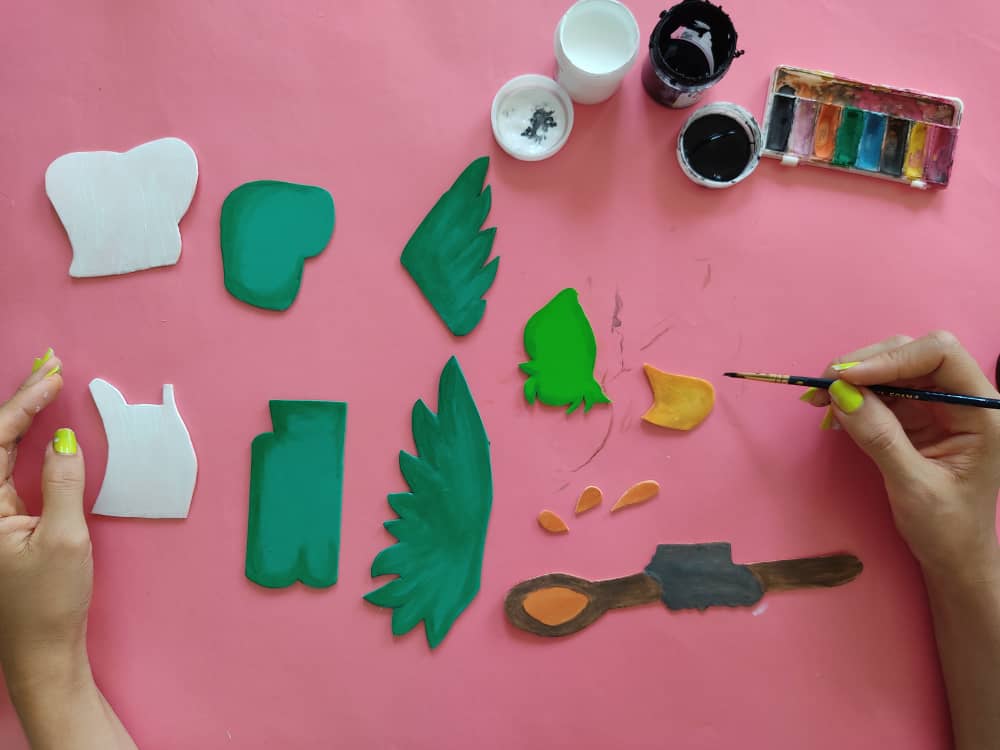
Now, the most fun and expected step, to fill our beautiful drawing with color, love, and joy, if we do it with a lot of love we will make it draw so much, but so much, the attention that we will leave everyone surprised.
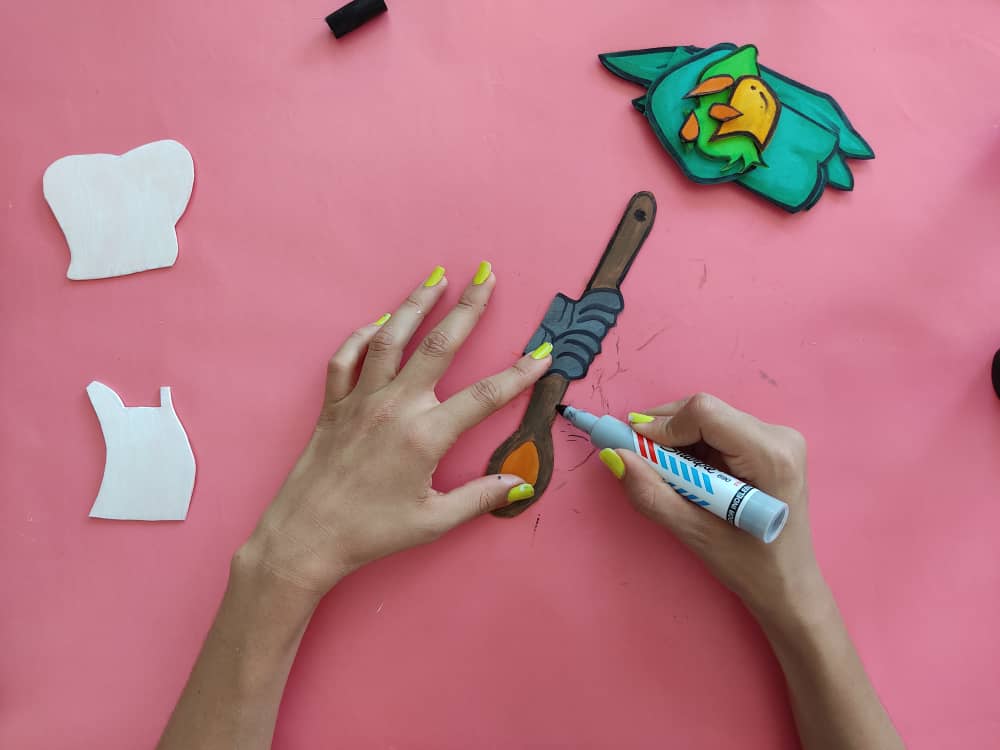
Una vez que ya esté totalmente seca las pinceladas que le dimos a cada pieza, continuamos remarcando cada borde de estás con la ayuda de un marcador negro de pinta fina. Esto sin duda hará que nuestro dibujo resalte muchísimo más, y así, lograr que todos admiren nuestro trabajo.
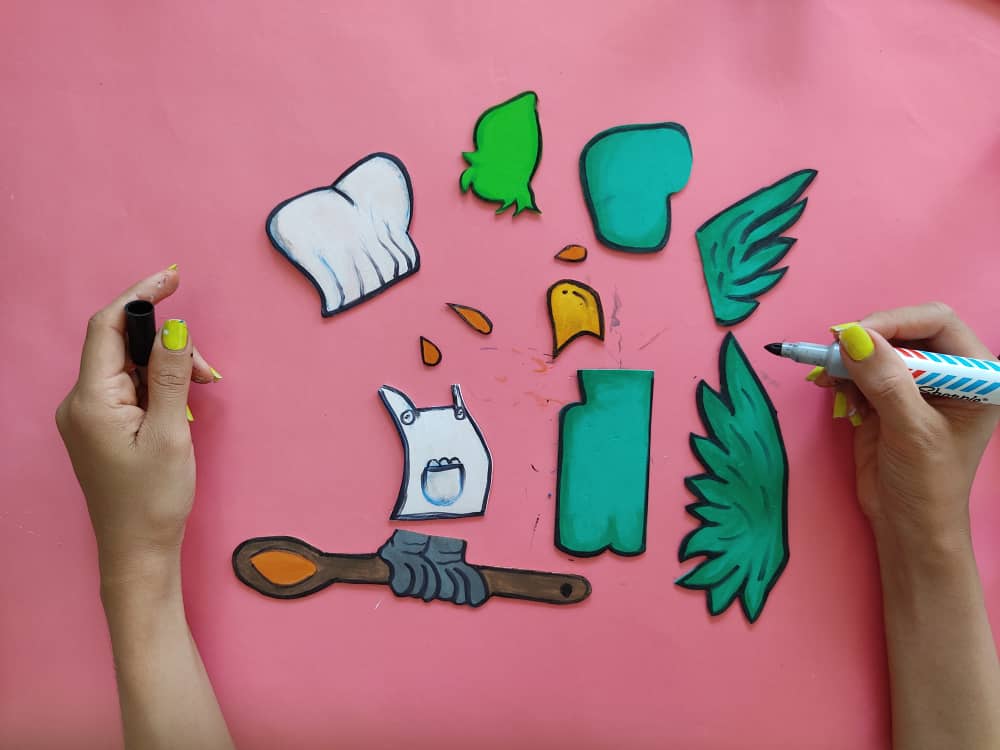
Once the brush strokes we gave to each piece are completely dry, we continue to highlight each edge of this with the help of a fine-looking black marker. This will undoubtedly make our drawing stand out much more, and thus, make everyone admire our work.
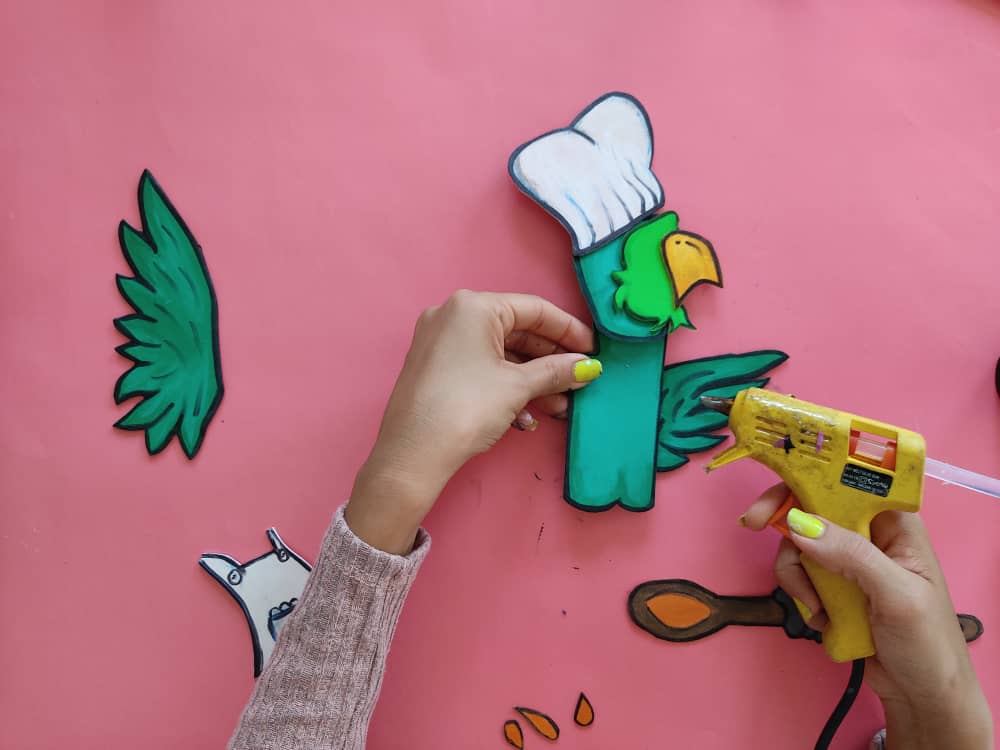
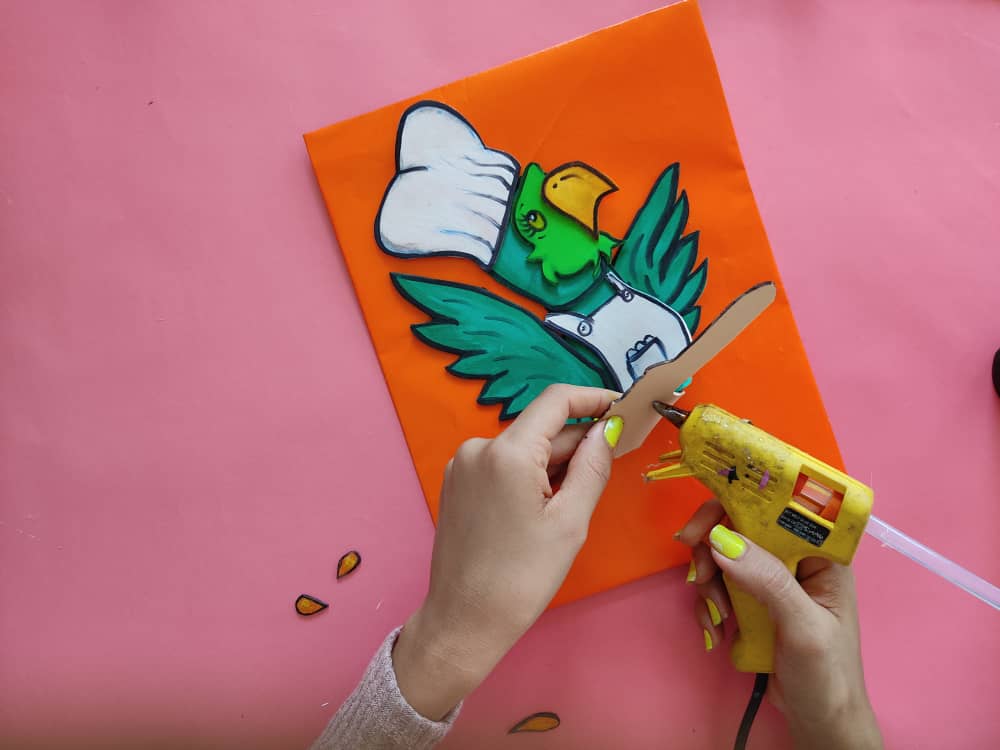
Ahora, estoy segura de que al culminar este lindo paso quedaremos muy satisfechos con todo el amor que le dimos a nuestro humilde trabajo. Pero, para lograrlo debemos armar nuestro hermosísimo loro cocinero uniendo sus partes en orden y con la ayuda de silicona caliente o pegamento, luego de que todo esté en su lugar definimos unos lindos ojos, con ayuda del marcador y un pincel.

Now, I am sure that at the end of this beautiful step we will be very satisfied with all the love we gave to our humble work. But, to achieve this we must assemble our beautiful cook parrot joining its parts in order and with the help of hot silicone or glue, after everything is in place we define beautiful eyes, with the help of the marker and a brush.
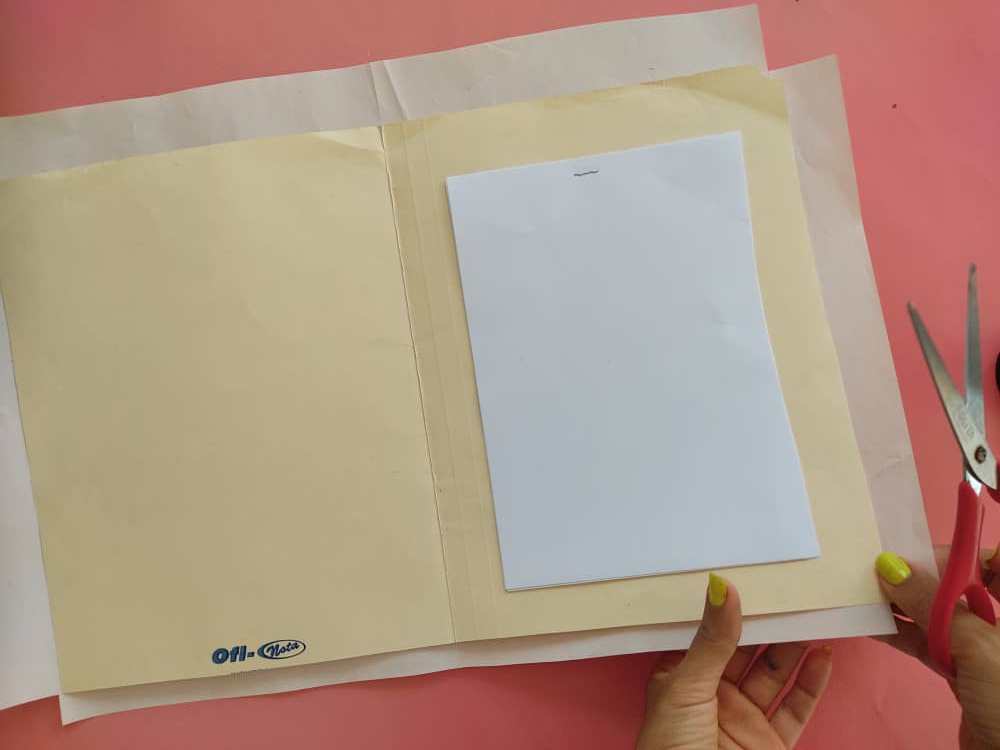
Ahora, forramos una carpeta usada, para que luzca como nueva (este paso también podrá ser muy útil para forrar los cuadernos escolares o incluso podemos hacer de este lindo loro un hermoso cuadro). El secreto para lograr este paso está en ser muy cuidadosos. Primero, grapamos la cantidad de hojas que creamos o tengamos en mente que vamos a necesitar para nuestro libro de recetas, y sin esperar mucho tiempo, cortamos el papel lustrillo de color que queramos unos 3 cm más grande que la carpeta, en cada esquina debemos hacer un corte de cada lado del papel y sacaras una especie de cuadro, en la parte del dobles de la carpeta haz un pequeño corte.
Now, we cover a used folder, so that it looks like new (this step can also be very useful to line the school notebooks or we can even make this cute parrot a beautiful picture). The secret to achieving this step is to be very careful. First, we staple the number of sheets that we create or have in mind that we are going to need for our recipe book, and without waiting long, we cut the colored luster paper that we want about 3 cm larger than the folder, in each corner, we must Make a cut on each side of the paper and you will get a kind of box, in the fold of the folder make a small cut.
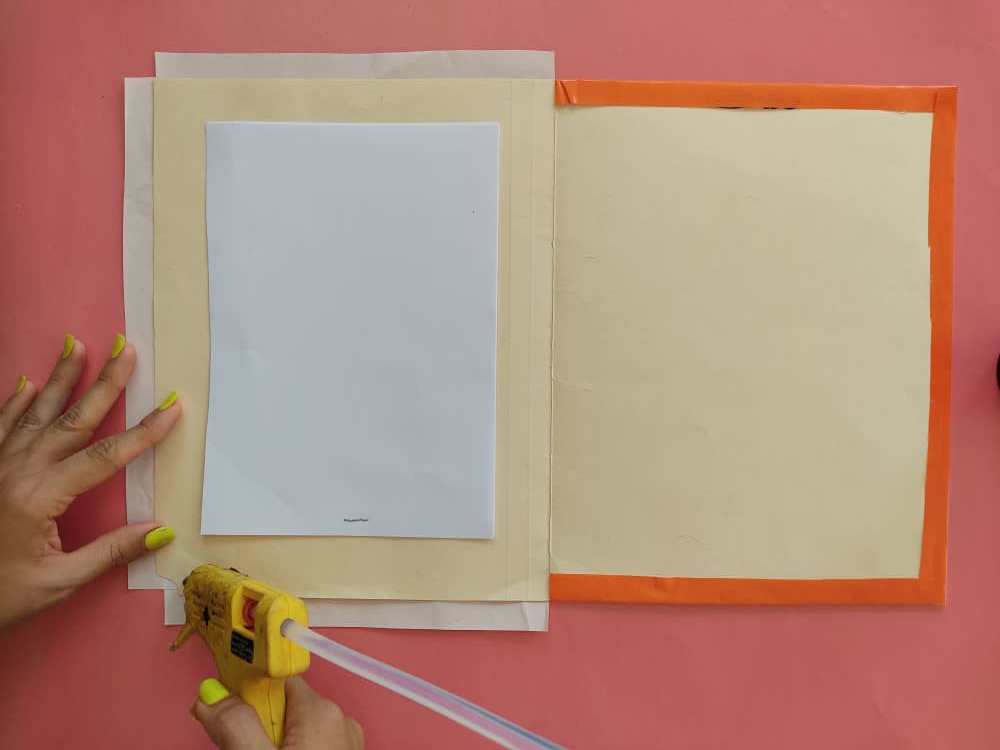
Luego, pegamos las pestañas sobresalientes del papel lustrillo aplicando silicona caliente sobre los bordes de la parte interna de la carpeta, y doblamos el papel lustrillo hacia adentro. Debemos hacer un poco de para que quede bien distribuido y bien pegado.
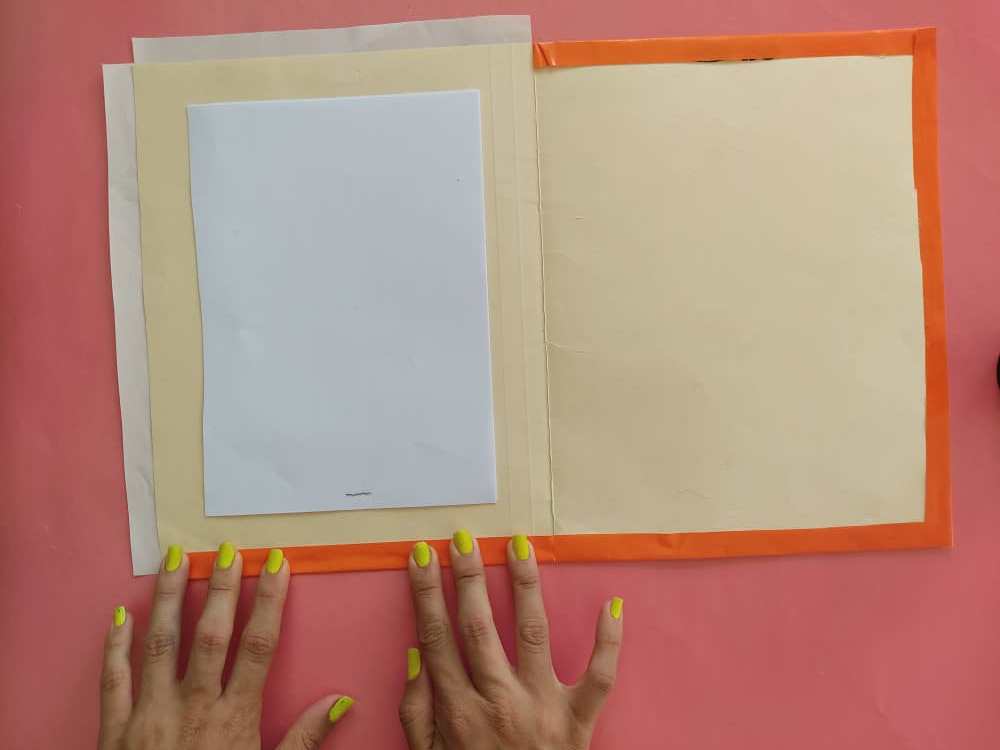
Then we glue the protruding tabs of the gloss paper by applying hot silicone to the edges of the inside of the folder and fold the gloss paper inward. We must do a little so that it is well distributed and well glued.
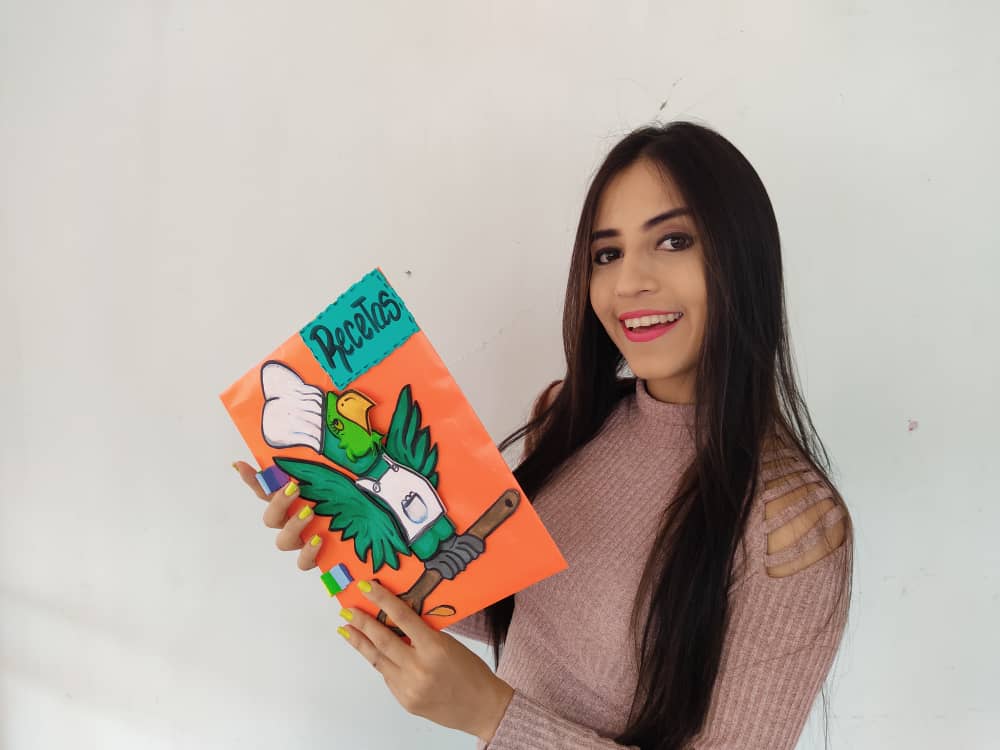
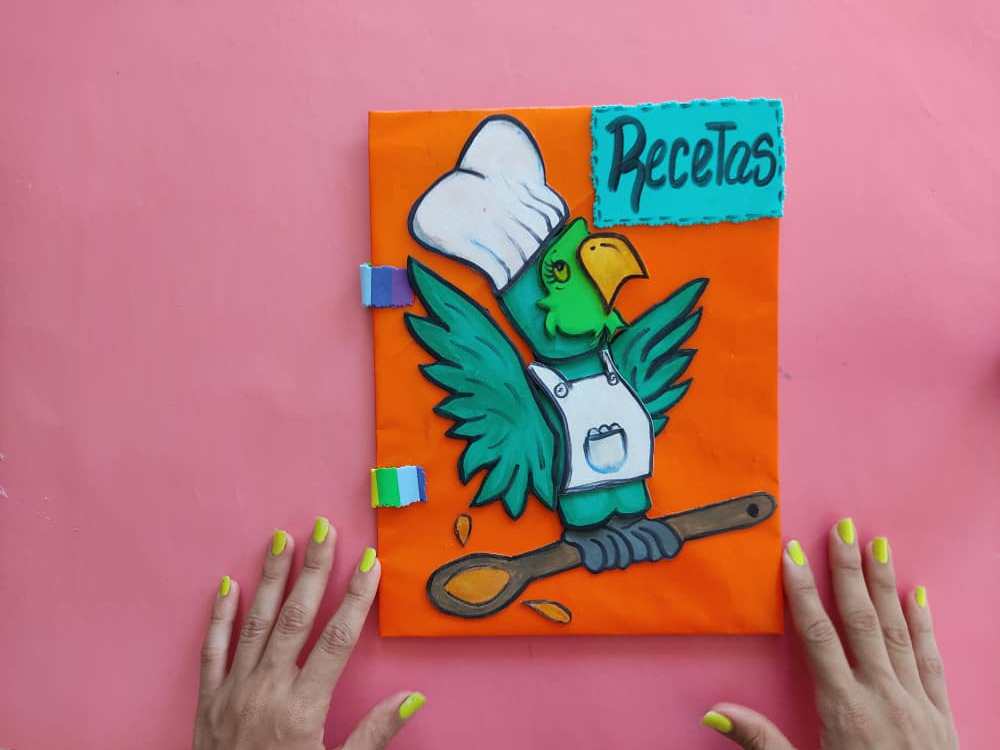
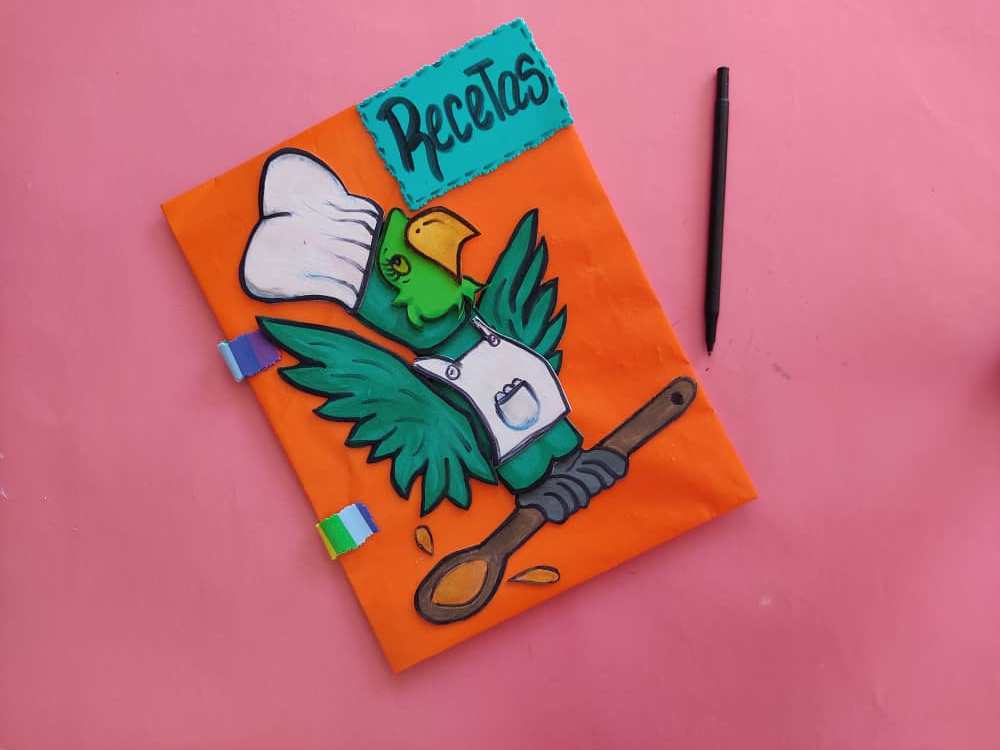
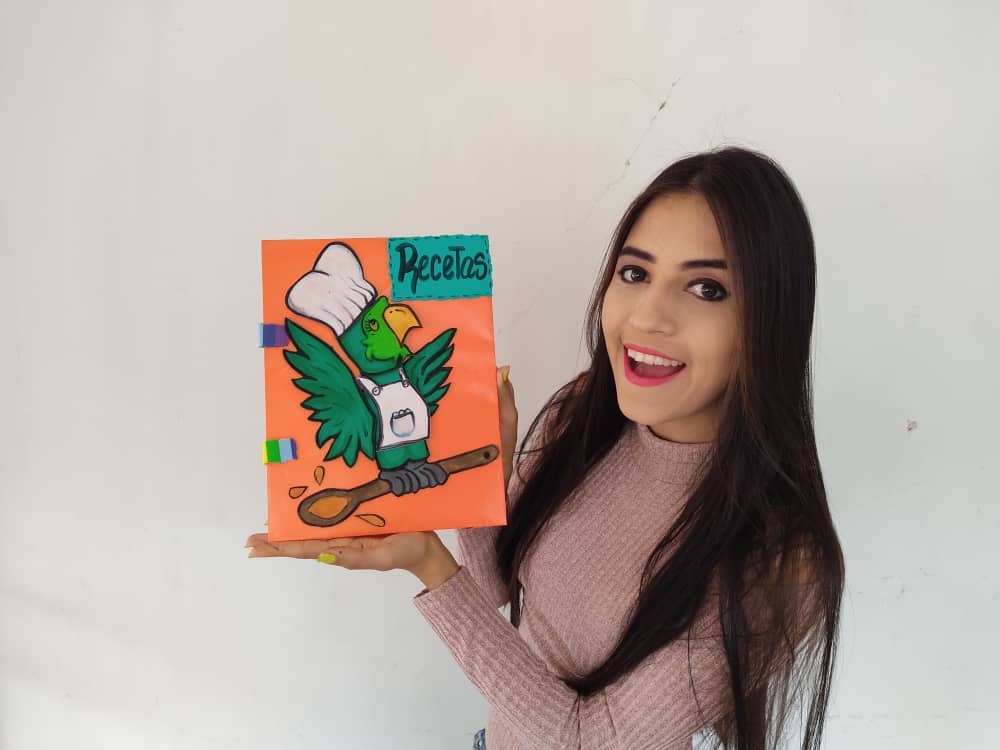
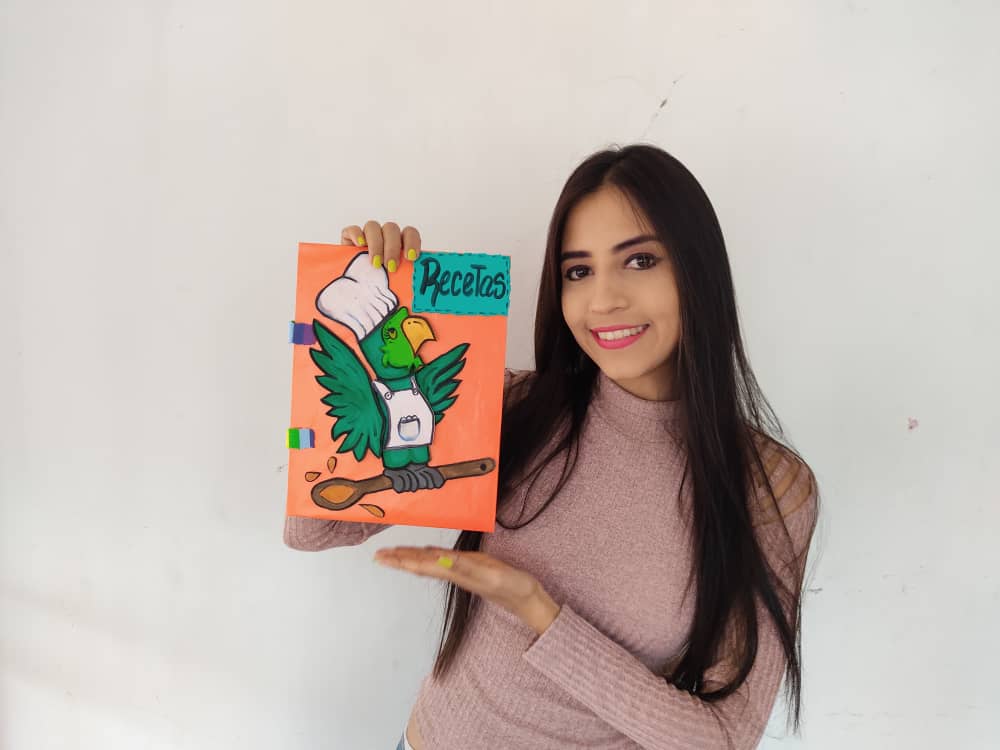
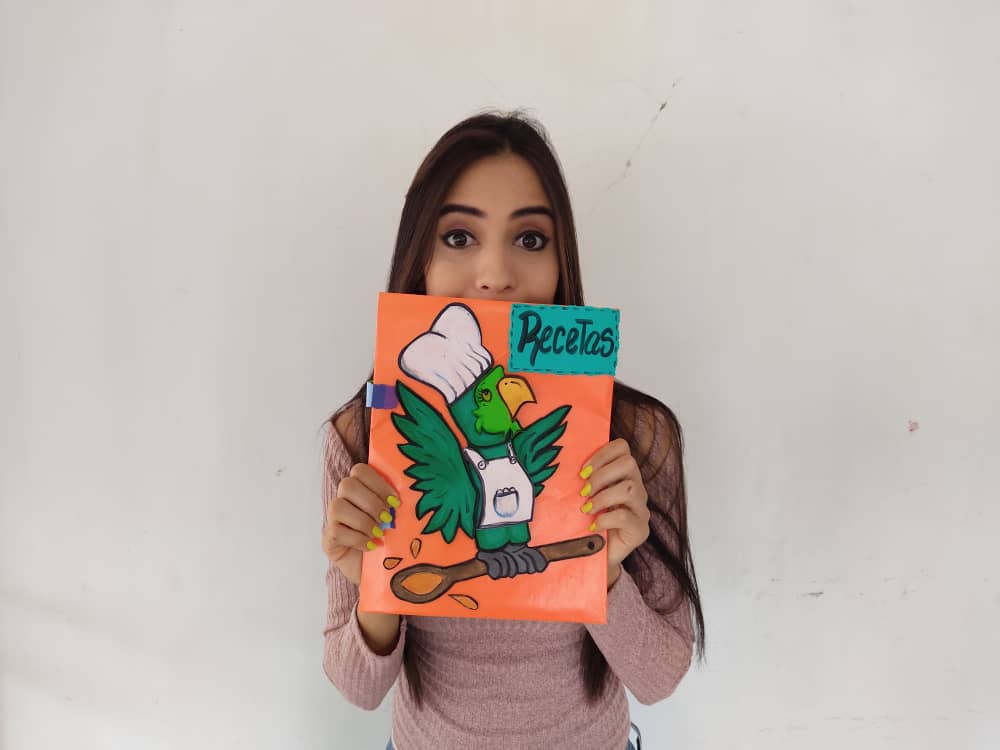
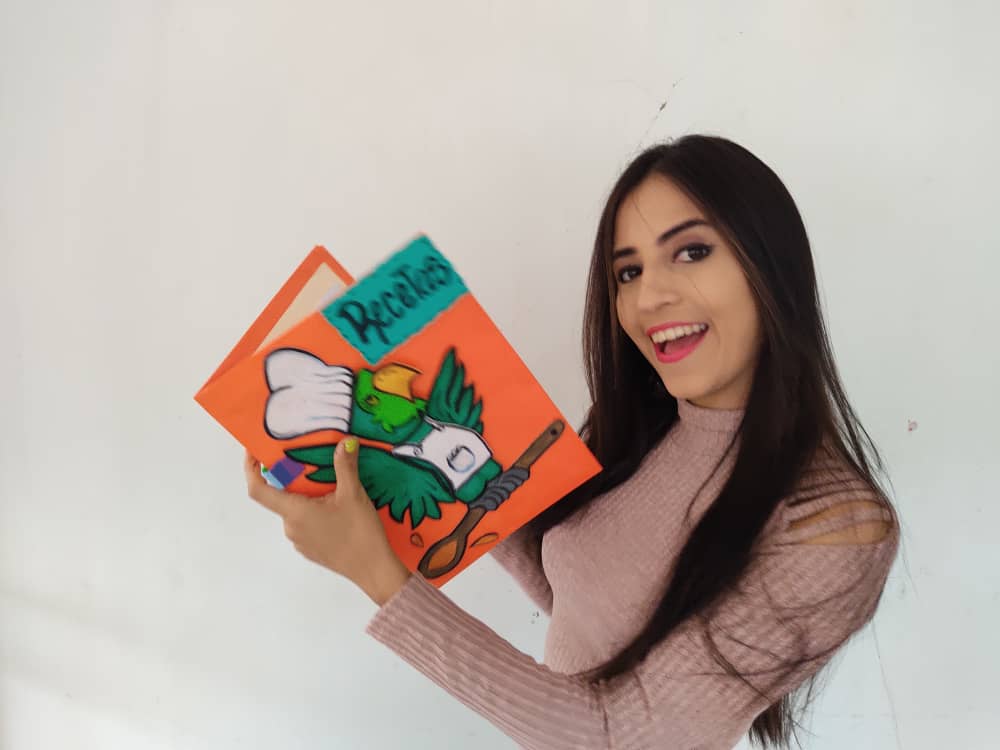
Finalmente, ya tenemos lista nuestra carpeta y solo debemos pegar nuestro hermoso loro cocinero que acabamos de diseñar, dibujar y pintar, más los detalles que se nos vengan a la mente, en este caso, yo opte por agregar dos lindas tiras de arcoíris que simulan un cierre y un pequeño identificador que dice recetas y listo a divertirnos en la cocina.
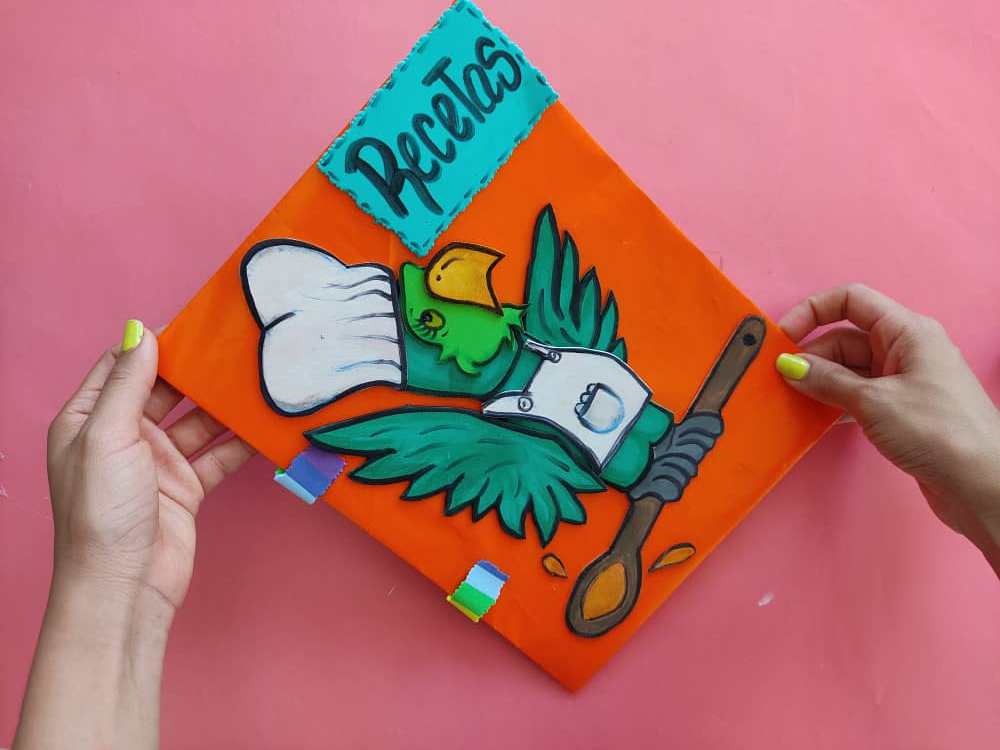
Finally, we already have our folder ready and we only have to paste the beautiful cook parrot that we have just designed, drawn and painted, plus the details that come to mind, in this case, I chose to add two cute rainbow strips that simulate a closure and a small identifier that says recipes and ready to have fun in the kitchen.
Gracias por acompañarme y espero que lo hayan disfrutado. ❤️
Thanks for joining and I hope you enjoyed it.❤️

Clic para ver trabajos anteriores | Click to see previous works
.jpeg)


My twt #posh
Gracias por el apoyo querida...
Saludos 🤗 🤗
Excelente trabajo. Una pregunta; como haces para colocar una foto al lado de la otra?
Gracias por comentar, yo aprendi investigando y como hacer las cosas por nuestra cuenta da resultado. Te invito a leer el siguiente post. https://peakd.com/hive-186377/@ilazramusic/te-perdiste-mi-curso-de-markdown-ven-y-lee-este-post-or-guia-de-markdown-y-html5-or
Alli encontraras la informacion deseada
Gracias por la información, muy amable!
Admiro la destreza que tienes para crear, buena publicación.
Muchisimas gracias :D
Super beautiful, as always. Excellent work, Sara! 🤗
Very much dear friend!. Thanks for your support
Te quedó muy lindo, esta perfecto para aquellos que nos gusta la cocina, excelente tutorial.
¡Saludos!
Gracias querida me alegra que e guste lo que hago. Saludos!!
Thanks :D Very much!