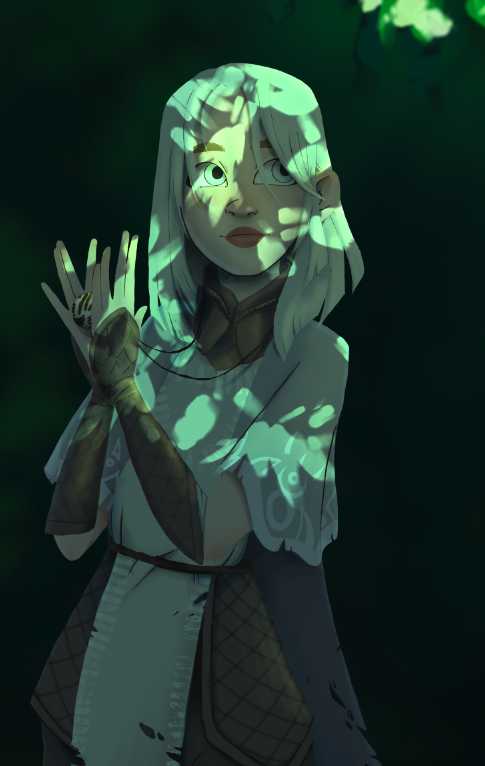
Hi! Hi! Hello! 💜 Today I'd like to make a quick trip around lighting in art. Maybe some of my tips and observations would help you with your own work! As an example, I'll use the art of Lia - my character in one of Dungeons and Dragons campaigns. Lia is a cleric ^^".
I'd like to share with you how I made this:
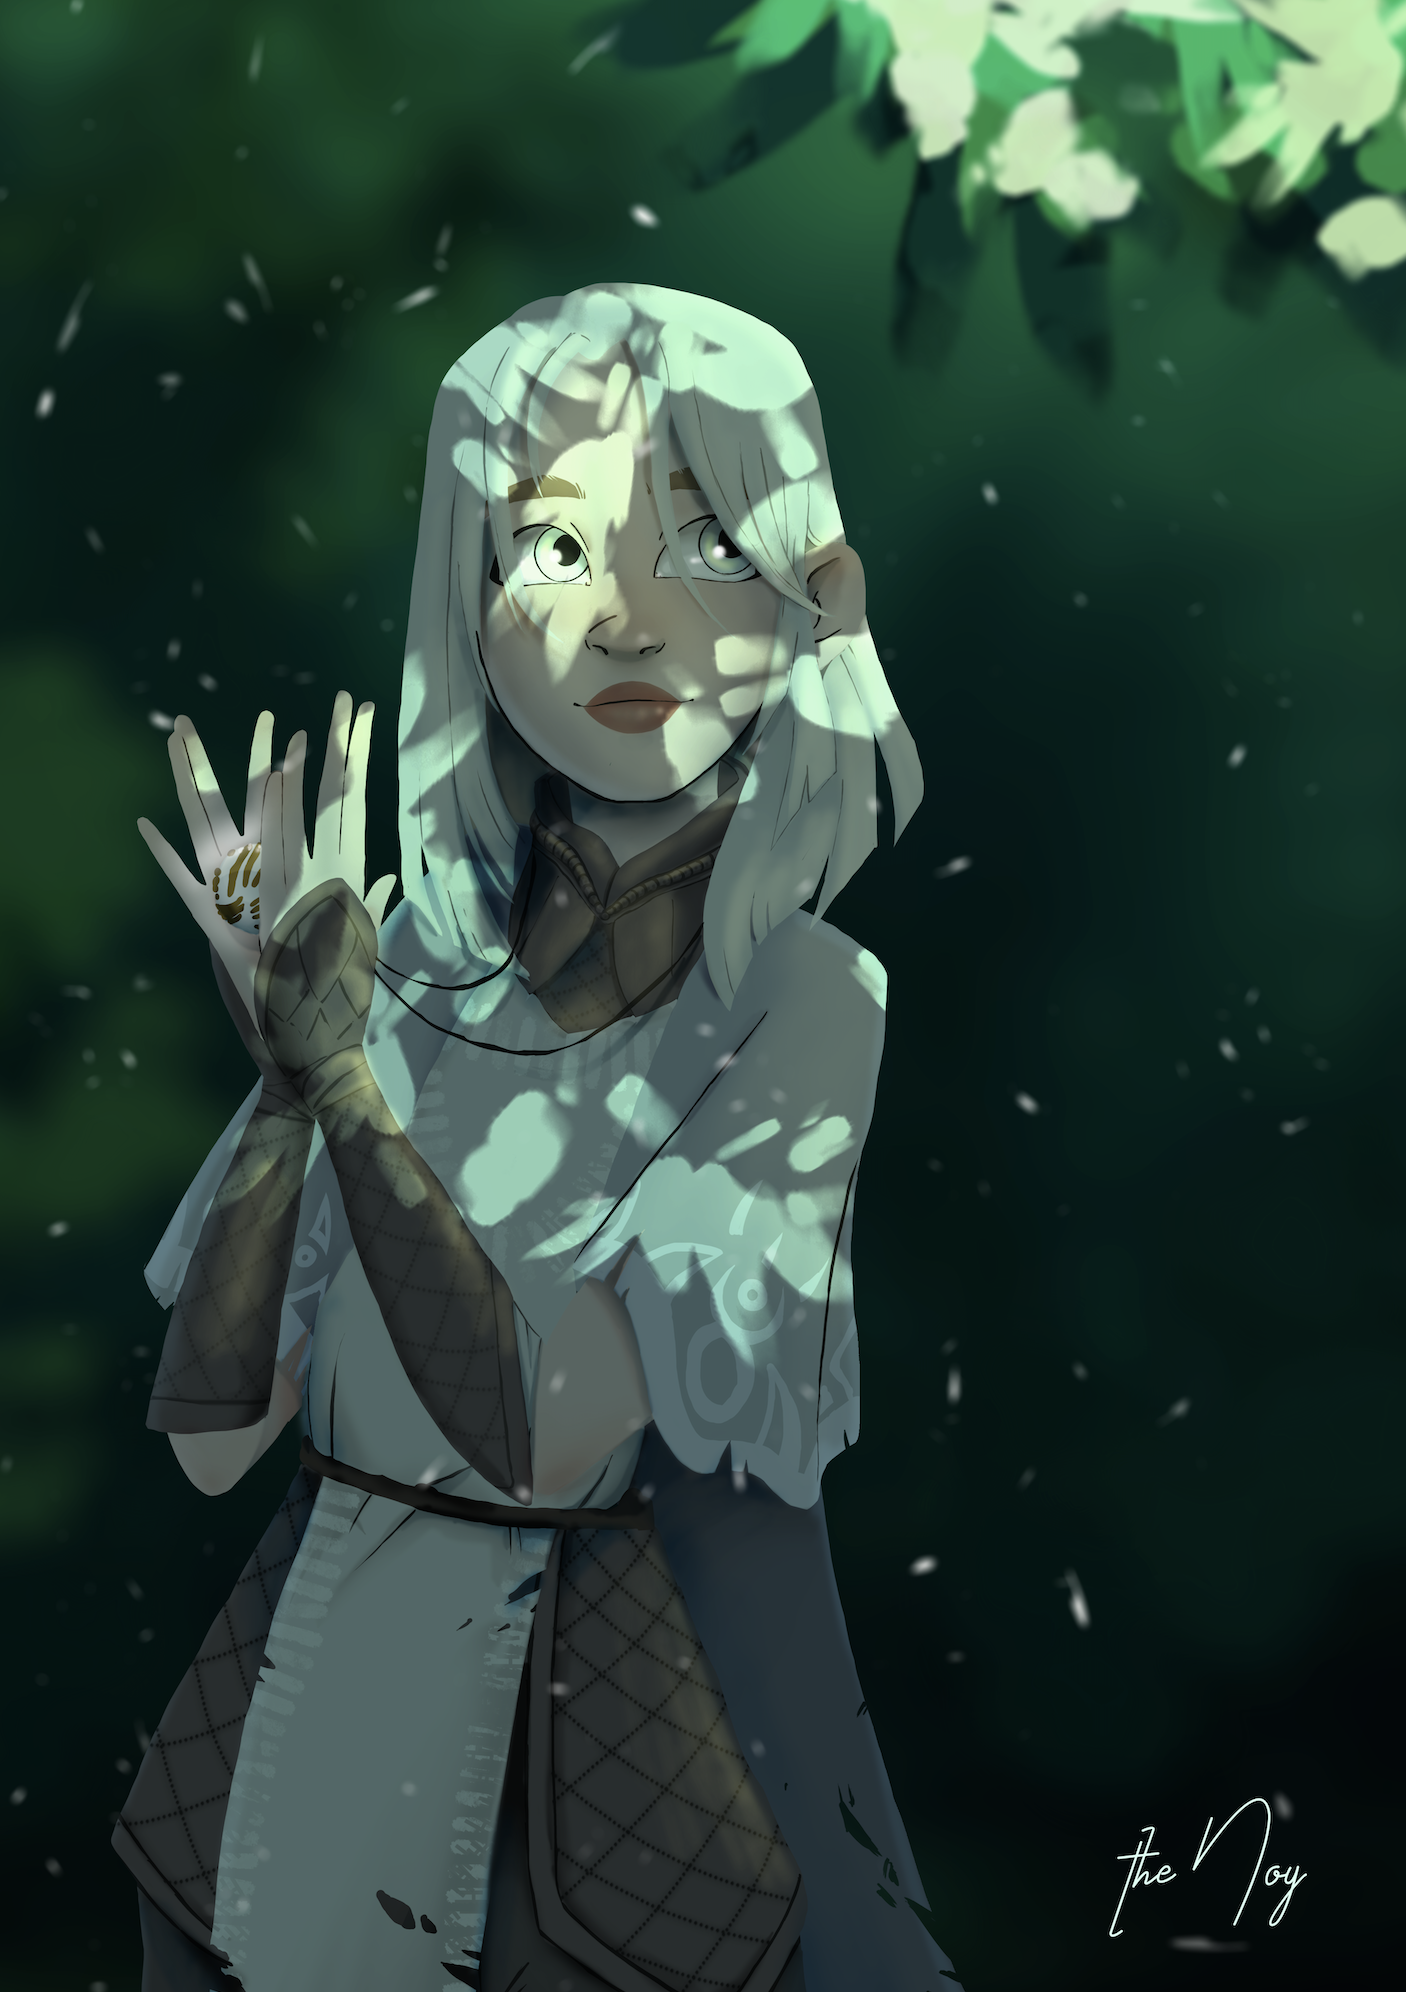
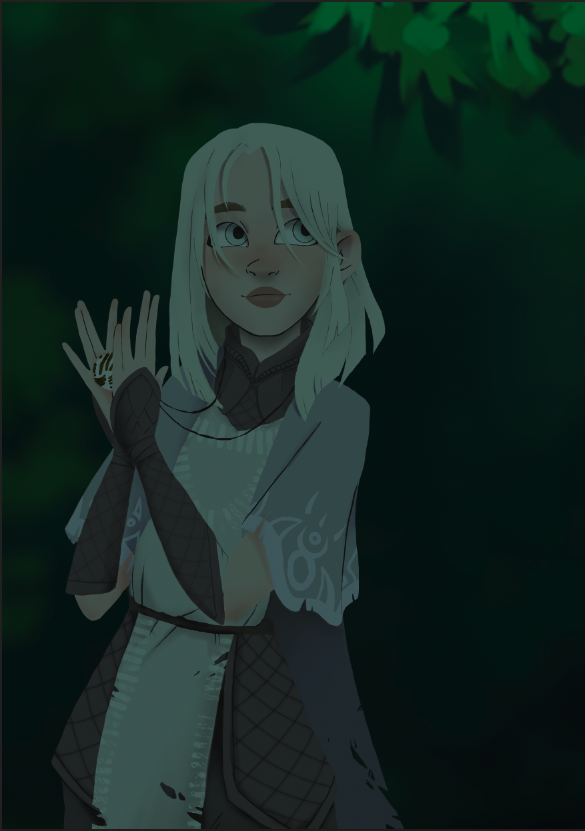
Lia in the forest - by @thenoy
from this:
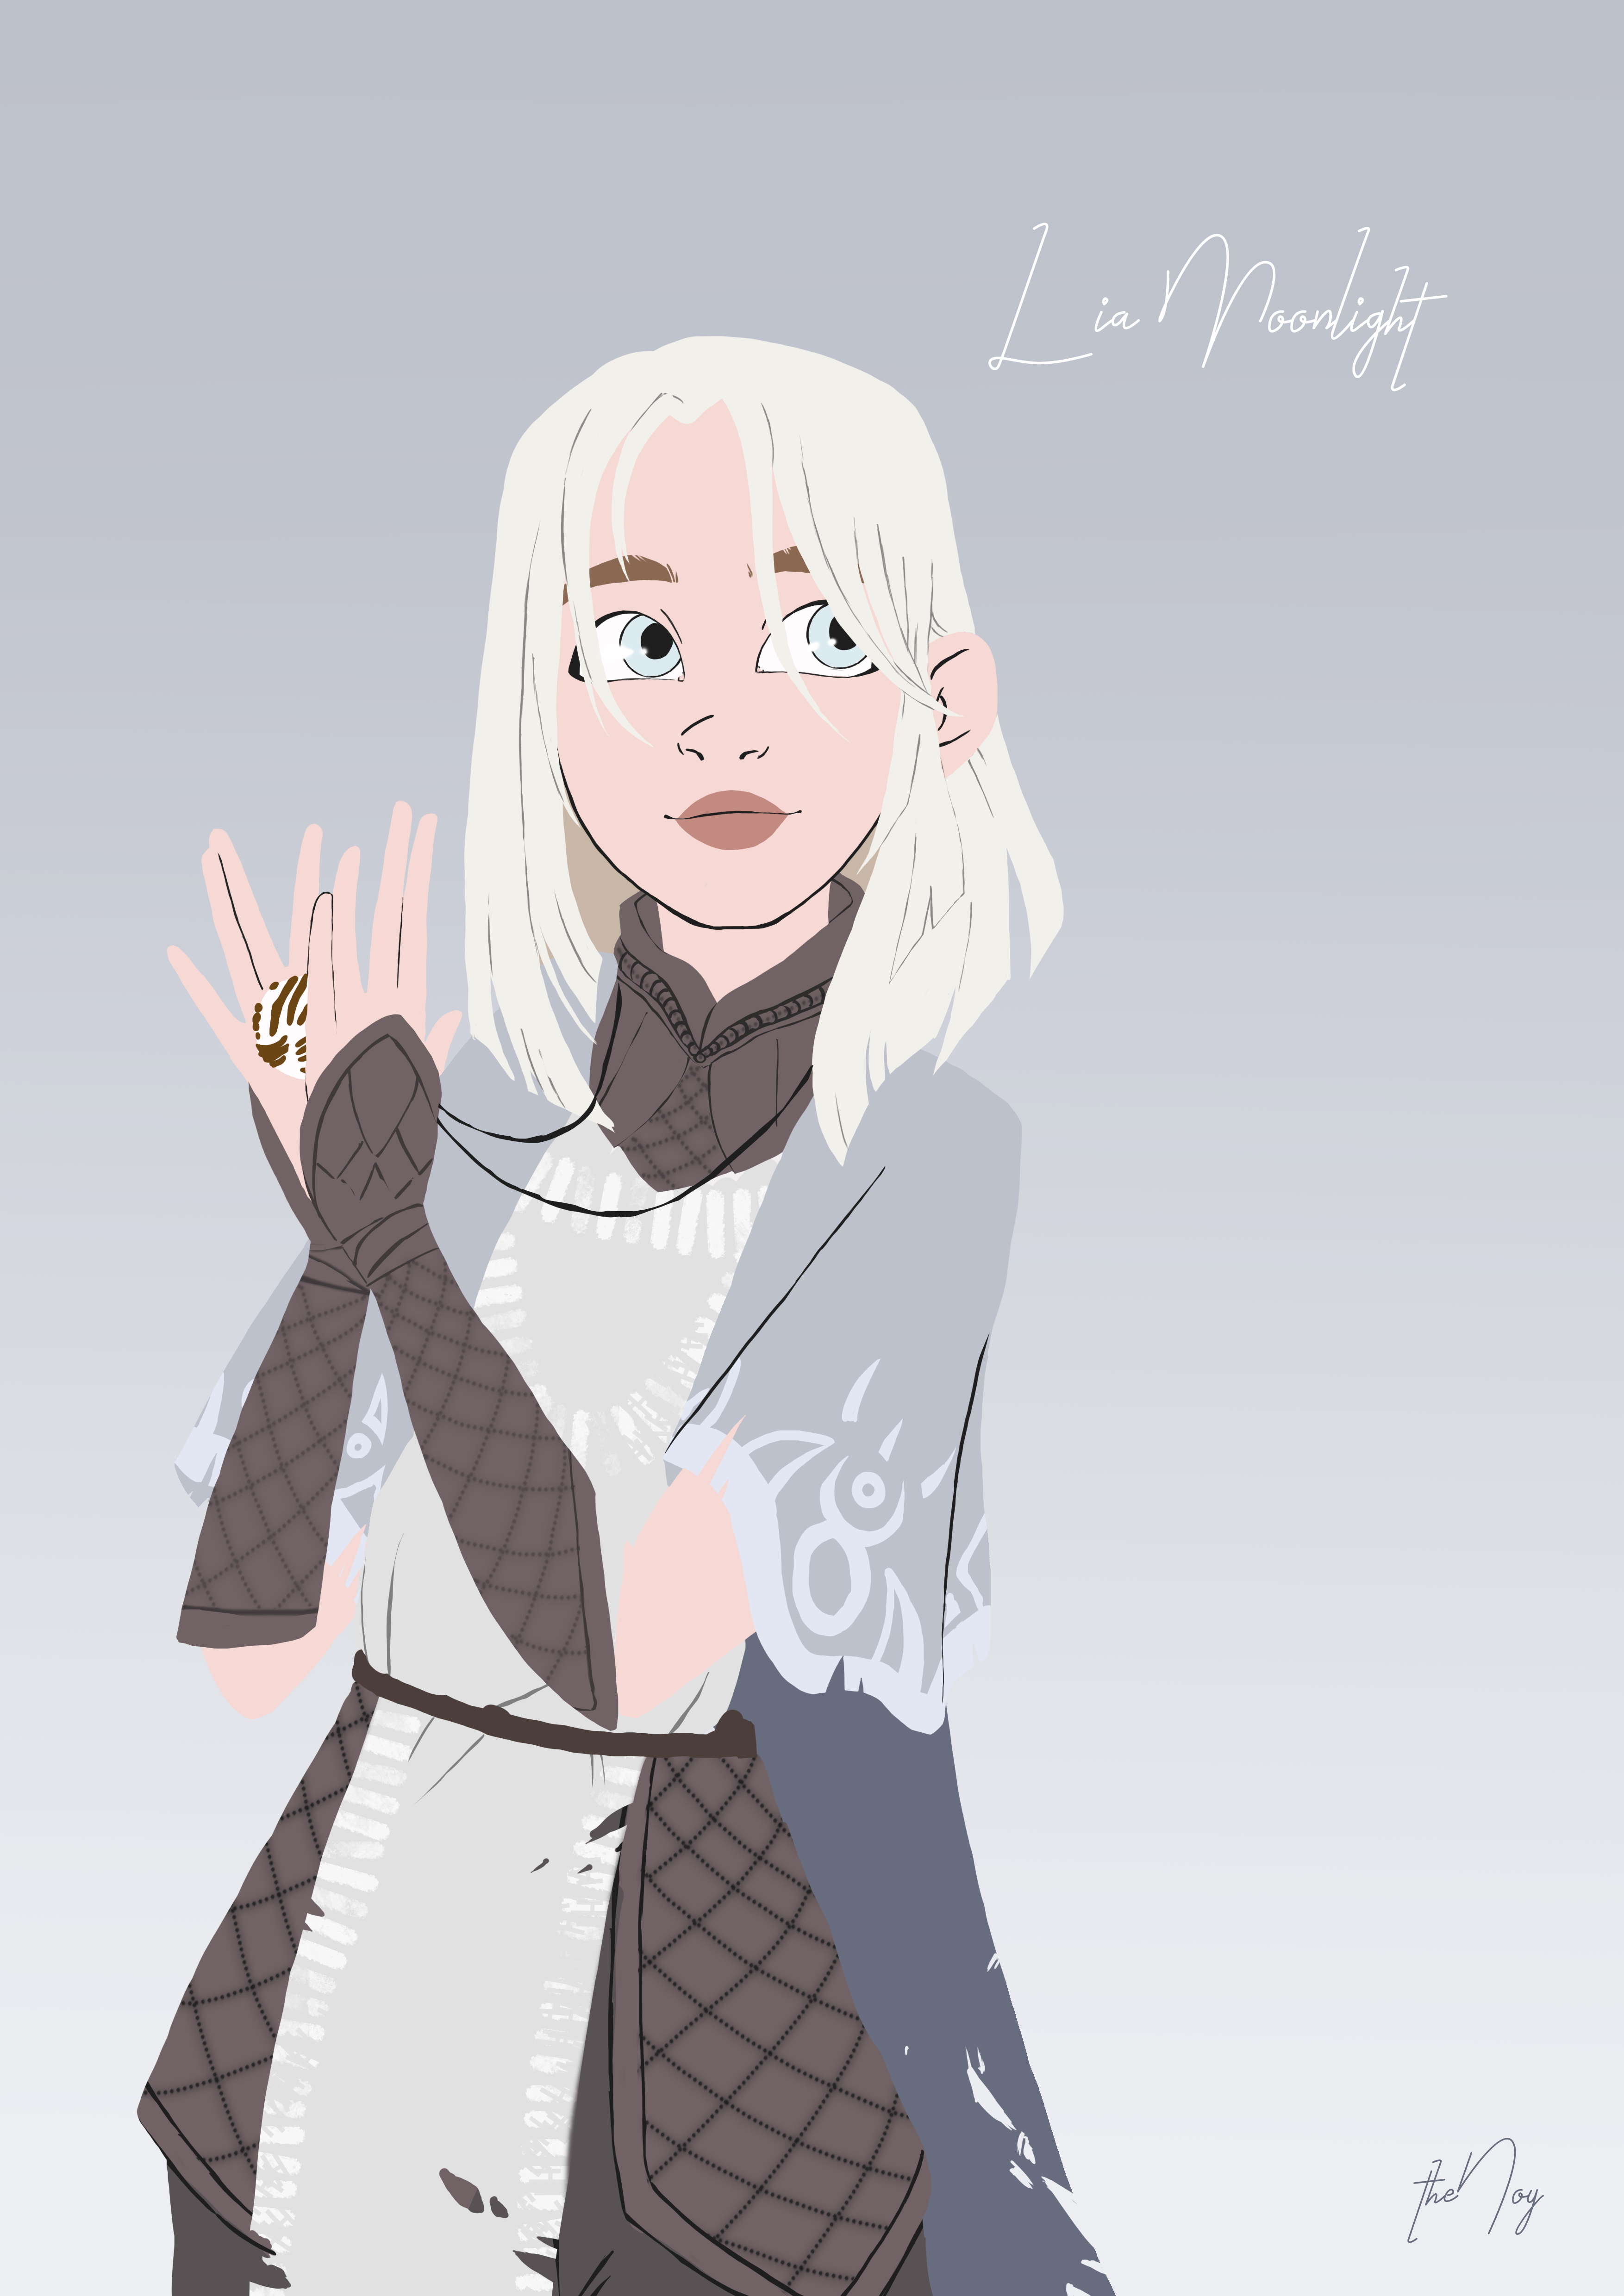
Lia Moonlight - flat image - by @thenoy
Let's start with basic shadows that are needed in any environment.
We always have some places that will be in shadow anyway. Make it darker. Use hard edges for things that are closer to each other (like hair near the face) or smooth edges for things that have more distance (f.e back part of pelerine here. It gets some shadow from the rest of the clothes). I'm simplifying that because that is a big topic, but it would be great for you if you would look for some articles about soft and hard light in photography. Understanding that would give you a lot. Remember about the direction of light. For now, you probably should know where it should be. It can be a sun or some other source of light. We will look at it closer in the next part.
Also to give your characters more life, try to add some red color near the nose, ears, fingers, etc.
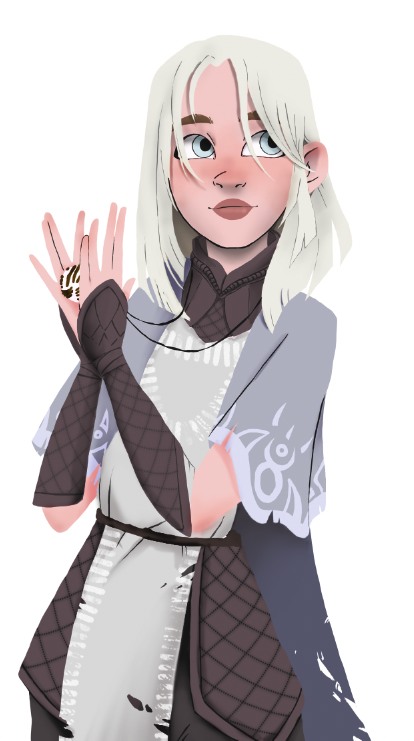
Standard shadow - by @thenoy
Environment setting
The next step is our environment. Where is the character? What light does it get from there? What is the color of the light? I've decided to use the forest. First I found some forest pictures and used them to get the right colors. I created a background layer and with leaves brush, I paint darker and lighter areas, then I've simply made it blur. This trick will give your art some deep, so the eyes of the observer would be focused on the character. Then I added another layer on the top and made a few more leaves at the right top corner. Then I've also blurred it but not as much as the background. Because I'm using forest I know some things already: My main light would be the sun, so it would be a light yellow color. And because of the sky and forest, I would have some blue/green shadow impact. It's because light reflects off the trees, grass, and sky ;)
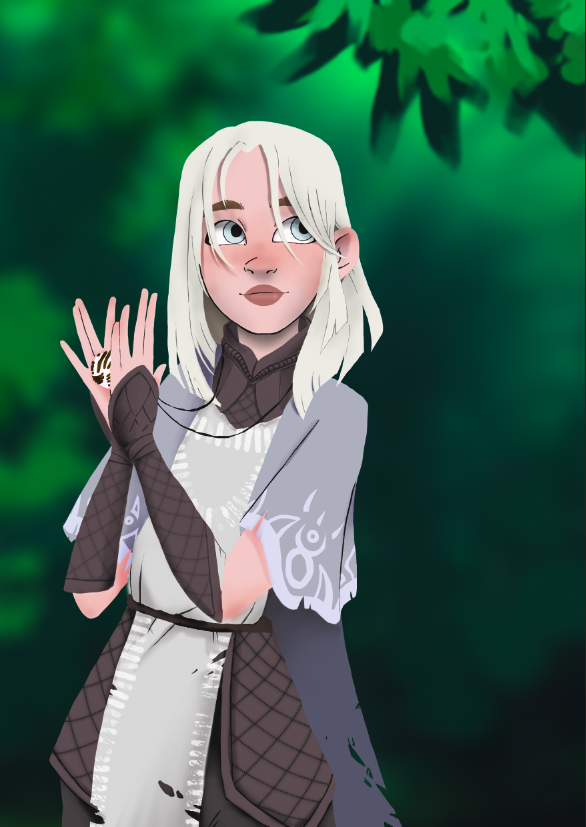
Background and foreground - by @thenoy
Time to switch off the light
To do it, we just need to add 3 more layers - one for background, one for our character, and one for our first plan elements (leaves in the right corner). Let's make them and clipping mask (right-click on the layer then setting clipping mask). Because of those settings that would appear only on the top of our elements that are in the layer below, not at the whole view, so we can set different opacity for all of them. Let's fill it with some color. I'm using a dark green/blue color. For this combination, I used lower opacity for the first plan, mid for middle, and higher for the background. Also, layers should be set to multiply (when you create a new layer it's set to "normal", you can change it to multiply, overlay, etc. For me multiply works the best for it, but in your art, any other could be better)
No light - by @thenoy
Main light
Let's go with some more layers. One for our character, two for the foreground. Set them as clipping masks again, and this time try overlay or hard light. I've used the same brush as for background and foreground in the second step, and this time using light yellow color I create some light that shines through the leaves.
Main light - by @thenoy
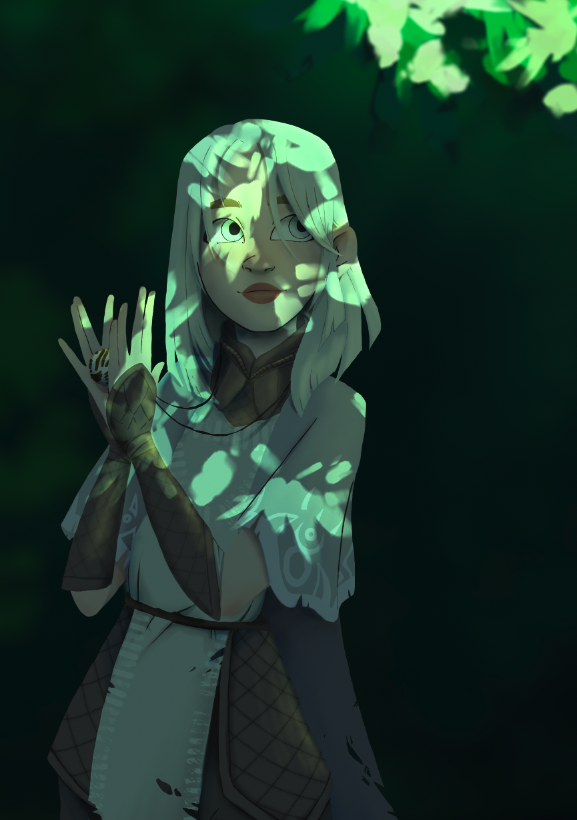
Add more soft lights.
It takes some time and some layers, but let's play with layers settings and get some more light on hair, clothes, and hands.
Soft lights - by @thenoy
If we have more light, let's add more shadows - just for better contrast.
I used a dark blue shadow, also having layers set in “multiplay”, “darken” or other modes.
Shadows - by @thenoy
We're almost there!
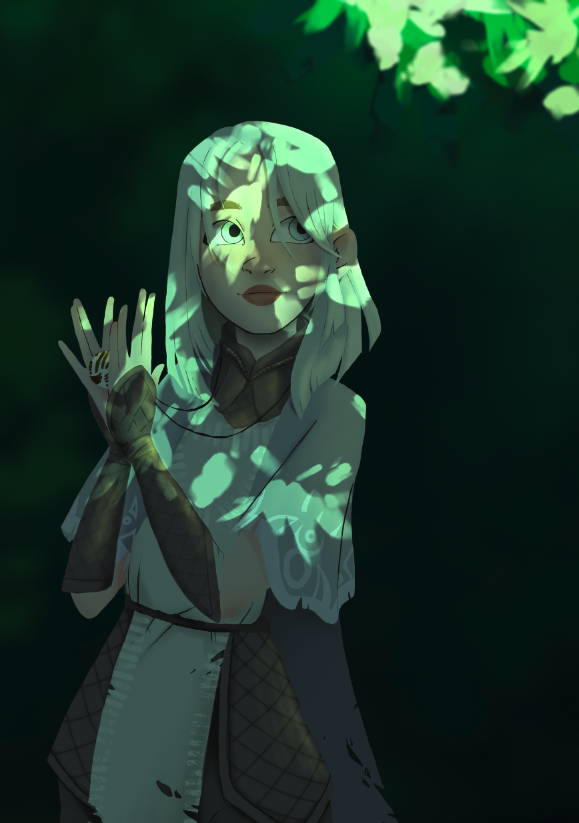
Reflected light
Let's add some balance to our main light. I'd like to have something that looks natural so I'm using blue light. Just to mark the silhouette of Lia. It would work in any case. Just think about what color of light would be best for balance. Here also I recommend you to look for some articles about reflected light. For sure you will find some life examples in nature, photographies, and movies. To give you an example, I'll use a simple drawing.
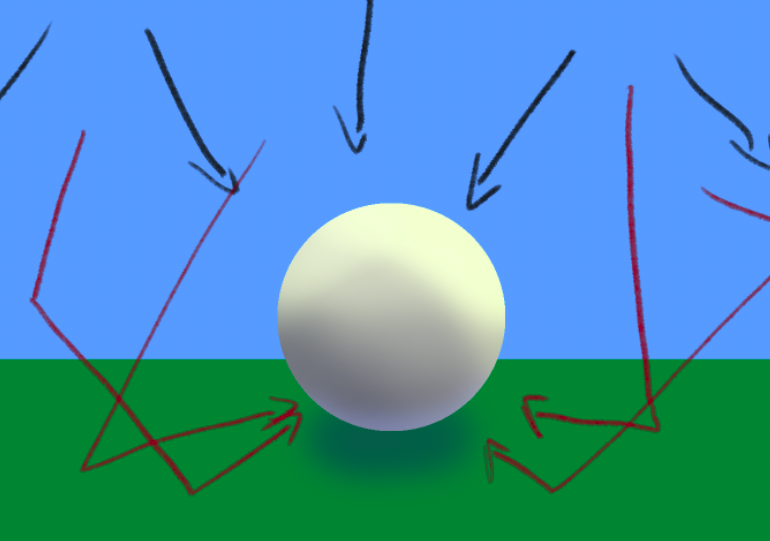
Reflected light - example
Let's use black arrows as a main, straight light, and red as reflected light. Our warm sunlight touches the ball and makes some impact on it, but it also reflects from the sky and ground, and again touches the ball but less intensive, blue light. Blue because of the sky color. If the light would reflect off some red car, on a white ball it would look like a red light.
Reflected light - by @thenoy
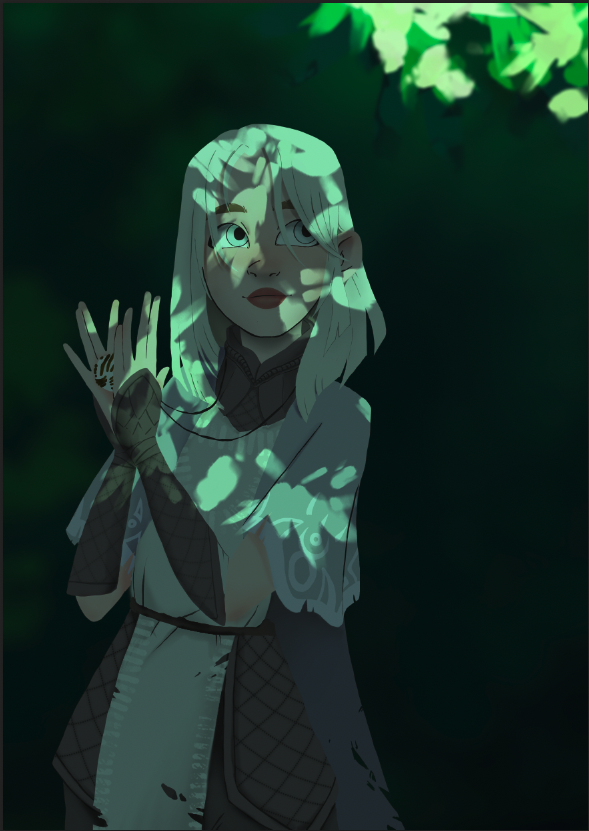
Let's add some magic.
I'd add some additional lights for eyes and for the amulet - it should glow with its own, white light.
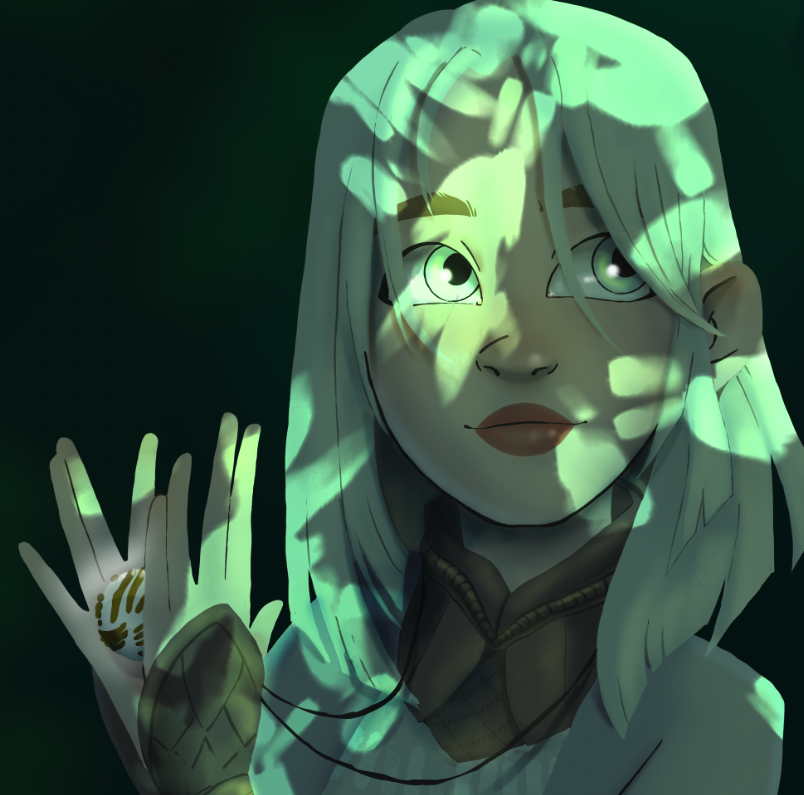
Light effects in eyes and on the amulet- by @thenoy
I'd add some dots, blur a few of them and add yellow hollow to add my environment even more life. And here we are 😄 that's it!
Final picture - by @thenoy
As always thank you for reading! I hope you like my arts and some of these tips would be useful for you.
See you soon! 💜
Awesome! I'm looking forward for more. Much more :-)
Thank you!
The end result is stunning! Great tutorial and artwork!
Thank you! I'm glad to hear that :)
My pleasure 🌸
Beautiful!!!
Thank you!
Beautiful work, I like how the light reflects on the character in a smooth way.
Thank you!
cool work !
Thank you ^^
Congratulations @thenoy! You have completed the following achievement on the Hive blockchain and have been rewarded with new badge(s) :
You can view your badges on your board and compare yourself to others in the Ranking
If you no longer want to receive notifications, reply to this comment with the word
STOPI love your process and technique! Amazing 😍