LMAC School - How to add rays of light
Whether it is an alien laser beam, a ray of sunshine through a window or the beam of a flashlight, light rays are a little challenge in photo collages and photo montages.
In this tutorial, I'll show you some ideas of creating light rays and, using a few examples, how to implement it.
Warning - Internet bandwidth:
A lot of GIFs are used for explanation in this post. If you have a very slow internet connection please leave me a message. Then I will make this post available compressed in a ZIP file.
Requirements
You may need the GIMP software to understand this tutorial. GIMP is a free, open source tool for image processing of all kinds. Lots of people say GIMP is the open source Photoshop. I agree with this statement at least for the functionality I personally need.
You can download GIMP here: Click
I created this tutorial for GIMP version 2.10.20 (and higher).
We will work with layers in this tutorial. If you do not know how to work with layers, just take a look into the LMAC School - How to work with layers post.
1.) Basics
Before I get into the how-to, let's take a closer look at light rays in the nature and what different kind of rays exist. Because when we become aware of the details, we can achieve more realistic effects when we depict rays in our works.
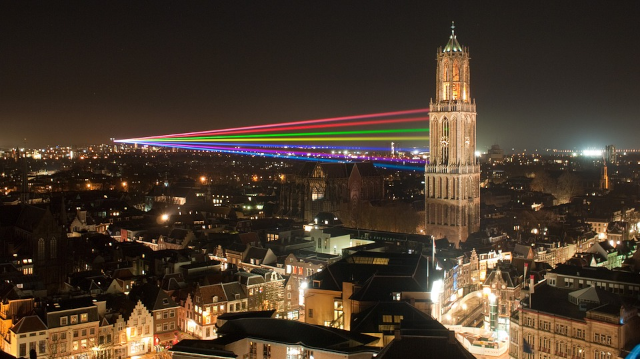
1.1) Laser
A laser beam is extremely concentrated light that is emitted in a focused manner by its light source. The light waves in a laser beam are all from the same color.
An important property of lasers is the strong focus of the generated light beam and the respective low intensity loss in the distance. This means that a laser beam barely appears wider at short distances than at the starting point. This also applies to the strength of the light itself. Over greater distances (miles), however, a difference in width and strength can be determined. How strong this effect is depends on the strength of the laser itself.
How strongly a laser beam is visible and looks translucent in a photo also depends on the strength of the laser, but also on the strength of the ambient light compared to the laser strength and the densitity of the medium (air, water, etc). The lower the density of the medium, the less visible the beam is. Because the beam becomes visible through reflections from particles, molecules in the medium.
Any film that shows laser beams in space is just wrong. There is hardly any reflective material in space that a laser beam can pass to get reflected as a result.
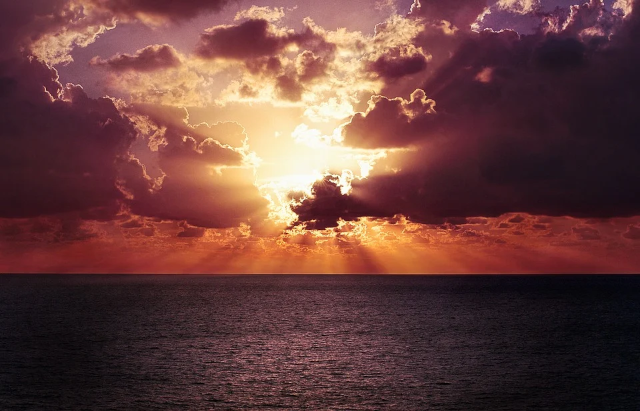
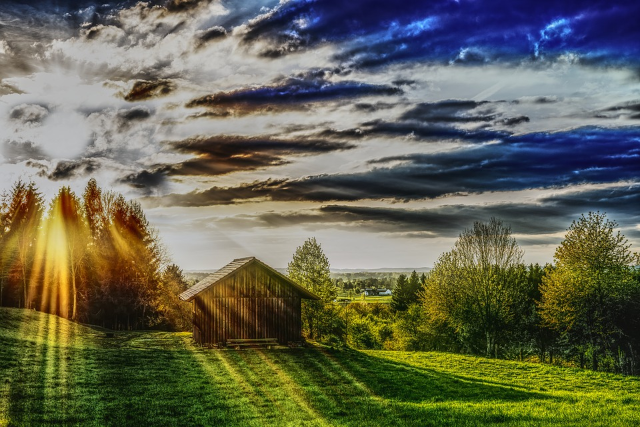
1.2) Sunlight rays
Rays of sunlight or strips of light that come from the sun and in most cases shine through clouds are more precisely not really rays in a physical meaning, but bundles of light. The course of the light becomes visible through the scattering in the air.
When the sun is low, they are shown most clearly. Then they can extend almost over the whole sky.
They are actually not that rare.
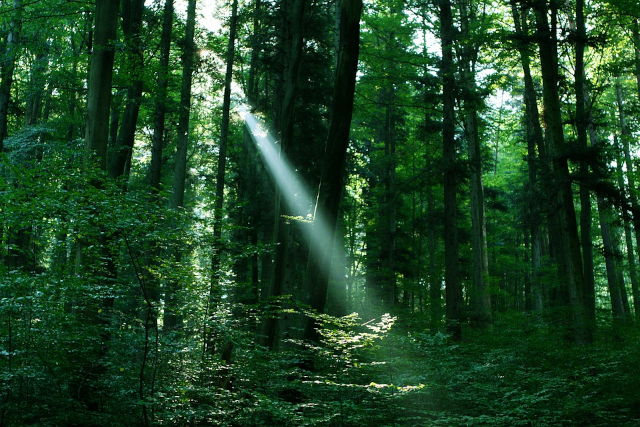
We know a similar effect from dusty rooms or saunas into which the light shines through the window. The rays become there visible because the incident light is reflected by particles in the air.
Both types of sunlight have two things in common. Over the distance they stretch out in length, the light cone get wider towards the end. And on the other hand, the more reflective material there is in the air, the more visible the respective ray (water droplets, dust).
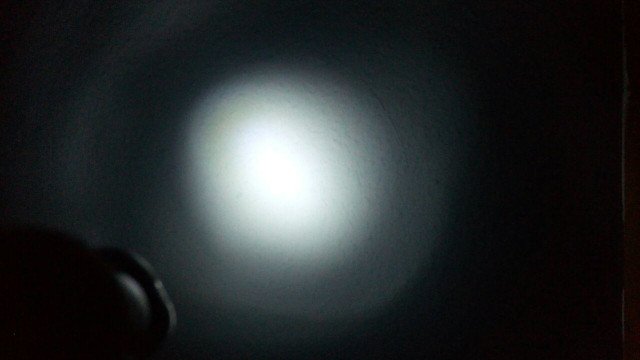
1.3) Flashlight beam
In fact, the light from flashlights is not always visible. Just like the rays of sunlight, they only become visible through particles in the air.
And just like the rays of sunlight, the beam of a flashlight is conical.
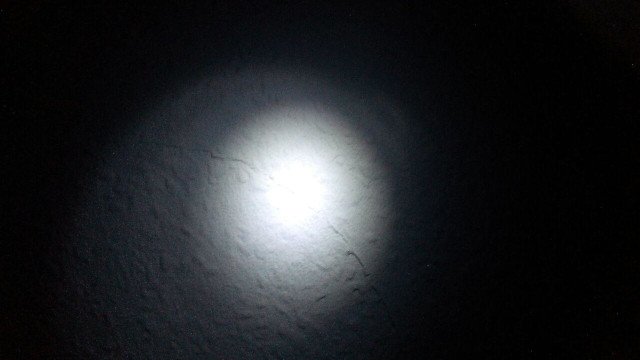
However, at the end of this cone, where the beam hits a surface, there is the specialty of the flashlight light. Because there the beam depicts a so called Light Cookie.
The Light Cookies looks a little different for each flashlight model. Older models with incandescent lamps usually have a clearer Light Cookie. Younger models with LEDs, on the other hand, usually project a soft, bright circle.

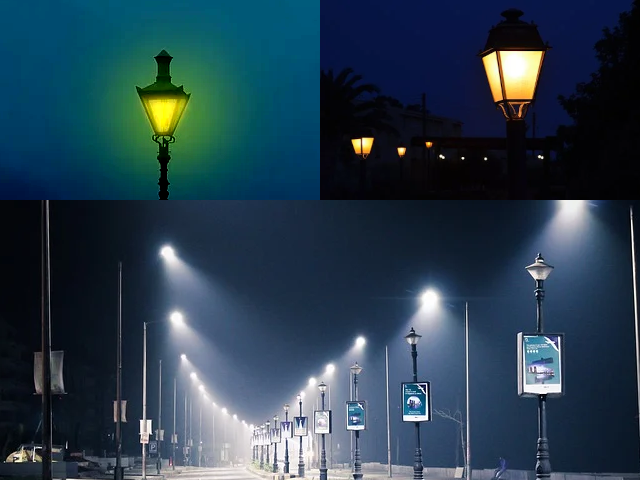
1.4) Lamp light
Most lamps these days have a cover, whether they are indoors or outdoors.
Such cover mostly works more or less as diffuser that diffuses the light. The light cone of such a lamp appears smooth and to a certain extent undefined.
Sometimes the light is also scattered radially around the lamp body. Fog and air humidity or other particles are also decisive for the direct visibility of such radiation.
1.5) Resume
- We can tell that rays of light are transparent to a certain extent.
- The more focused (more strongly directed) the light, the sharper the ray. (Laser)
- The more scattered the light is, the softer is the ray. (Wall lamp, Sun ray)
- The brighter the surroundings are compared to the ray, the more invisible the ray is.
2.) Use cases and techniques
Now we are once again aware of the properties of different light ray effects. So it is time to show you in the examples below, how to implement the different kinds of rays into your photo works.
2.1) Laser beam
- Load your photo or collage.
- Create an empty layer and make it the active layer.
- Use the free select tool to define the shape of the laser beam.
I drew the selection slightly conical so that it gets wider with length. Because the end of the visible beam is closer to the viewer (camera). According to the optical rules of three-dimensional space, things on less distance look larger and things on higher distance look smaller. - Define the color of the laser beam as foreground color on the color selection box.
- Click the menu item "Edit/Fill with FG color".
- Hit shift+ctrl+a on your keyboard to remove the selection (unselect).
- Click the menu item "Filters/Blur/Gaussian blur". A dialog window will open. Leave the values in the dialog window as they are. (1.5px Gaussian blur is absolutely ok for our purpose.) The press the "ok" button.
This simulates a slight scattering effect that a laser should have in a dusty environment, as in the photo. - Change the layer mode of the laser beam layer to "Lighten only" and change the opacity value of this layer until you like the result.
2.2) Sun light rays
- Load your photo or collage.
- Create an empty layer and make it the active layer.
- Right click to this layer and then click on the context menu to the item "Add layer mask".
Then a dialog window will appear. In this window select "Black (full transparency)".
After clicking the "Ok" button, you will see another thumbnail image to the right of the preview image of your layer in the layer list. This image represents the mask. The mask is configured so that all black (or certain black) areas are displayed transparently on the canvas.
When you draw with a white pen on this mask, the image content of the layer will become visible. - Click the layer mask thumbnail to make it active for editing.
- Select the color white on the color selection box.
- Click the free selection tool and draw the selection in the shape you want for the light beam.
In the example photo, the light comes from the top right side through the window. You can see it at the lightened floor on the left side.
Therefore I drawed the selection over the window glass and added a cone to the selection, which is getting wider through the room, in direction of the lightened area. - Click the menu item "Edit/Fill with FG color".
- Hit shift+ctrl+a on your keyboard to remove the selection (unselect).
- Click the menu item "Filters/Blur/Gaussian blur". Change the X&Y values in the dialog window To 4-6px. We need a more smooth light cone than for the laser beam.
Then hit enter to submit your changes. - Click the layer image thumbnail of the layer with the mask to make it active for editing graphicaly.
- Click the menu item "Filters/Light and Shadows/Supernova".
Then a dialog window for configuring the supernova opens.
Because the natural light source (sun) comes from the more or less upper right corner of the window, you need to move the coordinates of the supernova effect to the outside of our white mask area above the upper right corner of the window. In this way, only the rays of the supernova are displayed in this layer, but not its point of light.
Then adjust the number of rays, color, and radius until it looks more like sun rays. - Change the mode of the supernova layer to "Linear light" and adjust the transparency of the layer until you get the best result.
Hint: You may want to add some haze or dust before you start working on the sun's rays. Then these types of rays appear more natural.
You can easily paint this on your canvas with a white brush, with low hardness and low force.

2.3) Flashlight beam
Flashlight beams can be made using the same methods that we used for sunlight rays and the laser.
It depends on the requirements of your scene which method is suitable.
One difficulty, however, is the Light Cookie that the beam projects onto surfaces.
There are a lot of usable Light Cookie textures on the internet. But you can also use mine.
It imitates the projection of the glass lense of a flashlight.
How-To:
We skip the first steps that you already know from the laser and sunlight ray.
So let's start with placing this Light Cookie onto a wall, on a prepared canvas.
- Paste the Light Cookie as a new layer underneath your light ray layer.
- Change the scale and the perspective of the layer.
- Change the layer mode to "Linear Light" (I've also had positive results with "Grain Merge") and adjust the layer transparency until you get a result that looks like a projection.
2.4) Lamplight
In this example I show one way how to illuminate a lamp with diffuse light. Instead of a defined beam, I put a ball of light on the lamp, so that it looks like it's shining brightly.
In addition, I will show you a way how to solve the lighting of the background.
- Load an image as background for our experiment.
- Choose a color in the color box in which the light ball should shine. (The color should not be too dark and not too light. RGB: f6d389 i.ex.)
- Activate the pencil tool and set the size of the pencil to the size the light ball should have.
- Set the hardness of the pencil to 54 and the force to 100.
- Add a new layer and name it "Lighting".
- Change the layer mode to "Overlay".
- Draw a little bit around the area of the lamp. Just enough for the lighting area.
- Open the Gaussian Blur function and set the deviation for both axes to 5.The drawing must be a bit blurry because it represents the illumination of a diffuse light source.
- Add another new layer and name it "Light ball"
- Change the layer mode to "Linear light" and the opacity to 75%.
- Draw a single spot at the visual center of the lamp (one click).
- Open the Gaussian Blur function and set the deviation for both axes to 5. Since it is a diffuse light source, this layer must also be blurred.
Materials in this tutorial
I used a lot of artwork for the animations and illustrations. Most of the material is sourced from Pixabay and is free for any use.
Only the light cookie and the light cookie photographs are my own materials.
Best regards
QuantumG
PS: 33% of the rewards for this post go to LMAC as beneficiary ( #supportlmac ).
You will have noticed that I am not a native English speaker. Therefore, there are probably a few linguistic bumps in my texts. If there are any passages that could trigger accidently a world war or something similar, please let me know so I can change it. :-)
Of course, I am also interested in making the text easier to understand if it is partially necessary.
I have so much to learn! Thanks for the tutorial. I'm going to practice
This is the second light lesson I'm reading. I read the one about drop shadows and shading. There was so much there I will study that again and this one.
I can't draw, but I never know what to do with light when I do try to draw. All I ever put in is the drop shadow (I didn't know it was called that) and even that I handle badly. I use GIMP lighting effects but they are confusing. It is wonderful to have all of this explained. Thank you very much, teacher :)
It's my pleasure!
Thank you for reading the tutorials and also thank you very much for the tip. :-)
I would absolutely encourage you to continue to handle it badly, but just with a little wink to the rules of the reality. :-)
You'll laugh, but sometimes imperfection looks perfect in the bigger picture. You know, nothing in nature is perfectly geometric. Nothing is for the specific moment completely predictable or completely comprehensible. Even a drop shadow can be subject to many different influences. And the brain does not trust the perfect picture.
Happy little accidents can therefore make a drop shadow perfect, above all.
The tutorial about shadow itself, is next on the LMAC School list. I've almost finished it.
You have used the Hashtag #CC and can now reward 21 comments under your post with one CC.
More information about the Commentcoin-Project can be found on this account.
You can easily add an upvote to this post to support the project.
Thanks for using it.
Happy comments.
Your CC-Team:
@kristall97 ([Code-Designer, Witness])
@alucian ([Project-Designer])
!discovery 30
This post was shared and voted inside the discord by the curators team of discovery-it
Join our community! hive-193212
Discovery-it is also a Witness, vote for us here
Delegate to us for passive income. Check our 80% fee-back Program
Greetings friend, what a good tutorial to continue learning the management of light in Gimp
Please @quantumg, where can I get this information compressed?
You're welcome to use on of these two download links. :-)
I just downloaded this whole page including the pictures and made a zip file out of it. It's much better for slow internet connection, to have the whole page in one file.
Download Mirror 1: https://ufile.io/5u7ruc0f
Download Mirror 2: https://www.file-upload.net/download-14313054/HowToAddRaysOfLight.zip.html
If something doesn't work, please let me know.