
Previously I mentioned I had been working on my Stargrave terrain.
Today I printed a full-size habitat but also did some crafting of a sci-fi desert-world shanty.
If you want to create a Tatooine style feel then read on to see what I did.
First the 3D Print
If you have a 3D printer then you don't have to worry about digging around in your recycling, just download the print from my Printables and go for it.
Here is the 3D-printed version. Yeah this is a bit more up-market, rather than a shanty it's more of a premium neighbourhood.
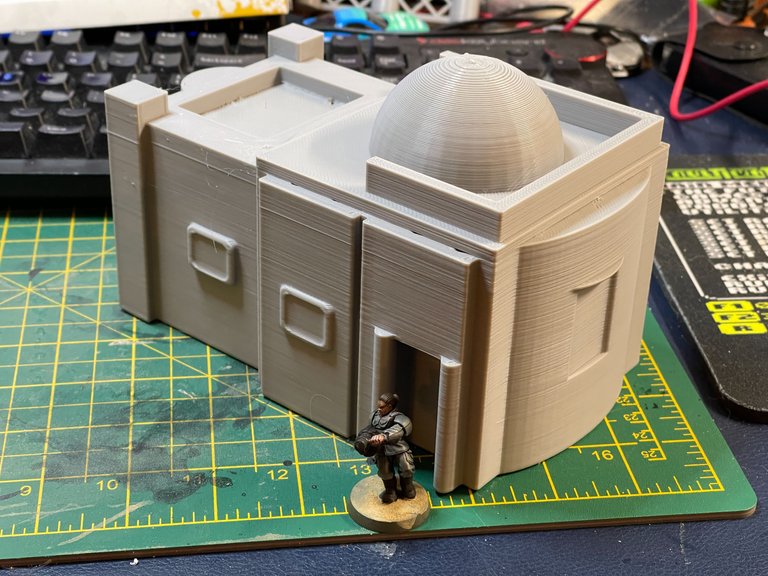
I created it in Tinkercad and printed it off on my Prusa Mini+ with 0.6mm nozzle. Even so, it took hours to print and the spool must have been tangled a little as there is a layer skip part way to the top.
Thankfully that will be easily remedied and this terrain is pretty much created to be disposable in a way.
DIY Version
Speaking of disposable, here is my shanty made out of recycling:
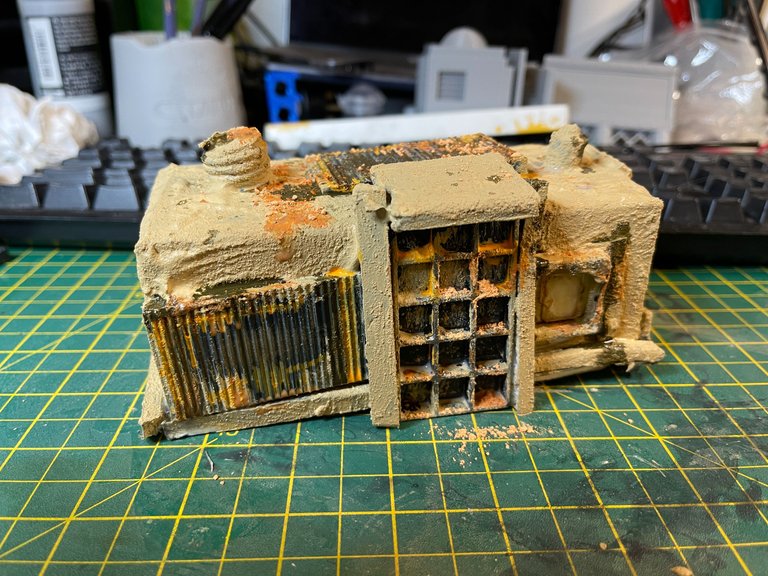
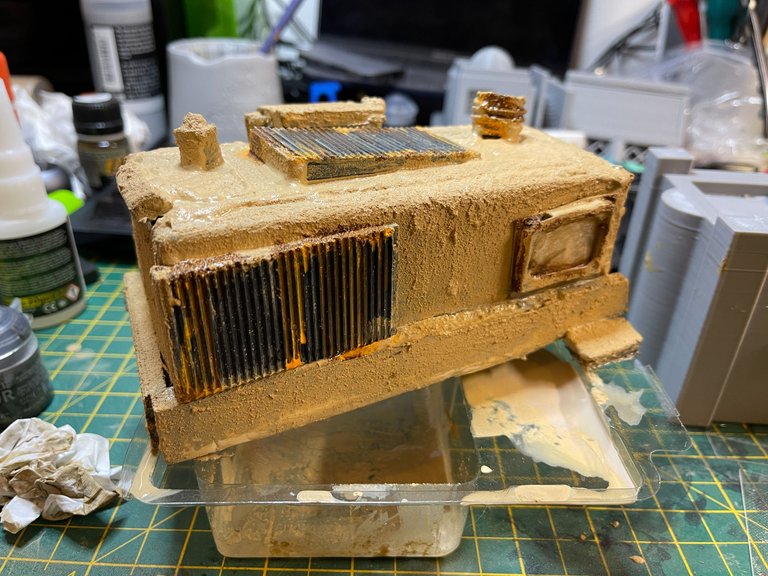
When it is dried I will take a look to see if I overdid the weathering. It's always hard to tell until fully cured because everything tones down as it dries. You have to push yourself past what is comfortable because nothing ever stays full saturation!
Build Process
To start I needed to dig through our soon-to-be-trash and see what I could recycle for the project. Using a 25mm scale model I found a catfood box that when cut in half would serve as the basis for our shack.
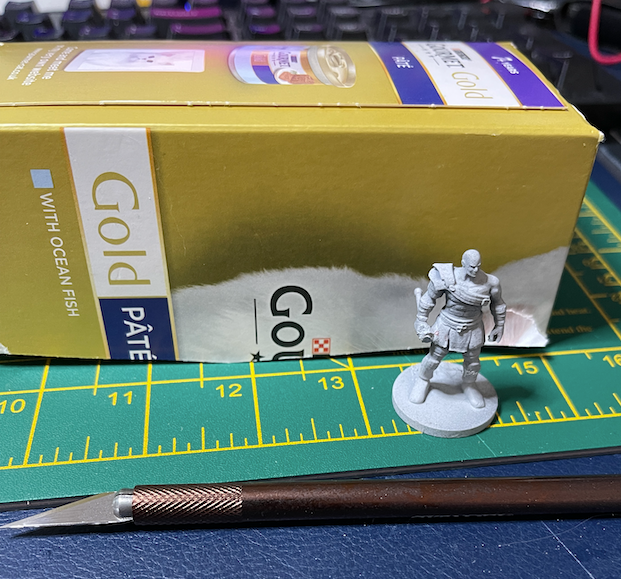
Next it is a matter of finding small detail bits and pieces and figuring out what they might be put into service for. We know our shack will need a door, windows, perhaps a chimney or vent, and then some kind of siding. For added interest and stability it is good to have other chonky elements too.
Pressing two parts of the blister pack from an SD card served as the windows, but I couldn't use my foam cutter because unfortunately, it requires 110v. I put in an order for a 240-110v transformer but in the meantime, I used pieces of poster board.
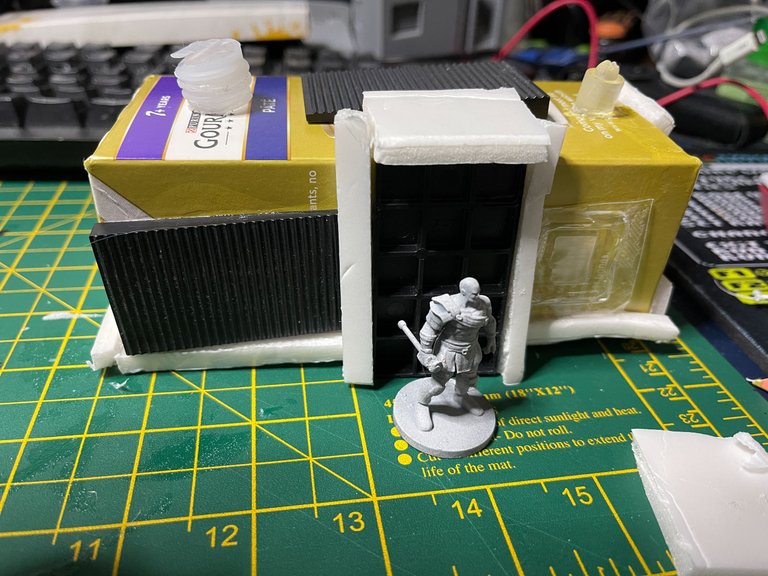
For corrugated siding, I found some wedge pieces from when I laid flooring a while ago. Made me sad to think that floor is back in Canada. Ah well, onwards!
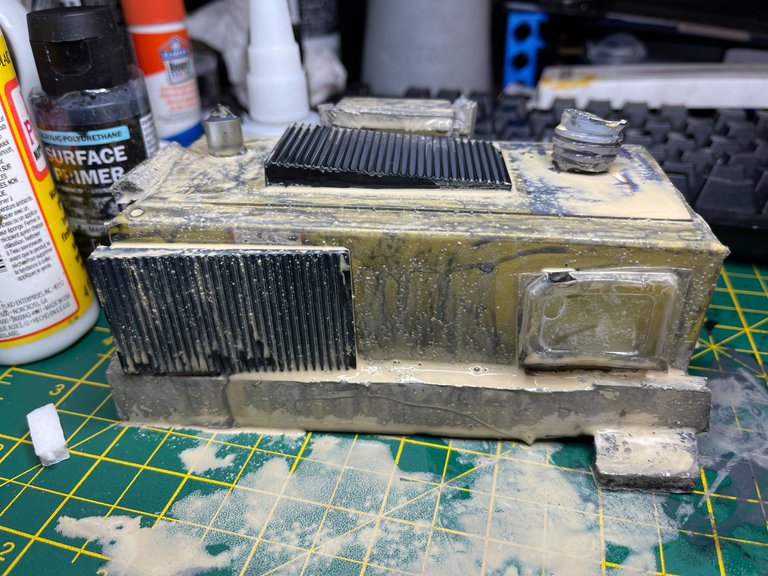
Nothing is going to stick to pristine cardboard and foam so I made a highly dilute mix of modpodge and primer, followed by another dilute layer of sand colour.
The actual sand texture is provided by acrylic diorama paste from AK. This is meant for sanding bases but works great for this because it offers the precise texture I need but also works as a filler. And, of course, it is the correct colour.
Now I just need to make the shanty look old and, well, shanty-like! That means adding rust, grime, chipping and so on. Seeing as the windows aren't actual windows I especially paid attention to makeing them look extra dirty in a swirling pattern as if someone had tried to wipe the window to see out.
I would have left it here but as mentioned earlier, things tend to get a lot more tame as paint and pigment dries back.