
English
Recently, a friend asked me for a rather interesting craft as a gift for your daughter. It turns out that her daughter is a fan of a series called "Miniforce", specifically she is a fan of the character "Lucy".
As she knows that I make things with plasticine, she came to my house to ask me if I could make her something to decorate a little table that she has in her daughter's room. I asked her if she wanted a figurine, but surprisingly she said no, she wanted something flat to stick on the wall or hang it.
For what she wanted there was no need for plasticine, as she could use eva rubber or foami, but she insisted on plasticine for the figurine, as her daughter also loves plasticine. Well, with this in mind I got down to work.
Español
Hace poco, una amiga me pidió una manualidad bastante interesante como regalo para tu hija. Resulta que su hija es fan de una serie llamada "Miniforce", específicamente es fan del personaje "Lucy"
Como ella sabe que hago cosas con plastilina, vino a mi casa a preguntarme si podía hacerle algo para decorarle una mesita que le tiene en el cuarto a su hija. Le pregunté si quería una figurita, pero sorprendentemente me dijo que no, que mas bien quería algo plano para pegarlo en la pared o colgarlo.
Para lo que quería no era necesaria la platilina, pues podía usar goma eva o foami, pero ella insistió en que fuese plastilina para la figurita, pues a su hija también le encantan la plastilina. Pues bien, con esto en mente puse manos a la obra.
Step by step
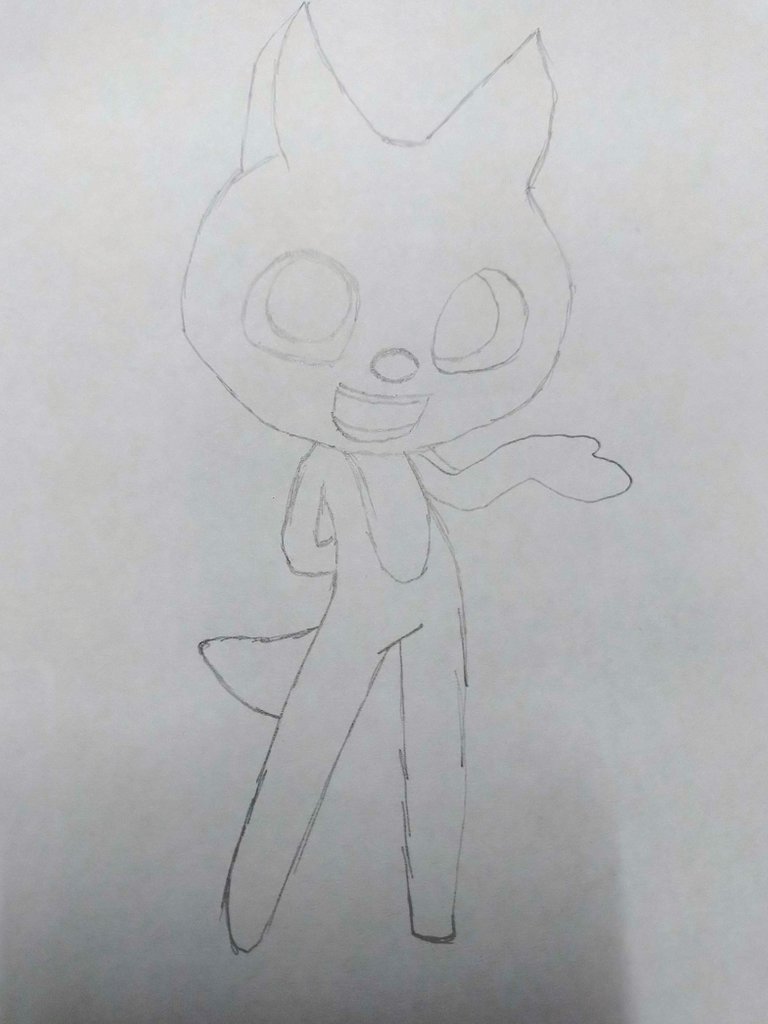
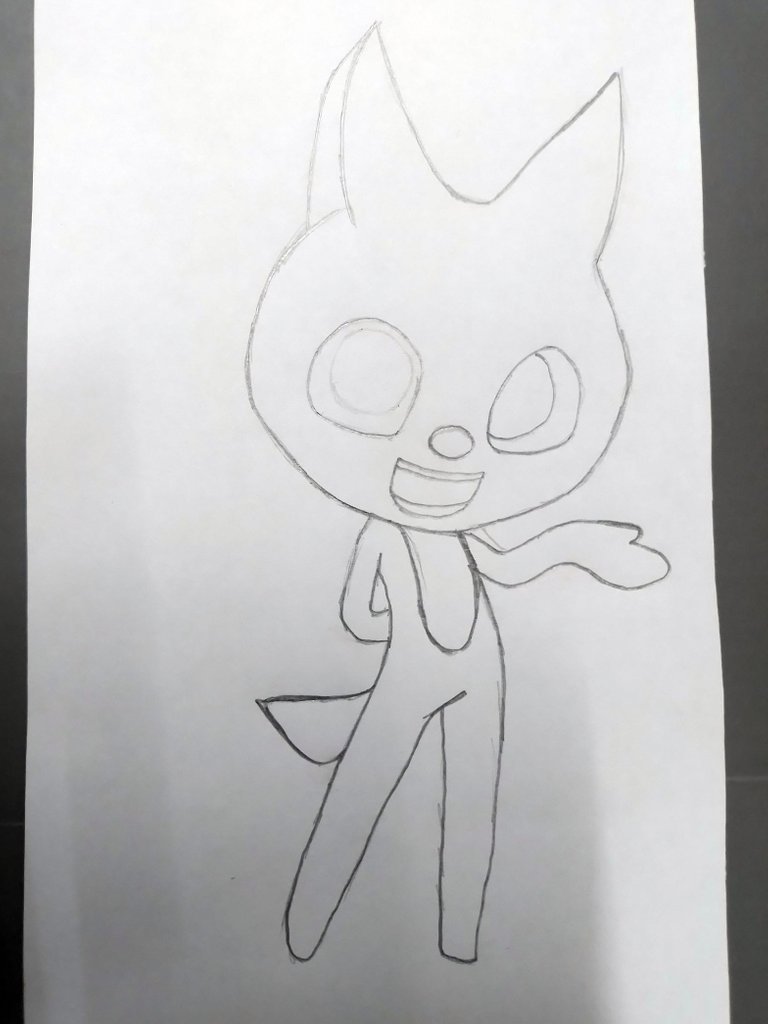
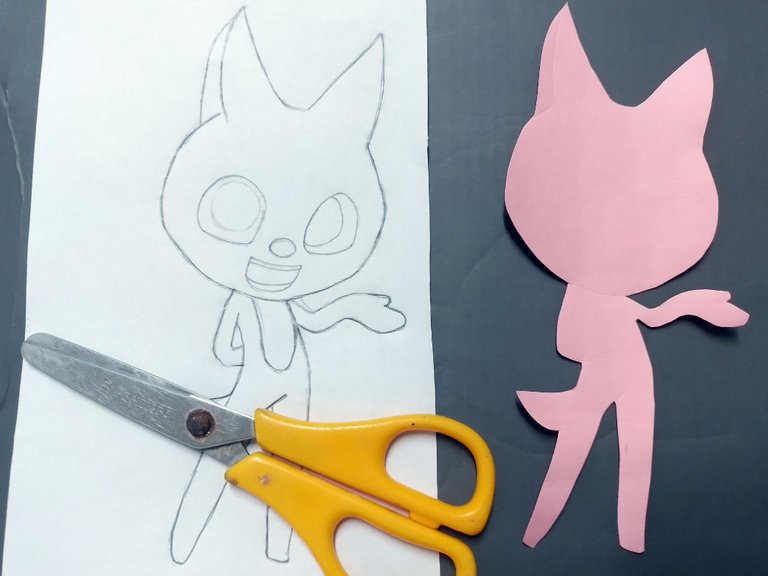
The first thing I did was to draw the character on paper. I made a sketch with clear lines and then I outlined it.
Paso a paso
Lo primero que hice fue dibujar al personaje en papel. Hice un boceto con líneas claras y luego lo remarqué.
 |  |
|---|
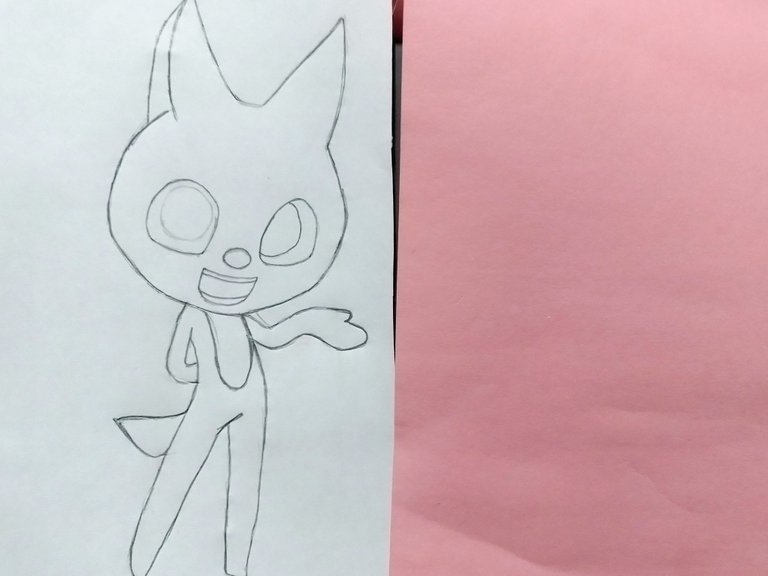
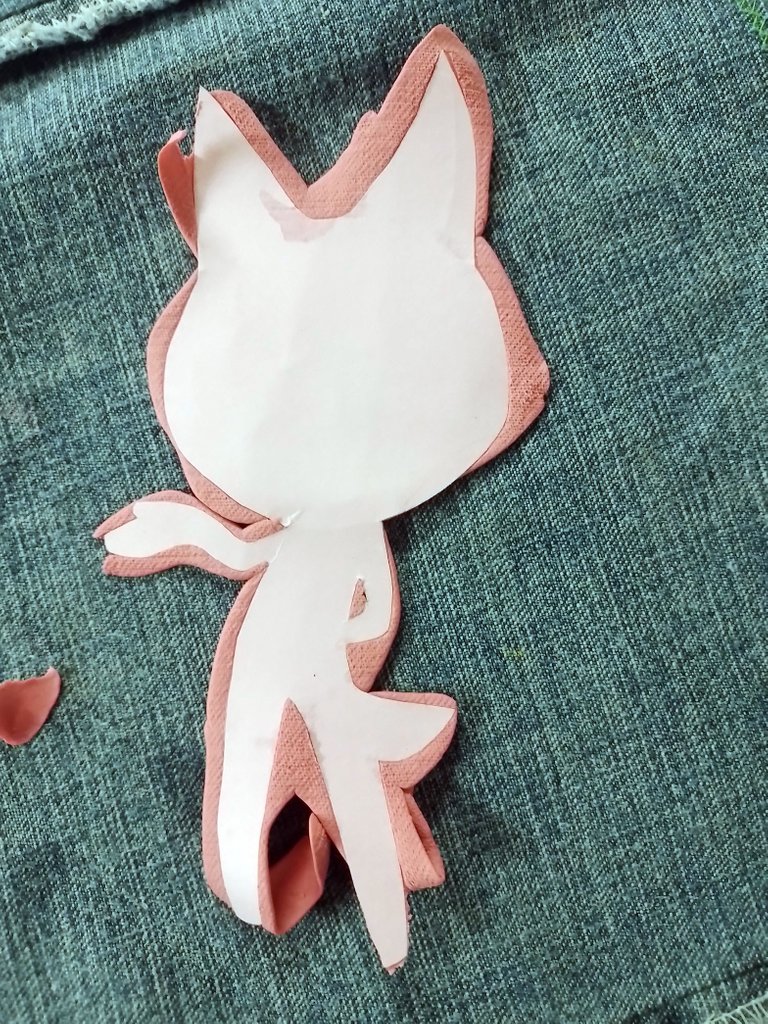
As soon as I had the sketch, I looked for a cardboard to put the model on it, because the paper was too soft to use the plasticine on it.
It was as simple as placing the mold on the cardboard, mark it on top of the cardboard so that the marks would remain and cut it out.
Tan pronto tuve el boceto, busqué una cartulina para plasmar el modelo en esta, pues el papel era muy suave para usar la plastilina sobre este.
Fue tan sencillo como colocar el molde sobre la cartulina, remarcarlo encima de esta para que quedaran las marcas y recortar.
 |  |
|---|
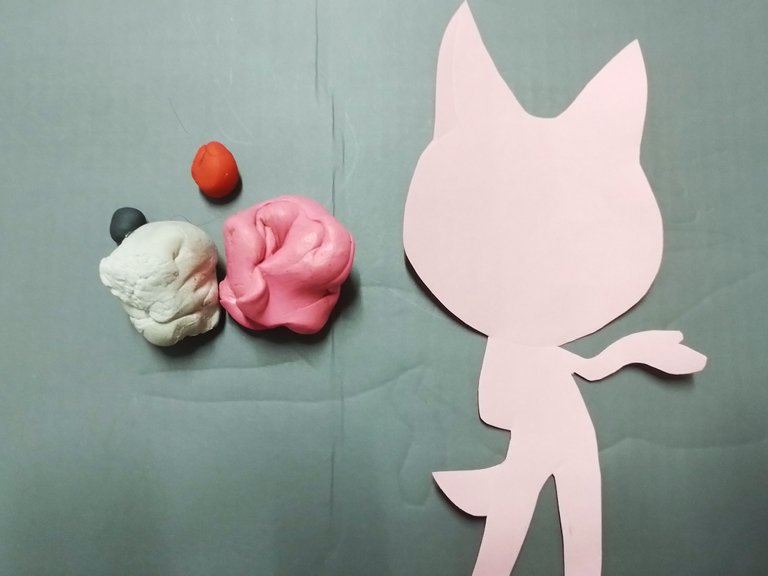
Now, since cardboard is a more resistant material than paper, I could start placing the plasticine on it. I thought about using clay of any color and then paint, but in the end I decided to use only clay, it would look better.
With this in mind, I chose the plasticine of each corresponding color and began to cover the cardboard in pink, which is the color of this character.
Ahora sí, como la cartulina es un material mas resistente que el papel, podría comenzar a colocar la plastilina sobre este. Pensé en usar plastilina de cualquier color y luego pintar, pero al final me decidí en usar solo plastilina, quedaría mejor.
Con esto en mente, elegí las plastilinas de cada color correspondiente y comencé a cubrir la cartulina de color rosa, que es el color de este personaje.
 |  |
|---|
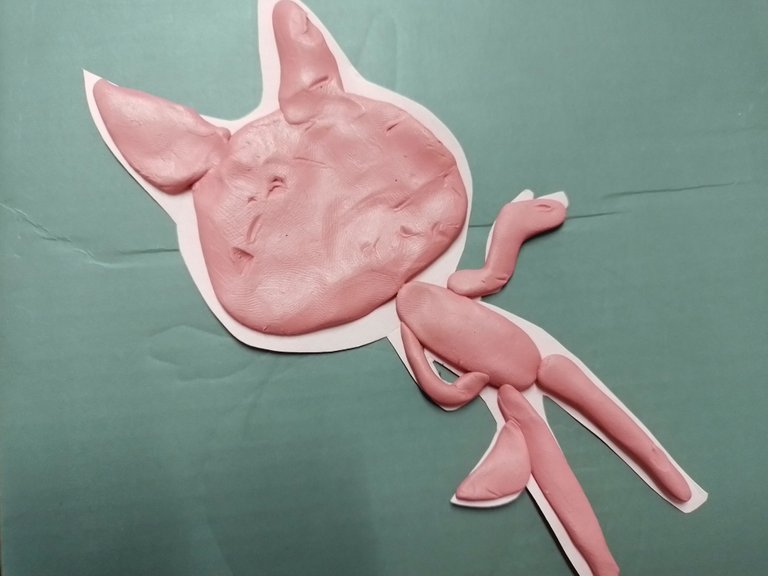
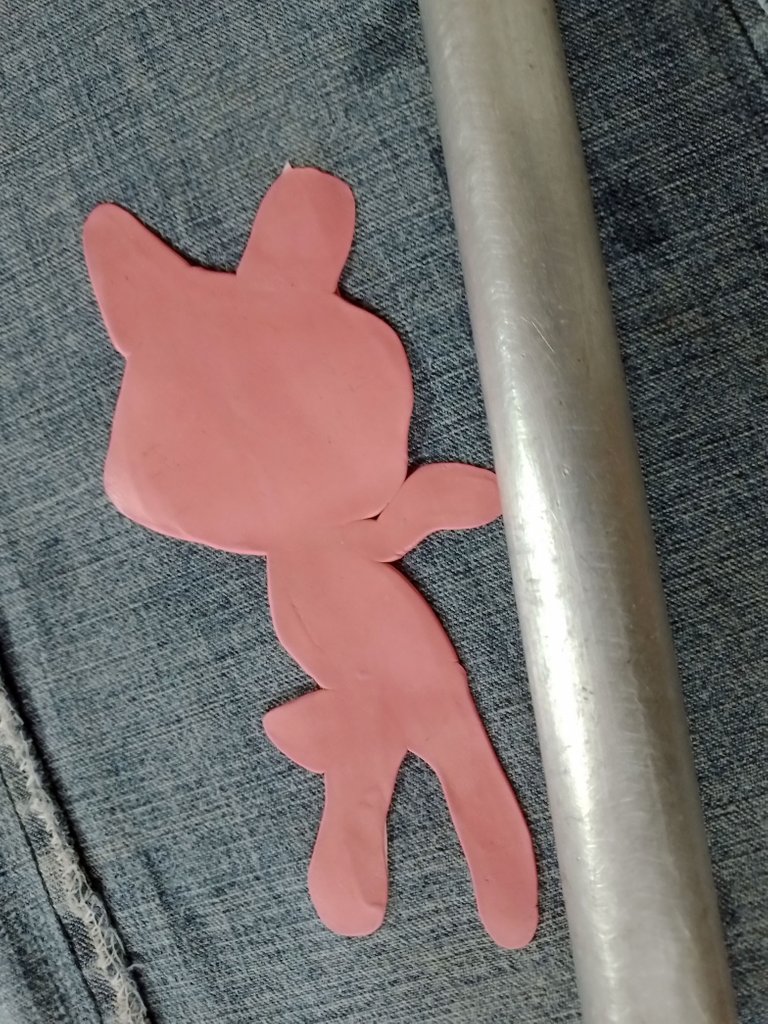
As you can see, I wasn't careful when I covered the cardboard with the plasticine, it looks ugly. Why did I do it this way? Because I'm going to use a rolling pin to flatten it.
Here's a trick. Plasticine is oily, so if we spray it with a little water, the plasticine won't stick to the rolling pin when we are rolling it. In this way, we will be able to stretch all the plasticine to cover all the cardboard.
Como pueden ver, no tuve cuidado al momento de cubrir la cartulina con la plastilina, se ve hasta feo. ¿Por qué lo hice así? Porque voy a usar un rodillo para aplastarla.
Aquí un truco. La plastilina es aceitosa, así que si la rociamos con un poco de agua, la plastilina no se quedará pegada al rodillo cuando la estemos aplastando. De esta manera, lograremos estirar toda la plastilina hasta cubrir toda la cartulina.
 |  |
|---|
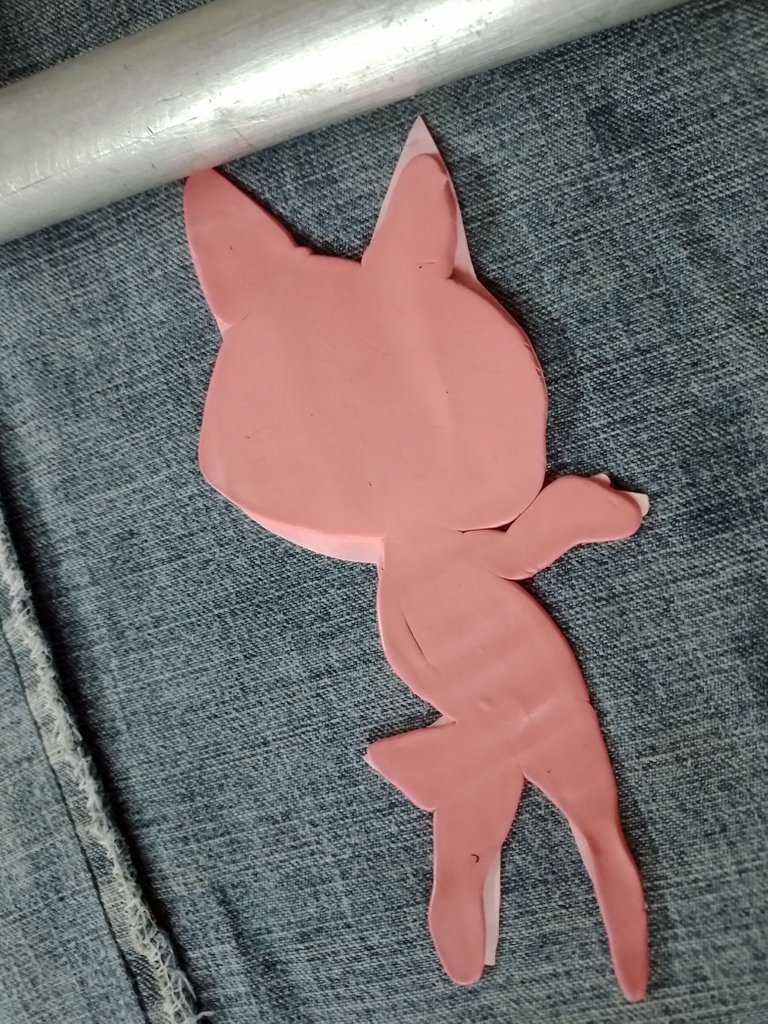
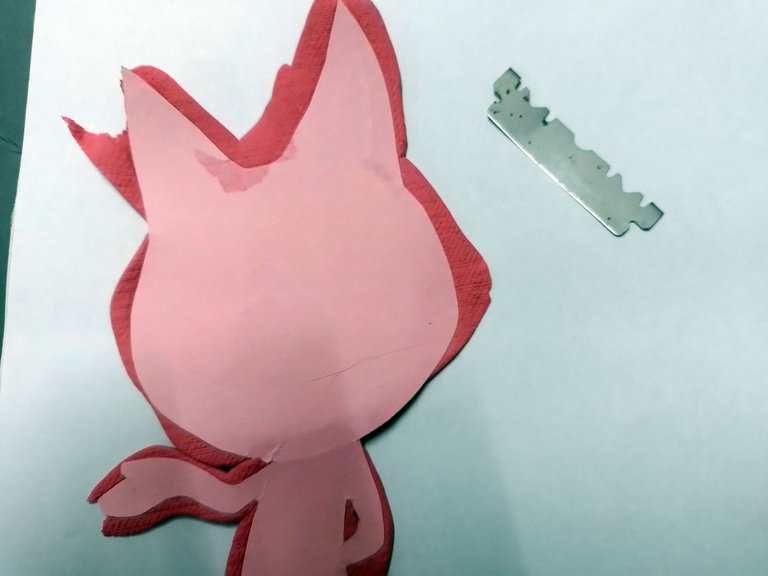
To remove the edges with excess of plasticine you can use a scissors or a fine needle to cut it, either way works. In my case I used a blade.
The important thing in this case, is to turn the figurine over and follow the pattern marked by the cardboard until all the excess of plasticine is removed.
Para retirar los bordes con exceso de plastilina se puede usar una tijera o una aguja fina para cortarla, cualquiera de las dos cosas sirve. En mi caso yo usé una hojilla.
Lo importante en este caso, es voltear la figurita y seguir el patrón marcado por la cartulina hasta retirar todo el exceso de plastilina.
 |  |
|---|
Once this is done, the figurine will look like this:
Una vez hecho esto, la figurita quedará de la siguiente manera:
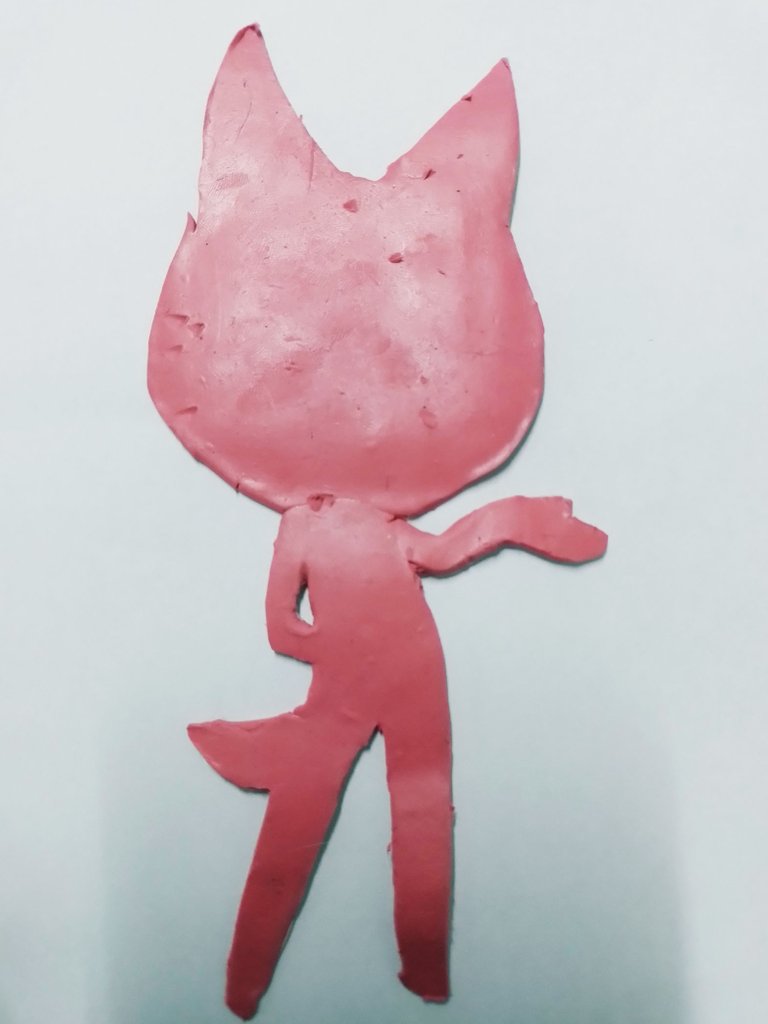
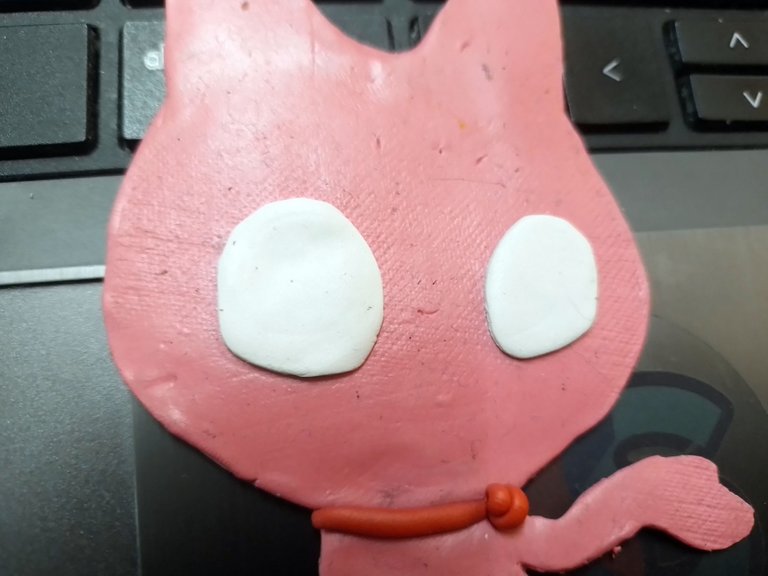
It doesn't look good, but it wasn't finished yet. To make it start to take shape I placed the eyes and a scarf that the character wears.
For the eyes I simply used two spheres of white plasticine, flattened it and put it in place.
No se ve bien, pero aún no había terminado. Para que comience a tomar forma le coloqué los ojos y una pañoleta que usa el personaje.
Para los ojos simplemente usé dos esferas de plastilina blanca, la aplasté y la coloqué en su lugar.
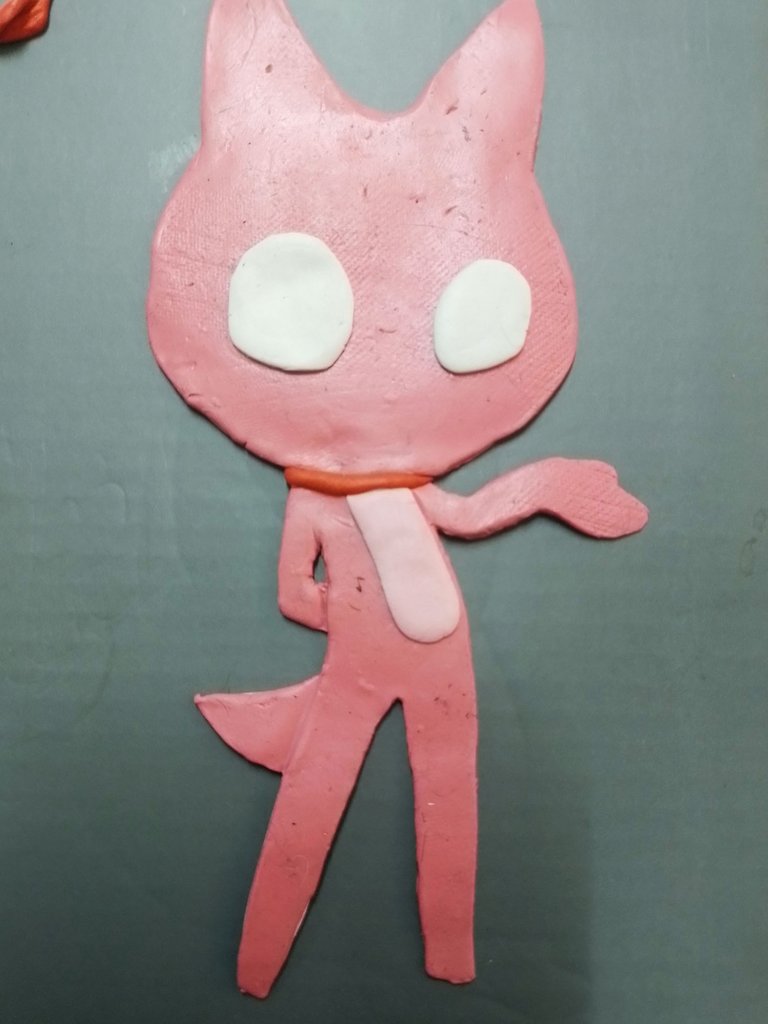
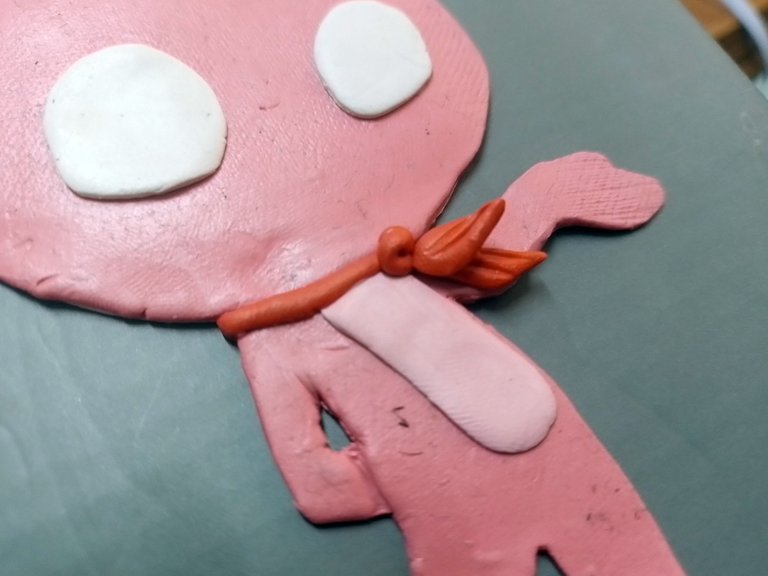
For the chest area, I used a lighter pink. With this I would make that part, the whole front area of the torso, which is a sort of strip that goes from the neck to the belly.
I also placed the scarf, which I made with a strip of red plasticine, which I molded until I achieved the desired result.
Para la parte del pecho, usé un rosado mas claro. Con este haría esa parte, toda el área frontal del torso, que es una suerte de franja que va desde el cuello hasta la panza.
También le coloqué la pañoleta, esta la hice con una tira de plastilina roja, la cual moldeé hasta lograr el resultado deseado.
 |  |
|---|
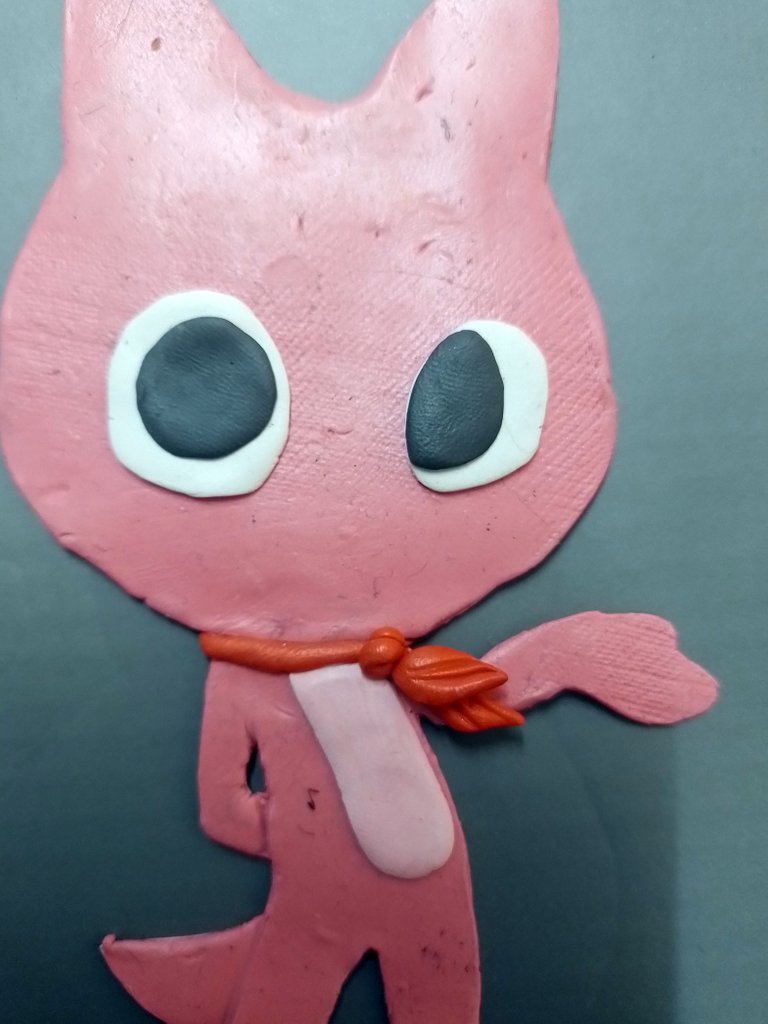
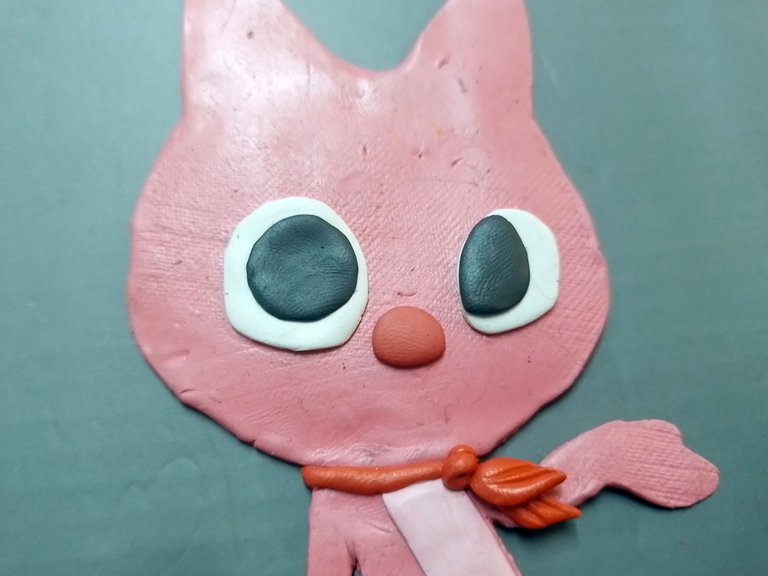
After what was explained above, I used the black plasticine for what would be the pupils of the eyes. You have to try to give a proper shape to the position of the eyes, so they don't look bad.
For the nose I used a small sphere of red plasticine, mixed with pink plasticine, which I placed in the lower part of the eyes, in the middle of them.
Después de lo explicado anteriormente, usé la plastilina negra para lo que serían las pupilas de los ojos. Hay que tratar de darle una forma adecuada a la posición de los ojos, para que no se vean mal.
Para la nariz usé una pequeña esfera de plastilina roja, mezclada con plastilina rosa, la cual coloqué en la parte baja de los ojos, en medio de estos.
 |  |
|---|
Finally I made the mouth and a couple of glitter dots on the eyes and nose. In addition to this, I placed a couple of lines of pink clay above the eyes, to create a sort of relief to create depth in this area.
On the other hand, on the ears I also removed some plasticine to make the lines you see in that area of the ears, so that it didn't look like a flat drawing, but something a little three-dimensional.
Finalmente le hice la boca y un par de puntitos de brillo en los ojos y la nariz. Además de esto, coloqué un par de líneas de plastilina rosa encima de los ojos, para crear una suerte de relieve para crear profundidad en esta área.
Por otra parte, en las orejas también retiré un poco de plastilina para hacer las líneas que ven en esa área de las orejas, para que no pareciera un dibujo plano, sino algo un poco tridimensional.

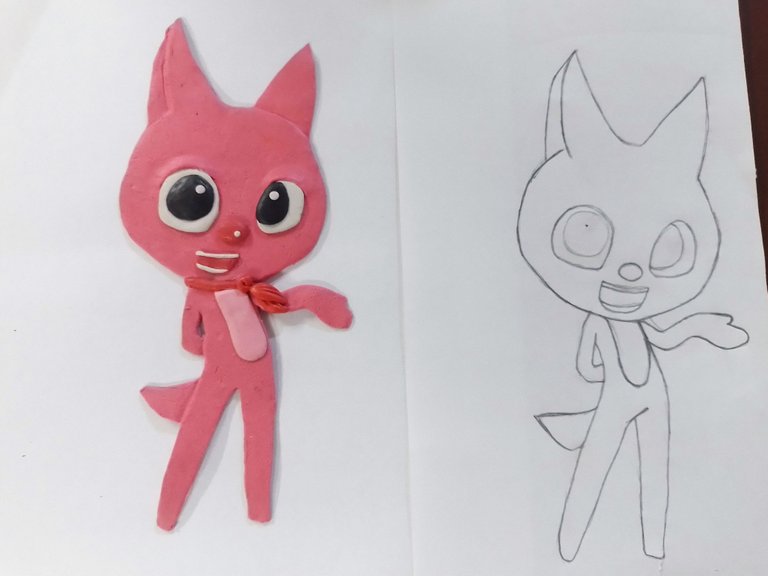
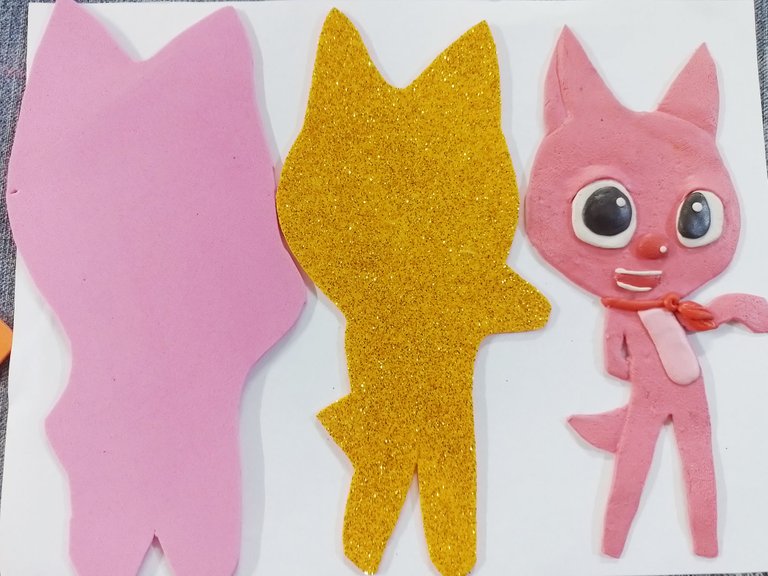
Below you can see a comparison between the plasticine figurine and the drawing:
A continuación pueden ver una comparativa entre la figurita de plastilina y el dibujo:
Well, after making the plasticine figurine, I prepared a foami support, or eva rubber, on which I would glue what I had already made. I chose the gold-colored foami and another one in pink, similar to the body of the figurine.
Bien, después de hacer la figurita de plastilina, preparé un soporte de foami, o goma eva, sobre el cual pegaría lo que ya había hecho. Elegí el foami de color dorado y otro de color rosa, similar al cuerpo de la figurita.
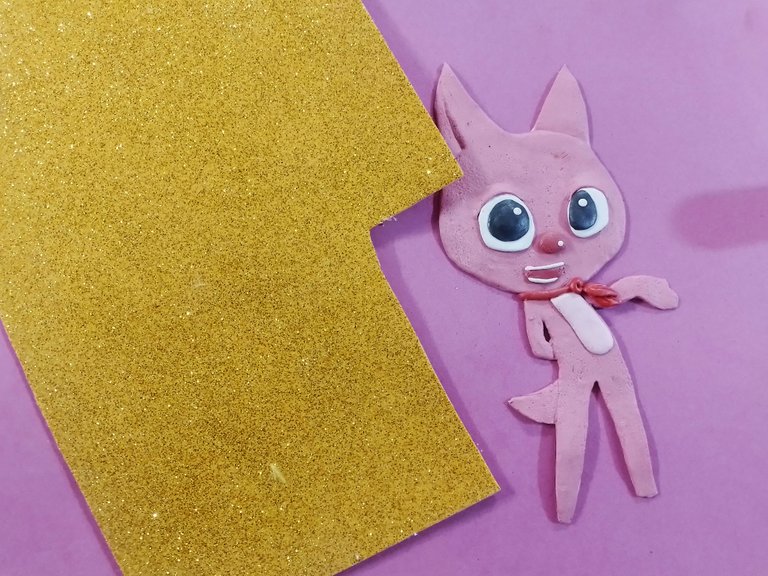
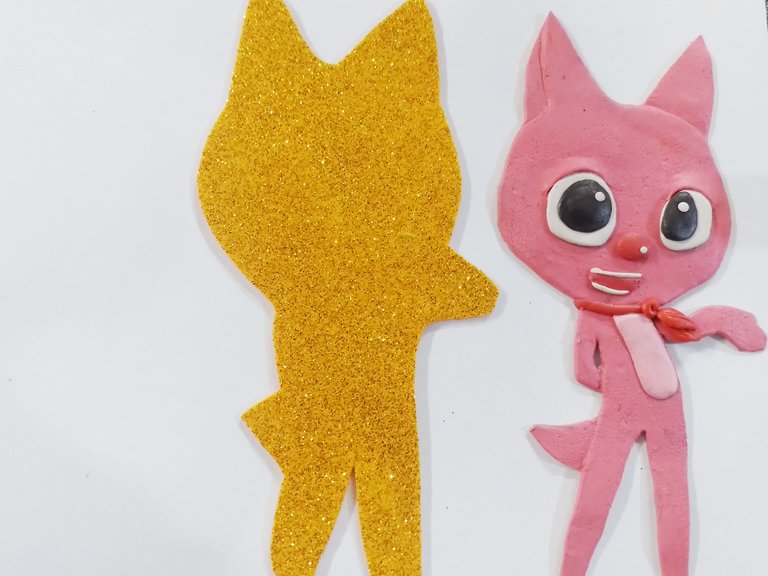
To cut it I repeated the process for cutting the cardboard, with the difference that for this one I left a bigger margin in the cut so that the foami could be seen around the body of the plasticine figurine.
First I cut the gold foami and then the pink one.
Para cortarlo repetí el proceso para cortar la cartulina, con la diferencia que para este dejé un mayor margen en el recorte para que el foami se viese alrededor del cuerpo de la figurita de plastilina.
Primero corté el foami dorado y luego el rosado.
 |  |
|---|
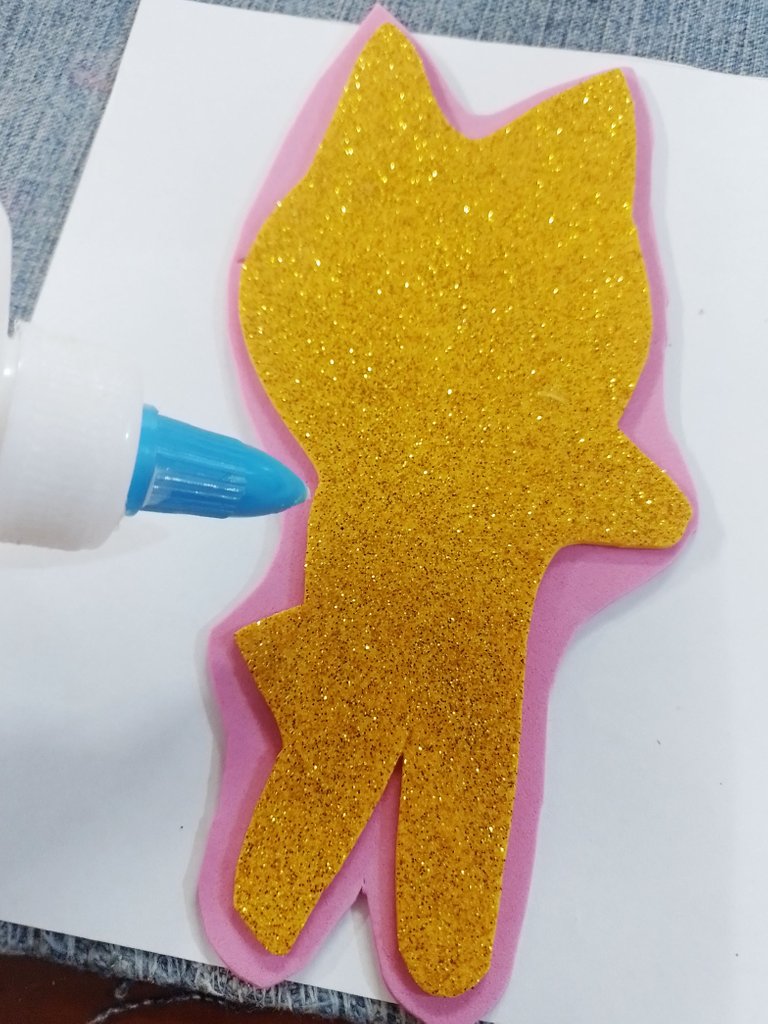
The next step was to simply put everything in its place and glue it. I thought about using white glue, the old school glue, but then I decided to use hot silicone. Silicone is the best option for this kind of materials.
Lo siguiente fue simplemente colocar cada cosa en su lugar y pegarlo. Pensé en usar pega blanca, la escolar de toda la vida, pero luego me decidí por silicón caliente. El silicón s la mejor opción para este tipo de materiales.
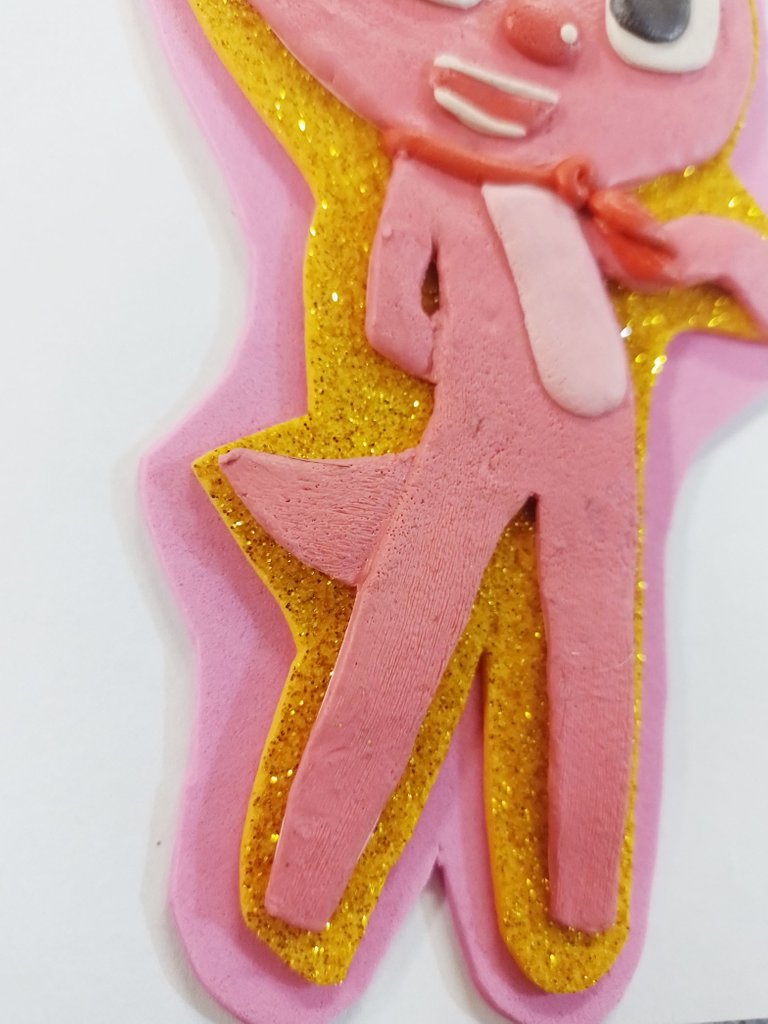
Finally, I used a small brush to make tiny lines along the body of the figurine, to give it that fur-like texture, as I didn't want it to have a completely flat shape.
Finalmente, usé un pequeño pincel para hacer diminutas líneas a lo largo del cuerpo de la figurita, para darle esa textura similar a la de pelaje, pues no quería que tuviera una forma completamente plana.
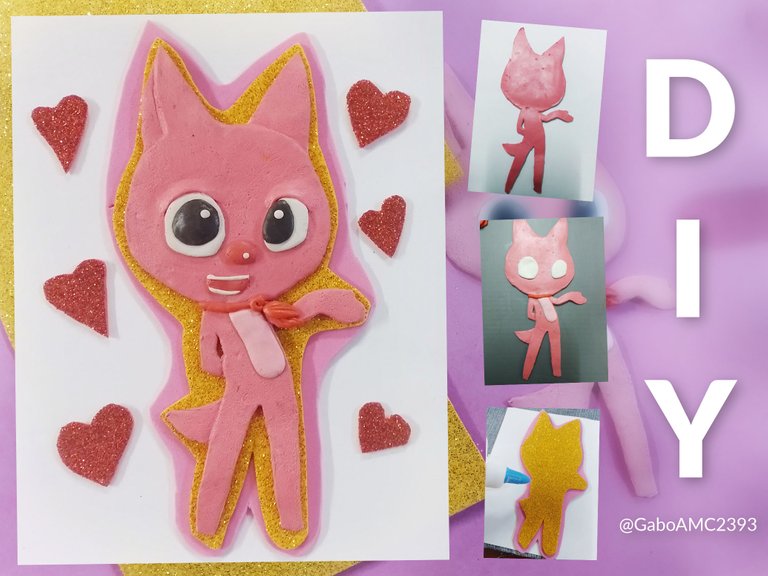
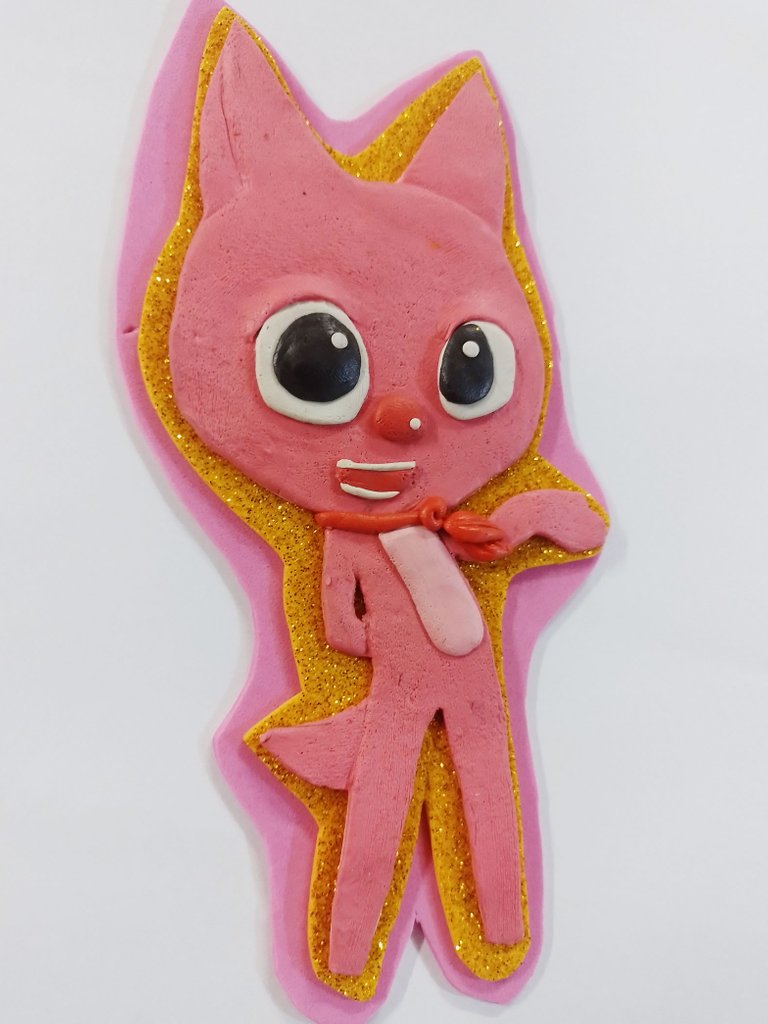
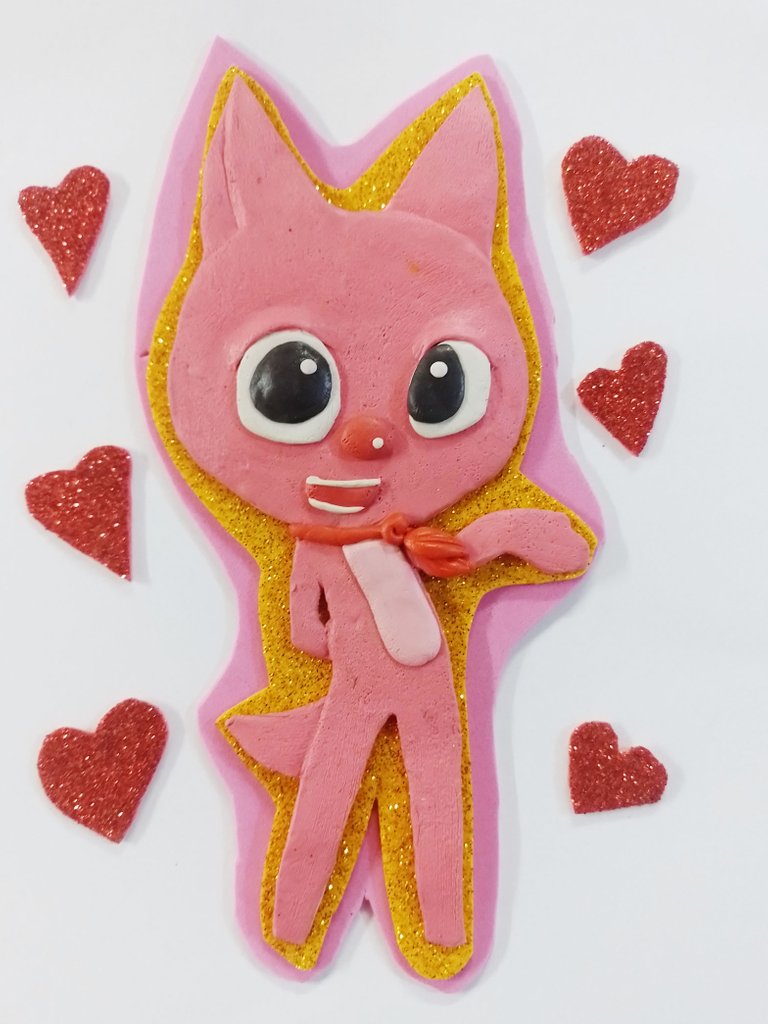
This is how the figurine was finished, with its gold and pink foami ornament. Below is a picture of the final result:
De esta manera quedó terminada la figurita, con su adorno en foami de color dorado y rosado. A continuación una fotografía del resultado final:
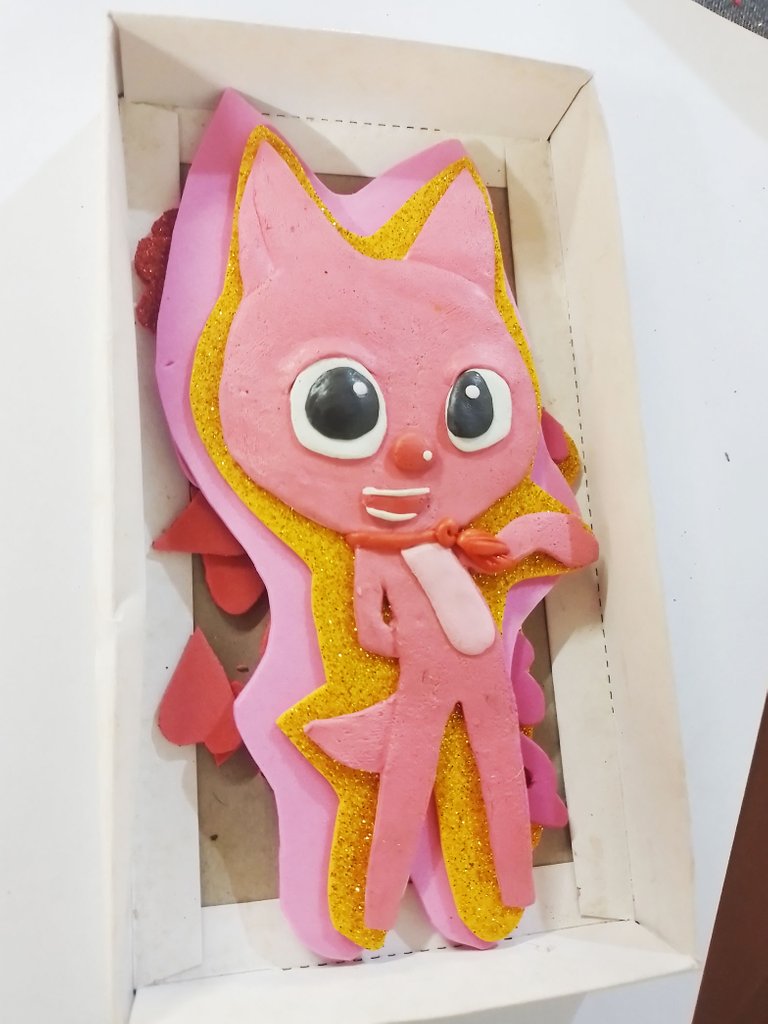
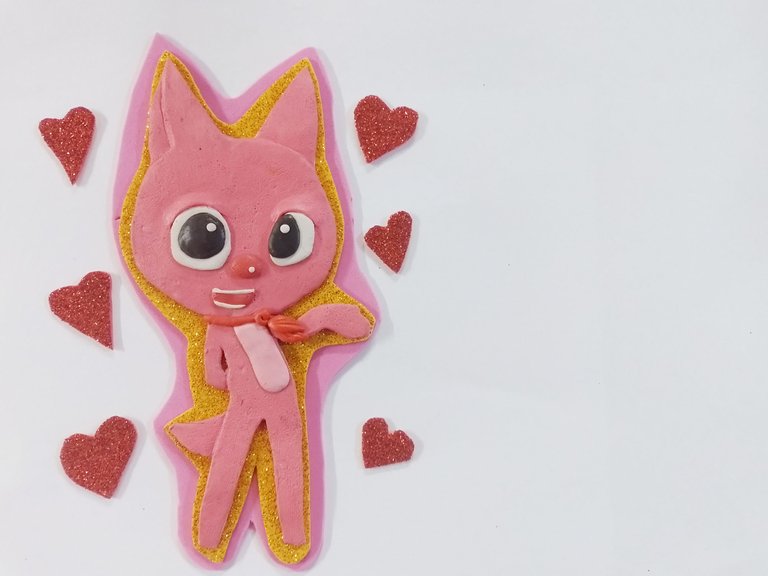
As an additional detail, since I thought they would look good, I cut out a bunch of little red foami hearts, the kind with glitter.
All these hearts, along with the craft itself, I kept them in a little box, which I gave to my friend to take home.
Como detalle adicional, pues pensé que quedarían bien, recorté un montón de corazoncitos de foami rojo, de ese que tiene brillo.
Todos estos corazones, junto a la propia manualidad, los guardé en una pequeña cajita, la cual le entregué a mi amiga para que se la llevase a su casa.
 |  |
|---|
Here are a couple more pictures of the final result, this time with the hearts:
Aquí un par de fotografías más del resultado final, esta vez con los corazones:
Well friends, this has been all. I haven't made crafts for a long time, but those who know me know that I love to do these things, especially if they are crafts made with plasticine.
If this is the first time you visit one of my publications, I invite you to leave an opinion about my work, you can do it below in the comments and I as always will be happy to read you.
I really appreciate everyone's visits and comments. With nothing more to add, I'll say goodbye then...
See you next time!
Bien amigos, esto ha sido todo. Llevaba tiempo sin hacer manualidades, pero los que me conocen saben que me encanta hacer estas cosas, sobre todo si se trata de manualidades elaboradas con plastilina.
Si es la primera vez que visitas una de mis publicaciones, te invito a dejar una opinión sobre mi trabajo, puedes hacerlo abajo en los comentarios y yo como siempre estaré encantado de leerte.
Agradezco mucho las visitas y comentarios de todos. Ya sin más que agregar, me despido entonces...
¡Hasta la próxima!

This post has been manually curated by @steemflow from Indiaunited community. Join us on our Discord Server.
Do you know that you can earn a passive income by delegating to @indiaunited. We share more than 100 % of the curation rewards with the delegators in the form of IUC tokens. HP delegators and IUC token holders also get upto 20% additional vote weight.
Here are some handy links for delegations: 100HP, 250HP, 500HP, 1000HP.
100% of the rewards from this comment goes to the curator for their manual curation efforts. Please encourage the curator @steemflow by upvoting this comment and support the community by voting the posts made by @indiaunited.
Hi! Thanks for the suppor. Gladd you like my post ✌️😁
uy, bonito esto... jjjj 😍😘 qué ternura. Espero que estés usando mucho tu nuevo juguetico, voy a ver el post anterior.
Holaaaa! Que bueno que le gustó. Muchas gracias por pasar a comentar. Y sí, he estado haciendo varios dibujos por allí jejeje
Thank you for sharing this post in the DIYHUB Community!
Your content got selected by our fellow curator priyanarc & you just received a little thank you upvote from us for your great work! Your post will be featured in one of our recurring compilations which are aiming to offer you a stage to widen your audience within the DIY scene of Hive. Stay creative & HIVE ON!
Please vote for our hive witness <3
Thank you for the support. Glad you like my post!
😍 Ainssssss ñiomio, this is beautiful, I loved how the figure turned out, it is full of so many details and delicacy. You always surprise us with every single thing you do. Congratulations my friend @gaboamc2393 💕
😍 Ainssss ñiomio, esto es una hermosura, me encantó como quedó la figura está llena de tantos detalles y delicadeza. Siempre nos sorprendes con cada cosa que haces. Felicidades amigo @gaboamc2393 💕
!DIY
Dataa que bueno que re gusto. Viste como quedó jejeje quedo chévere el adornito
¡Qué linda figura mi querido @gaboamc2393! La niña, imagino estaría muy feliz con su decoración. Te felicito porque cada vez que haces un post, te destacas. Saludos y cariños.
Bueno fue algo sencillo, que quedo bien bonito a pesar de que lo hice rapidito pues fue algo de emergencia jejeje
Saludos!
Excelente trabajo!
Todo un proceso, pero estoy segura que la niña quedo feliz!
Bendiciones!
Ah la niña quedó encantada con su adorno. Lo tiene en una mesita
The rewards earned on this comment will go directly to the people( @gaboamc2393 ) sharing the post on Twitter as long as they are registered with @poshtoken. Sign up at https://hiveposh.com.
Te quedó hermosa la figura, la niña de tu amigo debe estar muy feliz con su regalo.
Bendiciones!
Holis, gracias por el comentario. Me alegra que te gustara. Bendiciones para ti también.
Muy lindo @gaboamc2393 me encanta la personalidad que tienen tus personajes, es increíble que transmiten tanto.
Felicitaciones por ese gran don
Gracias gracias, estimada. Se hace lo que se puede, porque la idea no es que quede una figurita plana que no trasmita nada, la idea es que sí parezca el personaje jeje
The rewards earned on this comment will go directly to the people sharing the post on Twitter as long as they are registered with @poshtoken. Sign up at https://hiveposh.com.
Greetings dear friend, how have you been? Today I have learned some techniques for the use of plasticine I have not really worked with this material but it looks very pretty your work shows that this girl will be happy with the results I love the pink color . Thank you for sharing your creativity with this beautiful decorative ornament.
Oh well glad to see what you can do with play dough. It's a very soft material and you have to treat it with care, but once you get the hang of it you can make great things.
Thanks for stopping by to comment.