This is will be my first Illustrator tutorial on Steemit, so any and all feedback would be appreciated. Let's dive in shall we.... Oh! just a forewarning all quick keys are for the Mac. Sorry PC users.
Step #1
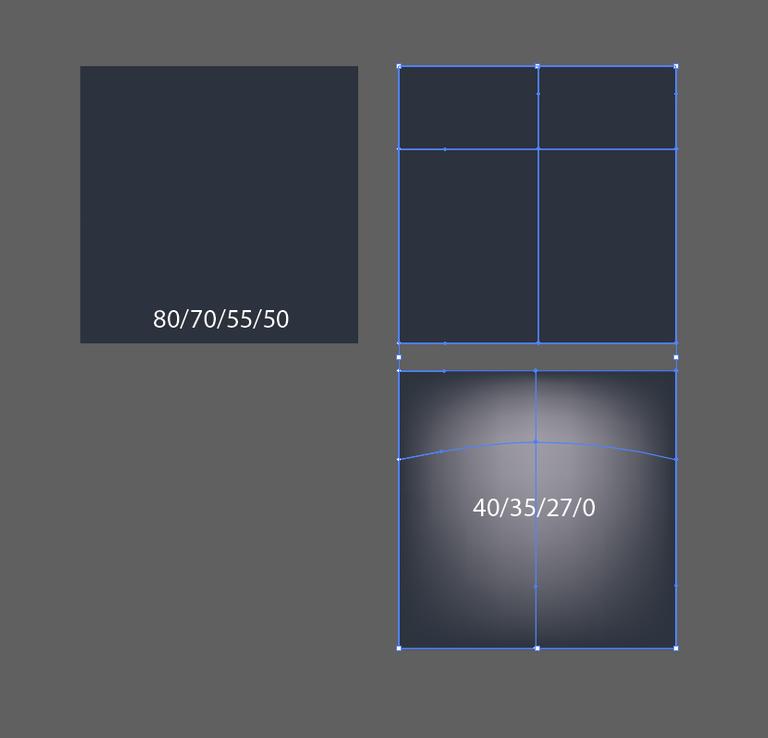
Create a rectangle and give it a fill with the color build shown below. (Note: All color builds will be in C/M/Y/K format). With the Gradient Mesh Tool(u) place a single point just above the mid-section of your rectangle as shown. Give this row a slight curvature and color it with the build shown.
Step #2
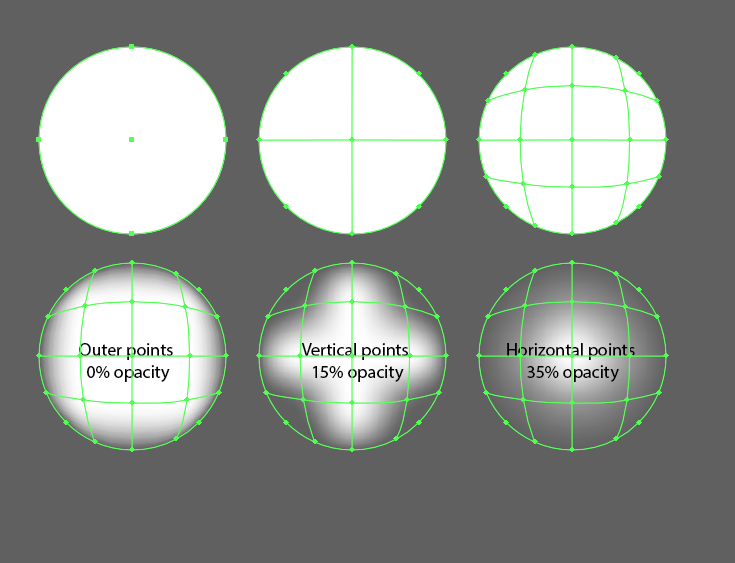
Draw a circle and apply a 3x3(3 rows, 3 columns) gradient mesh to it. Apply a 0% opacity to the outside points; a 15% to the vertical points and a 35% opacity to the horizontal points. Leave the center point 100% white(Note: Feel free to make it whatever color you want; It's your lightning anyways).
Place this circle on the background as shown. This element will be used to hide the origin points of our lightning bolts.

Step #3
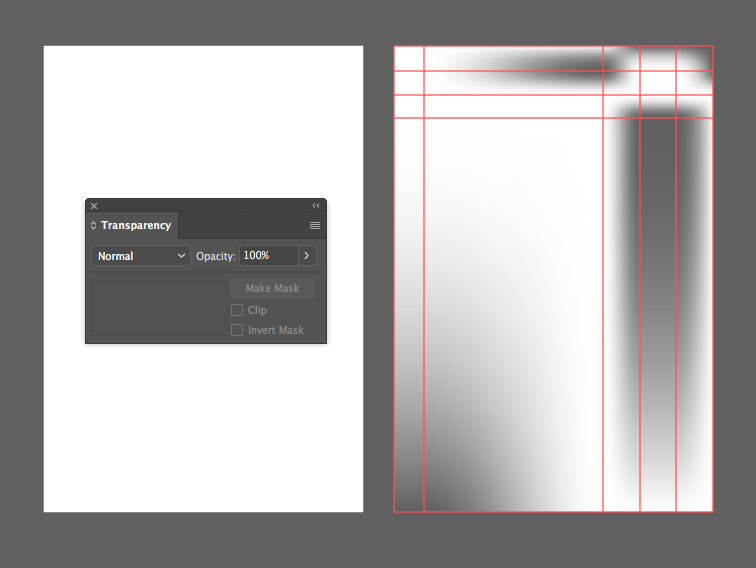
Before we start making the bolts lets create the the gradient mesh that we will use to fill the lighting with. Make a rectangle with a gradient mesh roughly like the one shown. There really is no right or wrong way of doing this part as long as it isn't completely transparent.
Step #4
With the pen tool(p) create a an element that roughly resembles a lightning bolt. Make it roughly 25pt thick and give it a Width Profile 1(Pssst. thats the oval looking thing in the Stroke settings).
now lets add an effect to give more of a random strike of lightning feel. Go to Effects>>>Distort&Transform>>>Roughen. Feel free to mess with the settings yourself to get a feel for it. I have the settings I used shown below.

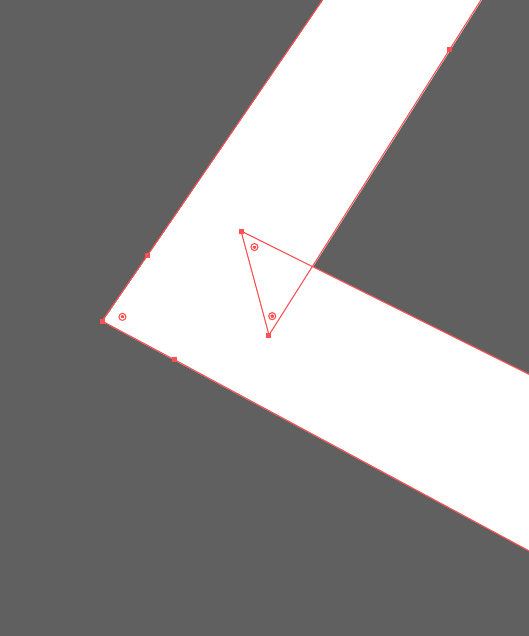
If your bolt gets anything that looks like the below image go to pathfinder and unite and it will take care of it. We won't want those pesky triangles getting in the way of our next step.
Step #5
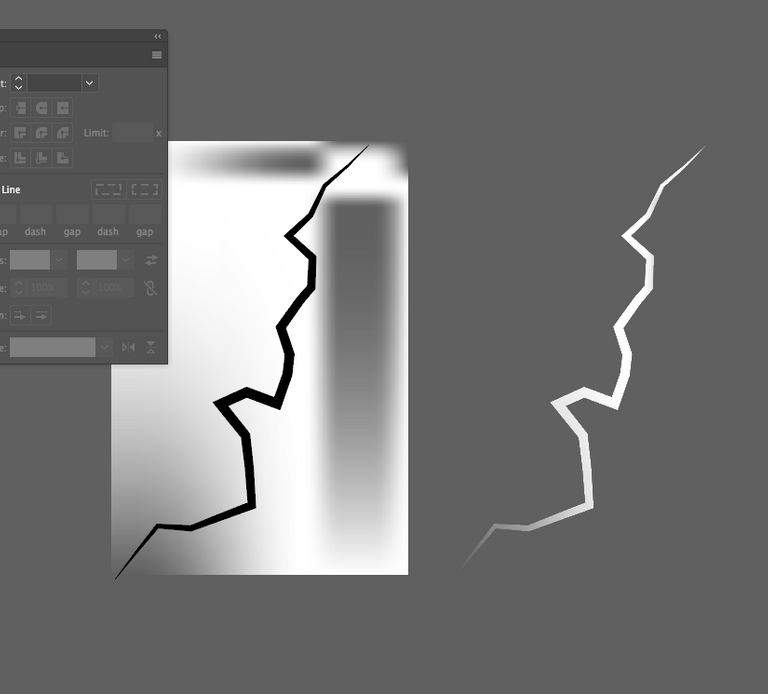
Take our newly created bolt and place it over our rectangle gradient mesh. Try and place it where the gradient transitions underneath our lightning bolt. We will be re-using this rectangle and lighting bolt so make sure you make a duplicate of both before going any further. (Note: Here is where I will create a new layer called "delete me". I will keep any elements that I think I can re-use in the future on this layer).
Use the lighting bolt as a clipping mask by placing it above the rectangle mesh and while selecting both elements press cmd-7.
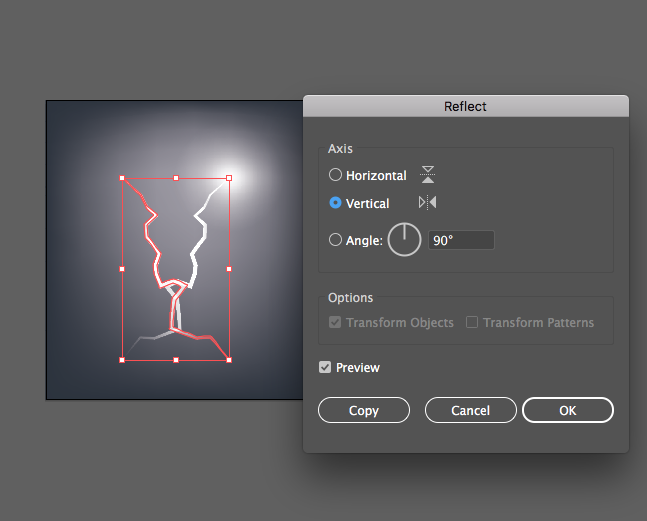
Place this lighting bolt on our art board using the circle mesh we already created as a disguise for the bolts origin point. Feel free to repeat this process to create another secondary bolt or you can just reflect this one.
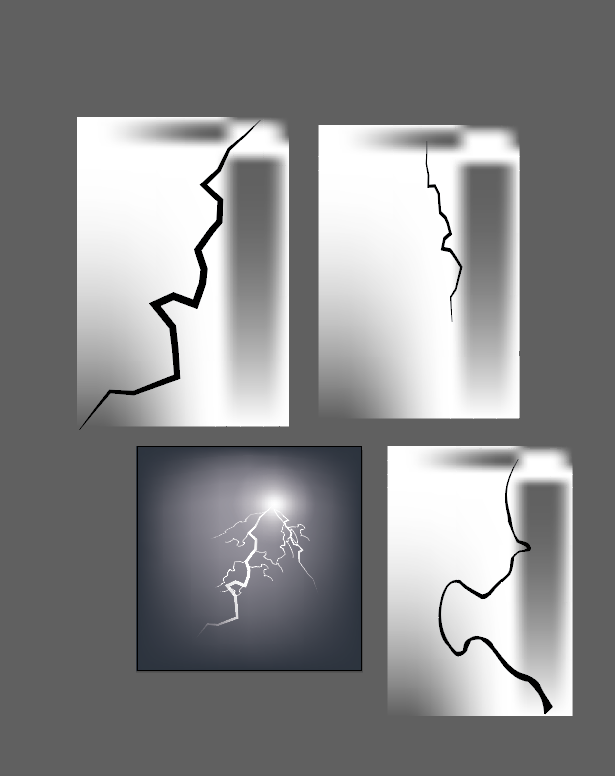
Use the transform effect to create different bolts to add detail elements to our piece. It is a good idea to make at least 4-5 different variations to break up the design.
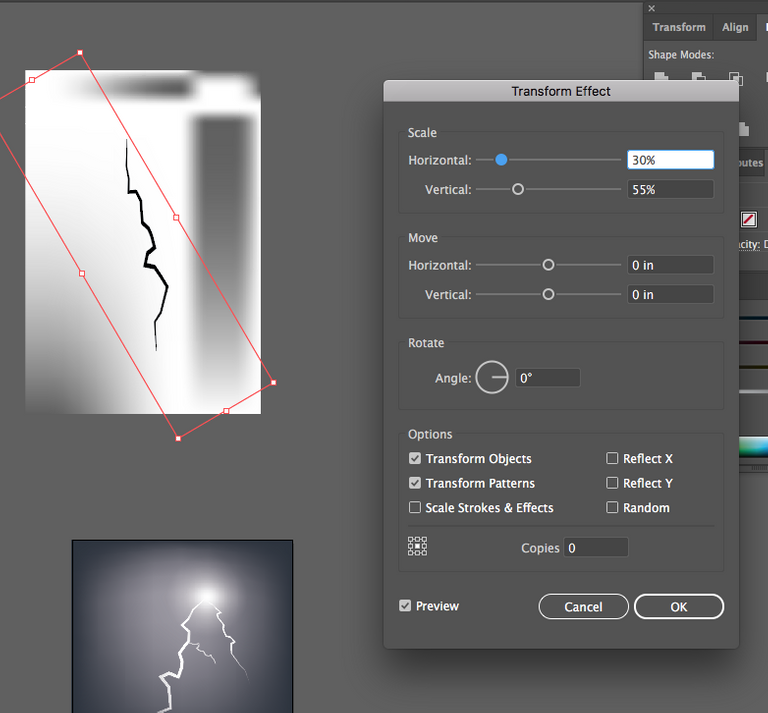
Don't be afraid to experiment with different tools and effects when creating these variations.
Step #6
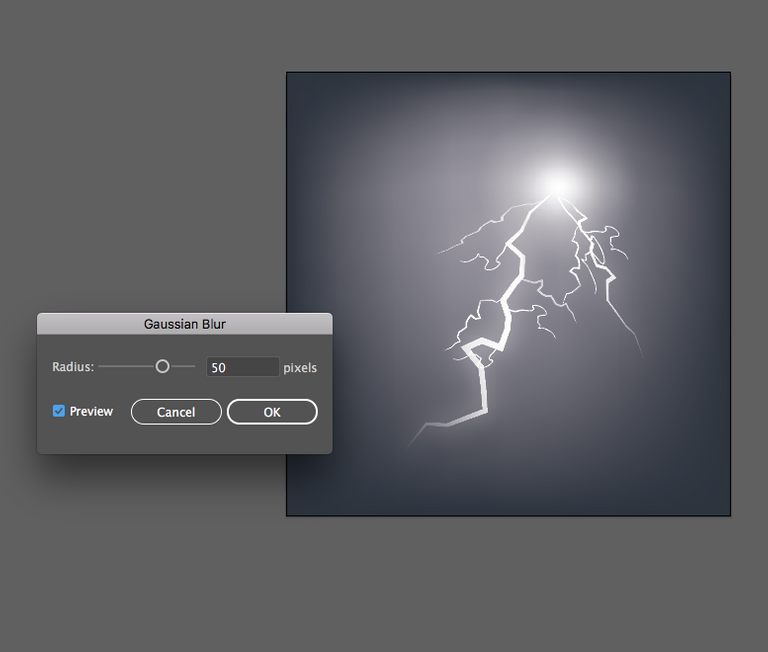
After you are satisfied with the placement and detail of your lightning it is time to add the glow. Select the clipping paths of the main bolts and a few of the detail bolts. It does not need to be every one of them. Copy them up to a new layer named "Glow".
Go to Effect>>>Blur>>>Gaussian Blur. I set mine to 50 pixels you can always change it to your own personal taste if you wish. I myself like to copy(cmd-c) paste in front(cmd-f) to add more glow if need be.
Step #7
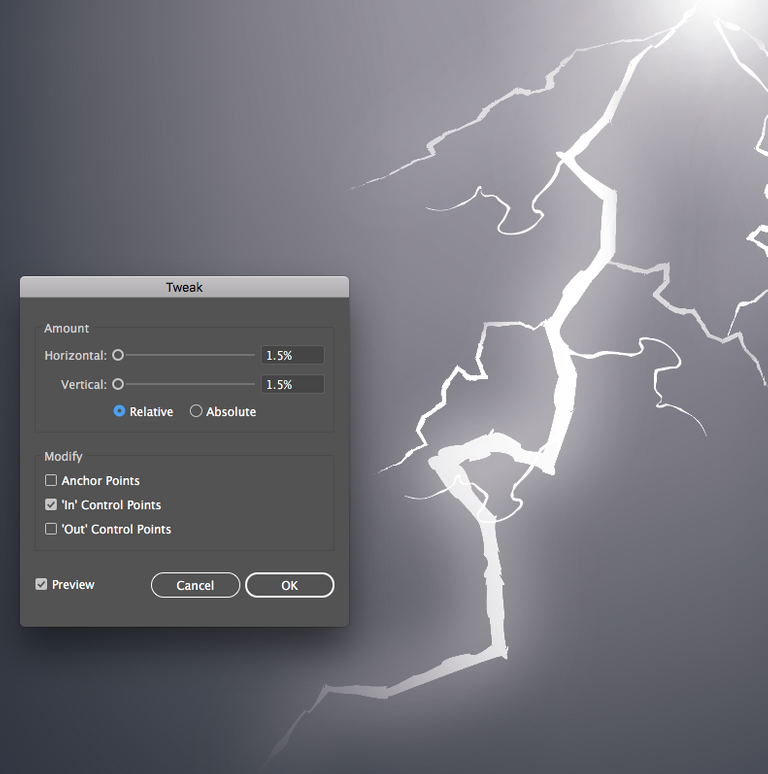
Add some of your own effects to get the feel your looking for. I used the Tweak effect that can be found in Effect>>>Distort&Transform>>>tweak. I believe it gives it a more static charge feel to the lighting that it was missing.
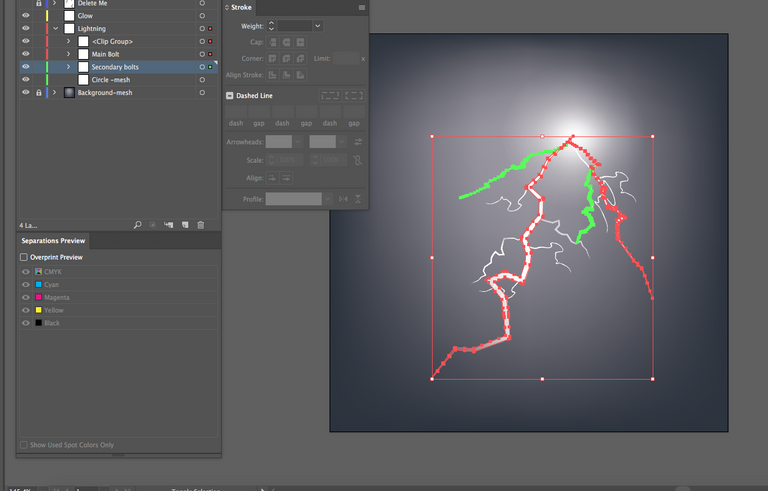
Layers! Always Use Layers!
Here is a look at how I have structured my layers panel. Treat it as if it is your files roadmap and label it as such.

The finished piece
There you have it! Your own vector lighting. Hope you had success in creating your own. Feel free to ask any questions about the tools I used or if you need any clarifications on the steps; and as always if you enjoyed the post give me an up-vote and a follow for more tutorials.

Very detailed and very straight to the point. I love that you have a single and clear focus in this tutorial. That is what a tutorial needs to be. You give us tools to use that let us create our own artwork instead of just leading us to the finished product and overwhelming us with complexity and detail.
Creating art is a step by step process.
Great job.
Thanks! I really appreciate the feedback. I am pretty new to the Steemit community and still trying to find my niche.