In my previous post, I have discussed how to create an environment which can be used to start coding. In this post, I am going to discuss how to setup a conda environment in PyCharm. I am using PyCharm COMMUNITY 2018.1 version. Let's start.
Create a conda environment. For that, you can refer to this documentation. The command I used to create a new environment is mentioned below.
conda create --name my_test_env python=3.6Open PyCharm and create the project that you need to continue with your coding. For that you can go to File -> New Project..., in my case I have created the project called testProject.
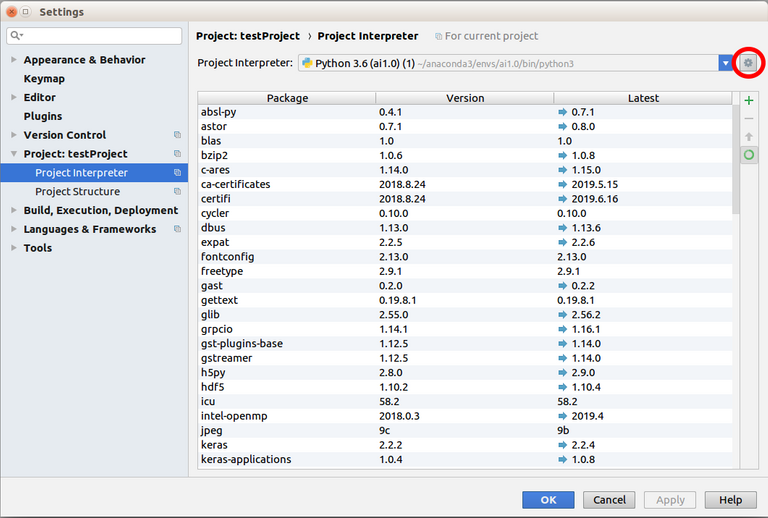
Now we need to set the created conda environment(my_test_env) to the project(testProject). For that, you should navigate to File -> Settings and click on it. Then you will be able to see the Settings window as follows.

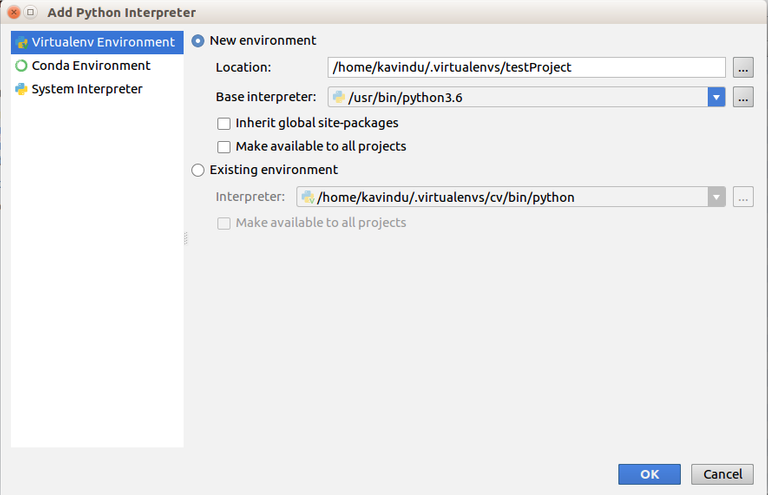
In the Settings window, navigate to Project: testProject -> Project Interpreter and click on the wheel icons and click on the Add.... Now you will be able to see the Add Python Interpreter window.


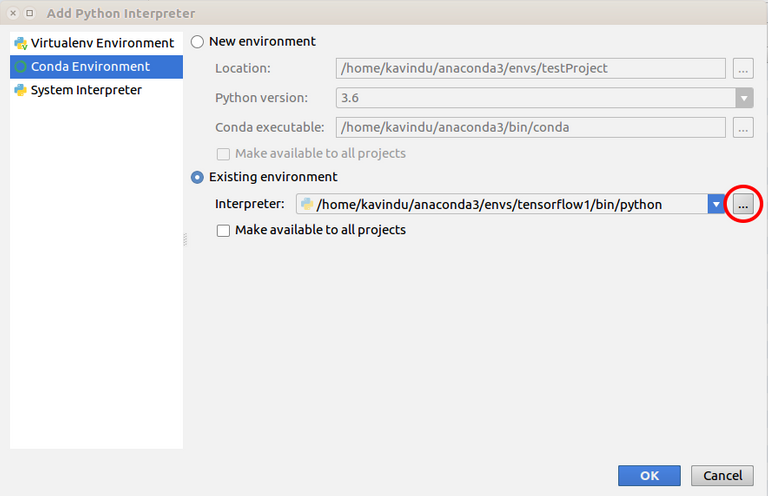
In that window, click on the Conda Environment and select the Existing environment. Now you should select the interpreter you want to run and we are going the select the python interpreter which belongs to our conda environment(my_test_env).

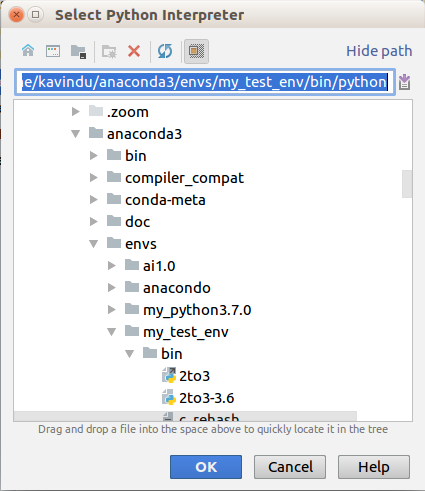
Now click on the icon which has three dots and select the conda environment which is located in /home/user/anaconda3/envs/my_test_env/bin/python. Here my_test_env the test conda environment created by me and you should select your conda environment.

Click on OK button in Add Python Interpreter window. Now you have successfully set the conda environment to your projects
Let's discuss how to install libraries to this conda environment. We have two ways to do this. The first one is that activating the conda environment in command line(using the command conda activate <your_env_name>) and install relevant libraries using conda install command. For example conda install numpy. The second one is that installing libraries using PyCharm. For that navigate to the File -> Settings and open the Settings window. Then navigate to the Project: testProject -> Project Interpreter and click on the plus mark.

Now you can select any package and install it.
Please feel free to raise any concerns/suggestions on this blog post. Let's meet on next post.
Great ! very informative
Thanks ...
Awesome tutorial!
Thanks ...