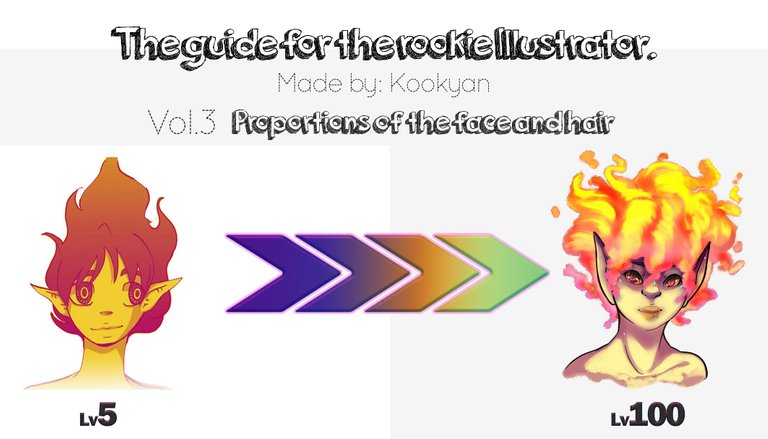
Hello!
Today we will explain how to create a face in its two basic frames, forming eyelids, lips, some common mistakes and much more.

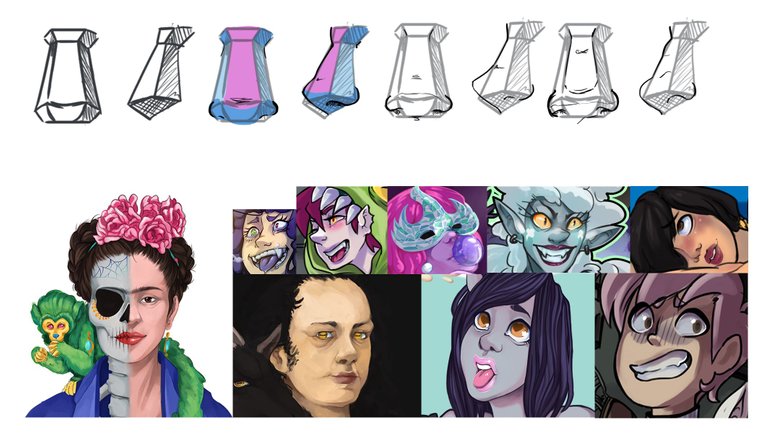
Many mistakes start with the incorrect positioning of the objects that form the skull
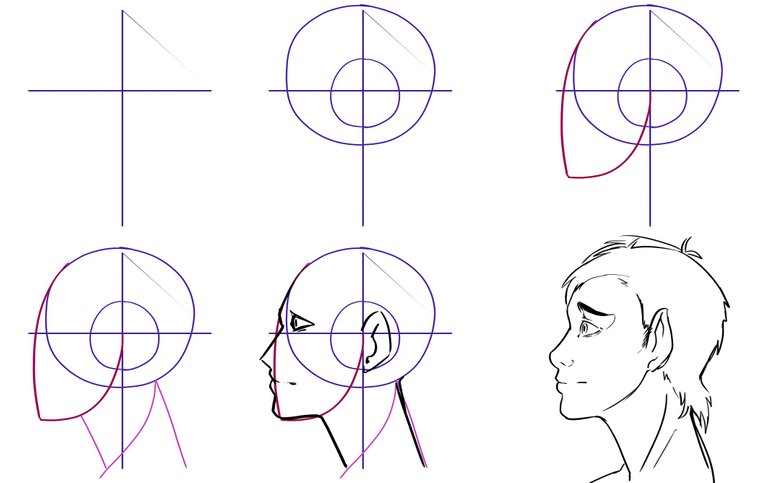
To correctly make a head I will demonstrate the key points of both front and profile.
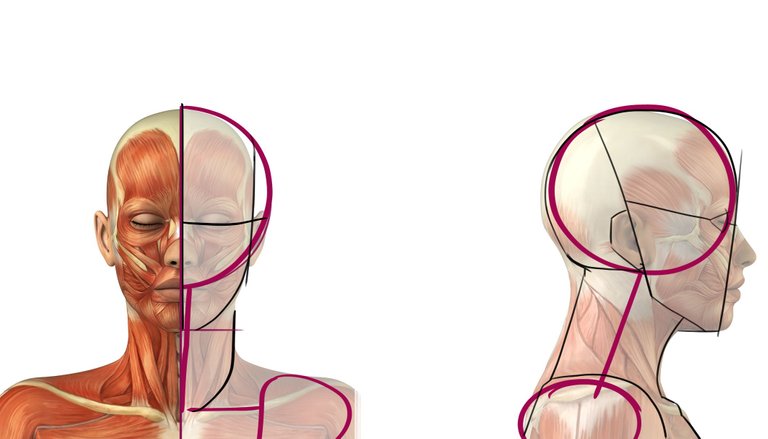
Front.
The first line that we see represents the separation of the cheeks and the eye sockets ,In the next step we visualize the light blue lines that are linked to form the ears, nose and chin.
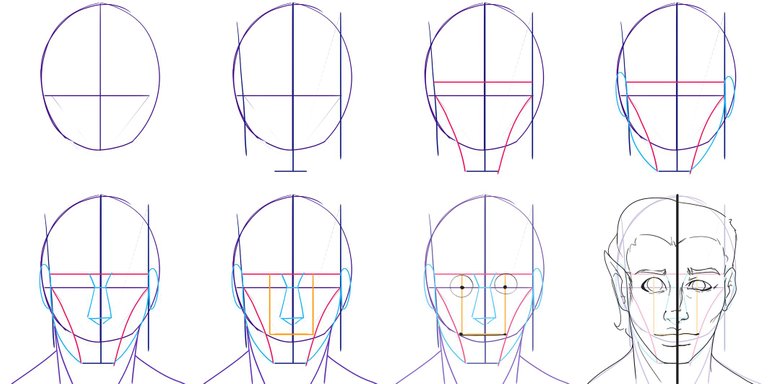
Finally, the yellow line represents the location of the eyelids and the beginning of the lips.
Profile.
At making a profile, we can see the initial shape as a shooting target, the center always forms the base of the ear and the beginning of the chin.

Maybe looking for how to draw eyes you stumbled upon this style of explanation.
Which without any context, even when well explained is not of much help.
But calm, I will explain to you!
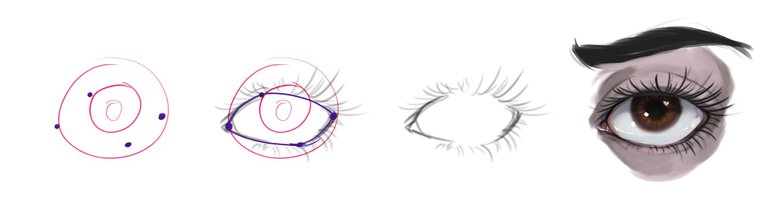
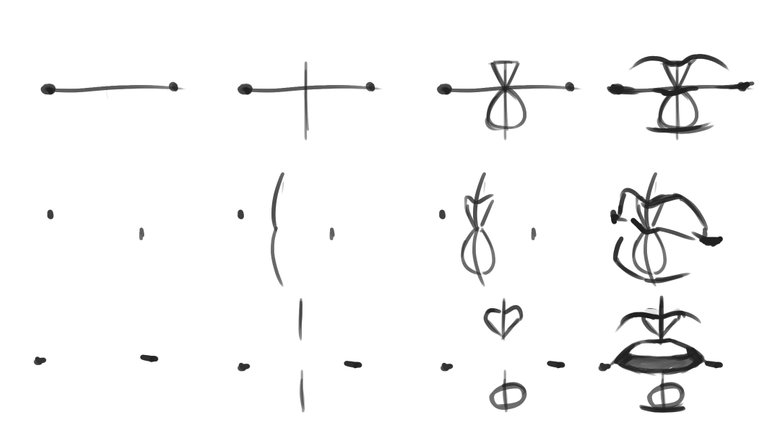
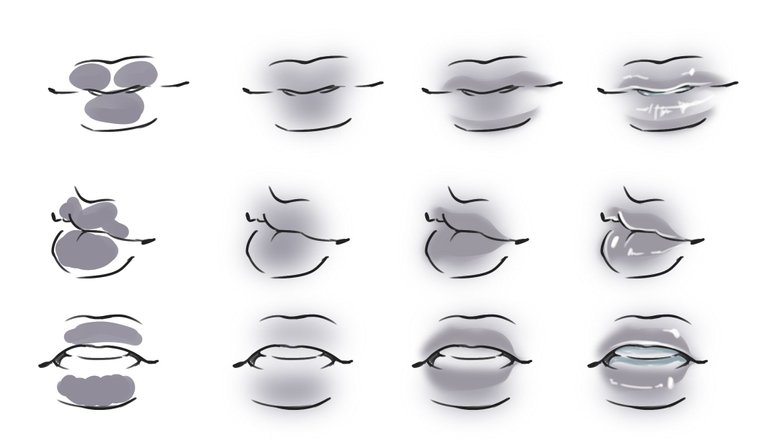
We draw an eye first to learn to visualize an eye without an eyelid, since it is easier to choose the shape of the eye, and visualize the correct position of the iris and pupil (something that people tend to ignore a lot).
To create the eyelid space is divided into four points, two at the ends to define the length of the eye and one up and down, which will mark the weight of the eyelid.
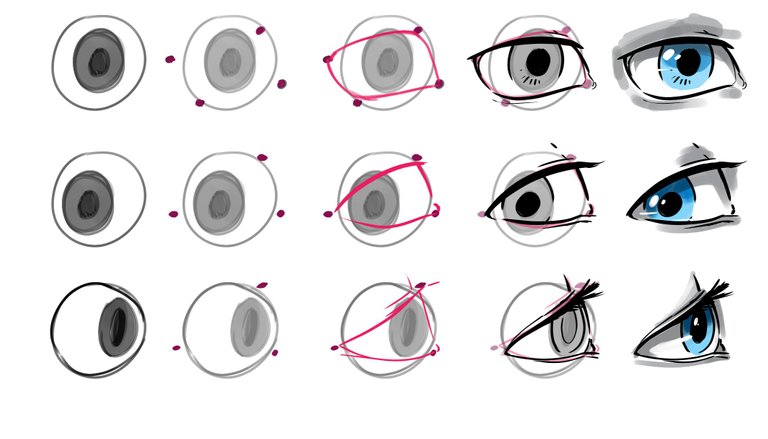
But, when we are going to draw the eye of a very curved angle, we should only make three points, since the angle's own weight will create the lower eyelid. A trick to visualize the position of the eyes is to draw an eye in the center of both since this is the measure of the space between them.
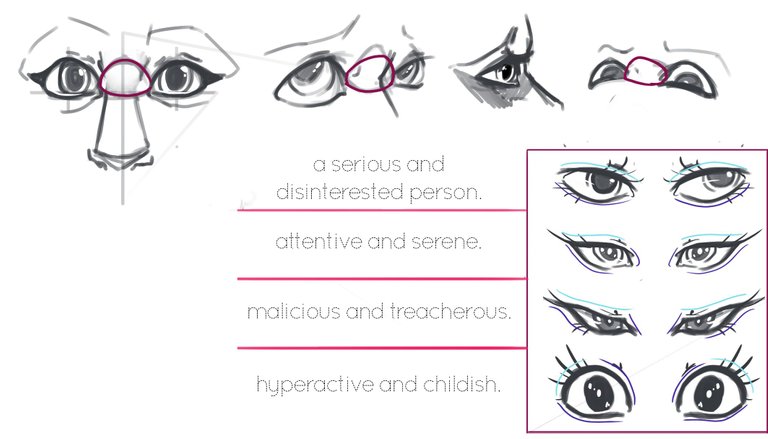
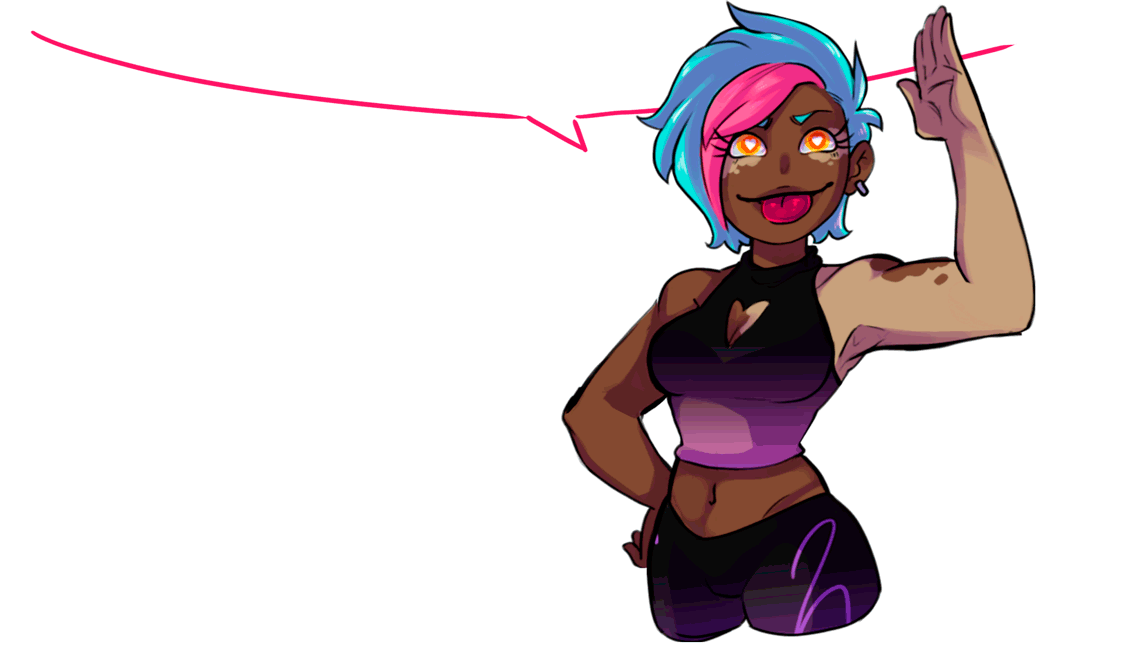
Another very useful TIP when creating characters, is to use an eyelid style to reinforce the main feature of the character.

In the balance of the face the most important factor is to keep the nose and ears with equal or similar angles and sizes, since they are the central elements of the face.
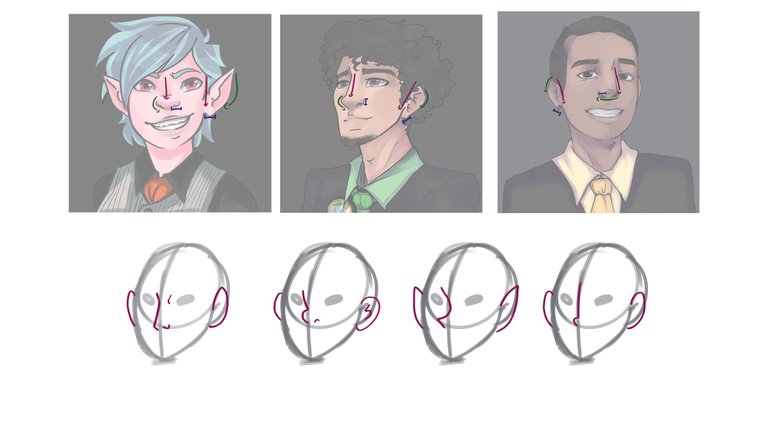
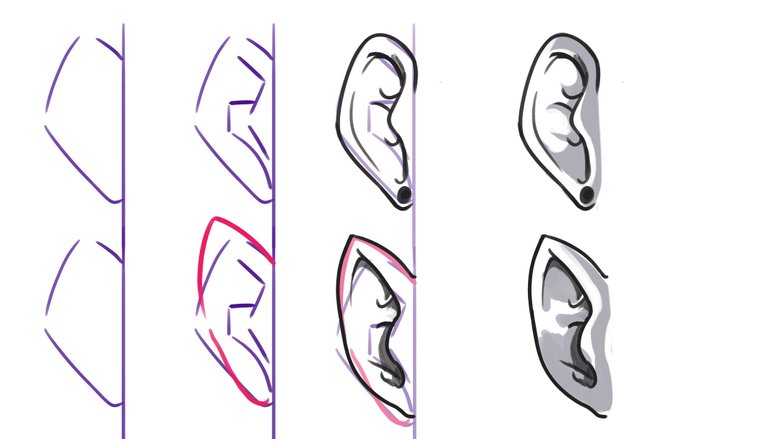
The ear is very simple to draw, its enough to design the outer shape and then use straight lines to match the gaps that lead to the eardrum.
Contrary to the case of the ears, the complicated part of the nose is when we add the depth effect, especially in the lower part.

Then it only remains to do the details of shadow and lighting, which we will explain in a more detailed guide.

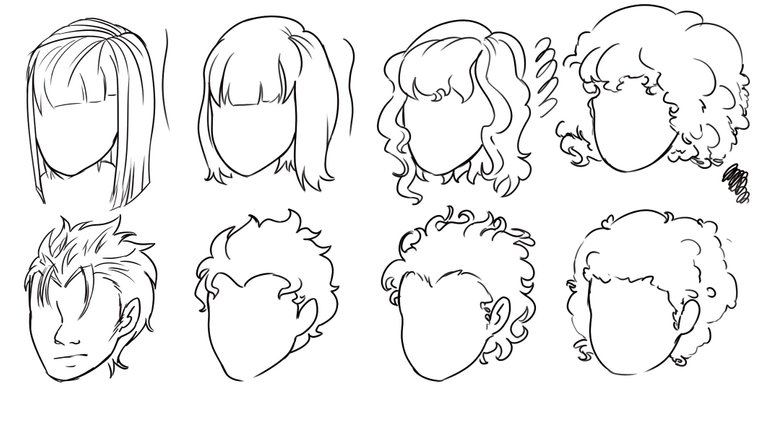
First we must be clear about what we want with the style of the character, since the hair is responsible for reinforcing or weakening facial expressions, and when not having an idea of how gravity affects the hair, we can end up making a tangle without meaning.
Like a wire or cable if its thicker, longer and heavier, that will decide the direction in which it ends.
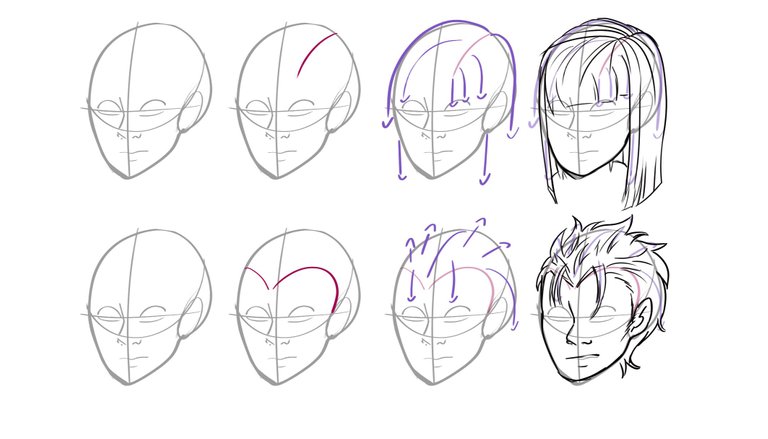
This means that although the hair is short if the strand is very heavy, the weight will take it down, on the contrary, even if the hair is long, if the strand is very thin, it will sponge because of the little effect of gravity.

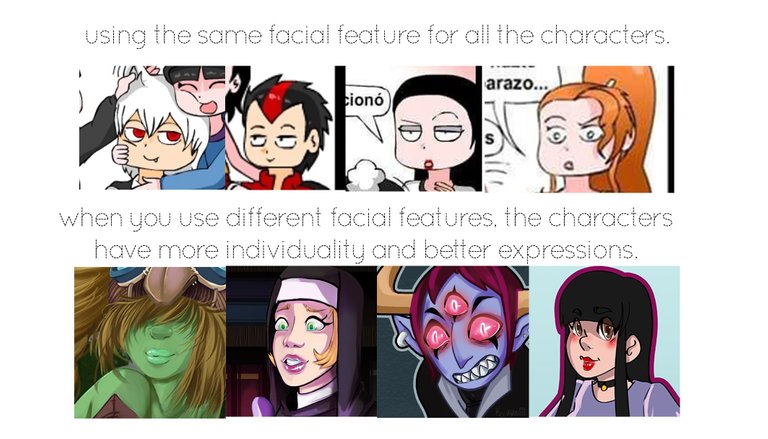
In this last fragment one of the most important topics to be addressed is the "Same Face Syndrome"
It happens commonly because people who draw, usually use the same formula for all their characters, the best example for this is Yamil in his cartoon called
"My imagination and me."
When a character makes an expression or speaks, the elasticity of the jaw is indispensable
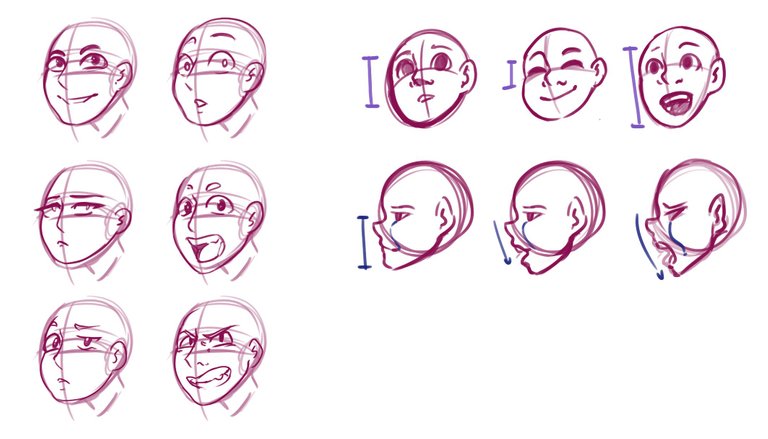
also an important factor to generate more realism in the expression
is the positioning of the eyebrows.
The most important thing to remember is to have fun, this is just a guide to learn faster. We all start by seeing our work as a hobby, and if you lose that feeling, you will most likely end up abandoning the practice.
This is all for now. See you in the next post!
I missed another one!! this is a really great explanation and I think I will learn from it.. I hope you decide to do the #developacharacter contest because I need something that hasn't been done in another language! thanks so much for this tutorial I think that I can learn from it!!
I'm glad that my guide works for you, but I do not know what contest you're talking about and nothing comes out in #, you could explain me better please.
I wrote it wrong its either #designacharacter or #designacharactercontest
Congratulations @kookyan! You have completed some achievement on Steemit and have been rewarded with new badge(s) :
Click on any badge to view your own Board of Honor on SteemitBoard.
For more information about SteemitBoard, click here
If you no longer want to receive notifications, reply to this comment with the word
STOPkooky! esta vaina tienen que votartela mucho ajuro y por que si u.u, te admiro muchísimo saludos <3.
En ingles la gente no me notices :'(, ojala lo voten xD
claro que lo hacen chica! quedate tranquila <3, a mi no me notan ni en español :,p