Hello, and welcome to my page!
Last year I wrote a series of posts about working on my older Ford Ranger pickup truck. I bought the truck to use for hauling my little travel trailer. I wanted to make sure that the suspension was up to the task, so I replaced the original rear shock absorbers with coil-over "load leveling" shocks. While under the truck doing that, I realized how rusty the frame was on the back half, and that started a chain of events that led to pulling the box off the frame, cleaning up the rust, painting the frame, and then starting on a flat bed for it.
If you would like to read those older posts, here's the list for them.
https://hive.blog/car-repair/@amberyooper/fixing-up-an-older-pickup-truck-part-1
https://hive.blog/car-repair/@amberyooper/fixing-up-an-older-pickup-truck-part-2
https://peakd.com/car-repair/@amberyooper/fixing-up-an-older-pickup-truck-part-3
https://peakd.com/car-repair/@amberyooper/fixing-up-an-older-pickup-truck-part-4
https://hive.blog/car-repair/@amberyooper/fixing-up-an-older-pickup-truck-part-5
https://peakd.com/car-repair/@amberyooper/fixing-up-an-older-pickup-truck-part-6
https://peakd.com/car-repair/@amberyooper/fixing-up-an-older-pickup-truck-part-7
This post is about working on the exhaust system, a real pain in the butt...
This was my last post about the truck up to now.
https://peakd.com/car-repair/@amberyooper/fixing-up-an-older-pickup-truck-part-8
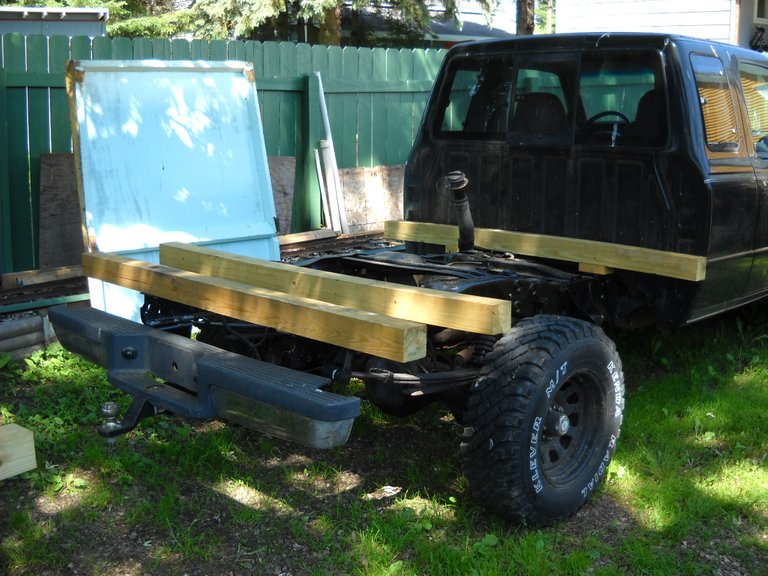
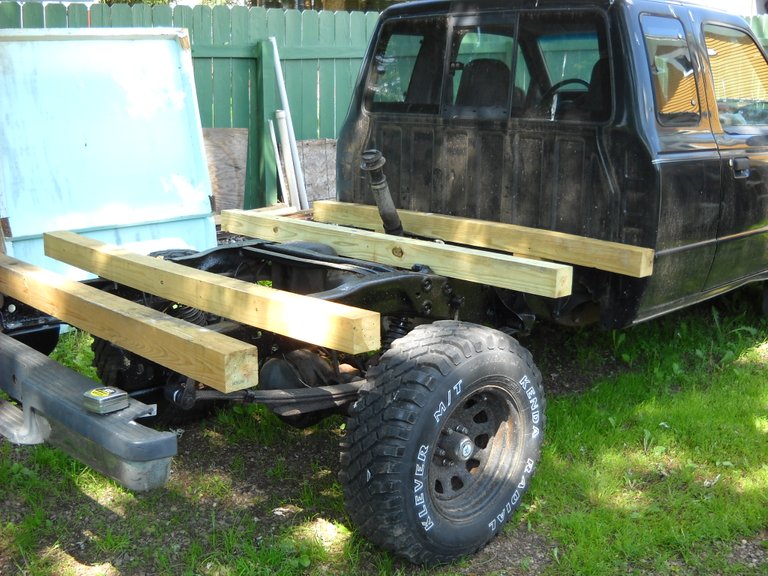
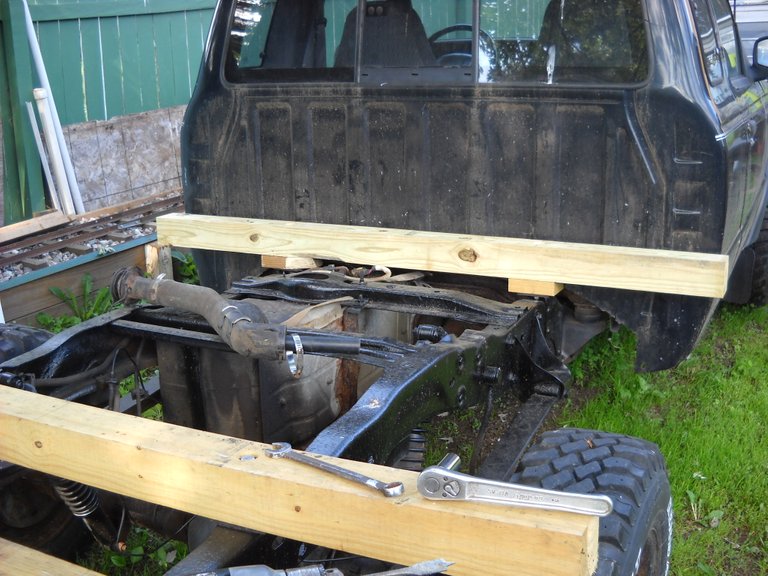
I wanted to start working on the flatbed project for the truck again, picking up where I left off. When I started working on the project again, I realized that I should replace 2 of the 4X4 cross-beams on the frame, both had warped significantly over the winter. You can see how the 4X4 by the cab had warped down on the ends, and the one behind the wheels was also warped.
I was in the process of fitting the 4th 4X4 when I noticed the warp on the front one.
I pulled the 4X4 off the frame and laid it on it's side to get a picture of the warp. You can really see it in this picture. It is actually warped in 2 directions.
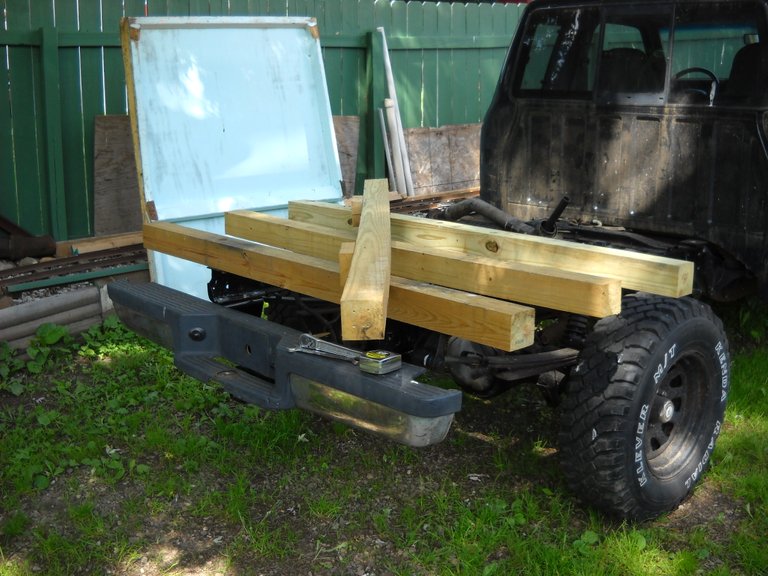
I bought 2 new 4X4s, being careful to pick out ones that aren't warped and have the center of the tree they were cut from centered in the 4X4. Those are theoretically less likely to warp over time as they dry out.
After cutting them to proper length for the job, I had to drill the holes through them for the mounting bolts. I used my small drill press for this to make sure that the holes were drilled through as straight as possible. I started by drilling a large hole into the 4X4 about 3/4s of an inch deep as a countersink for the bolt head and washer so the bolt head won't stick up above the surface of the beam. I used an 1-1/4 inch spade bit for that job, to get a large enough diameter hole with a flat bottom for the washer to sit on. Once that was drilled out, I changed bits and drilled out a 9/16s hole for the 1/2 inch bolts that I used to bolt the beams down onto the truck frame with. I'm using all stainless steel bolts, washers, and nuts to prevent rusting from contact with the treated wood.
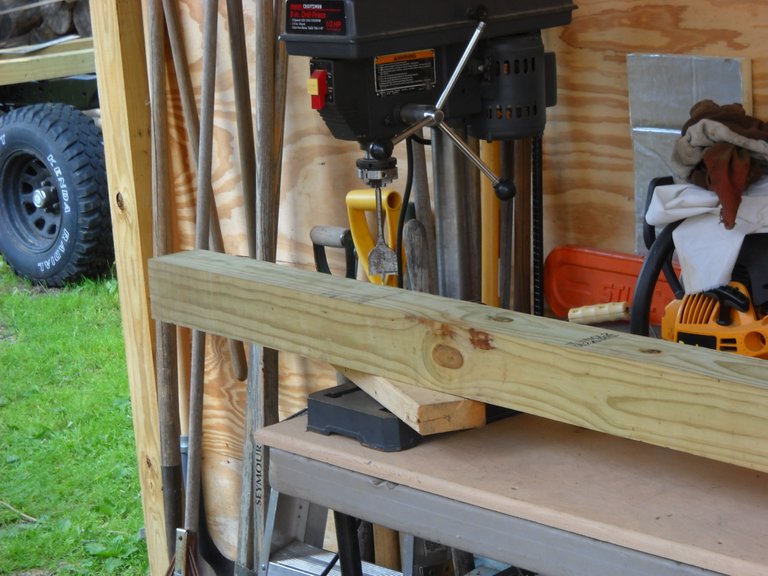
I was unable to drill all the way through the 4X4 with the drill press due to the limited drilling depth of the drill press, so I had to finish drilling the holes with the hand drill. At least there's a half drilled hole to use as a guide to finish the hole straight. I had to drill 2 holes in each of the 3 4X4s that I put on the truck frame. There was 2 replacement beams, and the 4th beam that I started to put on at the beginning of this part of the project. The beam at the end of the frame did not need to be replaced, so that was good anyway.
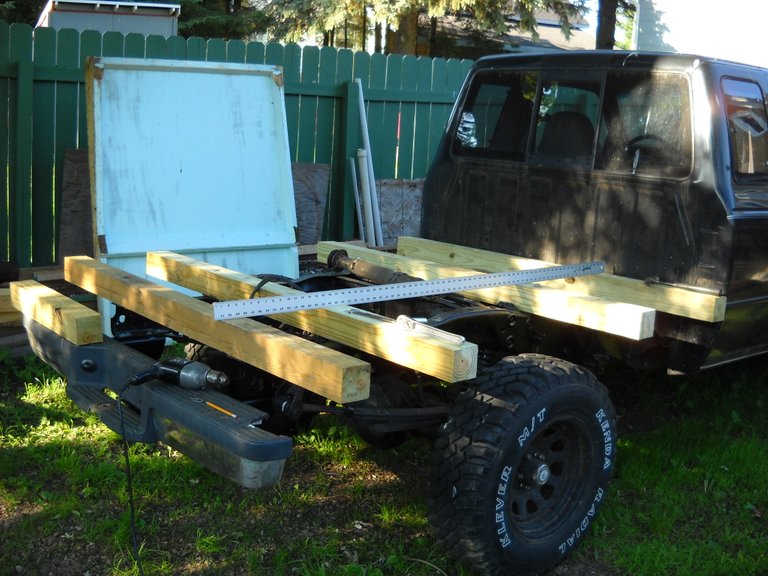
I started mounting the beams on the frame with the front beam. Putting the washers and locknuts on the bolts for the front beam is a bit tricky due to limited clearance for your hands in the frame. The rest of the beam bolts are easier to get to in the frame.

After that, I bolted the other 2 beams in place on the frame. They all seem to be more or less level with each other.
The last thing I did for this part of the project was to put the 2X4 end cap boards on the 4X4s. I still needed to cut these to length.
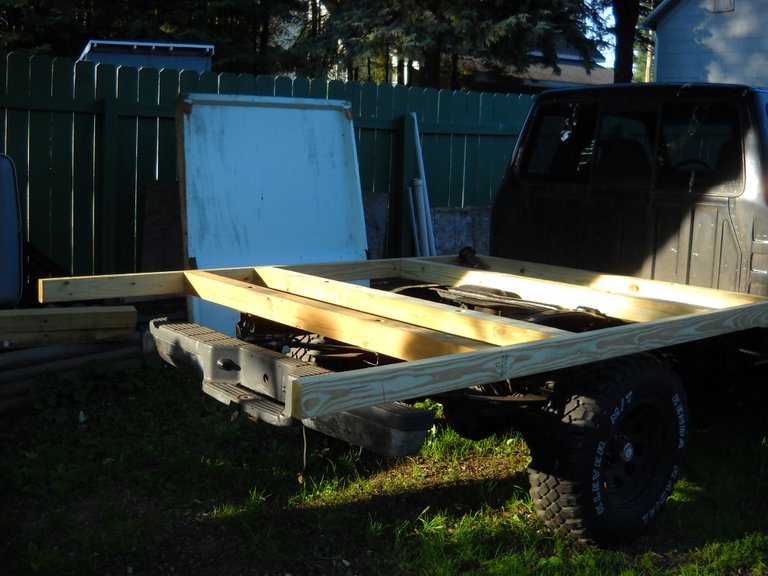
From this point, I can move onto putting the deck onto the frame. The start of this part of the project will be the subject my next post in this series.
That's all I have for this post, thanks for stopping by to check it out!

Congratulations @amberyooper! You have completed the following achievement on the Hive blockchain and have been rewarded with new badge(s) :
You can view your badges on your board And compare to others on the Ranking
If you no longer want to receive notifications, reply to this comment with the word
STOPTo support your work, I also upvoted your post!
Do not miss the last post from @hivebuzz:
Support the HiveBuzz project. Vote for our proposal!