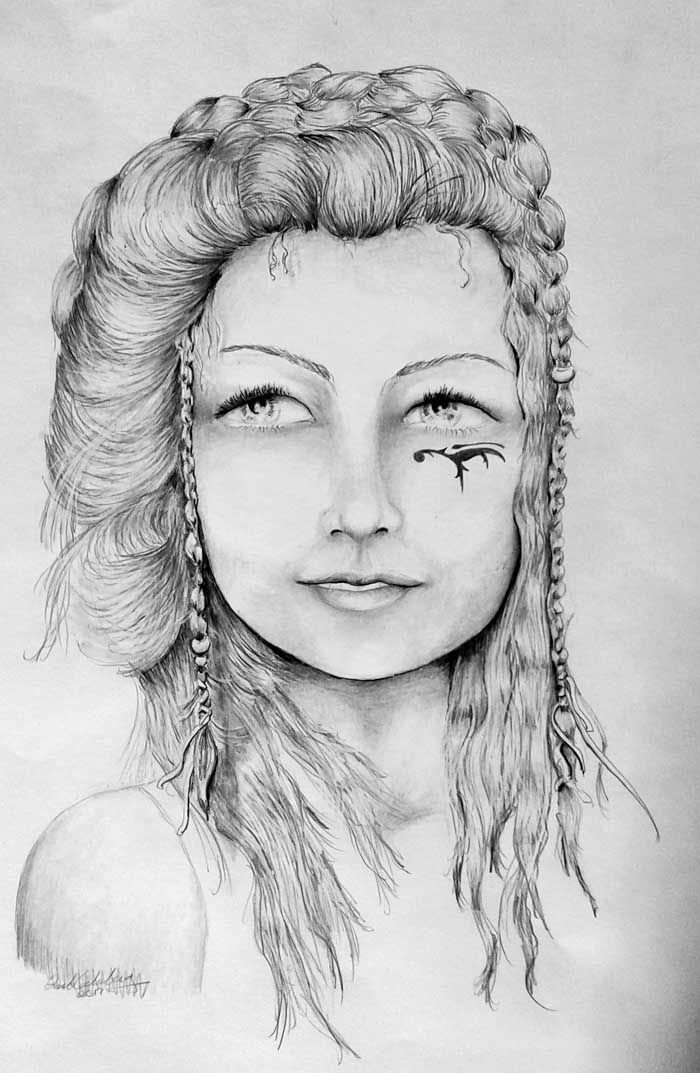
Finished Drawing...
I just finished this drawing and had a lot of fun with her. At some point during the drawing I realized that she looks a little like that actress LeeLee Sobieski. Honestly, this was a total accident. I find this sometimes happens to me, maybe it is subconcious but if you asked me to draw her - I couldn't do it. It's just not part of my process. I find that I draw better from my imagination or "happy accidents" on the paper. Just me!
Also, I was aiming for a Northern European (viking) and slightly Eastern European look to this girl. Really historically they are pretty related. The vikings did spend a lot of time in Eastern Europe.
Have been experimenting with some new hair techniques and pretty happy with the whole thing. Remember, I am learning as I go. I have been honing and working on my drawing skills for quite a few years and you may notice in some previous blog posts that I have showed some of my older drawings too.
As I learn I will grow, and that is really the point of this entire Blog. I love Steemit cause it does give an artist a reason to keep working, so I appreciate everyone on Steemit. I want to see this platform grow - it's great!
Let's start drawing...
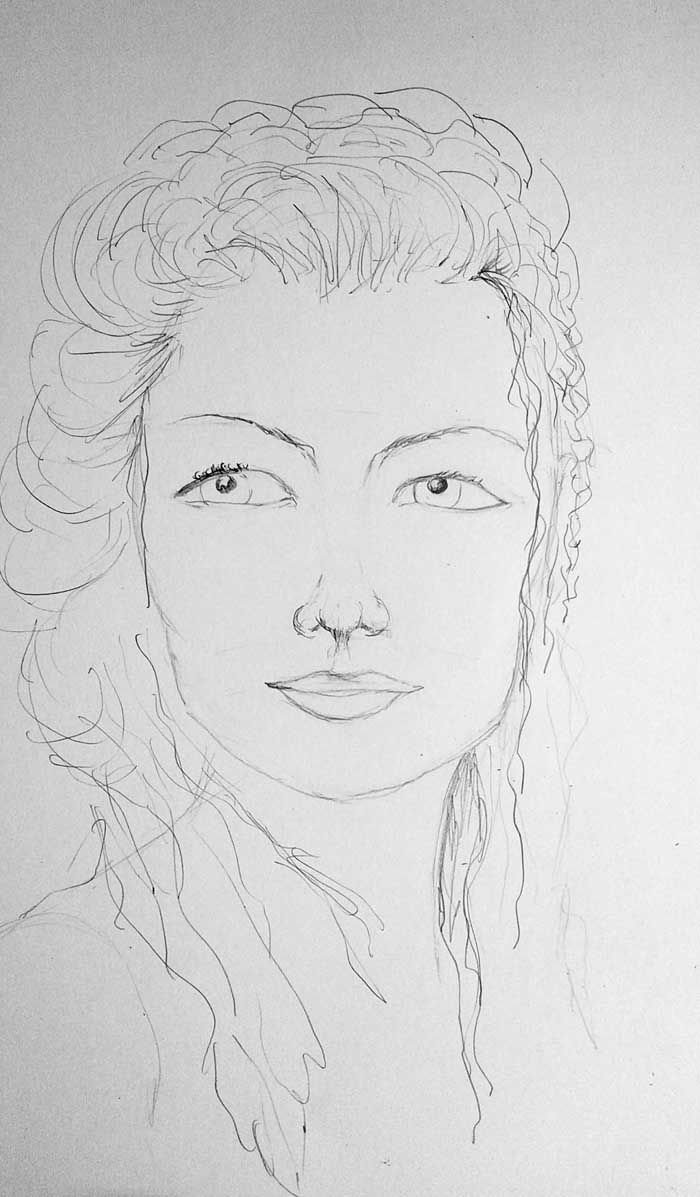
First Sketch... (above)
I have tried to make this original sketch pretty basic - and in the future will try to do better on this.
This is a basic layout of my idea for my young viking girl drawing... she is going to have a large pull up of hair on the left turning into a braid on the top of her head and then ending in a dropping braid down the right side. Also wanted the rest of her hair looking a little wild and falling out of the braids - plural twisted on top of her head.
Structured the basic shape of her eyes and facial features and shapes.
Of course you can draw with me but still change the look of each feature. I am just laying out the structure in this sketch.
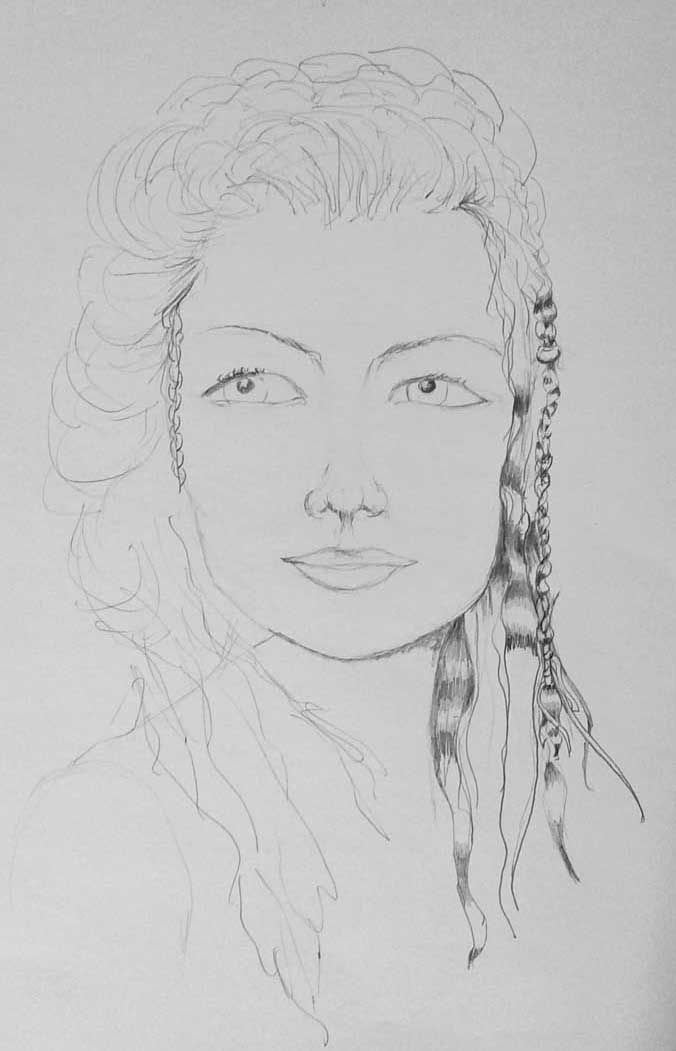
Putting In Some Shading To Shape And Define Hair (above)
You will notice when I draw that I tend to jump around a fair bit. I have always done this and it works for me. It's because I tend to get into a "zone" when drawing and if I have an idea about some aspect of the drawing, I just jump to it. I feel confident leaving something I have started to structure cause then it is easy to come back and just continue doing the work.
What I have done here is to start with some general structure of the waves in her hair on the right and the braid. The dark graphite I am laying down are representing the low lights in her hair. I like to start with low lights and the process I am creating here show me where the low lights and the highlights are. This will create a sort of general shiny-ness and wavy-ness underlying her hair.
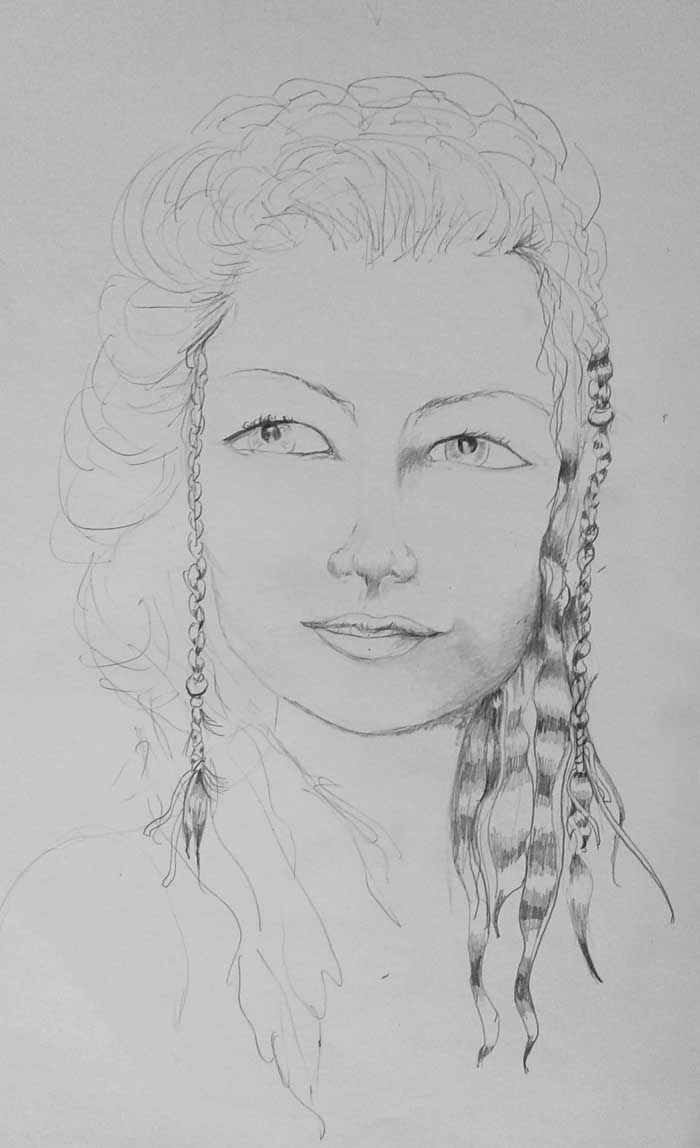
Starting To Work Shape Of Face With A Blending Stick (above)
Okay here I do jump over to her face, just kind of saw where I want to start blending on the face. I lay down a light coating of graphite and start blending with a blending stick - or you can use a q-tip or tissue. I like blending sticks and they are really cheap at an art store.
So I start gently blending the contours of her face. This is when you have to think like a sculptor and blend and even use a "kneaded eraser" which is a stretchy eraser (somewhat like playdough) also available cheaply at an art store. I touch the paper lightly with the kneaded eraser if I want to remove a little graphite.
Notice I have even started some texture in the eyes with highlights. It gets so exciting once you are working on the eyes, I think this is when your drawing starts to come to life.
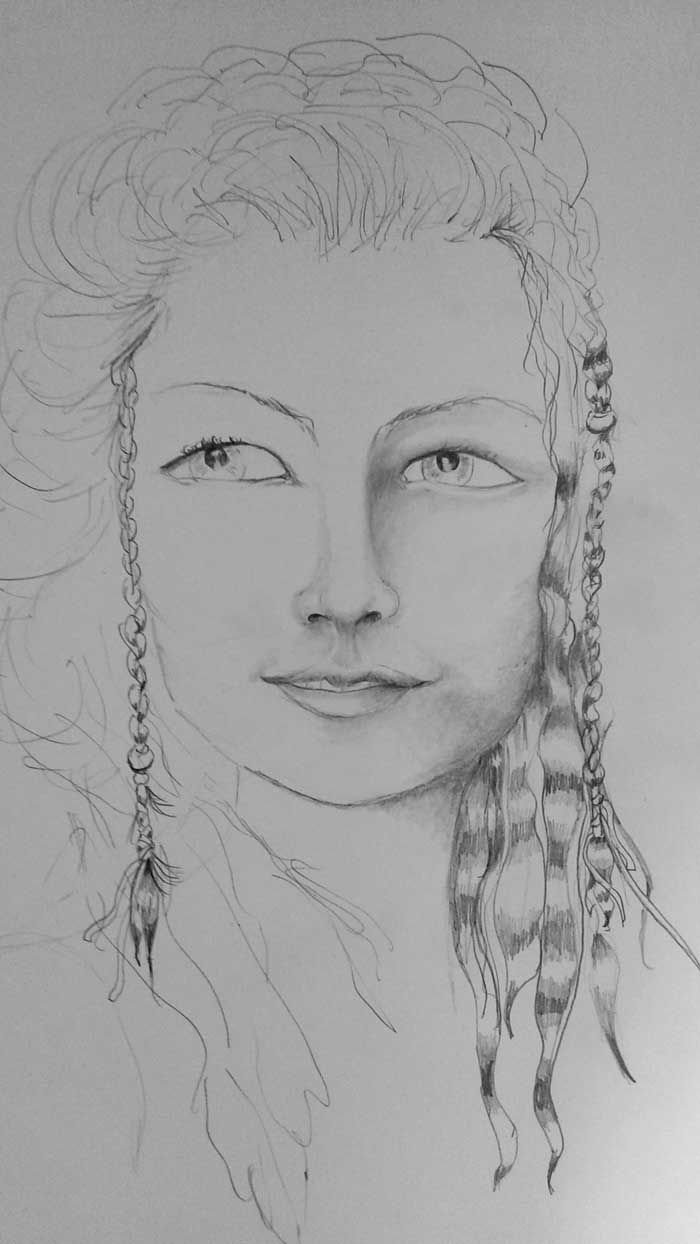
Left This A Little Darker So You Can See The Shaping And Contouring
Okay since I am shaping and putting in low lights on the face and figuring out where to leave the highlights I have decided where the light is coming from. It is right above her head just gently shining downwards. Remember that this is important if you don't decide where the light is coming from - even just generally, you won't know where to shadow and it can end up looking kind of weird. I have done this. p.s. still do if I forget.
Making sure I keep the highlights of her cheekbones fairly high to give that northern look, and even her eyes since they are sort of looking up, I am keeping the highlights on the lower part of her eyes and her lid has that fleshy look.
On her lips the light is bright on the top portion of her top lip and darker into the teeth. Same on the bottom but with more highlight on the fleshy part of the bottom lip.
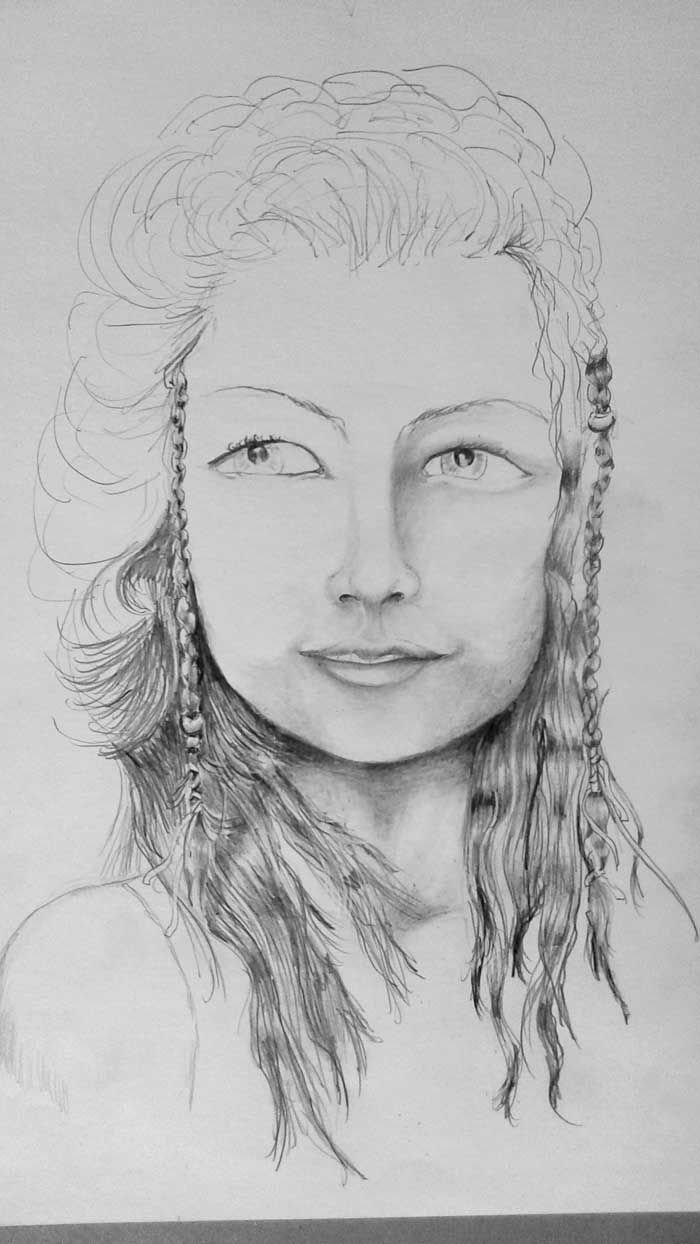
To The Left You Can See How I Am Adding The Wispy Hair (above)
So I jump again - (to the left side of the drawing) and started working my pencil with very fine lines following the flow of the waves I created in my original sketch. I find with this technique that you have to be fairly loose and light with the pencil. Don't over think it just go with the flow. Sometimes the messier the better.
I am also at the same time putting in the darker pencil where I want low lights.
Over to the right side of the drawing... I did the pencil lines over the waves already created, and again very loosely. Just kind of go with the waves.
Then I take the blending stick and really blend the low lights into the highlights - right over the pencil lines. Don't worry about messing it up. It makes it more natural. This you can start to do on all of the hair - both sides.
Next I start running a "pencil-like" eraser I also found at an art store. ( I will do a post soon showing you these basic tools) What I like about this eraser is that you can do "rendering" That means erasing over your graphite to create texture (and it is a pencil drawing technique). The pencil eraser has a hard tip and in this case I am making highlight hairs. Just go over like you did with the pencil - nice and loosely and wild.
At this point (see this at the bottom left) I have taken my "kneaded eraser" (you can use any eraser just be really soft) and created a highlight that sort of goes across all of the hairs at once. This really gives the look of shine.
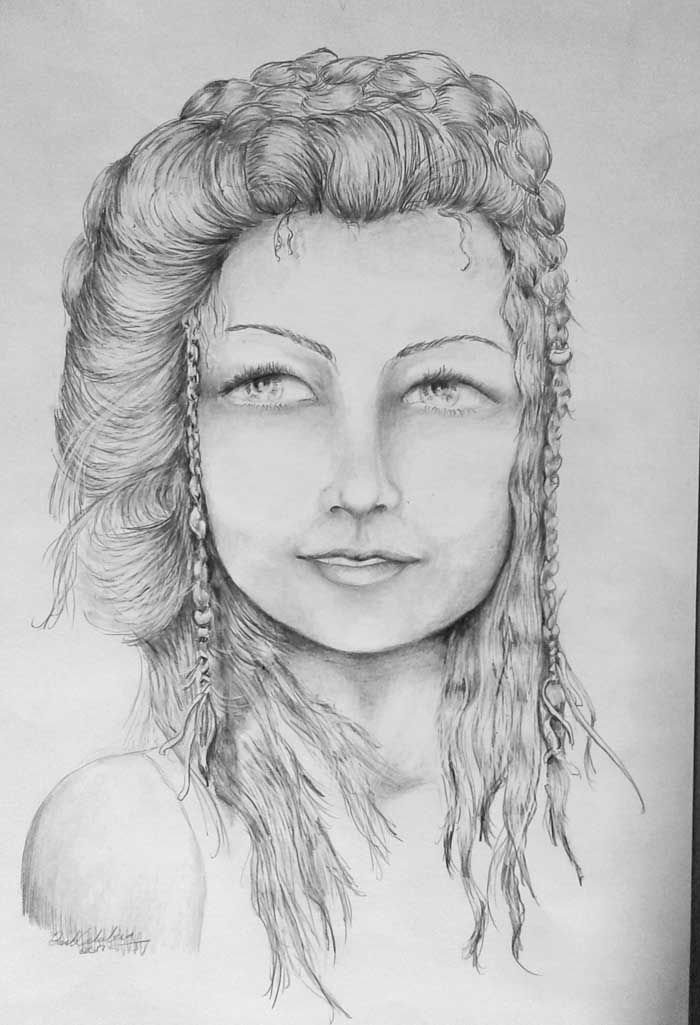
Filled In All The Hair and Still Working And Refining Face Shadows
So now after repeating many of the techniques that I have explained above I just went into the "zone" and finished the drawing. Sorry sometimes I forget to stop and take a pic.
Again, something I will work on.
However, I do feel that what I did here (above) is just repeat all the steps on the rest of the drawing. Playing with the contours of the face. Highlighting the eyes. Working the hair with the process, graphite for low lights - leave the highlights, blend, run pencil lines over loosely and then pencil tip eraser to create white hairs.
I also emphasize the darker areas with some heavy work on the shadows just shading as heavily as I can.
Here is what I am debating, and perhaps you can give me your opinions in the comments.
I am wondering - cause I think she looks great with just raw pencil. I think she looks finished in the above drawing.
Yet... go to next drawing below.

To Finish Added Black Pen In Areas That Needed Darkening - Or Did They?
Here I have added black pen to really bring out the darks. I also added a little tattoo.
I like this look, but am still deciding if I don't like it better with just raw pencil.
So I hope you enjoyed this tutorial and I am working on another coming soon.
In the meantime just have a great time drawing and Steeming!
I love that viking girl.. soo nice!!:O
Thank you - sorry must have missed this comment. Soooo nice to have people looking and commenting.
no problem, beautifull viking girl!!:))
She is totally Viking! ^^ I like the pencil look better, also I wonder how she would look without tattoo in the last one with the pen. Beautiful work with the eyes :)
Glad she does look viking... and you know what I think I am liking the just pencil look too! Thanks for the comment. I so like to know what people think. I am always learning and just love to draw. Thanks for the eyes comment - getting a little better.
Great! Interesting subject!
I love vikings... my next drawing is an even more serious looking viking shield maiden! Promise I will be drawing some more mean looking viking dudes too!
Interesting I'll look forward for it!
Awesome sketches , she is looking very detailed , great job it most have taken a while to do this, i also followed u
Thank you for the nice comment and the follow - that's great!
Lovely Sketch
Nice Details
Followed :)
Thanks for the nice comment and the follow - I love Steemit!
This is lovely!!!
Glad you think so! Thank you
Te quedo genial felicidades por el tutorial.
Gracias por el comentario agradable! I did use google translate so...???
beautiful peice of work. I love it. Stay close bkecause i draw too
Thank you very much - great we can all draw together in this community!
Congratulations @granblock! You have completed some achievement on Steemit and have been rewarded with new badge(s) :
Click on any badge to view your own Board of Honor on SteemitBoard.
For more information about SteemitBoard, click here
If you no longer want to receive notifications, reply to this comment with the word
STOPnice job mabro!!!!
i like it
Glad you like!
Really beautifully done! I guess my "drawing skills" will never get that good, thanks for the tutorial though! ^^
Thank you very much - but what you do with photos - I guess digitally - is amazing! So thanks again for the compliment but you know as an artist that it is a skill.
Ah thank you so much! 😁
It gives me a vibe of the Viking series we have seen in the latest years. I think is really cute and dreamy.
Yes, I love the Vikings Series! Thank you for the comment.
awesome drawing, from one artist to another, u get a vote from me
Really nice comment and compliment - it keeps us going! I really liked your Mona Lisa Selfie...and voted - Yesssss Steemit!
Wow. That's got to take loads of patience. Amazing work.
yes, but I find once I am past the structure of the drawing that I just sort get into a trance or the "zone" and so enjoy the shading and shaping. So... I love it. Thank you for the lovely compliment.