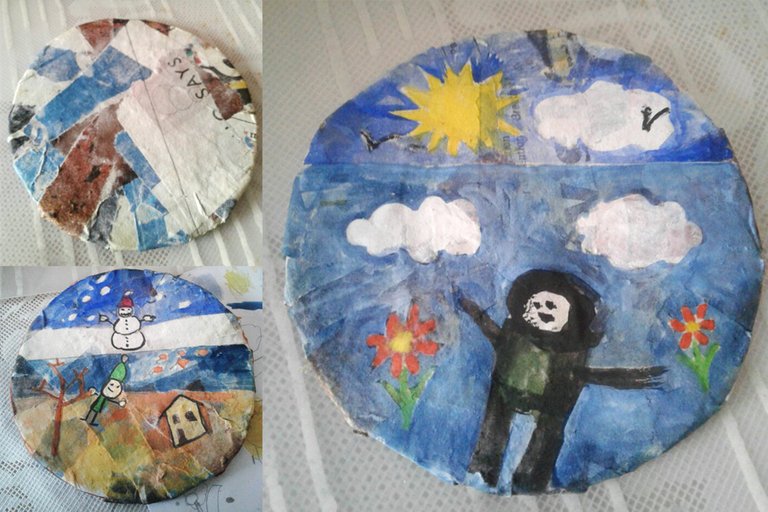
This was a fun, easy and not very messy artistic collaboration with a 6 year old! It's a cool way for kids to make a homemade gift.
You can make all kinds of things using this method -- bowls, door signs, decorations, toys etc. The possibilities are endless!
This is a project to do in 2 phases to allow sufficient drying time. This builds up excitement for the youngsters and also allows them time to think up ideas if they want to :)
Materials
Cardboard
HB Pencil
Scissors
Newspaper
Paste (1 part white flour + 2 parts water + some salt to prevent mould, stirred enough so there aren't any lumps)
1 inch paintbrush
Non-toxic, childfriendly watercolours
Optional - clear spray varnish, gesso and sandpaper
Instructions
- Cut out the desired coaster shape from cardboard
- Rip up old newspaper into strips
- Prepare the paste so that it's ready in time for the next step.
- Soak newspaper strips in water for a few minutes
- After each newspaper strip is sufficiently wet, but not wet enough for paper to start breaking apart, remove each strip and drain excess water.
- Use the paintbrush soaked with flour paste to brush the wet newspaper strip onto the cardboard template! Brush over each strip with paste. Don't use excessive paste as the cardboard will get too wet and start to bend!
- Cover the whole template with enough layers to bulk up the cardboard template.The edges can have thinner newspaper strips folded over the edge to make a smooth finish.
- Leave the coaster to dry or place in a low heated oven (left with the door open) to quicken the process. If the oven is too hot, an air bubble will form or the paper might burn.
- OPTIONAL STEP -- paint with gesso and sand to a smooth finish if desired. We skipped this step!
- Once the coaster is completely dry, use a pencil to roughly create a pattern on both sides of the coaster. In this case, my crafty collaborator chose a winter/autumn + spring/summer design.
- Time to paint! Help younger ones out with more complicated designs if they want assistance.
- OPTIONAL STEP -- You can choose to spray with clear varnish if you desire to make the coaster waterproof. The coaster pictured below hasn't been varnished yet. I might do it later!
Swap jobs with your younger collaborator whenever they want to and invite them to choose colours, designs, themes and shapes!
Have fun! :)

Pic: Coaster after drying stage. Painted coaster front and back prior to varnishing.
Personally I really like not having done the optional gesso step. It's quicker and also makes the design and texture look more interesting!
My last quick craft project: Lastminute Pop-Up Birthday Card for Little Boy
Congratulations @nadinemenezes! You received a personal award!
Click here to view your Board of Honor