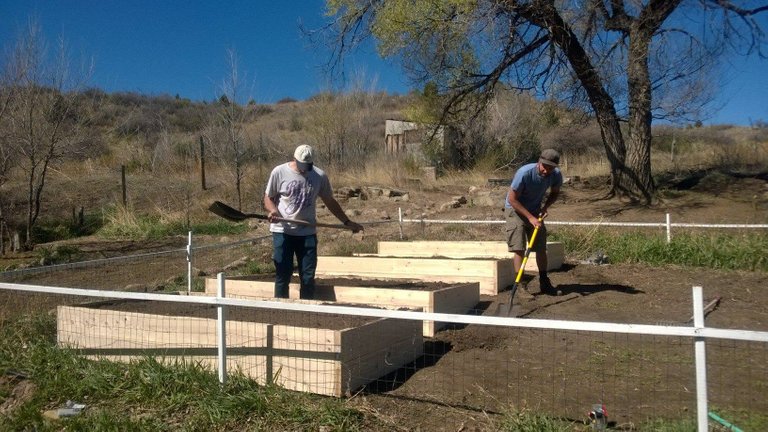
All you gardeners have heard the buzz about "raised beds", and probably if you don't have them already, you've thought about making some. I highly recommend it! Raised beds offer so many benefits and advantages for relatively low hassle/expense to get them started. They save your body a little bit because you don't have to be down on your hands and knees all the time to tend a ground level garden. If you have bad soil, you can start over with raised beds and fill 'em up with the good stuff, rather than spend years amending your bad soil. They retain water; if you have a garden space on uneven ground you can level it out with beds (see photo below). They're all around easier to manage, and also prettier to look at! If you want to give them a try, please read on and follow my easy guidelines to make sure you do them right and don't regret not thinking ahead!

CHOOSE THE RIGHT WOOD: The absolute ideal wood for a raised bed is redwood. It naturally lasts longer without rotting, and it looks beautiful for a long time. It's more expensive, and some folks are concerned about using redwood because it's a much more limited resource than regular pine or cedar. Fine, I get that, but according to my research the production of composite and plastic boards intended to substitute the use of redwood actually creates more waste and environmental issues than the harvest of redwood anyway. So I still use redwood. Do some of your own research, and if you are convinced alternatives to redwood are better environmentally, go for it! Regular pine board can be used as well. It will last as a raised bed in the 5 year range, rather than 10 year range like redwood. Landscaping block and brick can make for a good raised bed as well. They take a little more work since you have to level and compact the ground underneath the block much more thoroughly than for a wood raised bed.
CHOOSE THE RIGHT SOIL: In my first year of business building gardens for people, I made a mistake choosing the right soil. I built raised bed gardens for 4 clients that summer and thought I'd save a buck by getting some cheaper soils and mixing them myself. I mixed a sandy topsoil with a compost/manure mix. My mix didn't have any fluffing agents and it compacted down like clay. I had to go back and amend the soil for all four clients the next year, I should have researched first or just gone with my landscape suppliers designated raised bed mix! So my suggestion to you is to either fill up your beds with a mix that is already created for raised beds, or ask your local garden shop for advice on what to mix. Just make sure that you have a good "loam" (more sand than clay, but a mix of both) for your soil medium, a quality compost mix that makes up about 20%-30% of the entire mix, and then some peat and/or perlite/vermiculite to aerate the soil and keep it from compacting.
CHOOSE THE RIGHT SIZE: First of all, you'll want to keep the width of your beds AND the width of your pathways in mind when designing your garden. If you make your beds too wide, you'll have trouble reaching the center of the beds to pull weeds, harvest, etc. The traditional size is 4 feet wide, and it works great, leaves enough room for 3 or 4 rows of plants and you can easily reach to the center of the bed. Also make sure you don't put your beds too close together. 1.5ft to 2ft is a comfortable width for a pathway, making it easy to move a wheel barrel through or to sit or kneel between beds. Second, you'll also want to keep in mind the depth of your beds. Most annual vegetables/fruits/herbs need about 12" of soil depth for healthy root growth. In order to achieve this, most people use 2 stacks of 2x6's for their raised beds, making a 12" deep raised bed. I like to use 2 stacks of 2x8's, just to allow for a little more room at the top of the raised bed to prevent water spillover, and to give my plants a little more root depth. Last thing to consider when designing the size of your beds is whether to include center support or not. If your beds are much higher that 16" and you are using 2" thick lumber, I would highly suggest that you include a board or some form of tensioner in the middle of the beds. If you don't, the sides of your boards will begin to bow outwards from the weight of the hydrated soil. Not a functional issue, but it looks kinda bad.
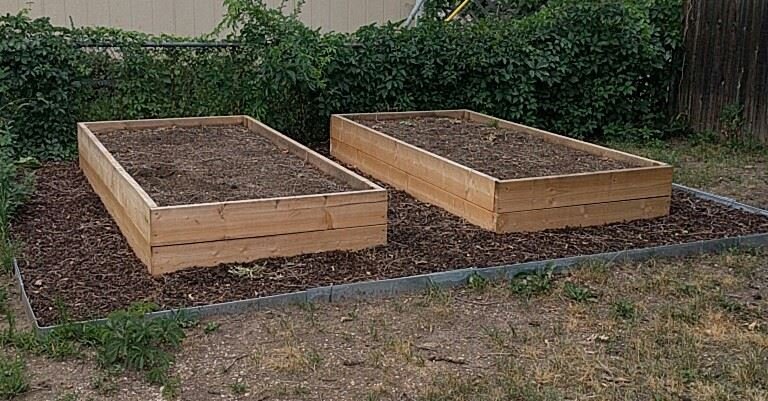
PREP YOUR SITE: What you do with the space around your raised beds is totally up to you. I like to lightly landscape the areas around beds that I install for clients. I install metal edging around the site, pin down landscape fabric, and mulch the pathways around the beds. Here's an example:

If you have invasive weeds that spread with runners or vines (bindweed, crab grass, etc) and can spread through their roots rather than seeds, I would suggest doing this fabric and mulch method. And I would even leave the fabric underneath the beds and staple it down well so that the invasive weeds don't find their way up through your nice new soil. However, if you plan to grow perennial plants or shrubs in your raised beds, cut out the landscaping fabric at the bottom of your beds before adding soil. Perennial plants need more root depth, and if there is landscape fabric at the bottom of the bed, that will impede its growth. And of course, ,make sure the ground is level underneath your beds before you install them. If your beds are at a slope, the soil inside of them will eventually settle at a slope as well and you'll have problems with water retention.
That's the gist of it! It's pretty simple work, just get the good wood, the good soil, and prep the site properly. Happy gardening!

Most interesting to learn how a professional does raised beds.
I hope you don't mind me putting a link but I would be interested in your views on how I do beds over in the UK. I'm just a hobby gardener so I would appreciate any input on what I am doing.
Congratulations! This post has been upvoted by SteemMakers. We are a community based project that aims to support makers and DIYers on the blockchain in every way possible. Find out more about us on our website: www.steemmakers.com
If you like our work, please consider upvoting this comment to support the growth of our community. Thank you.