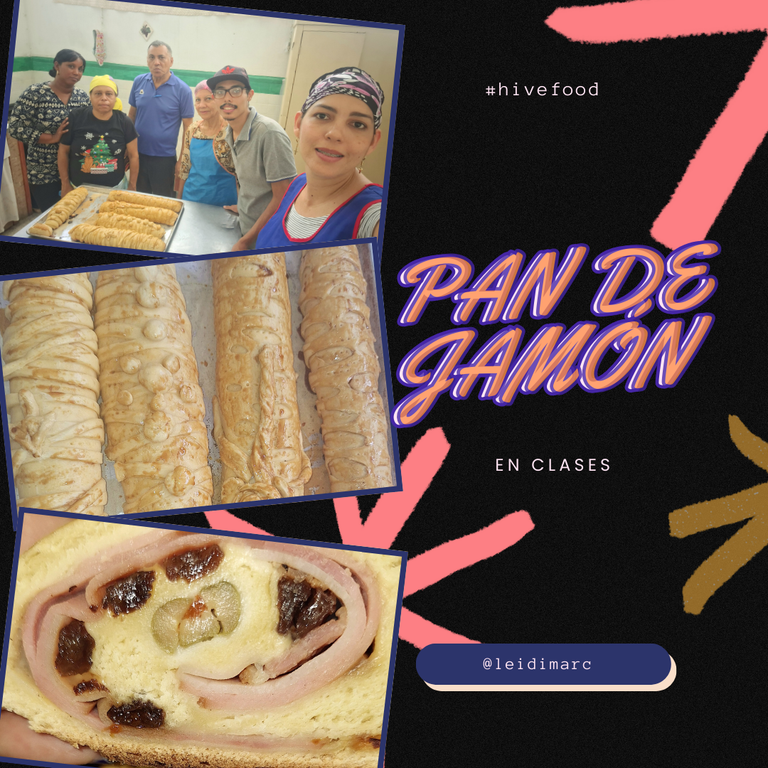
Saludos y bendiciones, mi gente bella de @hivefood. Me complace pasar por acá para mostrarles cómo en mi clase de gastronomía estuvimos haciendo Pan Jamón en los días de Navidad. No serán los mejores, ni los más bonitos, je, je, je. Pero por aquí les cuento cómo los estuvimos realizando.
Este pan es una de las comidas características de la Navidad en casa, a mí me encanta y tenía años que no lo hacía. A decir verdad, no soy muy buena haciendo pan, o más bien la levadura, y yo no, nos las llevamos bien. Así que esta oportunidad me pareció fantástica para darme una nueva oportunidad.
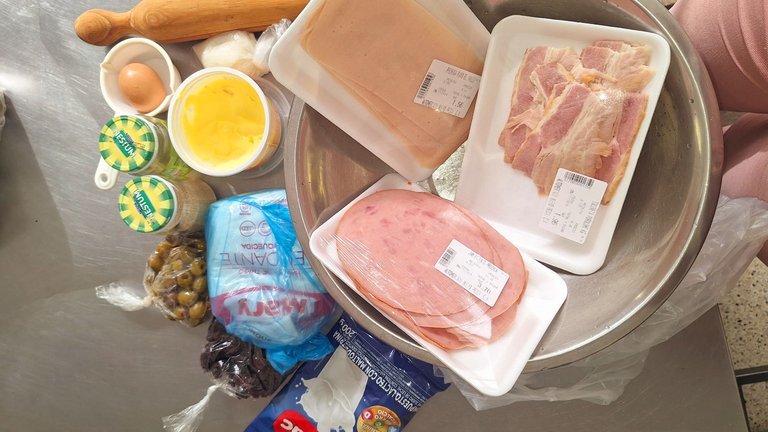
Para la preparación de este pan, usamos los siguientes ingredientes:
Para la masa:
500 gr de harina de trigo para todo uso.
250 ml de agua tibia.
1 huevo mediano.
35 gr de leche en polvo.
25 gr de azúcar.
6 gr de levadura seca.
5 gr de sal.
50 gr de margarina pomada.
Aceite para engrasar.
Para el relleno:
100 gr de aceitunas rellenas de pimientos.
10 - 12 tiras de tocinetas.
400 gr de jamón armado.
40 gr de pasas sin huesos.
Papelón.
Para pincelar: 1 huevo.
Esto es lo necesario para hacer un pan grande. Pero cada quien llevó lo que pudo a la clase.
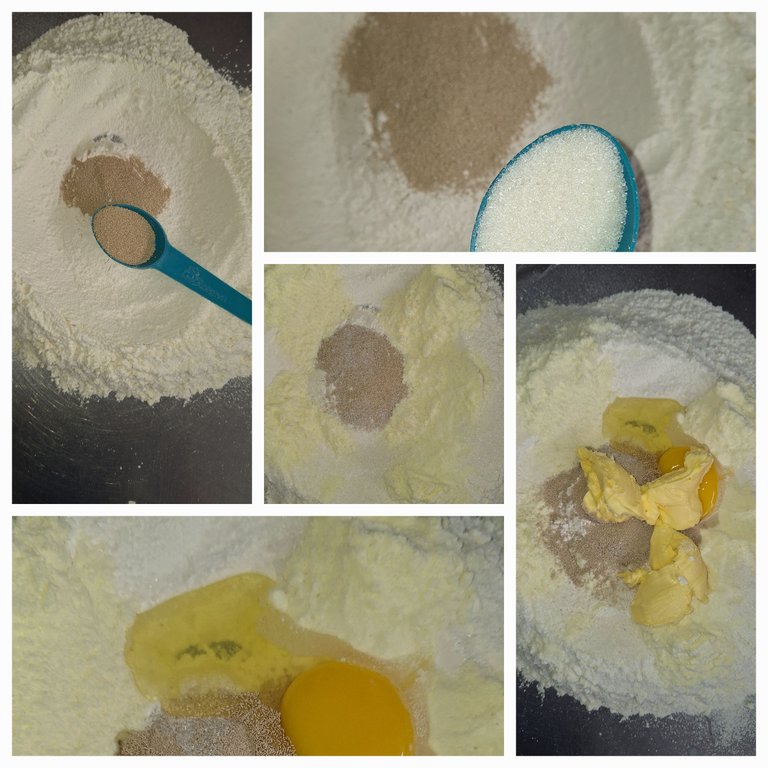
Preparación
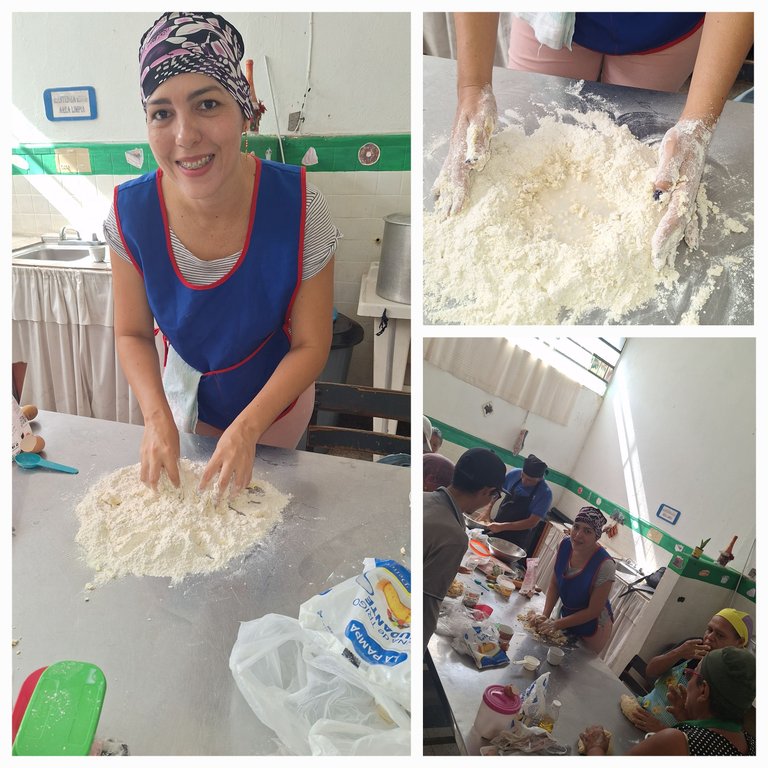
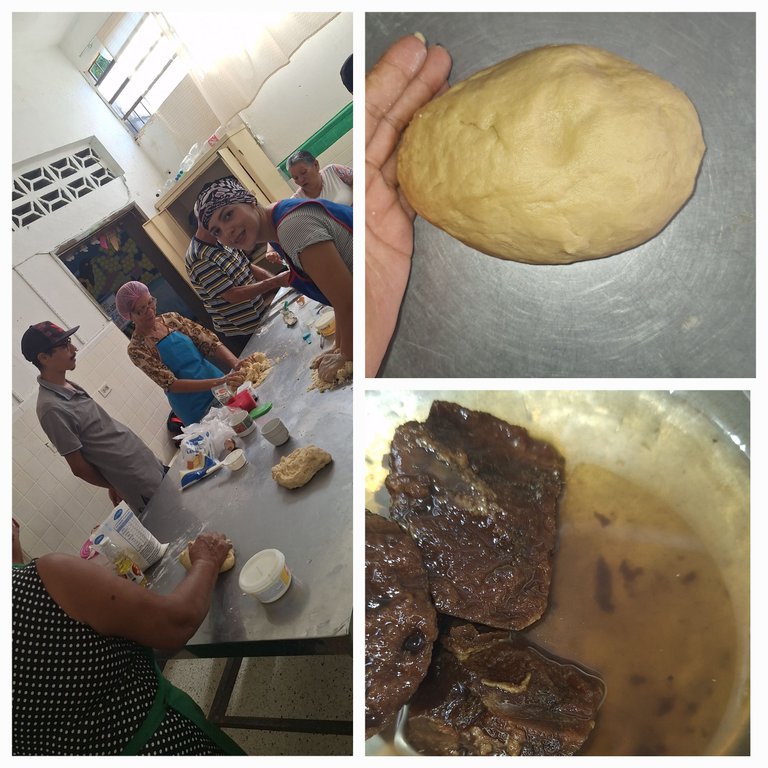
Para hacer la masa, el proceso es muy fácil, con tanto miedo que le tengo a las masas con levadura, je, je, je. Lo primero fue cerrar la harina en la mesa previamente limpia con agua caliente.
A la harina se le hace un huevo en forma de volcán, para ir incorporando en el siguiente orden los demás ingredientes para la masa: levadura, azúcar, leche, huevo, margarina y la sal, esta que no tuviera contacto con la levadura.
Luego se fueron integrando los ingredientes y se fue echando el agua poco a poco, para ir amasando, durante unos cuantos minutos, hasta que la masa se sintiera suave y homogénea.
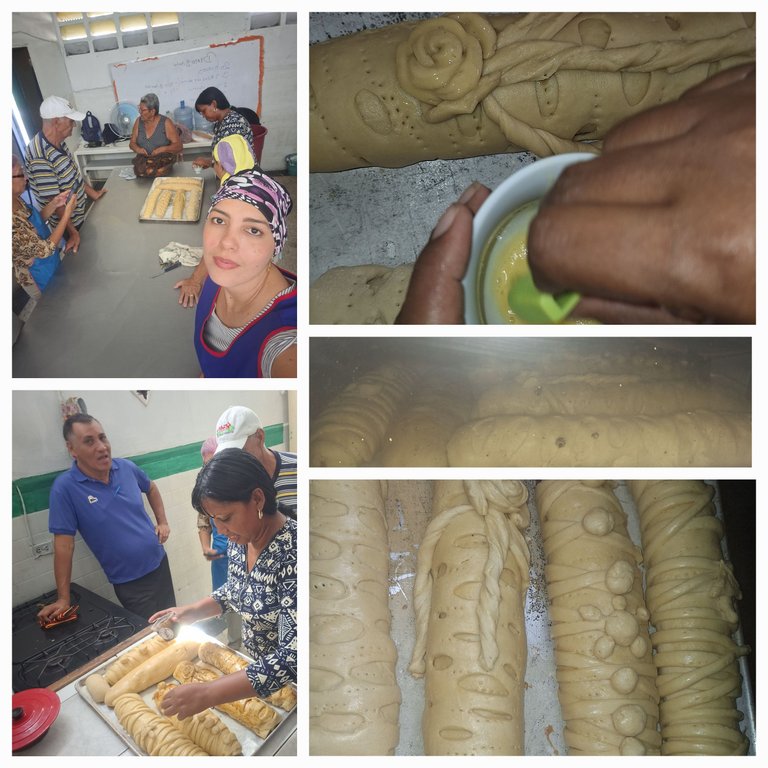
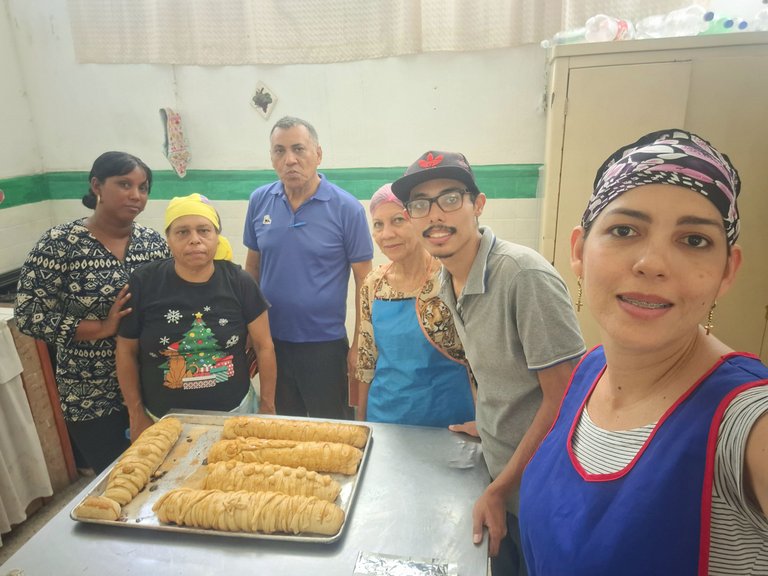
Cada uno de los participantes del curso, estuvo haciendo su pan, aunque hubo dos alumnas que no trajeron material y nos estuvieron ayudando un poco, porque eran más diestra haciendo estos panes.
Luego pusimos a reposar la masa, tapándole con un paño, durante media hora. Mientras tanto, se puso a derretir el papelón, esto fue algo extra que una de las participantes sugirió que era bueno para darle un mejor sabor al pan.
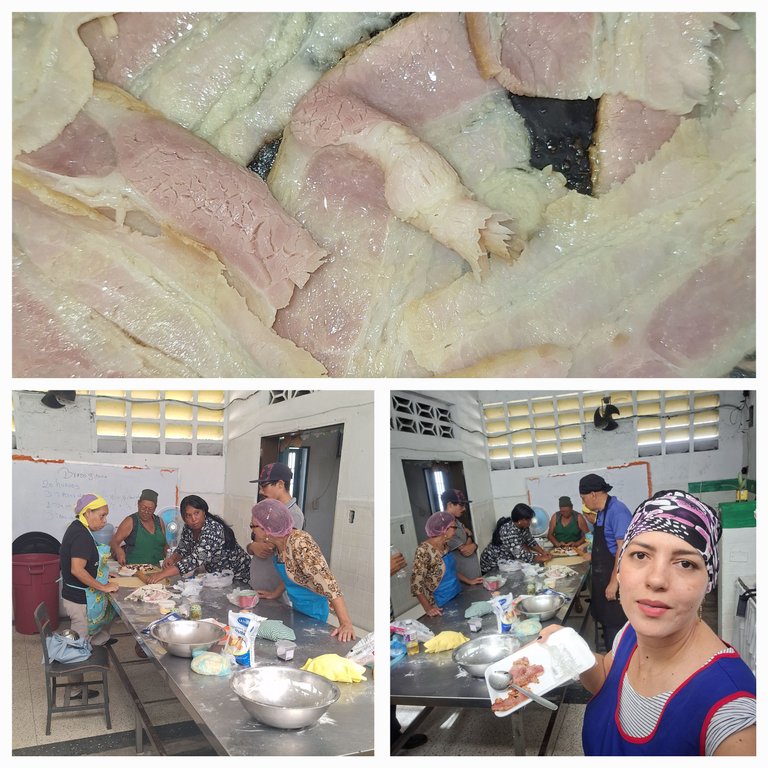
Las tiras a tocinetas se pusieron al fuego, según para sacarle un poco de aceite y pasárselo a la masa, pero no salió casi grasa, sería porque era poco, je, je, je.
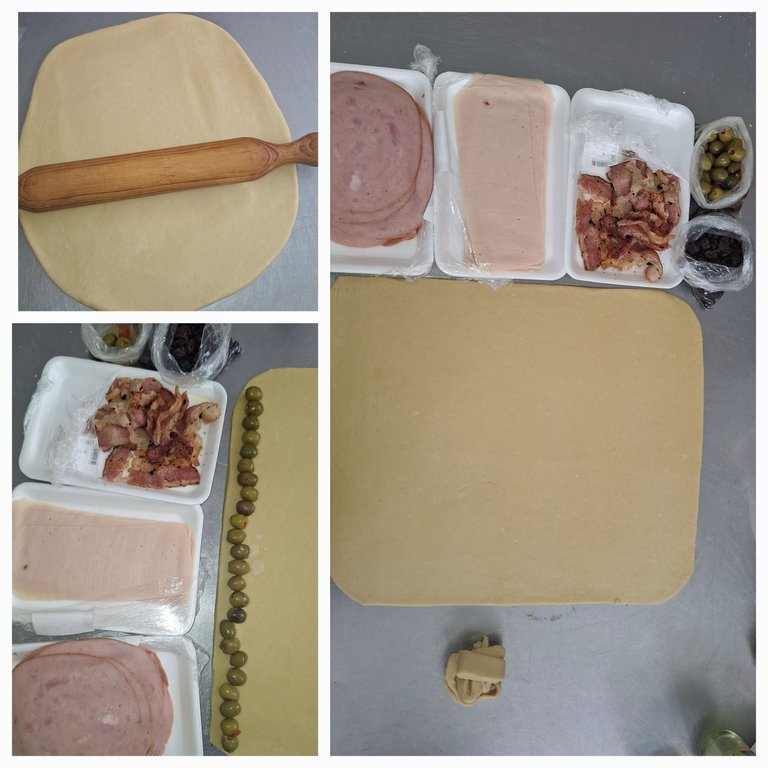
Luego del reposo de la masa, se estiró con el rodillo de forma que quedara lo más cuadrada posible para darle mejor forma al pan.
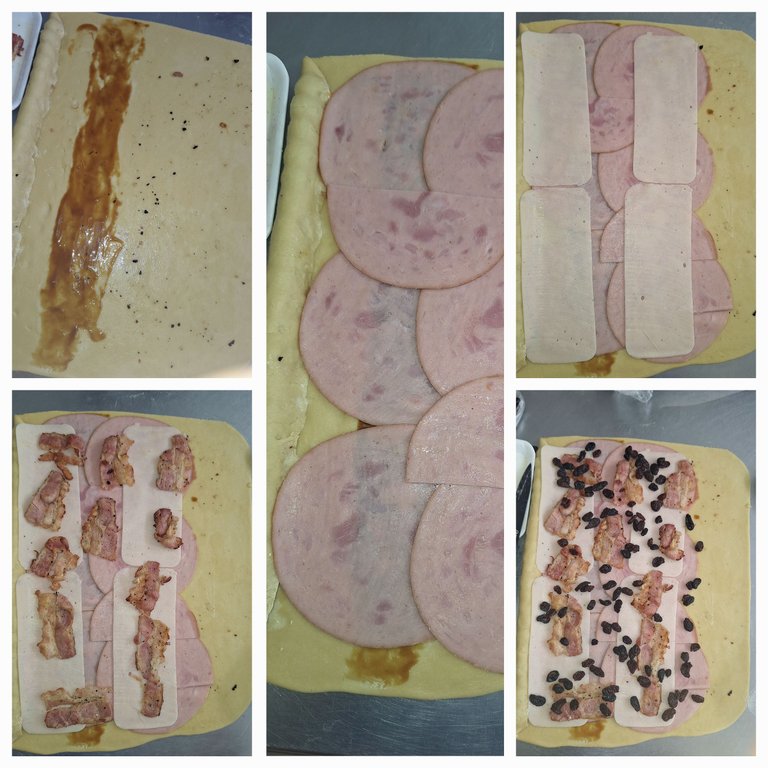
Ordenamos todos los ingredientes del relleno y se empezó a ir incorporándolos uno a uno en este orden. Primero, las aceitunas a todo lo largo del inicio de la masa, esto con el fin de que cada rebanada de pan tuviera aceitunas.
Luego se taparon las aceitunas envolviendo con la masa. Le echamos un poco de la grasa de las tocinetas y un poco del papelón derretido, solo en una pequeña zona de la masa.
Seguimos colocando el jamón ahumado, jamón de pavo, las tocinetas y pasas.
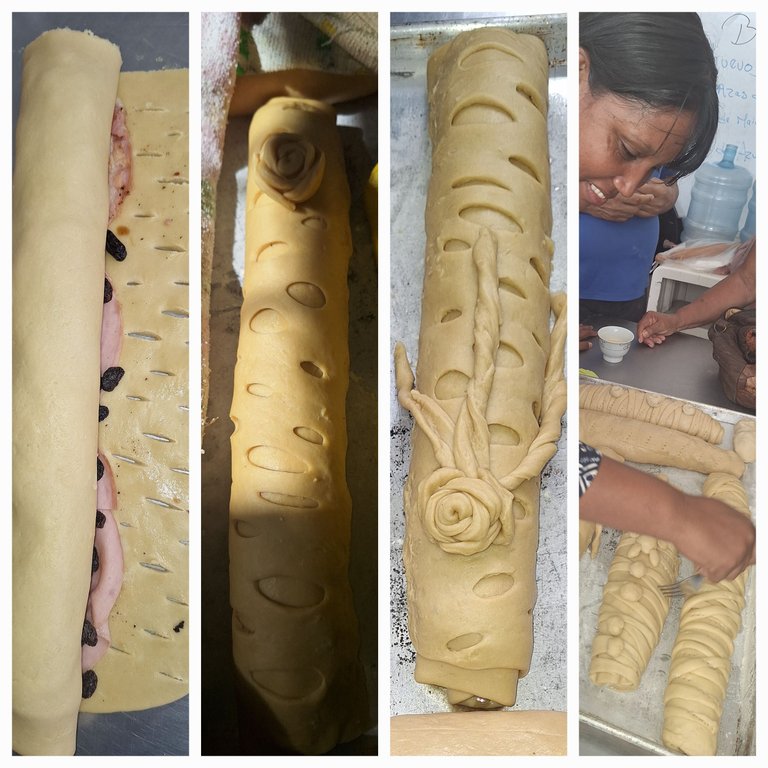
Ahora empezamos a enrollar el pan, tratando de presionar un poco para que no se desmorone todo. Se deja una parte sin rellenar y ahí podemos hacer algunos diseños para darle una forma más linda al pan y así tener una bonita presentación.
Yo le hice unos cortes rectos que al estirar la masa se forman unos círculos. Con un poco de masa que me quedó, quise hacer una flor que, aunque no se ve como quería, lo diferencia de los otros panes.
Se dejaron reposar los panes, un rato más para que levaran, y luego por encima se le echó huevo, para que agarrarnos color, que para mi gusto, igual se veían blancos.
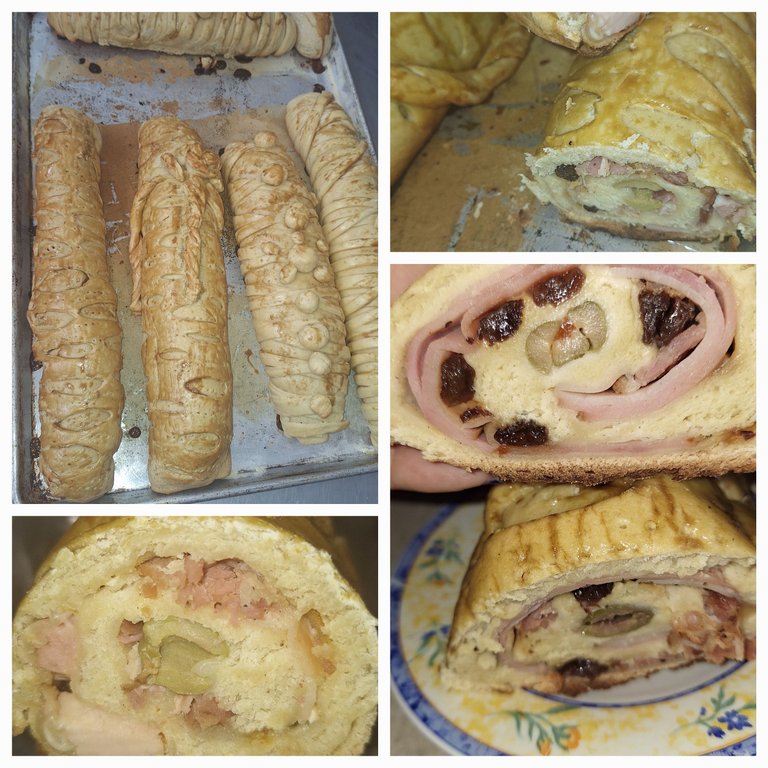
Se llevaron bastante tiempo, se estaban quemando por debajo, pero sentíamos que estaban crudos. Incluso una de las alumnas se llevó el pan así.
Yo quise esperar más, sin embargo, a pesar de que se veían bien, porque el profesor abrió el de él para ver cómo quedó, por eso nos los trajimos a casa. Al abrirlo, se sentía un poco o crudo en el centro. Lo puse a cocinar un rato más y quedó de muy buen sabor. Gracias a Dios, no se perdieron esos reales, je, je, je.
Bueno, amigos, este fue un recuento más de mis clases, que a pesar de los tropiezos y errores, la pasamos bien aprendiendo de un plato diferente en cada clase.
Muchas gracias por su visita, hasta una próxima experiencia culinaria.


Pan de jamón in class

Greetings and blessings, my beautiful people from @hivefood. I am pleased to stop by to show you how in my culinary class we were making Ham Bread on Christmas days. They won't be the best, nor the prettiest, heh, heh, heh. But here I tell you how we were making them.
This bread is one of the characteristic meals of Christmas at home, I love it and I haven't made it for years. To tell the truth, I'm not very good at making bread, or rather yeast and I'm not, we don't get along well. So I thought this was a fantastic opportunity to give myself a new chance.

For the preparation of this bread, we used the following ingredients:
For the dough:
500 gr of all-purpose wheat flour.
250 ml of warm water.
1 medium egg.
35 gr powdered milk.
25 gr of sugar.
6 gr dry yeast.
5 gr salt.
50 gr ointment margarine.
Oil for greasing.
For the stuffing:
100 gr of olives stuffed with peppers.
10 - 12 strips of bacon.
400 grams of ham.
40 gr of raisins without bones.
Papelón.
For brushing: 1 egg.
This is what is necessary to make a large loaf. But everyone brought what they could to the class.


Preparation
To make the dough, the process is very easy, as afraid as I am of yeast doughs, heh, heh, heh. The first thing was to sift the flour on the table previously cleaned with hot water.
To the flour an egg is made in the form of a volcano, to incorporate in the following order the other ingredients for the dough: yeast, sugar, milk, egg, margarine and salt, this that did not have contact with the yeast.
Then the ingredients were integrated and the water was added little by little, and the dough was kneaded for a few minutes until it was smooth and homogeneous.
Each of the participants of the course was making their own bread, although there were two students who did not bring material and were helping us a little, because they were more skilled in making these breads.
Then we put the dough to rest, covered with a cloth, for half an hour. In the meantime, we melted the papelón, something extra that one of the participants suggested was good to give the bread a better flavor.


The bacon strips were put on the fire, according to the participants, to remove a little oil and add it to the dough, but almost no fat came out, probably because there was not much, heh, heh, heh.
After the dough rested, it was stretched with a rolling pin so that it was as square as possible to give the bread a better shape.
We ordered all the ingredients for the filling and began to incorporate them one by one in this order. First, the olives along the entire length of the beginning of the dough, so that each slice of bread would have olives.
Then the olives were covered by wrapping the dough around the olives. We added a little of the bacon fat and a little of the melted papelón, only in a small area of the dough.
Continue with the smoked ham, turkey ham, bacon and raisins.


Now we begin to roll the bread, trying to press a little so that it doesn't fall apart. Leave a part without filling and there we can make some designs to give the bread a nicer shape and thus have a nice presentation.
I made some straight cuts that form circles when stretching the dough. With a little bit of dough that I had left, I wanted to make a flower that, although it doesn't look like I wanted, it differentiates it from the other breads.
The breads were left to rest for a while more to rise, and then egg was added on top, so that they would take color, which for my taste, they still looked white.
They took a long time, they were burning underneath, but we felt they were raw. One of the students even took the bread like this.
I wanted to wait longer, however, even though they looked good, because the teacher opened his to see how it looked, so we brought them home. When we opened it, it felt a little raw in the center. I put it to cook for a while longer and it tasted very good. Thank God, those real ones were not lost, heh, heh, heh, heh.
Well, friends, this was one more account of my classes, that in spite of the stumbles and mistakes, we had a good time learning from a different dish in each class.
Thank you very much for your visit, see you again for the next culinary experience.

Mi blog es familiar, de mi día a día, en donde puedo subir fotos de niños u otras personas de mi entorno, NO autorizo a usar mis fotografías sin mi autorización.
My blog is a family blog, of my daily life, where I can upload photos of children or other people around me, I do NOT authorize you to use my photos without my authorization.
Dispositivo | Device | Samsung Galaxy A54
Fotos editadas en: |Photos edited in | CC Express for Picsart / Canva
Separadores hechos en | Separators made in | CC Express for Samsung
Traducción con | Translation with| DeepL
Quedaron muy lindos amiga. Que bueno que pudiste terminar de hornearlo jajaja
Se ven deliciosos amiga! Que bueno que hayas aprendido a prepararlos 💕
Una delicia poder comer pan de jamón, se nota que les quedaron excelente amiga que ricoooo 🤩
Congratulations @leidimarc! You have completed the following achievement on the Hive blockchain And have been rewarded with New badge(s)
Your next target is to reach 31000 upvotes.
You can view your badges on your board and compare yourself to others in the Ranking
If you no longer want to receive notifications, reply to this comment with the word
STOP