The dreaded Check Engine light popped up on the dash… Oh Great, What Now!! The car seems to be running great especially after I cleaned the throttle body. The Check Engine light was on before I cleaned and it is still there. So I pulled out my little Bluetooth code reader and pulled the codes from the computer. The Variable Valve Timing solenoid is bad on bank 1. Well good, it’s nothing major and this is a pretty quick and easy fix.
The VVT solenoids stick up through the valve covers at the front on the engine. The engine this 2005 Lincoln Navigator has is a 5.4L Triton V8 with 3 valves per cylinder. This engine is well know for having major issues when it comes to the timing chain setup amongst other issues. It’s definitely not the greatest motor the Ford Motor Company put in their cars… it’s a bit of a problem child if you will. Though I have had pretty good luck with this one. 183,000 miles and it’s still getting the EPA estimated Miles Per Gallon… Anyway… The VVT solenoids advance or retard the engine timing for the purposes of providing the best performance.
Let’s get these VVT solenoids changed out
Shall We?
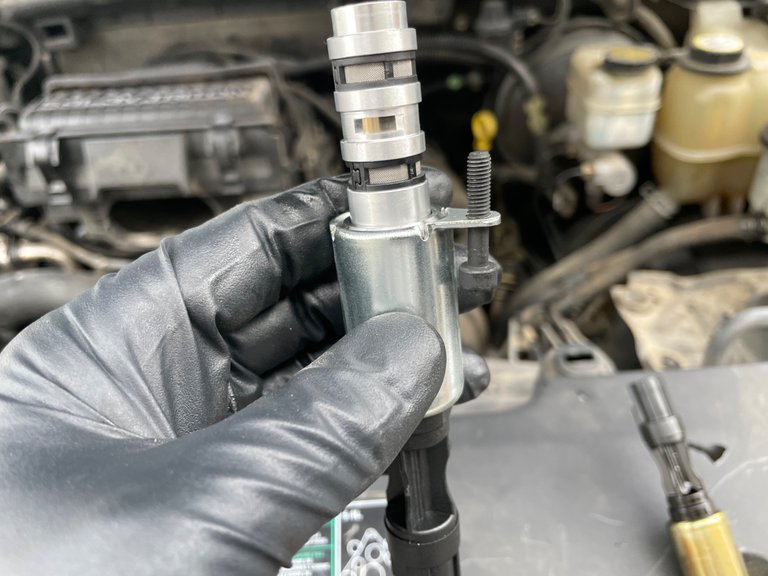
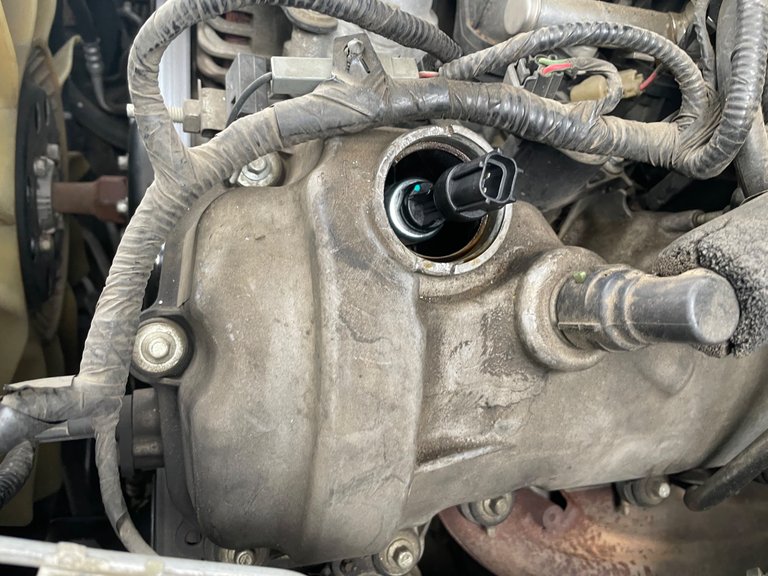
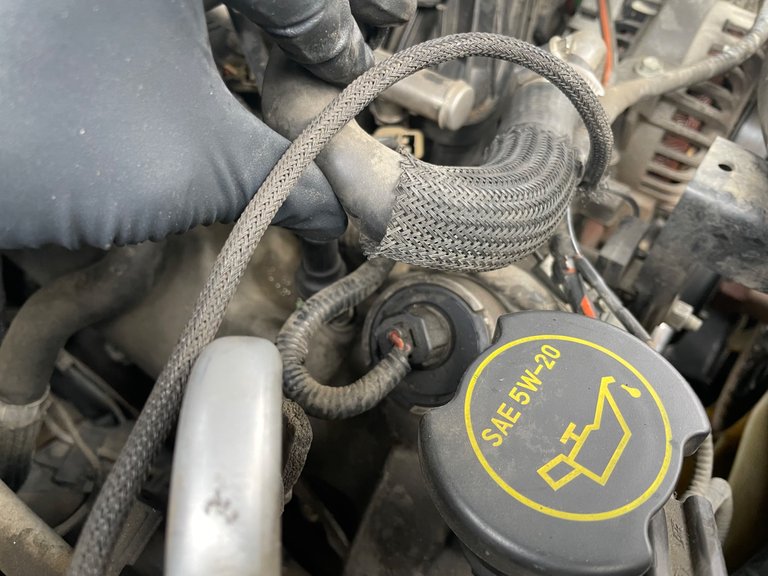
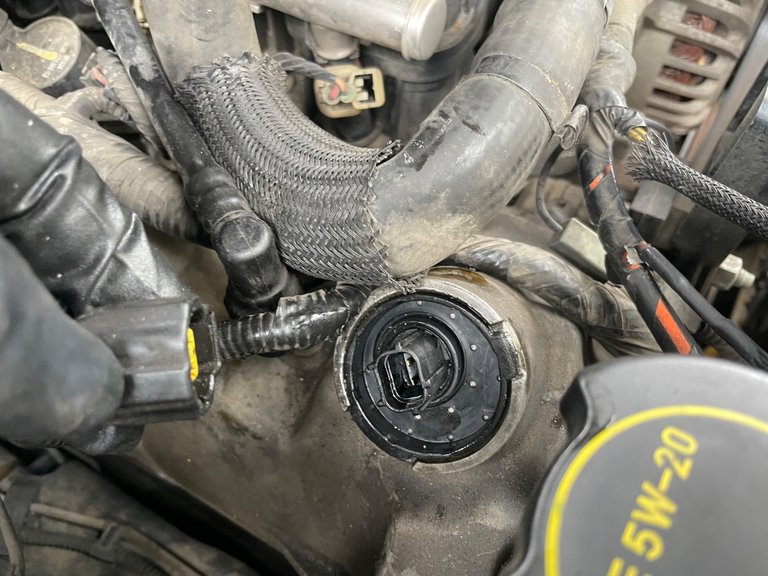
First thing is to locate the VVT solenoids. Both are located on the front of the valve cover and have one electrical connector plugging into them. Around the solenoid is a hard plastic seal that fits over it. Most likely you are gonna destroy them when removing. So make sure you buy replacements.
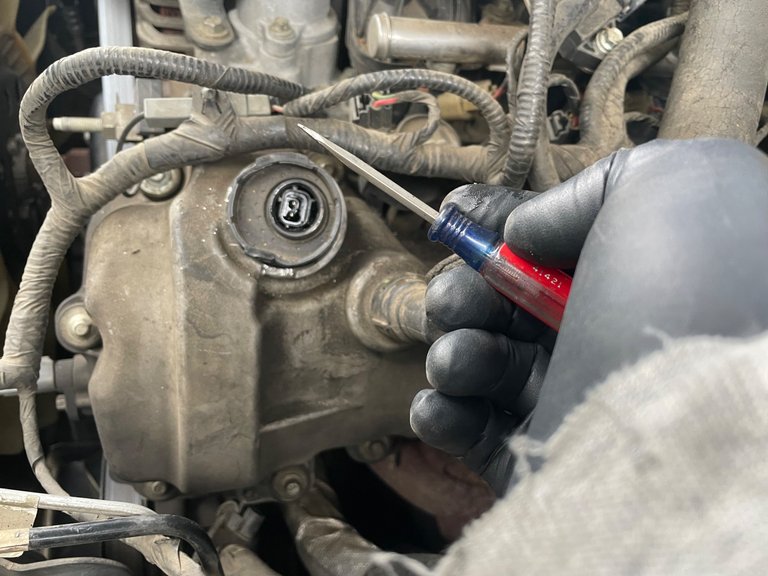
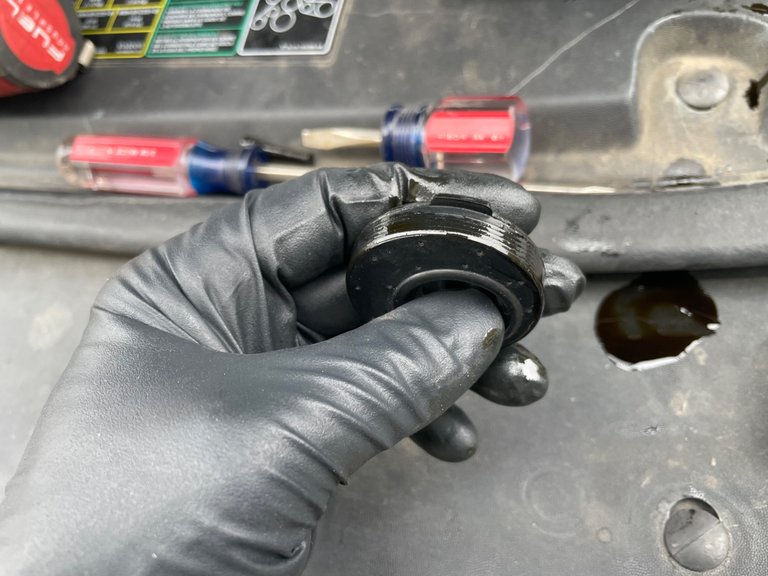
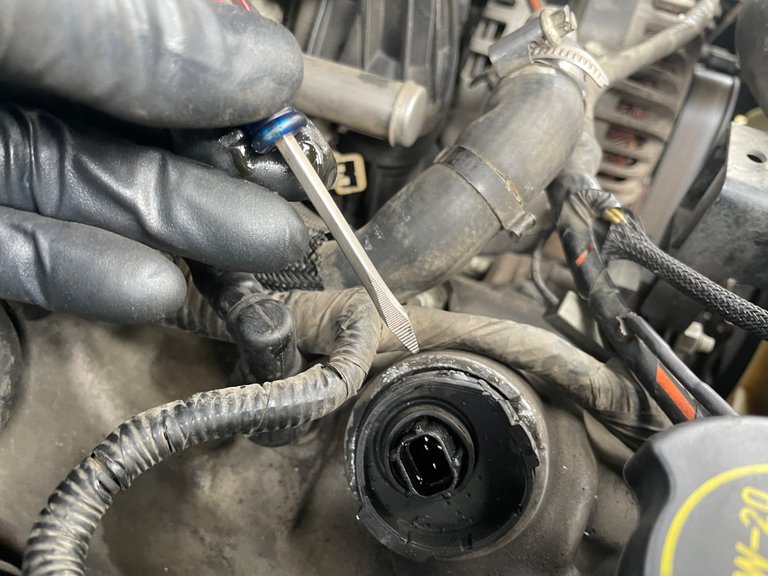
I ended up using a small flathead screwdriver to gently pry out the gasket seal around the VVT solenoid. Let’s just say it didn’t come out very easy.
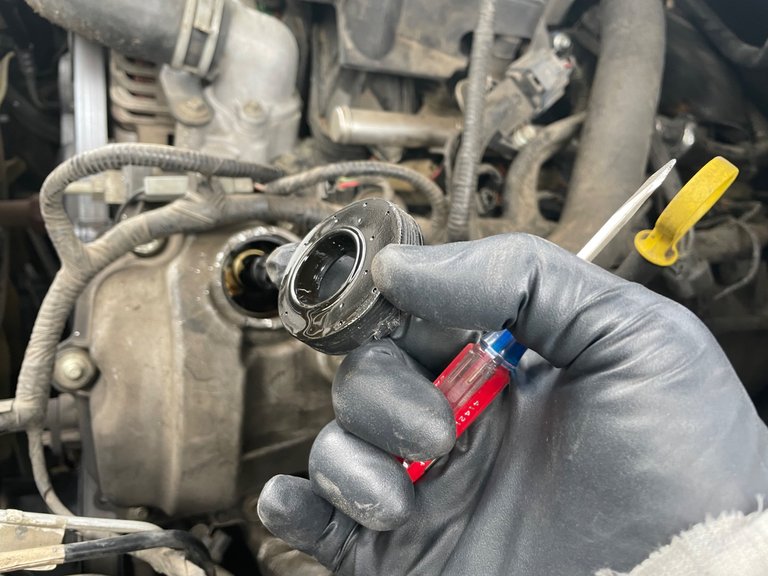
There is a retaining bolt down inside the valve cover that needs to be removed. This bolt holds the VVT solenoid in place. With the gasket seal deleo removed we can look down inside and see it… barely
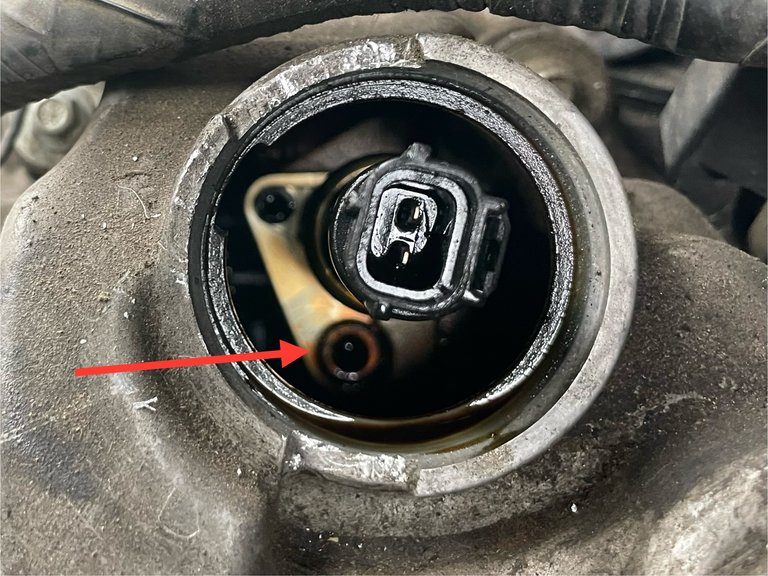
Using a T27 torques bit and a couple extensions, reach down in there and start to loosen the bolt.
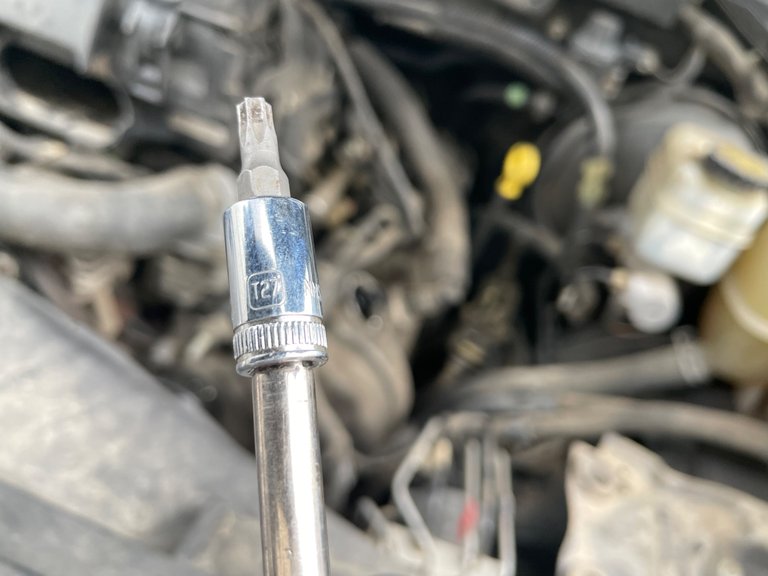
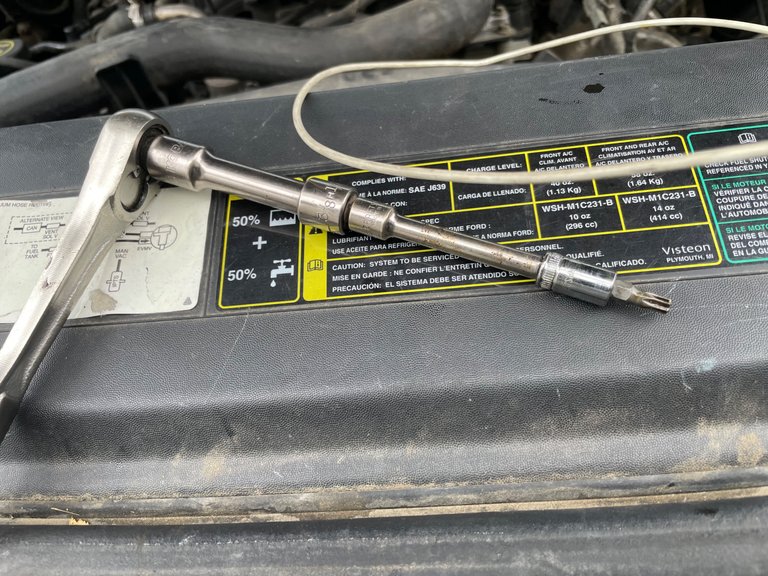
You don’t want to drop anything down inside the valve cover. Make sure your socket and extensions snap tightly together or better yet, tape them together. Dropping something in there is gonna cause a ton more work.
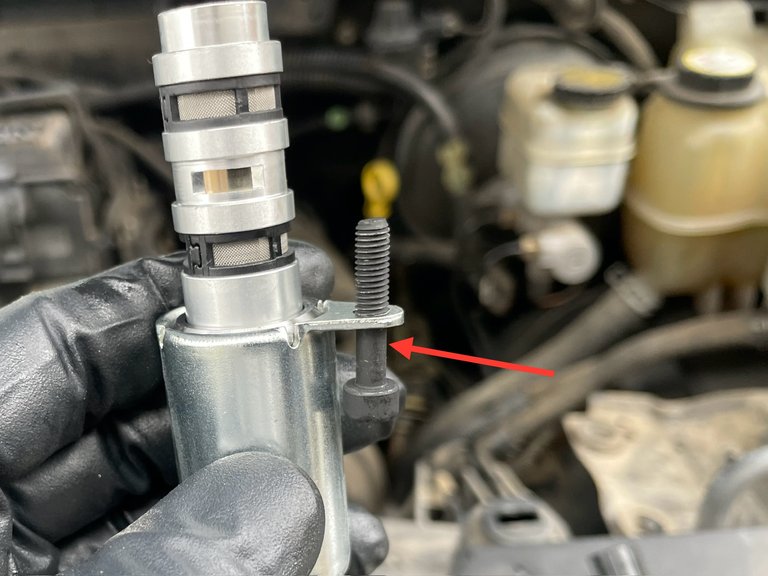
Not only do you have to worry about dropping a part of your tool in there, you have to worry about the retaining bolt too. As you can see it just slides right out of the hold down bracket.
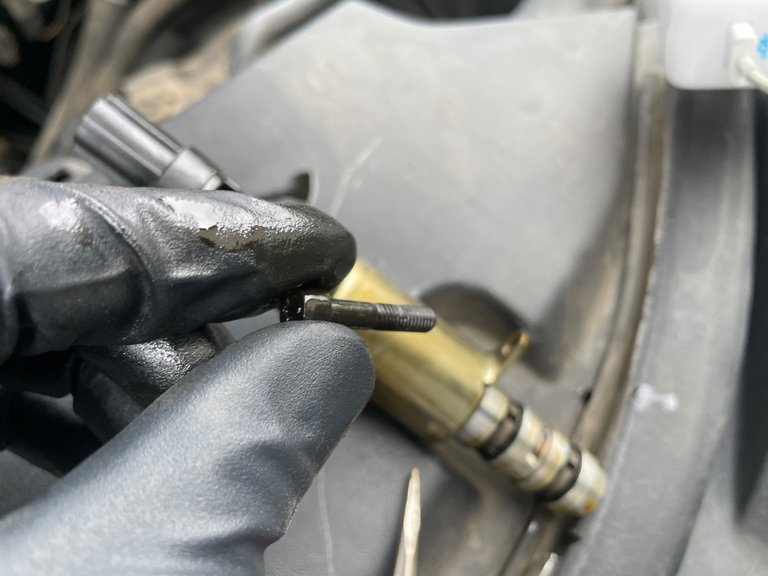
Using one hand to gently pull up on the solenoid and the other the loosen the bolt. This keeps the solenoid bracket against the shoulder of the bolt so the bolt doesn’t fall out.
The new solenoid does allow the bolt to fall out. The hole in the hold down bracket is just a touch smaller. This brings a little extra piece of mind when installing the new solenoid.
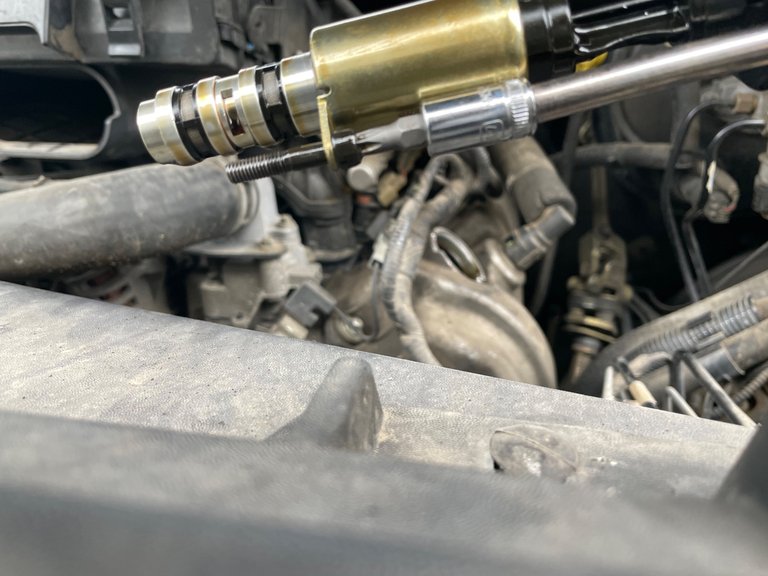
I put my torques socket into the bolt and held the extensions along side the solenoid and I installed the solenoid into the hole. Then used my fingers to get the bolt started so I didn’t strip it. Once it was finger tight I snugged the bolt down with the ratchet.
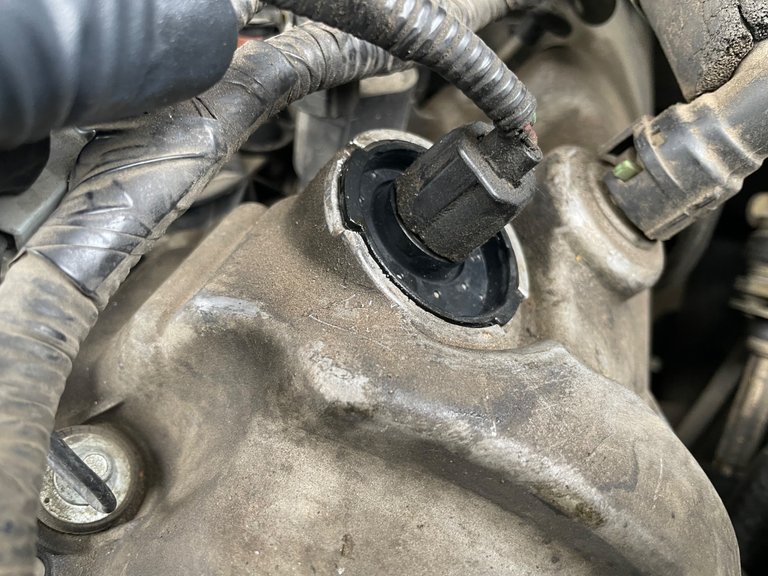
Next install the gasket seal deleo. I used a little engine oil to lube up the o’rings on the gasket. This will help it slide into place and seat properly.
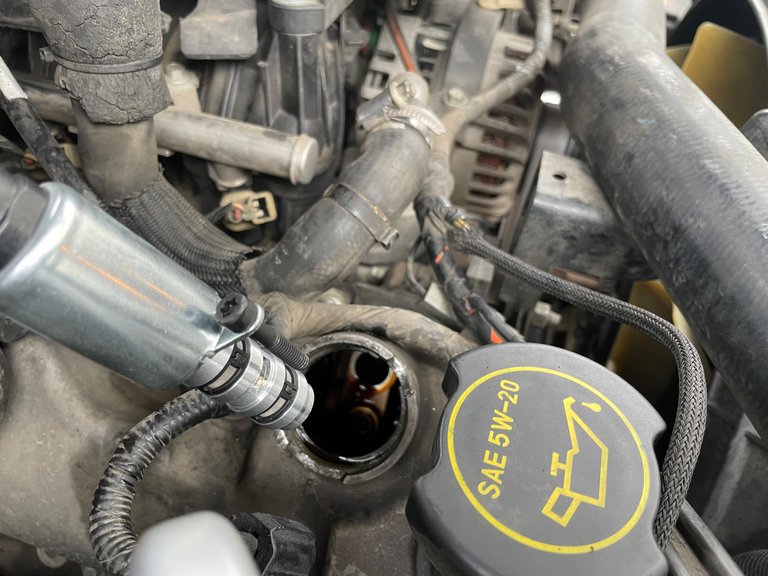
Using the back of my screwdriver, I gently tapped it into place. Working my way all the way around the gasket seal making sure it went into the hole evenly. Then plug in the electrical connector and the driver side VVT solenoid is done.
The passenger side VVT solenoid is kind of hidden under a hose. It’s located in the front of the valve cover just like the driver side but underneath the dang hose.
Repeat the same steps used to do the driver side on the passenger side.
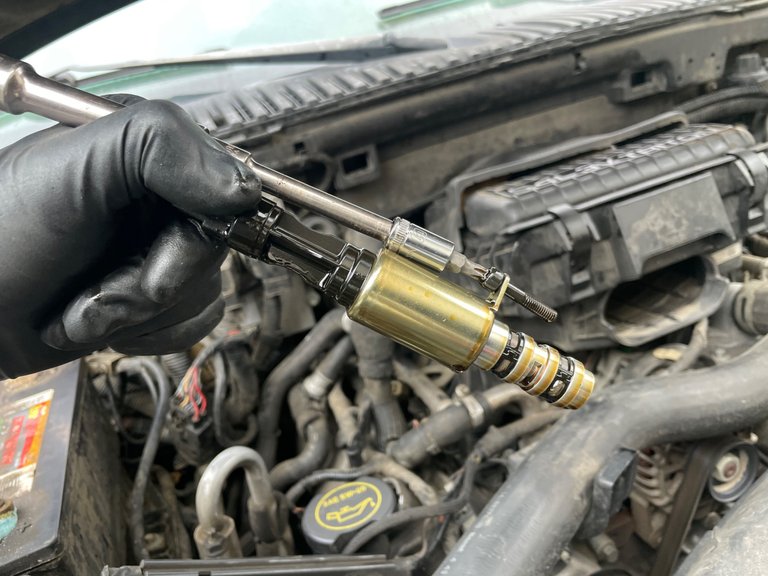
Remove old solenoid
Install new solenoid
Lube and install new gasket seal
Plug in electrical connector

Then go start the car and watch that check engine light magically disappear. This repair costs about $75 and it took a little over an hour to complete. The thought of dropping something inside the valve cover had me taking every precaution necessary to avoid that situation. These valve covers aren’t the funnest thing to remove on this vehicle I can tell you that.
Another repair complete and successful. I have a list of other repairs that need done to my vehicles that I just haven’t got to yet. I need front brake rotors on the Navigator and my Excursion plus I still need to yank the motor out of my son’s Subaru Outback that we got for $600 which will be his first car. When the we get the new motor we are going to be giving it a good overhaul before it goes into the car. This should be a great learning experience for the both of us.

Your Random
Dose of...


Oh broh... deadly shit having to fiddle around with that torque bit socket inside the cam box 🫠🫠 I can already hear the clink.
Laughs a lot of Ford's stuff are problem children🤣🫠 that's coming from someone that also drives a Ford.
Although..
You drive a 5.4liter V8 so shut up suck it up and enjoy the ride🤣😎😎
DAHAHAHAHA doing the timing job on this thing was a huge PITA!! The local shops want around $6k to do it and did it for $2k including buying the tools I needed. Starting it up was a bit nerve racking though. 😂🤣
I was scared too.
Ironically enough not long after that post he shared I saw a video of a T30 bit dropping down into a cylinder chamber! Guy had to remove the entire head!
Life!
Doah! Two steps forward and 10 steps back.
😉👊 nice wrenching..
I HATE to see the engine light!
Maybe I should carry some black tape and put over it whenever it pops up. 🤣🤣
good plan. 😉😆
No… LOVE the CEL Life bro. 😎
😁
Wow boss this is very technical to work. Weldone. I thank God you finally fixed it...
I tend to procrastinate a bit… especially if the car is running fine. That dang check engine light does get annoying after a while. Lol
Hello brother, good repair, without a doubt those code readers are amazing, that defective VVT solenoid was easily detected. Thanks for sharing, your publication has given me new knowledge. Regards
In cars with carburetor distribution was used in a vaccine that works with air that gave more high performance to the engine, in this case the VVT selenoid makes that function ..... Good that you were able to make that replacement of selenoid and very well detailed everything ...
WHAT!?!?
No more CEL life for you pal!
Me and my 2002, 225000 mile vehicle are gonna miss you at the “C.E.L. For Life Club” meetings! 🥲
Seriously though, intimidating repair job. Well done. I would be very afraid of dropping anything in there. I would’ve run away.