Step by step ❤️
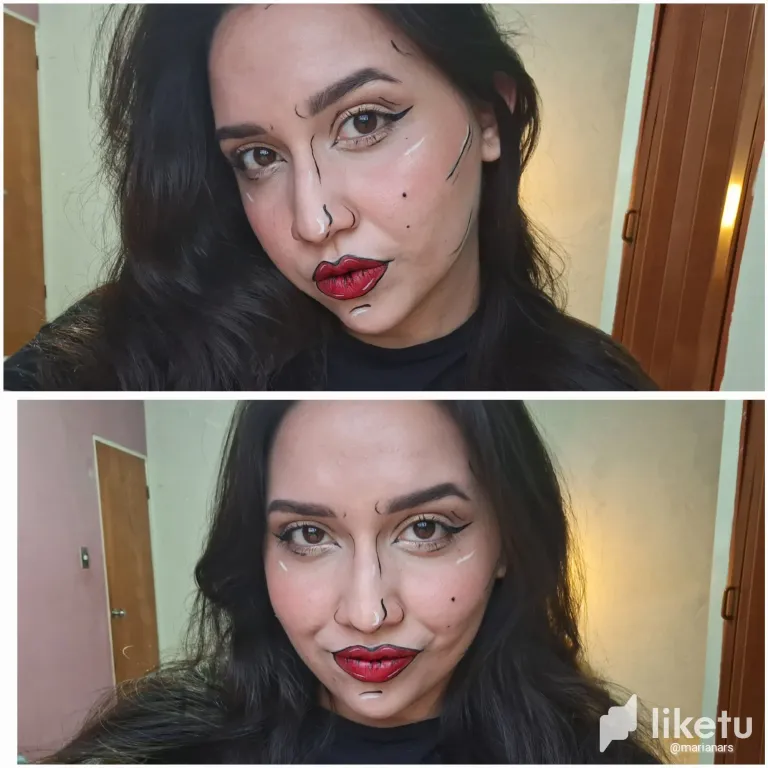
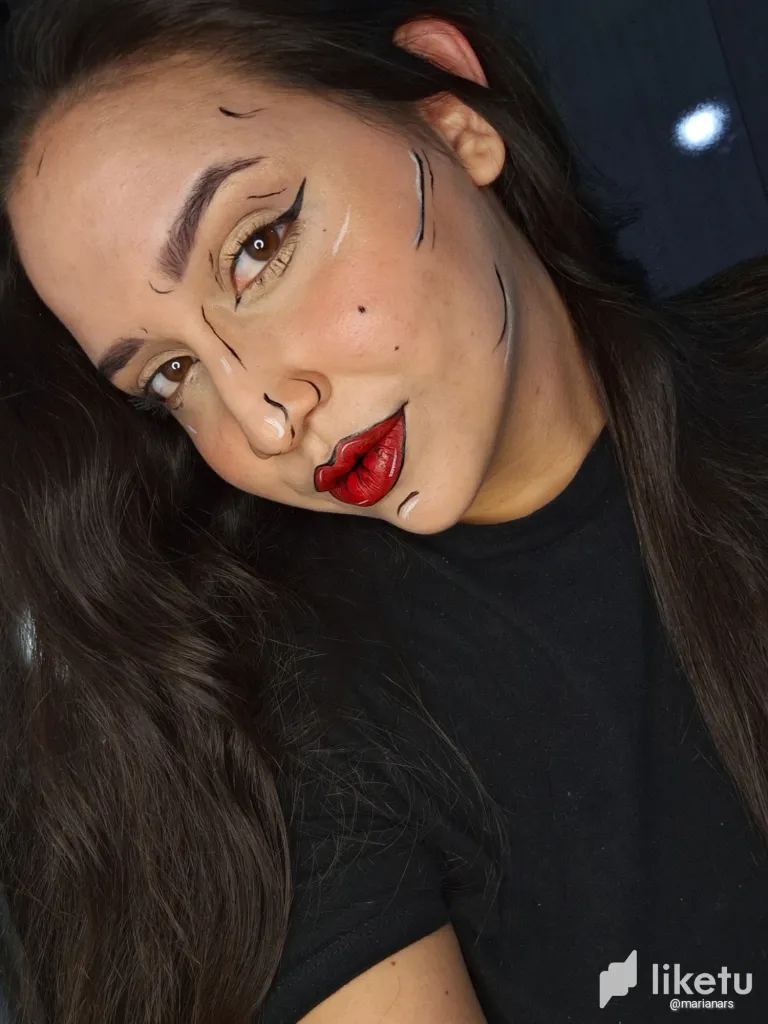
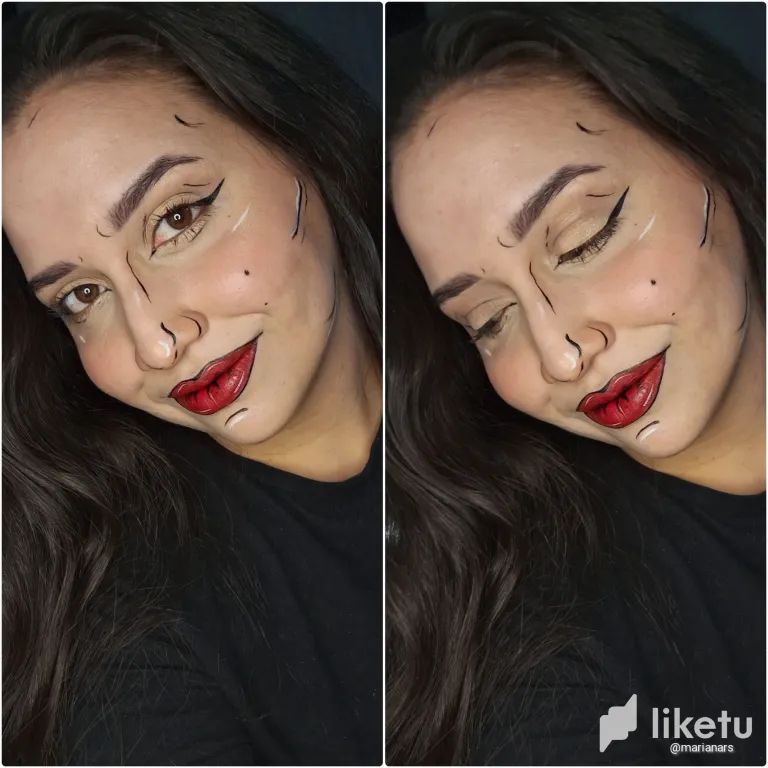
Hola amigos he estado inspirandome de algunos capitulo de la serie glow up competencia de maquillaje, entonces, me enamoré de la tendencia del arte pop, donde resaltamos gestos y características del rostro con líneas, hay mucho color en estos maquillajes especialmente colores primarios, se usan puntos y líneas que hacen ver nuestra cara como si fuera una caricatura de comic, en esta ocasión traigo un maquillaje algo discreto de este estilo, un poco minimalista en sus líneas y colores pero sin duda grita art pop.
Hi friends I have been inspired by some chapter of the series glow up makeup competition, then, I fell in love with the pop art trend, where we highlight gestures and features of the face with lines, there is a lot of color in these makeups especially primary colors, dots and lines are used that make our face look like a comic book cartoon, this time I bring a somewhat discreet makeup of this style, a little minimalist in its lines and colors but certainly screams pop art.
Vayamos con el: ✨️paso a paso ✨️
Let's go with him: ✨️Step by step✨️
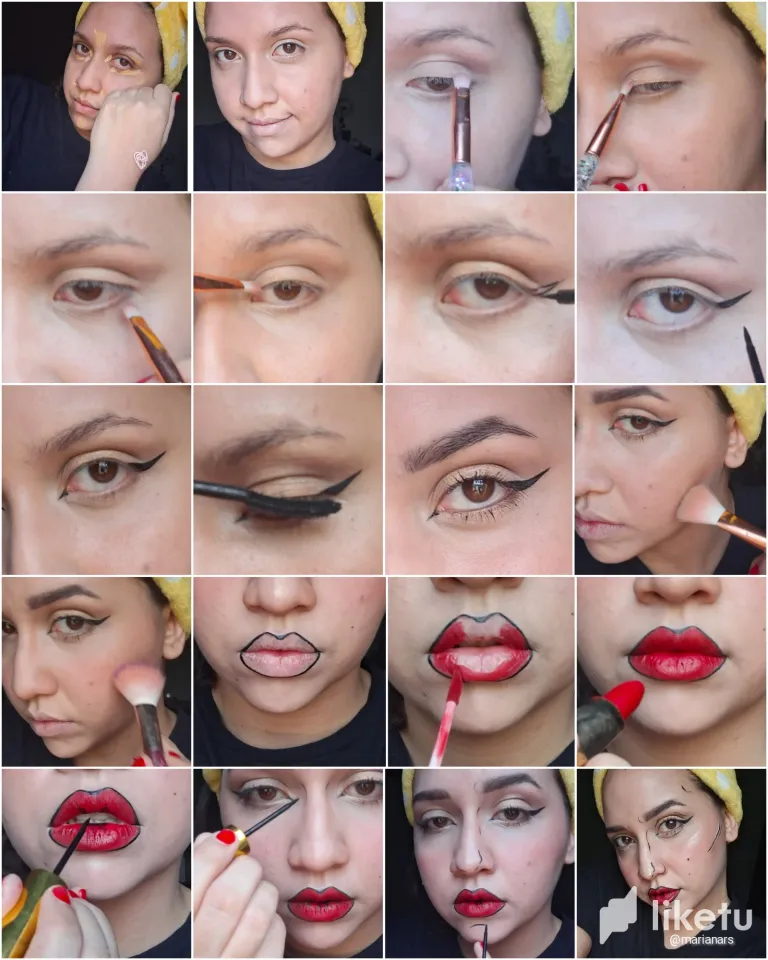
- Primero preparamos el rostro, ponemos corrector sobre la zona de ojos y base, la difuminamos con una esponja previamente humedecida.
- First prepare the face, apply concealer on the eye area and foundation, blend it with a previously moistened sponge.
- Con los ojos tomaremos brocha plana con una sombra gris clara y la aplicaremos sobre la cuenca, la difuminamos siguiendo la linea de pliegue con una brocha para difuminar, aplicamos un color más claro que este sobre el párpado móvil, intensificamos el final y al principio con una sombra más oscura y un pincel pequeño, sobre la línea de agua en el párpado inferior sombreamos con gris oscuro, procedemos a hacer un delineado para esto, nos establecemos en una superficie plana y ponemos nuestro codo para hacernos el delineado sin que tiemble mucho nuestra mano, así con el delineador líquido hacemos una línea en el extremo del ojo y hacemos otra que se devuelva a la línea de pestañas y rellenamos, también hacemos una línea pequeña que descienda un poco y la conectamos con otra pequeña línea en la zona del lagrimal, sobre la línea de agua aplicamos lápiz marrón y debajo de esta iluminador con pincel biselado. Proseguimos con las pestañas las rizamos y pintamos con máscara de pestañas de raíz a punta, peinamos y pintamos nuestras cejas de un color oscuro.
- With the eyes we will take flat brush with a light gray shadow and apply it on the socket, we blend it following the crease line with a blending brush, we apply a lighter color than this on the mobile eyelid, we intensify the end and at the beginning with a darker shadow and a small brush, on the water line on the lower eyelid we shade with dark gray, we proceed to make an eyeliner for this, we establish ourselves on a flat surface and put our elbow to do the eyeliner without shaking our hand too much, so with the liquid eyeliner we make a line at the end of the eye and make another one that goes back to the lash line and fill in, we also make a small line that goes down a little and connect it with another small line in the tear area, on the water line we apply brown pencil and below this illuminator with beveled brush. We continue with the eyelashes we curl them and paint with mascara from root to tip, comb and paint our eyebrows in a dark color.
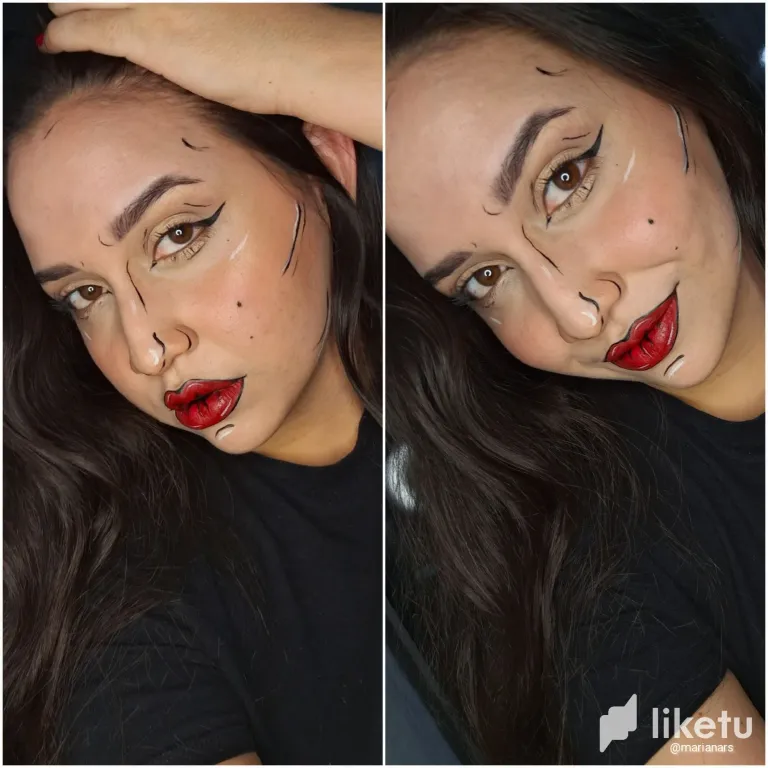
- Aplicamos contorno nude bajo nuestros pómulos y en las alas de la nariz, también en la línea de cabello y difuminamos, agregamos un rubor rosa suave difuminamos sobre pómulos y mejillas, procedemos a aplicar iluminador sobre los pómulos y un punto sobre la nariz, usamos polvo de hadas en los pómulos.
- We apply nude contour under our cheekbones and on the wings of the nose, also on the hairline and blend, we add a soft pink blush we blend on cheekbones and cheeks, we proceed to apply highlighter on the cheekbones and a dot on the nose, we use fairy dust on the cheekbones.
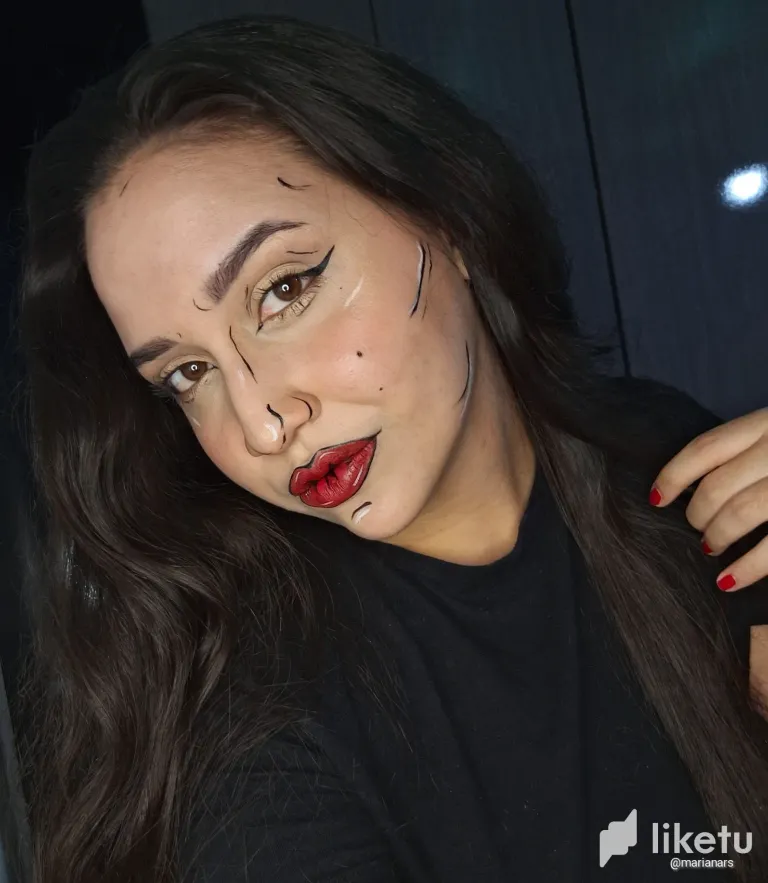
- Vamos con los labios, con delineador negro líquido delineamos alrededor de los labios, aplicamos labial rojo intenso respetando las líneas negras sin difuminar, en el medio de los labios ponemos un poco de rojo vivo en labial y difuminamos un poco con dedo o pincel los colores rojo oscuro y más claro, en el medio de los labios imitamos sus líneas con delineado negro.
- Let's go to the lips, with black liquid eyeliner we outline around the lips, we apply deep red lipstick respecting the black lines without blurring, in the middle of the lips we put some bright red lipstick and blur a little with finger or brush the dark red and lighter colors, in the middle of the lips we imitate their lines with black eyeliner.
- Con respecro al delineado y los detalles en el resto del rostro, hacemos una línea a lo largo de la nariz, en las alas de la nariz, sobre el pliegue del ojo y bajo los pómulos, en la barbilla y demás, esto lo haremos con delineado negro, y resaltamos con delineado blanco, también le hacemos detalles blancos a los labios y lo hacemos horizontales dando luz a los labios.
- With respect to the eyeliner and details on the rest of the face, we make a line along the nose, on the wings of the nose, over the crease of the eye and under the cheekbones, on the chin and so on, we will do this with black eyeliner, and highlight with white eyeliner, we also make white details on the lips and we do it horizontally giving light to the lips.
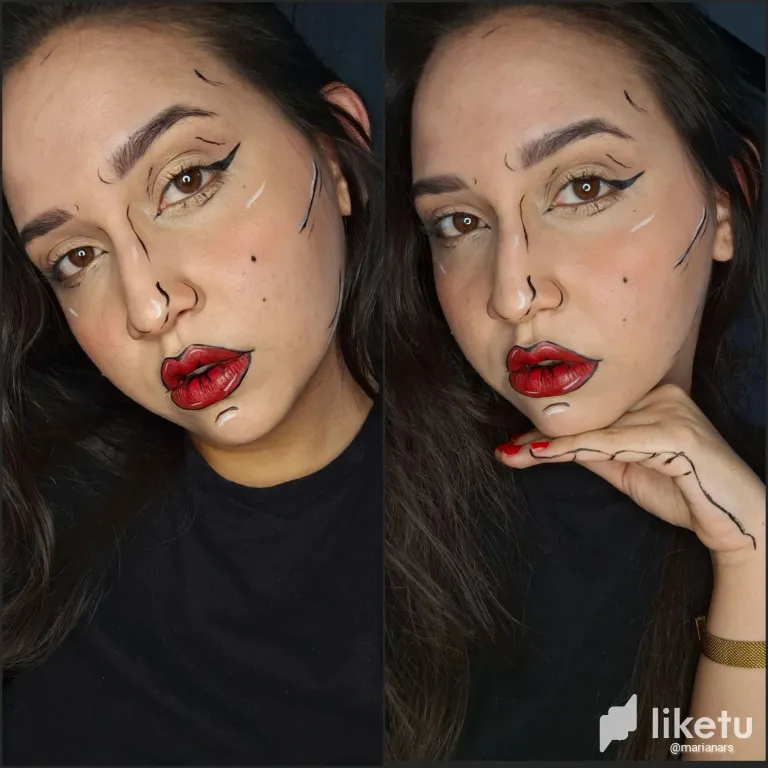
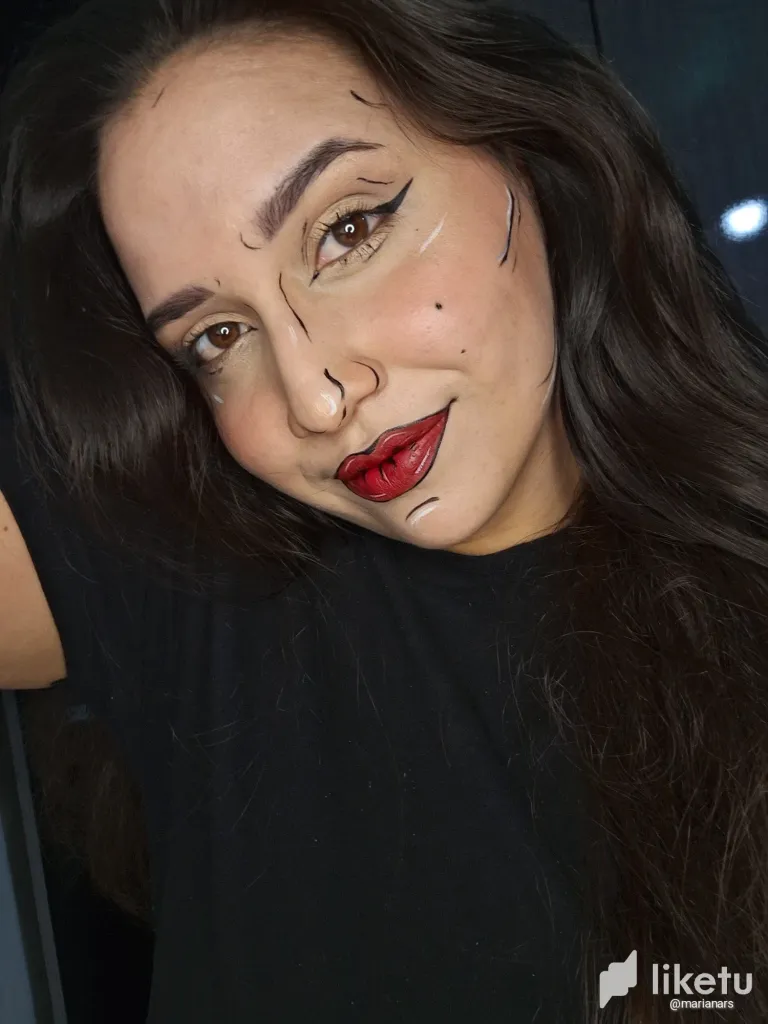
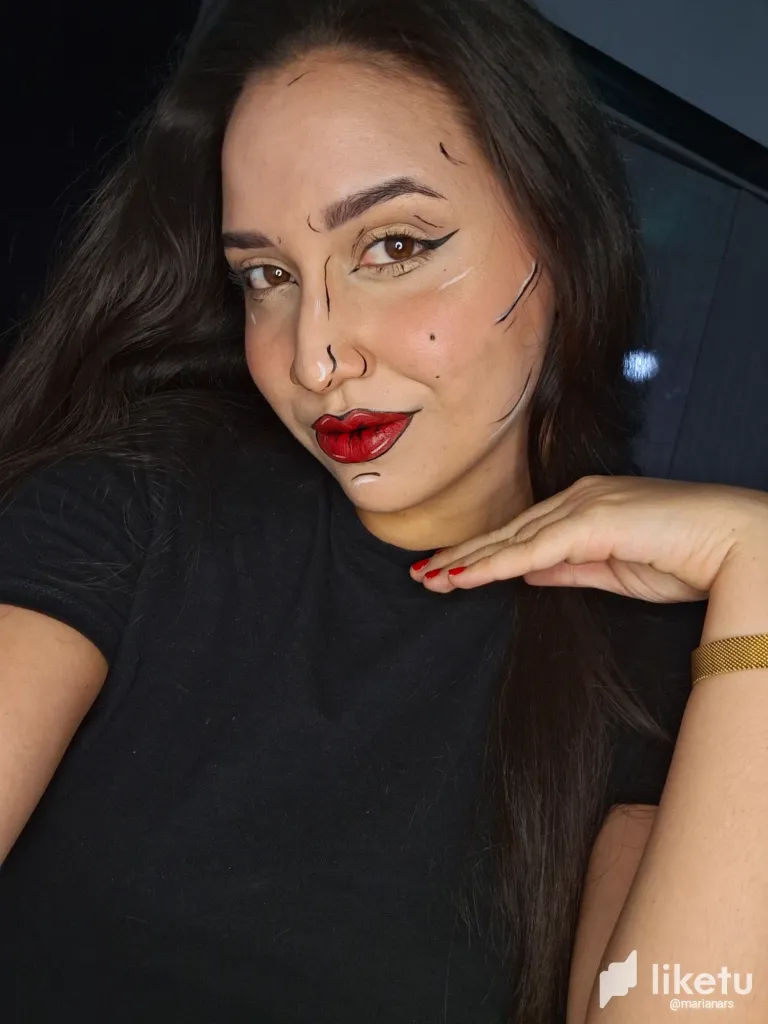
Negaría si digo que no me encantó, pues adoro el arte y esto es un creativo intento de pop art makeup, esta lindo, ¿a ustedes qué les parece?
I would deny if I said I didn't love it, because I love art and this is a creative attempt at pop art makeup, it's cute, what do you think?
.
.
.
• Photos taken of a galaxy a54.
• Traductor/translator: DeepL.
• Collage Editor: Polish.
For the best experience view this post on Liketu