content sources
deepl translation
gift:
facebook logo
instagram logo
hive logo
logo week zone
Register in hive
Earn some small tokens for googling. Register here
English
Hello hive friends, I hope you are all enjoying the community and sharing with each other, one of the most exciting things is to learn from each other, it is very nice what we all do.
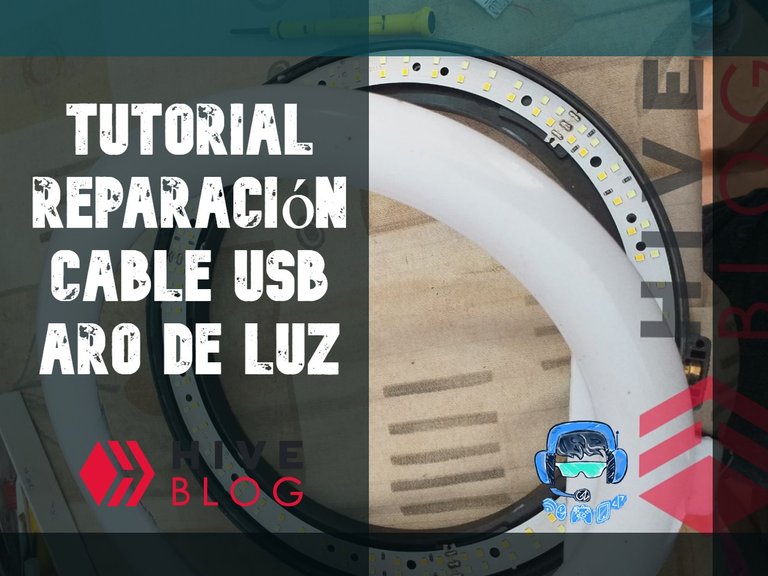
For this opportunity I want to share with you a resolution of a problem that occurred in my workshop. It simply did not turn on a light ring that my sister had bought and she had already been giving failures, she just did not want to send it to repair until it simply stopped turning on and then she had to send it to fix it. It is a light ring that is used as a tool to take pictures of her clothing store. She has a store on Instagram in which she manages to sell I will leave her store here, as she ships nationwide in Venezuela and her clothes are beautiful, the Instagram user is the following @fashondani22.
I was not of much use to her until her light ring broke and there she went in search of her older brother to repair it. This time I will show you step by step how to repair this Light Hoop, as it is a very important tool and it was also something very easy to do, so Let's Get Started.
##Tools for the repair
To do it all I needed was:_
- Soldering iron.
- Pewter.
- Flux paste.
- A number 5 slotted screwdriver.
- I will also use some plastic x-ray paddles.
- Silicone glue I will continue with the repair.
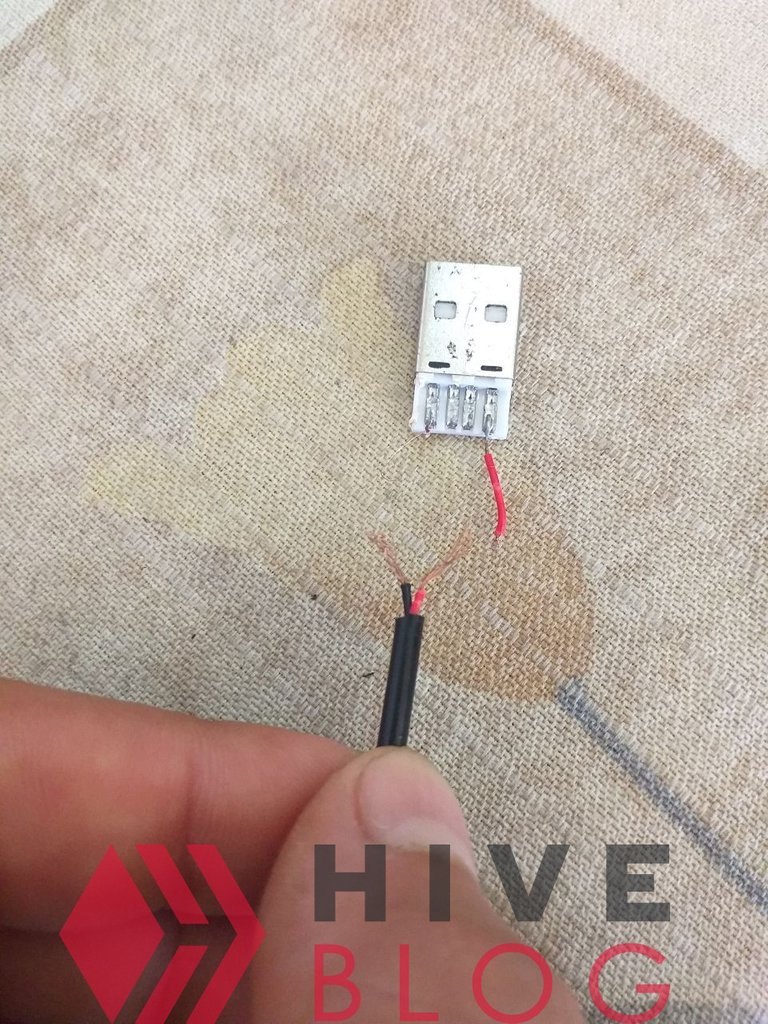 |  |
It was very easy to start with. What I could see at a glance is that the USB type male input was broken and had the wires split, then I proceeded to use an Exacto to remove the waste wires that were bad and also peel the tips I wanted to solder, I also used flux paste on the wires so that the tin that adheres to the wires would do it much more easily.
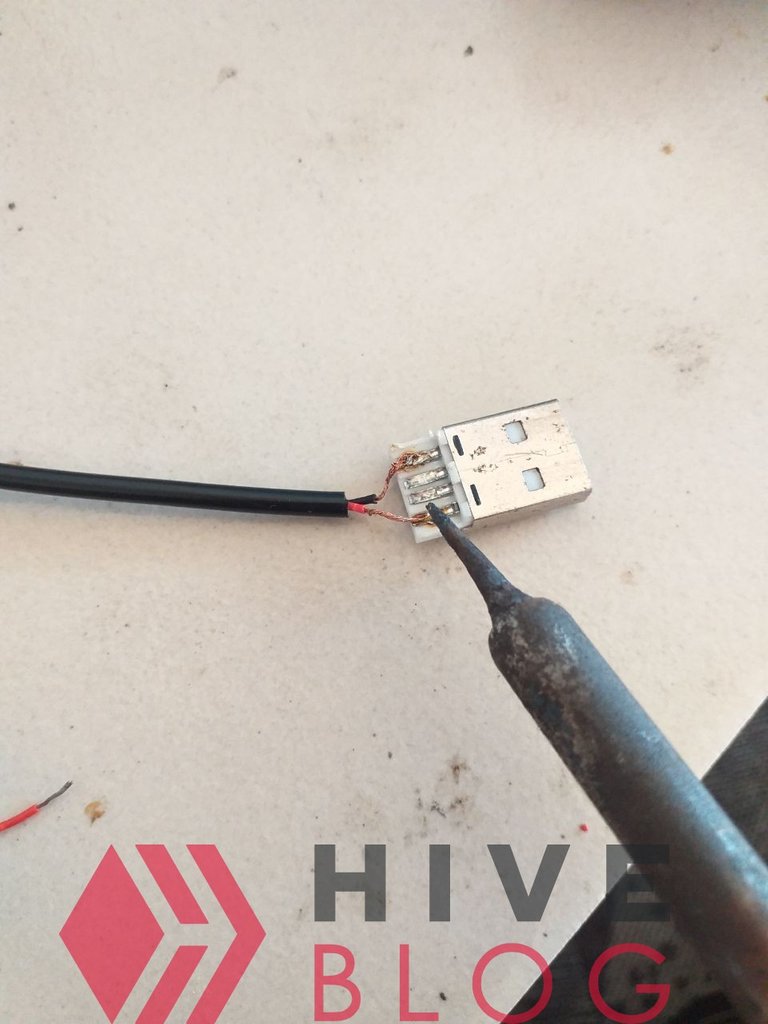 | 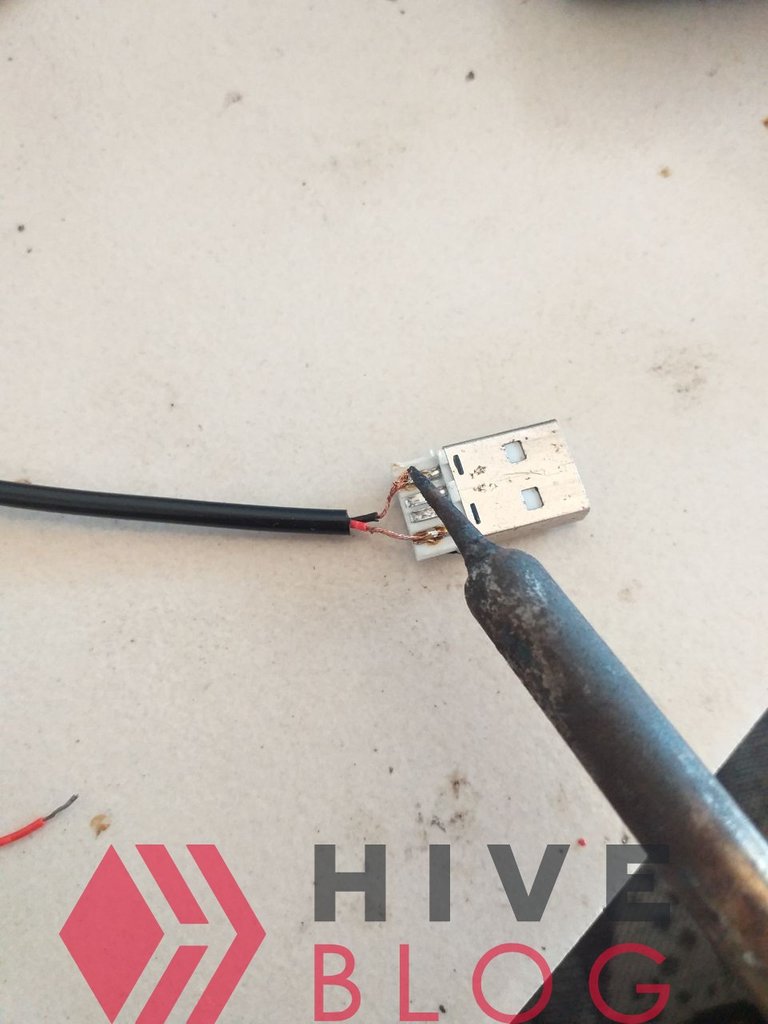 |
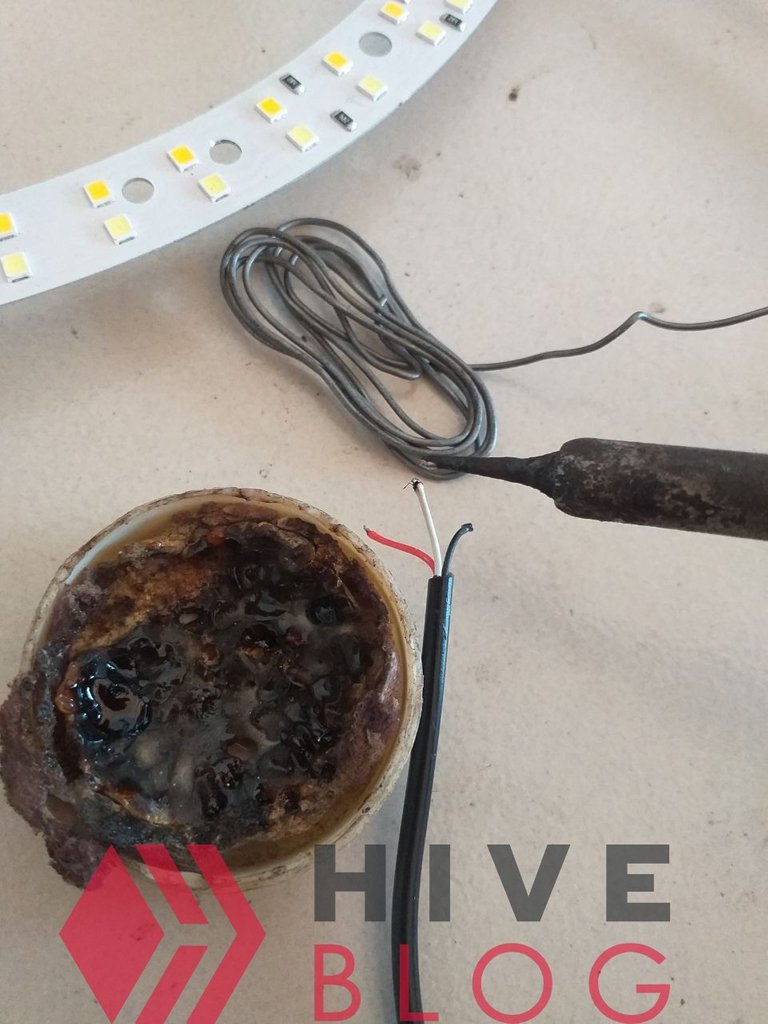
After this, use the red wire and the black wire.
- The red wire means positive.
- The black wire means negative.
It had to be right on the tracks where they were soldered so that it would not short out and damage all the light LED wires. Each of these two wires had to be soldered with tin right on the tracks where each one came from.
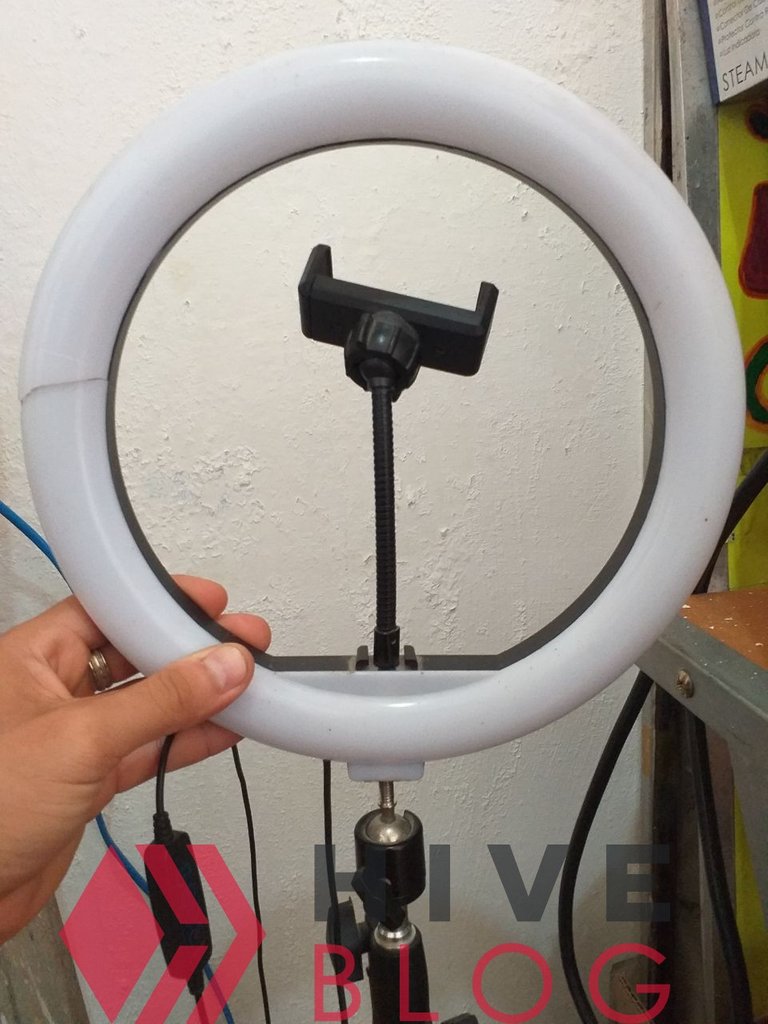 |  |
After this I am going to go directly to the ring where are the leds and all the internal cable system to look for any fault, cut cable, split cable, some short or some bad led that is also preventing its operation and to begin I began to unscrew the part of the legs that hold the ring making that this ring will be free being able to move it to any side.
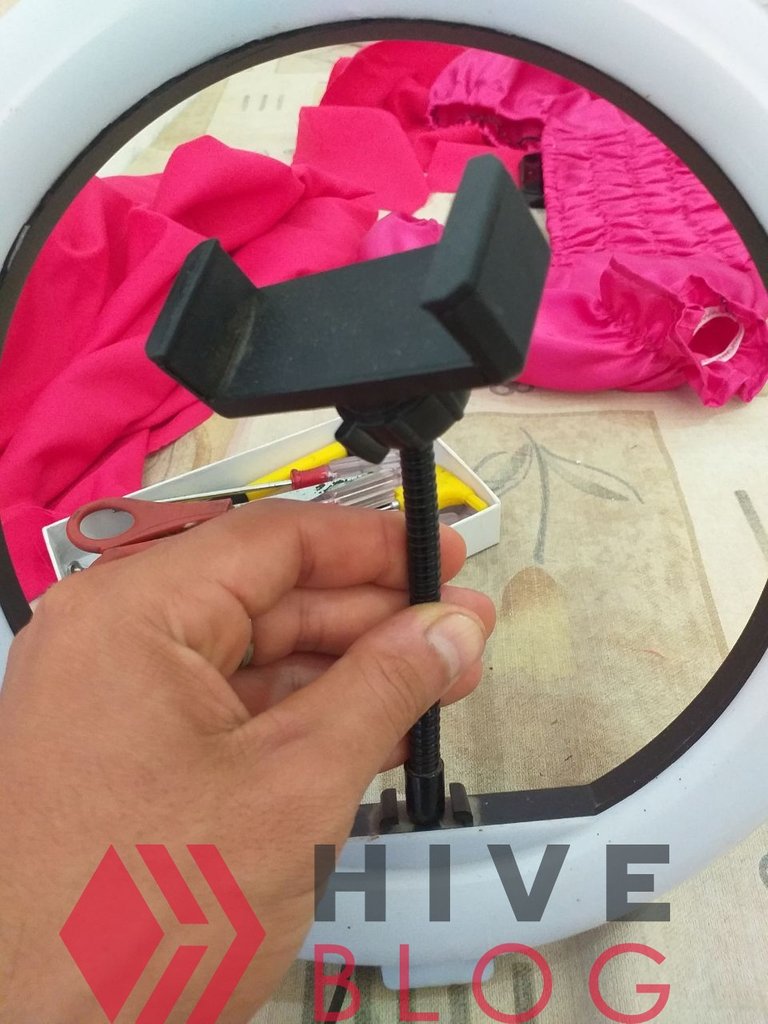 | 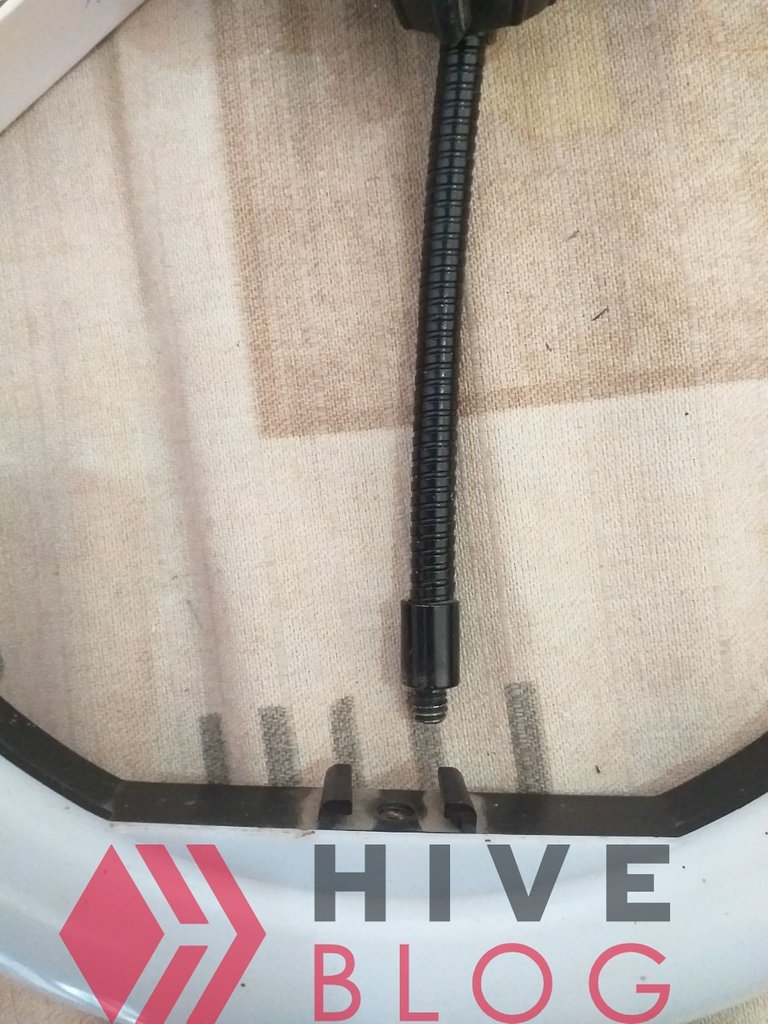 |
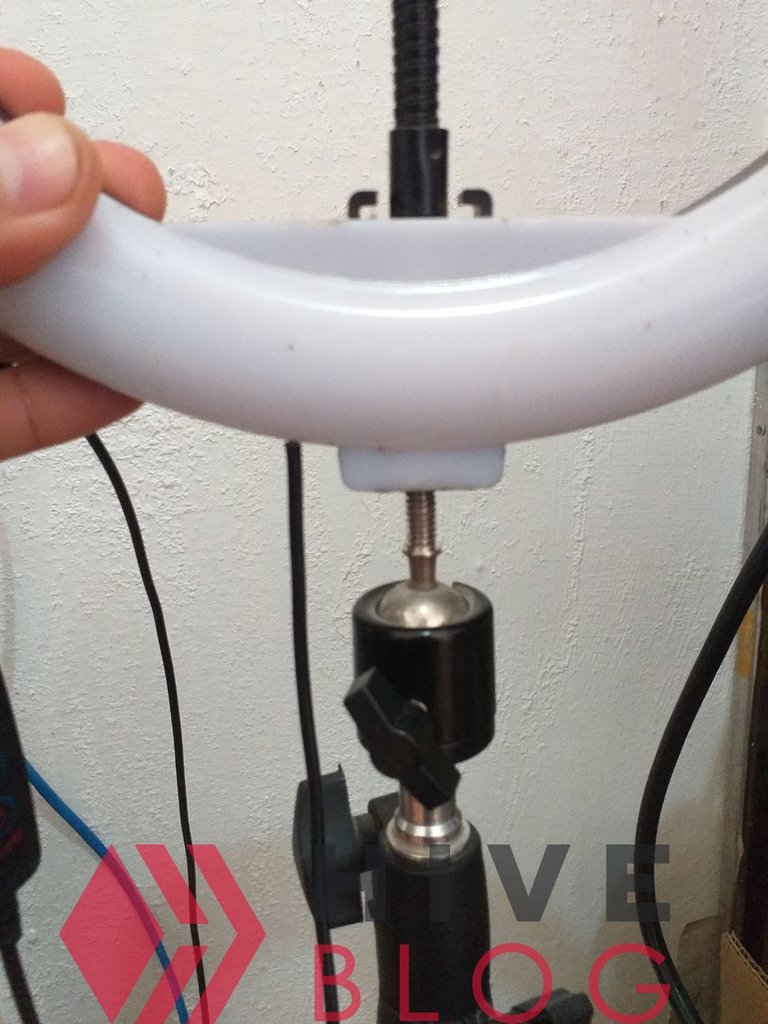
After this I had to unscrew also the leg that takes the holder of the telephones, this is done simply turning it and this one will be able to leave with total facility, we would already have our ring of free light.
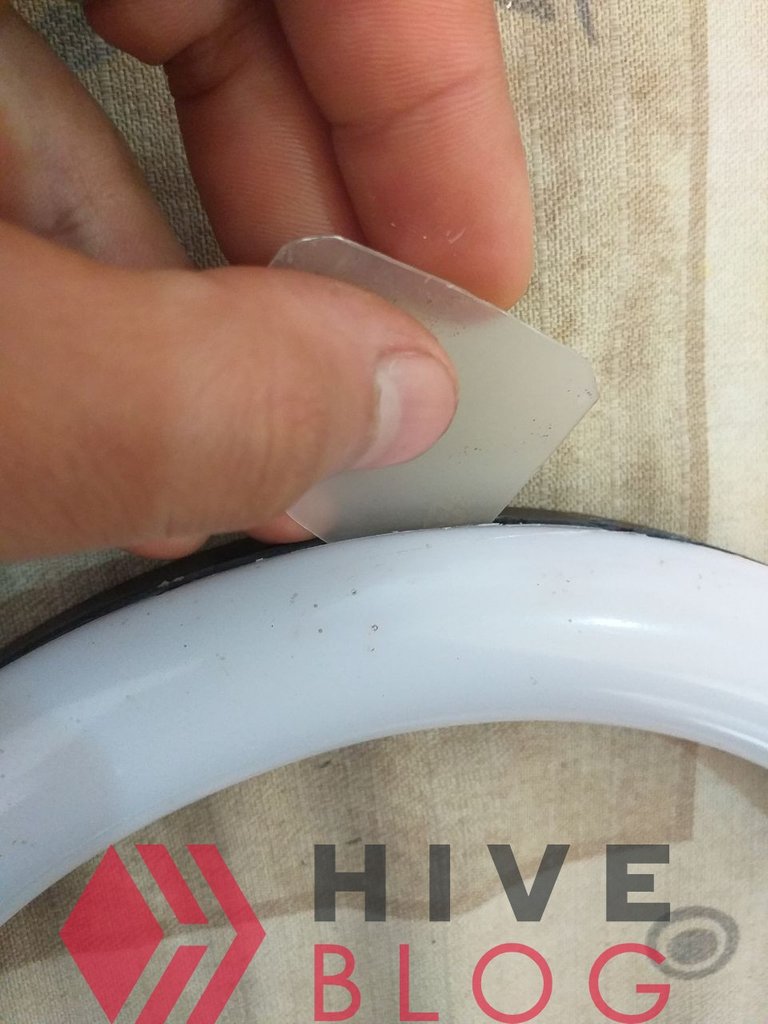 |  |
The following step is much more delicate, we have to take the X-ray plate to go placing it between the bulb and the casing so that it is Valle taking off very carefully without breaking it, since its glue is very resistant and this way to be able to uncover and to leave in discovered the LEDs of this apparatus.
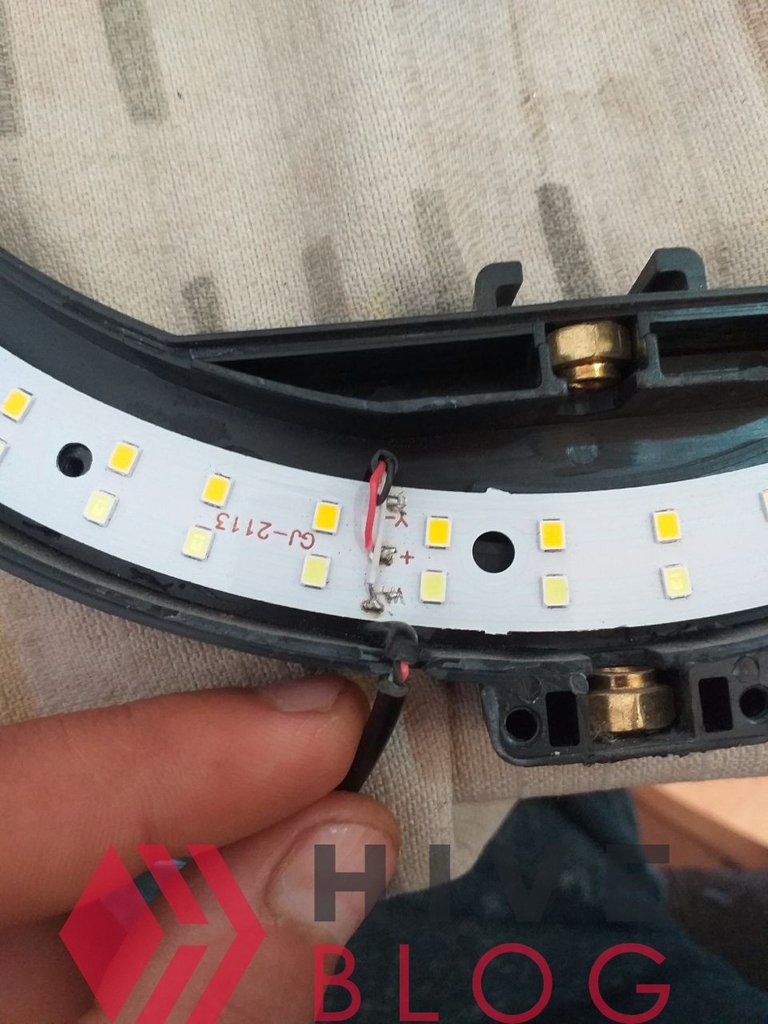 | 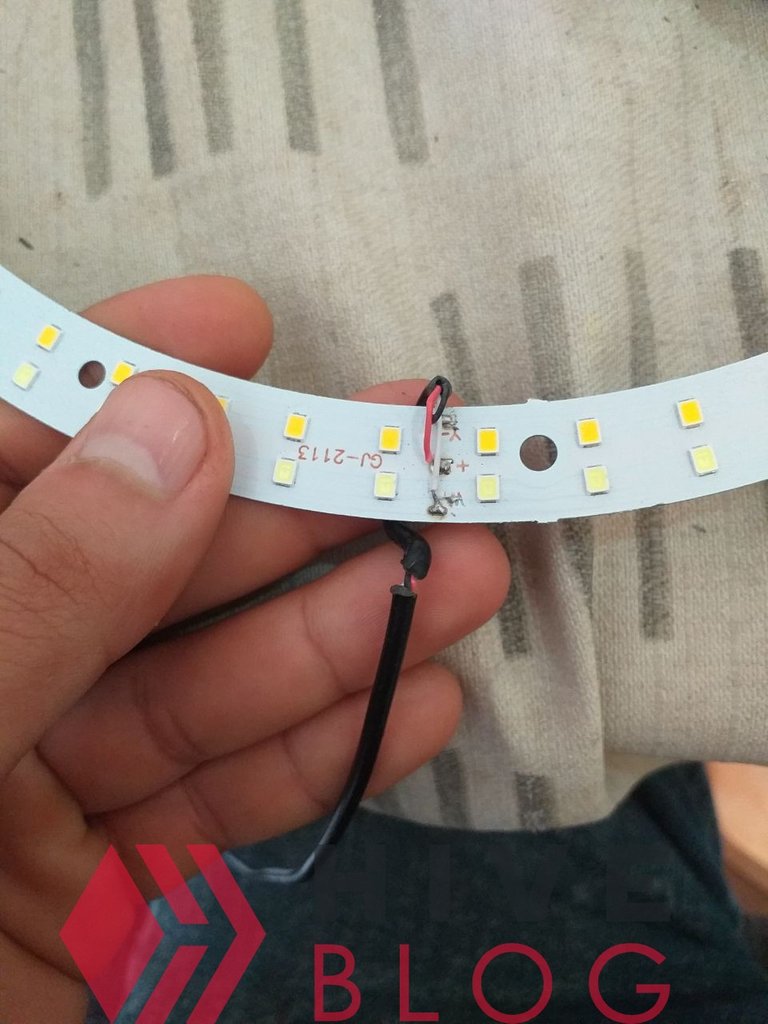 |
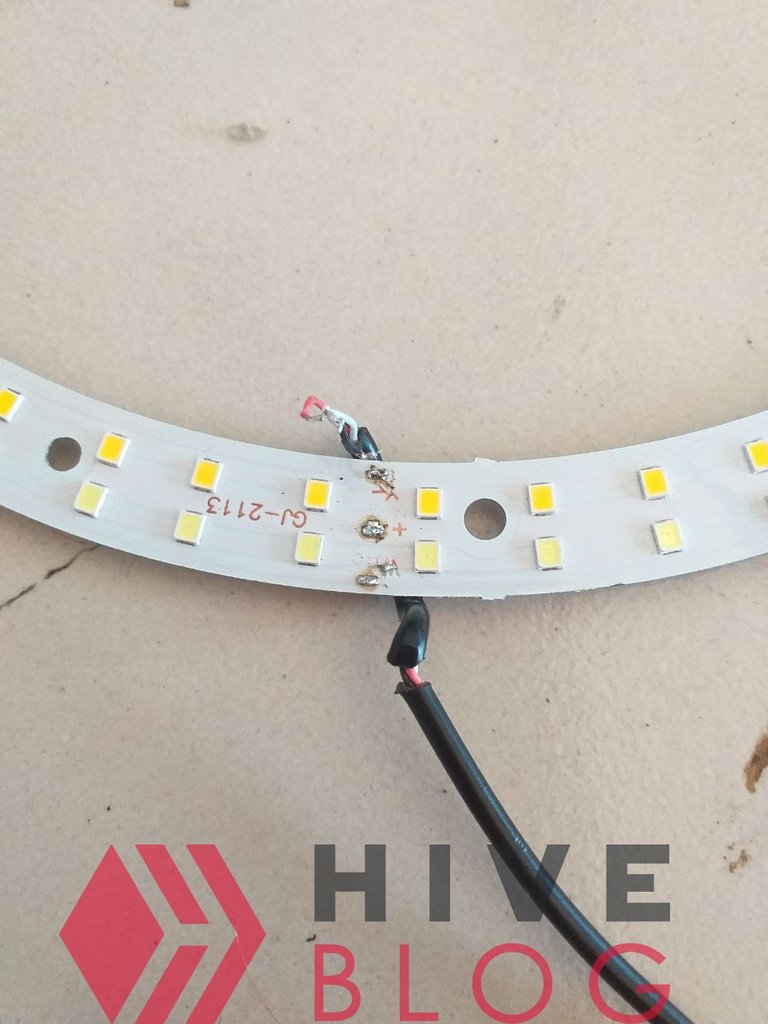
After this we will already see the three wires soldered and also you will observe a corner where the cable crosses and simply by its bad manipulation it is broken, this will make that the bulb remains sensitive and any movement would be extinguished.
After this we will already see the three wires soldered and you will also observe a corner where the wire crosses and simply by its bad manipulation is broken, this will make the bulb is sensitive and any movement would turn off.
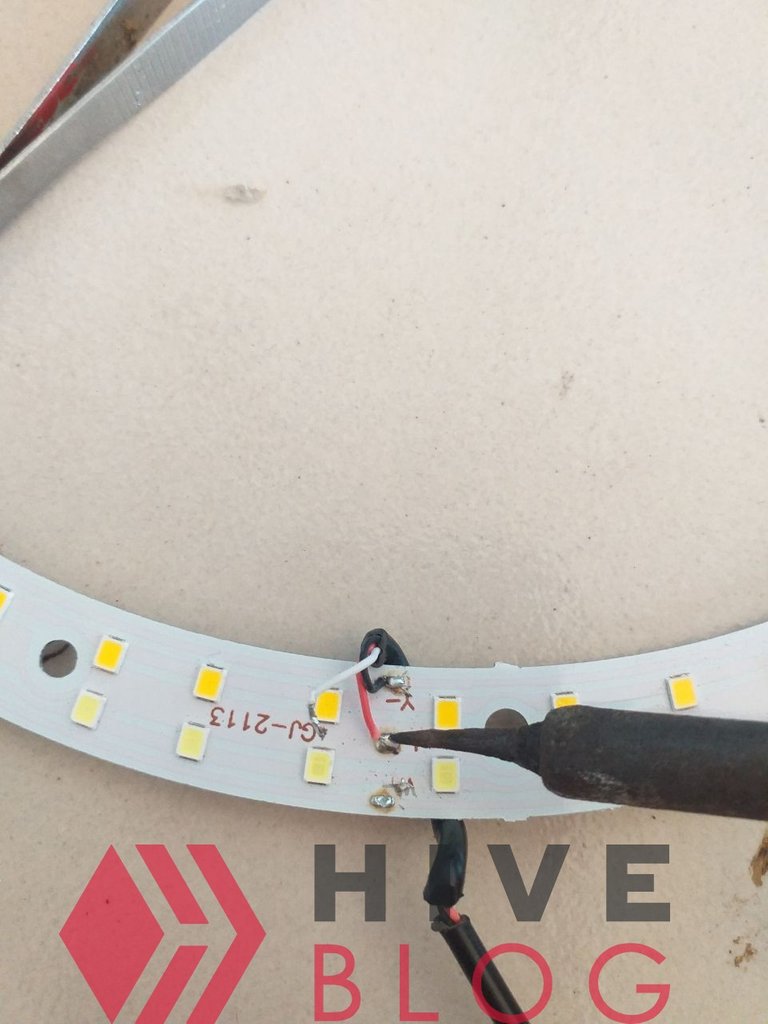 |  |
To solve this what I did is to de-solder each wire, always remembering the color order in which it is soldering so that it can be manipulated much more easily and be able to work with it freely. And so cut the piece of wire that was broken, remove the tips that should be soldered just with the pre-established color order and restore them using flux paste to re-solder how everything goes in its good order.
 |
|
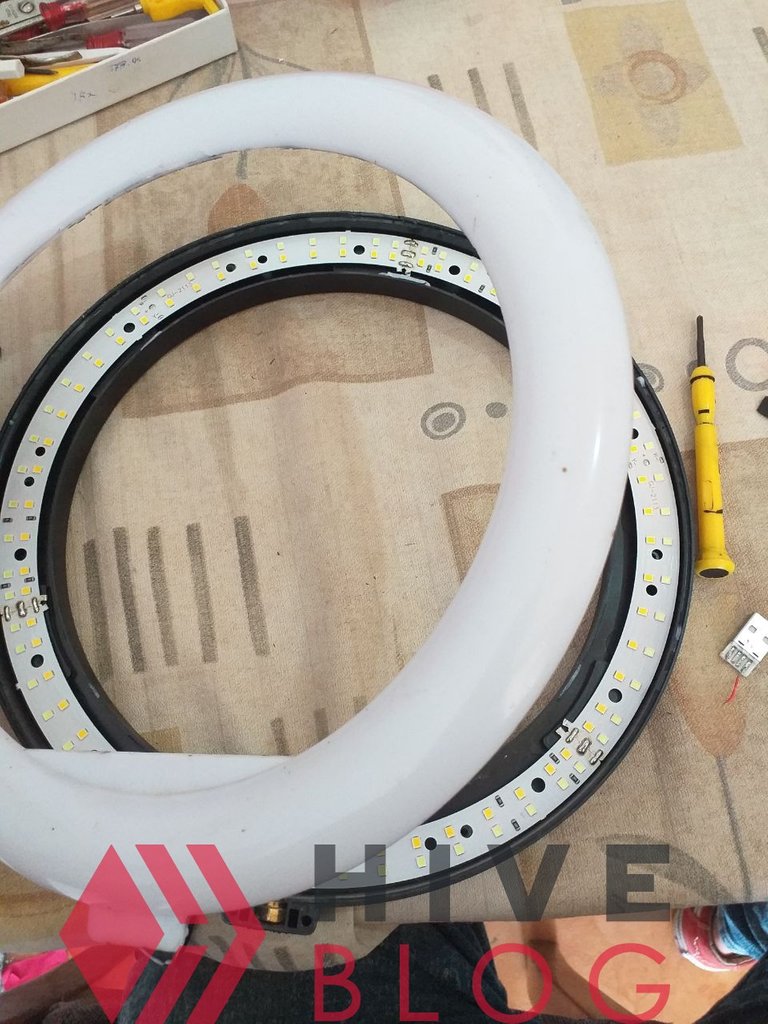
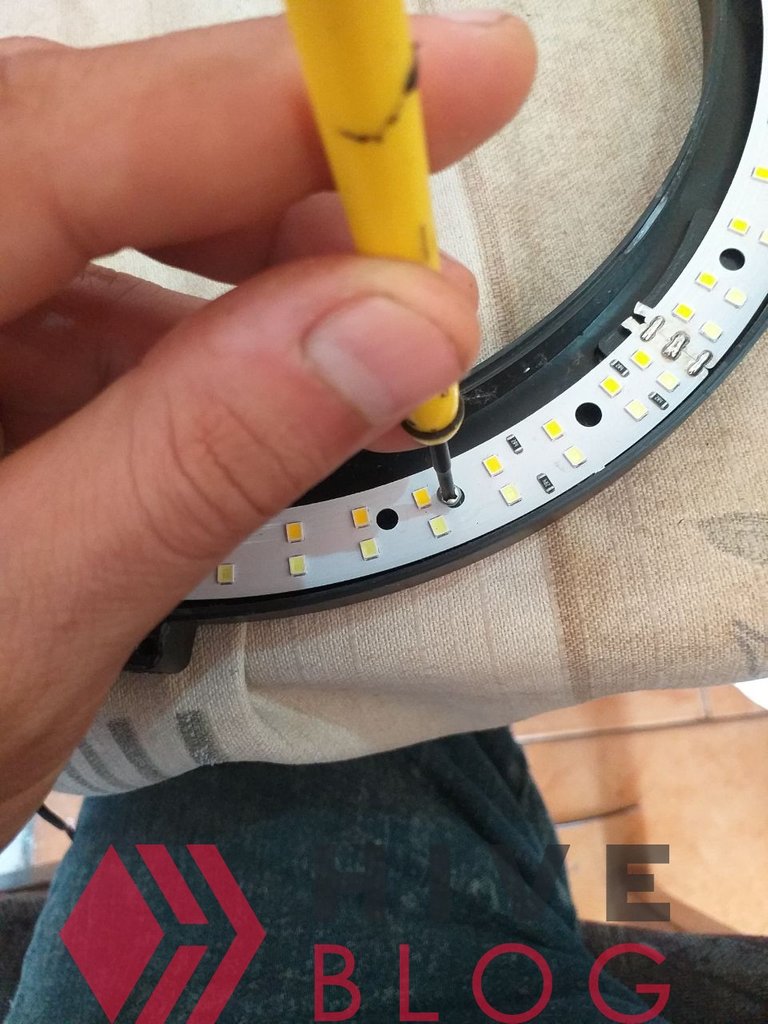
After this you must tighten four screws that are holding all the LEDs so that they are fastened again quite strongly in the casing and thus to avoid that by the movement they break again.
 |  |
After this the only thing you have to do is to place the glue that go in the bulb hugging the housing so that the whole equipment is not disassembled and reassemble it, everything as you realize was spectacular, the equipment is fully operational.
Español
Hola amigos de hive qué tal soy Daniel, espero todos estén disfrutando de la comunidad y compartir todos unos con otros, una de las cosas más emocionantes que es aprender unos de otros, agrada mucho lo que todos hacemos.
Para esta oportunidad Quiero compartir contigo una resolución de un problema que ocurrió en mi taller Simplemente no prendió más un aro de luz que mi hermana se había comprado y ya ella venía dándole fallas, Solo que no lo quería mandar a reparar hasta que simplemente dejó de encender y ahí tuvo que mandarlo arreglar obligatoriamente. Es un aro de luz que se utiliza como herramienta para tomar fotografías de su tienda de ropa. Ella tiene una tienda en Instagram en la cual ella logra vender Yo por aquí le dejaré su tienda, ya que hace envíos a nivel nacional en Venezuela y su ropa es hermosísima, el usuario de Instagram es el siguiente @fashondani22.
Yo no era de mucha utilidad para ella hasta que se rompió su aro de luz y Ahí salió en busca de su hermano mayor para repararlo. En esta ocasión te mostraré paso a paso cómo reparar este Aro de luz, ya que es una herramienta muy importante y también fue algo muy fácil de hacer, así que Comencemos.
##Herramientas para la reparación
Para hacerlo lo único que necesite fue:_
- Cautín.
- Estaño.
- Pasta flux.
- Un destornillador de estría número 5.
- También utilizaré unas paletas de rayos x de plástico.
- Pega de silicona continuaré con la reparación.
| |
Para comenzar fue muy fácil. Lo que podía observar a simple vista es que la entrada macho de tipo USB estaba rota y tenía los cables partidos, entonces procedí a utilizar de un Exacto para quitar los cables de residuos que estuvieran malos y además pelar las puntas que quería soldar, también utilice la pasta flux sobre los cables para que el estaño que se adhiere a los cables lo hiciera con mucha más facilidad.
| |
Luego de esto, use el cable rojo y el cable negro.
- El cable rojo significa positivo.
- El cable negro significa negativo.
Debía estar justo en las pistas dónde fueron soldadas para que no hiciera corto y dañar a toda la luz hilos LED. Cada uno estos dos cables debían ser soldado con el estaño justo en las pistas de venir cada uno.
| |
Luego de esto me voy a ir directamente al aro Dónde están los leds y todo el sistema de cable interno para ir en busca de cualquier falla, cable cortado, cable partido, algún corto o algún led malo que también esté evitando su funcionamiento y para comenzar comencé a desenroscar la parte de las patas que sujetan el Aro haciendo que este aro quedará libre pudiendo moverlo a cualquier lado.
| |
Luego de esto tuve que desenroscar también la pata que lleva el sostenedor de los teléfonos, esto se hace simplemente dándole vueltas y esta podrá salir con total facilidad, ya tendríamos nuestro aro de luz libre.
| |
El siguiente paso es mucho más delicado, tenemos que agarrar la placa de rayos X para ir colocándola entre el bombillo y la carcasa para que está Valle despegándose con mucho cuidado sin partirlo, ya que su pega es muy resistente y así poder destapar y dejar en descubierto los LED de este aparato.
| |
Luego de esto ya veremos los tres cables soldados y también observarás una esquina donde el cable cruza y simplemente por su mala manipulación sea partido, esto hará que el bombillo quede sensible y cualquier movimiento se apagaría.
| |
Para solucionar esto lo que hice es de-soldar cada cable, recordando siempre el orden de color en el que va soldando para que se pueda manipular con mucha más facilidad y poder trabajar con él libremente. Y así cortar el pedazo de cable que estaba partido, sacar las puntas que deben estar soldadas justas con el orden de colores preestablecido y restañarlos utilizando pasta flux para volverlo a soldar cómo va todo en su orden bueno.
|
Después de esto debes apretar cuatro tornillos que van sujetando todos los led para que vuelvan a quedar sujetados bastante fuerte en la carcasa y así evitar que por el movimiento se vuelvan a romper.
| |
Después de esto lo único que tienes que hacer es colocar la pega que van en el bombillo abrazando la carcasa para que no se desarme todo el equipo y volver a armarlo, todo cómo se dan cuenta quedó espectacular, el equipo está totalmente en funcionamiento
fuentes del contenido
Traducción deepl
gift:
Logo facebook
logo instagram
Logo hive
Logo week zone
Regitrate en hive
Ganar algunios pequeños tokens por buscar en google. Registrare aqui
 Instagram
.png)

Todos deberíamos tener un hermano como Daniel para que nos arregle los electrodomésticos rotos xd, excelente tutorial mi hermano, todo muy bien explicado y la selección de imágenes está muy bien utilizada.
Saludos!
Jajajajajaj a mi me gusta ser el hermano que si que sirve para reparar cosas y que ayuda a todos. Asi que sienen algo que reparar alli estare jejejej
Si y trato debque sea entendible para todos. Gracias por compartir tu comentario mano
Te felicito, gracias a ti no tuvo que invertir en uno nuevo. Me encantó el tutorial, bastante para recuperar el aro de luz.
Si bueno la verdad estos aparatos son muy utiles y no vale la pena desecharlos eso no.
Me urge la Pasta flux, cuando hago soldaduras, me cuesta un poco sin eso. Me agrada ver este tipo de contenidos, muy útiles para todos aquí, una forma puntual de explicar como se debe hacer una correcta reparación del usb de estos aros de luz, saludos y bendiciones!
Bueno hermano te dure que puede servir para eso y es un poco menos costoso. Eso se llama perrubia es una cosa con la que afinan los violines es la misma sabia de arboles y con esa es muy útil soldar amigo
Thank God I don't have to do that on my own as have my electrician who always takes care of everything, but it can come in handy to many, so thanks for the tutorial. Nowadays it's good if you can DIY and save some money.
despite the fact that it looks complicated, it is something easy, you just have to have patience, none of them are so complicated and here in my country, Venezuela, they charge $10 to do that
Saludos amigo, excelente trabajo que has realizado, algo tan sencillo pero a la vez muy complicado, ya que soldar, unir los cables y todas las cosas que hiciste, se require de práctica. Además me alegro de que hayas dado con la falla y ahora podrá seguir disfrutando de el y tomarse todas las fotos que quieran. Muy bueno el paso a paso que nos compartes amigo. Saludos.
Gracias por tu comentario querido amigo la verdad sí es algo fácil Cuando ya llevas tiempo hacer las cosas más difíciles son solamente algunos detalles como dices tú quizás la técnica para soldar la técnica para desarmar sin que nada sé parta son cosas que se aprenden pero todo lo demás es muy fácil Gracias por comentar y visitar mi amigo
Increíble! Yo cuando veo a la gente haciendo esto siempre me impresiono ¿cómo saben esas cosasss? Yo habría dado por perdido mi aro, muchas gracias por publicar este tipo de contenido amigo, de verdad ¡demasiado útil!
Que bueno que no tuviste que hacwr nueva inversion para seguir con tus contenidos! 👏👏👏👏
Sí amiga Es algo difícil de hacer Ya mismo tiempo fácil es algo que si le ponemos empeño podemos hacerlo bien pero te haya gustado el contenido y y puedas quizás en algún momento será Útil para ti o si no ser Útil para otras personas éxitos para ti
Es muy satisfactorio poder reparar y darle nueva vida a los artefactos que nos acompañan en el día a día. es una buena publicacion amigo.
Congratulations @josuerr29! You have completed the following achievement on the Hive blockchain And have been rewarded with New badge(s)
Your next target is to reach 6000 upvotes.
Your next target is to reach 1500 replies.
You can view your badges on your board and compare yourself to others in the Ranking
If you no longer want to receive notifications, reply to this comment with the word
STOPCheck out the last post from @hivebuzz:
Support the HiveBuzz project. Vote for our proposal!