Español
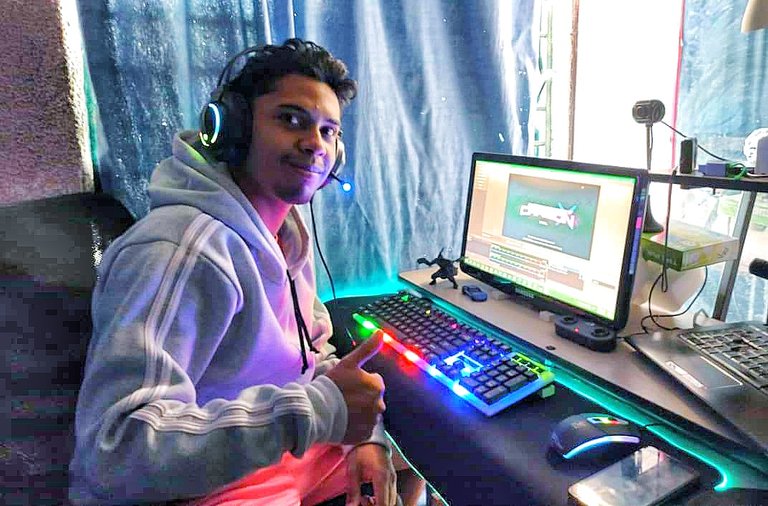
Hola amigos de Geek Zone ¿Cómo están? Espero que estén super bien y sean bienvenidos a una nueva publicación hecha por mí. Desde que era un niño me fascinaba mucho el mundo del internet, tantas coas que no se podían ver en televisión las podía ver por la red, recuerdo que me la pasaba jugando demasiados juegos gratis en distintas páginas para entretenerme por un buen rato.
Sin duda lo que más disfrutaba eran los vídeos de YouTube, Youtubers como Holasoygerman, Fernanfloo, Rubios, Willirex, Vegetta entre otros formaron mi infancia en el mundo del internet, cabe decir que cuando estos youtubers hacían contenido diario (cuando estaban en su mejor momento), yo tenía aproximadamente como 12 años y me la pasaba super genial.
Cuando estos youtubers estaban en alza me preguntaba si algún día llegaría a crear vídeos como ellos, también esperaba un vídeo de ellos casi todos los días sin saber que hacer un vídeo es mucho trabajo jaja. De eso trata la publicación de hoy, les mostraré mi método de como hacer vídeos, con que grabo, como los edito y mucho más.
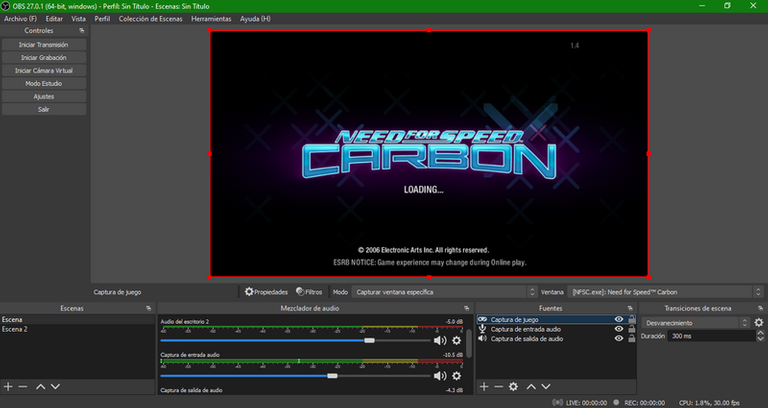
Para empezar mi contenido se basa más que todo en hacer Gameplays, una que otra vez hice un vídeo blog, pero son de una calidad tan probe jaja, aparte nunca he tenido una cámara así de profesional para grabar vídeos y mucho menos un micrófono de calidad para contrarrestar el audio del ambiente para el vídeo, así que les diré como grabo los Gameplays pero estos métodos también sirven para editar un vídeo blog normal.
Si me lo preguntan a mi ¿Qué tipo de vídeo es más difícil de hacer? Diría que es el vídeo Blog, ya saben grabarte a ti mismo con una cámara hablando sobre algún tema en específico, para esto según mi experiencia y la de los youtubers que mencioné anteriormente, necesitas buena iluminación, un guion, un lugar decente para grabar, una buena cámara y un micrófono, si tienes todo eso te saldrá un vídeo Blog de calidad.
Como no soy muy fanático de hacer estos vídeos (aún) pues ahora sí les mostraré como hago los Gameplays , hace días subí un vídeo de Halo, pues ese vídeo lo grabé con dos programas, el primero y el más importante desde luego es el OBS Studio, este es el programa que uso para grabar los videojuegos, una de las cosas importantes a tener en cuenta son las pruebas, por ejemplo antes de grabar ese vídeo de Halo debía comprobar con varios días de anticipación si el juego no recibiría lag por parte del programa, es decir, que la grabación se pegue sin darme cuenta.
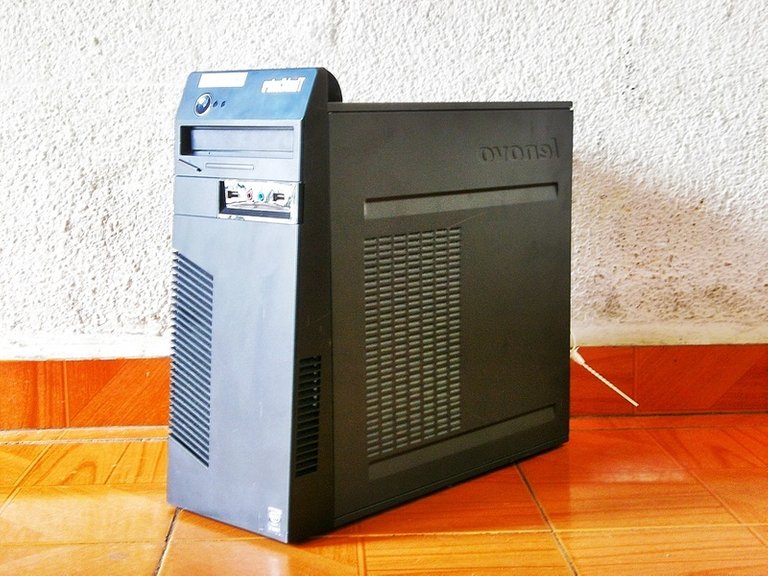
Efectivamente se pegaba en algunos frames del vídeo, sobre todo cuando había mucho movimiento brusco en la partida, por eso la configuración en este programa es importante dependiendo del equipo que tengas disponible, en mi caso tengo una Computadora con procesador I5 de 4ta generación de 4 núcleos con una gráfica integrada de 2GB, con este equipo cualquier videojuego de gama media va a 60fps, pero en grabación lo cambia todo.
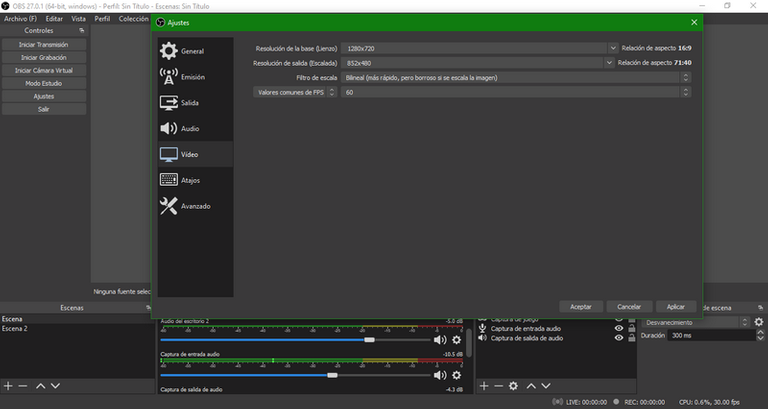
Mi configuración de OBS para la grabación de la de los juegos es con lienzo de 1280x720 con la escalada de 852x480, en el filtro de escala (que es lo que más influye) lo tengo en el Bilineal, es decir, el más rápido y bueno la velocidad de fps lo tengo en 60 como corresponde, con esta configuración me ha ido bastante bien a la hora de grabar videojuegos sin que sufra lag por algunos frames, tal vez pueda cambiar la escala a 720, todo esto es cuestión de probar.
Los problemas que se me han presentado con el OBS han sido realmente pocos, el único inconveniente que he tenido a la hora de grabar ha sido cuando me toca grabar en consola, para capturar la imagen de la consola utilizo mi capturadora Easy Cap para salida RCA, esta capturadora (barata) como máximo puede grabar en 480p, el problema es que cuando la conecto a la CPU pues la imagen en la tv se distorsiona, aparte si coloca la cap no puedo (o no he descubierto la forma de hacerlo) colocar la webcam al mismo tiempo.
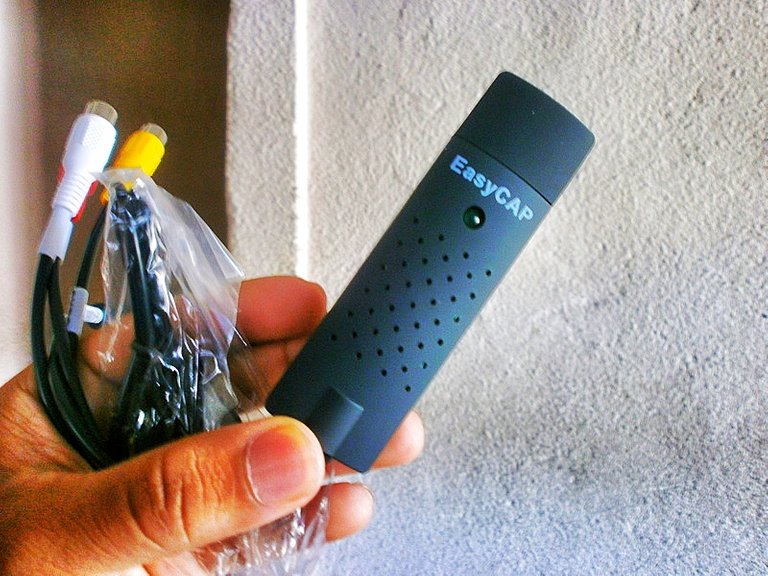
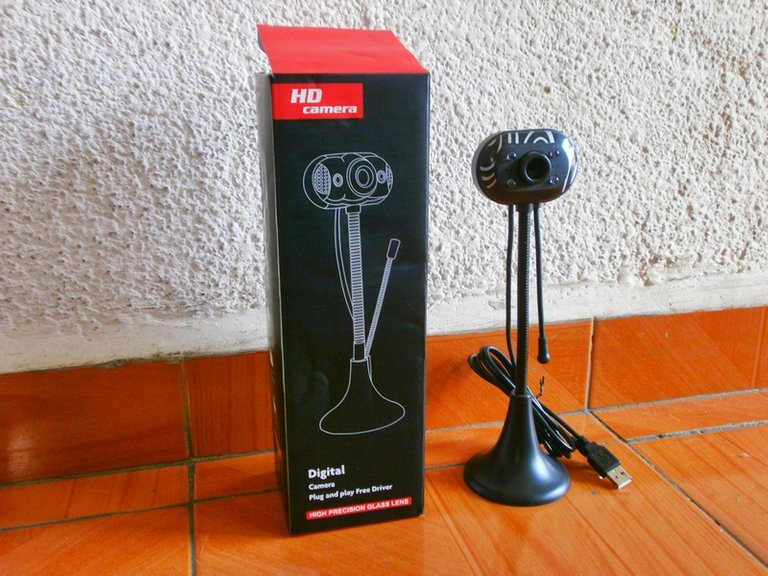
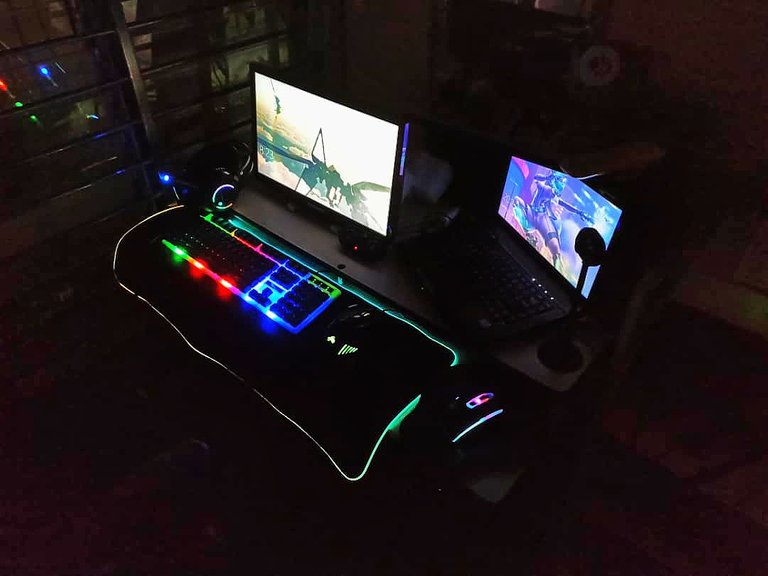
Para solucionar esto es simple, tengo mi laptop al rescate, cuando grabo videojuegos de consola uso mi laptop para grabar la imagen de la capturadora, mientras que la CPU graba la webcam y el audio. La cámara web que utilizo graba con una resolución máxima de 480p, es barata, pero me funciona muy bien.
En cambio, cuando me toca grabar videojuegos de PC también uso mi laptop, pero para grabar la imagen de la webcam así puedo chequear el ángulo de la cámara y cuanto tiempo llevo grabando, el videojuego y el audio se graban en la PC con la configuración que expliqué anteriormente.
Algo a tomar en cuenta, dependiendo del videojuego, puede ser que necesite una captura distinta, por ejemplo, si voy a grabar un emulador de Game Boy, lo mejor es grabar la pantalla de la PC directamente, ahora si voy a grabar Halo pues recomiendo que busquen la opción de capturar juego, buscan ventana especifica y seleccionan la opción con el nombre del juego.
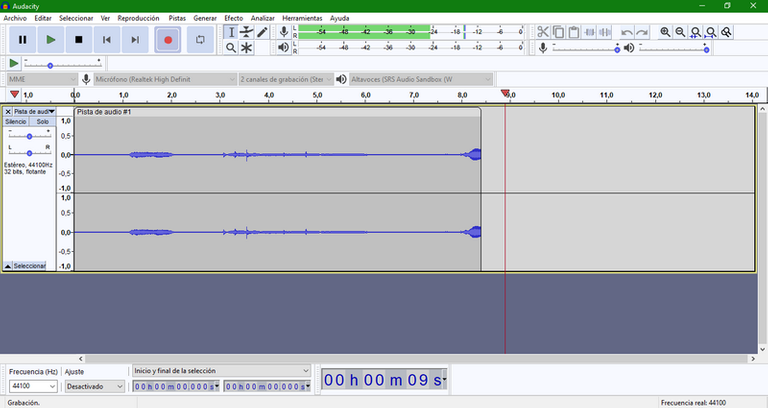
El audio lo grabo con un programa llamado Audacity, el cual es fácil de usar, lo activo cuando empiezo la grabación en ambos dispositivos, también recomiendo que configuren la opción de atajos en el OBS eso les puede servir mucho.
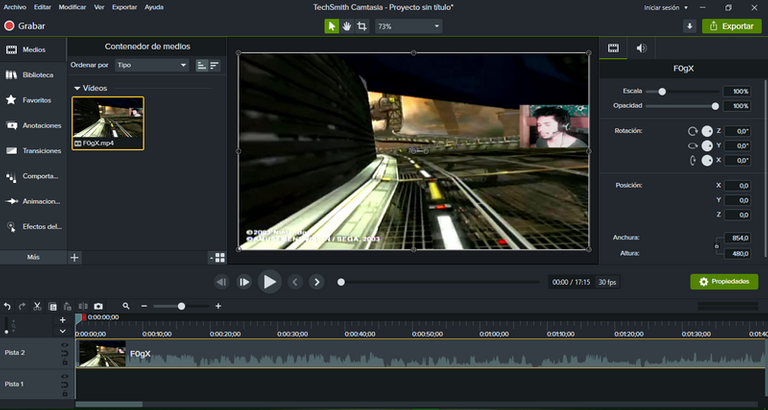
Bueno dicho la parte de como grabo mis Gameplays pasamos ahora a la edición y creación. Una de las cosas que hago antes de editar es usar el Camtasia Studio 21 para convertir la relación de aspecto de los vídeos, más que todo lo uso con las grabaciones de la webcam o las de la capturadora, como dije antes estos dispositivos graban en 480p así que los paso a 720p.
¿Por qué uso Camtasia Studio para la relación de aspecto? Es simple, se me hace más cómodo, en todos los programas para editar vídeos puedo modificar la relación de aspecto, pero en Camtasia lo considero más fácil porque tu mismo puedes manejar la relación a tu gusto, y también a la hora de renderizar no perderá la calidad.
Una vez renderizados los vídeos en Camtasia ahora si se viene lo chido, para editar vídeos uso Sony vegas pro 19, he querido probar otros programas como Davinci, pero no he encontrado la forma de hacer que funcionen, de igual forma vegas pro 19 es muy bueno.
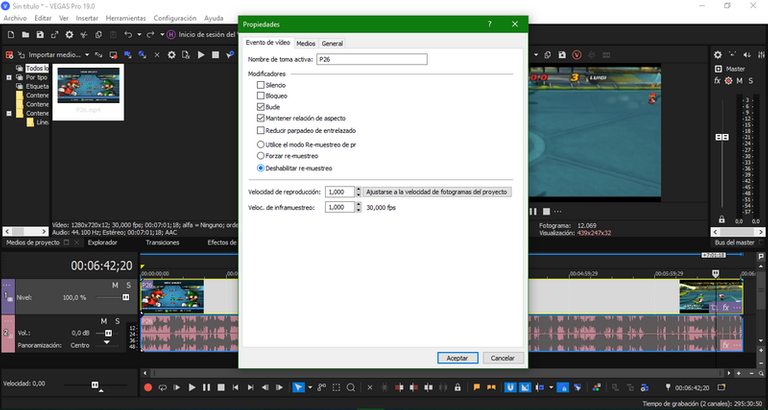
Lo primero que recomiendo que hagan es ir a las propiedades del archivo y deshabiliten la opción del remuestreo, luego cuando vayan a introducir un vídeo en la barra le hacen click derecho, buscan las propiedades, y hacen lo mismo deshabilitan el remuestreo de esa pista y todas las pistas de vídeo que coloquen, esto sirve para que el vídeo no se les vea borroso, pero aún falta.
Para sincronizar los audios es algo complicado, pero es la forma con la que me siento más seguro, yo me fijo en los picos de los audios, para poder introducir el audio de mi voz pruebo a escuchar el audio del juego como tal, una que sepa en donde hablé (en baja frecuencia) introduzco el audio verdadero que coincida con ese instante donde hablé para que se escuché mejor, lo mismo hago con el audio de la webcam. Puede que exista una opción para sincronizar los audios automáticamente, pero prefiero hacerlo yo mismo hasta que este conforme.
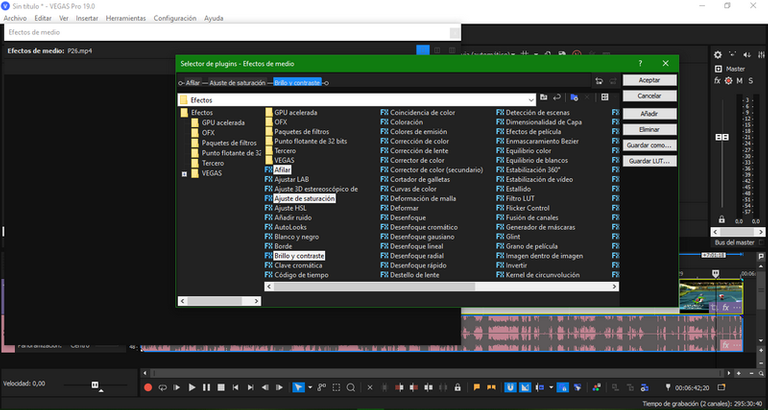
Otra cosa que hago para que los vídeos se vean mejor es aumentarle la nitidez, el brillo, contraste y los colores, para esto debemos seleccionar la pista del vídeo con click derecho, por ahí saldrá una opción que diga efectos y podemos añadir los que mencioné, dependiendo de tu gusto puede modificar como se verá el vídeo, yo suelo aumentar más que todo los colores, ya que para mí se ve más vivo el vídeo.
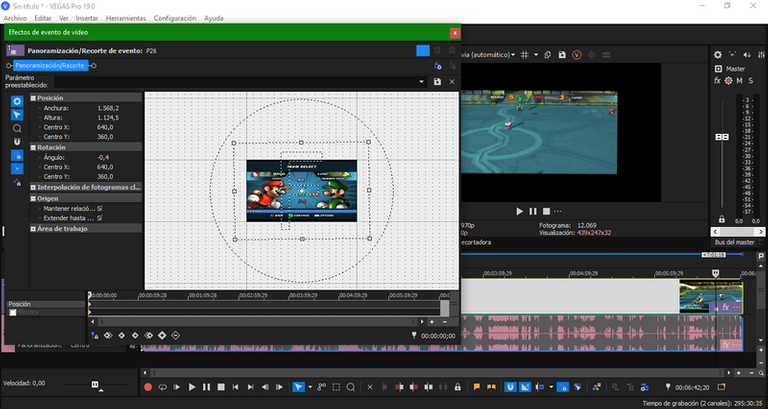
Para la posición de la cámara, en su respectiva pista de vídeo le hago click a la opción de panoramización, en ella se puede modificar la relación de aspecto de la imagen y la posición de la misma, también la puedes voltear o ponerla en modo espejo, normalmente en mis vídeos suelo poner la cámara en el costado derecho de la pantalla y trato de poner la imagen lo más pequeña posible para que la imagen del juego no se vea tapada por la misma.
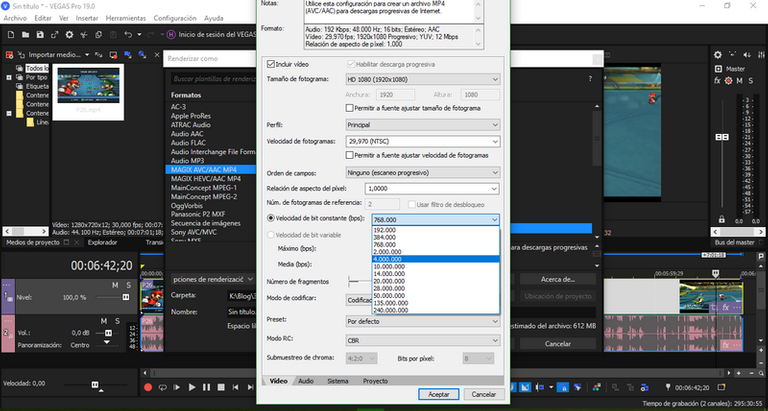
Por último, la renderización (en Vegas pro 19), podemos renderizar el vídeo con una calidad mínima de 720p hasta 2160p, para que el vídeo no se vea para nada borroso debo buscar la opción de personalizar plantilla, cuando salga esta pantalla debo buscar el codificador, como tengo tarjeta gráfica pues la selecciono.
Esta acción permite que el vídeo se vea con una tasa de bits constantes, esto permitirá que el vídeo se vea a una cierta cantidad de bits sin que esta suba o baje, yo recomiendo que rendericen el vídeo desde los 2.000.000bits hasta los 10.000.000, lo malo de esto es que afectará mucho el peso del vídeo, todo dependerá de tu velocidad de internet y cuanto espacio tienes en el disco duro, para acabar, busco la opción RC selecciono mi tarjeta gráfica y listo. La renderización de los vídeos dura desde 30 minutos hasta una hora.
Bueno amigos de Geek Zone, esta es mi forma de crear vídeos para las distintas plataformas de internet, todo los que les expliqué lo aprendí en base a mi experiencia y en varios tutoriales jaja, como dije antes este es mi método de crear y editar vídeos, de seguro muchas personas no lo hacen igual que yo y esta bien, si no sabían alguna de estas cosas pues genial, de todas formas, me falta mucho por aprender jaja.
Espero que esta publicación ayuda alguno y espero que les haya gustado, quería enseñarles como hago los vídeos, me despido señores, gracias por leer y por escuchar, hasta la próxima.
👏¡Adiós!👏
¡¡Muchas Gracias!!

Translated with www.DeepL.com/Translator

English

Hello Geek Zone friends, how are you? I hope you are doing great and welcome to a new publication made by me. Since I was a kid I was fascinated by the internet world, so many things that could not be seen on TV I could see them on the net, I remember that I used to play too many free games on different pages to entertain me for a while.
Undoubtedly what I enjoyed the most were YouTube videos, YouTubers like Holasoygerman, Fernanfloo, Rubios, Willirex, and Vegetta among others formed my childhood in the internet world, it should be said that when these YouTubers made daily content (when they were at their best), I was about 12 years old and I had a great time.
When these YouTubers were on the rise I wondered if one day I would get to create videos like them, I also expected a video from them almost every day without knowing that making a video is a lot of work haha. That's what today's post is about, I will show you my method of how I make videos, what I record with, how I edit them, and much more.

For starters, my content is based mostly on making Gameplays, once or another time I made a video blog, but they are of such a probe quality haha, besides I have never had a professional camera to record videos and much less a quality microphone to counteract the ambient audio for the video, so I'll tell you how I record the Gameplays but these methods also serve to edit a normal video blog.
If you ask me, what type of video is the most difficult to make? I would say it's the Blog video, you know recording yourself with a camera talking about a specific topic, for this according to my experience and that of the YouTubers I mentioned above, you need good lighting, a script, a decent place to record, a good camera and a microphone, if you have all that you will get a quality Blog video.
As I'm not a big fan of making these videos (yet), now I will show you how I make the Gameplays, days ago I uploaded a video of Halo, and I recorded that video with two programs, the first and most important of course was the OBS Studio, this is the program I use to record video games, one of the important things to consider are the tests, for example before recording that video of Halo I had to check several days in advance if the game would not receive lag by the program, ie, that the recording sticks without realizing it.

Effectively it stuck in some frames of the video, especially when there was a lot of sudden movement in the game, so the configuration in this program is important depending on the equipment you have available, in my case I have a computer with a 4th generation I5 processor with 4 cores and a 2GB integrated graphics, with this equipment any mid-range game goes at 60fps, but in recording it changes everything.
My configuration of OBS for the recording of one of the games is with the canvas of 1280x720 with the scaling of 852x480, in the scale filter (that is what more influences) I have it in the Bilineal, that is to say, the fastest and good the speed of fps I have it in 60 as it corresponds, with this configuration it has gone me quite well at the time of recording video games without suffering lag for some frames, perhaps it can change the scale to 720, all this is a question of testing.

The problems that I have had with the OBS have been really few, the only inconvenience that I have had when recording has been when I have to record in console, to capture the image of the console I use my Easy Cap capturer for RCA output, this capturer (cheap) at most can record in 480p, the problem is that when I connect it to the CPU because the image on the tv is distorted, besides if I place the cap I can not (or I have not discovered the way to do it) place the webcam at the same time.

To solve this is simple, I have my laptop to the rescue, when I record console video games I use my laptop to record the image from the cap, while the CPU records the webcam and audio. The webcam I use records with a maximum resolution of 480p, it's cheap, but it works very well for me.
On the other hand, when I have to record PC video games I also use my laptop, but to record the webcam image so I can check the camera angle and how long I have been recording, the video game and audio are recorded on the PC with the settings I explained above.

Something to take into account, depending on the game, you may need a different capture, for example, if I am going to record a Game Boy emulator, it is best to record the PC screen directly, now if I am going to record Halo, I recommend that you look for the option to capture game, look for specific window and select the option with the name of the game.
I record the audio with a program called Audacity, which is easy to use, I activate it when I start recording on both devices, I also recommend that you configure the shortcut option in the OBS that can be very useful.

Well, having said the part about how I record my Gameplays, let's move on to the editing and creation. One of the things I do before editing is to use Camtasia Studio 21 to convert the aspect ratio of the videos, mostly I use it with the webcam recordings or the capture devices, as I said before these devices record in 480p so I convert them to 720p.
Why do I use Camtasia Studio for the aspect ratio? It's simple, it's more comfortable for me, in all video editing programs I can change the aspect ratio, but in Camtasia, I consider it easier because you can manage the ratio to your liking, and also when rendering it will not lose quality.

Once the videos are rendered in Camtasia now comes the cool part, to edit videos I use Sony vegas pro 19, I have wanted to try other programs like Davinci, but I have not found a way to make them work, but vegas pro 19 are very good.
The first thing I recommend you do is to go to the file properties and disable the resampling option, then when you go to enter a video in the bar right-click, look for the properties, and do the same disable the resampling of that track and all video tracks that you place, this serves so that the video does not look blurry, but still missing.

To synchronize the audios is somewhat complicated, but it is the way I feel more confident, I look at the peaks of the audios, and to introduce the audio of my voice I try to listen to the audio of the game as such, once I know where I spoke (at low frequency) I introduce the real audio that coincides with that instant where I spoke to be heard better, the same thing I do with the audio from the webcam. There may be an option to synchronize the audio automatically, but I prefer to do it myself until I am satisfied.
Another thing I do to make the videos look better is to increase the sharpness, brightness, contrast, and colors, for this we must select the track of the video by right-clicking, there will be an option that says effects and we can add the ones I mentioned, depending on your taste you can modify how the video will look, I usually increase more than everything the colors, because for me the video looks more alive.

For the position of the camera, in its respective video track, I click on the panning option, in it, you can modify the aspect ratio of the image and its position of it, you can also flip it or put it in mirror mode, usually in my videos I usually put the camera on the right side of the screen and I try to put the image as small as possible so that the game image is not covered by it.

Finally, the rendering (in Vegas pro 19), we can render the video with a minimum quality of 720p up to 2160p, so that the video does not look blurry at all I must look for the option to customize the template, when this screen appears I must look for the encoder, as I have a graphic card I select it.
This action allows the video to be seen with a constant bit rate, this will allow the video to be seen at a certain amount of bits without going up or down, I recommend rendering the video from 2,000,000bits to 10,000,000, the bad thing about this is that it will affect the weight of the video, everything will depend on your internet speed and how much space you have on the hard disk, to finish, I look for the option RC select my graphics card and that's it. The rendering of the videos takes from 30 minutes to an hour.

Well, friends of Geek Zone, this is my way to create videos for different internet platforms, everything I explained I learned based on my experience and in several tutorials haha, as I said before this is my method of creating and editing videos, surely many people do not do the same as me and that's fine if you did not know any of these things then great, anyway, I still have a lot to learn haha.

I hope this post helps some and I hope you liked it, I wanted to show you how I make the videos, I say goodbye gentlemen, thanks for reading and for listening, until next time.
👏Bye!👏
Thank you very much!!

Translated with www.DeepL.com/Translator

que bien amigo me llamo mucho la atencion el capturador Easy Cap yo aun no grabo juegos de consola por eso quisas mas adelante lo compre cuando lo necesite y si yo tambien uso OBS es muy bueno pero para editar uso Davinci resolver es el que aprendi a usar hasta el momento. gracias por compartir.
!PIZZA
Gracias por leer mi publicación Bro, esa capturadora es muy barata en el mercado, cuando la vayas a comprar debes comprarle adicionalmente unos componentes de vídeo para que puedas ver la imagen tanto en PBS como en el TV.
OBS es uno de los mejores, aunque a veces me da problemas jaja, Davinci resolver lo descargue hace poco, pero por alguna razón en mi computadora no se pudo instalar, tengo pensado en aprender a usarlo algún día. Gracias por comentar un saludo. :=)
Muchas gracais por traernos tu manera de editar contenido amigo. Cada quien encuentro que, tiene sus formas para editar, para renderizar y subir contenido en Hive. Lo más interesante es que cada persona lo hace de una forma diferente.
Personalmente, también uso Obs para grabar, me ha funcionado excelente hasta el día de hoy. Te dejo un saludo y que estés muy bien!
!LUV !PGM !LOLZ
Muchas gracias por comentar Brother, la edición y la grabación de un vídeo es un trabajo que requiere de mucha concentración, muchas personas tienen diferentes formas de hacer el contenido y es mejor hacer con la forma más cómoda.
Comparto mi experiencia para ayudar al que más lo necesite jaja. :)
@mclarenf11, @bananasfallers(5/10) sent you LUV. wallet | market | tools | discord | community | daily
lolztoken.com
He was just going through a stage.
Credit: reddit
@mclarenf11, I sent you an $LOLZ on behalf of @bananasfallers
Use the !LOL or !LOLZ command to share a joke and an $LOLZ.
Delegate Hive Tokens to Farm $LOLZ and earn 110% Rewards. Learn more.
(4/8)
First thing first, I like your set up. You have a great set up. Nice!!! I have heard of OBS, but I don't know how to make use of it, it seems quite complex. I make use of Zoom to record myself and my screen. I recently heard of Camtasia Studio, but I haven't used it at all. I have also heard of Da Vinci, Vegas Pro, but I haven't used any. What I use to edit my videos, is Shotcut and it is serving me quite well.
I really enjoyed reading through your recording and editing process. A lot of people don't know how difficult it is to edit videos and produce video contents. Great article @mclarenf11
Thank you very much for commenting my friend, I'm glad you like the way I have everything set up haha. OBS is a very good program especially for recording video games or live, what I explain in the publication is very basic but it works, I recommend it.
Vegas has also helped me a lot, as I have a lot of time editing with that program because I learned basic things that if or if someone should know if you want to publish a quality video, Davinci would like to use it someday.
Camtasia I recommend it especially for the aspect ratio of some videos, in my case I use it for the videos from my capture and webcam, it is easier to set the aspect ratio in that program in my opinion.
Thanks again for reading my post and I hope it will be of great help to many in the community. 😃
Is Davinci free? Doesn't it have some kind of subscription? I will definitely give a shot at OBS, to see if I can make use of it. Great article my friend @mclarenf11
I don't think Davinci is free, you have to do some research on the internet. Thanks for commenting. :)
Rebuenisimo el setup bro, tiene su proceso grabar allí jaja al final los gameplays salen de calidad y se nota el esfuerzo. Máximos saludos
Gracias brother, hacer vídeos es un trabajo que requiere tiempo y ganas jaja. :)
No sabía que era tan arduo el trabajo de edición, con razón la gente se tarda tanto en eso jaja.
Muy buena explicación, me sirve para cuando empiece a subir contenido de ese tipo. Salu2
Me alegra que te sirva jaja, cuando yo empecé también pensaba que era pan comido pero no es así, hay que tener mucho cuidado con ciertas cosas, por un detalle puedes perder una hora de tu vida, así que es bueno que sigas estos consejos e investigues más. Saludos para ti también :D
PIZZA Holders sent $PIZZA tips in this post's comments:
@elfino28(1/5) tipped @mclarenf11 (x1)
Learn more at https://hive.pizza.
Thank you for sharing. You've got a nice setup. :)
!1UP
You have received a 1UP from @thecuriousfool!
@stem-curator, @pal-curatorAnd they will bring !PIZZA 🍕
Learn more about our delegation service to earn daily rewards. Join the family on Discord.
He estado aprendiendo con obs, ¿Que me recomendarías para principiante? Usualmente grabo los juegos es con windows xbox bar, no queda mal la cosa, pero no se como agregarle pista de habla en obs, ando buscando aprender eso justamente :)
OBS es un programa genial, incluso para principiantes, para buscar una pista de habla debes añadir la pista de "captura de entrada de audio", si tienes micrófono tu voz se escuchará durante el Gameplay, pero recomendaría mejor grabar tu voz con el Audacity para que la calidad de tu audio sea mejor y no te cause problemas.
Gracias bro por comentar mi publicación. :)
Muchas gracias por la recomendación :D
De nada bro. :)