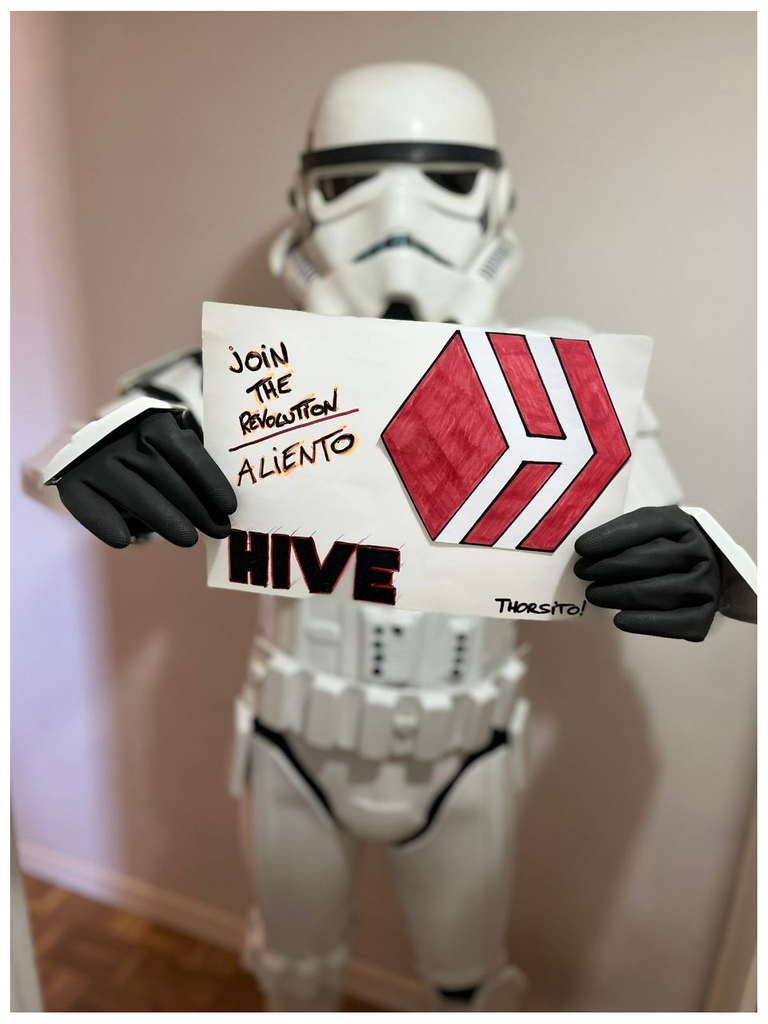

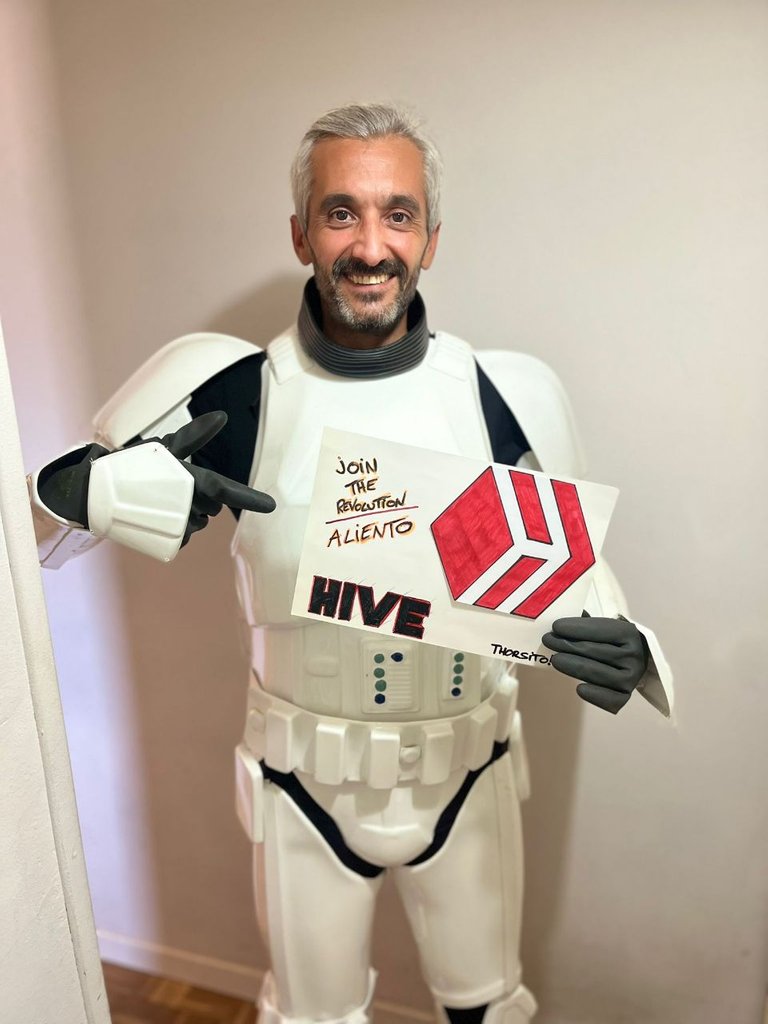
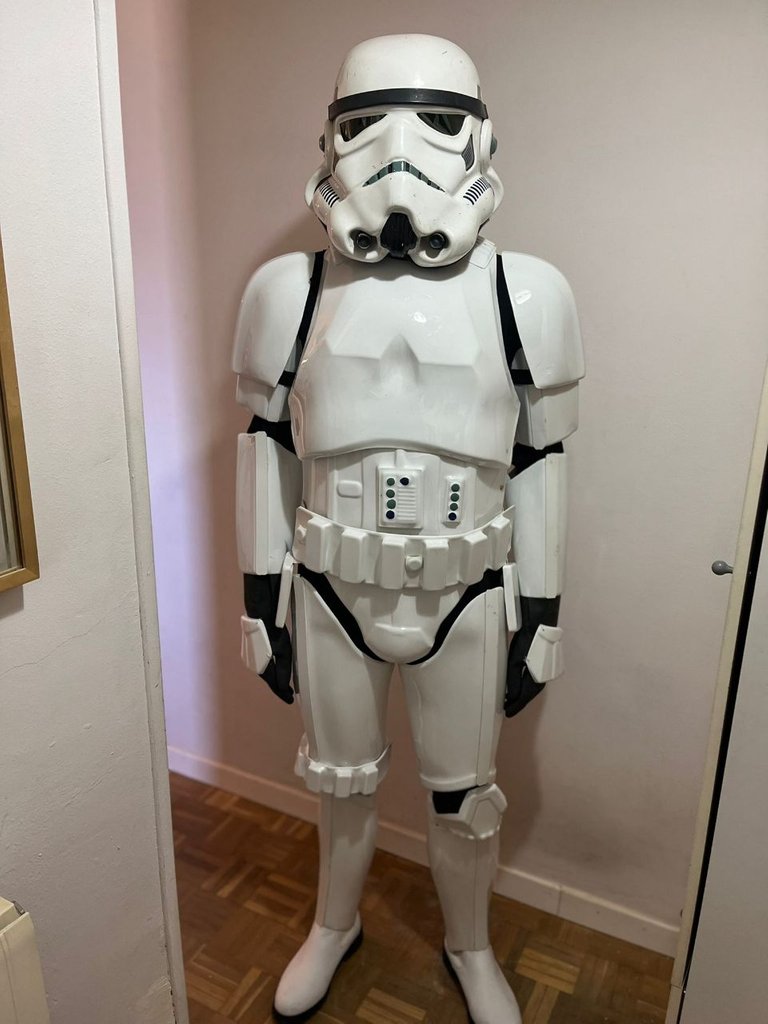
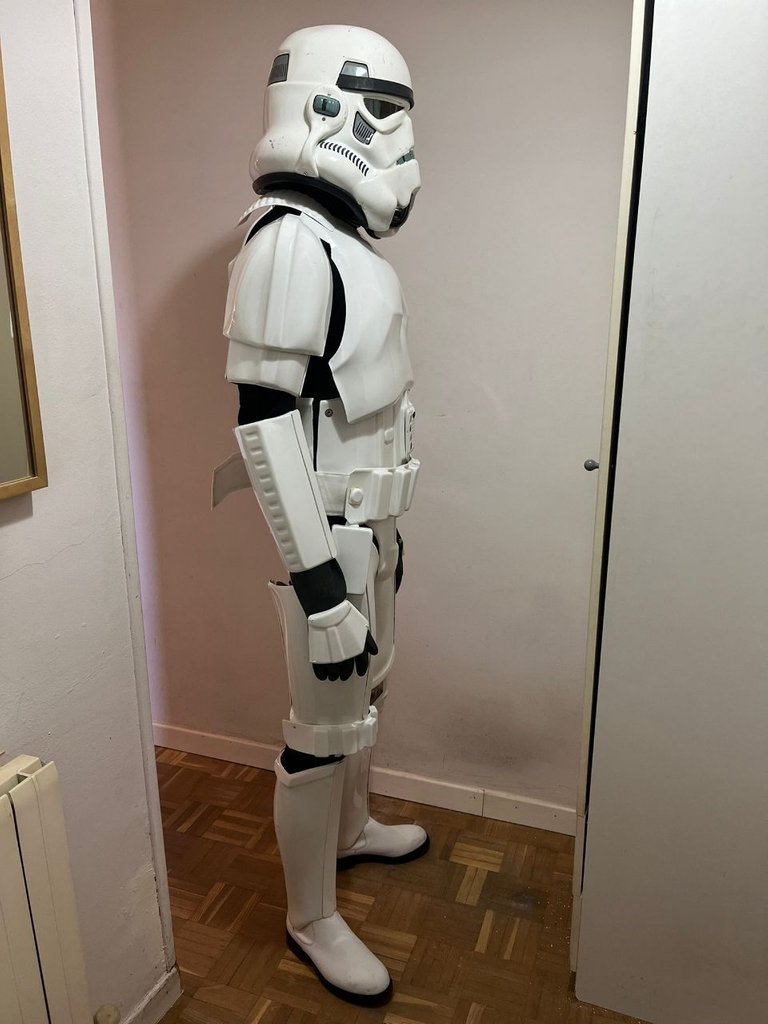
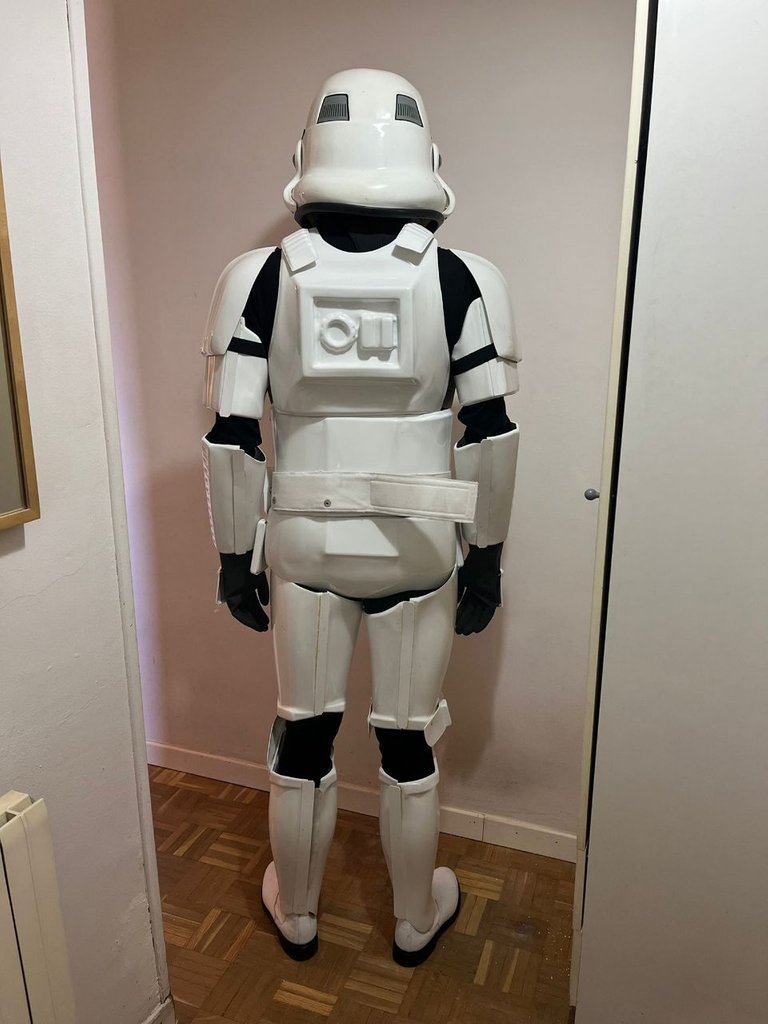
Hola amig@s de HIVE! Y en particular a toda la comunidad de #Aliento🤗. Este tutorial me a llevado bastante tiempo, sobre todo por las fotos Hiver que me hice para este post😅. Hoy vamos a ver como poder montar al detalle un cosplay de una armadura de Stormtrooper (soldado de asalto imperial del mundo Star Wars). En este tutorial vamos a ver todas y cada una de las partes que componen este cosplay explicándolo con el mayor detalle que me ha sido posible. El montaje de esta armadura es sin duda el más complicado de los tres, tanto por la cantidad de piezas que tiene como todos los anclajes que hay que poner, que son muchos. Con este post daremos por terminado esta colección de tres post de "Los tres blanquitos de Star wars". Espero que os guste😉.
Hello friends of HIVE! in particular to the whole community of #Aliento🤗. This tutorial took me a long time, especially because of the Hiver photos I took for this post😅. Today we are going to see how to assemble in detail a cosplay of a Stormtrooper armor (imperial stormtrooper from the Star Wars world). In this tutorial, we are going to see every one of the parts that make up this cosplay explaining it in as much detail as possible. The assembly of this armor is undoubtedly the most complicated of the three, both because of the number of pieces it has and all the anchors that have to be put in place, which is many. With this post, we will finish this collection of three posts of "The three whities guys of Star wars". I hope you like it😉.
Materiales:
- Armadura y casco
- Botas blancas
- Guantes negros
- Balaklava negra
- Sujeción casco-cabeza
- Visor verde para el casco
- Piezas decorativas
- Velcro blanco y negro
- Snaps, cierres clap, etc.
- Mono negro
- Cubre cuello polipiel
- Blaster
- Cartuchera
- Pegatinas y calcomanías
- Cola de contacto y cianocrilato
Herramientas
- Remachadora
- Tijeras profesionales
- Cutter
- Taladro
- Brocas pequeñas
- Pinzas de presión
Materials:
- Armor and helmet
- White boots
- Black gloves
- Black balaklava
- Helmet-head support
- Green visor for the helmet
- Decorative parts
- Velcro black and white
- Snaps, clap fasteners, etc.
- Black jumpsuit
- Leatherette neck cover
- Blaster
- Holster
- Stickers and decals
- Contact glue and cyanoacrylate
Tools
- Riveting machine
- Professional scissors
- Cutter
- Drill
- Small drill bits
- Pressure clamps
Guía de como poner los snaps en las piezas de plástico y en los elásticos negros.
Guide on how to put the snaps on the plastic parts and on the black elastics.
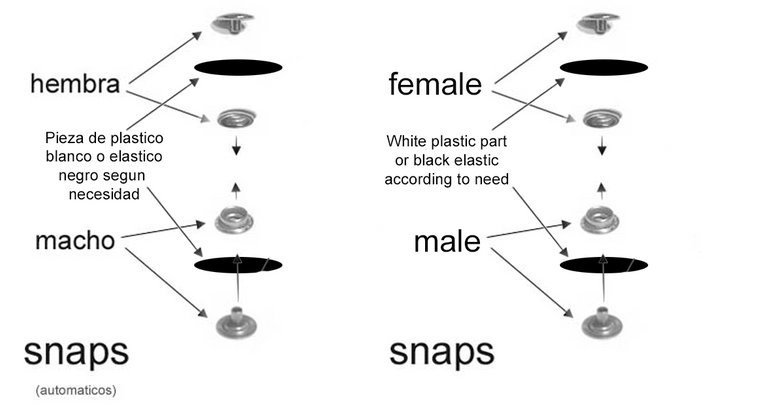
Hay que hacer un agujero con un taladro en el plástico para poder pasar la punta del snap hembra, después colocaremos la otra parte y golpearemos con el martillo para que quede fijo, haremos lo mismo con la punta macho y su otra parte. Con el elástico el proceso es el mismo, pero para hacer el agujero usaremos un punzón.
We must make a hole with a drill in the plastic to be able to pass the tip of the female snap, then we will place the other part and hit it with the hammer to fix it, we will do the same with the male tip and its other part. With the elastic the process is the same, but to make the hole we will use a punch.

Para este tipo de plásticos lo que recomiendo es mezclar cola de contacto con unas gotas de cianocrilato y extenderlo por las dos partes a pegar, después hay que dejarlo sujeto con una pinzas de presión unos minutos hasta que quede bien pegado.
For this type of plastic what I recommend is to mix contact glue with a few drops of cyanoacrylate and spread it on the two parts to be glued, then leave it attached with a pair of tweezers for a few minutes until it is well glued.

🛑⭕️⚫️🔴SOFTPARTS🔴⚫️⭕️🛑
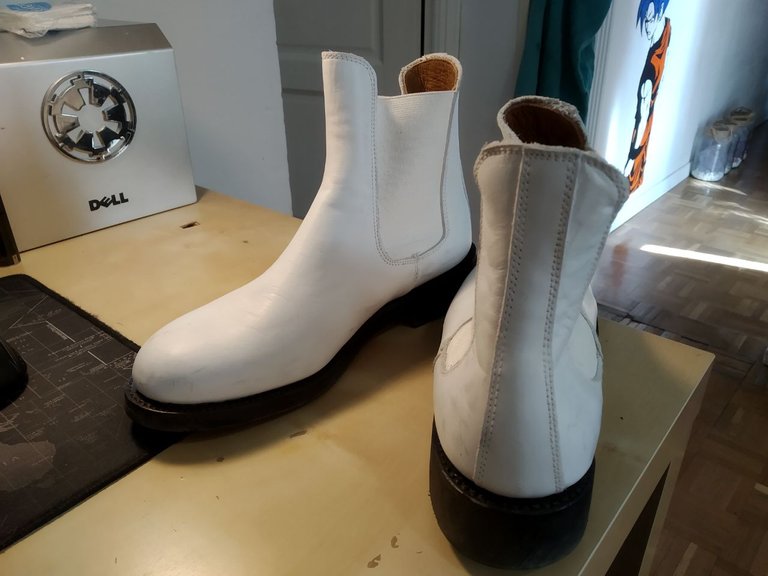
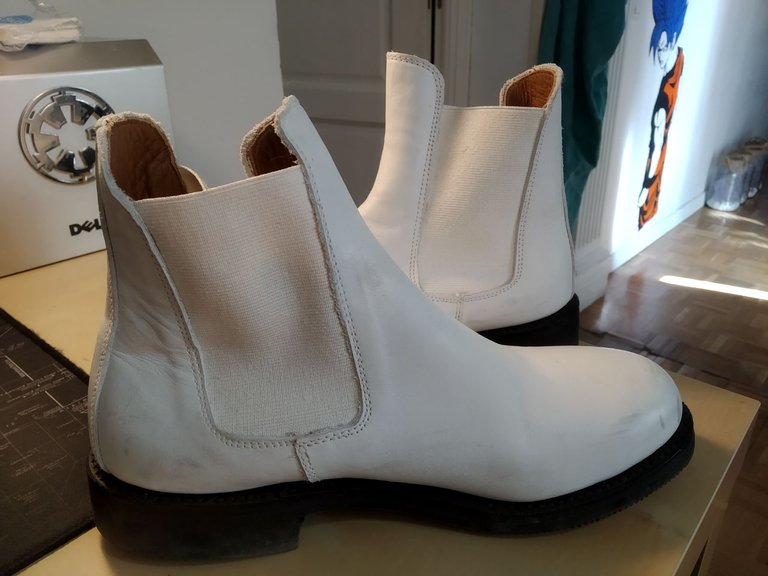
🔸BOTAS / BOOTS🔸
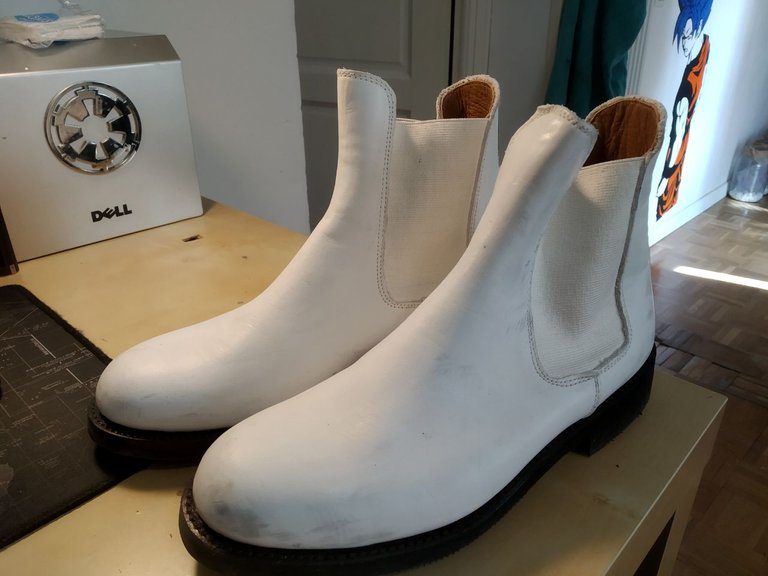
Hace muchos años cuando empecé a interesarme por el cosplay Star wars era realmente muy difícil y caro conseguir este tipo de botas, las primeras botas solo existían en color negro y había que teñirlas de blanco a mano☹️. Mas adelante en el tiempo empezaron a aparecer más opciones con precios más asequibles. Existen muchos fabricantes de este tipo de botas y en la web Etsy puedes ver las diferentes opciones que hay.
Many years ago when I started to get interested in Star wars cosplay it was very difficult and expensive to get this kind of boots, the first boots only existed in black color and you had to dye them white by hand☹️. Later more options started to appear with more affordable prices. There are many manufacturers of this type of boots and on the Etsy website you can see the different options there are.
🔸MONO NEGRO / BLACK JUMPSUIT🔸
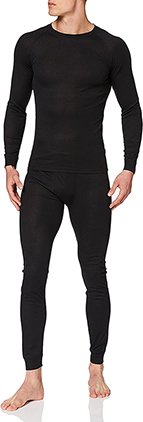
Aquí podemos usar varias opciones, podemos usar licra, spandex, ropa térmica, etc. Para mí la mejor opción es la ropa térmica negra que permite que la piel transpire y el sudor se seque rápidamente, es algo que se agradece mucho. Este tipo de prendas están diseñadas para ser usadas en climas fríos y cálidos.
Here we can use several options, we can use lycra, spandex, thermal clothes, etc. For me the best option is the black thermal clothing that allows the skin to perspire and sweat to dry quickly, it is something that is much appreciated. These types of garments are designed to be worn in cold and hot weather.
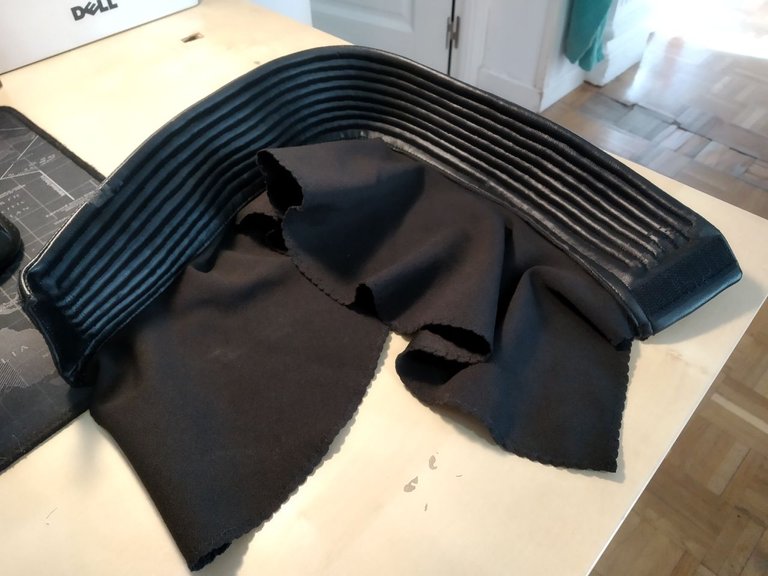
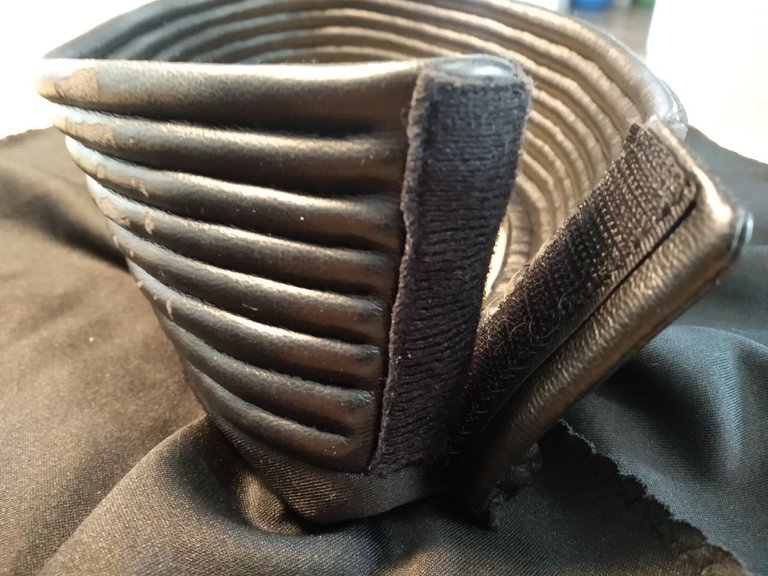
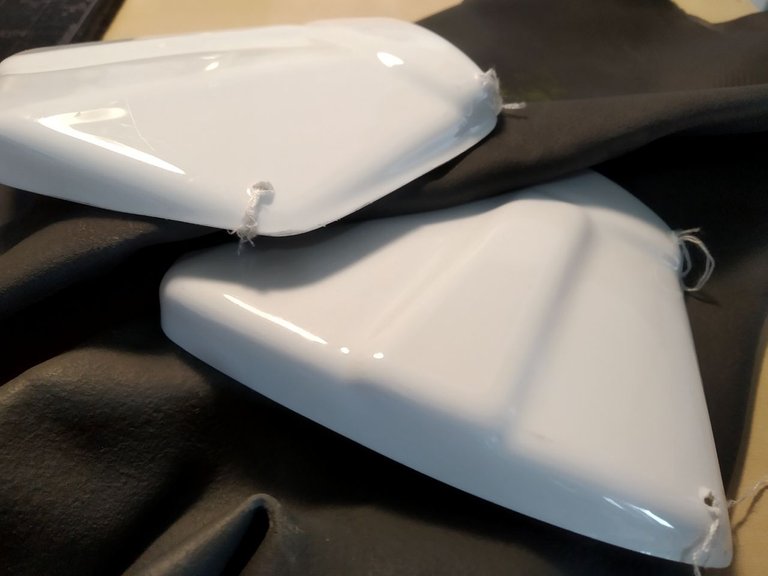
🔸COLLARIN / NECK BRACE🔸

Esta pieza de poli piel sirve para esconder el cuello dándole un bonito acabado al cosplay. No es difícil de hacerlo a mano, pero a menos que uno sea un profesional no recomiendo hacerlo porque ya existen varios fabricantes que los hacen y a muy buen precio, el tiempo también es valioso. También en Etsy, en foro de la legión 501 y otras muchas páginas web.
This piece of poly leather is used to hide the neck giving a nice finish to the cosplay. It is not difficult to do it by hand, but unless you are a professional I do not recommend doing it because there are already several manufacturers that make them, and at a very good price, time is also valuable. Also on Etsy, Legion 501 forum and many other websites.
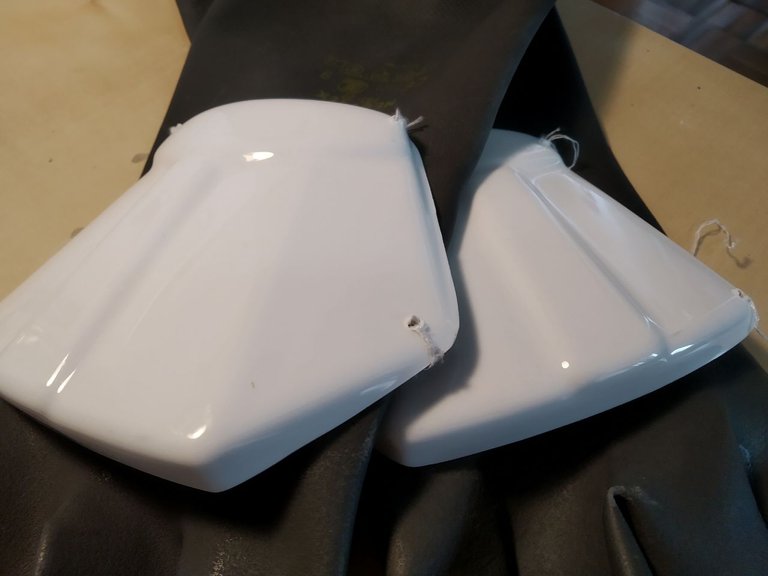
🔸GUANTES/ GLOVES🔸
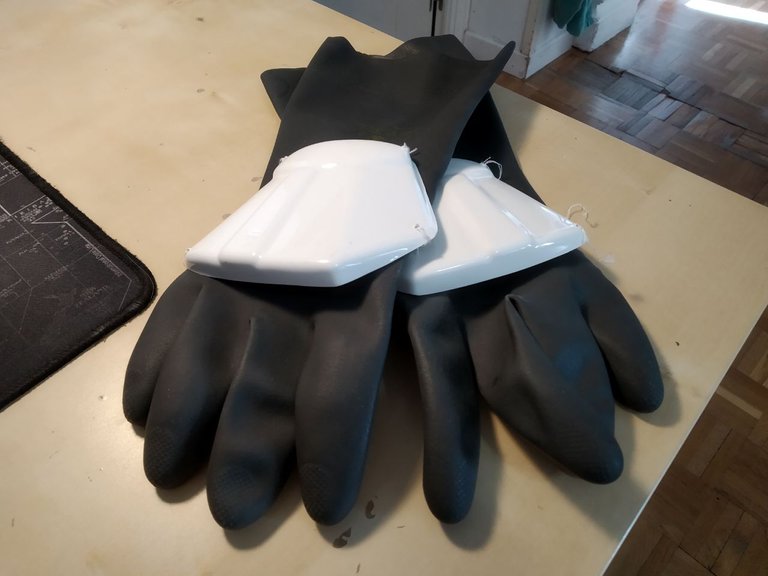
Los guantes que llevaban los stormtroopers en las películas originales eran de goma negra de fregar platos, llevaban placas de armadura pegadas en los dorsos de ambas manos, así que lo hice igual😄.
The gloves the stormtroopers wore in the original movies were black rubber dishwasher gloves, with armor plates glued to the backs of both hands, so I did it the same way😄.
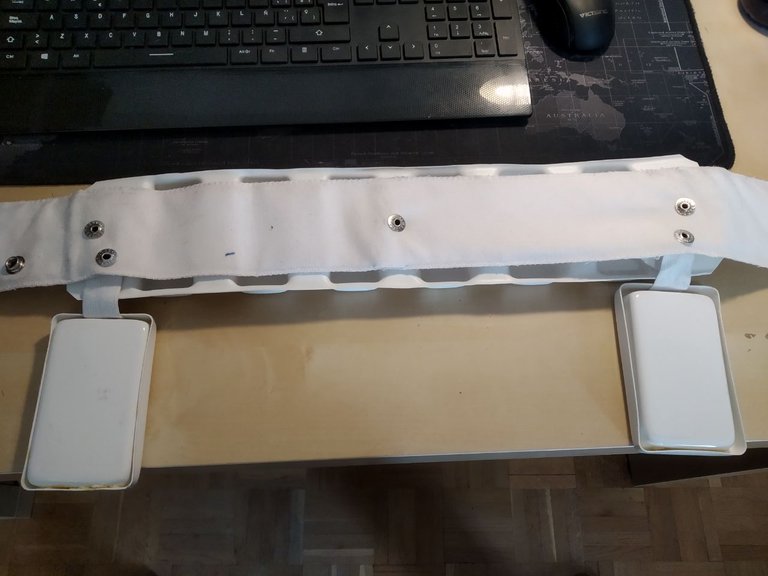
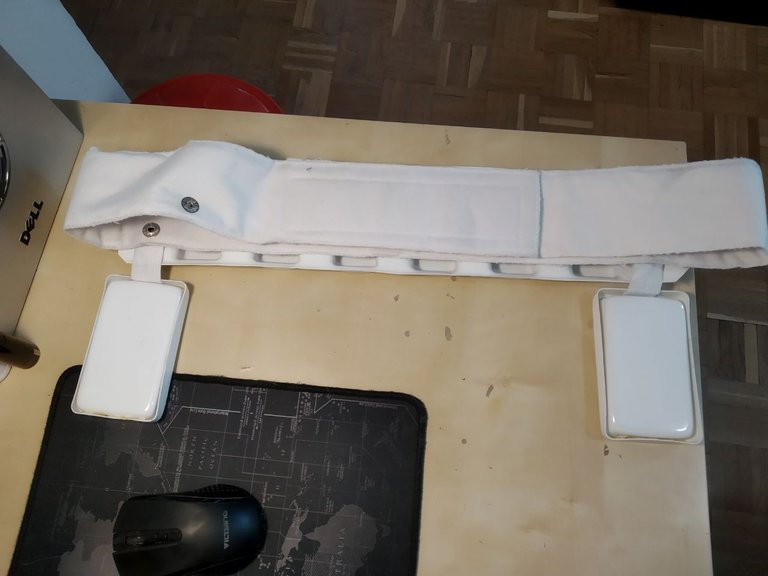
🔸CINTURON / BELT🔸
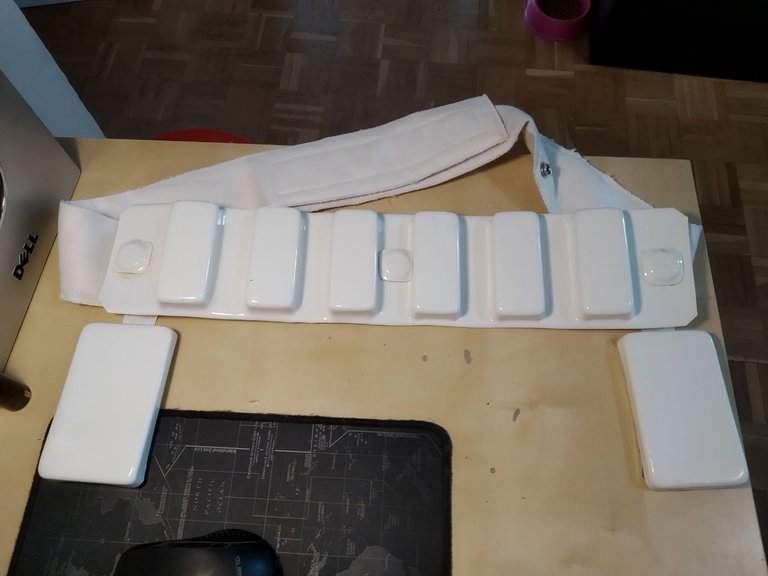
Esta pieza está compuesta de un cinturón de tela blanca de quince cm de ancho y se fija con velcro del mismo color. La pieza de la armadura se fija al cinturón de tela con remaches, tendremos que usar la remachadora con cuidado para no dañar la pieza de plástico. Para fijar las dos cajitas usaremos también la remachadora, emplearemos como enganche unos trozos de elástico blanco.
This piece is composed of a white fabric belt fifteen cm wide and is fixed with Velcro of the same color. The piece of the armor is fixed to the fabric belt with rivets, we will have to use the riveter carefully to avoid damaging the plastic piece. To fix the two little boxes we will also use the riveting machine, we will use some pieces of white elastic as a hook.
🛑⭕️⚫️🔴HARDPARTS🔴⚫️⭕️🛑
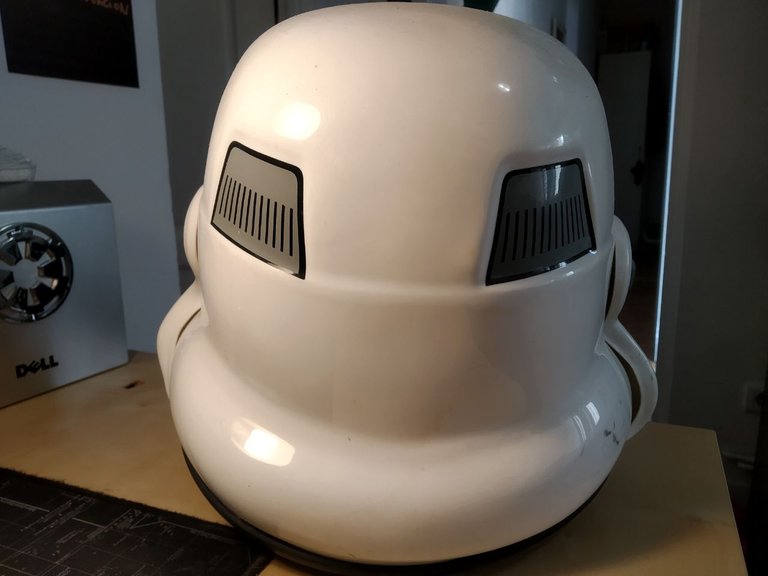
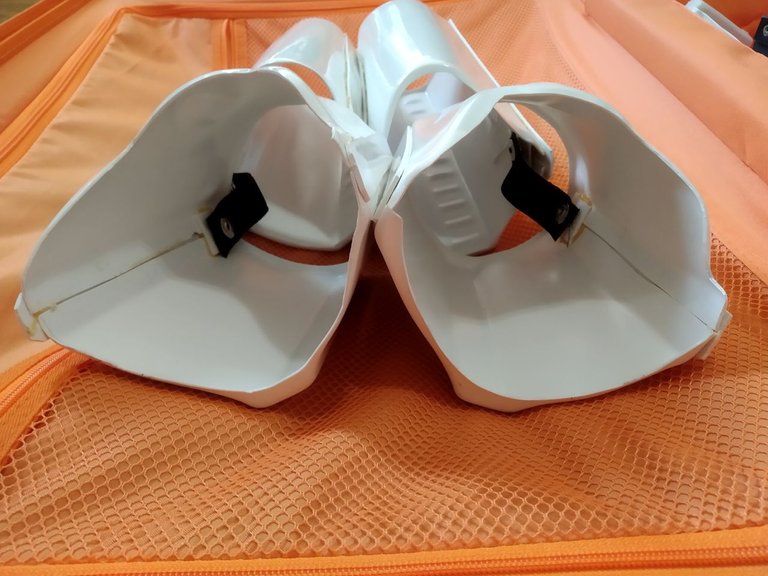
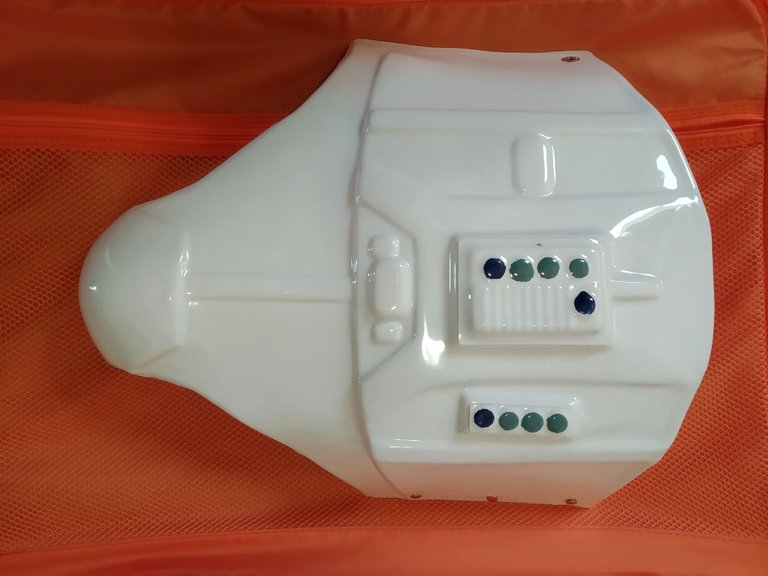
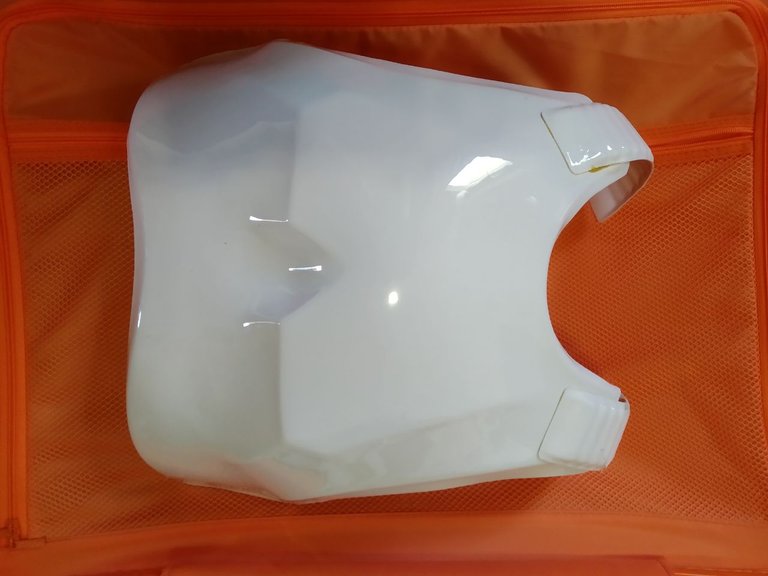
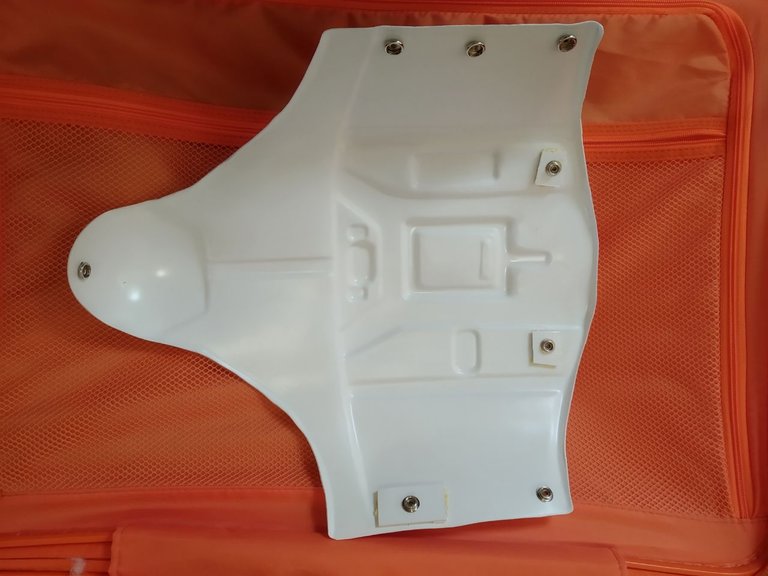
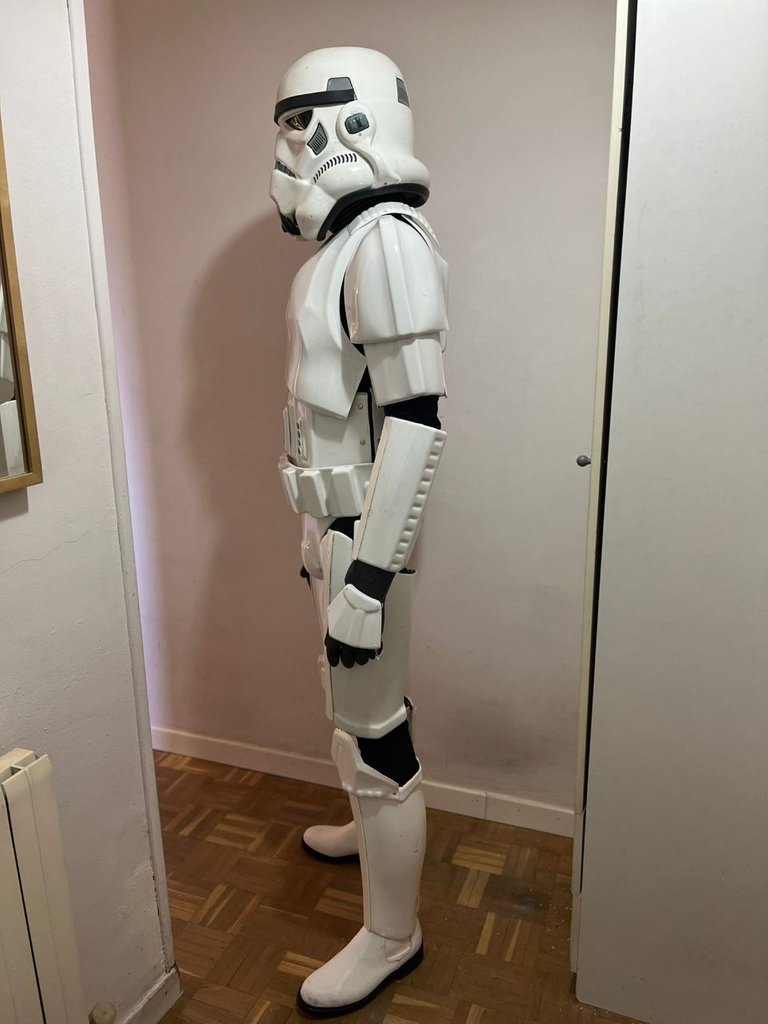
🔸CASCO / HELMET🔸
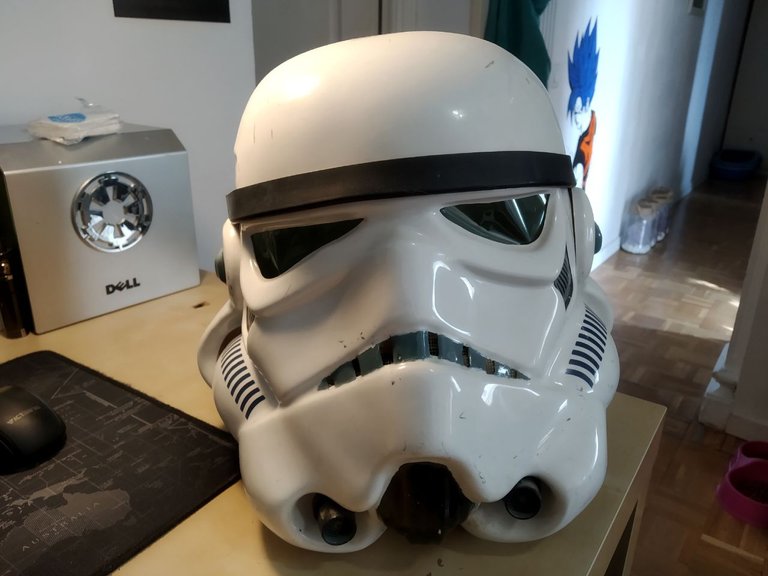
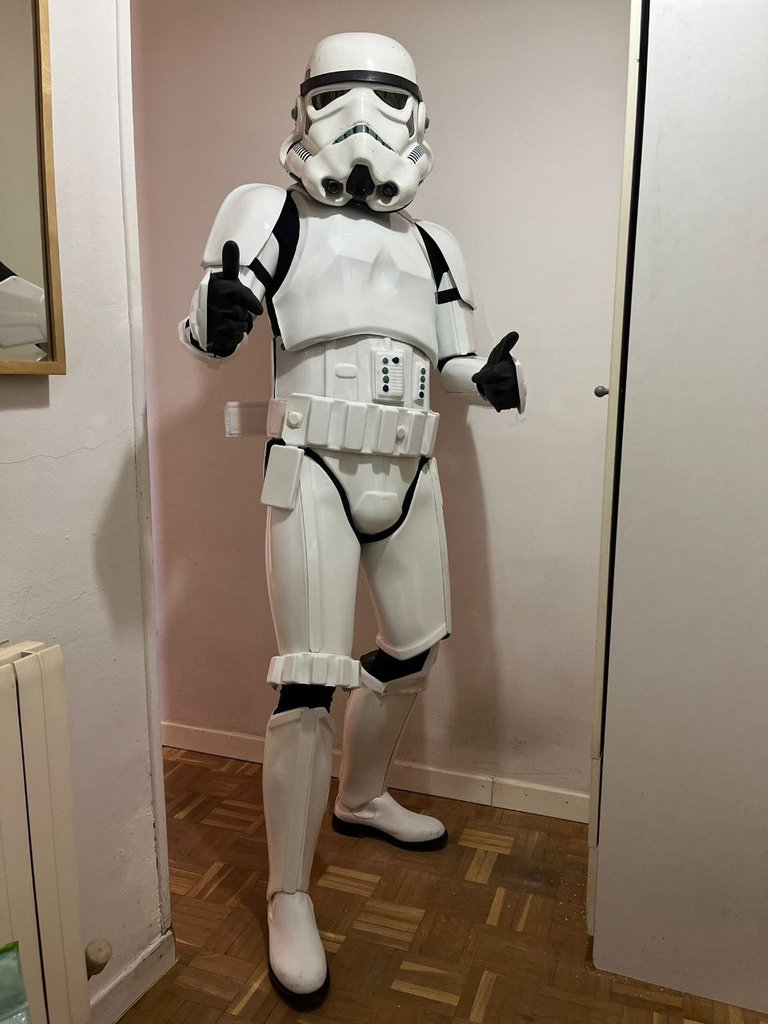
El casco de stormtrooper es posiblemente el objeto más reconocido de la saga y existen dos maneras de hacerlo, puedes comprar el casco ya terminado o comprarlo por partes, todo depende de tu bolsillo y de tus ganas de trabajar😅.
Si te decides por hacerlo tu mismo, el casco está compuesto de todas estas partes:
The stormtrooper helmet is possibly the most recognized object of the saga and there are two ways to do it, you can buy the helmet already finished or buy it in parts, it all depends on your pocket and your desire to work😅.
If you decide to do it yourself, the helmet is composed of all these parts:
- Pieza domo
- Pieza frontal
- Pieza trasera
- Orejeras x2
- Lentes acetato, lentes gafas, etc. x2
- Goma negra (embellecedor)
- Respiradores resina o impresión 3D
- Pegatinas o calcomanías (Etsy)
- Rejilla plástica
- Pintura negra y gris
- Dome piece
- Front part
- Rear part
- Earmuffs x2
- Acetate lenses, spectacle lenses, etc. x2
- Black rubber (trim)
- Resin breathers or 3D printing
- Stickers or decals (Etsy)
- Plastic grille
- Black and gray paint
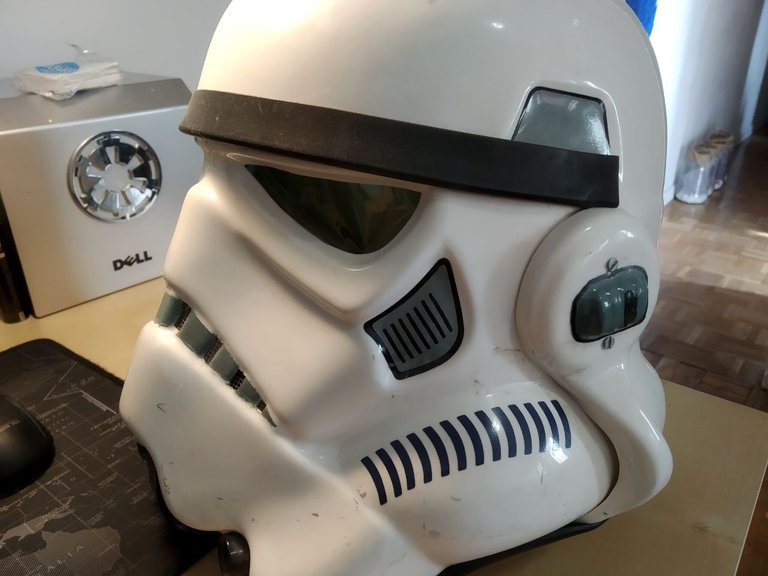
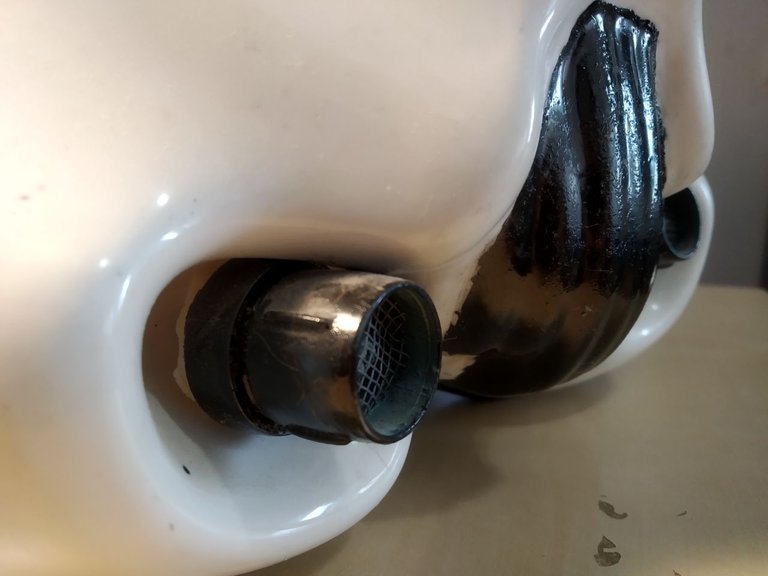
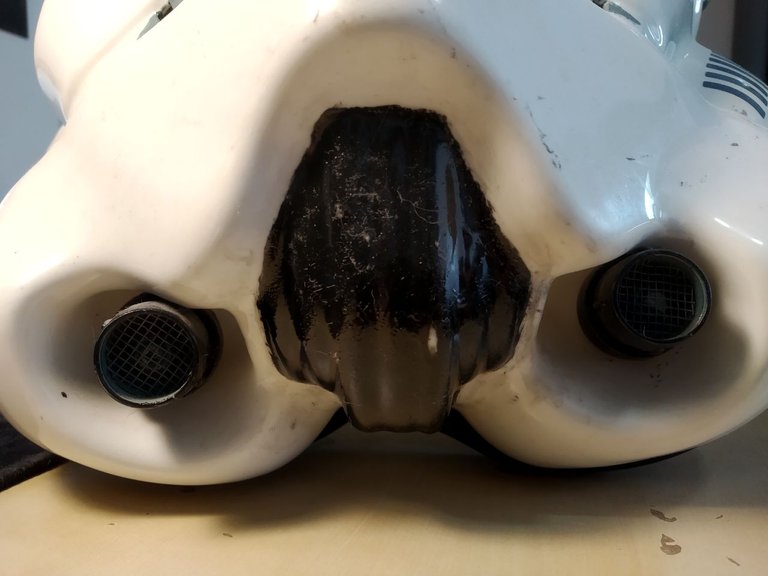

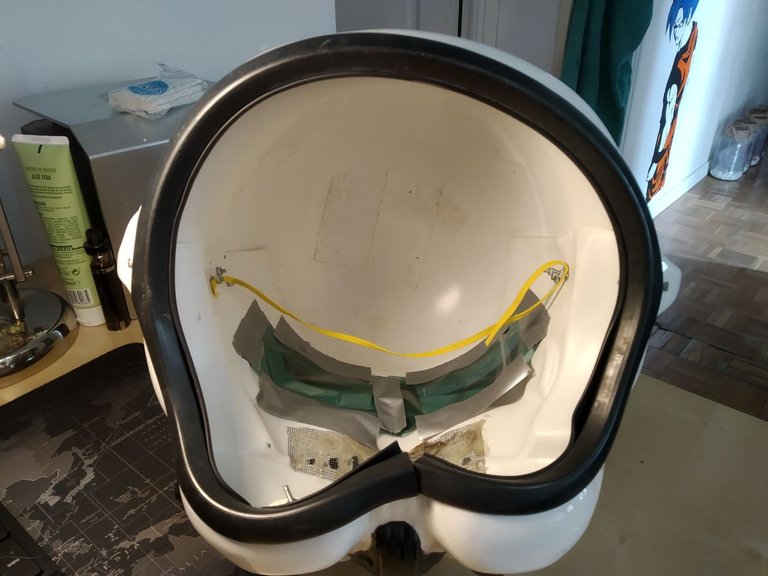
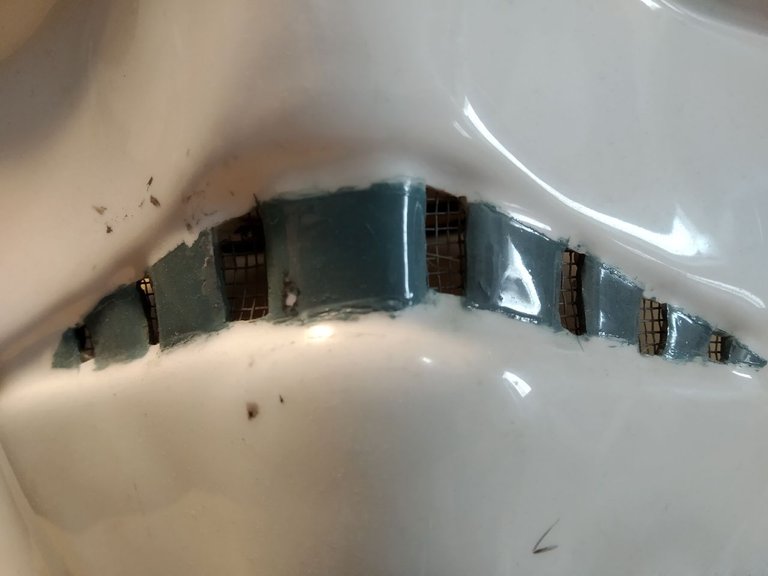
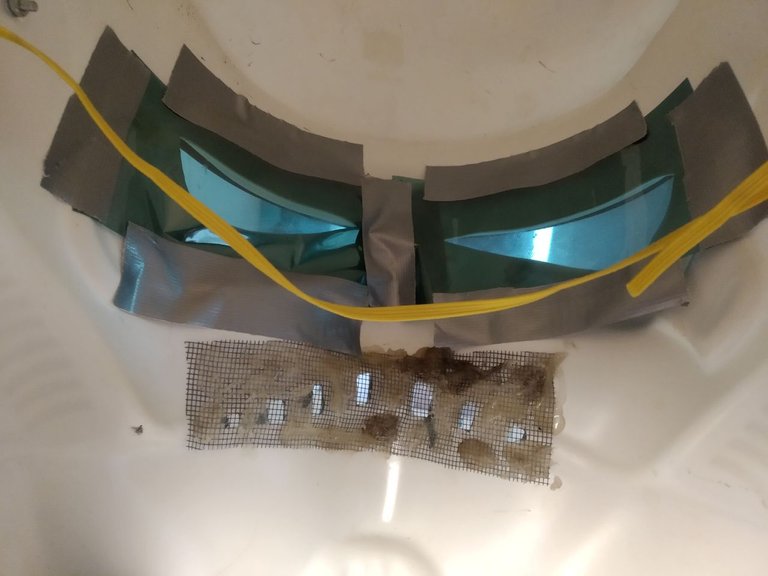
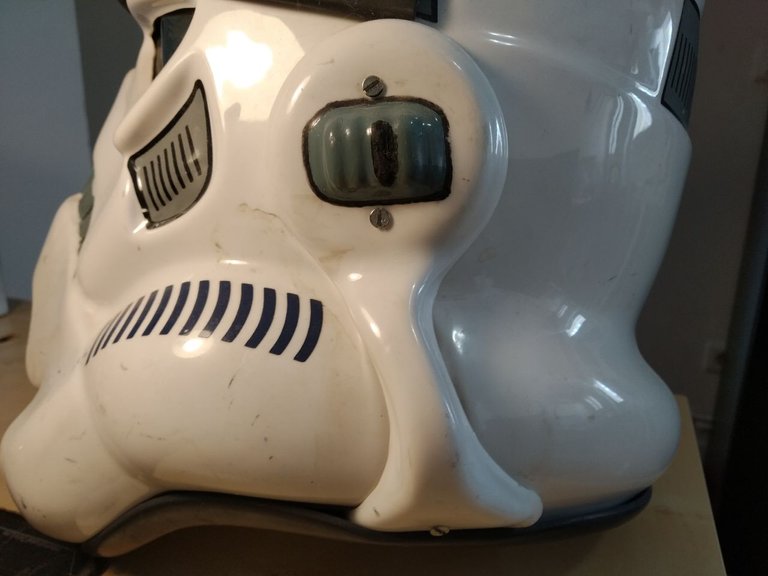
Primero pegaremos con pegamento rápido las piezas trasera, domo y frontal por este mismo orden. Después pondremos goma negra por toda la parte de abajo del casco y la parte de encima de los ojos. A continuación pondremos las orejeras que fijaremos al casco con unos pequeños tornillos. Colocaremos rejilla plástica en ambos respiradores y en las aberturas de la boca por el interior del casco, colocaremos los respiradores pegándolos en el interior de las toberas, por último quedaría pintar y poner las calcomanías.
First we will glue with quick glue the rear, dome and front parts in the same order. Then we will put black rubber all over the bottom of the helmet and the part above the eyes. Next, we will put the earmuffs that we will fix on the helmet with small screws. We will place the plastic grid in both respirators and the openings of the mouth on the inside of the helmet, we will place the respirators gluing them inside the nozzles, and finally we will paint and put the decals.
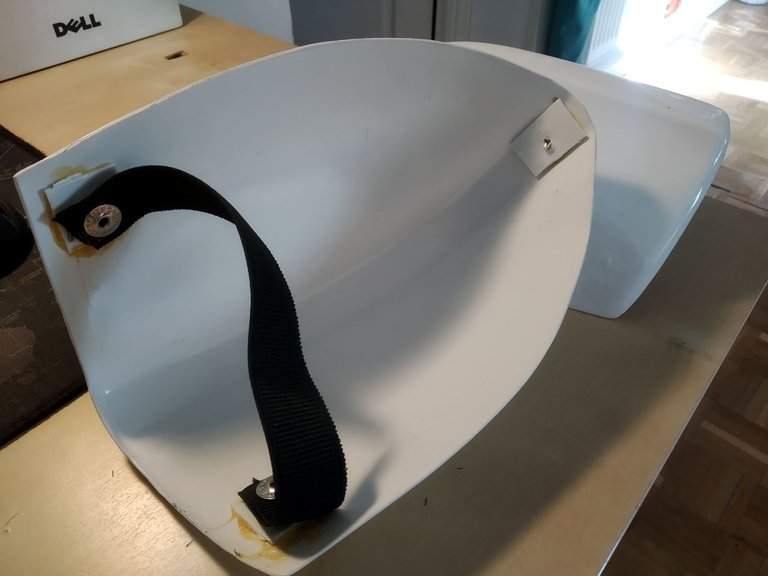
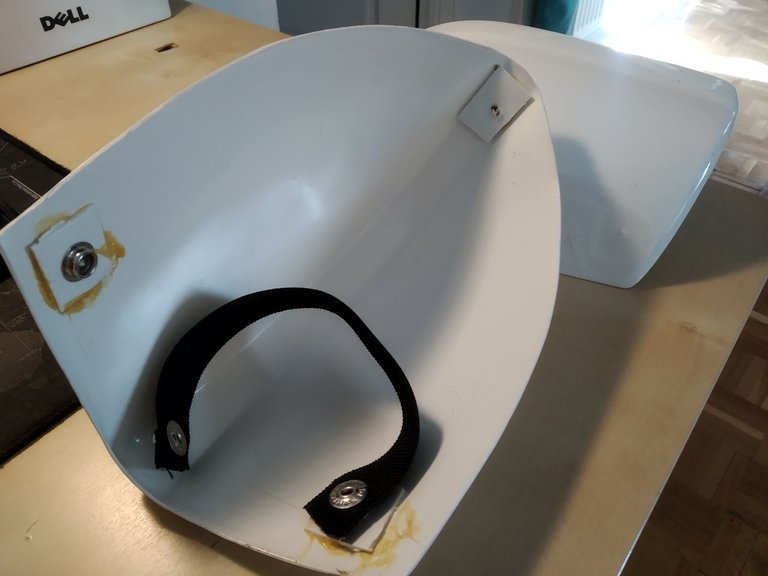
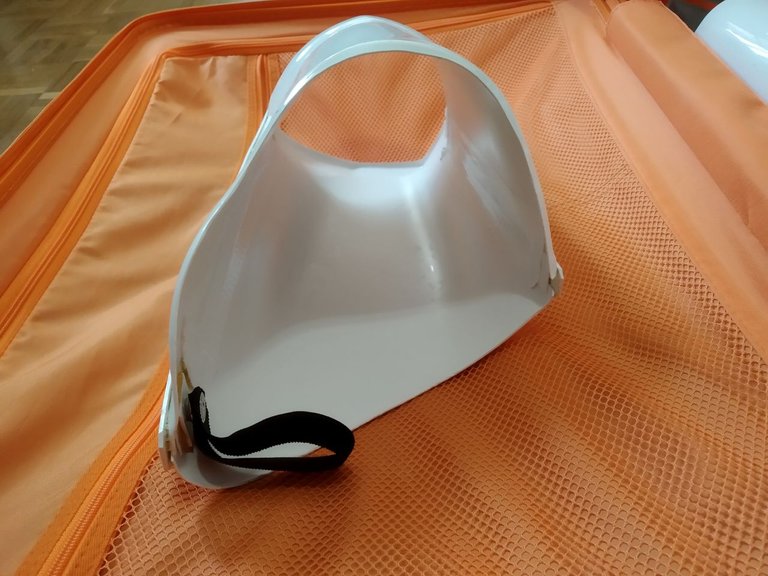
🔸HOMBRERAS / SHOULDERS🔸
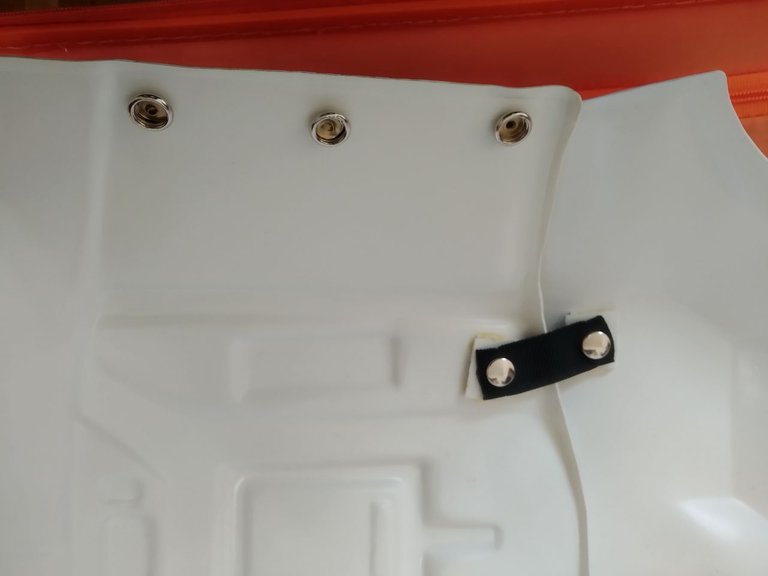
Para las hombreras tendremos que usar unos trozos de plástico para poder colocar una parte de los snaps, estas piezas las pegaremos con adhesivo por el interior de la hombrera, la otra parte la podremos en elástico negro que nos servirá para sujetarla al brazo. En la parte superior también pondremos snaps para sujetar la hombrera al hombro.
El elástico negro de la imagen nos servirá para ponerlo por encima de la pieza del tríceps y así sujetará el brazo completo.
For the shoulder pads we will have to use some pieces of plastic to place a part of the snaps, these pieces will be glued with adhesive on the inside of the shoulder pad, the other part we can use black elastic that will serve to hold it to the arm. In the upper part we will also put snaps to hold the shoulder pad to the shoulder.
The black elastic in the image will be used to put it over the triceps piece and will hold the whole arm.
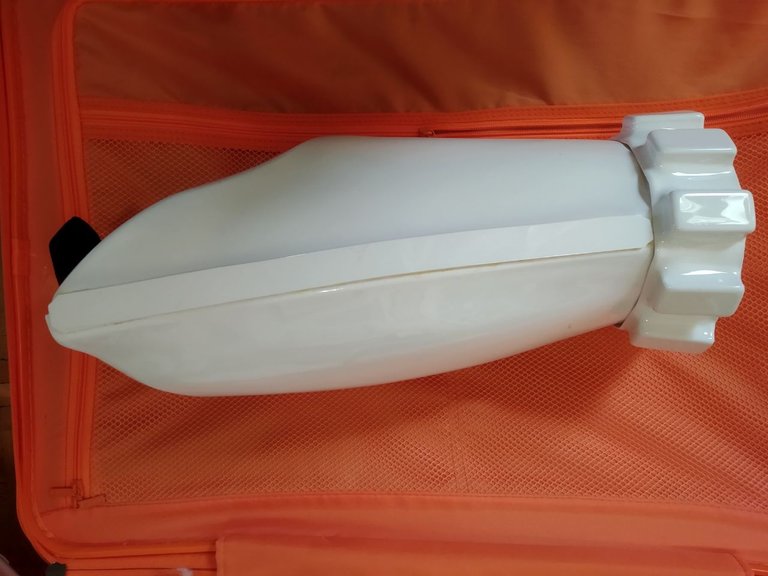
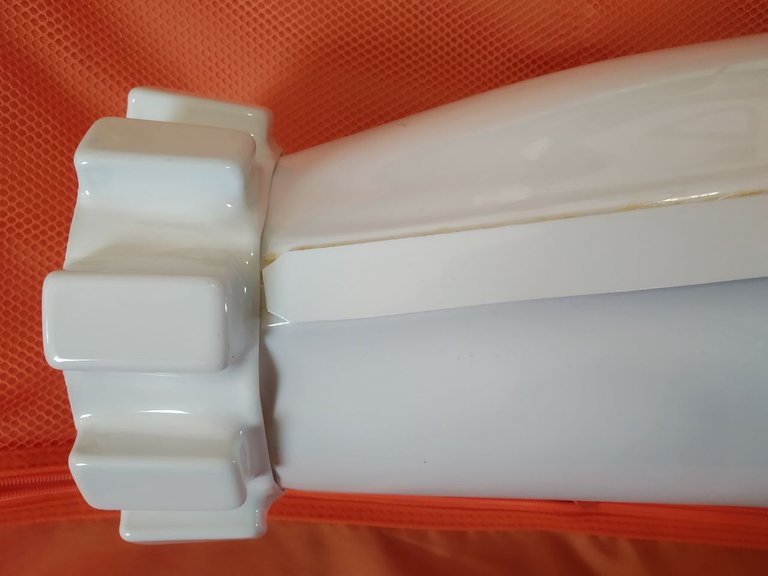
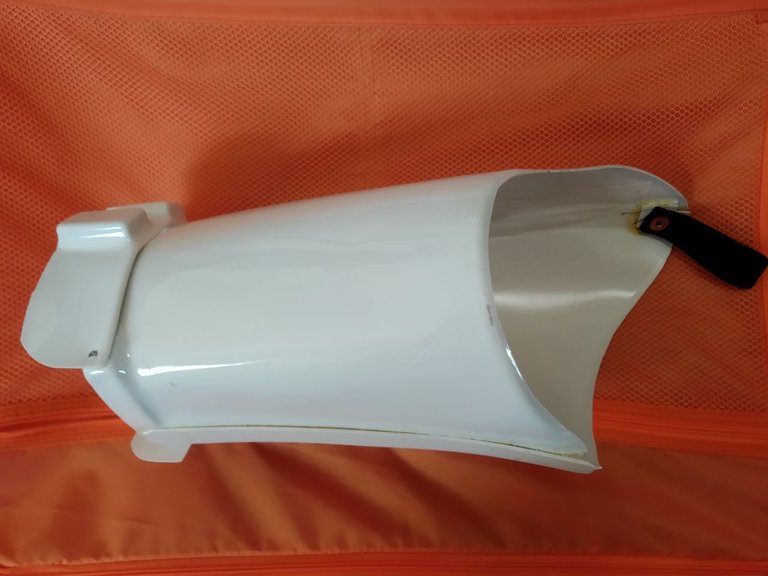
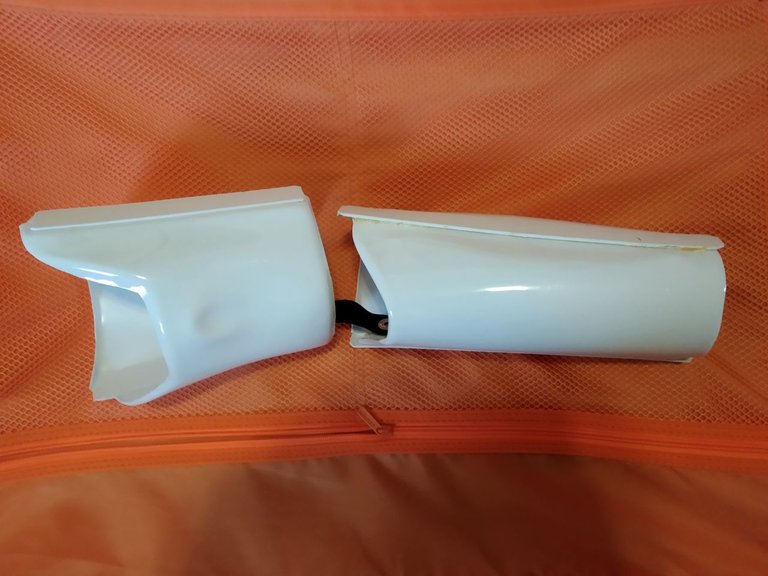
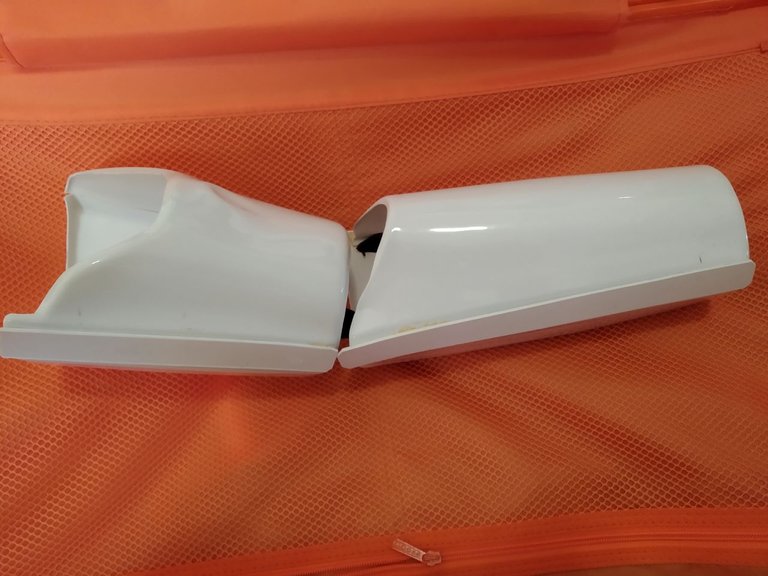
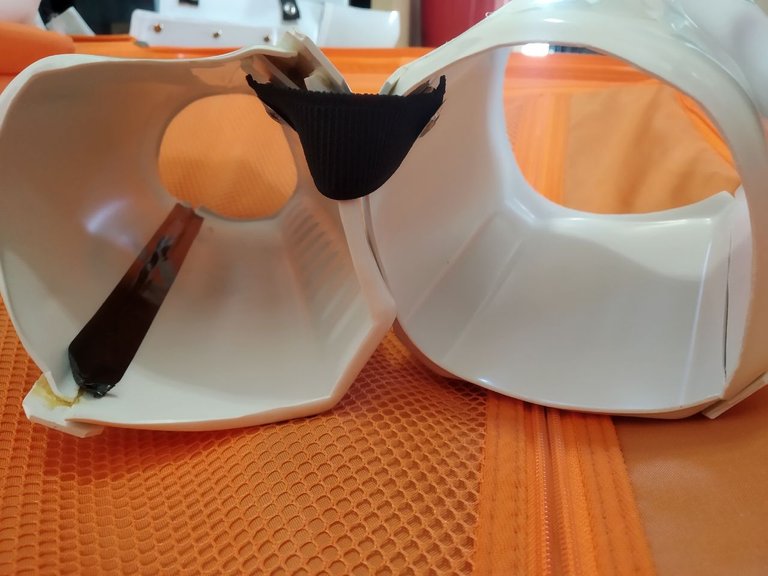
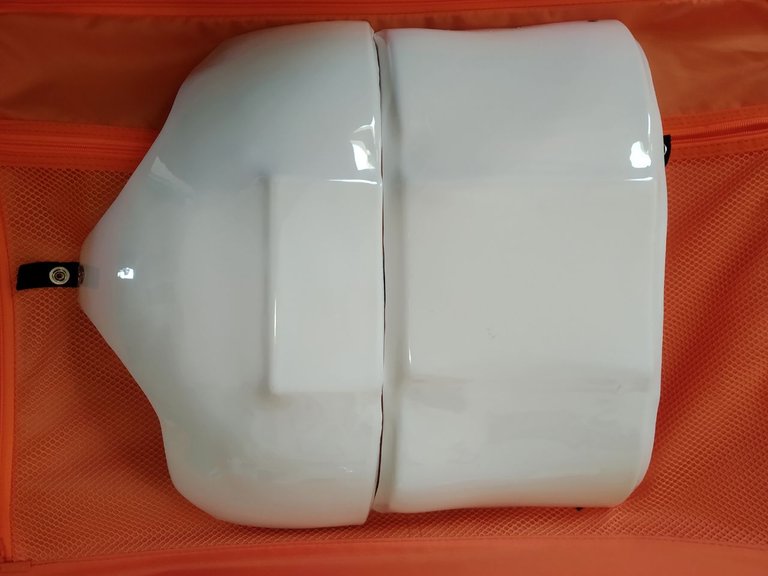
🔸PIERNA INFERIOR/ LOWER LEG🔸
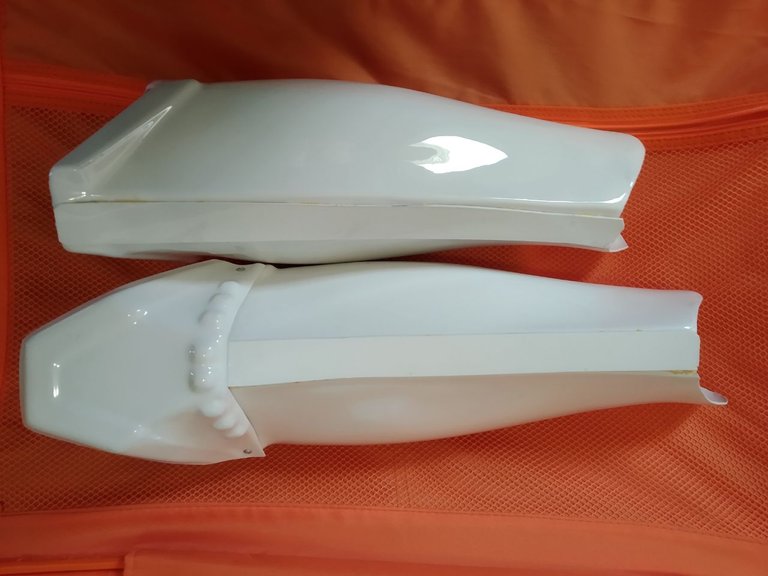
Cada espinillera está compuesta de tres partes, la parte izquierda, la derecha y la pieza larga que pegaremos para fijar las dos caras de la espinillera y tapar la unión entre estas. La espinillera izquierda lleva una rodillera e ira remachada a la parte superior de la pieza. Pondremos por detrás velcro blanco adhesivo en las dos partes para poder cerrarla. Recomiendo poner cinta americana resistente por dentro de la pieza para fijar mejor las dos partes.
Each shin guard is composed of three parts, the left part, the right part and the long piece that we will glue to fix the two sides of the shin guard and cover the joint between them. The left shin guard has a knee pad and will be riveted to the upper part of the piece. We will put white adhesive Velcro on the back of the two parts to be able to close it. I recommend putting strong duct tape on the inside of the piece to better secure the two parts.

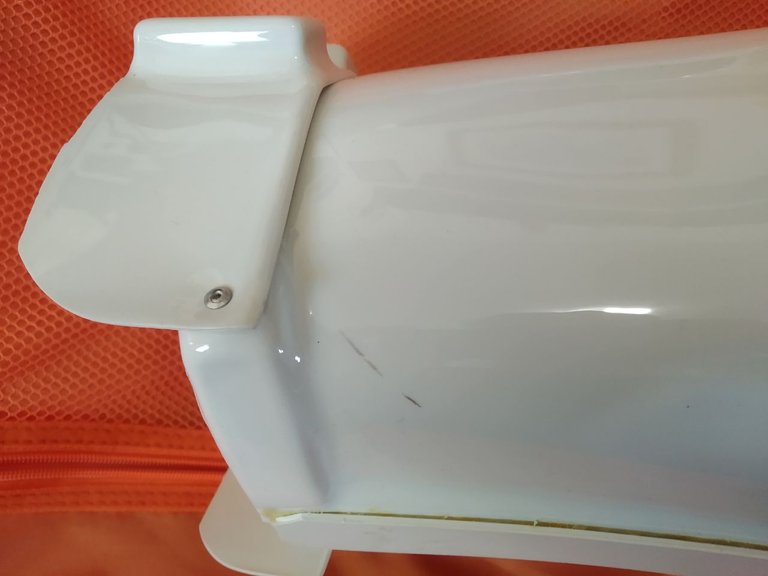
🔸PIERNA SUPERIOR/ UPPER LEG🔸
Los muslos también están compuestos por tres partes, la cara izquierda, la derecha y la pieza larga y estrecha que nos servirá para juntar las dos caras de la pieza del muslo, el muslo debe quedar cerrado totalmente tanto por delante como por detrás. El muslo derecho lleva una decoración extra que deberemos remachar por la parte delantera inferior del muslo. En los dos muslos deberemos pegar un snap como aprendimos anteriormente, a ese snap ira un elástico negro que nos servirá para sujetar los muslos, estos elásticos irán sujetos a un cinturón simple que llevaremos puesto. Recomiendo poner cinta americana resistente por dentro de la pieza para fijar mejor las dos partes.
The thighs are also composed of three parts, the left side, the right side and the long and narrow piece that will serve to join the two sides of the thigh piece, the thigh must be completely closed both front and back. The right thigh has an extra decoration that must be riveted on the lower front part of the thigh. In the two thighs, we will have to glue a snap as we learned previously, to this snap will go a black elastic that will serve to hold the thighs, these elastics will be attached to a simple belt that we will wear. I recommend putting strong duct tape on the inside of the piece to better secure the two parts.
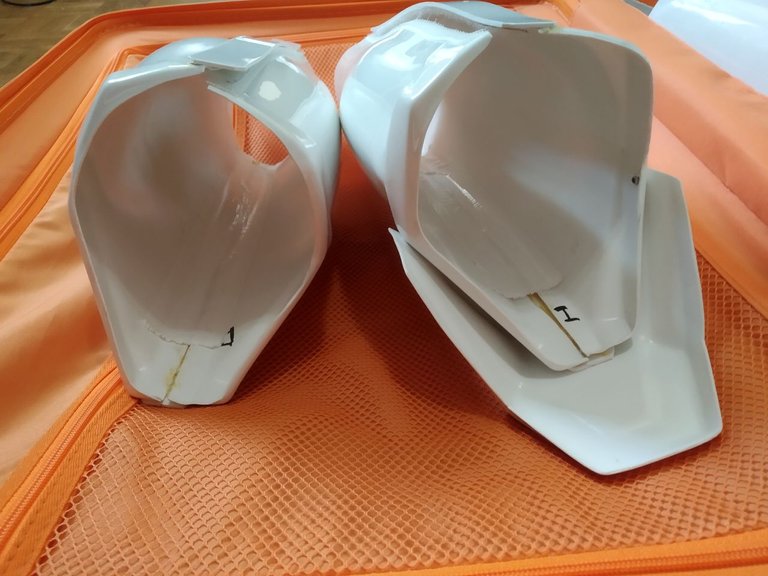
🔸BRAZOS / ARMS🔸

Cada brazo está compuesto de cuatro partes, dos para el antebrazo y otras dos para la parte del tríceps. Usaremos la misma técnica de unión de usar una pieza larga y estrecha para unirlas y esconder las uniones. Antebrazo y tríceps estarán unidos por elástico negro y snaps. Recomiendo poner cinta americana resistente por dentro de la pieza para fijar mejor las dos partes. Los brazos se sujetaran con el elástico de la pieza del hombro.
Each arm is composed of four parts, two for the forearm and two for the triceps part. We will use the same joining technique of using a long narrow piece to join them together and hide the joints. The forearm and triceps will be joined by black elastic and snaps. I recommend putting strong duct tape on the inside of the piece to better secure the two parts. The arms will be fastened with the elastic of the shoulder piece.
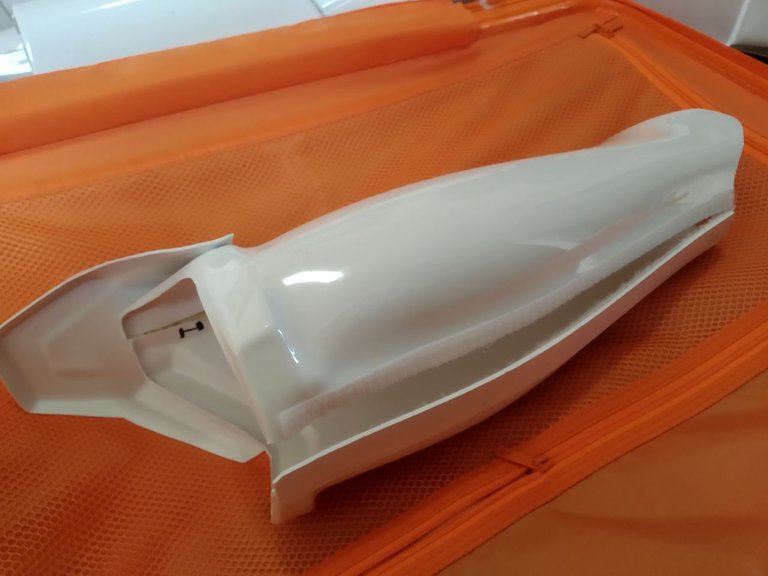
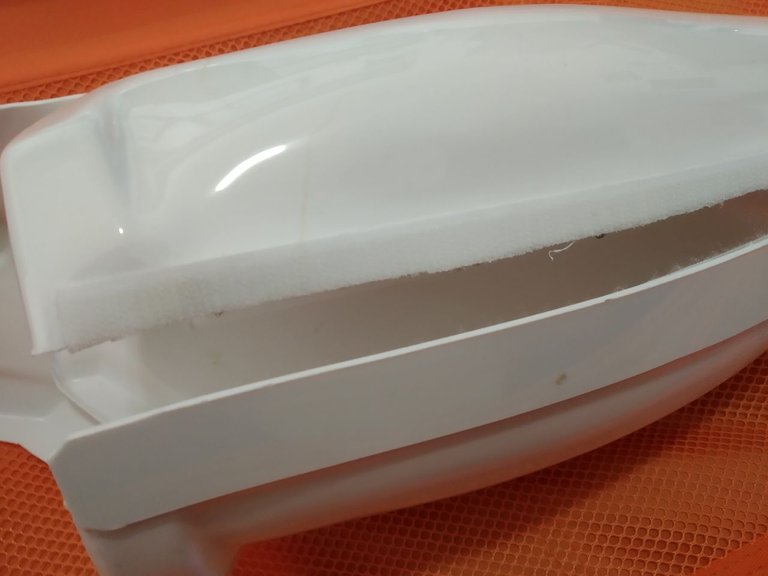
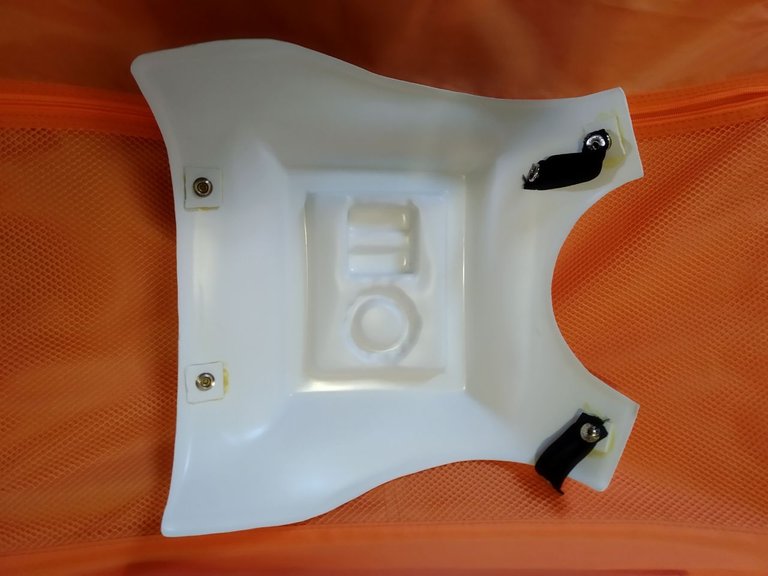
🔸CORAZA PECTORAL/ CHEST ARMOR🔸
La coraza delantera está compuesta de las partes superior e inferior, las dos tiras de los hombros y las dos botoneras que vemos en la parte inferior de la coraza, estas dos piezas decorativas irán pegadas y pintadas como puede verse en la imagen. Las tiras de los hombros se pegarán con pegamento, no tienen que soportar peso y son simplemente decorativas.
The front armor is composed of the upper and lower parts, the two shoulder straps and the two button panels that we see at the bottom of the armor, these two decorative pieces will be glued and painted as you can see in the picture. The strips of the shoulders will be glued with glue, they do not have to support weight and are simply decorative.
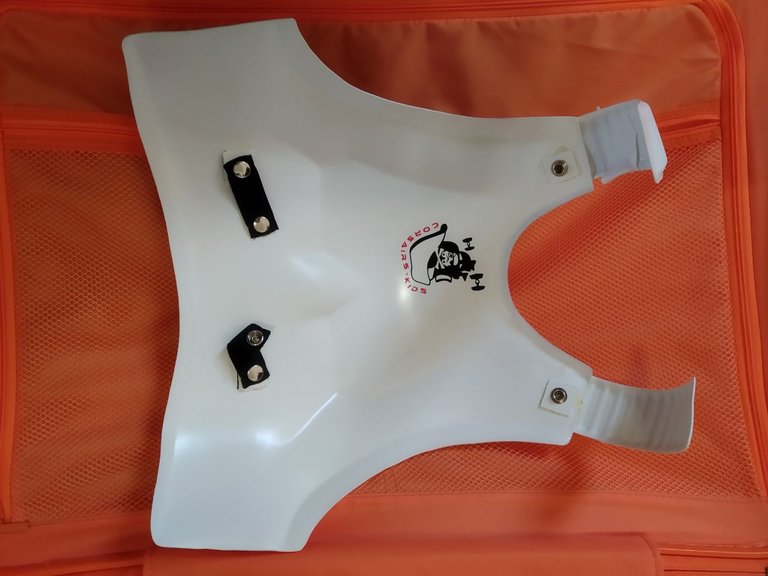
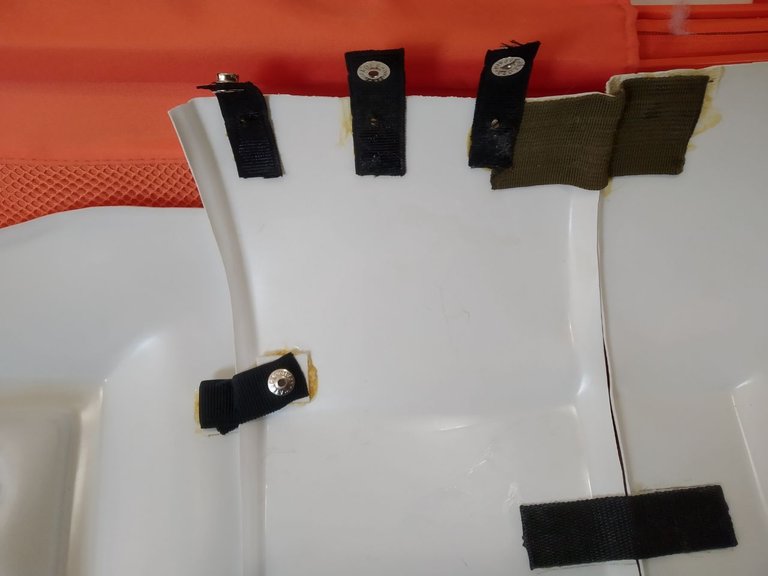
A continuación debemos poner los snaps como vemos en las imágenes que nos servirán para unir la coraza delantera y trasera. Usaremos la técnica del trozo de plástico con el snap. También tendremos que cortar varios trozos de elástico negro bien grueso y le pondremos snaps para fijar las piezas, antes de cortar el elástico debemos calcular la medida para que no quede ni largo ni corto y la armadura quede bien colocada.
Next we must put the snaps as we see in the images that will serve to join the front and rear armor. We will use the technique of the piece of plastic with the snap. We will also have to cut several pieces of thick black elastic and we will put snaps to fix the pieces, before cutting the elastic we must calculate the measure so that it is neither long nor short and the armor is well placed.

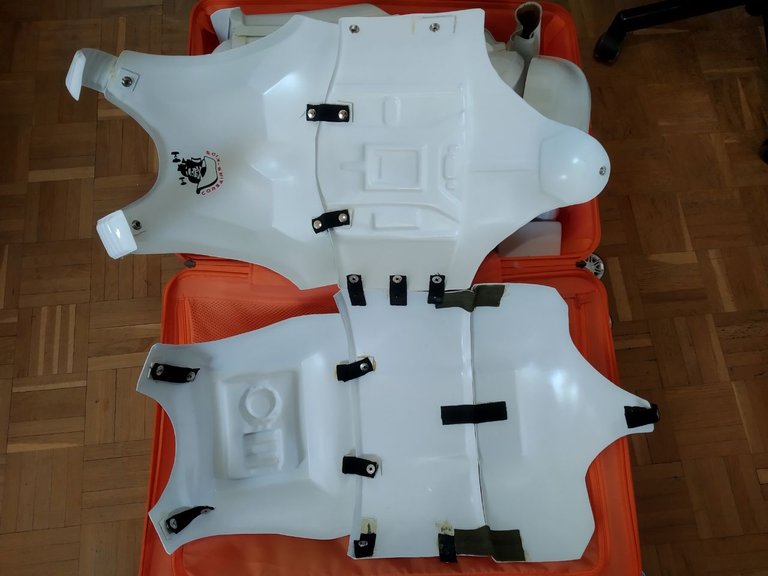
🔸CORAZA TRASERA / BACK ARMOR🔸
La coraza trasera está compuesta de las partes superior, media e inferior. Para unir la parte media e inferior usaremos cinta de correa y la pegaremos con pegamento por la parte interior, también podemos usar cinta americana resistente para que quede más sujeta.
The back shell is composed of the upper, middle and lower parts. To join the middle and lower part we will use strap tape and glue it with glue on the inside, we can also use strong duct tape to make it more secure.
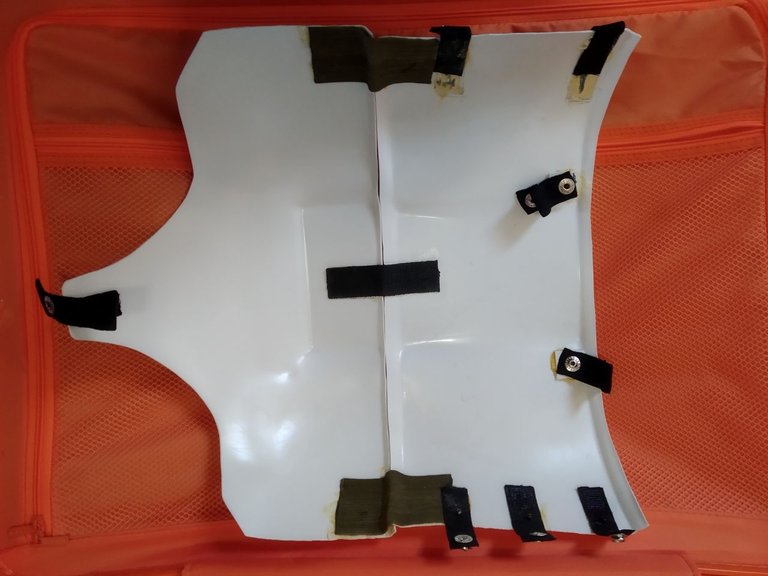
A continuación debemos poner los snaps como vemos en las imágenes que nos servirán para unir la coraza delantera y trasera. Usaremos la técnica del trozo de plástico con el snap. También tendremos que cortar varios trozos de elástico negro bien grueso y le pondremos snaps para fijar las piezas, antes de cortar el elástico debemos calcular la medida para que no quede ni largo ni corto y la armadura quede bien colocada.
Next we must put the snaps as we see in the images that will serve to join the front and rear armor. We will use the technique of the piece of plastic with the snap. We will also have to cut several pieces of thick black elastic and we will put snaps to fix the pieces, before cutting the elastic we must calculate the measure so that it is neither long nor short and the armor is well placed.
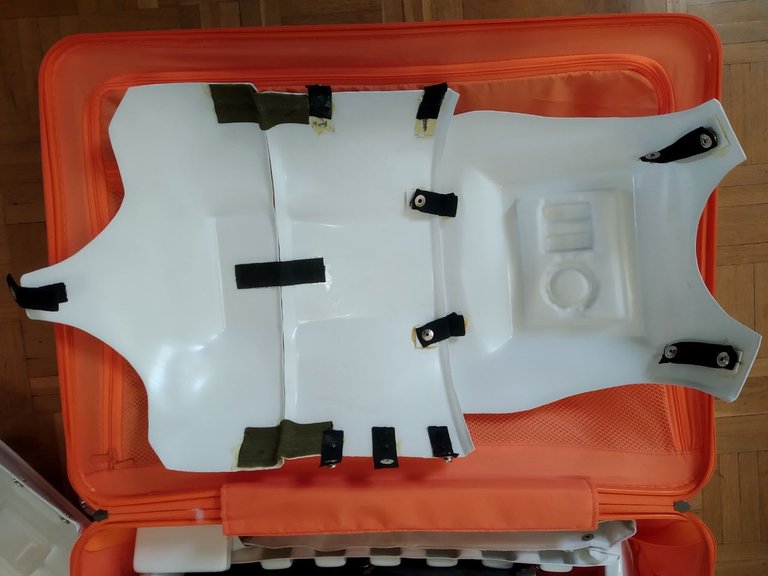
🔸EMSAMBLAJE CORAZA / ARMOR ASSEMBLY🔸
Una vez puestos todos los snaps en la armadura, cortado los elásticos a medida y puestos sus snaps correspondientes podremos ver como nos queda para ir ajustándola. Este paso es complicado por que si alguno de los elásticos no es de la medida correcta tendremos que hacer otro hasta que quede perfecto.
Once all the snaps have been placed on the armature, the elastics have been cut to size and the corresponding snaps have been placed, we can see how it looks to adjust it. This step is complicated because if any of the elastics are not the right size we will have to make another one until it is perfect.

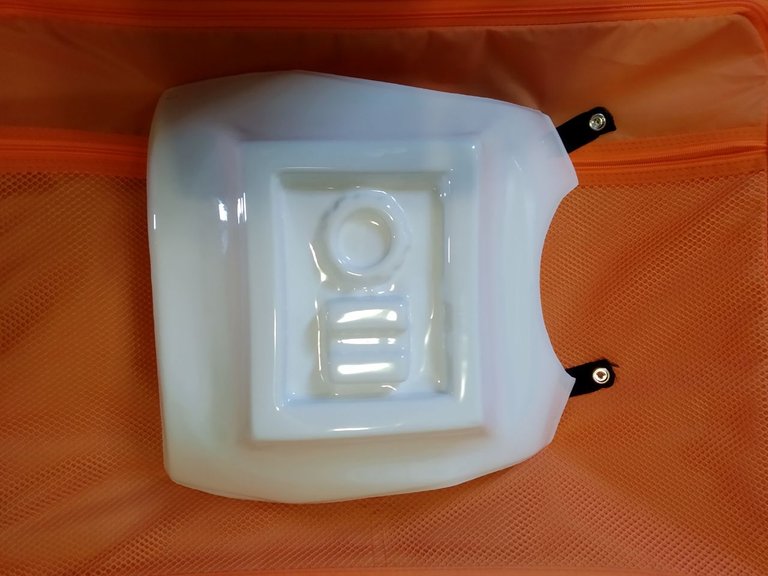
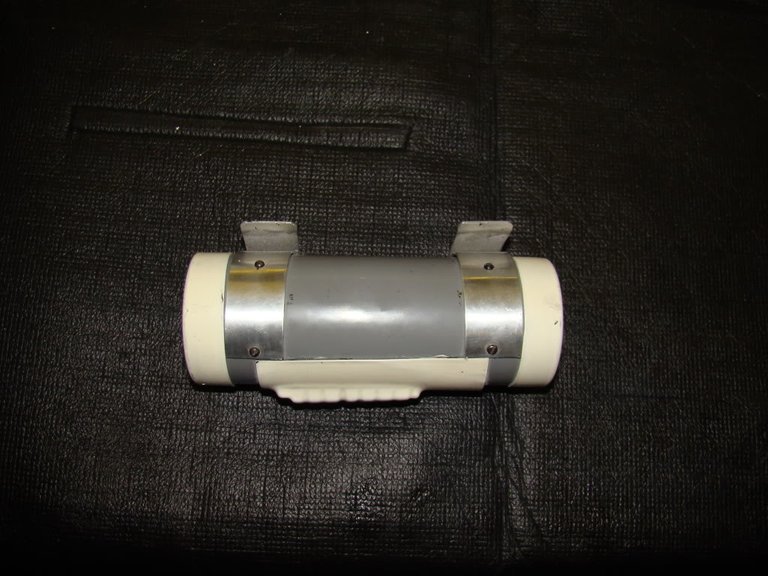
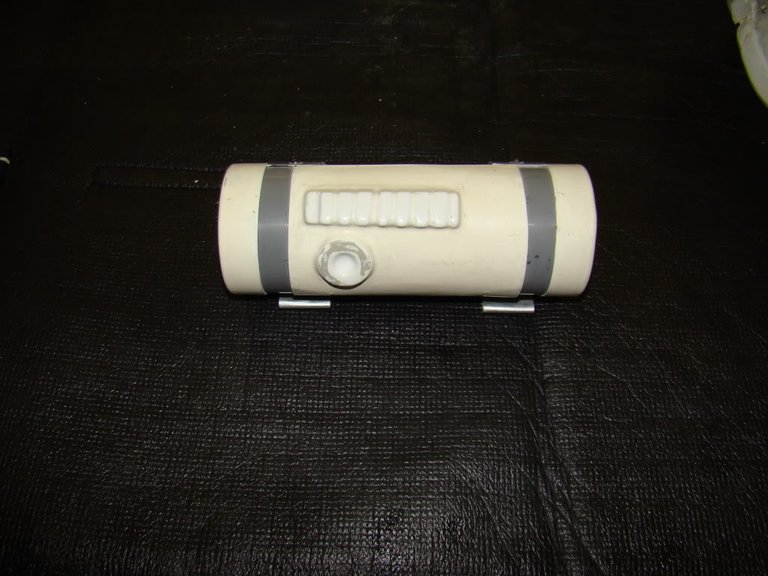
🔸DETONADOR TERMAL / THERMAL DETONATOR🔸
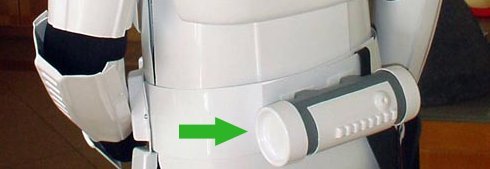
El detonador esta compuesto por un tubo de PVC y tres piezas de plástico, las dos tapas y el frontal que hay que pegar en el tubo. Para sujetarlo al cinturón pondremos dos piezas de metal con remaches al tubo y las doblaremos para que nos hagan de soporte.
The detonator is composed of a PVC tube and three plastic pieces, the two caps and the front, these pieces must be glued to the tube. To attach it to the belt we will put two pieces of metal with rivets to the tube and we will bend them so that they make us of support.
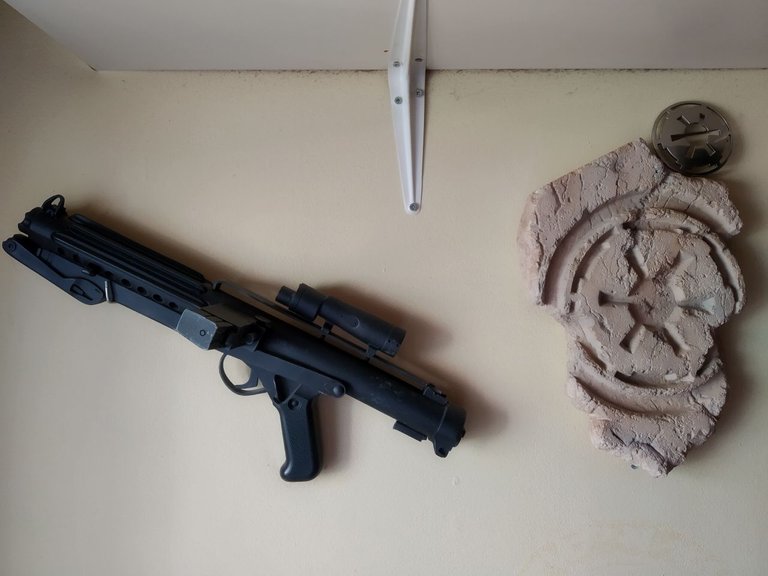
🔸CARTUCHERA Y BLASTER / HOLSTER AND BLASTER🔸
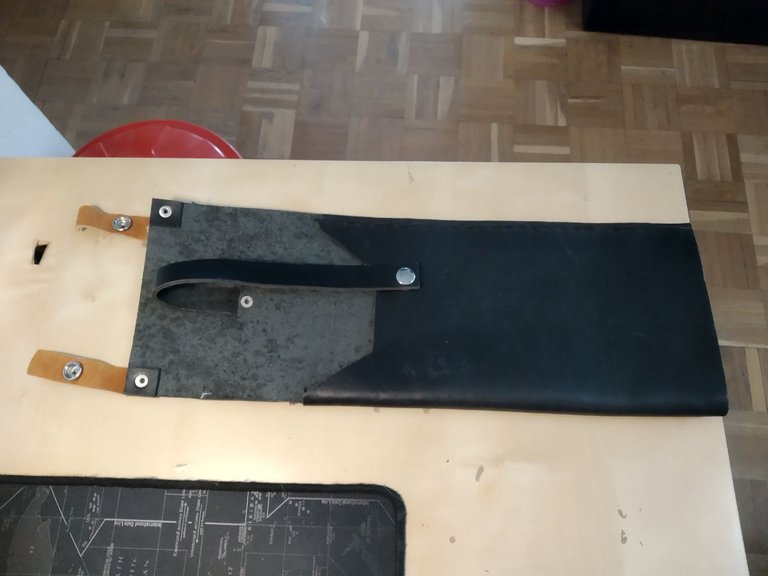
Esta pieza es muy simple de hacer, aunque hay muchos fabricantes a quien encargársela. La cartuchera está hecha de piel o piel sintética y está cosida por solo un lado. Tiene unas sujeciones y unos snaps para sujetar el blaster y que no se caiga.
This piece is very simple to make, although there are many manufacturers to order it from. The holster is made of leather or synthetic leather and is sewn on one side only. It has some fasteners and snaps to hold the blaster so that it does not fall out.
NO CREO QUE ME OLVIDE NADA / I DON'T THINK I'M FORGETTING ANYTHING🤣😂😅
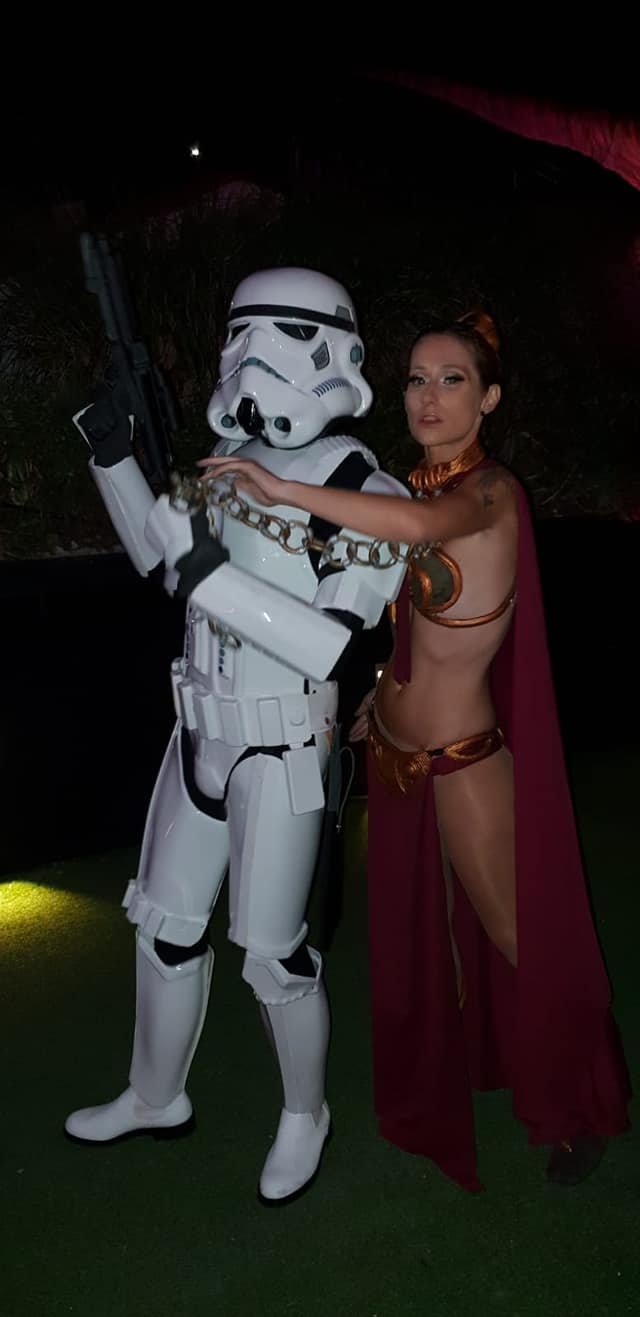
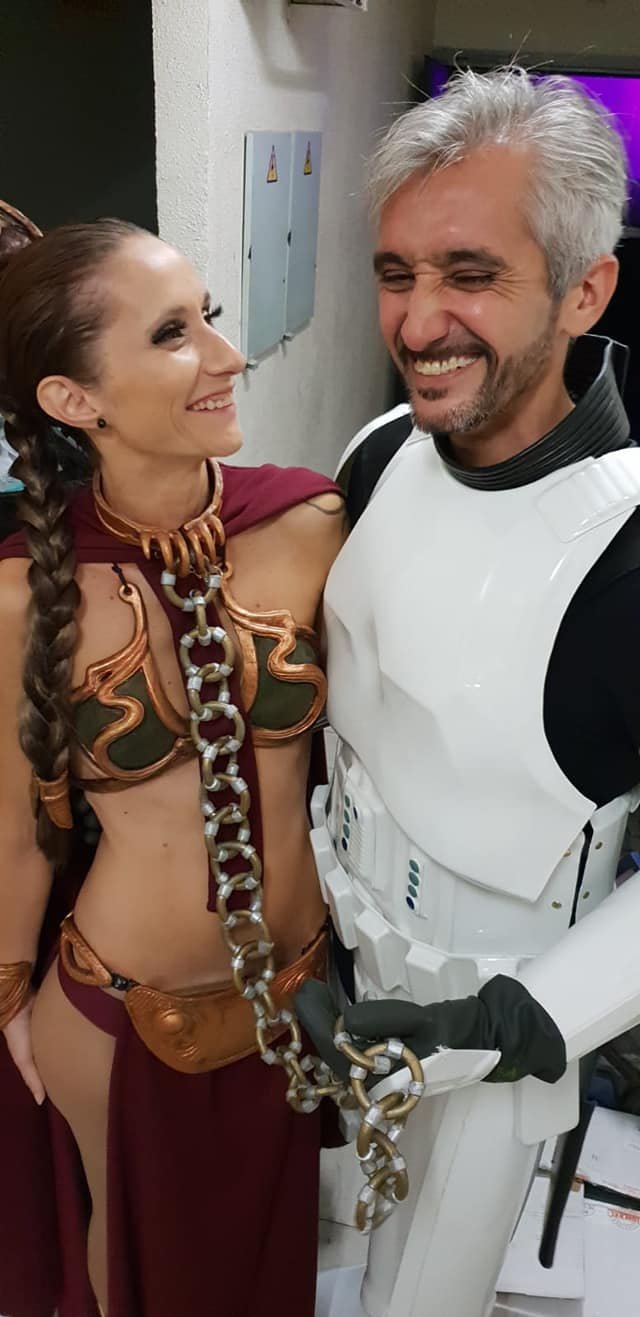
Con mi esposa Olga, mi princesa Leia / With my wife Olga, my princess Leia
🔸🔹AVISO / NOTICE🔹🔸
◽️El tiempo usado para hacer este tutorial a sido de 25 horas aprox. (incluido fotografiado)
◽️Todas las imágenes usadas en este post son de mi propiedad, excepto las
que estén atribuidas a otras personas de la manera correspondiente.
◽️Banner superior usado propiedad de geralt en pixabay
◽️Edición de imágenes y fotografías con Photoshop
◽️Imagen adopt en firma por 3333873 en pixabay
◽️Traducido al inglés con DeepL Translate
◽️Corregido con languagetool español
◽️Corregido con Grammarly inglés
◽️Corrected with Grammarly english
◽️Corrected with languagetool spanish
◽️Photoshop PS image and photo editing
◽️Translated to English with DeepL Translate
◽️Top banner used property of geralt at pixabay
◽️Image adopt in signature by 3333873 at pixabay
◽️All images used in this post are my property except
those attributed to other people in a corresponding way.
◽️The time used to make this tutorial was about 25 hours (including photography).
Todas las partes de la armadura, ya sean rígidas o no, pueden ser compradas a diferentes fabricantes a través de la web de ETSY y a otros fabricantes como pueden ser StudioCreations. Si tu idea es llegar a la perfección y que todo este totalmente al detalle como en las películas, tendrás que recurrir a la web mas famosa del costuming Star wars "La Legión 501".
All armor parts whether rigid or not can be purchased from different manufacturers through the ETSY website and other manufacturers such as StudioCreations. If your idea is to reach perfection and that everything is detailed as in the movies you will have to resort to the most famous Star wars costuming website "The 501st Legion"
◽️Si no lo viste, aquí puedes ver el montaje de mis cosplays de snowtrooper y biker scout◽️
◽️If you didn't see it, here you can see the montage of my snowtrooper and bikerscout cosplays◽️
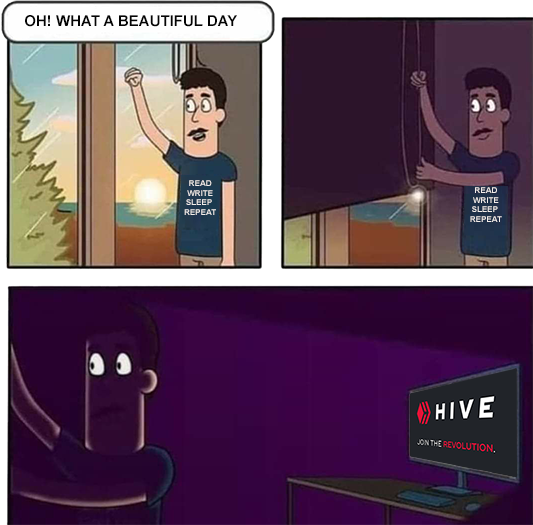
Hiverizado del meme hecho por mi (Autor original del meme desconocido)
Hiverized meme made by me (Original author of the meme unknown)

This post was written listening City Pop music and New Retro Wave🎼
May we be governed by a DAO
Este post a sido redactado escuchando música City Pop y New Retro Wave🎼
Que nos gobierne una DAO
is the community open for english speaking people or only spanish? cause I only see spanish posts... X_x
yes, it is a Spanish-speaking community
Está increíble este cosplay. Al menos ya tengo el casco, me falta todo lo demás jajaja
Anímate hombre nunca es tarde, ya sabes como hacerlo jajajaja
Este post ha sido realmente increíble e impresionante, te felicito 💗
Muchísimas gracias por tus palabras😊
Ufff la verdad no puedo decir nada más que ESPECTACULAR! Me parece una locura el trabajo que has hecho, es simplemente excelente.
También, debo felicitarte por tu post, esta muy bien logrado tanto el escrito como las imágenes que has utilizado, se ven en súper buena calidad y eso definitivamente es un plus. 11 Puntos de 10.
La alegria y la calidad en una solo foto juntas ❤️
Te invito a que te des una vuelta por nuestra comunidad, donde buscamos generar un espacio similar a los grandes eventos donde uno suele disfrutar de éste tipo de cosas como los Cosplays. Se llama Hive-Con: https://peakd.com/c/hive-128240/trending
También te invito si es de tu agrado a que nos compartas algo de tu contenido, quedé sinceramente fascinado. Un saludo y que estés muy bien!
Muy buenas Julian, muchas gracias por tus palabras, intentare subir algo a vuestra comunidad, otra vez, muchas gracias.