

Cocoa and orange, is the perfect fusion to prepare a rich marbled cake and celebrate the life of our loved ones, this time the life of my beloved son. A few days ago I told you about his birthday, today I want to share with you how I prepared and decorated his cake, his Dino cake as he calls it.
I am not a pastry chef, but people tell me that I have a "good hand for cakes", the guests liked this preparation very much, I even won my first customer and during the preparation I learned some things that will allow me to improve day by day. My weak point in the preparation of the cakes is undoubtedly the decoration, since I do not have the necessary tools and I need to learn some techniques, especially the correct use of the sleeves and the frosting of the whipped cream, I will take care of that next year, because I have in mind to take some courses that allow me to combine some techniques and tricks in a more professional way, without losing my own essence, because after all this is what makes a cake or any recipe is distinguished from the others.
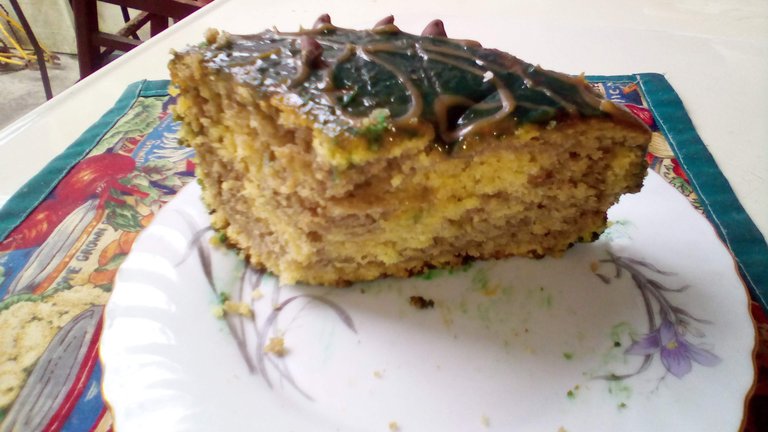
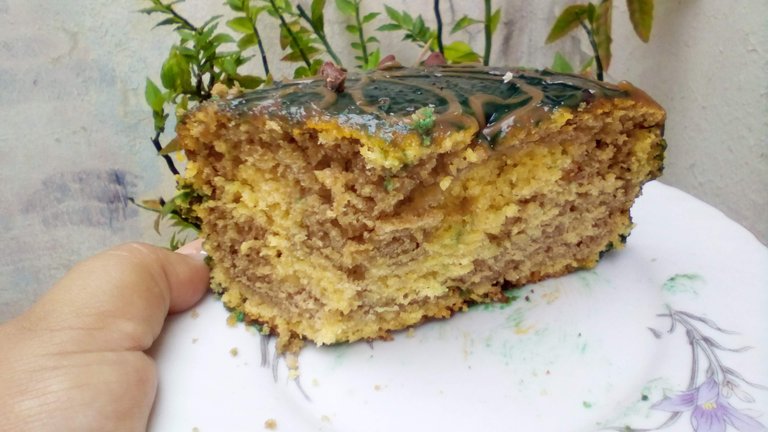
When I bought the ingredients I did not have a plan in mind, besides the dinosaur theme, it was at the time of preparation that I thought of creating two different mixtures and making it marbled, this is what differentiates this cake from the other cakes I have prepared, as previously I made a single mixture using milk and or some citrus, I divided it in two and to one of the halves I added chocolate or cocoa.
This time I prepared a mixture of concentrated orange juice and another mixture with liquid milk, condensed milk and cocoa. All the flavors could be appreciated and enjoyed in every bite. A delight.
Let's see the Recipe!


El cacao y la naranja, es la fusión perfecta para preparar una rica torta marmoleada y celebrar la vida de nuestros seres queridos, en esta ocasión la vida de mi amado hijo. Hace unos días les conté que tal estuvo su cumpleaños, hoy quiero compartirles como preparé y decore su torta, su Dino torta como él la llama.
No soy repostera, pero las personas me dicen que tengo “buena mano para las tortas”, esta preparación les gusto bastante a los invitados, incluso gane mi primer cliente y durante la preparación aprendí algunas cosas, que me permitirán mejorar día a día. Mi punto débil en cuanto a la preparación de las tortas es sin duda la decoración, ya que no tengo las herramientas necesarias y me falta aprender algunas técnicas, sobre todo el uso correcto de las mangas y el frisado del chantillí, me ocuparé de eso el año que viene, pues tengo en mente, realizar algunos cursos, que me permitan combinar algunas técnicas y trucos de una forma más profesional, sin perder mi propia esencia, pues al fin de cuenta es esto lo que hace que una torta o cualquier receta se distinga de las demás.
Cuando compré los ingredientes no tenía un plan en mente, además de la temática que era de dinosaurios, fue en el momento de la preparación en que pensé en crear dos mezclas distintas y hacerla marmoleada, es esto lo que diferencia esta torta de las demás tortas que he preparado, ya que anteriormente hacia una sola mezcla usando leche y o algún cítrico, la dividía en dos y a una de las mitades le agregaba el chocolate o el cacao.
Esta vez preparé una mezcla de Jugo concentrado de Naranja y otra mezcla con leche líquida, leche condensada y cacao. Todos los sabores se podían apreciar y disfrutar en cada bocado. Una delicia!.
¡Veamos la Receta!
Ingredients
Ingredientes
1.5 kg Leavened Wheat Flour
800 gr of sugar
500 gr of butter
10 eggs
1 teaspoon of Baking Powder
500 ml of Orange Juice (approximately 1 kilo of Oranges)
30 gr of Bitter Cocoa
150 gr of condensed milk
700 ml of liquid milk
100 gr of whipped cream
Milk caramel
Blue and yellow coloring
100 gr of chocolate drops
1.5 kg de Harina de Trigo Leudante
800 gr de Azúcar
500 gr de mantequilla
10 huevos
1 Cucharadita de Polvo de Hornear
500 ml de Jugo de Naranja (1 kilo de Naranjas aproximadamente)
30 gr de Cacao Amargo
150 gr de Leche condensada
700 ml de leche líquida
100 gr de chantillí
Dulce de leche
Colorante azul y Amarillo
100 gr de gotas de chocolate
Step by Step - Paso a Paso
Step 1
The preparation of this cake follows the same steps of a base mix, it is actually very easy and practical, it is important that we use the best quality ingredients possible, so that the result is better, as I have written in previous posts, I like to prepare the cake mix by hand, with a wooden spoon, that's how my mother makes them and as for me her cakes are amazing I faithfully follow her steps.
La preparación de esta torta sigue los mismos pasos de una mezcla base, en realidad es muy fácil y práctica, es importante que usemos ingredientes de la mejor calidad posible, para que el resultado sea mejor, como he escrito en publicaciones anteriores, me gusta preparar la mezcla de las tortas a mano, con una cuchara de madera, así las hace mi madre y como para mí sus tortas son increíbles sigo fielmente sus pasos.
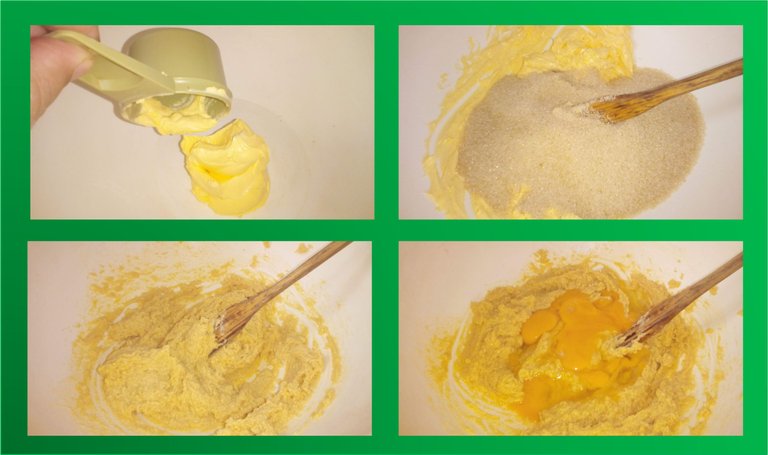
Step 2
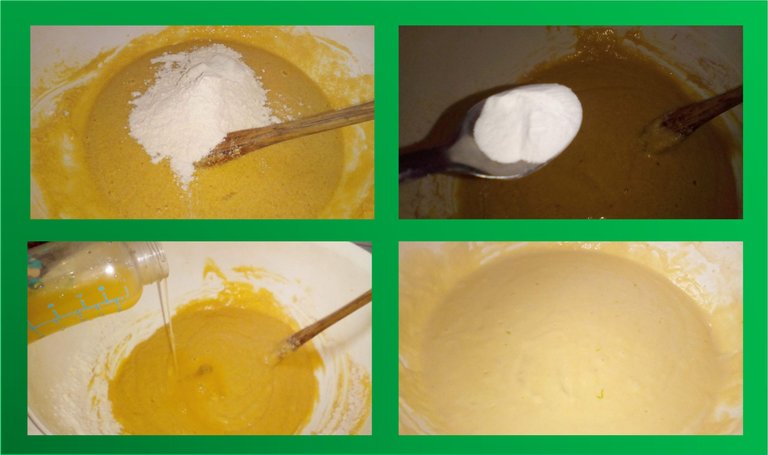
We incorporate the wheat flour previously sifted to avoid lumps, a teaspoon of baking powder and our liquid ingredient.
Vamos incorporando la harina de trigo previamente tamizada para evitar grumos, una cucharadita de polvo de hornear y nuestro ingrediente líquido.
Step 2.1
For the orange mixture, I used about 400 ml of orange juice that I obtained from approximately 1 kg, this amount can vary so I recommend that the liquid is added little by little, as we incorporate the flour.
Para la mezcla de naranja, use alrededor de 400 ml de jugo de naranja que obtuve de 1 kg aproximadamente, esta cantidad puede variar así que recomiendo que el líquido se vaya agregando poco a poco, a medida que vamos incorporando la harina.
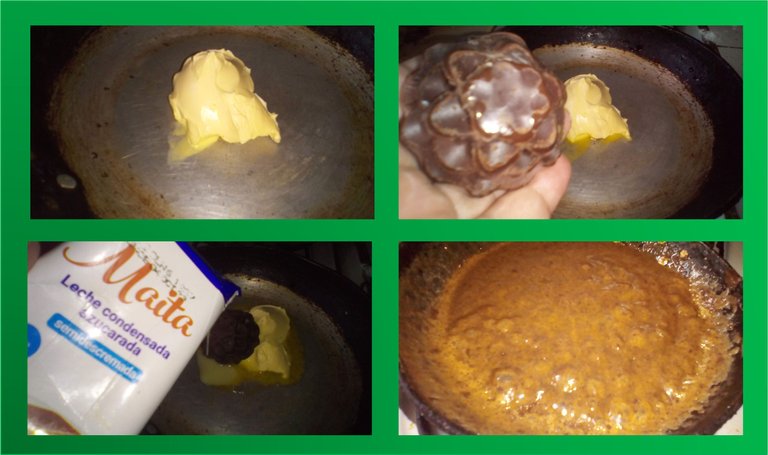
Step 2.2
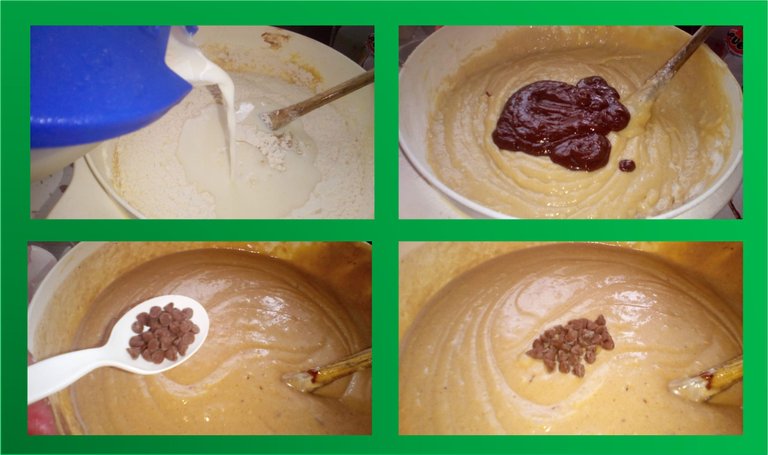
For the Cocoa Mixture: In a frying pan I melted a tablespoon of butter, together with about 100 grams of condensed milk and 30 grams of bitter cocoa. And once step 1 and 2 were done again in a separate bowl, I incorporated the liquid milk and the melted chocolate mixture along with about two tablespoons of chocolate drops, as with the previous mixture I was incorporating the liquid milk little by little, because we must take care that our mixture has good consistency.
Para la Mezcla de Cacao: En una sartén derretí una cucharada de mantequilla, junto a unos 100 gr de leche condensada y 30 gr de cacao amargo. Y una vez realizado el paso 1 y 2 nuevamente en un bol aparte, incorporé la leche líquida y la mezcla del chocolate derretido junto a unas dos cucharadas de gotas de chocolate, al igual que con la mezcla anterior fui incorporando la leche líquida poco a poco, pues debemos cuidar que nuestra mezcla tenga buena consistencia.
Step 3
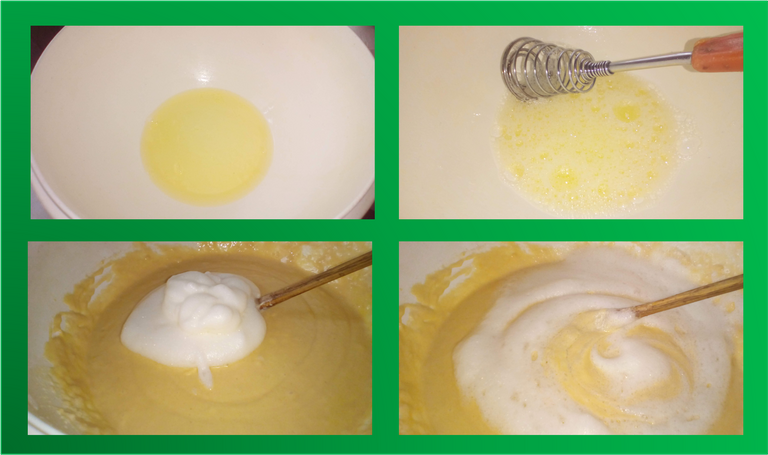
With the egg whites that I reserved initially, I try to get the snow point and double its volume, at this point I like to add a pinch of salt and a few drops of lemon juice, for this I use a balloon whisk and start beating as fast as I can. Once the yolks take body, I incorporate them to both mixtures stirring gently.
Con las claras de los huevos que reservé inicialmente, trató de conseguir el punto de nieve y duplicar su volumen, en este punto me gusta agregar una pizca de sal y unas gotas de jugo de limón, para esto uso un batidor de globo y comienzo a batir lo más rápido que puedo. Una vez las yemas tomen cuerpo, las incorporó a ambas mezclas removiendo suavemente.
Step 4
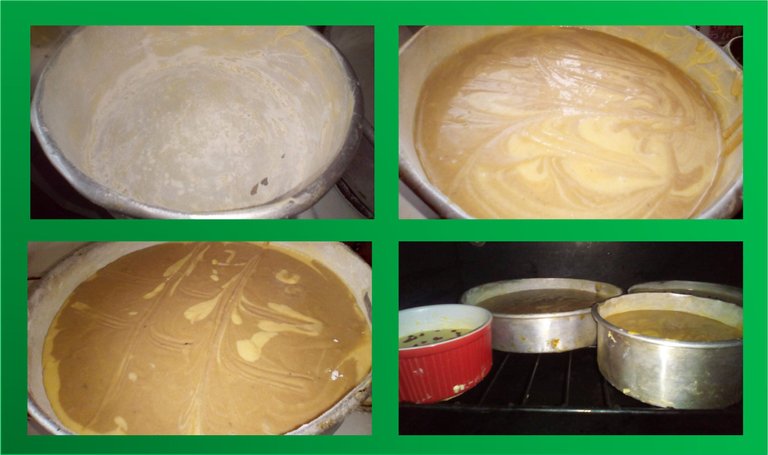
Finally, the next step is to prepare our molds, for this we butter the entire surface and add wheat flour which we distribute on all sides. Add the orange mixture, then the cocoa mixture and stir very gently with a fork, giving it the decorative shape of our preference.
Finalmente, el siguiente paso es preparar nuestros moldes, para esto enmantequillamos toda la superficie y agregamos harina de trigo la cual distribuimos por todos lados. Agregamos la mezcla de naranja, seguidamente la de cacao y remover muy suavemente con un tenedor, dándole la forma decorativa de nuestra preferencia.
Step 5
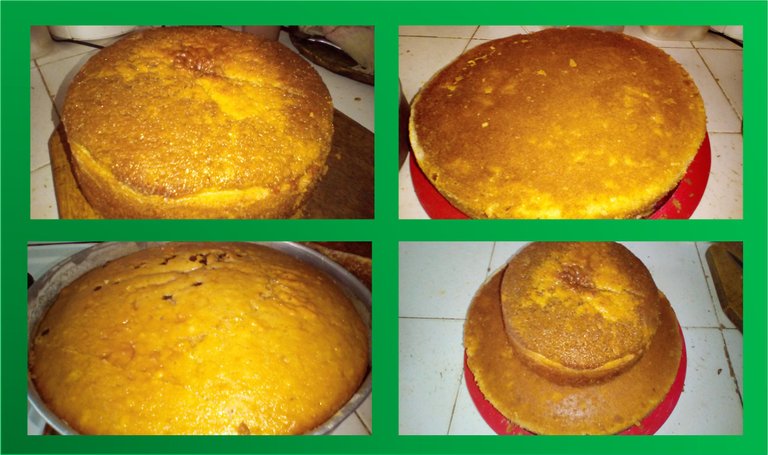
We take them to the oven, here I also have a disadvantage, the cakes are a little uneven and so I have to try to level them before decorating them, we let them bake for at least 45 minutes before giving them our first check, so that it does not go down. This cake took exactly 80 min. We turn off the heat, and let our cakes rest.
Llevamos al horno, aquí también tengo una desventaja, las tortas me quedan un poco desniveladas y así que tengo que ingeniármelas para tratar de nivelarlas antes de decorarlas, dejamos hornear como mínimo 45 minutos antes de darles nuestro primer chequeo, para que esta no baje. Esta torta tardó exactamente 80 min. Apagamos el fuego, y dejamos reposar nuestras tortas.
Decoration.
Decoración
As I said at the beginning, I am still learning how to decorate or rather, I like to decorate freely letting inspiration take me, I am a little rustic and I am trying to improve this, because presentation is also important, but at this point I like to relax and have a little more fun.
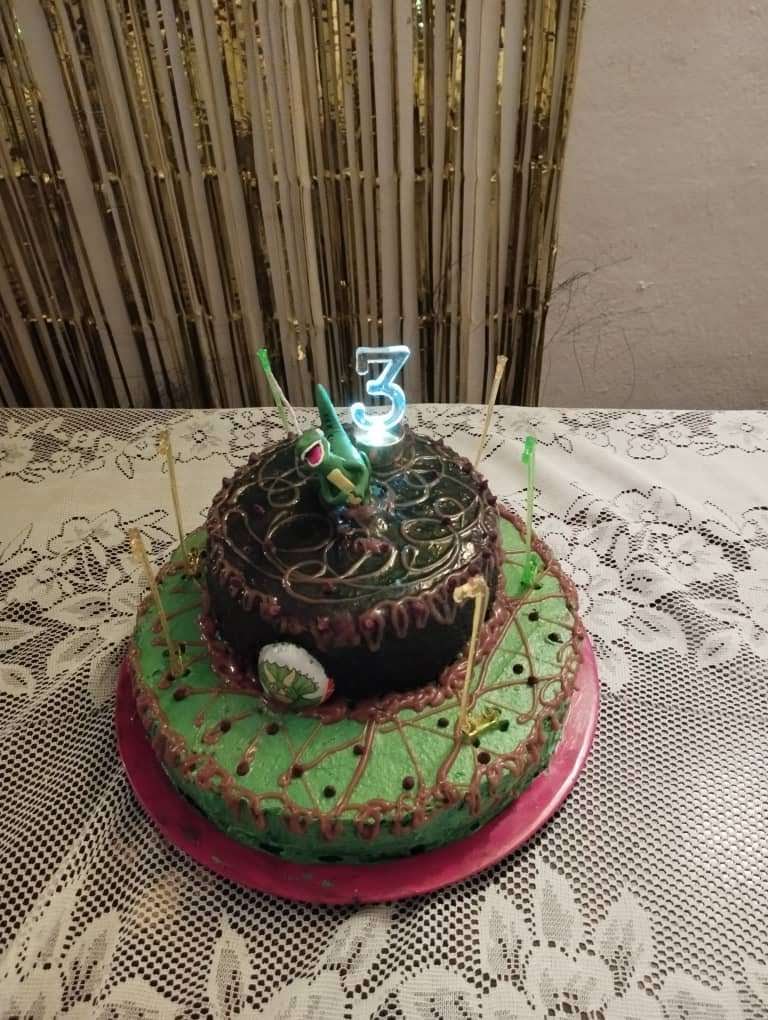
My son wanted his dinosaur cake, so I was gathering a couple of packages of those eggs, surprises that kids love because it brings two things that they love in one package (chocolate and toys). I saved some to decorate the cake and give a new use to these plastic packages, I also found in the market a dinosaur candle made of flexible dough, which fit me like a glove and some acrylic stirrers that I found in a party store that I thought would combine very well.
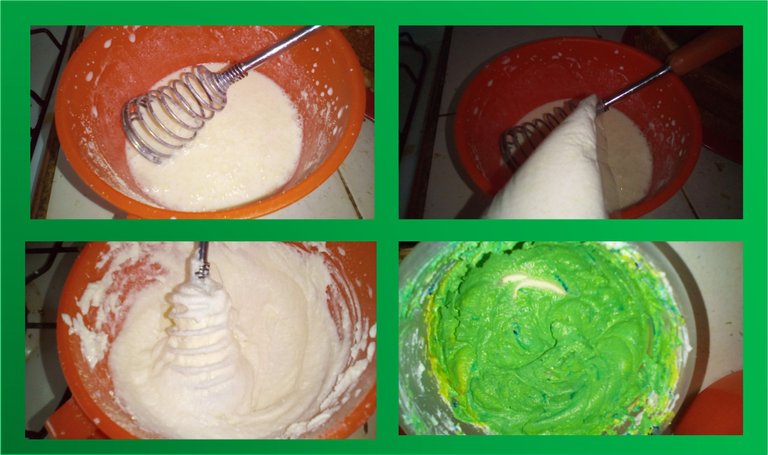
To decorate I used milk caramel or arequipe as it is called in my country and powdered whipped cream. Preparing the whipped cream is very simple, but everything must be very cold for it to work, I stirred 100 grams of whipped cream with 150 ml of liquid milk and added blue and yellow coloring until I got that shade of green; however, I left some blue threads for a change.
Como dije al principio, aún estoy aprendiendo a decorar o mejor dicho, me gusta decorar libremente dejando que la inspiración me lleve, soy un poco rústica y estoy tratando de mejorar esto, porque la presentación también es importante, pero en este punto me gusta relajarme y divertirme un poco más.
Mi hijo quería su torta de dinosaurios, entonces estuve reuniendo un par de empaques de esos huevos, sorpresas que a los niños les encanta porque trae dos cosas que a ellos les fascina en un solo empaque (chocolate y juguetes). Guarde unos para decorar la torta y así darles un nuevo uso a estos empaques plásticos, también encontré en el mercado una vela de dinosaurio elaborada en masa flexible, que me quedó como anillo al dedo y unos removedores acrílicos que encontré en una tienda para fiestas que pensé combinarían muy bien.
Para decorar usé dulce de leche o arequipe como se le dice en mi país y chantillí en polvo. Preparar el chantillí es sumamente sencillo, pero todo debe estar muy frío para que funcione, removí 100 gr de chantillí con 150 ml de leche líquida y agregue colorante azul y amarillo hasta conseguir esa tonalidad en verde; sin embargo, deje algunos hilitos azules para variar.
I started with the largest cake, applying a layer of dulce de leche and then the whipped cream, but 100 gr were not enough for the next level of the cake and here I had to improvise.
Comencé con la torta más grande, aplicando una capa de dulce de leche y después el chantillí, pero 100 gr no fueron suficientes, para el siguiente nivel de la torta y aquí tuve que improvisar.
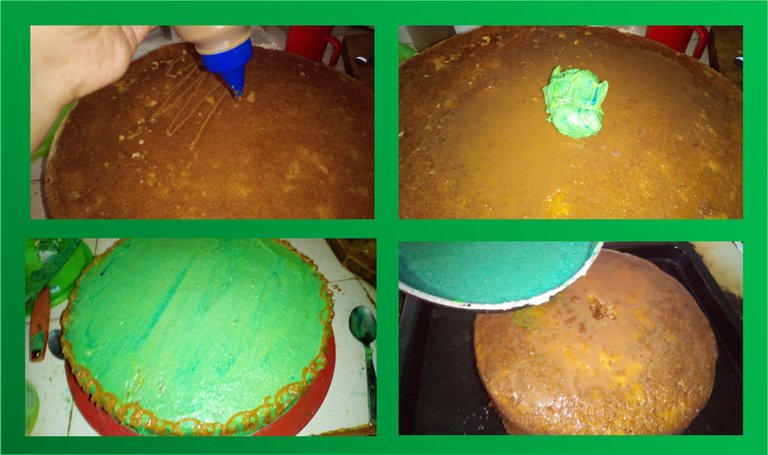
Then I melted some chocolate drops, condensed milk, arequipe and liquid milk and added coloring, I obtained a darker green mixture. I put the cake in a pan and bathed it with this mixture, I let it drain and to my surprise it was quite good, it covered quite a lot and the flavor was very good. I loved it.
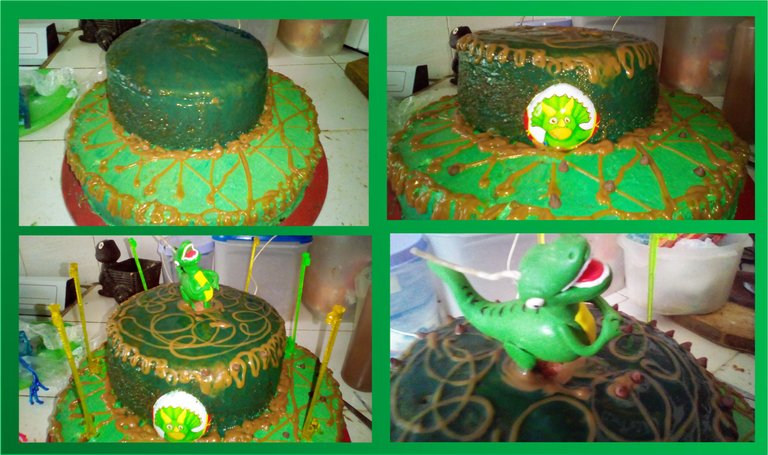
To finish I added milk caramel around the cake in a circular shape and incorporated the dinosaur figurines and I achieved my main goal which was that my son would love his cake as much as I love him.
Entonces derretí algunas gotas de chocolate, leche condensada, arequipe y leche líquida y agregué colorante, obtuve una mezcla de un verde más oscuro. Coloque la torta en una bandeja y la bañe con esta mezcla, deje que escurriera y para mi sorpresa quedo bastante bien, cubrió bastante y el sabor era muy bueno. Me encantó.
Para finalizar agregué dulce de leche alrededor de la torta y en forma circular e incorporé las figuritas de dinosaurio y logré mi objetivo principal que era que mi hijo amará su torta tanto como lo amo a él.
To serve and enjoy
A servir y disfrutar

As you can see, sometimes we just need a little creativity and desire to do things to achieve good results with the ingredients we have available. I hope you liked my recipe and that you prepare it at home, because the combination of cocoa and orange is simply a delight. Do not forget to add your charisma and your personal touch to each recipe, you will see that everything made with love is delicious.
Como ven, a veces solo necesitamos un poco de creatividad y ganas de hacer las cosas para lograr buenos resultados con los ingredientes que tengamos disponible. Espero les haya gustado mi receta y que la preparen en casa, porque la combinación del cacao y la naranja, es simplemente una delicia. No olviden agregarle su carisma y su toque personal a cada receta, verán que todo lo que se hace con amor queda delicioso.
See you in the comments.
Nos vemos en los comentarios.

Fotografías propias editadas en Canva, Gif creado en GIF APP . Traducción realizada en DeepL Traductor.
Own photographs edited in Canva, Gif created in GIF APP . Translation made in DeepL Translator.
Join the foodie fun! We've given you a FOODIE boost. Come check it out at @foodiesunite for the latest community updates. Spread your gastronomic delights on and claim your tokens.
Thank you very much for your support. I hope you enjoy my recipe. 🤣
Has sido curado por @visualblock / You've been curated by @visualblock
Bienvenidas delegaciones / Delegations welcome
Encuentra nuestra comunidad aquí / Find our community here
Trail de Curación / Curation Trail
Thank you very much for your support.
me fascina este pastel..!!!
Muchas gracias. Me fascina que hayas visitado mi post. 😀😊
😍