Hello friends and crochet lovers! How are you today? 😁
Right now, I have tons of new ideas for accessories to crochet; I'm finding a lot of inspiration on Pinterest! 😊
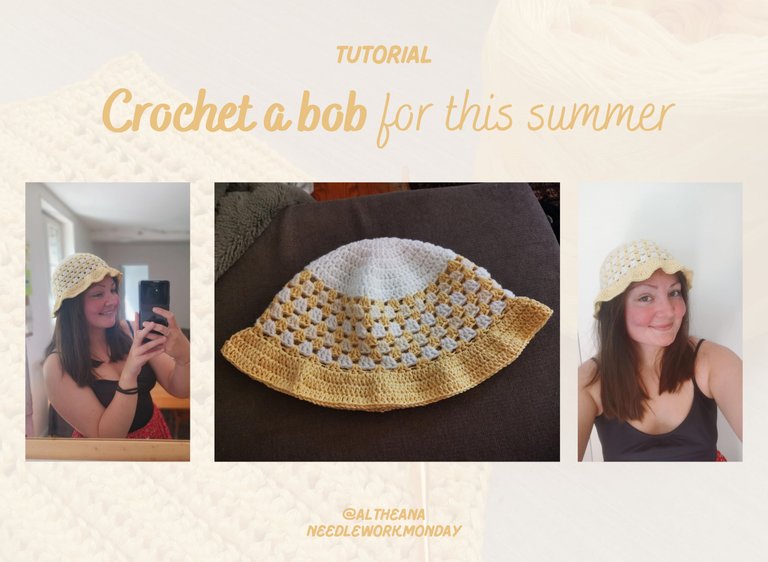
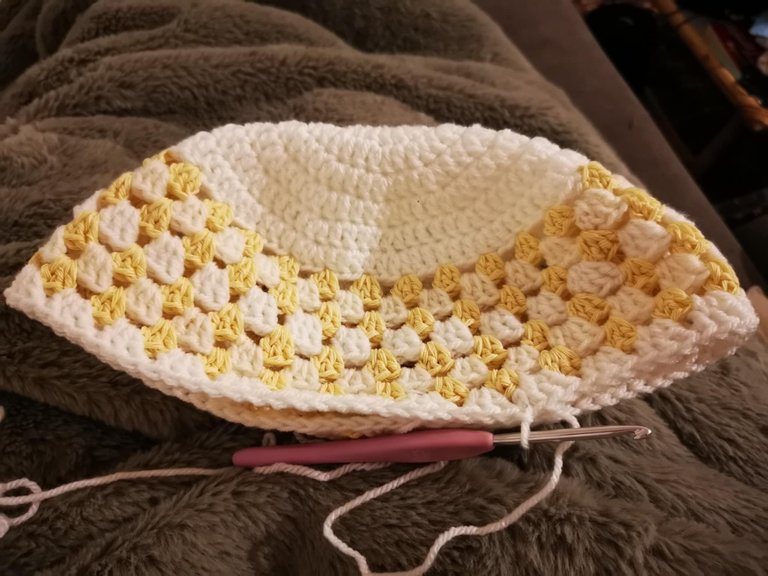
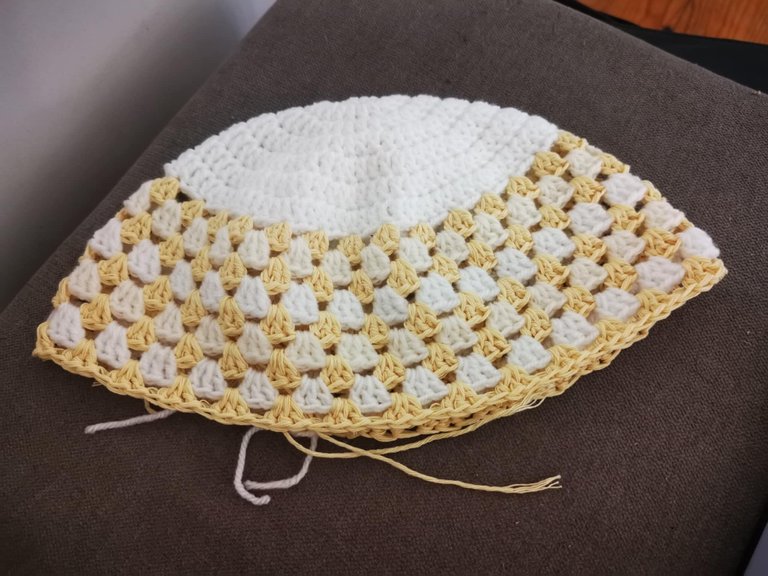
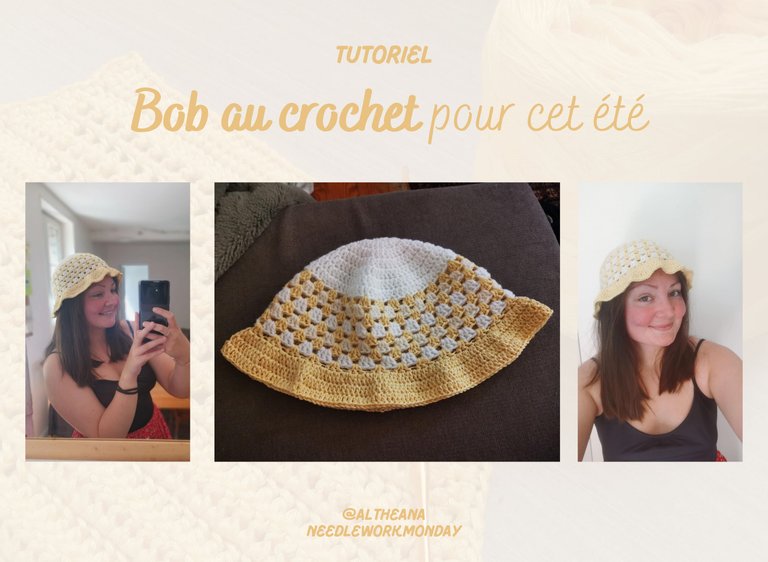
And this week, I crocheted a little bucket hat for this summer! I chose light colors so it would go with most of my summer outfits ☀️
There are tons of different patterns and shapes, but I simply followed the first tutorial I found on YouTube:
And honestly, I think it turned out pretty well! I love the shape, and the size is perfect!
It's a pretty simple project to make, and it doesn't take much time; I think it can be completed in 2 to 2.5 hours.
Here's the written tutorial 👇
Materials
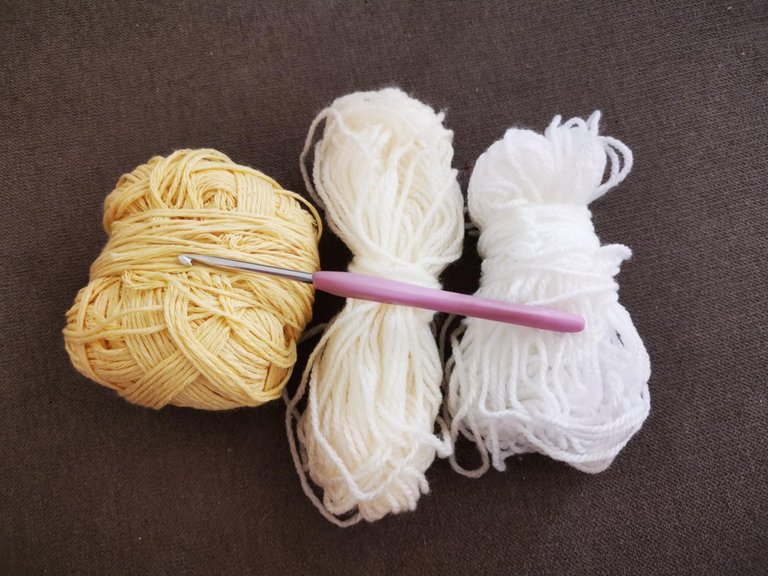
- A 4mm crochet hook;
- Skeins of yarn in different colors (I chose two different whites and one yellow);
- A yarn needle to weave in the ends.
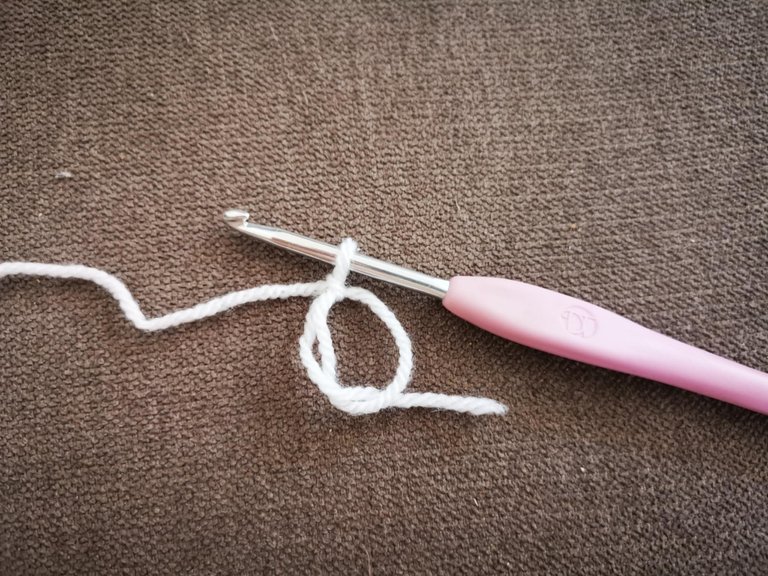
Steps to make the ring
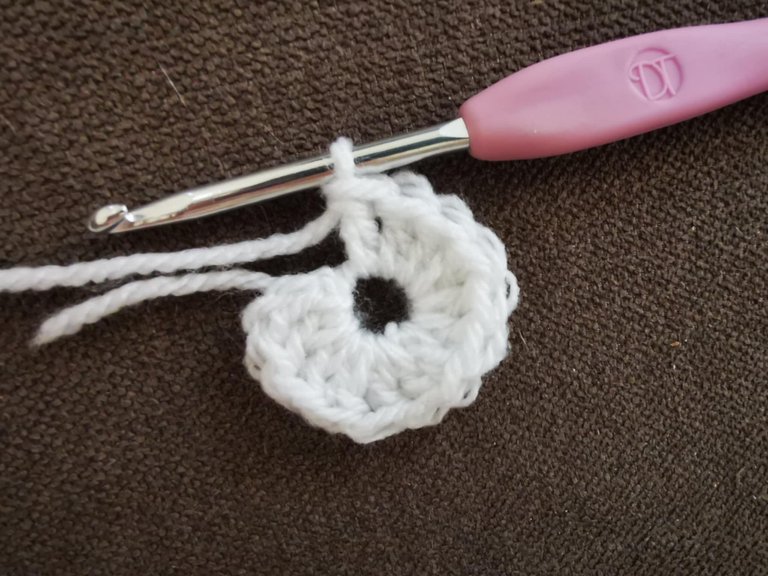
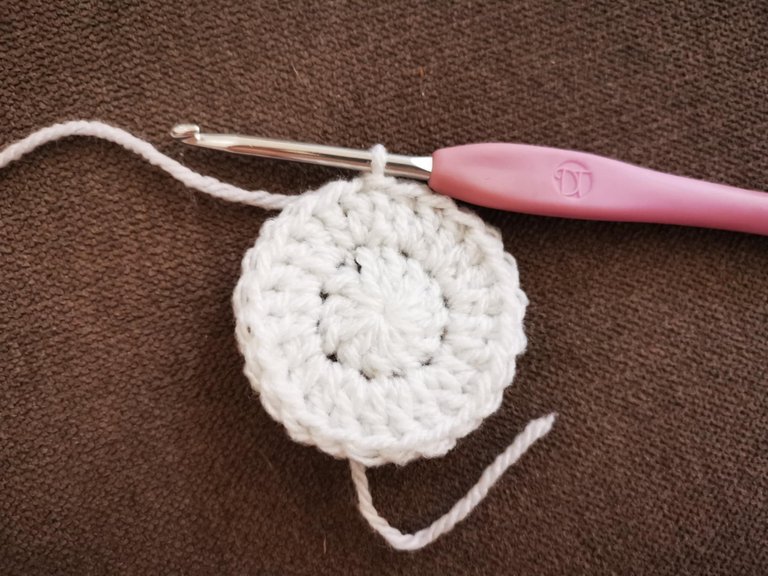
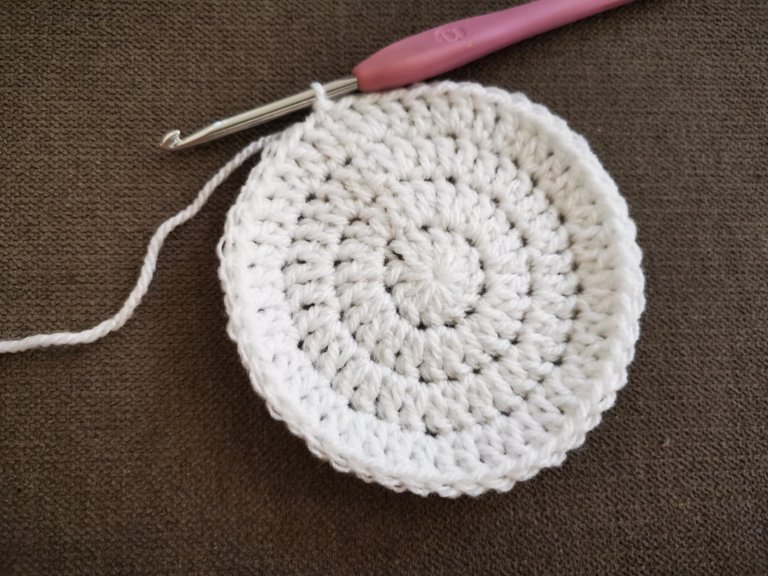
To begin, I made a magic ring:
Then, I cast on two chain stitches:
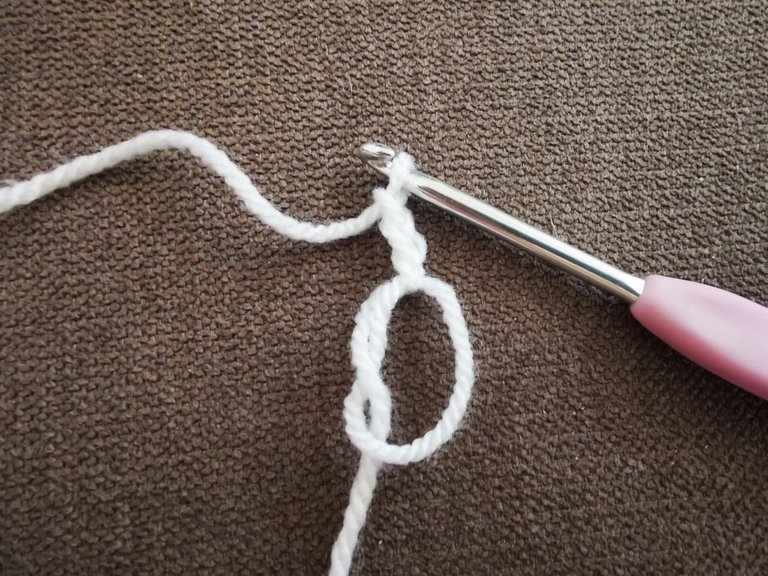
And I made 12 double crochets in the magic ring. Then I made a slip stitch in the first stitch and closed the ring.
For the second row, I started with two chain stitches.
Then, I made one increase (two double crochets in the same stitch) in each stitch. When I reached the end of the row, I closed it with a slip stitch in the first stitch.
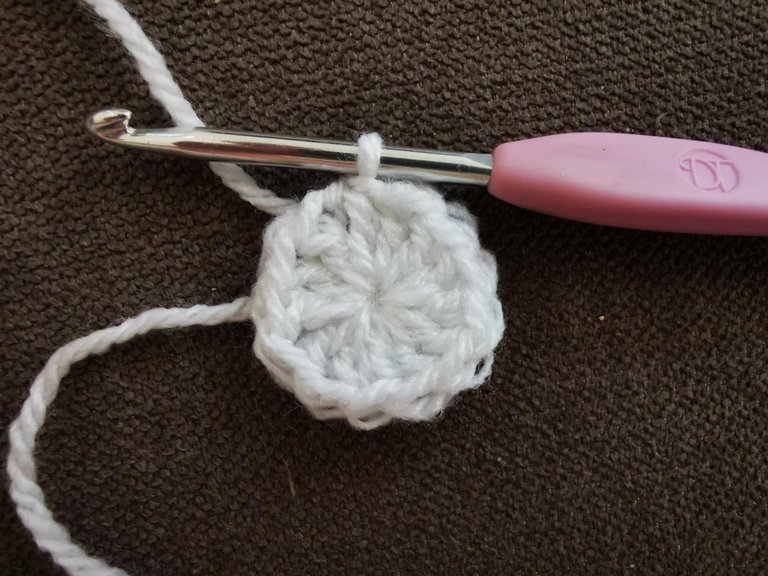
For the third row, I started with two chain stitches.
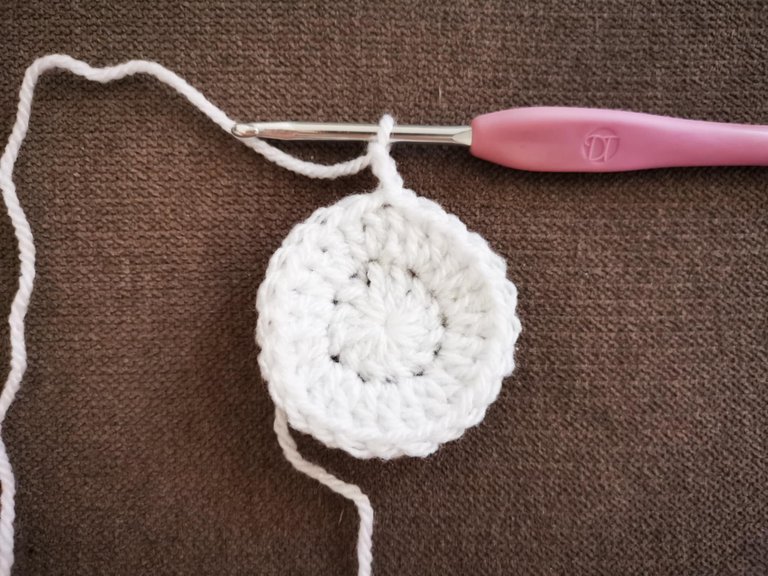
Then, I made 1 increase, 1 double crochet, 1 increase, 1 double crochet… throughout the row, alternating between increases and double crochets. And at the end, I closed the row with a slip stitch.

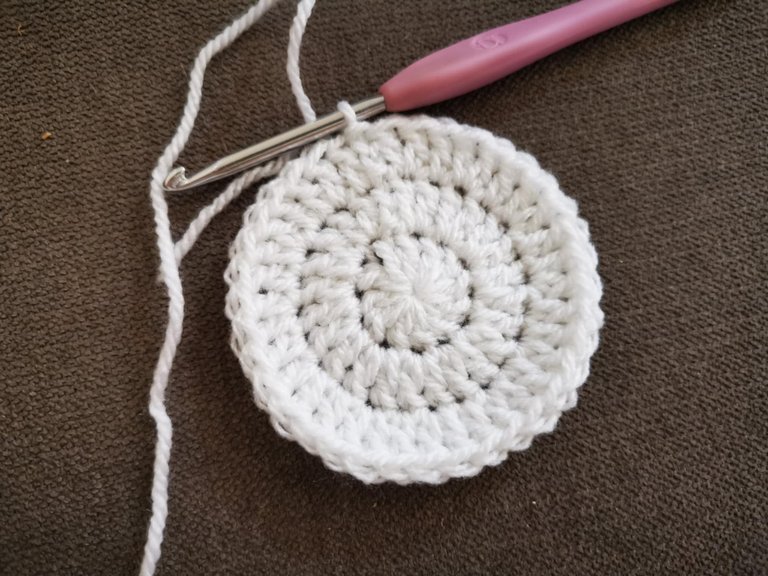
Then, for row 4, I started with 2 chain stitches.
Then, I made 1 increase, 2 individual double crochets, 1 increase, 2 double crochets… throughout the row. And at the end of the row, I finished with a slip stitch.
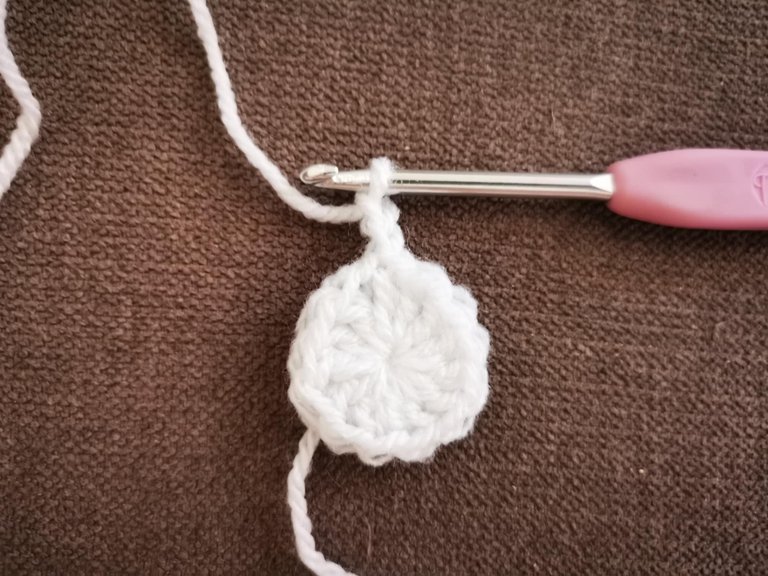
Row 5: 2 chain stitches, 1 increase, 3 individual double crochets… then a slip stitch to finish the row.
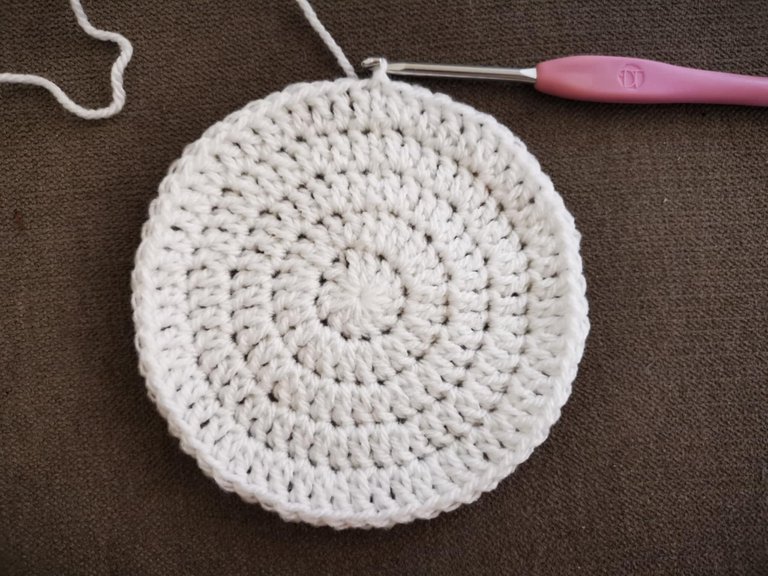
Row 6: 2 chain stitches, 1 increase, 4 individual double crochets, then a slip stitch to finish the row.
Row 7: 2 chain stitches, 1 increase, 5 individual double crochets, then a slip stitch to finish the row.
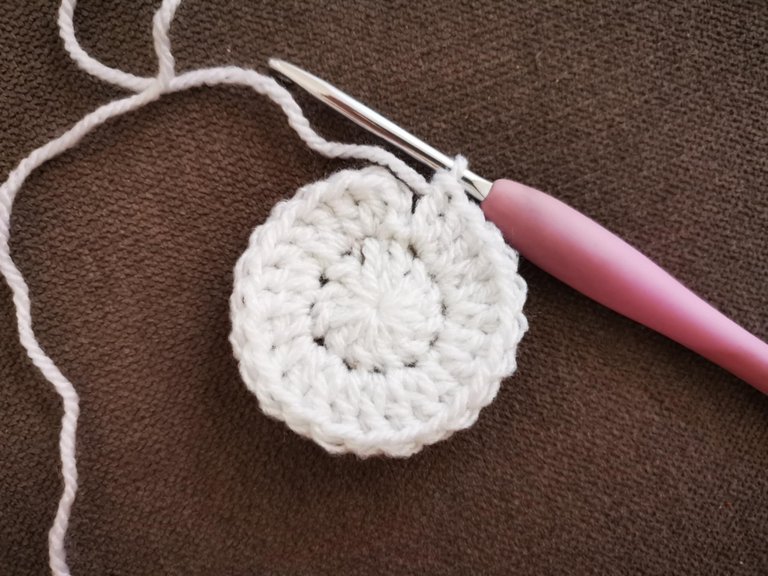
You can work more or fewer rows depending on your head size.
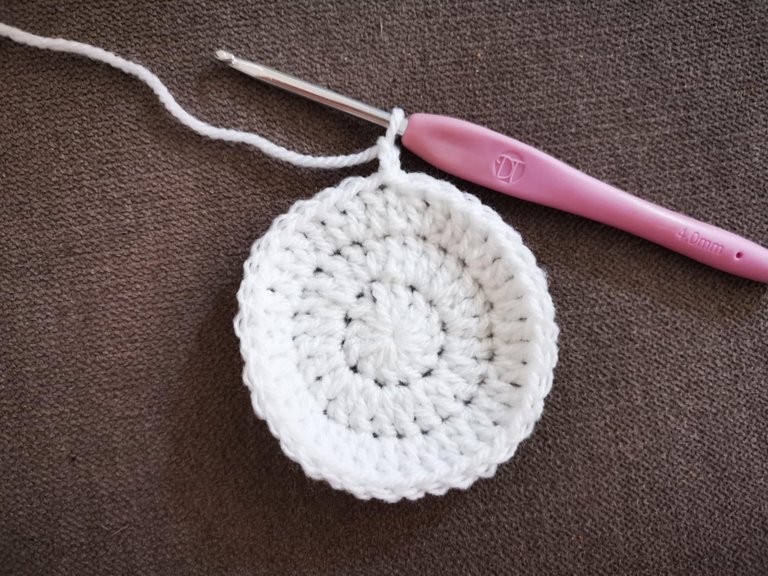
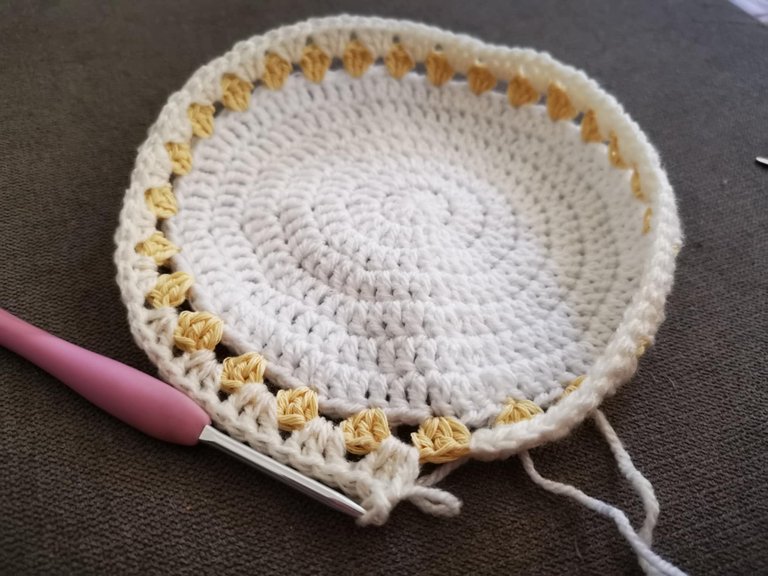
The top of the hat is finished; you can chain one stitch and cut the yarn.
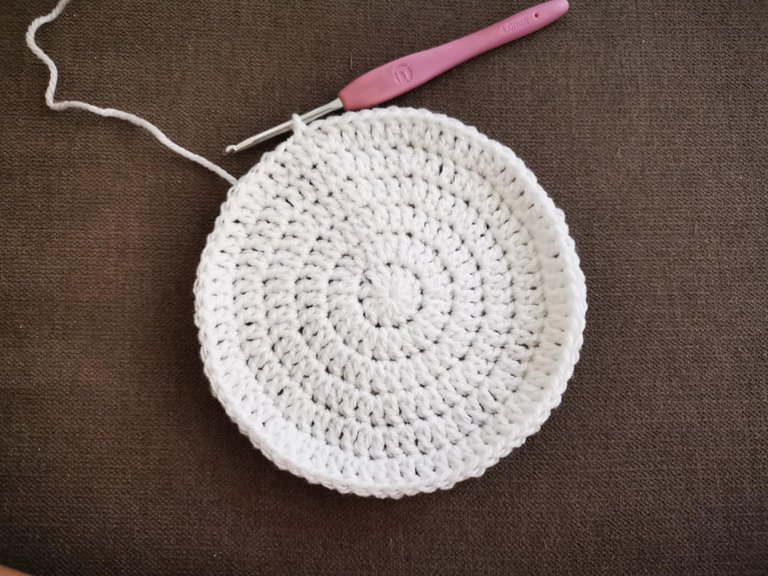
For the rest of the work, I chose to alternate and work one color per row.
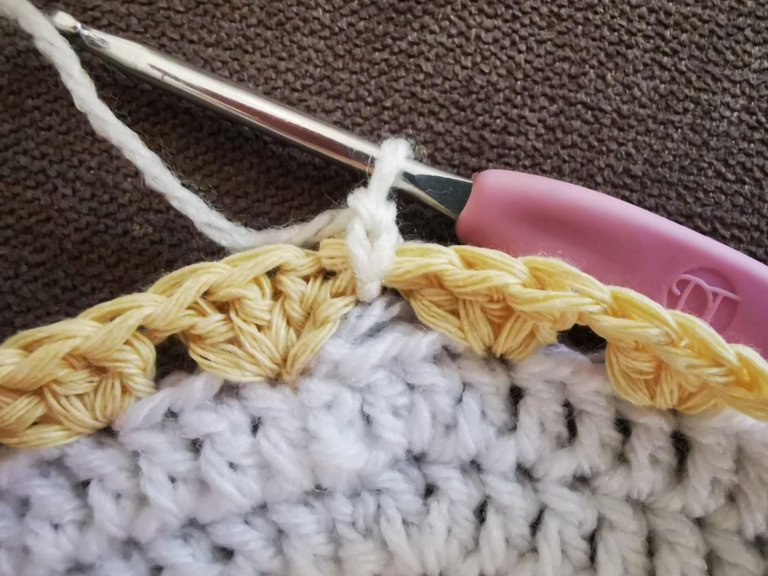
I started with a yellow row, so to do this, you need to attach the new yarn:
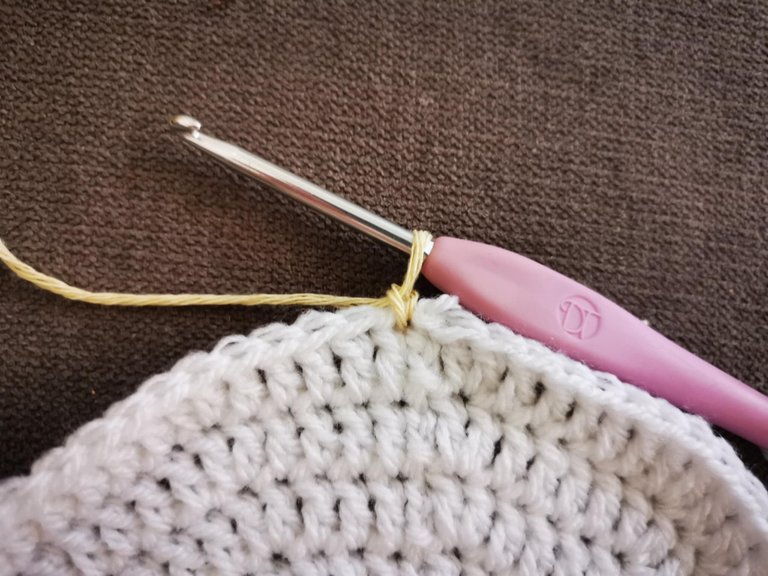
Then, cast on 2 chain stitches:
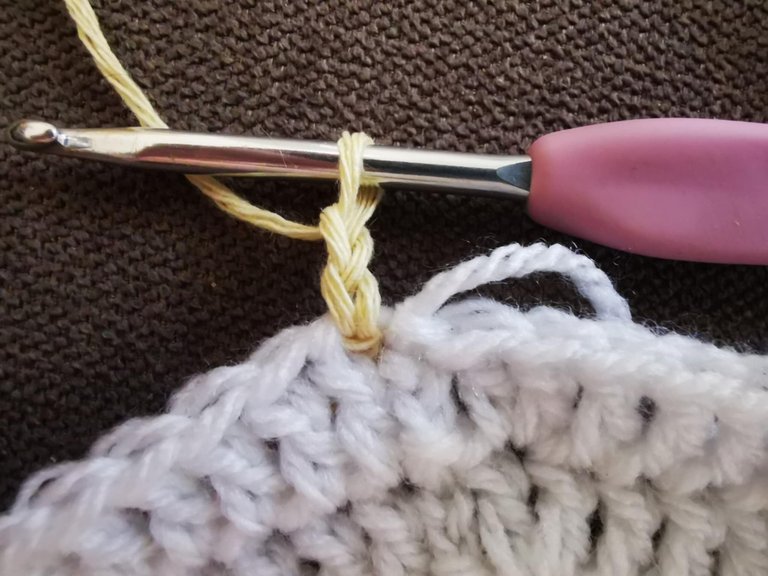
And add 2 double crochets in this same stitch:
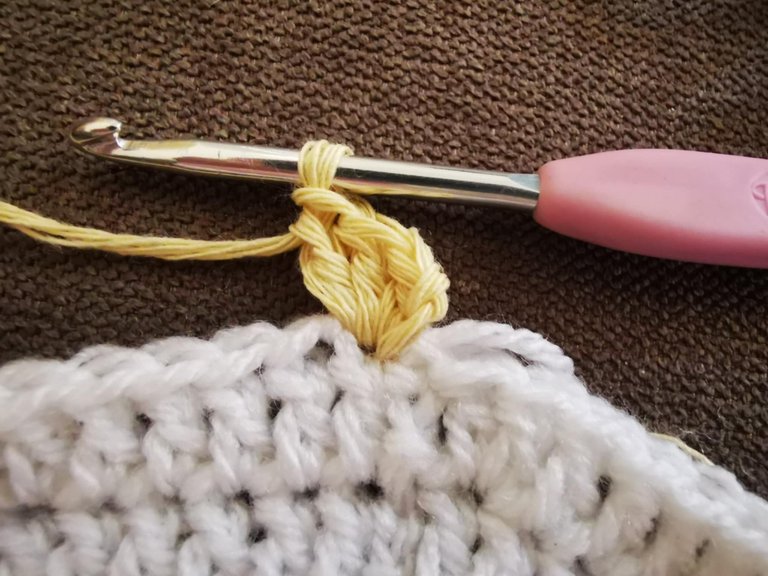
Then, skip 2 stitches and make 3 double crochets in the third stitch. This is what you need to do throughout the row: 1 group (cluster) of 3 double crochets, then skip 2 stitches and make another cluster of 3 double crochets in the third stitch…

At the end of the row, simply close it with a slip stitch, then chain one stitch and cut the yarn.
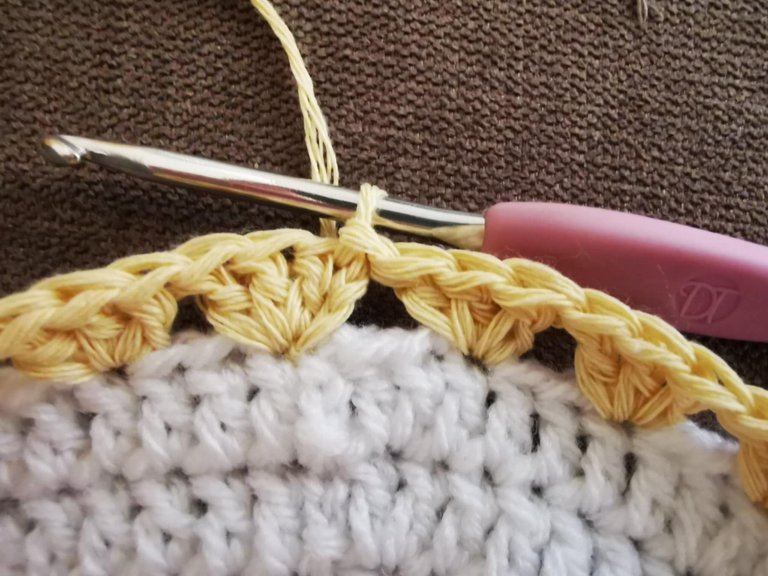
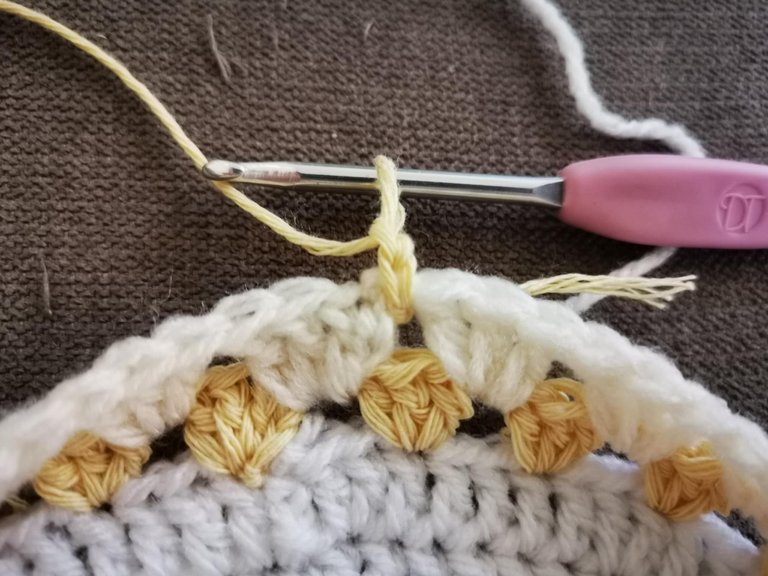
For the next row, I attached my new color (creamy white), then cast on 2 chain stitches. Then, I added 2 double crochets in the same space. Then, I made groups of 3 double crochets in each space of the previous row.
At the end of the row, I closed with a slip stitch, added a chain stitch before cutting the yarn.
I continued this way, alternating colors. I made 9 rows of clusters.
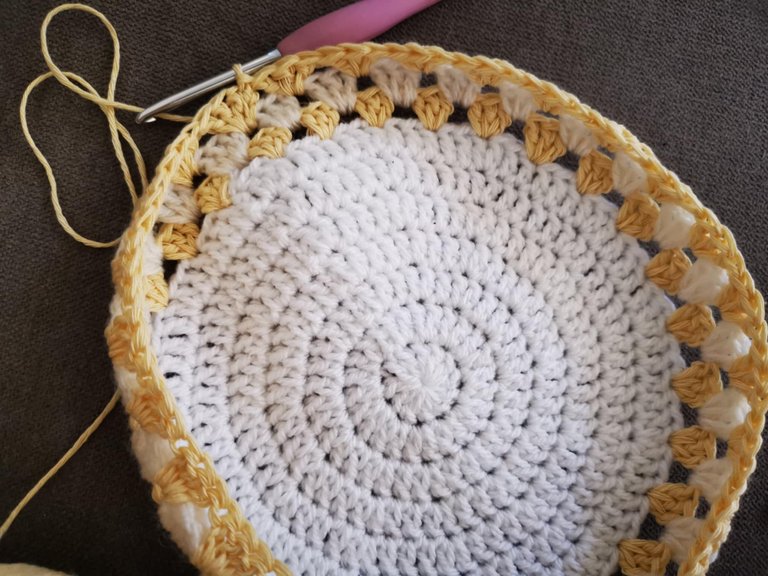
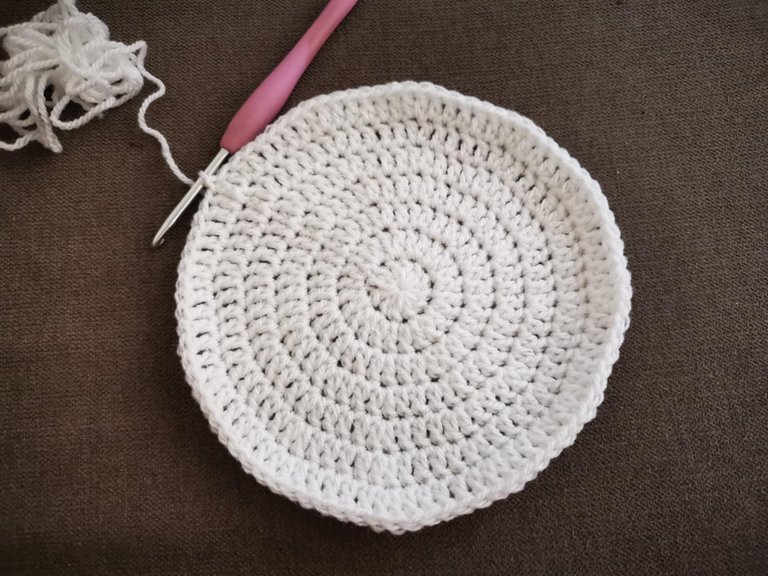
On the ninth row, I closed the row with a slip stitch. Next, I began the visor. To do this, I cast on 2 chain stitches with the same color. Then, I made 1 increase, so 2 double crochets, in each stitch. At the end of the row, I closed with a slip stitch.
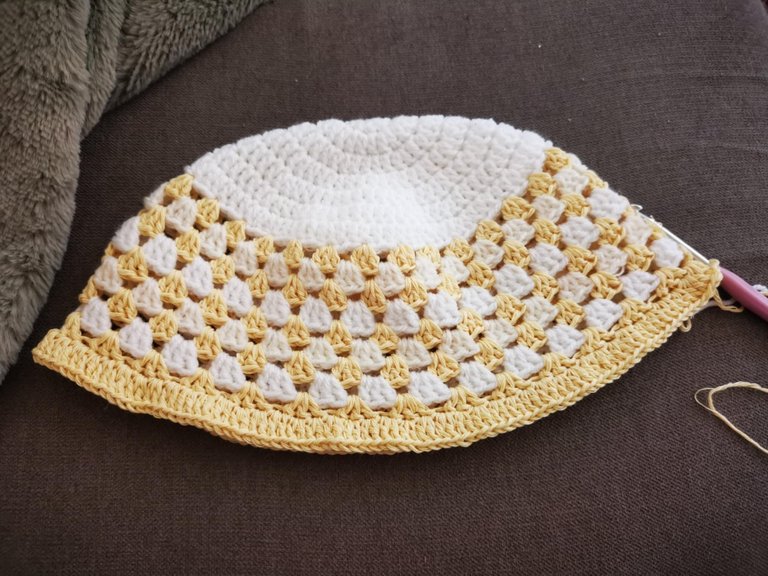
Then, I added two classic rows of double crochet in each stitch, closing each row with a slip stitch.
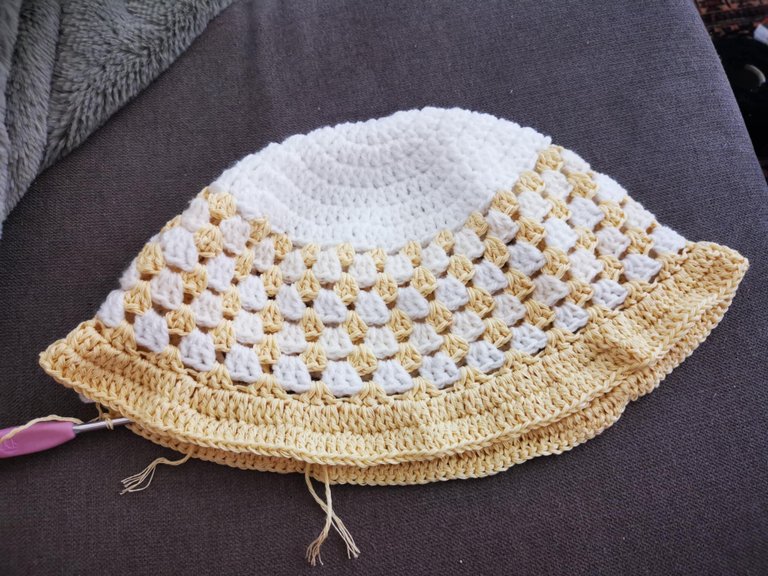
And at the end of these three visor rows, I cut the yarn. The bucket hat is almost finished!
Next, I had to weave in the ends with a yarn needle. This is my least favorite part 🤣
And here's the result of the bucket hat:
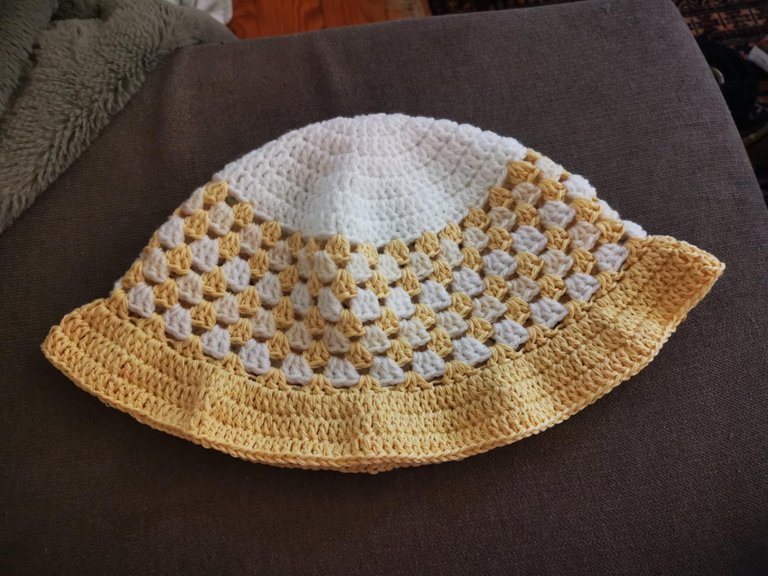
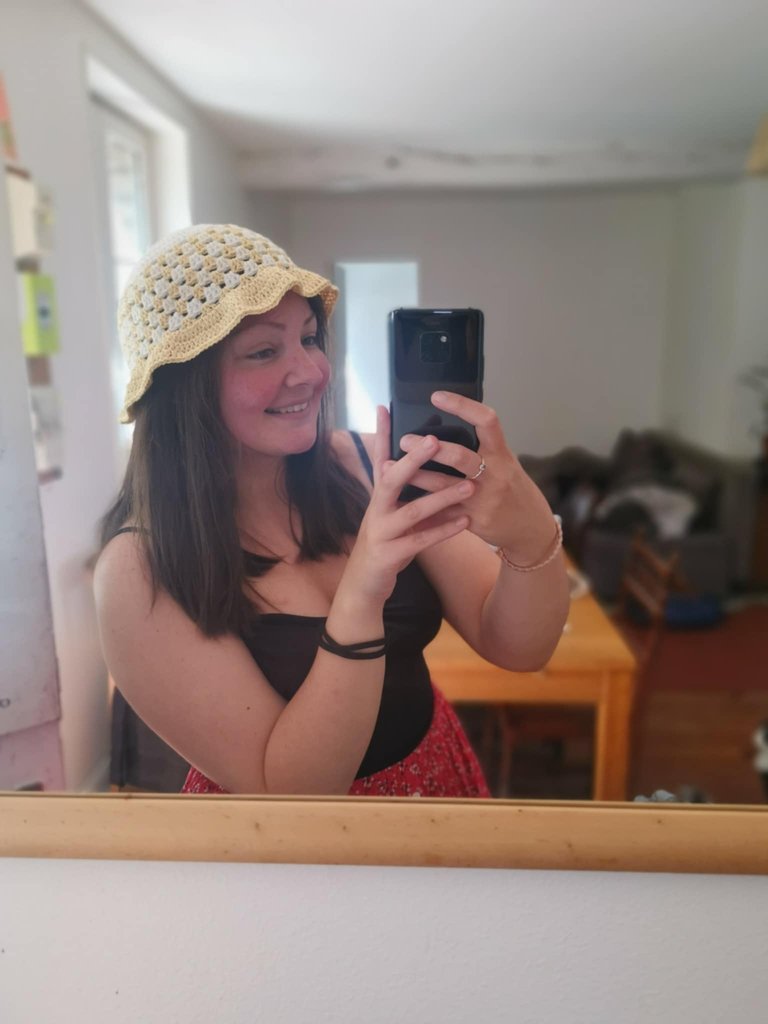
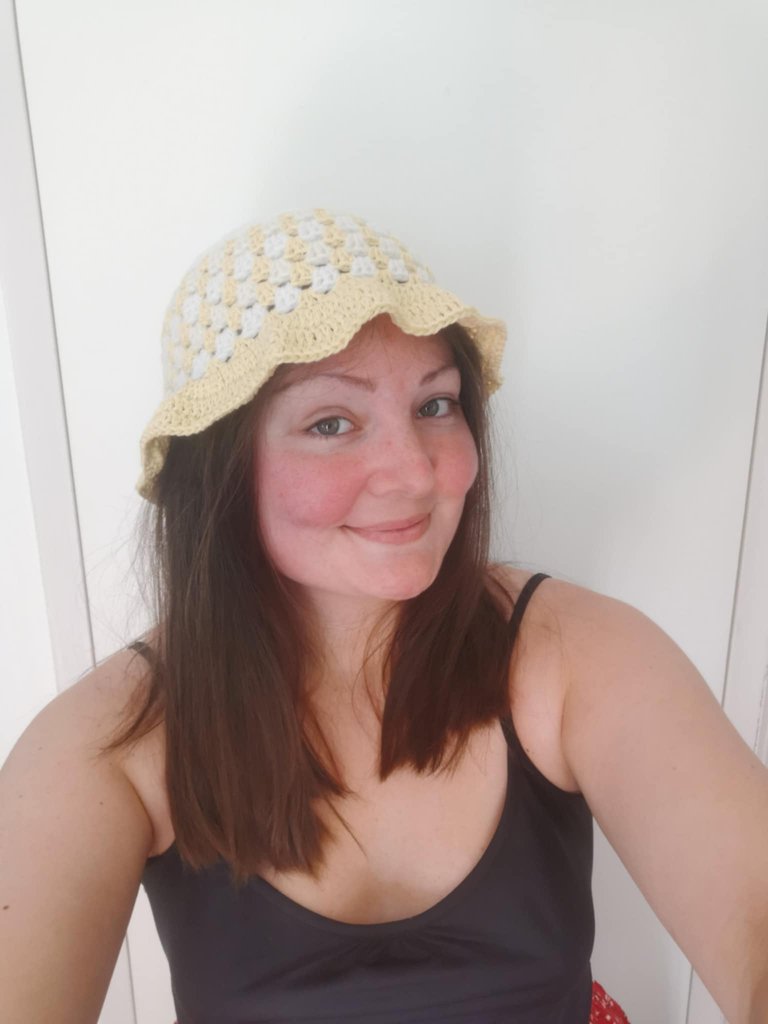
I love the result! I think it's really cute, and quite comfortable to wear 😁
The fact that it's 50% acrylic doesn't really matter, but it's not warm (and thankfully so, since I plan on wearing it this summer).
I'm thinking of making more of these, in different colors and shapes, because I really enjoyed crocheting it!
Anyway, I hope this little tutorial is clear enough. If you have any questions, don't hesitate to ask me 😊
This post is your cue to create your own bucket hat to protect your head from the sun ☀️
See you soon,
Johanna
PS: I used Google Translate to translate the English part.
Hello les amis et les crochet lovers ! Comment allez-vous aujourd’hui ? 😁
En ce moment, j’ai plein de nouvelles idées d’accessoires à crocheter, je trouve beaucoup d’inspiration sur Pinterest ! 😊
Et cette semaine, je me suis crocheté un petit bob pour cet été ! J’ai choisi des couleurs claires pour que le bob se marie avec la plupart de mes tenues d’été ☀️
Il existe une multitude de modèles et de formes différentes, mais j’ai simplement suivi le premier tutoriel que j’ai trouvé sur Youtube :
Et franchement, je le trouve plutôt réussi ! J’adore la forme et la taille est parfaite !
C’est un projet assez simple à réaliser, et il demande peu de temps, je pense qu’il peut être terminé en 2h ou 2h30.
Voici le tutoriel écrit 👇
Le matériel
- Un crochet 4mm ;
- Des pelotes de différentes couleurs (j’ai choisi 2 blancs différents et un jaune) ;
- Une aiguille à laine pour rentrer les fils.
Les étapes de fabrication
Pour commencer, j’ai fait un cercle magique :
Puis, j’ai monté 2 mailles en l’air :
Et j’ai fait 12 brides dans le cercle magique. Puis j’ai fait une maille coulée dans la première maille et j’ai fermé le cercle.
Pour le deuxième rang, j’ai commencé par 2 mailles en l’air.
Puis, j’ai fait 1 augmentation (2 brides dans la même maille) dans chaque maille. Arrivé au bout du rang, je l’ai fermé par une maille coulée dans la première maille.
Pour le troisième rang, j’ai commencé par 2 mailles en l’air.
Puis, j’ai fait 1 augmentation, 1 bride, 1 augmentation, 1 bride… tout au long du rang, j’ai alterné augmentation et bride. Et au bout, j’ai fermé le rang par une maille coulée.
Ensuite, pour le rang 4, j’ai commencé par 2 mailles en l’air.
Puis, j’ai fait 1 augmentation, 2 brides individuelles, 1 augmentation, 2 brides individuelles… tout au long du rang. Et à la fin du rang, j’ai terminé par une maille coulée.
Rang 5 : 2 mailles en l’air, 1 augmentation, 3 brides individuelles… puis une maille coulée pour terminer le rang.
Rang 6 : 2 mailles en l’air, 1 augmentation, 4 brides individuelles, puis une maille coulée pour terminer le rang.
Rang 7 : 2 mailles en l’air, 1 augmentation, 5 brides individuelles, puis une maille coulée pour terminer le rang.
Vous pouvez faire plus ou moins de rang en fonction de votre taille de tête.
Le haut du bob est terminé, vous pouvez faire une maille en l’air et couper le fil.
Pour la suite, j’ai choisi d’alterner et de faire 1 couleur par rang.
J’ai commencé par un rang jaune, donc pour cela, il faut attacher le nouveau fil :
Puis, monter 2 mailles en l’air :
Et ajouter 2 brides dans cette même maille :
Puis, sauter 2 mailles et faire 3 brides dans la 3ème. Il faut faire cela tout le long du rang : 1 groupe (cluster) de 3 brides, puis sauter 2 mailles et faire un autre cluster de 3 brides dans la troisième maille…
À la fin du rang, il suffit de le fermer par une maille coulée, puis de faire une maille en l’air et de couper le fil.
Pour le rang suivant, j’ai attaché ma nouvelle couleur (un blanc crème), puis j’ai monté 2 mailles en l’air. Et ensuite, j’ai ajouté 2 brides dans le même espace. Puis, j’ai fait des groupes de 3 brides dans chaque espace du rang précédent.
À la fin du rang, j’ai fermé par une maille coulée, j’ai ajouté une maille en l’air avant de couper le fil.
J’ai continué ainsi, en alternant les couleurs. J’ai fait 9 rangs de clusters.
Arrivé au neuvième rang, j’ai fermé le rang avec une maille coulée. Ensuite, j’ai commencé la visière. Et pour cela, j’ai monté 2 mailles en l’air avec la même couleur. Puis, j’ai fait 1 augmentation, donc 2 brides, dans chaque maille. Au bout du rang, j’ai fermé avec une maille coulée.
Puis, j’ai ajouté deux rangs classiques d’une bride dans chaque maille, en fermant chaque rang par une maille coulée.
Et à la fin de ces 3 rangs de visière, j’ai coupé le fil. Le bob est presque terminé !
Il a fallu ensuite rentrer les fils avec une aiguille à laine. C’est la partie que j’aime le moins 🤣
Et voilà le résultat du bob :
J’adore le résultat ! Je trouve que c’est vraiment très mignon, et assez agréable à porter 😁
Le fait qu’il soit à 50% fait en acrylique ne dérange pas tellement, il n’est pas chaud pour autant (et heureusement vu que je compte le porter cet été).
Je pense en refaire d’autres, de différentes couleurs et de différentes formes, parce que j’ai vraiment aimé le crocheter !
Bref, j’espère que ce petit tutoriel est assez clair, si jamais vous avez des questions, n’hésitez pas à me les poser 😊
Ce post est votre signe de créer votre propre bob pour protéger votre tête du soleil ☀️
À bientôt,
Johanna
PS : J’ai utilisé Google Traduction pour traduire la partie en anglais.
This is really incredible and awesome
Thank you for such an amazing tutorial
Thank you so much for your compliment! I'm glad you like this tutorial 😁
This post has been shared on Reddit by @elias22 through the HivePosh initiative.
Thank you 🙏🙏
Your knitting skills are truly amazing, able to complete it in such a short time. The results are truly beautiful. The color combination is also perfect, and it looks even more beautiful when worn.
That's really very kind of you. Thank you for all your kind compliments; it means a lot to me. I'm glad you like the result! Thank you so much. Have a great day! 🥰
Your work is worthy of praise. I hope you have a nice day too, dear.
It is fashionable, charming, and elegant. It looks so beautiful. It shows talent. Love it. Thank you for sharing step by step guide. It is easy to follow. Well done!
selected by @rezoanulvibes
Thank you so much! I'm glad you enjoyed this tutorial 😁
This crochet hat is very pretty. I like the color combination and it looks great on you. Congratulations, you did a nice job. Greetings 😊.
That's really kind of you, thank you so much! Have a nice day 🥰
!INDEED
!BBH
Your post has been manually reviewed for curation by the Principality of Bastion.
Principality of Bastion - Our Leit Motiv? Let's Grow Together.
Principality's site | Minava NFT Market | Discord | Our Twitch Channel
You may TRAIL this account (or @hive-143869) if you like the curation we do, or join our discord to know more about what we do.
Comment readers : Your post can be curated too using #BASTION to interact with our community or #FR if you speak French.
🙏🙏
!BBH
Cute
Thank you 🙏