Good morning my dear people of this beautiful community, happy and blessed Monday of needles, I hope you have been able to rest and also have had the opportunity to do the things we leave for these days.
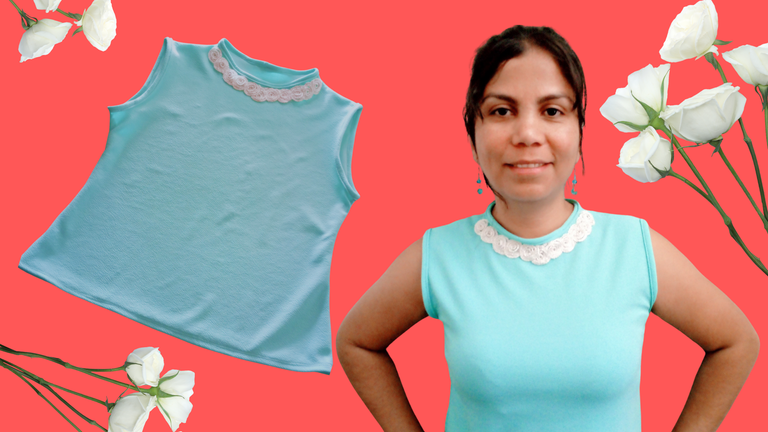
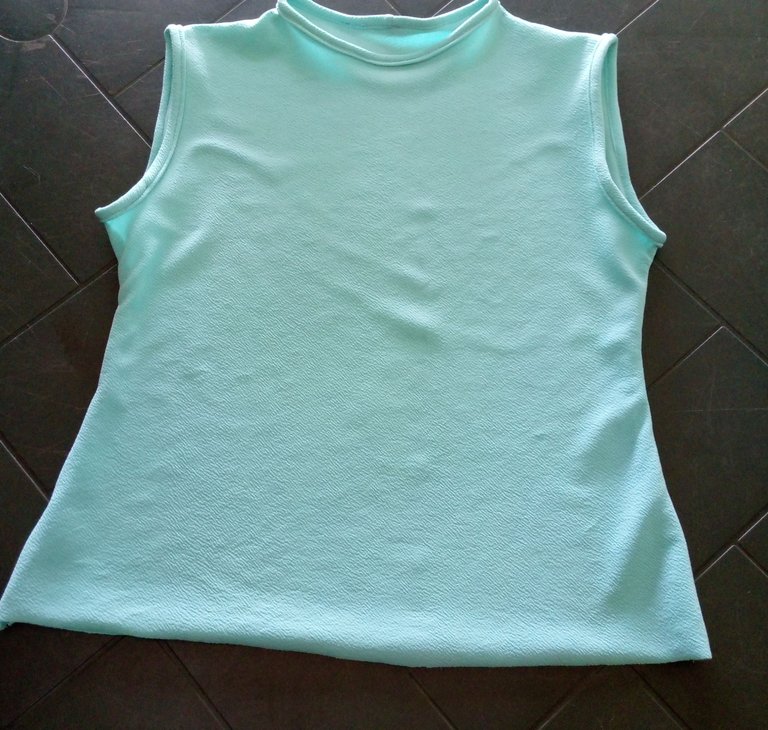
In my case I dedicated myself to make a classic design blouse with high neckline very nice and elegant that today I come to share with you with much affection.
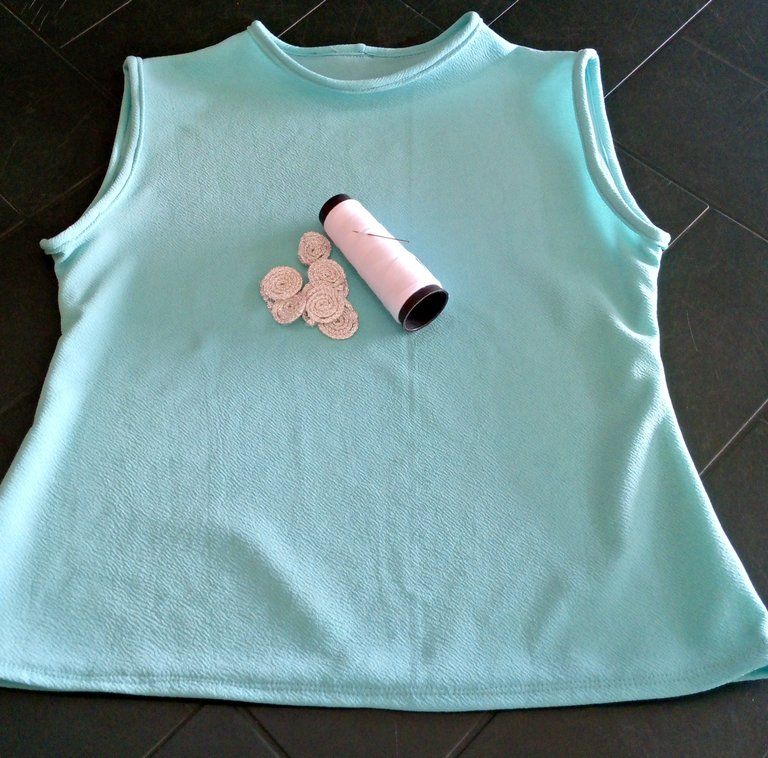
I tell you that I feel very motivated lately because I have some new tools like my embroidery needle, some threads and some fabrics that I could buy, among them is the fabric with which I made the blouse that next I will be showing you the step by step of how I made it.
Buenos días mi gente querida de esta linda comunidad, feliz y bendecido lunes de agujas, espero que hayan podido descansar y también hayan tenido la oportunidad de hacer las cosas que dejamos para estos días.
En mi caso me dediqué hacer una blusa de diseño clásico con escote alto muy linda y elegante que el día de hoy vengo a compartir con ustedes con mucho cariño.
Les cuento que me siento muy motivada últimamente porque tengo algunas herramientas nuevas como mi aguja de bordar, algunos hilos y unas telas que pude comprar, entre ellas está la tela con la que elabore la blusa que a continuación les estaré mostrando el paso a paso de como fue que la hice.
Las fotografías que verán a continuación, fueron tomadas con mi teléfono modelo TECNO SPARK GO 2023.

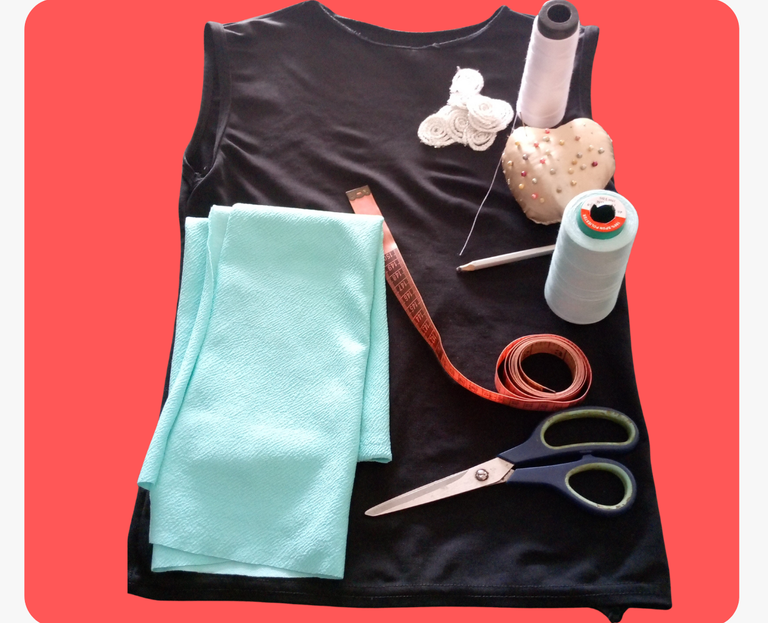
Materials to make the blouse.
- 1/2 meter of liverpool aquamarine green fabric.
- a blouse for pattern
- aquamarine green and white threads
- needle
- pins
- measuring tape
- scissors
- pencil
- sewing machine
Materiales para hacer la blusa.
- 1/2 metro de tela verde aguamarina liverpool
- una blusa para patrón
- hilos verde aguamarina y blanco
- aguja
- alfileres
- cinta métrica
- tijera
- lápiz
- máquina de coser
 |  |  |
|---|
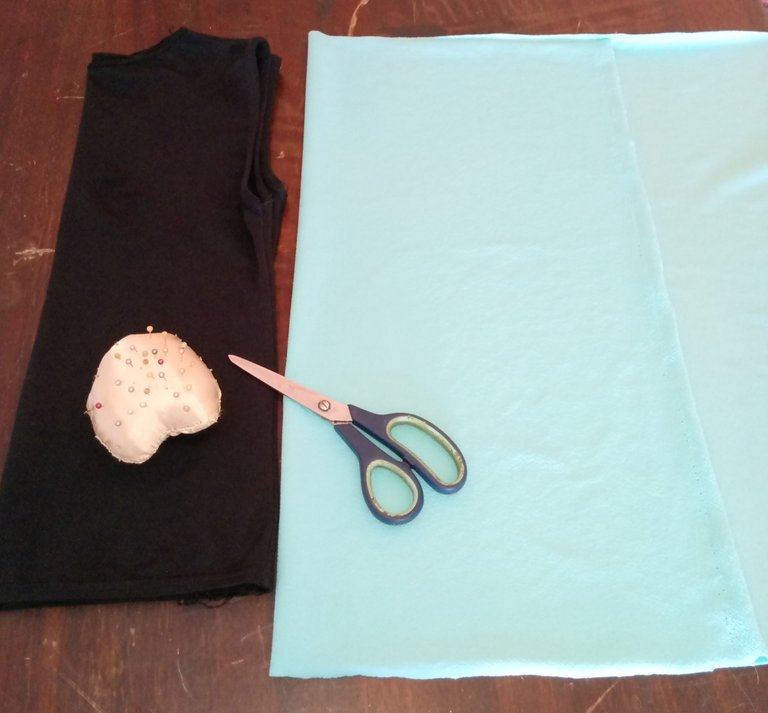
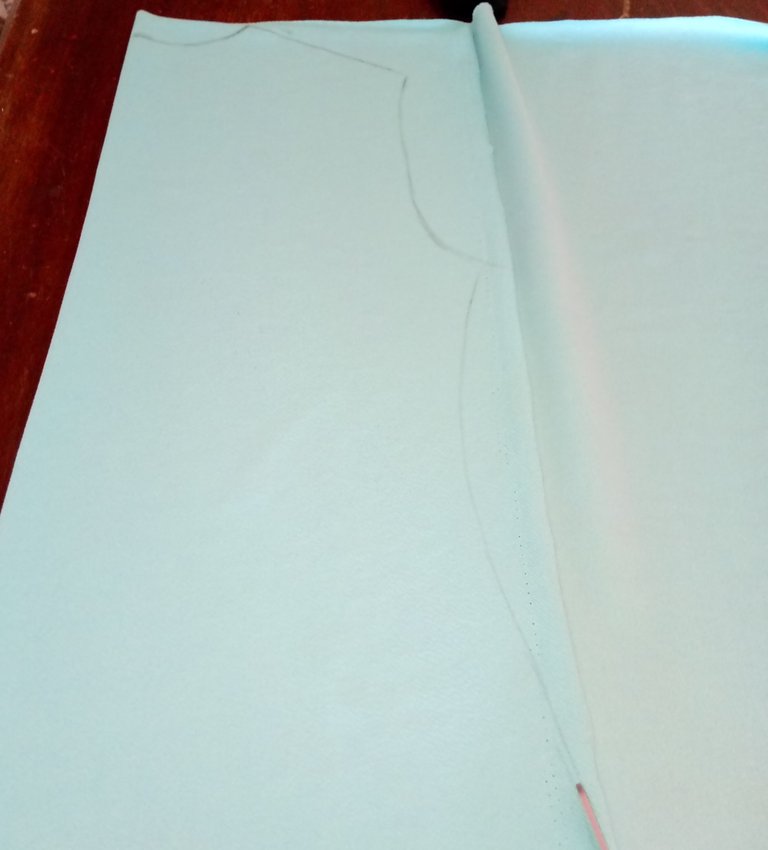
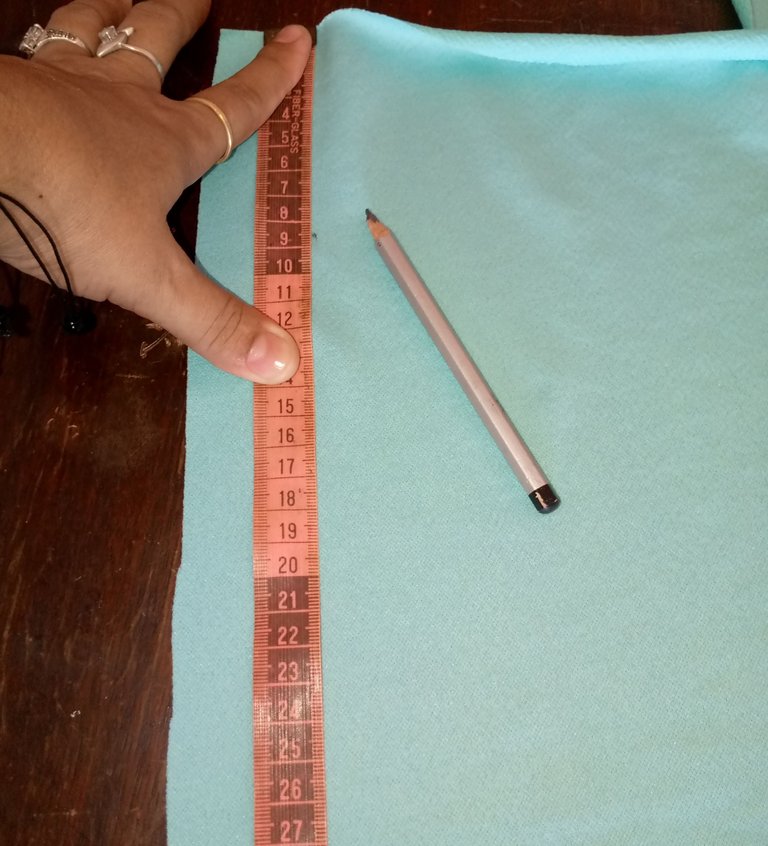
The first thing I did to start was to place on my work table the pattern blouse, the fabric, the pencil and the scissors.
Then I folded the fabric vertically on the side that stretches the most, in this case it stretches horizontally, which is the most important thing.
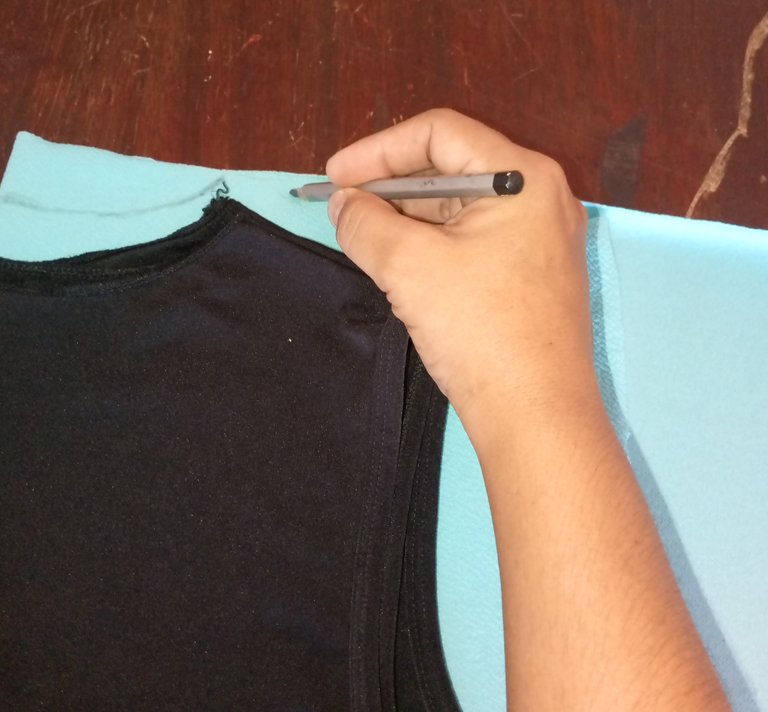
Then I placed the pattern blouse on the folded fabric and began to mark with the pencil, this blouse is size S so at the time of marking the fabric I left 2 cm more to make it as a looser size M, I did not want it to be so tight.
After marking the first piece of the blouse, I took the scissors and cut it along the mark I made with the pencil.
Lo primero que hice para comenzar fue colocar en la mi mesa de trabajo la blusa patrón, la tela, el lápiz y la tijera.
Después doble la tela en sentido vertical por el lado que más estira, en este caso estira de modo horizontalmente, que es lo más importante.
Enseguida coloqué la blusa patrón sobre la tela doblada y comencé a marcar con el uso del lápiz, esta blusa es talla S así que al momento de marcar la tela deje 2 cm más para hacerla como una talla M más suelta no quería que me quedase tan apretada.
Luego de marcar la primera pieza de la blusa, tome la tijera y la corte por toda la marca que le hice con el lápiz.
 |  |  |
|---|
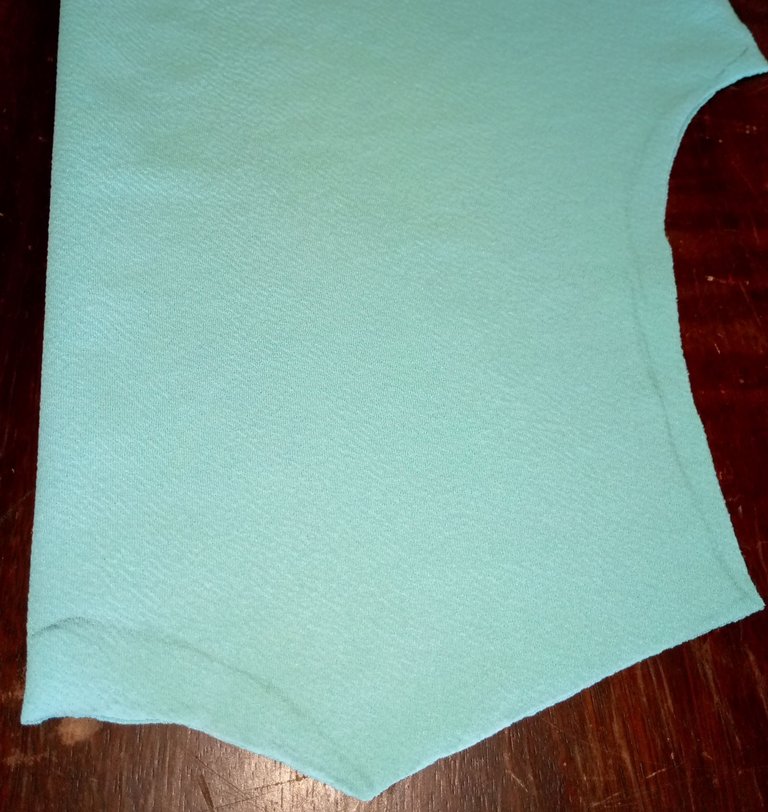
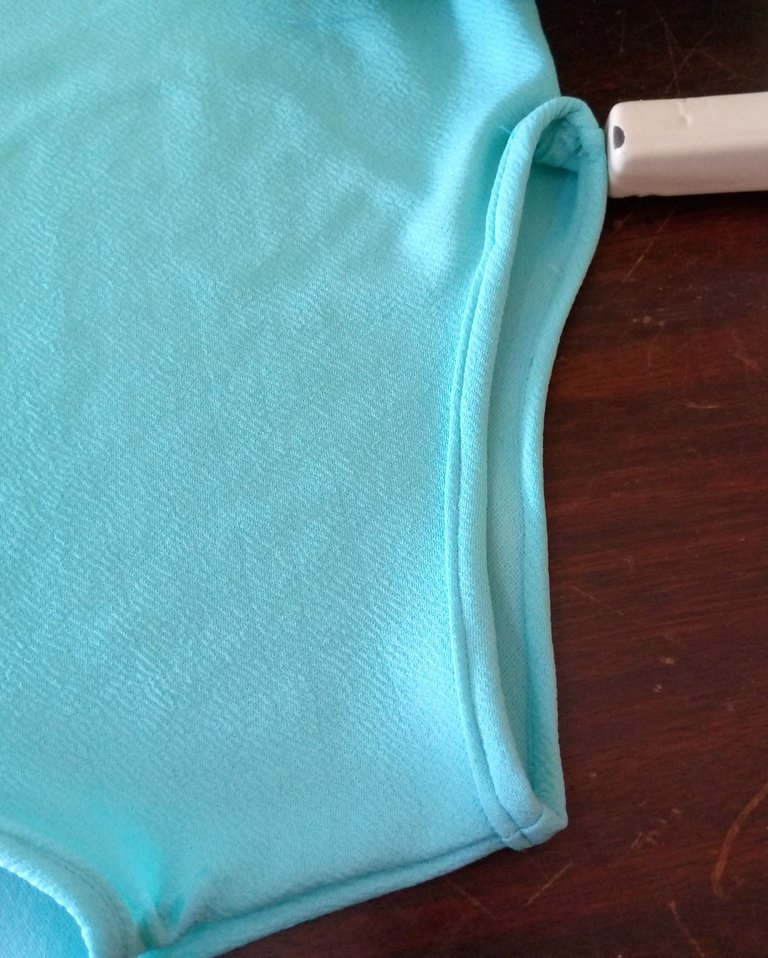
With the first piece of the blouse cut, fold the fabric again and on this I placed my piece already cut to guide me and cut the other piece, separating the pieces I marked with the pencil on the neckline a little lower 3 cm in the center of the neckline and decreasing in the shoulders to 2 cm, so that the neck would not be straight on both sides.
In the same way I also cut a little bit the sides of the armholes, these cutting measures were between 1 and 1/1/2 depending on how much we would want the armhole to be the width or neckline. If we want the armhole to be more open, we cut more cm inwards and we will get an armhole where the shoulders are more visible.
Con la primera pieza de la blusa cortada, doble nuevamente la tela y sobre esta coloque mi pieza ya cortada para guiarme y cortar la otra pieza, separando las piezas a una de ellas le marque con el lápiz en el escote un poco más abajo 3 cm en el centro del escote y disminuyendo en los hombros a 2 cm, para que el cuello no quedase recto de ambos lados.
En el mismo sentido también corte un poco los costados de las sisas, estas medidas de corte fueron entre 1 y 1/1/2 dependiendo que tanto querríamos que la sisa sea el ancho o escote. Si queremos que la sisa sea más abierta, cortamos más cm hacia dentro y obtendremos una sisa donde se vea más los hombros.
 |  |  |
|---|
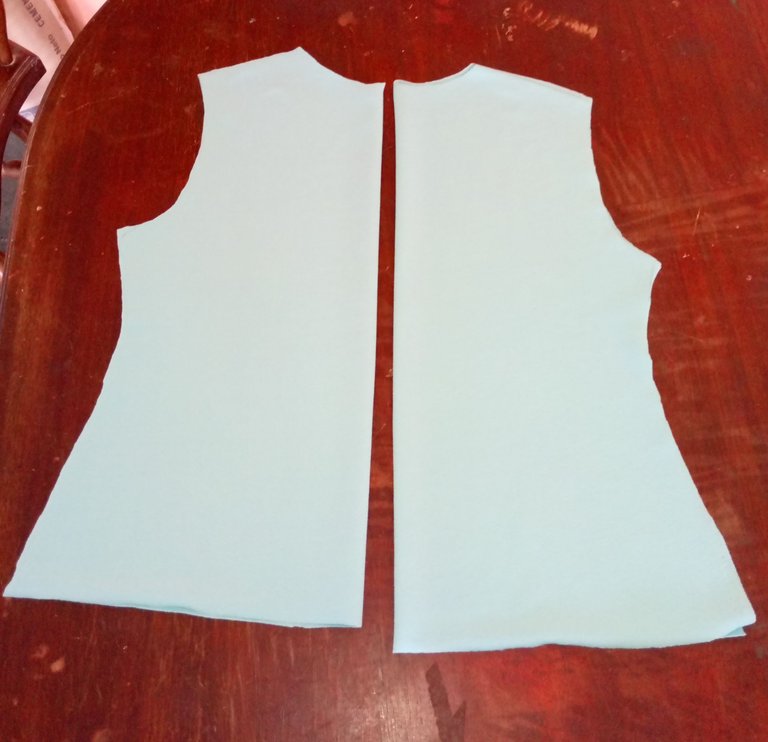
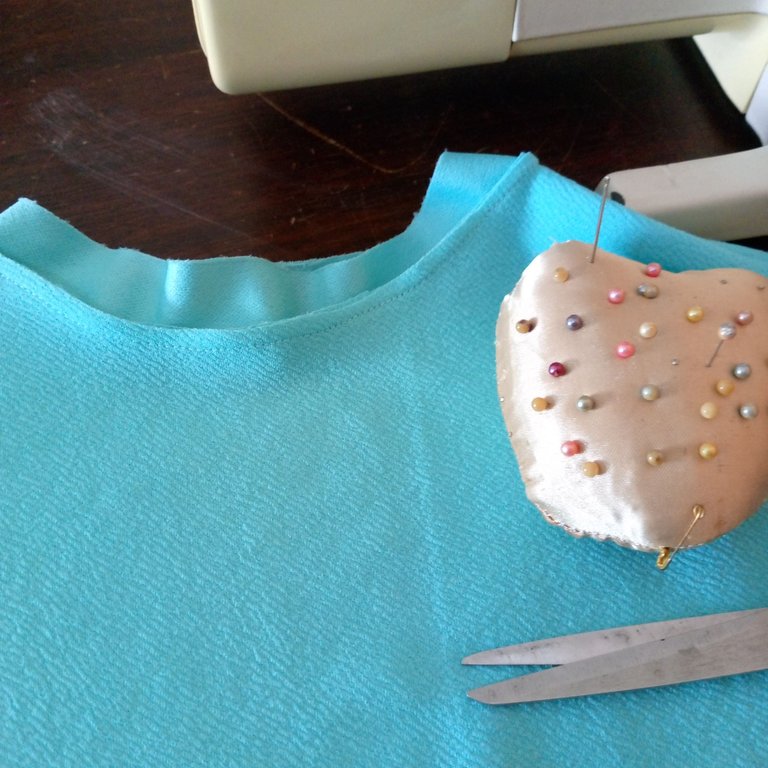
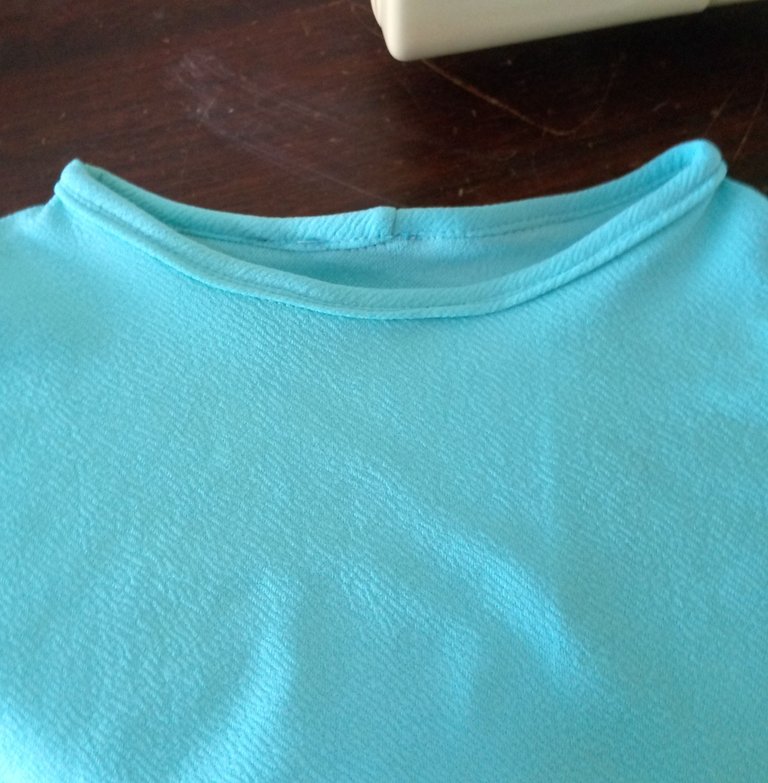
We can notice how the armhole has that centimeter less in the front part and it can also be seen in the neckline.
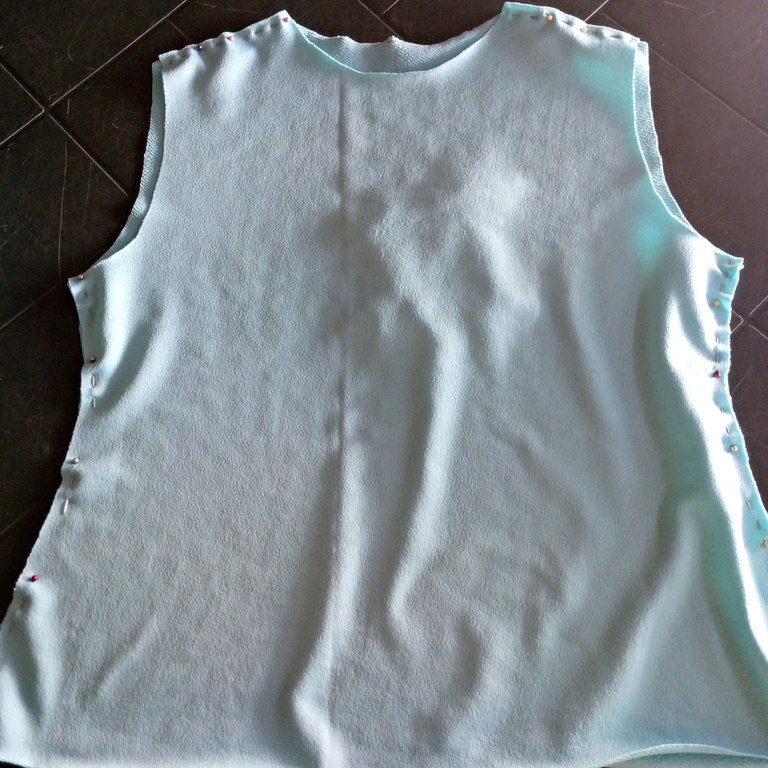
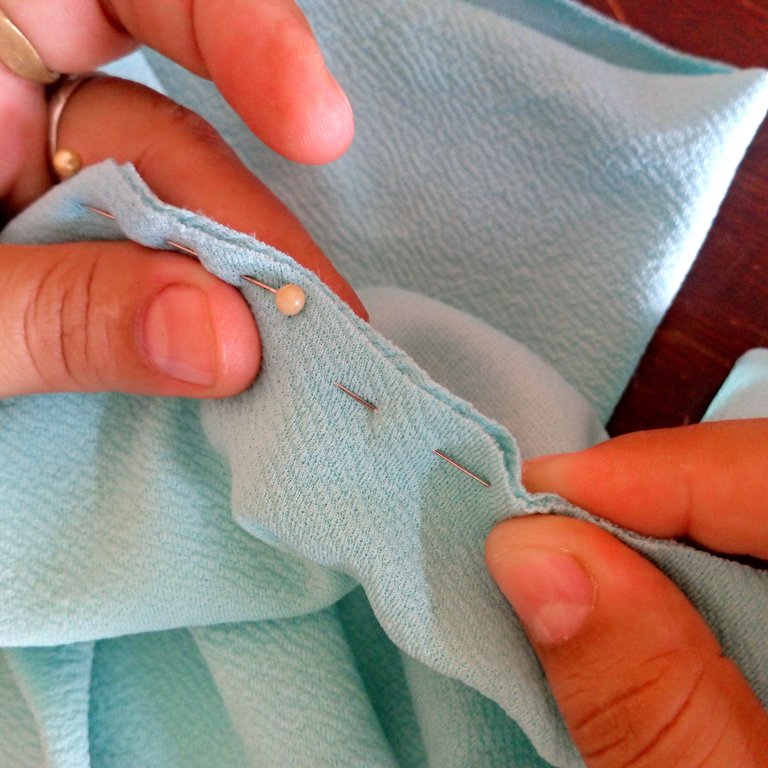
With the two layers of the blouse ready, I only joined right sides together, I put some pins to sew it in the machine, this seam was double stitched for more resistance and to avoid tearing.
Podemos notar como la sisa tiene ese centímetro menos en la parte delantera y también se puede ver en el cuello o escote.
Con las dos capas de la blusa listas solo uni derechos, le coloque unos alfileres para coserla en la máquina, esta costura la hice dobles para mayor resistencia y evitar que se rompa.
 |  |  |
|---|
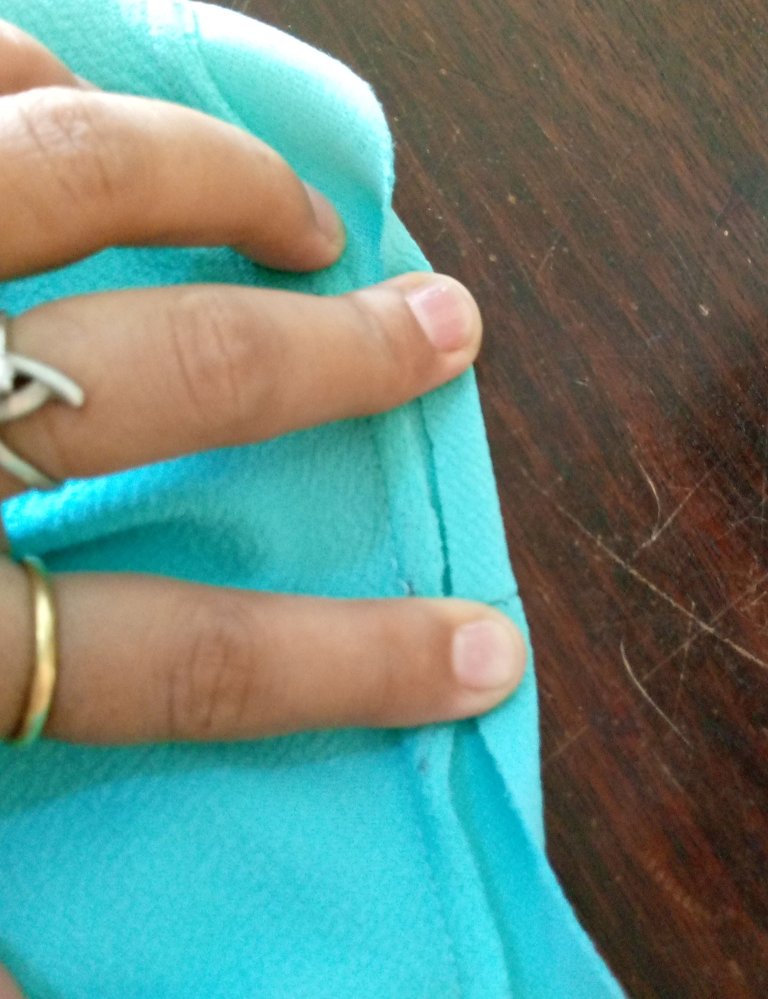
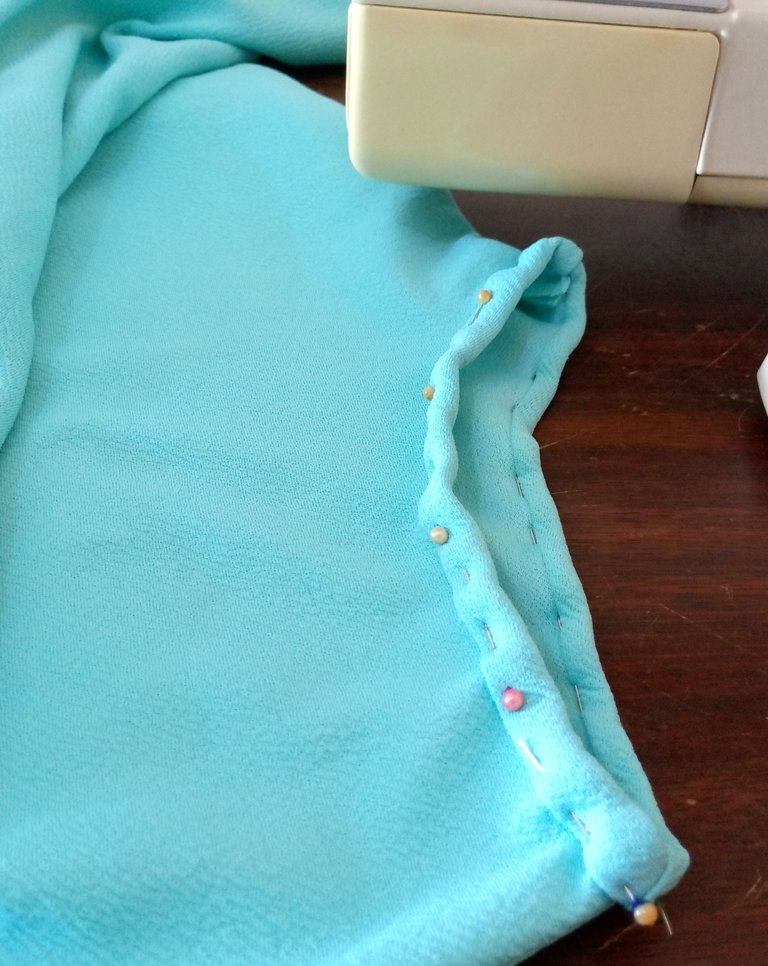
Having the blouse already sewn on the shoulders and sides, I began to cut some ribbons to polish the neckline and armholes, these strips I cut straight, I did not make them bias type so that the fabric could reach me to make a smaller blouse for my daughter with the rest of the fabric.
I pinned the ribbons to the neck with the pins on the back of the blouse, right side of the ribbon, then I sewed.
Teniendo la blusa ya cosida por los hombros y lados, comencé a cortar unas cintas para pulir el escote y las sisas, estas tiras las corte rectas, no las hice tipo sesgo para que la tela me pudiera alcanzar para hacerle una blusa más pequeña a mi hija con el restante de la tela.
Las cintas las fijé al cuello con los alfileres en sentido revés de la blusa derecho de la cinta, luego cosí.
 |  |  |
|---|
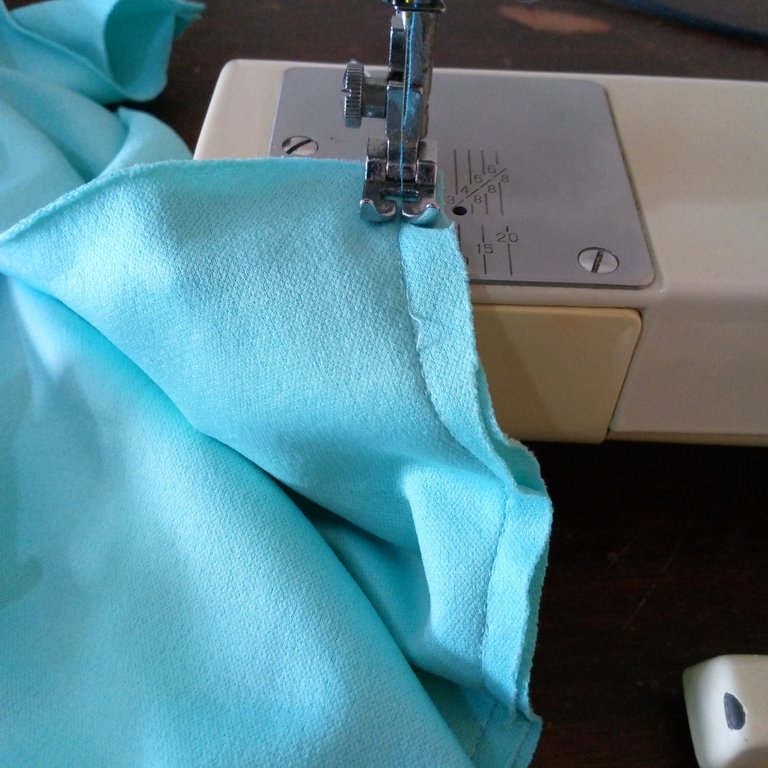
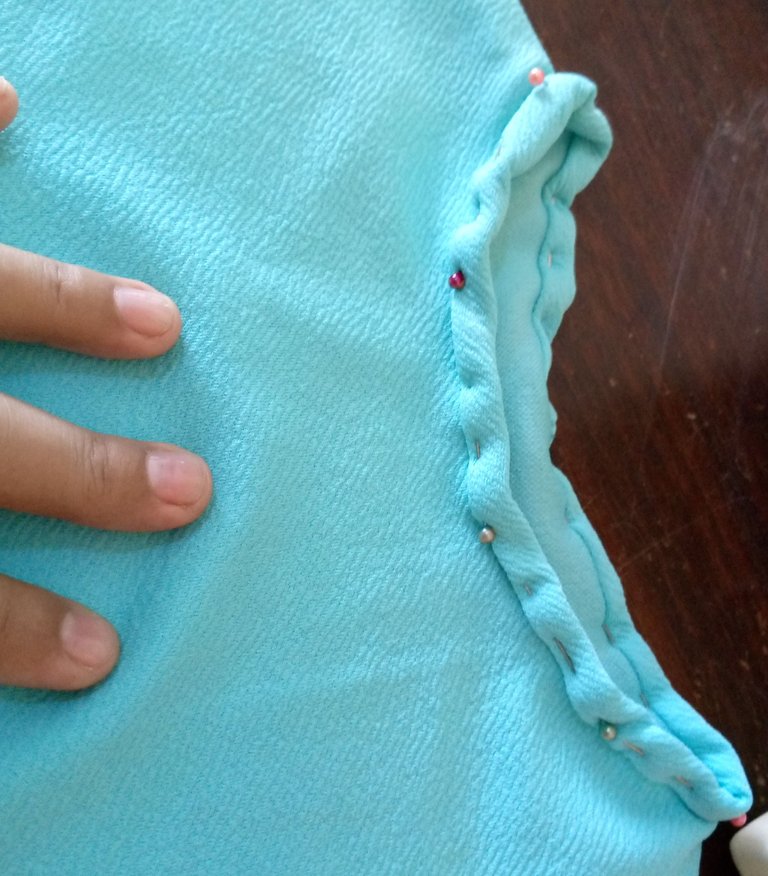
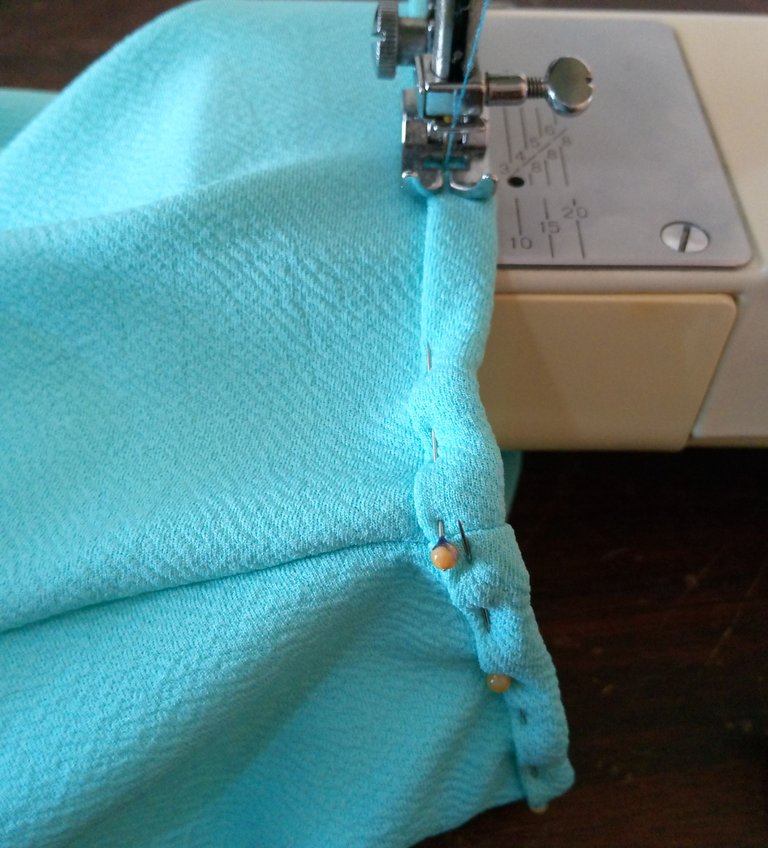
After making the first neck seam with the ribbon, fold to the right side of the blouse 1/2 cm and place pins to hold the ribbon and then sew.
Después de hacer la primera costura del cuello con la cinta, doble hacia el lado derecho de la blusa 1/2 cm y le coloque alfileres para sostener la cinta y luego de esto coser.
 |  |  |
|---|
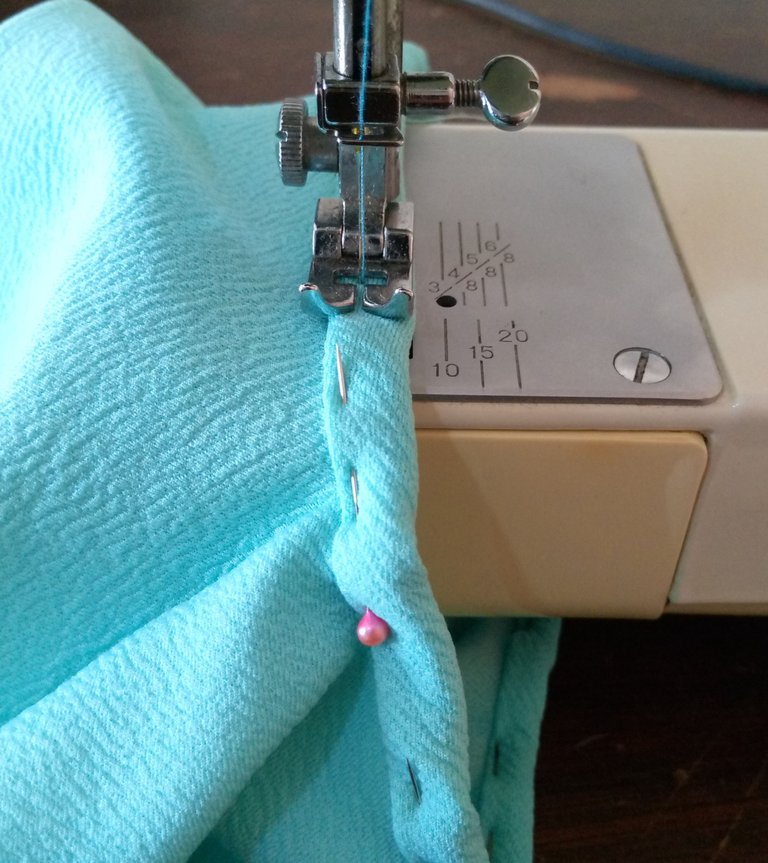
I sewed the collar and armholes using the same techniques mentioned above.
Cosí el cuello y las sisas aplicando las mismas técnicas antes mencionadas.
 |  |  |
|---|
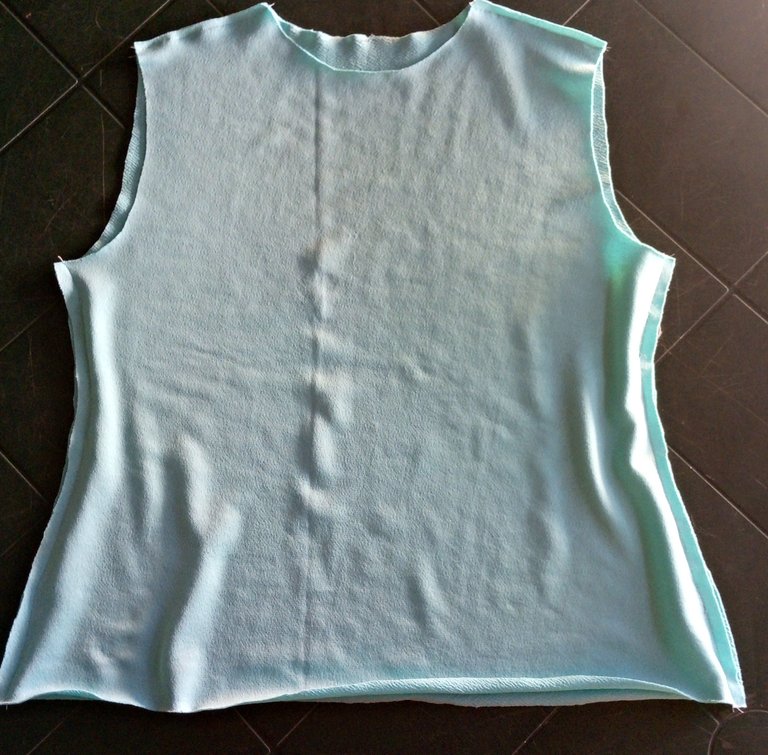
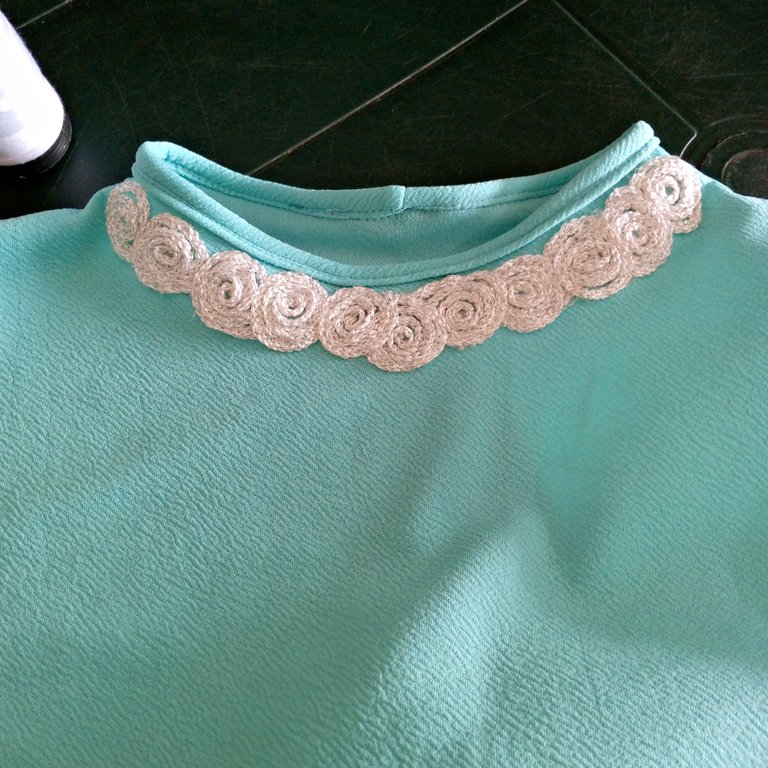
After finishing the total seams, the blouse is ready to be decorated with a decorative detail.
Terminando las costuras totales ya la blusa está solo para colocarle un detalle decorativo.
 |  |  |
|---|
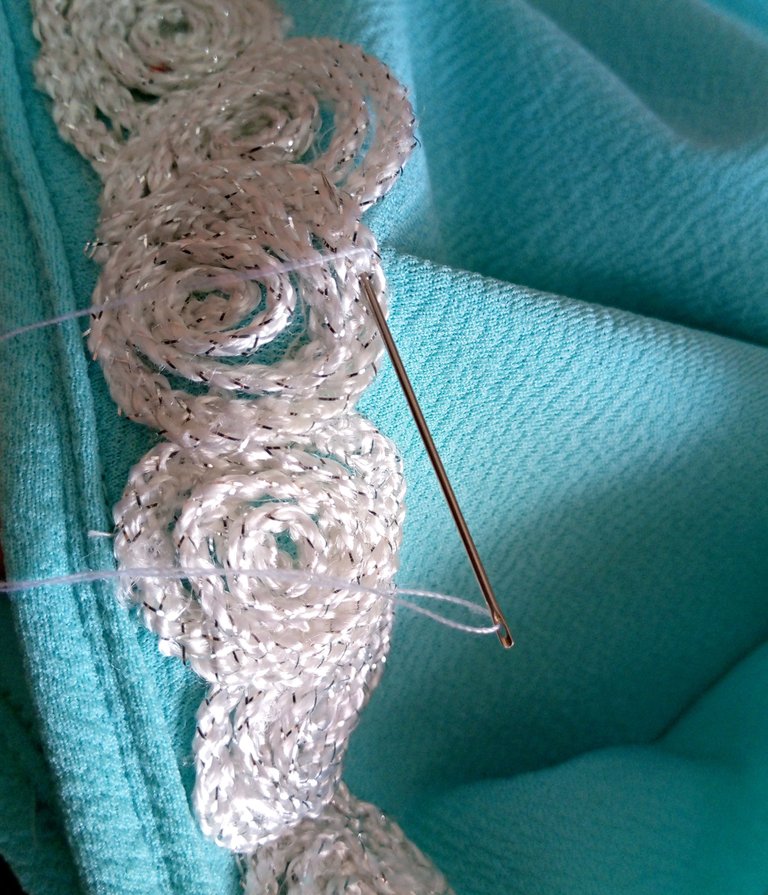
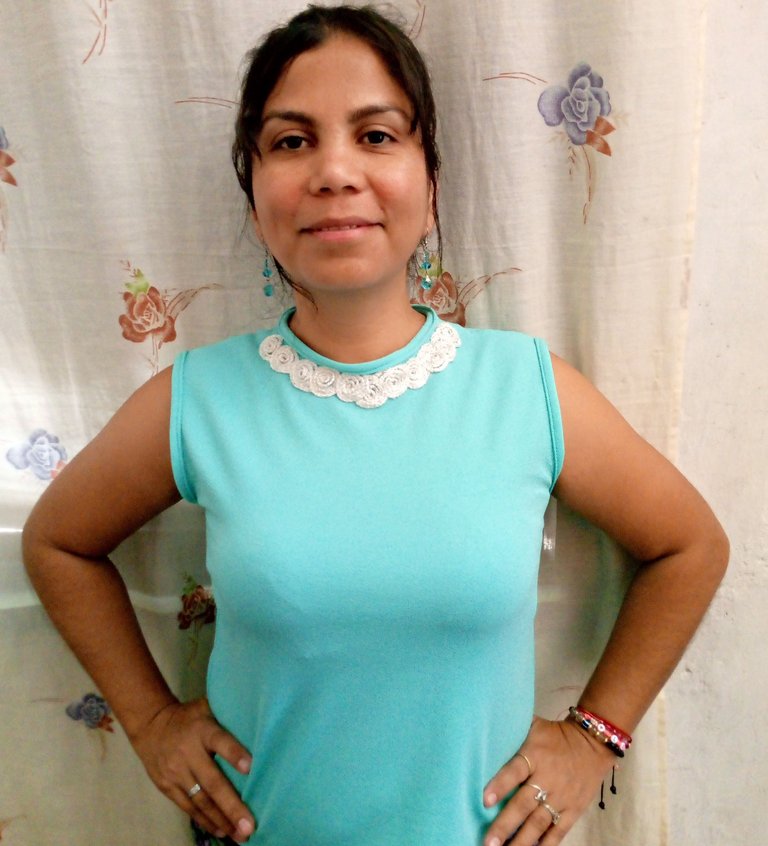
With the needle and the white thread I started to join the decorative roses on the neck like making a necklace and that's how I finished sewing my blouse looking very pretty. So ends my publication of the day hoping that it is to your liking.
Thank you for always joining me, I hope you can leave me your encouraging words to stay motivated and improve my artistic qualities.
As always it has been a pleasure to share with you each of my progress, I love you a lot, and wherever you are I hope you are happy, full of good health, peace and love.
Con la aguja y el hilo blanco comencé a unir las rosas decorativas en el cuello como haciendo un collar y así termine de coser mi blusa quedando muy linda. Así finaliza mi publicación del día esperando que sea de su agrado.
Gracias por acompañarme siempre, espero que me puedas dejar tus palabras alentadoras para seguir motivada y mejorar mis cualidades artísticas.
Como siempre ha sido un placer compartir con ustedes cada uno de mis avances, se les quiere un mundo, y donde quiera que se encuentren espero que estén felices, llenos de buena salud, paz y amor.

social networks / redes sociales
![]()
![]()
Traductor Deepl
Translated Deepl
Ediciones Canva
Editions Canva
 |
|
You have made a beautiful close, I would gladly wear this, I particularly love the neck details. Well done on a good needle work.
Thank you very much for your good point of view.😀😘❤️
Awwnnn this is sooo beautiful, first I like the color and it's good to see you feeling motivated and I love you smile that picture of you is so cute 🥰
Greetings dear @monica I am very happy and proud that you liked it, it is an honor for me to receive your nice comment that gives me even more motivation.🥰🫂
Saludos @lauracraft, que bueno cuando tenemos materiales para trabajar nos da mas motivación en crear nuevas piezas; la blusa quedó muy linda sobre todo el detalle del cuello, espero que la blusa para tu hija quede linda como esta, feliz dia.
Gracias mi corazón me da mucho gusto contar con tu motivador comentario, está blusa es sencilla pero luce increíble y como dices el detalle del cuello la hace resaltar, espero que también la de mi hija quede tan bien como está.
Que bueno que esas nuevas herramientas y materiales te mantengan activa y motivada.
Tu blusa quedo espléndida y el detalle en el cuello la hacen lucir muy romántica. Me encantó.
Feliz lunes de agujas.
Saludos querida @artsugar, gracias es un gusto saber que te haya gustado, esta blusa tiene su encanto es básica con un color suave y se puede combinar muy bien para ir a cualquier evento.
Feliz semana amiga 😘
The design you made at the neck is really elegant
I like how you made it in that pretty colour and the result looks good
Thank you friend yes I love it because it is reserved but it looks very pretty. I'm glad it's to your liking a big hug 😙🌹
You’re welcome
Hug received ☺️
It looks amazing, especially the neckline is so beautiful. Love its design. Well done!
Le ha quedado bastante bien, y le sienta la blusa. Es genial poder darle forma a nuestras ideas y mostrar el resultado del trabajo.
Espero que le saque buen provecho a su creatividad y nos traigas más trabajos interesantes.
Mucho ánimo.
Hola mi querida colega se la costura @lauracraft, que bueno que te guste este arte, bienvenida al club de las mujeres creativas. Tu blusa quedó genial, me encanta el color. Espero poder seguir pasando por aquí para compartir conocimiento y tips. Un abrazo🫂🙋