
Saludos para todos, espero se encuentren muy bien.
Hoy vengo a compartir con ustedes una más de mis creaciones, soy nueva en este arte de la costura, por lo que en algunos casos hay muchos detalles que todavía no domino, pero estoy muy contenta porque cada día aprendo un poco.
Quiero llegar, hacer proyectos como los que he visto de mis compañeras, me ha gustado mucho y quiero seguir sus pasos.
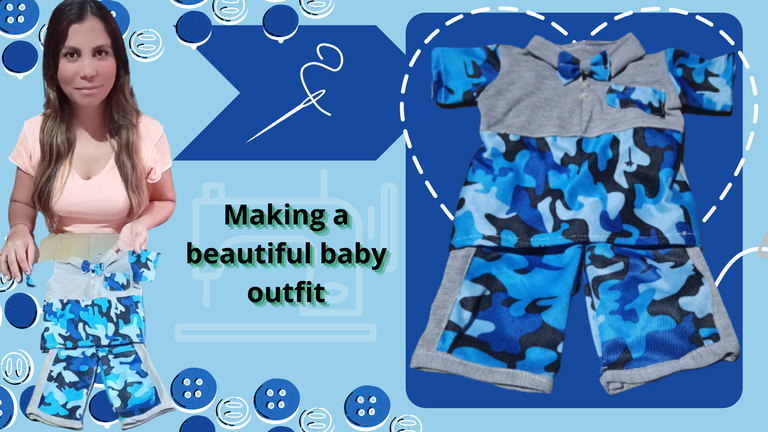
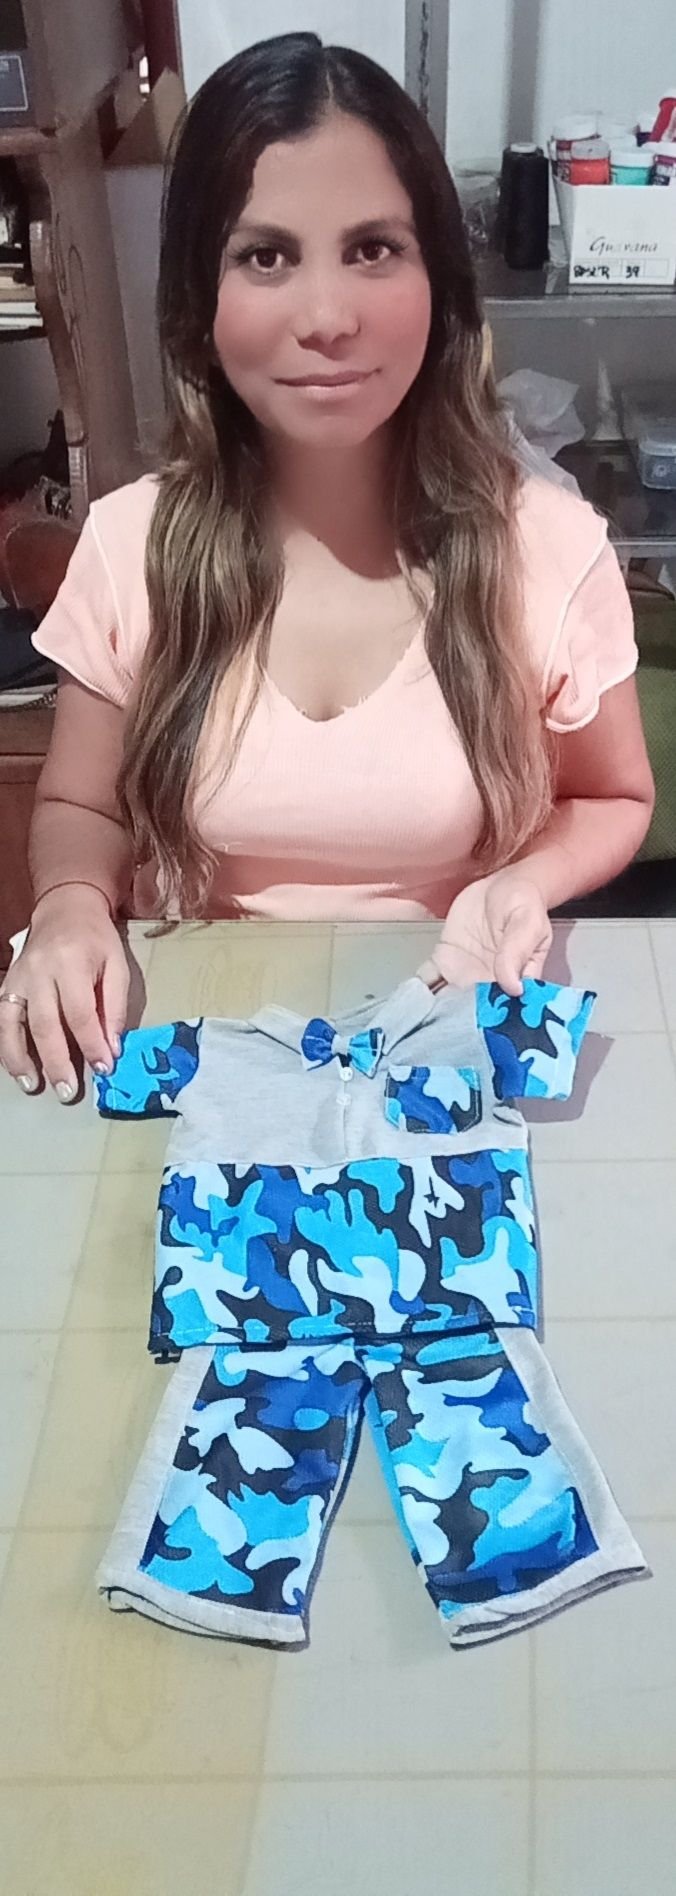
Hoy te presento un conjunto para bebes de meses que realice como parte de un donativo de una vecina que va a dar luz en estos días y no tiene prendas para su bebe, me estoy encargando de hacerle algunas cosas con material sobrante de retazos y algunas prendas de vestir que ya no estaba utilizando, las voy a utilizar realizando esta linda labor para esta querida amiga y su bebe, esperando que le guste mucho y a continuación les comparto la forma del proceso de como lo realice.
Las fotografías que verán a continuación, fueron tomadas con mi teléfono modelo Alcatel_5044R.

Greetings to all, I hope you are feeling well.
Today I come to share with you one more of my creations, I am new to this art of sewing, so in some cases there are many details that I still do not master, but I am very happy because every day I learn a little bit.
I want to get there, make projects like the ones I have seen from my colleagues, I really liked it and I want to follow in their footsteps.
Today I present a set for babies of months that I made as part of a donation from a neighbor who is going to give birth these days and has no clothes for her baby, I'm taking care of making some things with leftover material scraps and some clothes that I was no longer using, I will use them to make this beautiful work for this dear friend and her baby, I hope you like it very much and then I share with you how the process of how to do it.
The pictures you will see below, were taken with my phone model Alcatel_5044R.

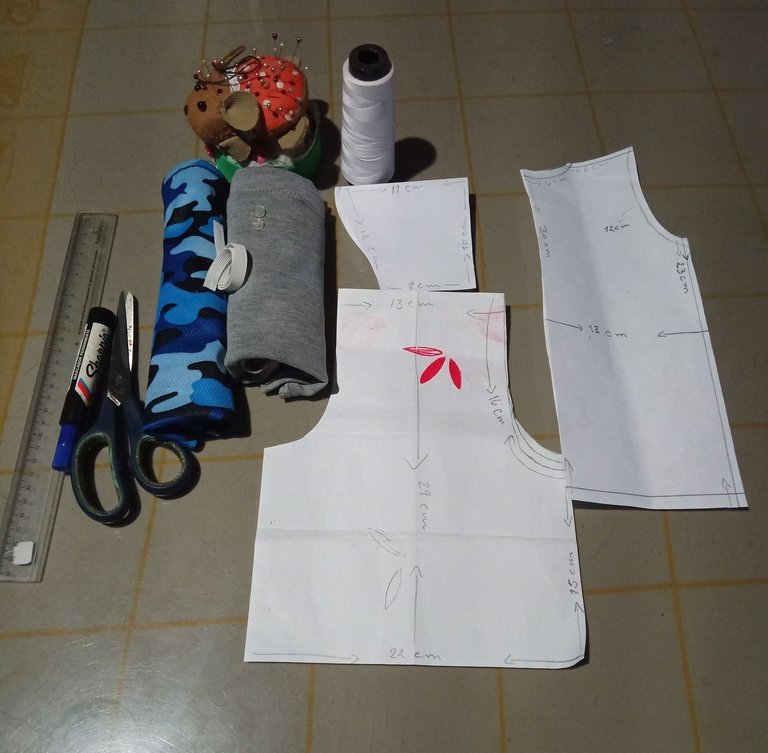
Materiales:
*Telas deportivas unicolor y estampadas.
*Agujas.
*Hilo blanco.
*Tijera.
*Patrones.
*Marcador.
*Regla.
*Goma.
*Aguja.
Materials:
*Sport fabrics unicolor and printed.
*Needles.
*White thread.
*Scissors.
*Patterns.
*Marker.
*Ruler.
*Rubber.
*Needle.
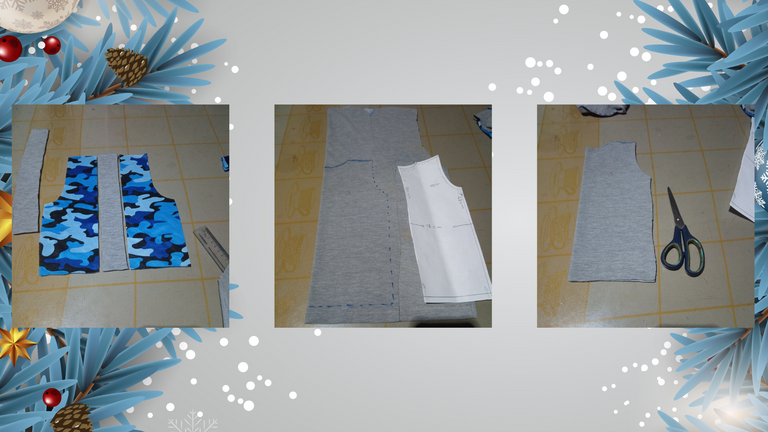
Inicio los primeros pasos con el uso de patrones para sacar las medidas de las piezas, empezando por el short, recortando un poco más ancho cada una de las piezas para cocer.
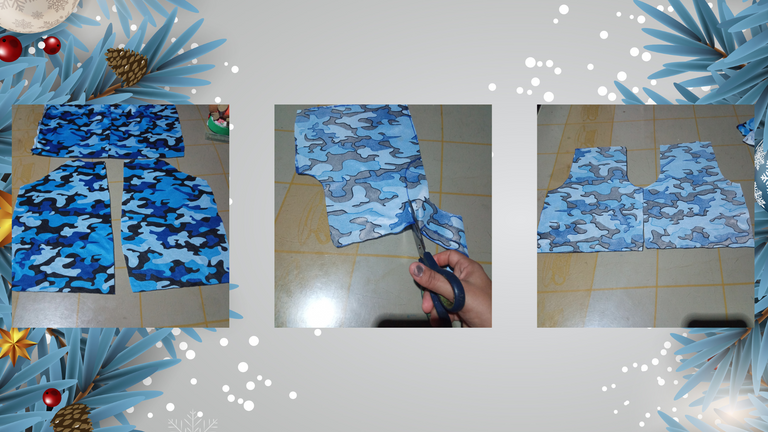
Después de marcar las piezas con un marcador, recorte por detrás de la marca que realice para evitar manchar las piezas de la prenda de ropa.
En el paso anterior pueden notar que cada una de las piezas del Short las recorte enteras, luego doble por la mitad y recorte sacando 4 mitades, las recorte así debido a que la tela no me alcanzaba y para hacerlo un poco más ancho, le metí un cinto de 5 centímetros de ancho por 28 de largo a cada lado de las mangas de este short.
I start the first steps with the use of patterns to take the measurements of the pieces, starting with the shorts, cutting a little wider each of the pieces to bake.
After marking the pieces with a marker, I cut behind the mark I made to avoid staining the pieces of the garment.
In the previous step you can notice that each of the pieces of the short I cut them whole, then fold in half and cut out 4 halves, I cut them like this because the fabric was not enough and to make it a little wider, I put a belt of 5 centimeters wide by 28 long on each side of the sleeves of this short.
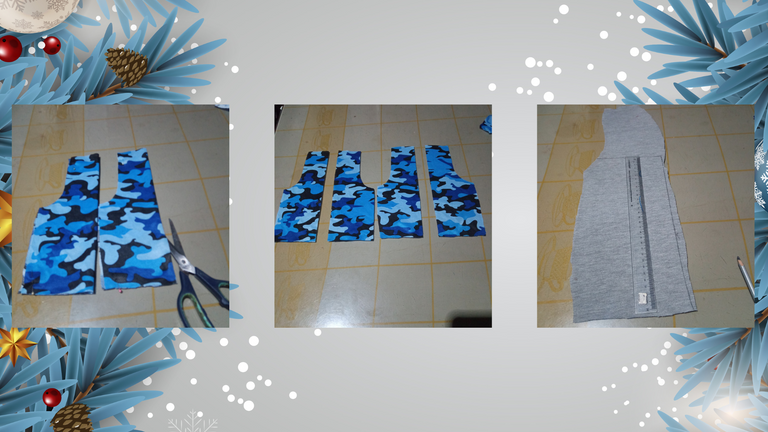
Después de tener todas las piezas listas para el short, las cuales son: 4 lados de manga, dos cintos para los lados y un cinto para la pretina.
Seguidamente, procedí a recortar parte de la camisa usando un patrón para sacar cada una de las piezas.
La camisa se divide en tres partes frontales y una parte de atrás, las cuales recorte siguiendo los patrones, pueden notar las piezas ya recortadas.
After I had all the pieces ready for the shorts, which are: 4 sleeve sides, two straps for the sides and one strap for the waistband.
Next, I proceeded to cut out part of the shirt using a pattern to take out each of the pieces.
The shirt is divided into three front parts and a back part, which I cut out following the patterns, you can see the pieces already cut out.
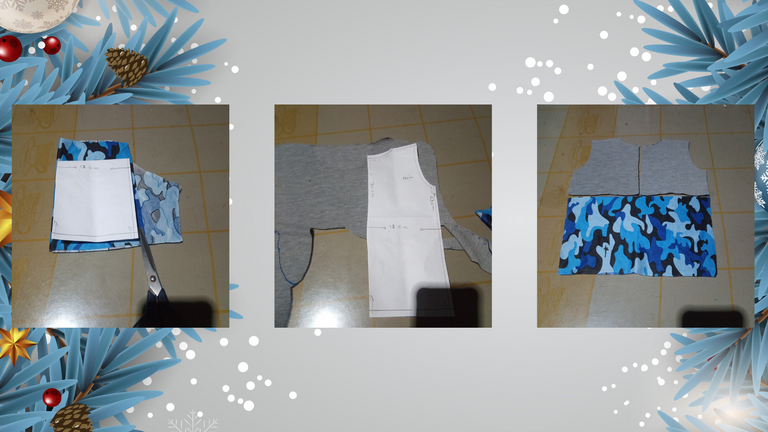
Las mangas las realicé doblando un trozo de tela por la mitad y colocando el patrón sobre esta para luego recortarlo, estas medidas deben coincidir con la medida de la camisa, después de recortar las mangas, también recorte un bolsillo decorativo, el mismo es un cuadrado con dos pequeños cortes en los lados de abajo del bolsillo.
I made the sleeves by folding a piece of fabric in half and placing the pattern on it and then cut it out, these measurements should match the size of the shirt, after cutting out the sleeves, I also cut out a decorative pocket, it is a square with two small cuts on the bottom sides of the pocket.
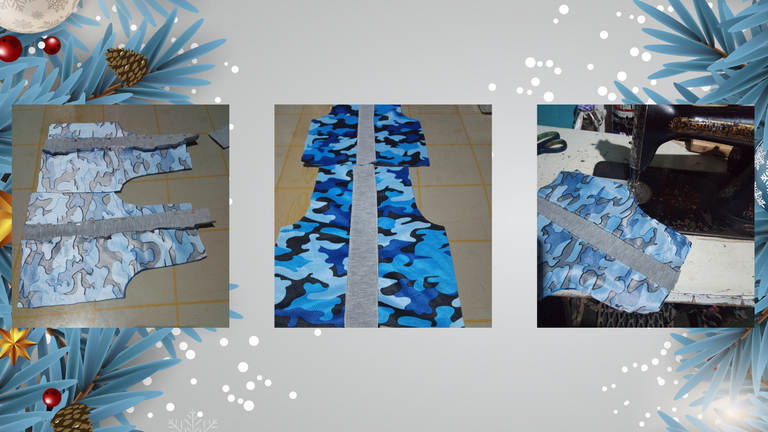
Teniendo todas las piezas de este conjunto listas, procedo a unirlas con la ayuda de los alfileres y luego pasarle costura con la ayuda de la máquina de coser.
Pueden notar como fui uniendo cada una de las piezas de las mangas del short para darle forma.
Primero uní la parte delantera con el cinto pegando las telas derechas con derecho y cociendo los lados por la guía de los alfileres que están colocados por el revés de las telas
Después de tener estas dos piezas que ven en la segunda imagen, las uní derecho con derecho y empecé a cocer primero la parte de arriba del short, luego cocí las partes de las mangas con el fundillo, por último le coloque un cinto en la pretina para la goma y unos cintos en al parte de bajo del short que serían los ruedos de esta hermosa bermuda.
Having all the pieces of this set ready, I proceed to join them together with the help of the pins and then sew them with the help of the sewing machine.
You can see how I was joining each of the pieces of the sleeves of the shorts to give it shape.
First I joined the front part with the waistband by gluing the fabrics right sides together and sewing the sides by the guide of the pins that are placed on the back of the fabrics.
After having these two pieces that you see in the second image, I joined them right to right and started to sew first the top part of the shorts, then I sewed the sleeve parts with the sleeve sleeve, finally I put a belt on the waistband for the elastic and some straps on the bottom part of the shorts that would be the hems of this beautiful bermuda.
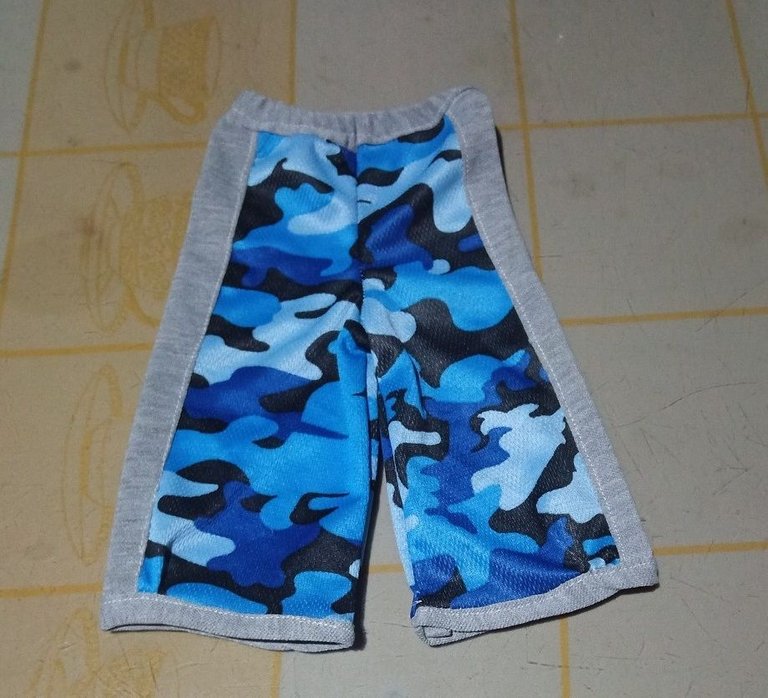
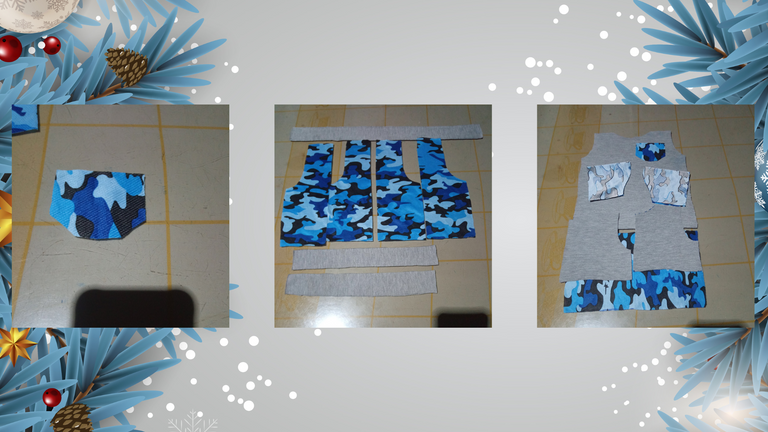
De esta forma, siguiendo los pasos mencionados anteriormente, hice este hermoso short, ahora toca unir todas las partes de la camisa.
In this way, following the steps mentioned above, I made this beautiful short, now it's time to join all the parts of the shirt.

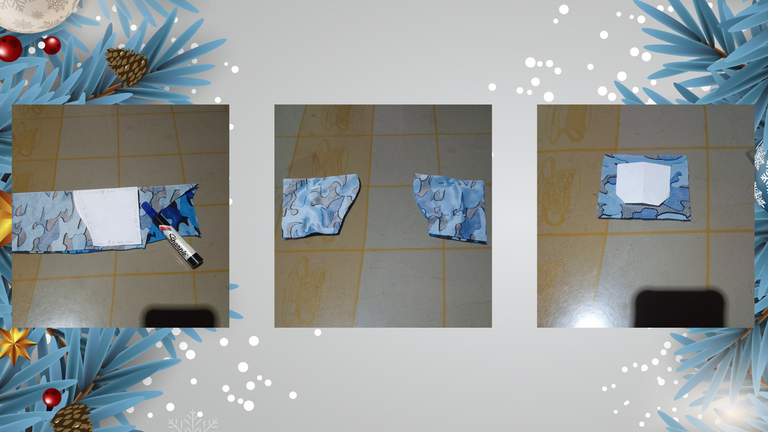
Para empezar a cocer las piezas de la camisa, uni las dos piezas delanteras de arriba por la mitad del pecho, dejando una abertura donde colocaré al finalizar un lazo decorativo.
Luego de unir las dos piezas de arriba, coloque con alfileres la tercera pieza y la cocí, También antes de unir las dos capas de la camisa, le coloque el bolsillo de un lado.
Para unir ambas piezas de la camisa, coloque ambas derecho con derecho, las fije con alfileres, seguidamente cocí por los costados, dejando 3 centímetros de cada lado sin costura, para luego proceder a cocer cada una de las mangas, cerrando toda la camisa y los 3 centímetros de lado que había dejado anteriormente.
Luego de esto doble 1 centímetro hacia adentro para hacer el ruedo de las mangas y de la camisa, después de terminar de cocer los ruedos de las mangas y de la parte de abajo de la camisa, recorte 1 trozo de tela doblado de 28 centímetros de largo, en el centro 5 centímetros de ancho y en los lados de las puntas del cuello termina a 3 centímetros.
Este cuello lo doble por la mitad, después hice un corte en el centro del mismo, así como También realice un corte en el centro del cuello de la camisa para guiarme al momento de pasar la costura, esta la realice sujetando el cuello con alfileres y luego cociendo.
Después que cocí el cuello, lo doble hacia el lado derecho y pace una costura por encima del lado derecho para fijarlo mejor y evitar que se levante.
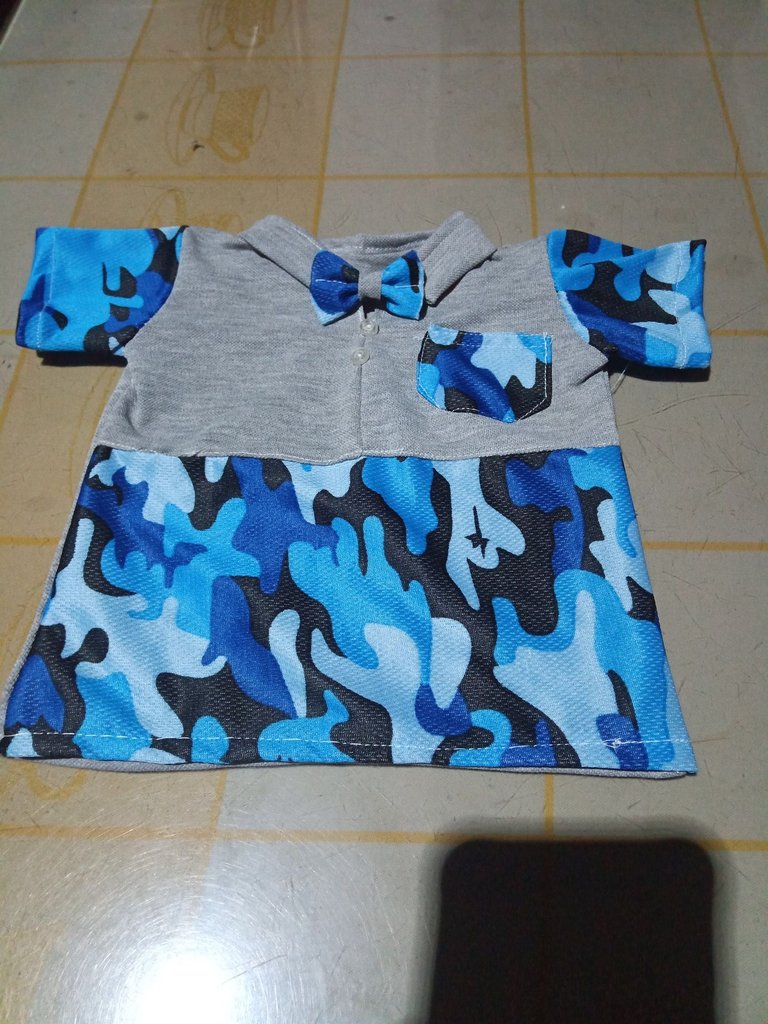
Teniendo todos estos pasos listos, realice un lazo y lo coloque en el centro del cuello con un asa de un lado y cocido del otro, en el asa de un lado le coloque un botón para poder abrir el cuello y usar con más facilidad, También coloque dos botones decorativos en la parte frontal del centro de la camisa.
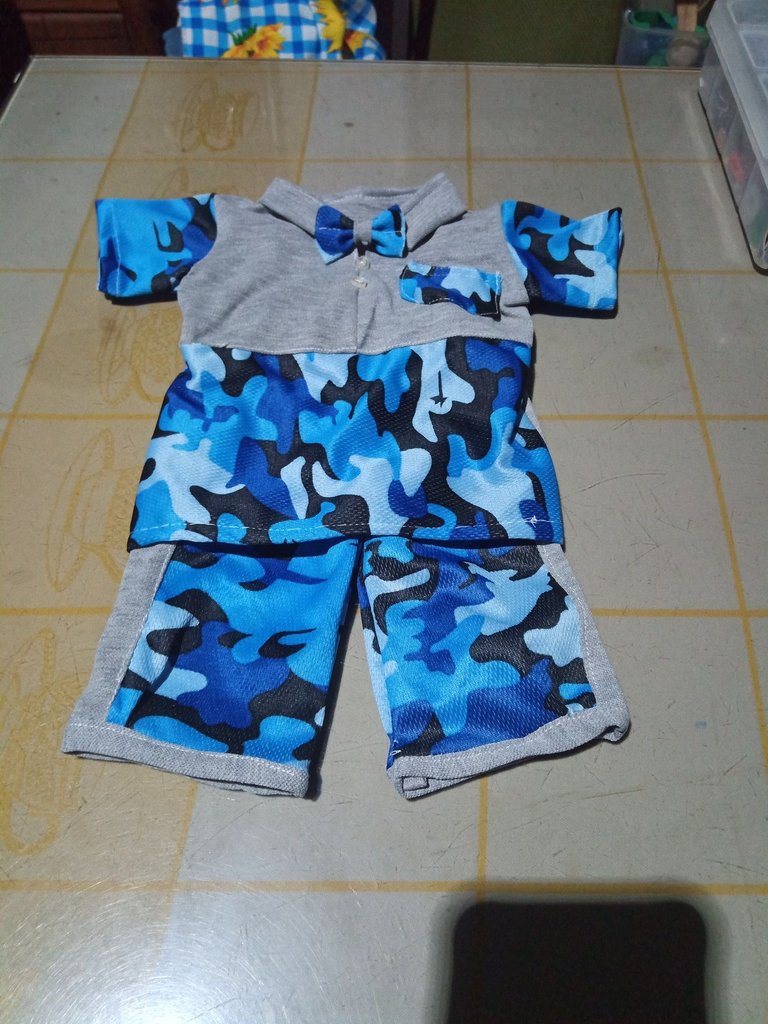
Así es como culmina la elaboración de este lindo conjunto para un bebe que está por nacer.
Amigos esta ha sido mi publicación del día de hoy, espero que puedan entenderla y les guste mucho, nos vemos en otra de mis publicaciones, esperando ir adquiriendo cada día nuevas técnicas para perfeccionar los detalles de mis proyectos.
Gracias por visitar mi post, bendiciones para todos.
To start sewing the pieces of the shirt, I joined the two front top pieces in the middle of the chest, leaving an opening where I will place a decorative bow at the end.
After joining the two top pieces, I pinned the third piece and sewed it. Also, before joining the two layers of the shirt, I placed the pocket on one side.
To join both pieces of the shirt, place both right sides together, pin them, then I sewed the sides, leaving 3 centimeters of each side without seam, and then proceed to sew each of the sleeves, closing the whole shirt and the 3 centimeters of side that I had left previously.
After this fold 1 centimeter inward to make the hem of the sleeves and shirt, after finishing cooking the hems of the sleeves and the bottom of the shirt, cut 1 piece of fabric folded 28 centimeters long, in the center 5 centimeters wide and on the sides of the ends of the neck ends to 3 centimeters.
I folded this collar in half, then I made a cut in the center of it, and also made a cut in the center of the collar of the shirt to guide me at the time of passing the seam, this was done by holding the collar with pins and then cooking.
After the collar was cooked, I folded it to the right side and sewed a seam on top of the right side to fix it better and prevent it from lifting.
Having all these steps ready, make a loop and place it in the center of the collar with a handle on one side and cooked on the other, on the handle on one side I placed a button to open the collar and use it more easily, I also placed two decorative buttons on the front of the center of the shirt.
This is how the elaboration of this cute outfit for a baby that is about to be born culminates.
Friends this has been my publication today, I hope you can understand it and like it very much, see you in another of my publications, hoping to be acquiring every day new techniques to perfect the details of my projects.
Thanks for visiting my post, blessings to all.
social networks / redes sociales
![]()
![]()
Traductor Deepl
Translated Deepl
Ediciones Canva
Editions Canva


The rewards earned on this comment will go directly to the people( @kawsar8035 ) sharing the post on Twitter as long as they are registered with @poshtoken. Sign up at https://hiveposh.com.
laura que lindo trabajo, eres una chica muy amigable, gracias por tus lindos saludos y por compertirnos este lindo trabajo, mis mejores deseos en esta plataforma amiga. :D
Gracias amiga, no fue fácil, pero poco a poco lo fui creando pero estoy muy feliz por los resultados.
Que lindo de tu parte hacer el donativo de ropa para bebe a tu vecina, la tela de camuflaje azul está muy linda, te quedo muy bonito Saludos
Thank you for sharing this post on HIVE!
Your content got selected by our fellow curator desro & you just received a little thank you upvote from us for your great work! Your post will be featured in one of our recurring compilations which are aiming to offer you a stage to widen your audience within the DIY scene of Hive. Next time make sure to post / cross-post your creation within the DIYHub community on HIVE and you will receive a higher upvote ;) Stay creative & HIVE ON!
Please vote for our hive witness <3
Congratulations, your post has been upvoted by @dsc-r2cornell, which is a curating account for @R2cornell's Discord Community. We can also be found on our hive community & peakd as well as on my Discord Server
Felicitaciones, su publication ha sido votado por @dsc-r2cornell. También puedo ser encontrado en nuestra comunidad de colmena y Peakd así como en mi servidor de discordia
Saludos @lauracraft, me encanta la combinacion de los colores, quedo lindo el conjunto a pesar que dices que estas aprendiendo te felicito.
Me alegro de que te haya gustado amiga, muchas gracias por tus felicitaciones, poco a poco iré mejorando amiga @eylis
Congratulations @lauracraft! You have completed the following achievement on the Hive blockchain And have been rewarded with New badge(s)
Your next target is to reach 900 replies.
You can view your badges on your board and compare yourself to others in the Ranking
If you no longer want to receive notifications, reply to this comment with the word
STOPCheck out the last post from @hivebuzz:
Support the HiveBuzz project. Vote for our proposal!
This is indeed very beautiful outfit. I love it
thanks