Un saludo muy especial hermosa comunidad costurera, que la bendición de Dios les acompañe cada dia, para que todo lo que se propongan les salga bien!!! Yo me encuentro recuperando aun de una fuerte gripe, por lo que hoy me emociona mucho llegar a ustedes con un nuevo tutorial de costura hecho a mano.
A very special greeting, beautiful seamstress community, may God's blessing accompany you every day, so that everything you set out to do is successful!!! I am still recovering from a bad flu, so today I am very excited to come to you with a new handmade sewing tutorial.
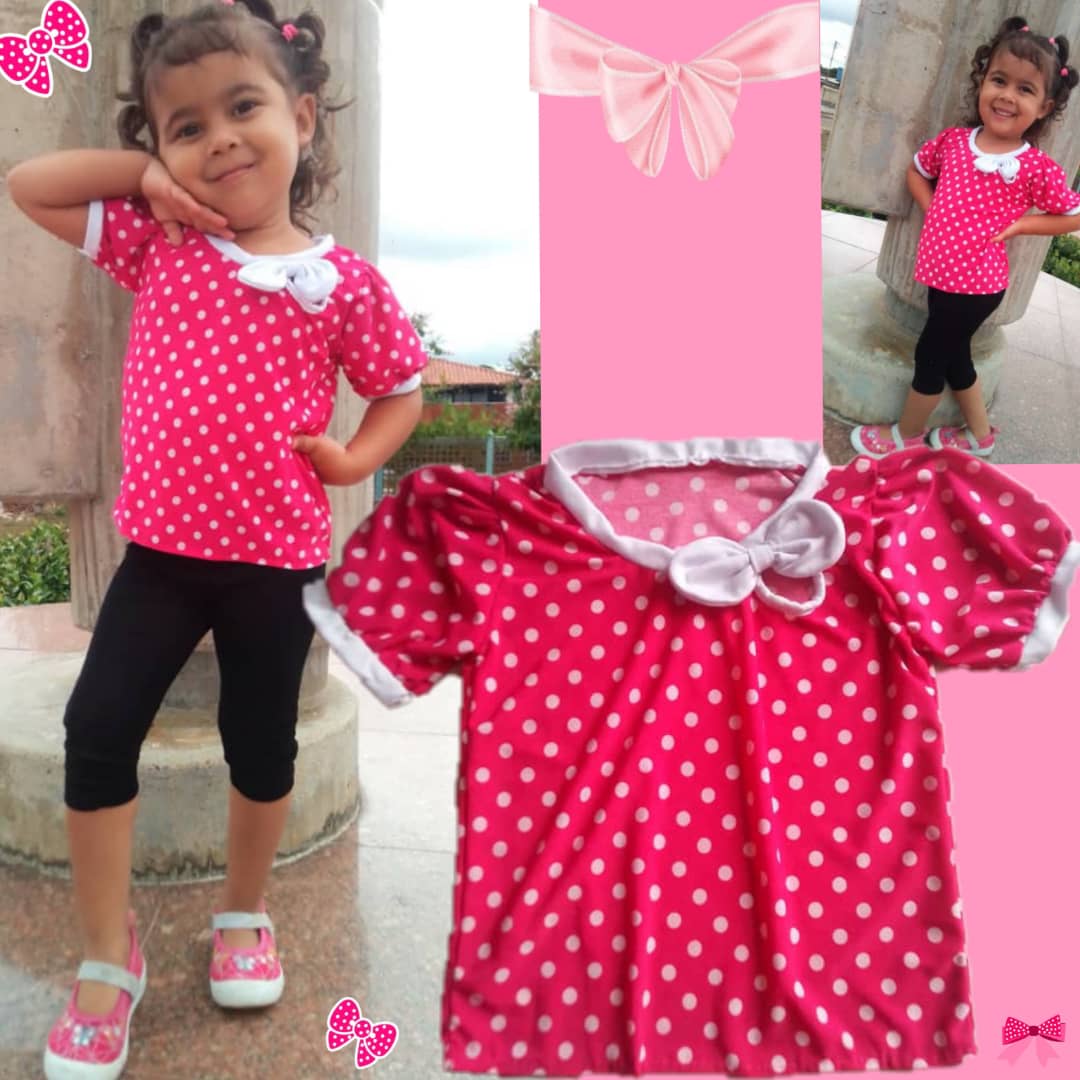
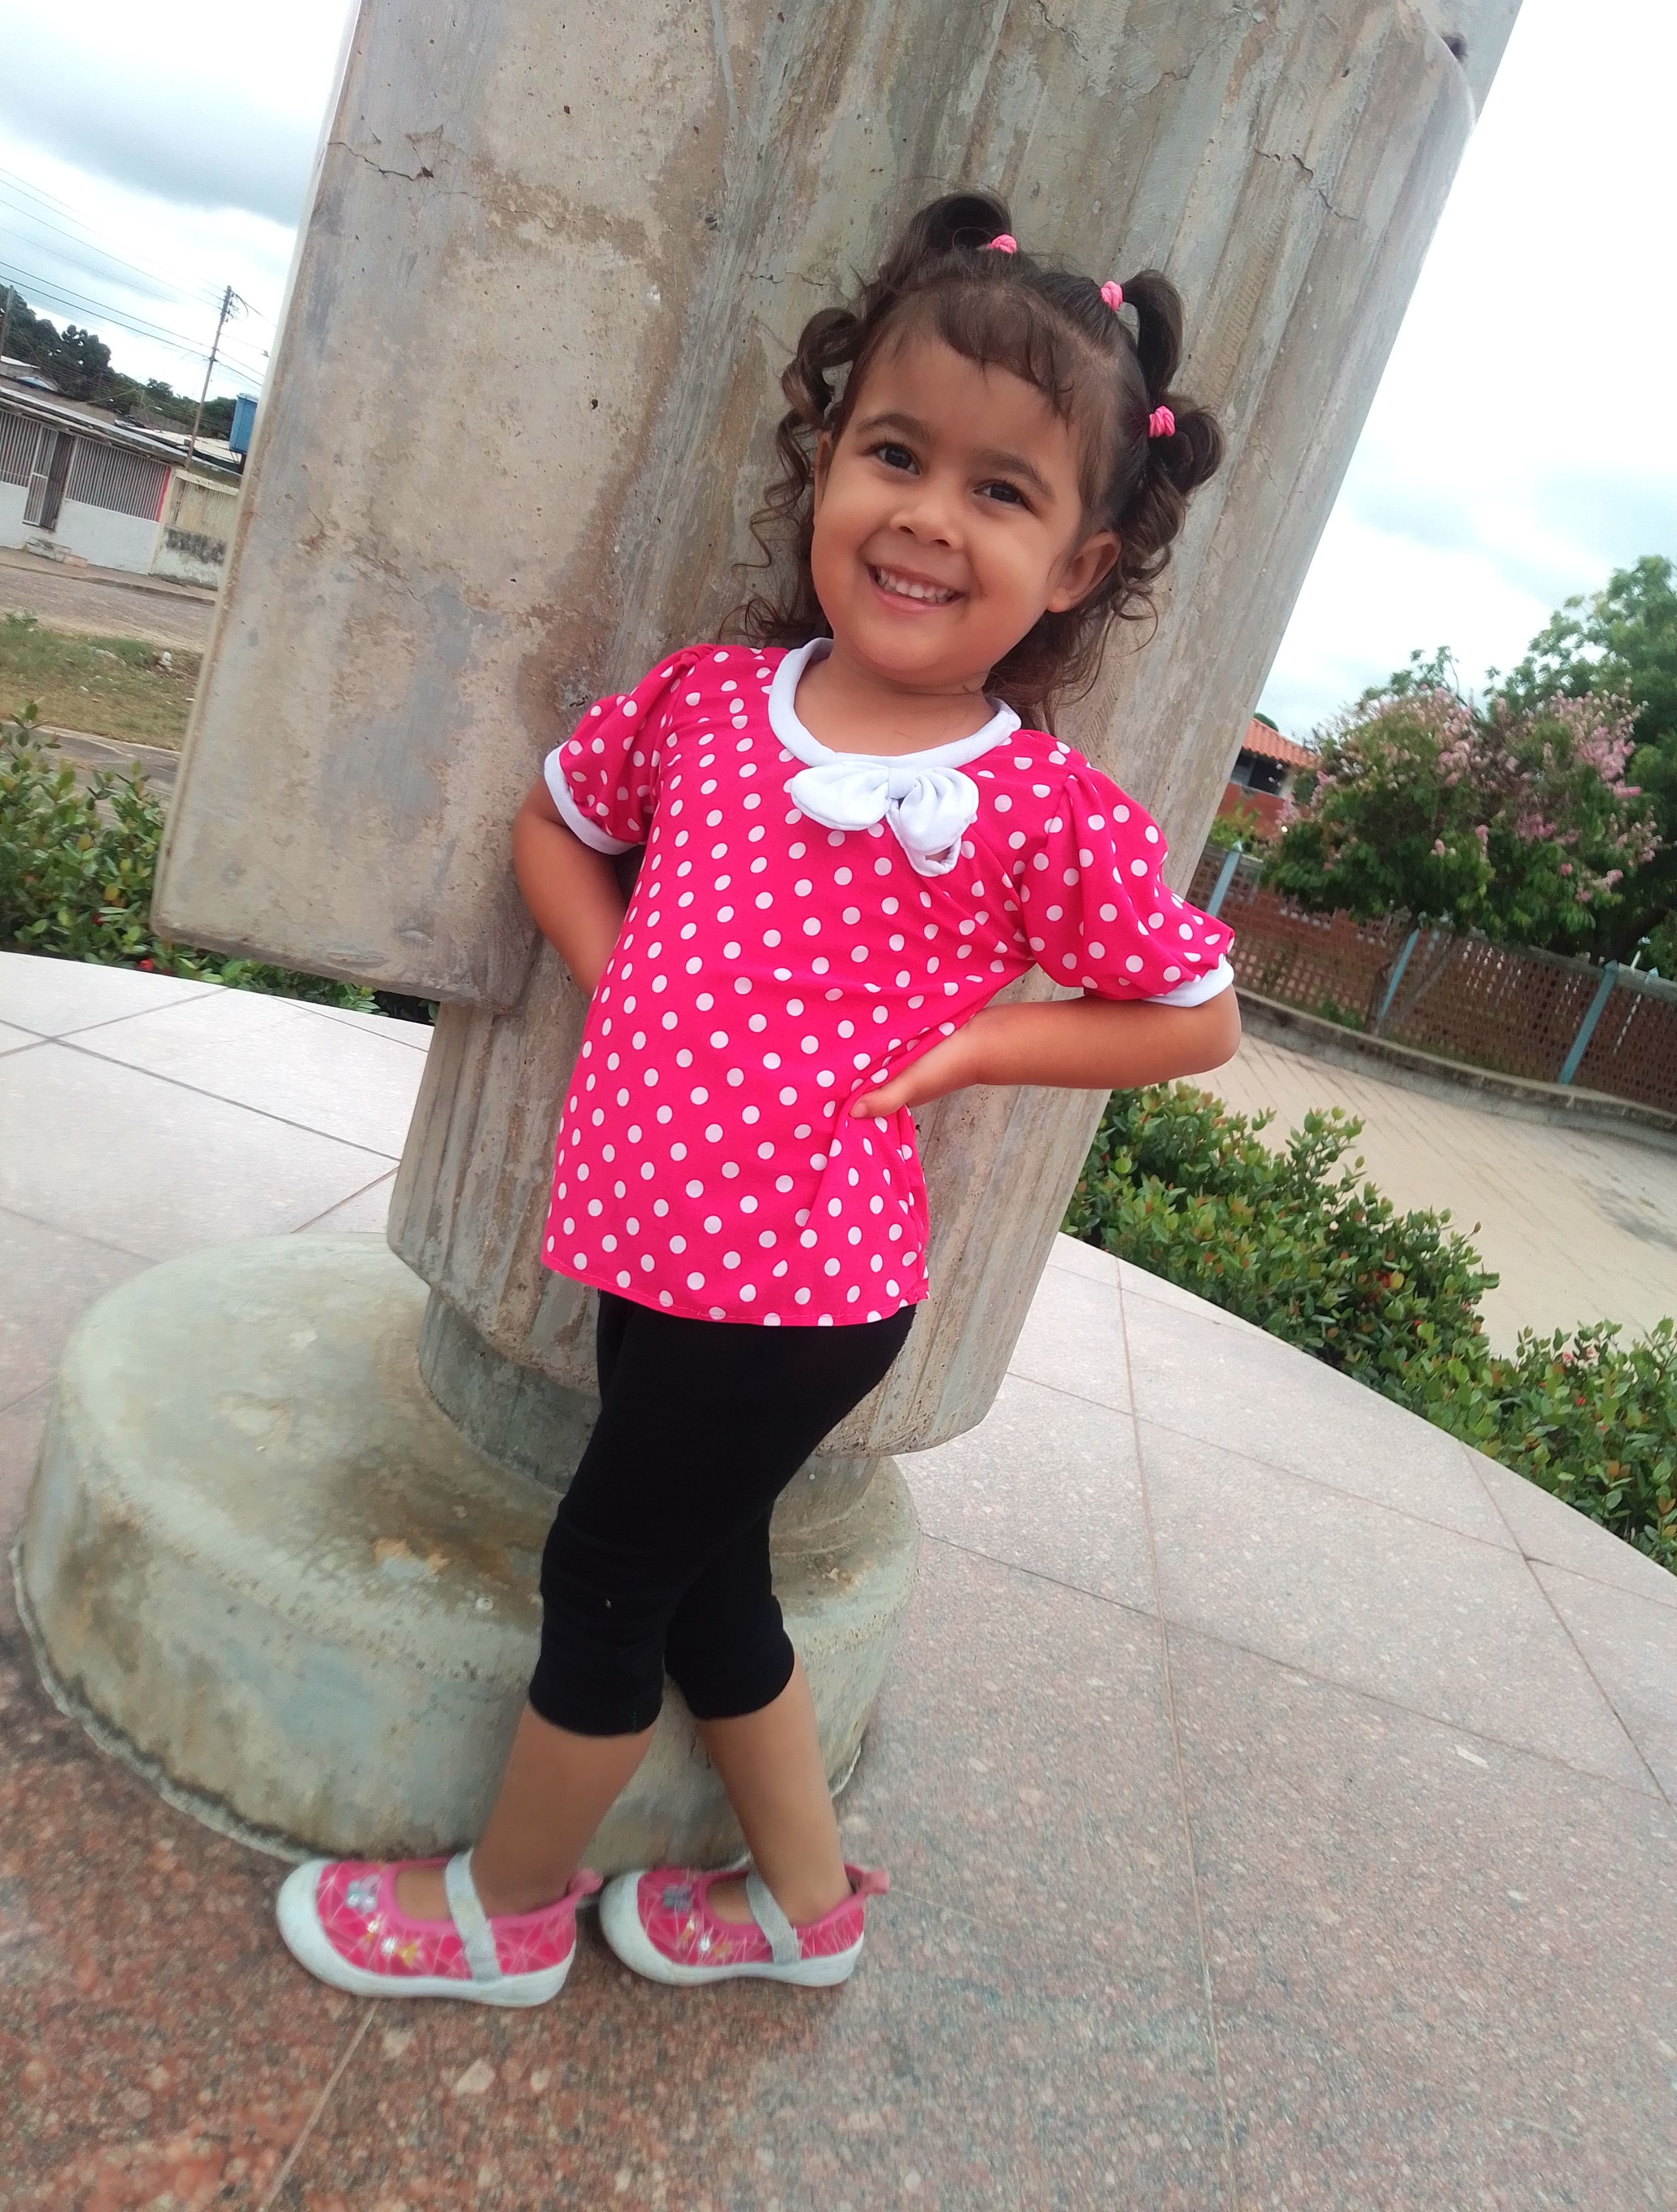
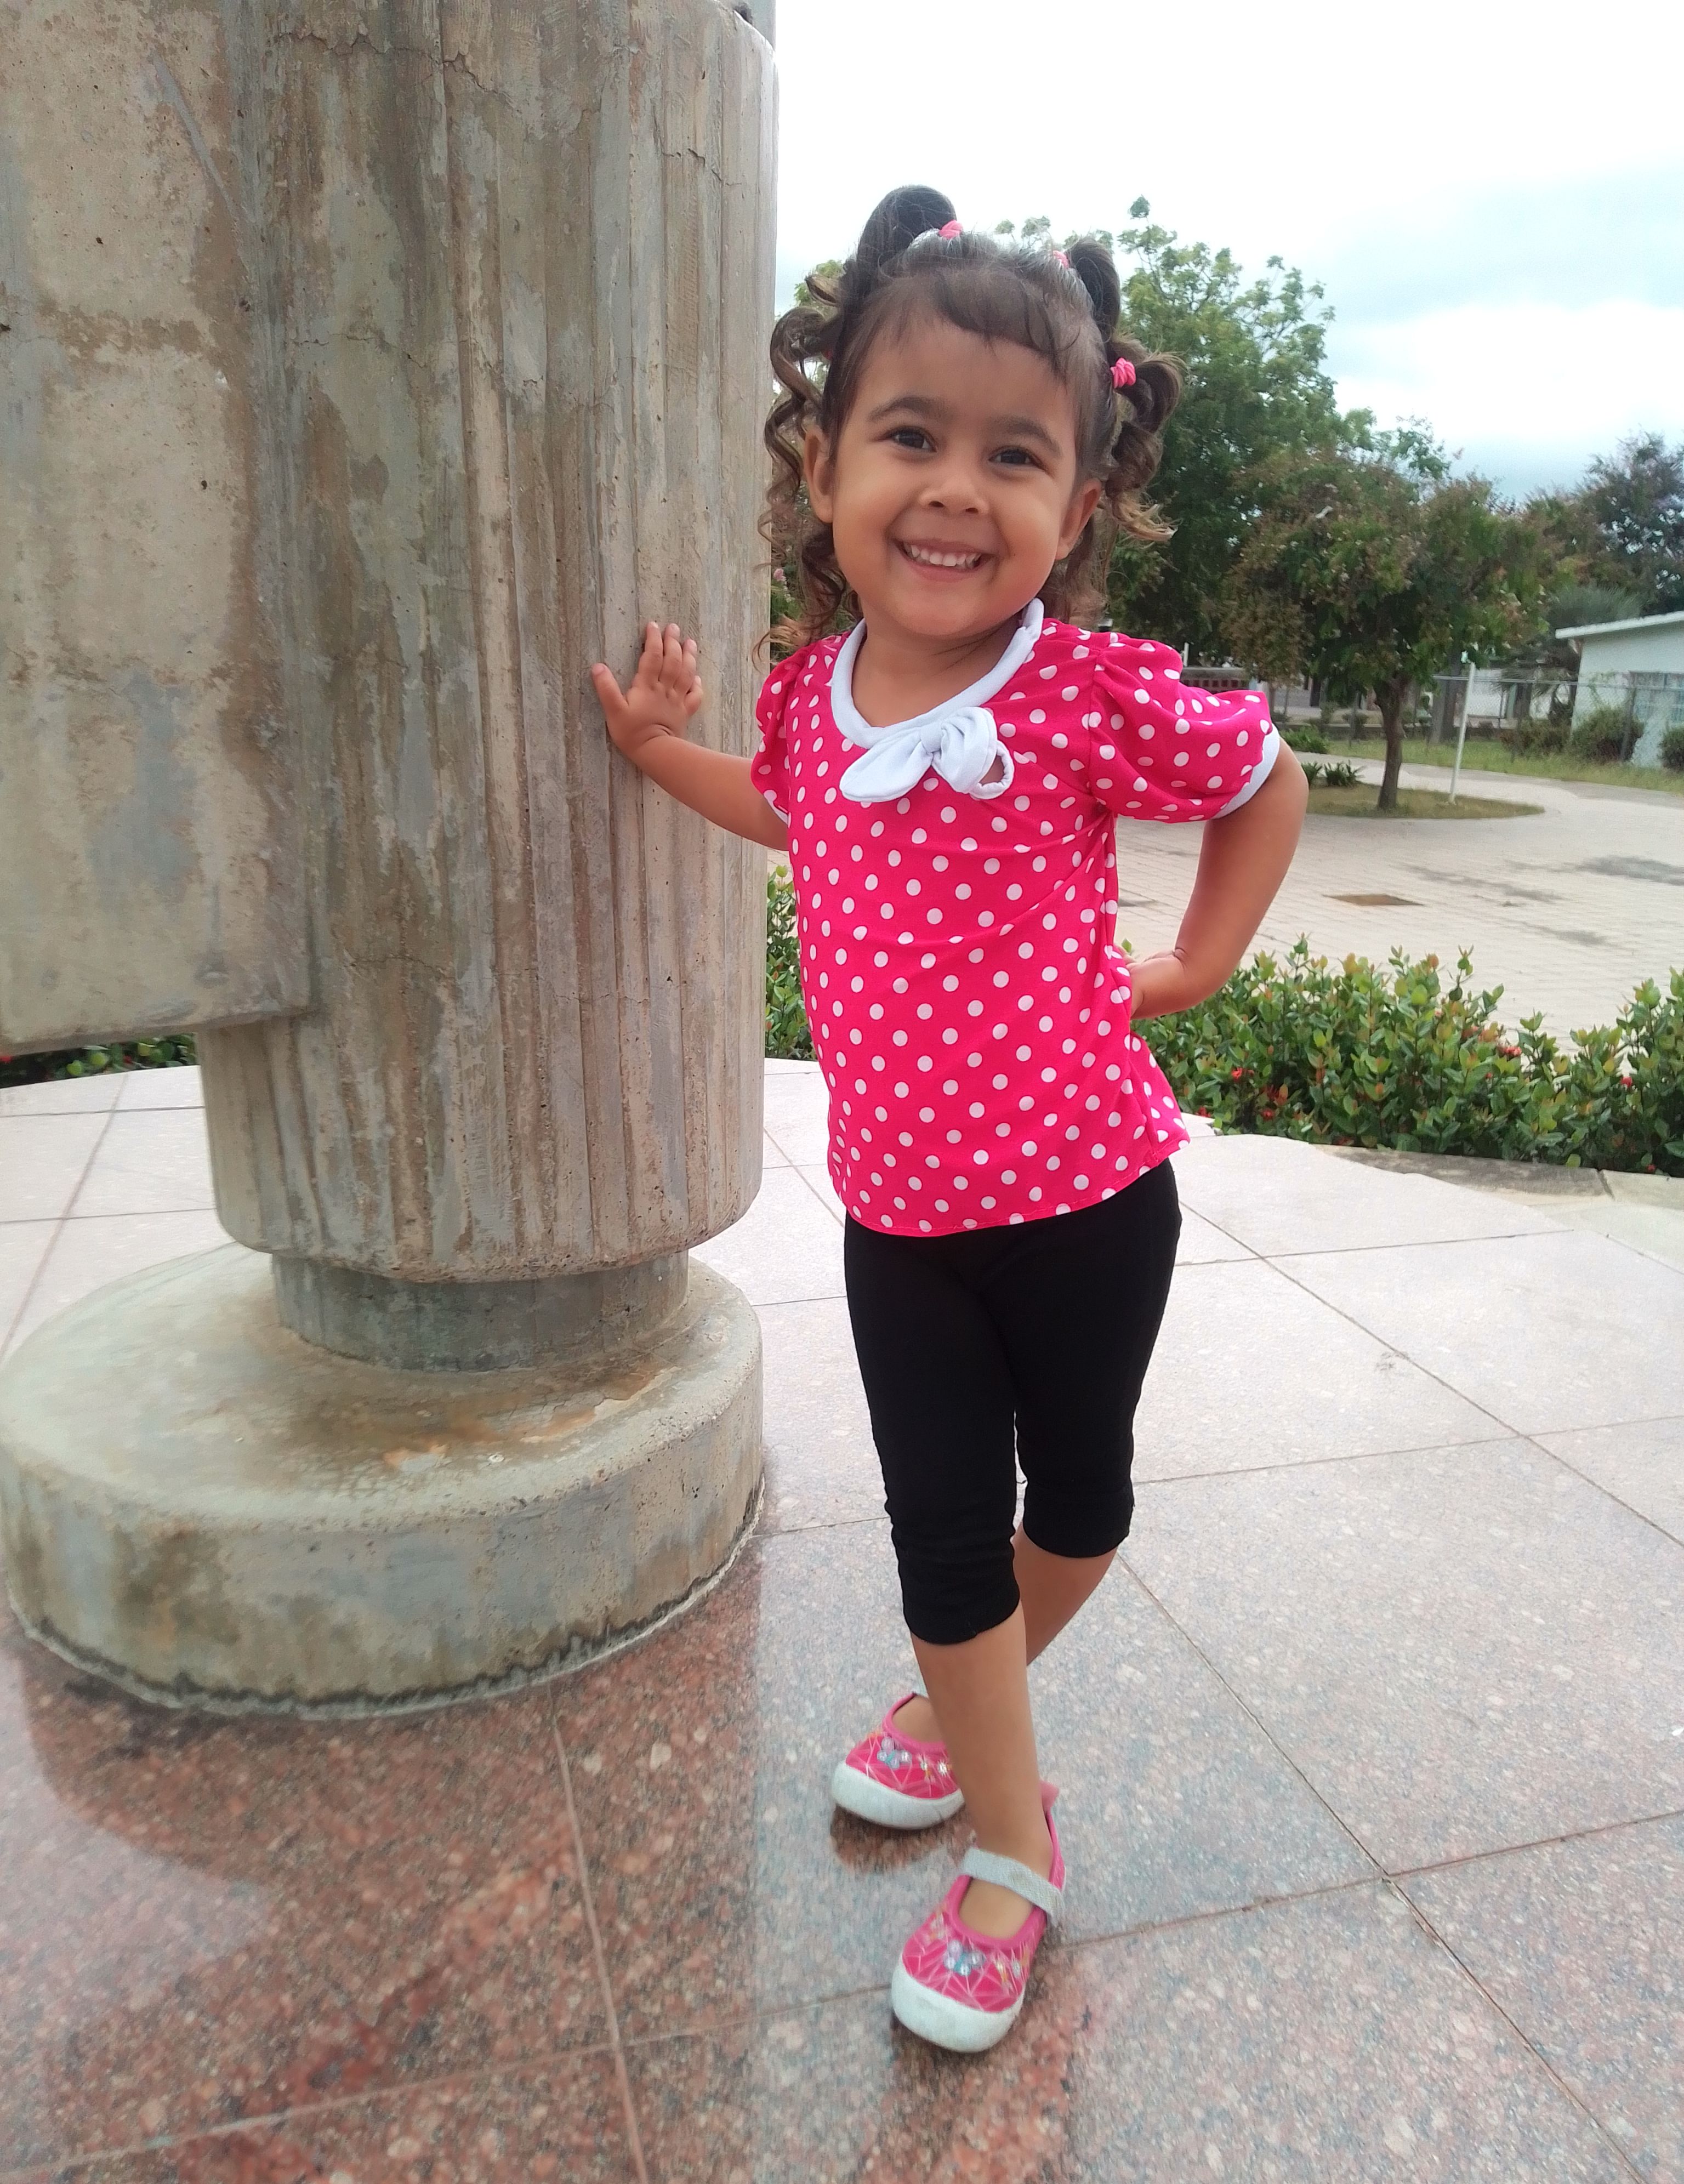
Hoy tengo el agrado de presentarles la creación de un bello diseño para niñas que una vez hice para mi pequeña princesa, se trata de una linda blusa elaborada en una estupenda e infantil tela fucsia de lunares blancos con mangas farol, además cuenta con una comoda abertura en la parte frontal y un bonito lazo como elemento decorativo, una pieza muy coqueta en realidad que trasmite mucha alegría y pureza. Acompáñame a ver su paso a paso y su llamativo resultado.
Today I am pleased to present to you the creation of a beautiful design for girls that once again, I made for my little princess, it is a beautiful blouse made in a wonderful and childish fuchsia fabric from White polka dots with lantern sleeves, it also has a comfortable opening on the front and a pretty bow as a decorative part, a very flirtatious piece that actually transmits a lot of joy and purity. Come with me to see its step by step and its striking result.
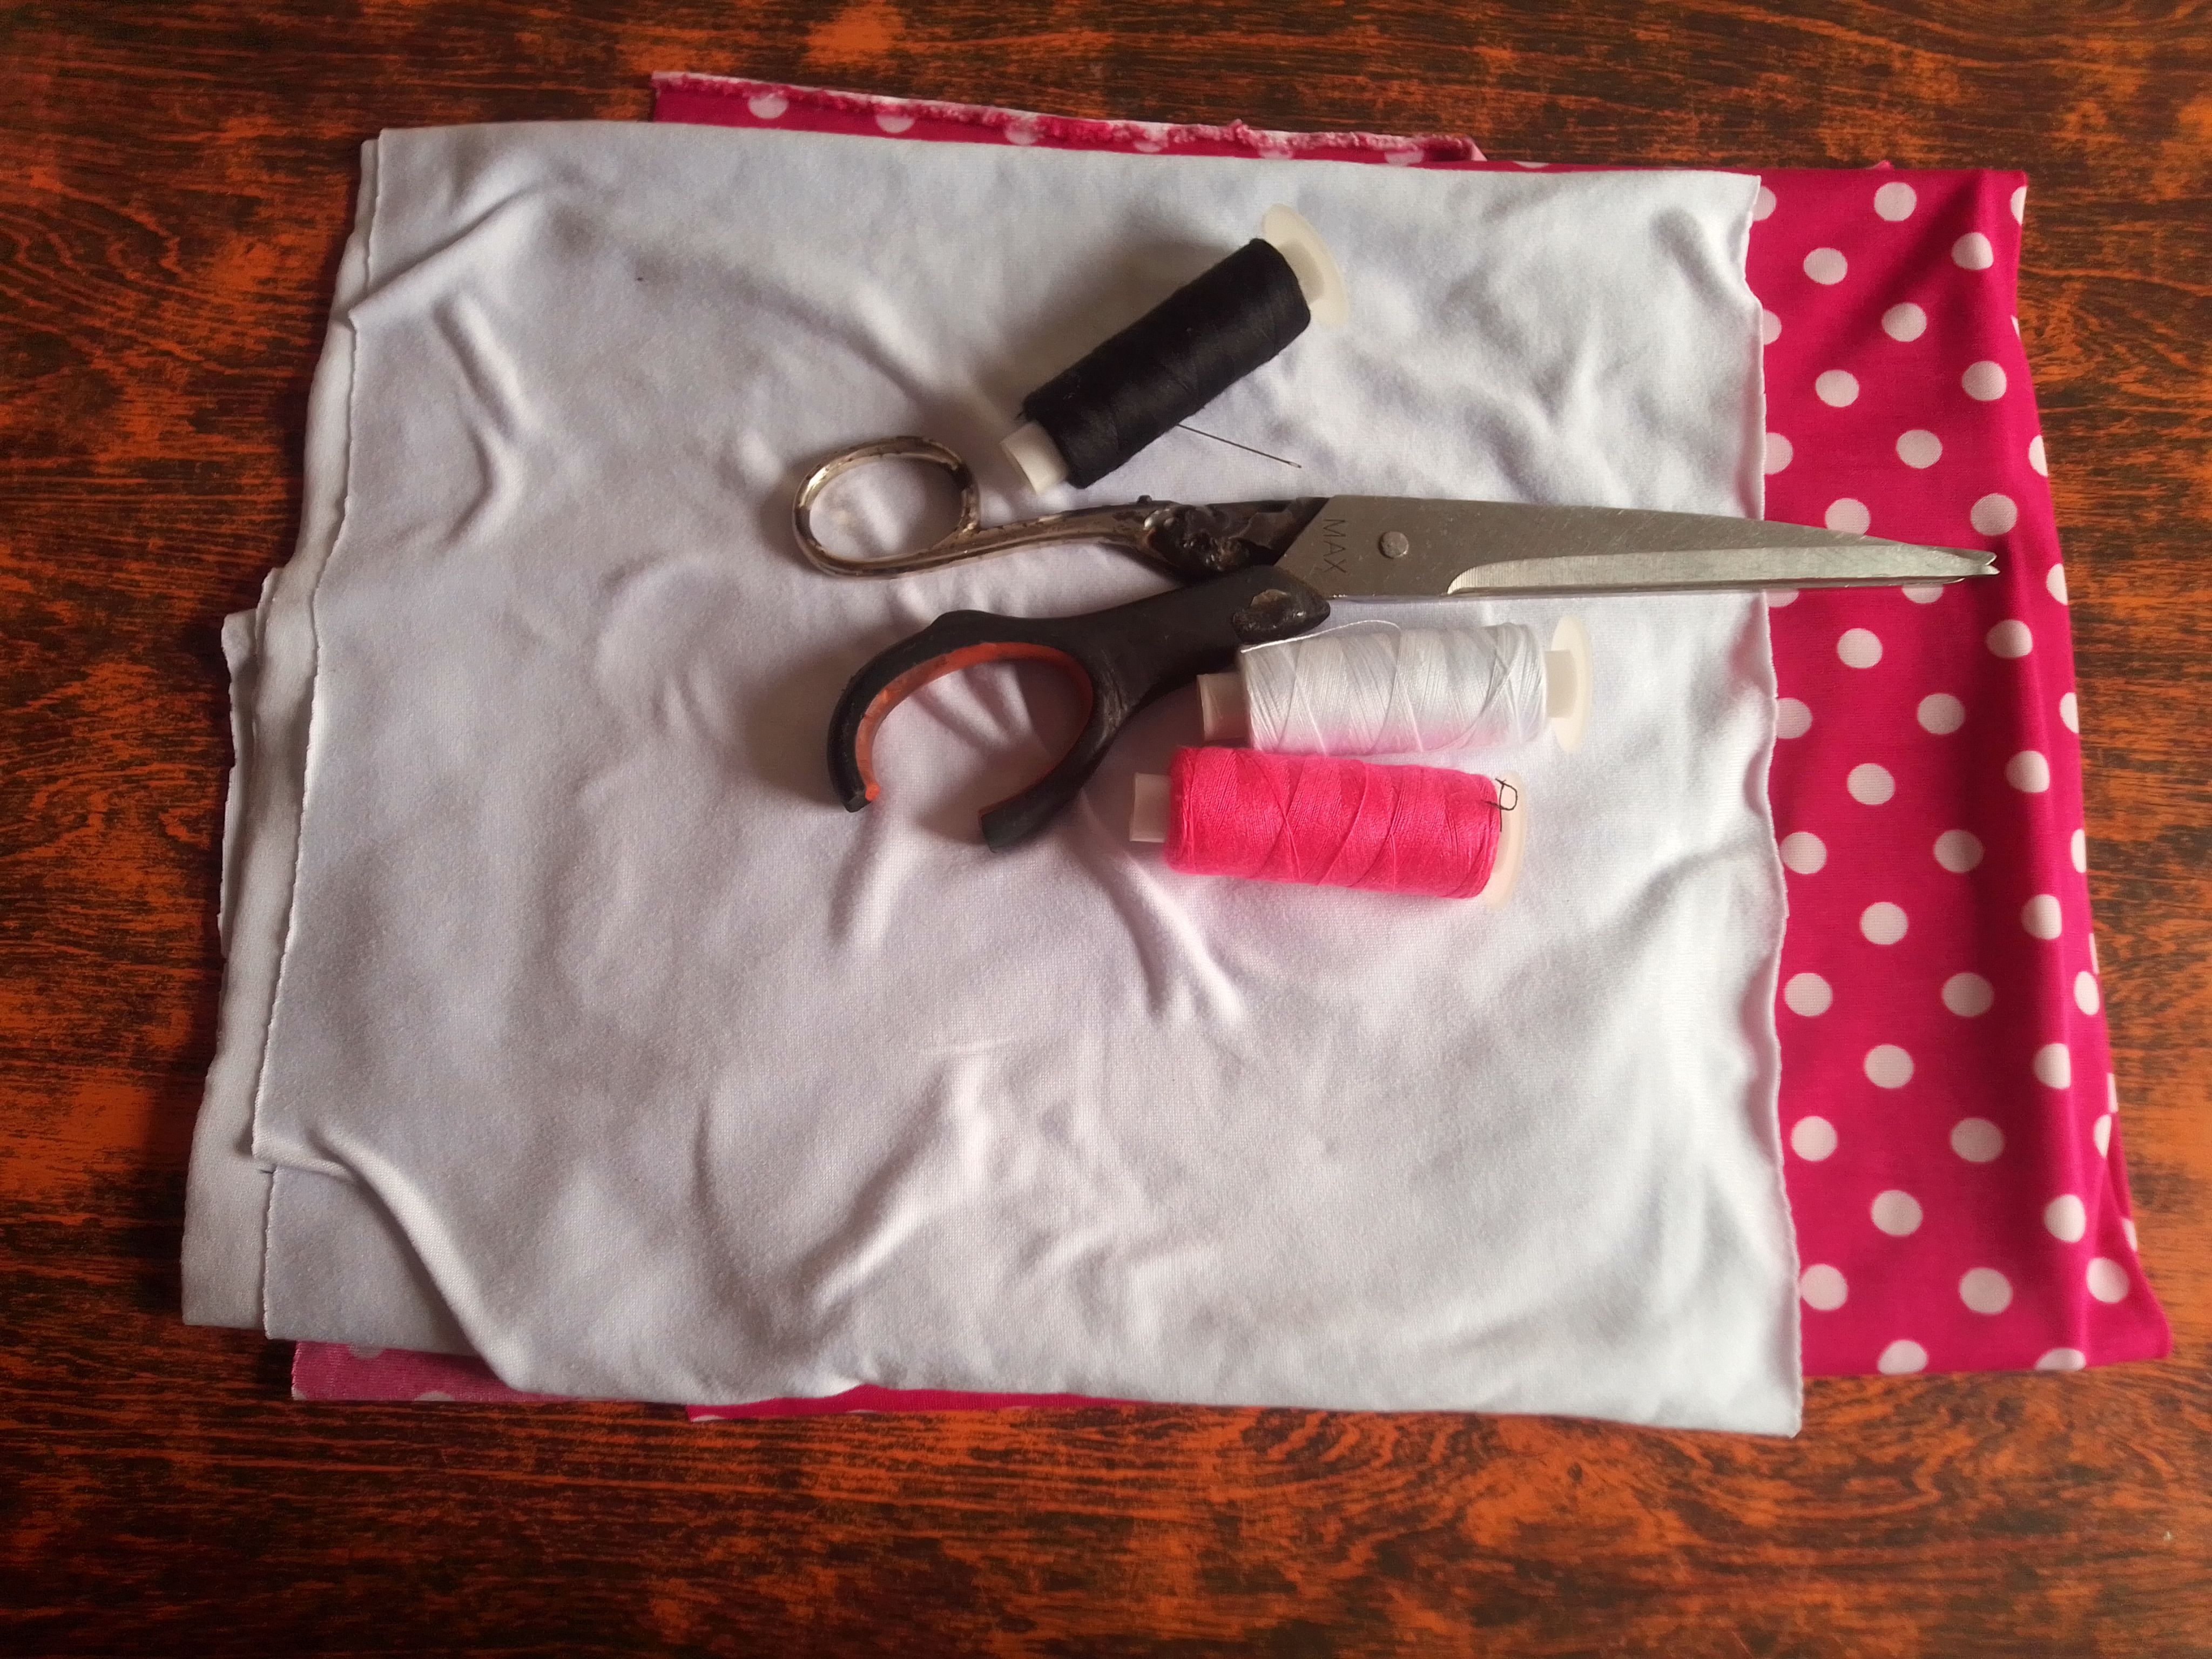
Materiales que necesitas:
Para esta confección utilicé tela Spandex, en un diseño muy popular de lunares, una tela muy cómoda y fácil de trabajar en este tipo de confeccion es, y para ropa de niñas, resulta ideal por su suavidad y su gran forma para adaptarse. Además necesitas otros materiales como:
- Tijeras.
- Hilo y aguja.
- Tela de algodón blanco (para combinar).
For this garment I used Spandex fabric, in a very popular polka dot design, a very comfortable and easy fabric to work with in this type of garment, and for girls' clothing, it is ideal for its softness and its great shape to fit. You also need other materials such as:
- Scissors.
- Thread and needle.
- White cotton fabric (to combine).
(PROCEDIMIENTO)
Paso 01
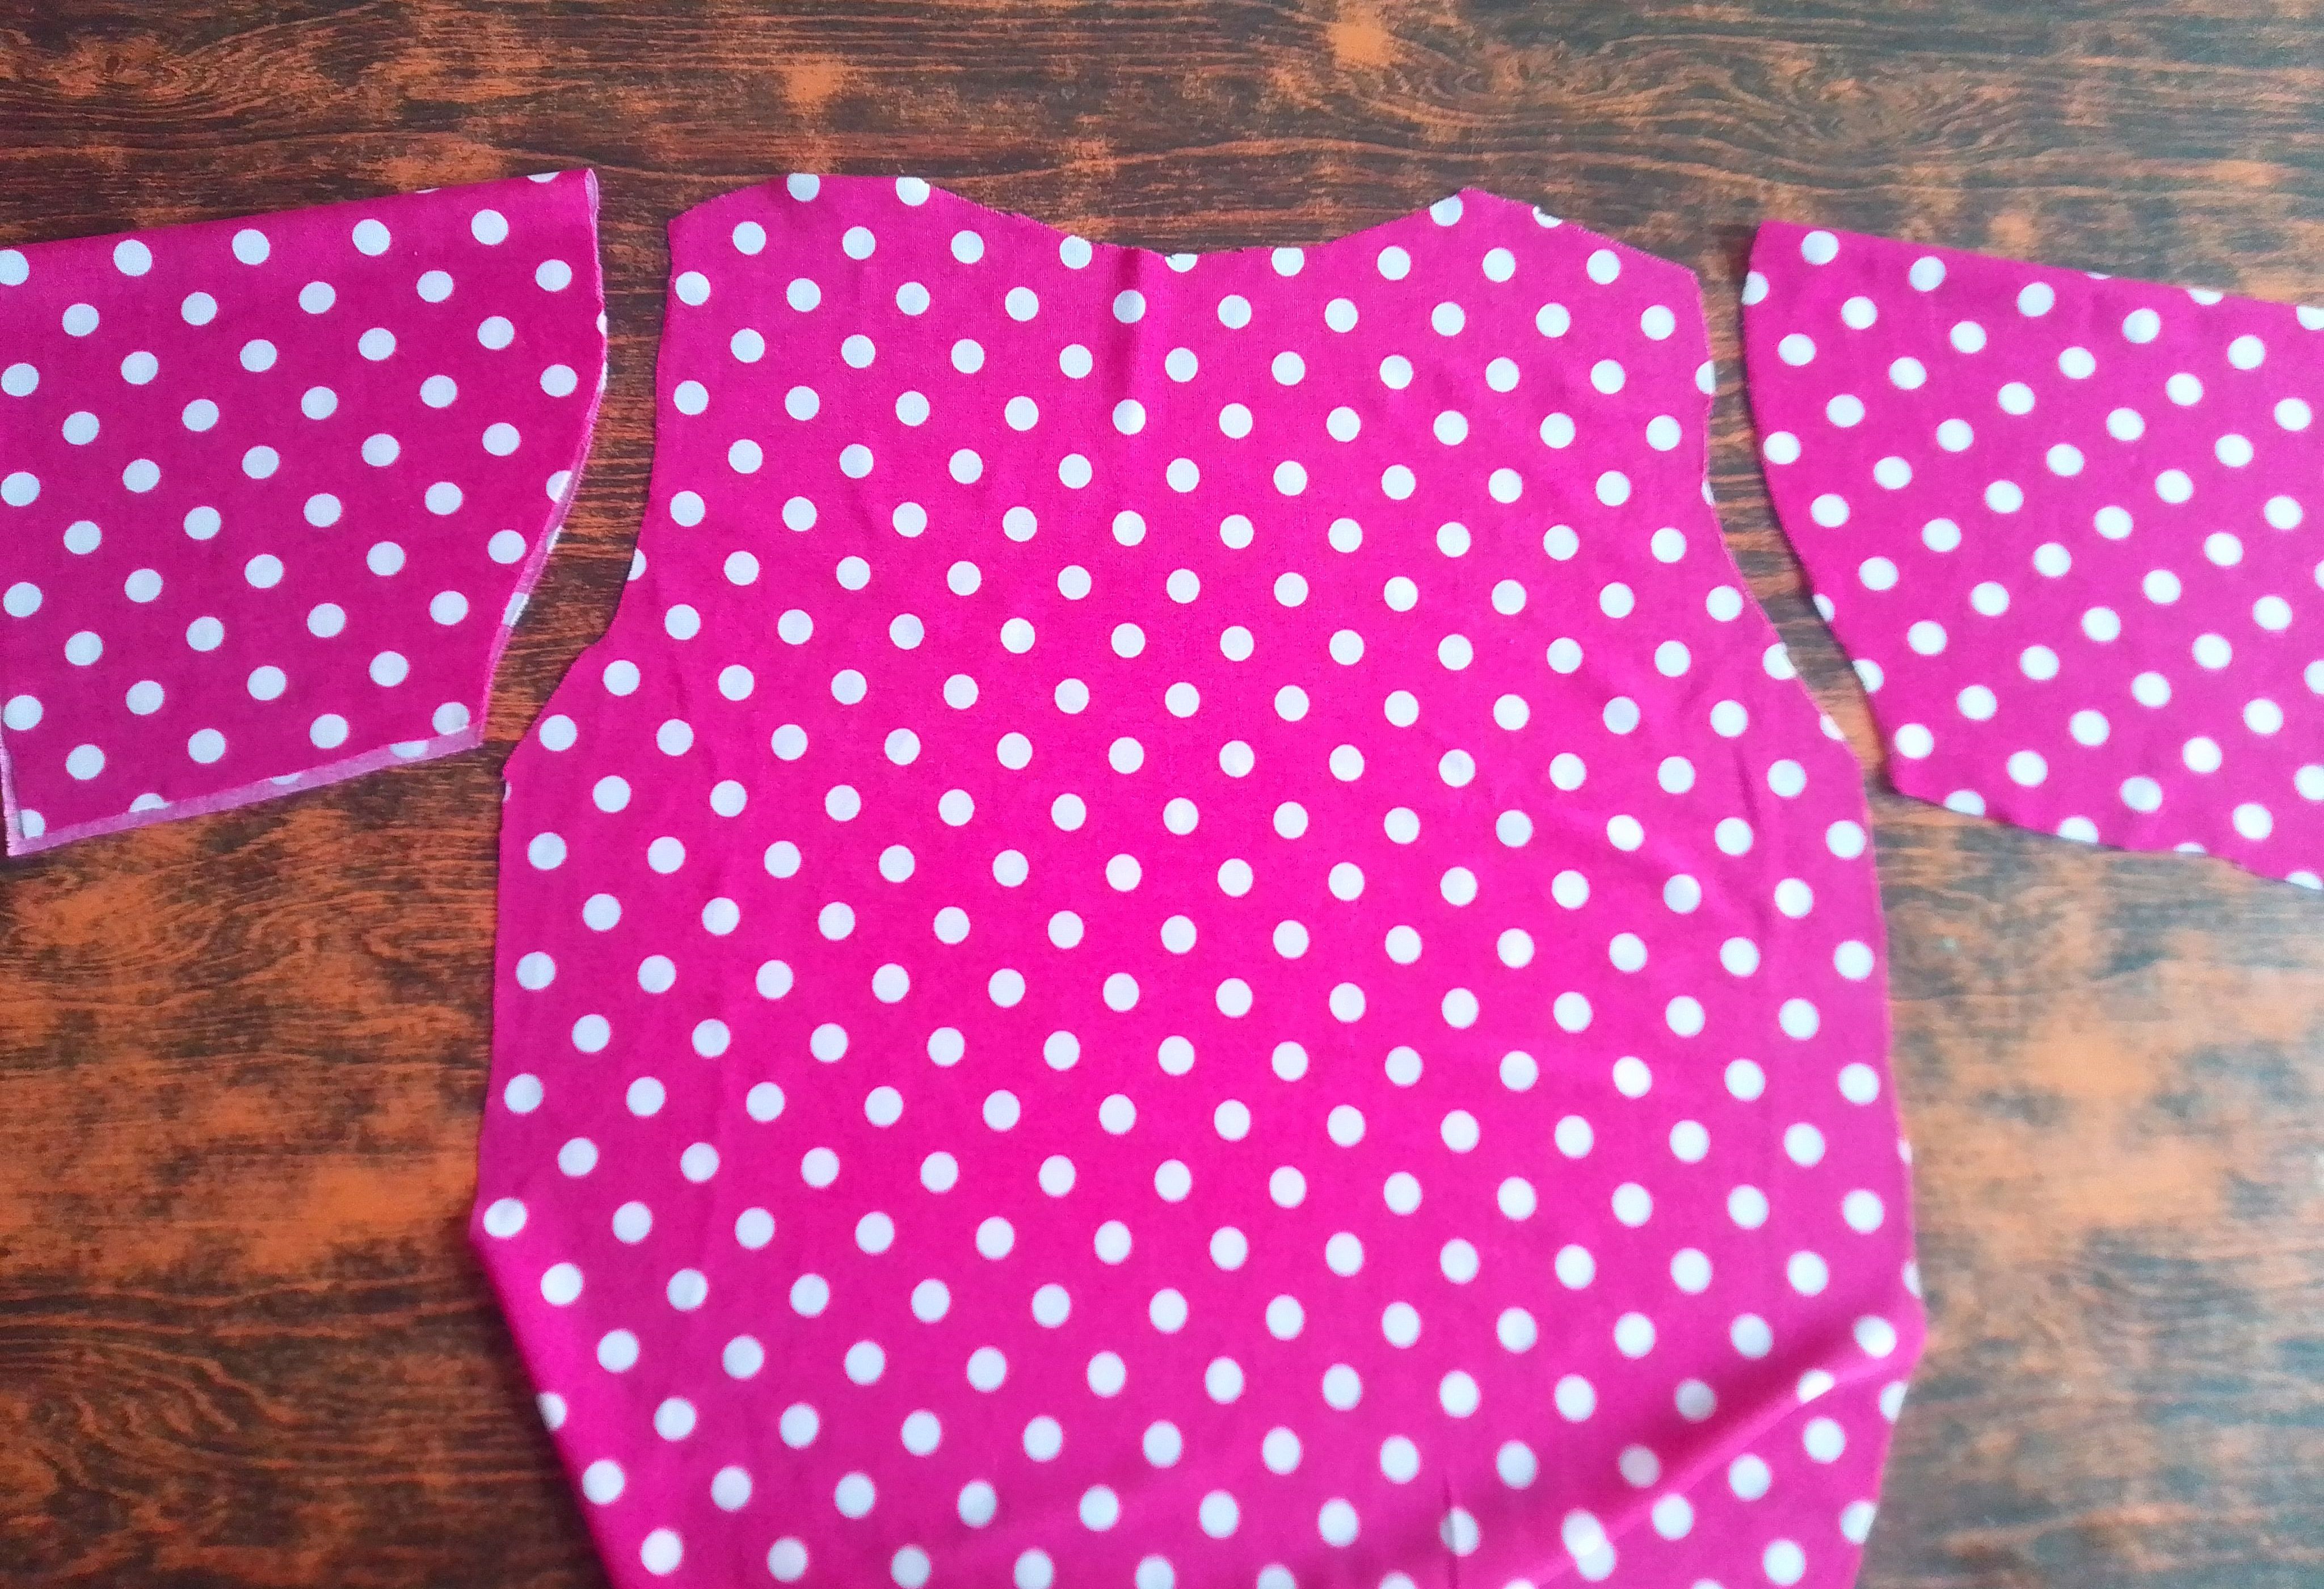
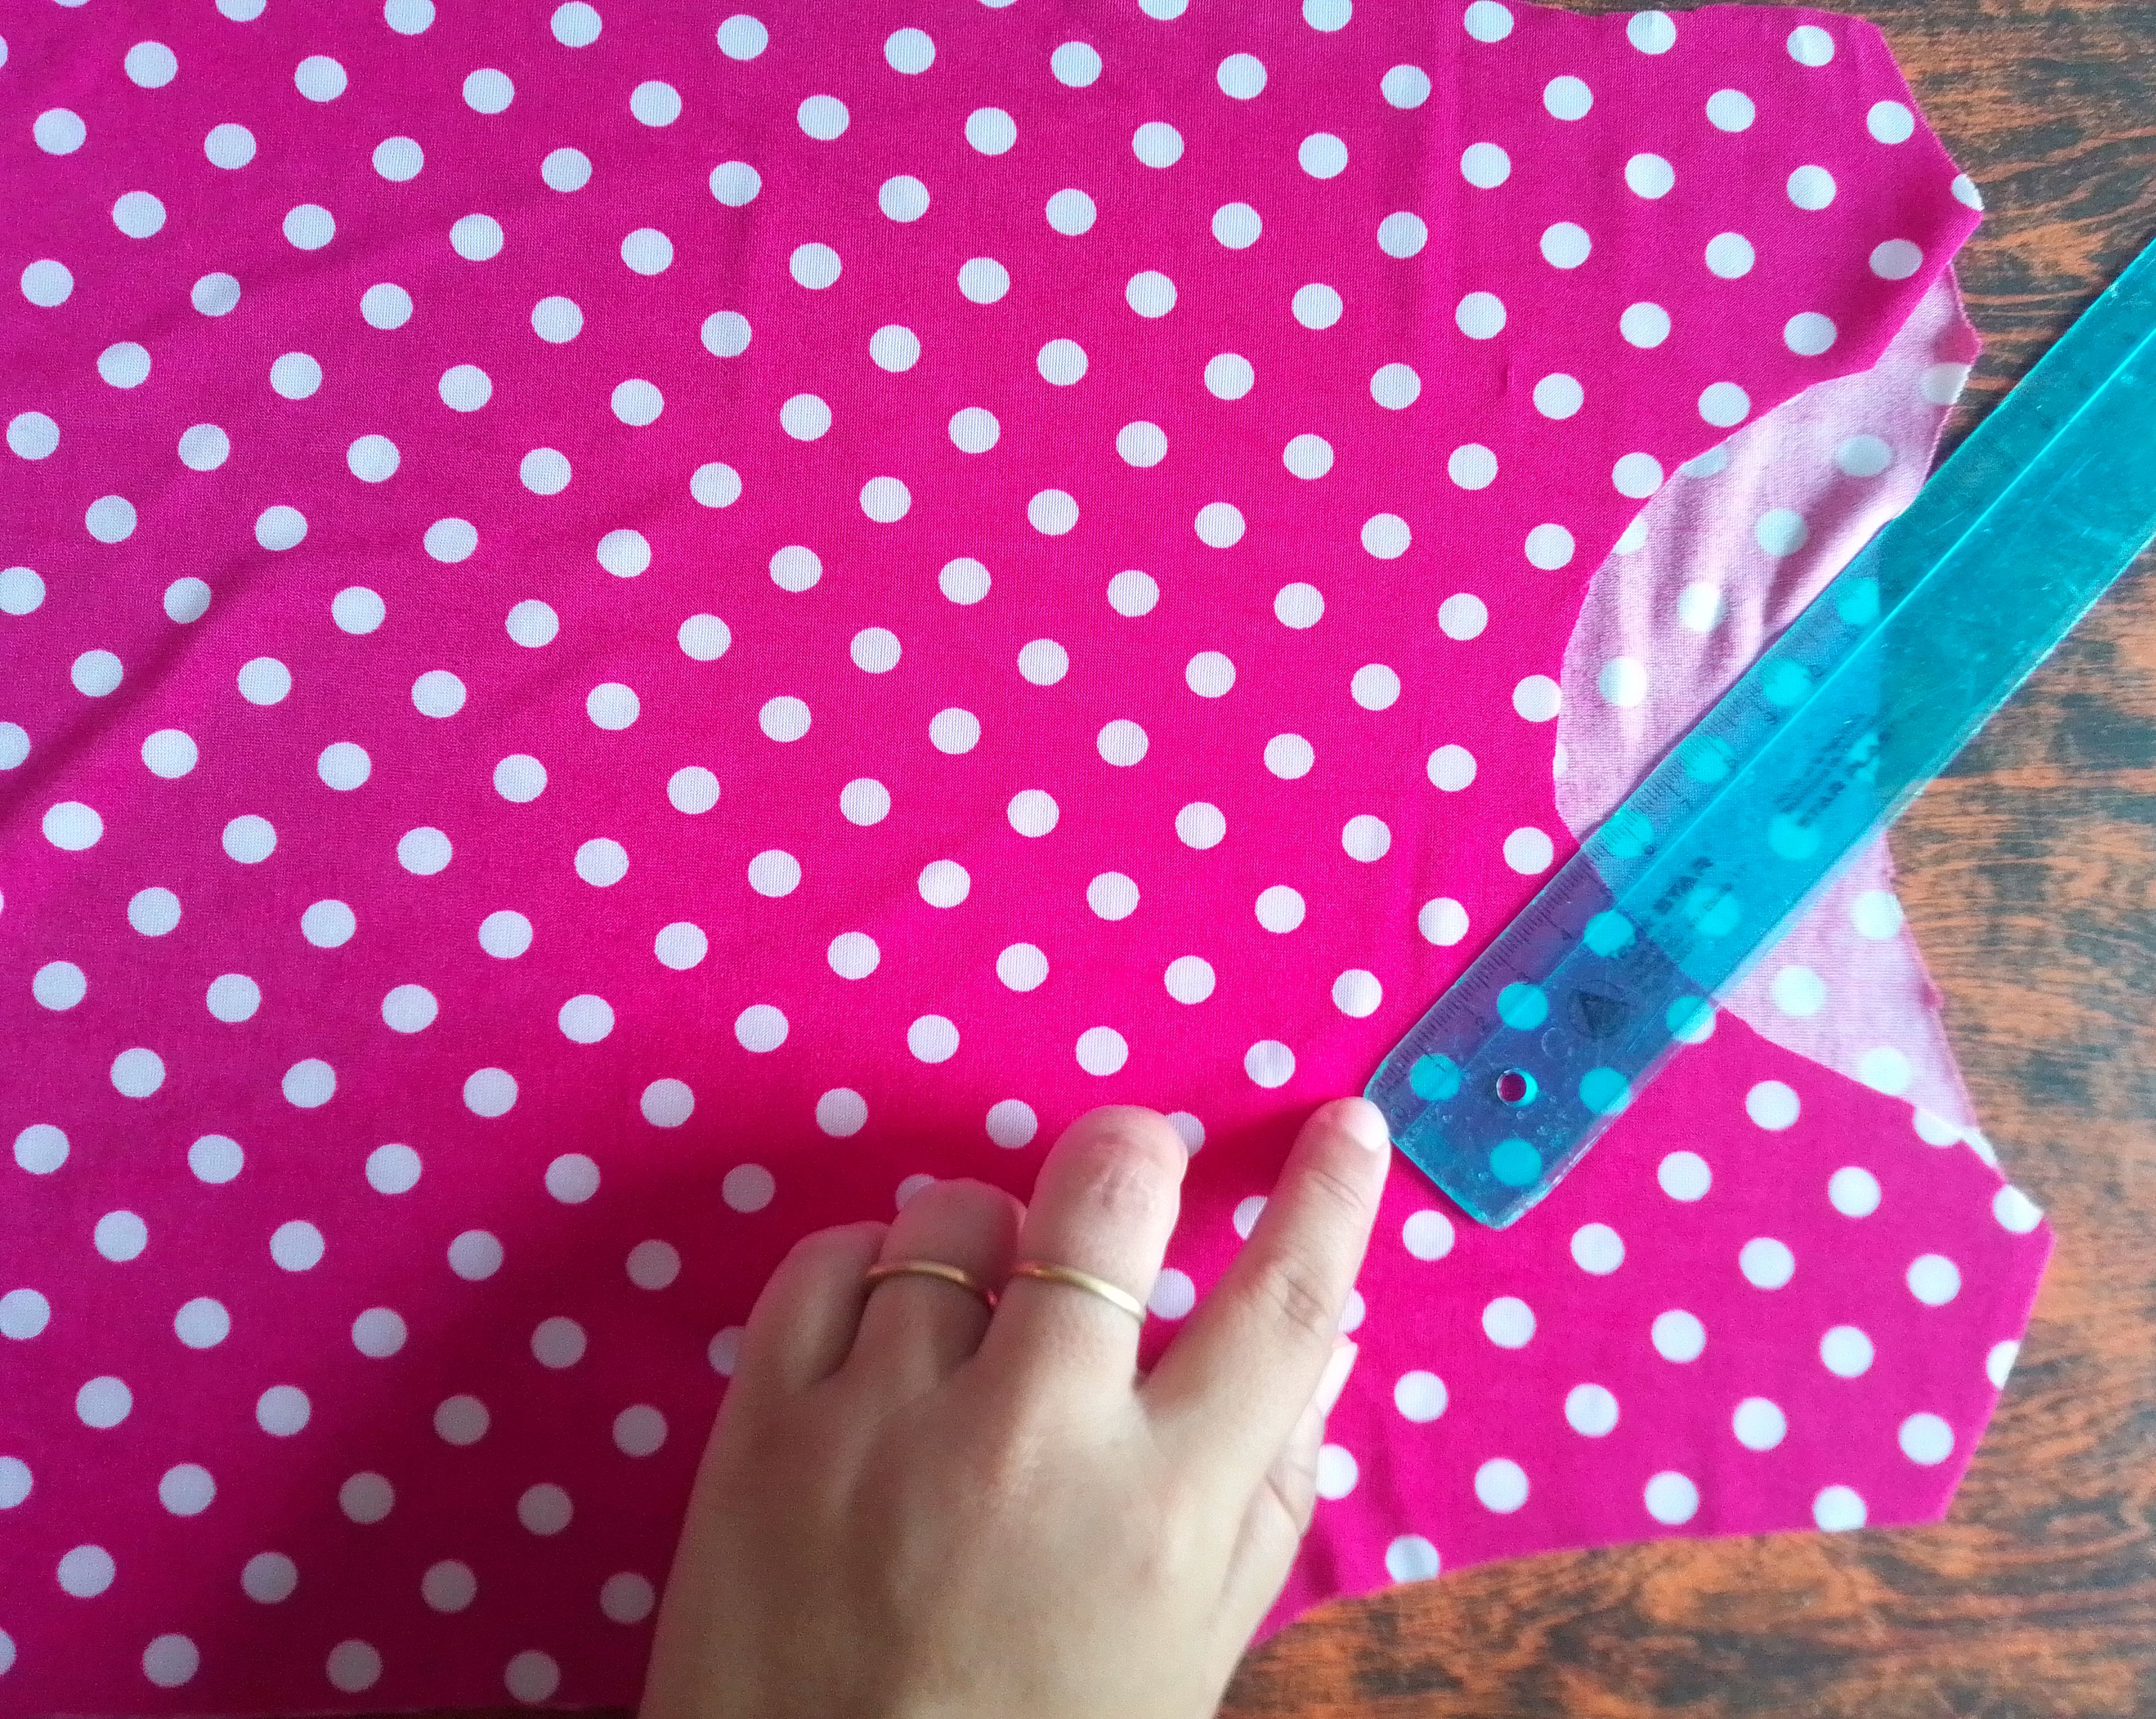
Habitualmente para iniciar los proyectos ubico una prenda de mi niña de su uso para los moldes y los patrones, tratando de obtener una pieza acordé a su tamaño. Así que la coloco sobre la tela doblada y corto los bordes de manera que consiga tener las dos partes principales de la blusa como lo es la parte delantera y la trasera. Luego ubico la zona de los brazos para tener la forma y taño de las manga, en esta ocasión tienen unos centímetros más de largo por el tipo de mangas que le hice.
Step 01
Usually to start the projects I locate a garment of my girl's use for the molds and patterns, trying to obtain a piece according to her size. So I place it on the folded fabric and cut the edges so that I get the two main parts of the blouse as the front and the back. Then I locate the area of the arms to have the shape and size of the sleeves, this time they are a few centimeters longer due to the type of sleeves I made.
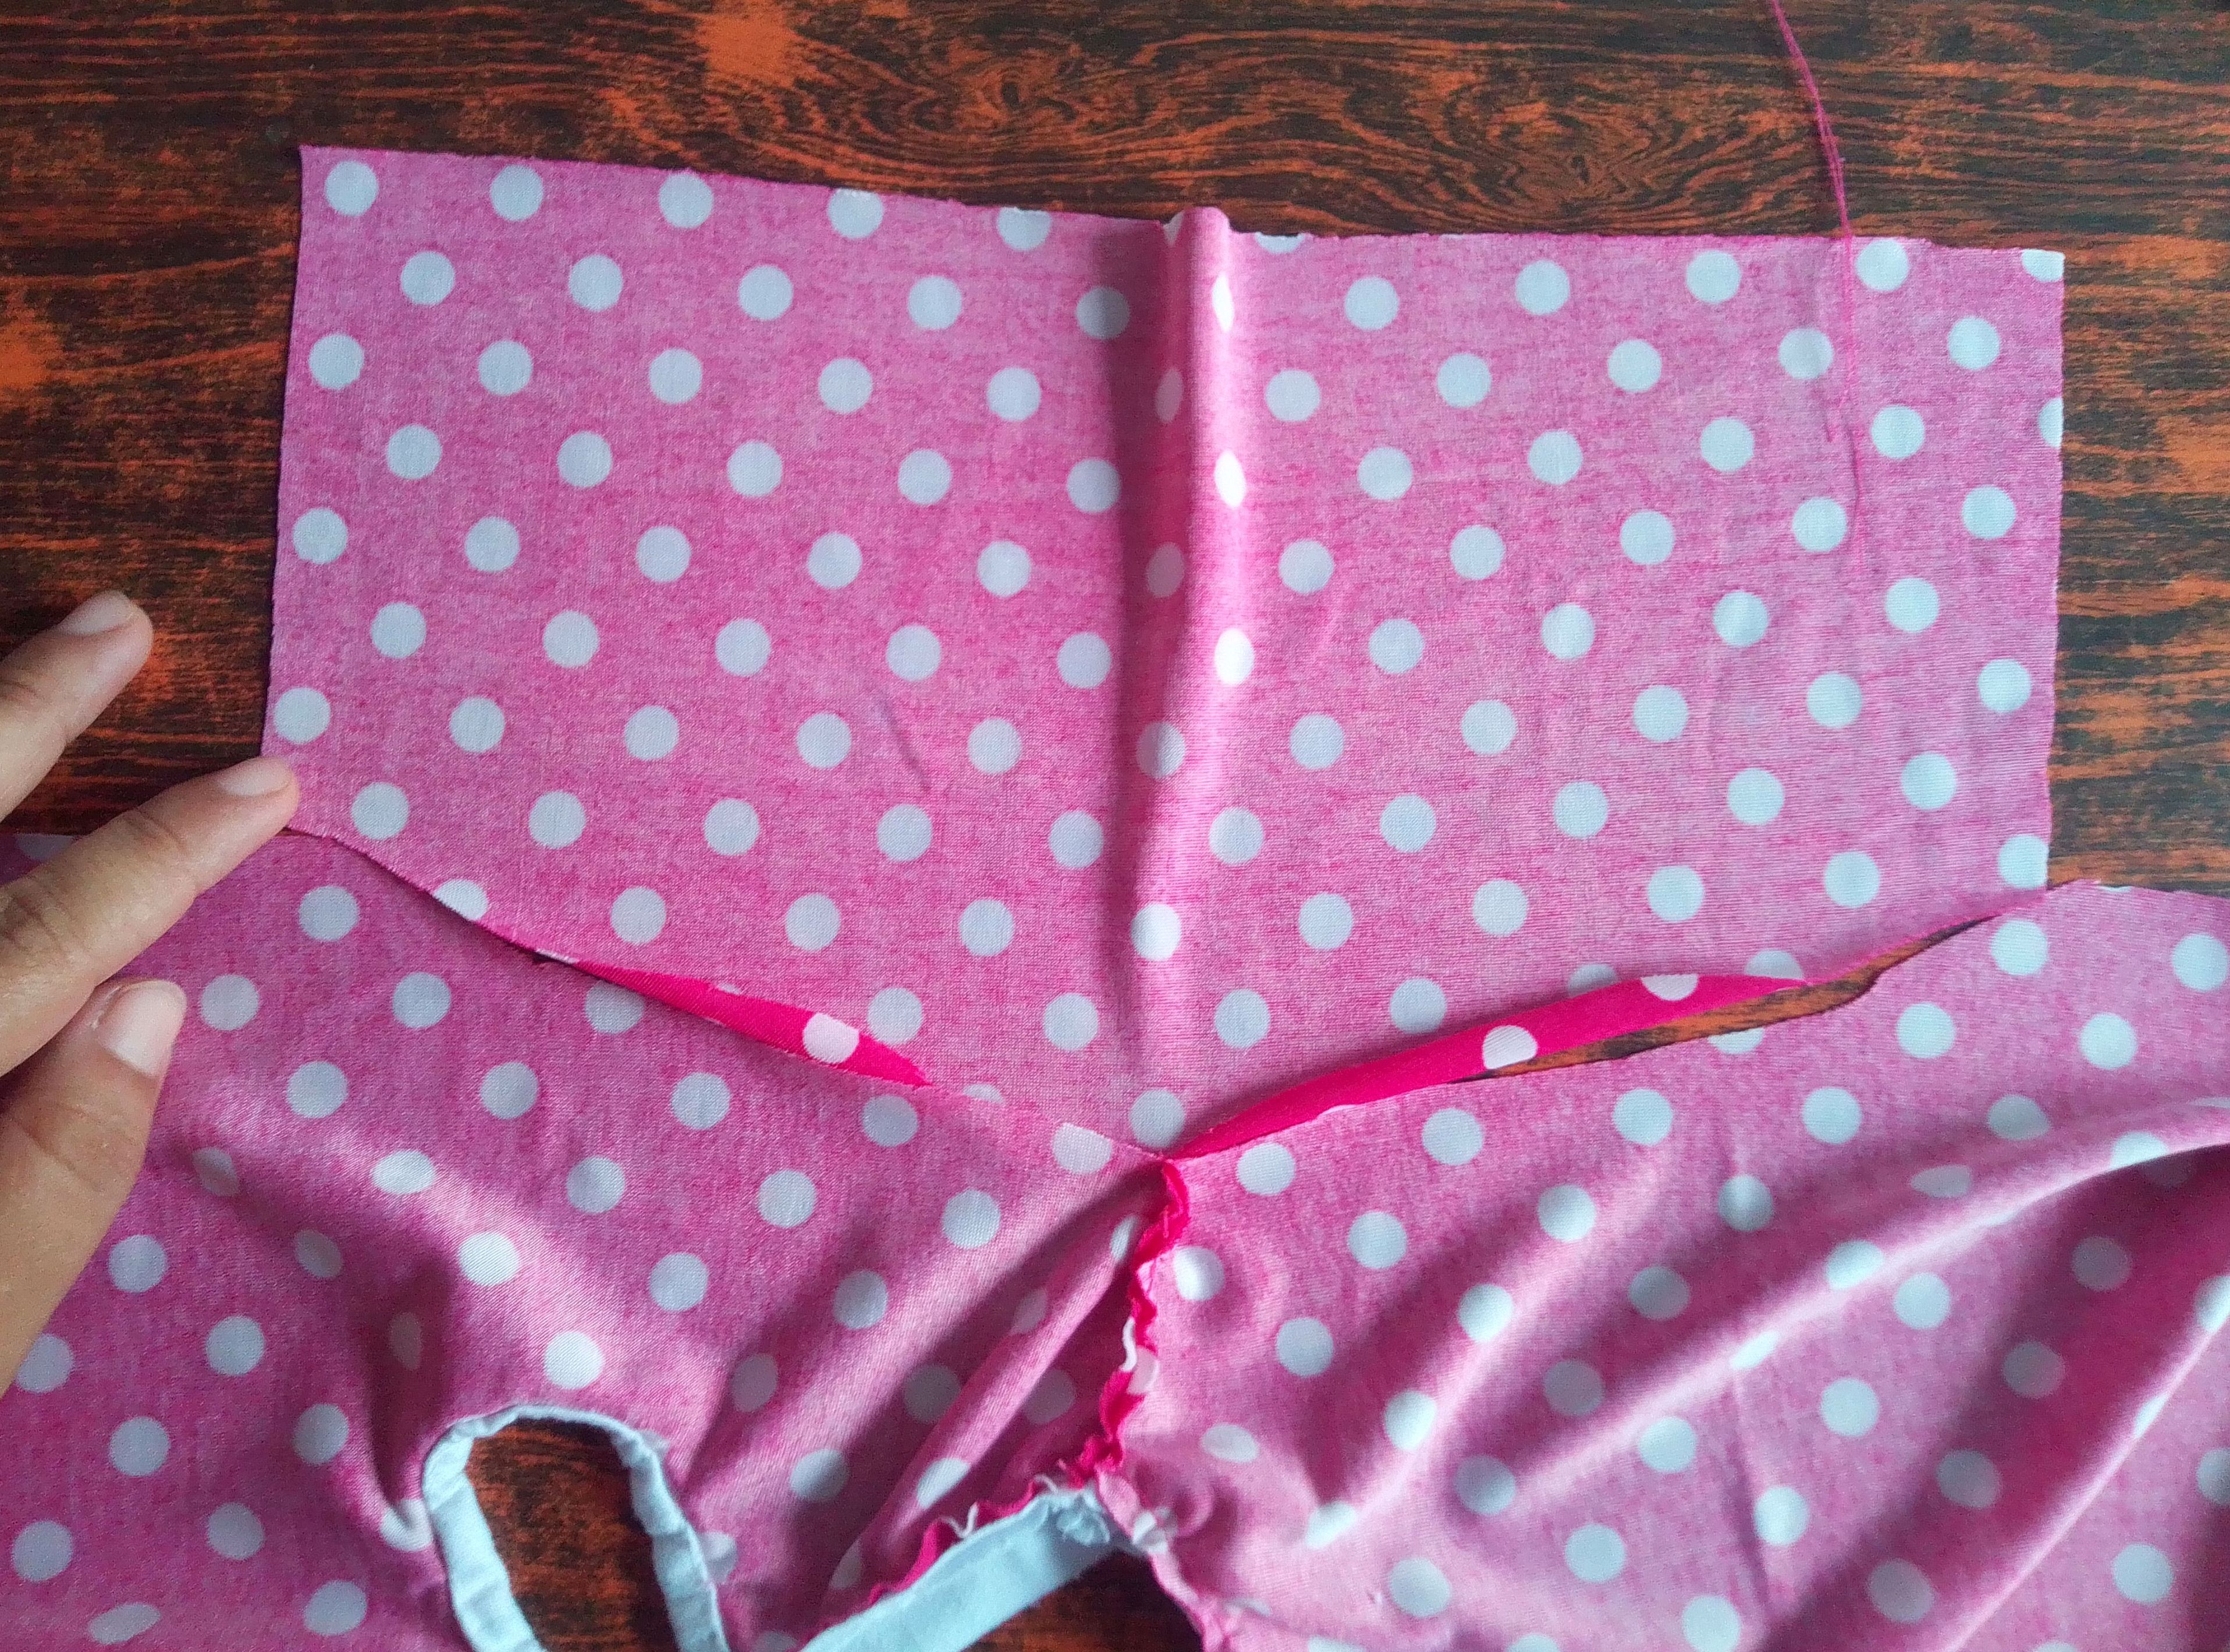
Paso 02
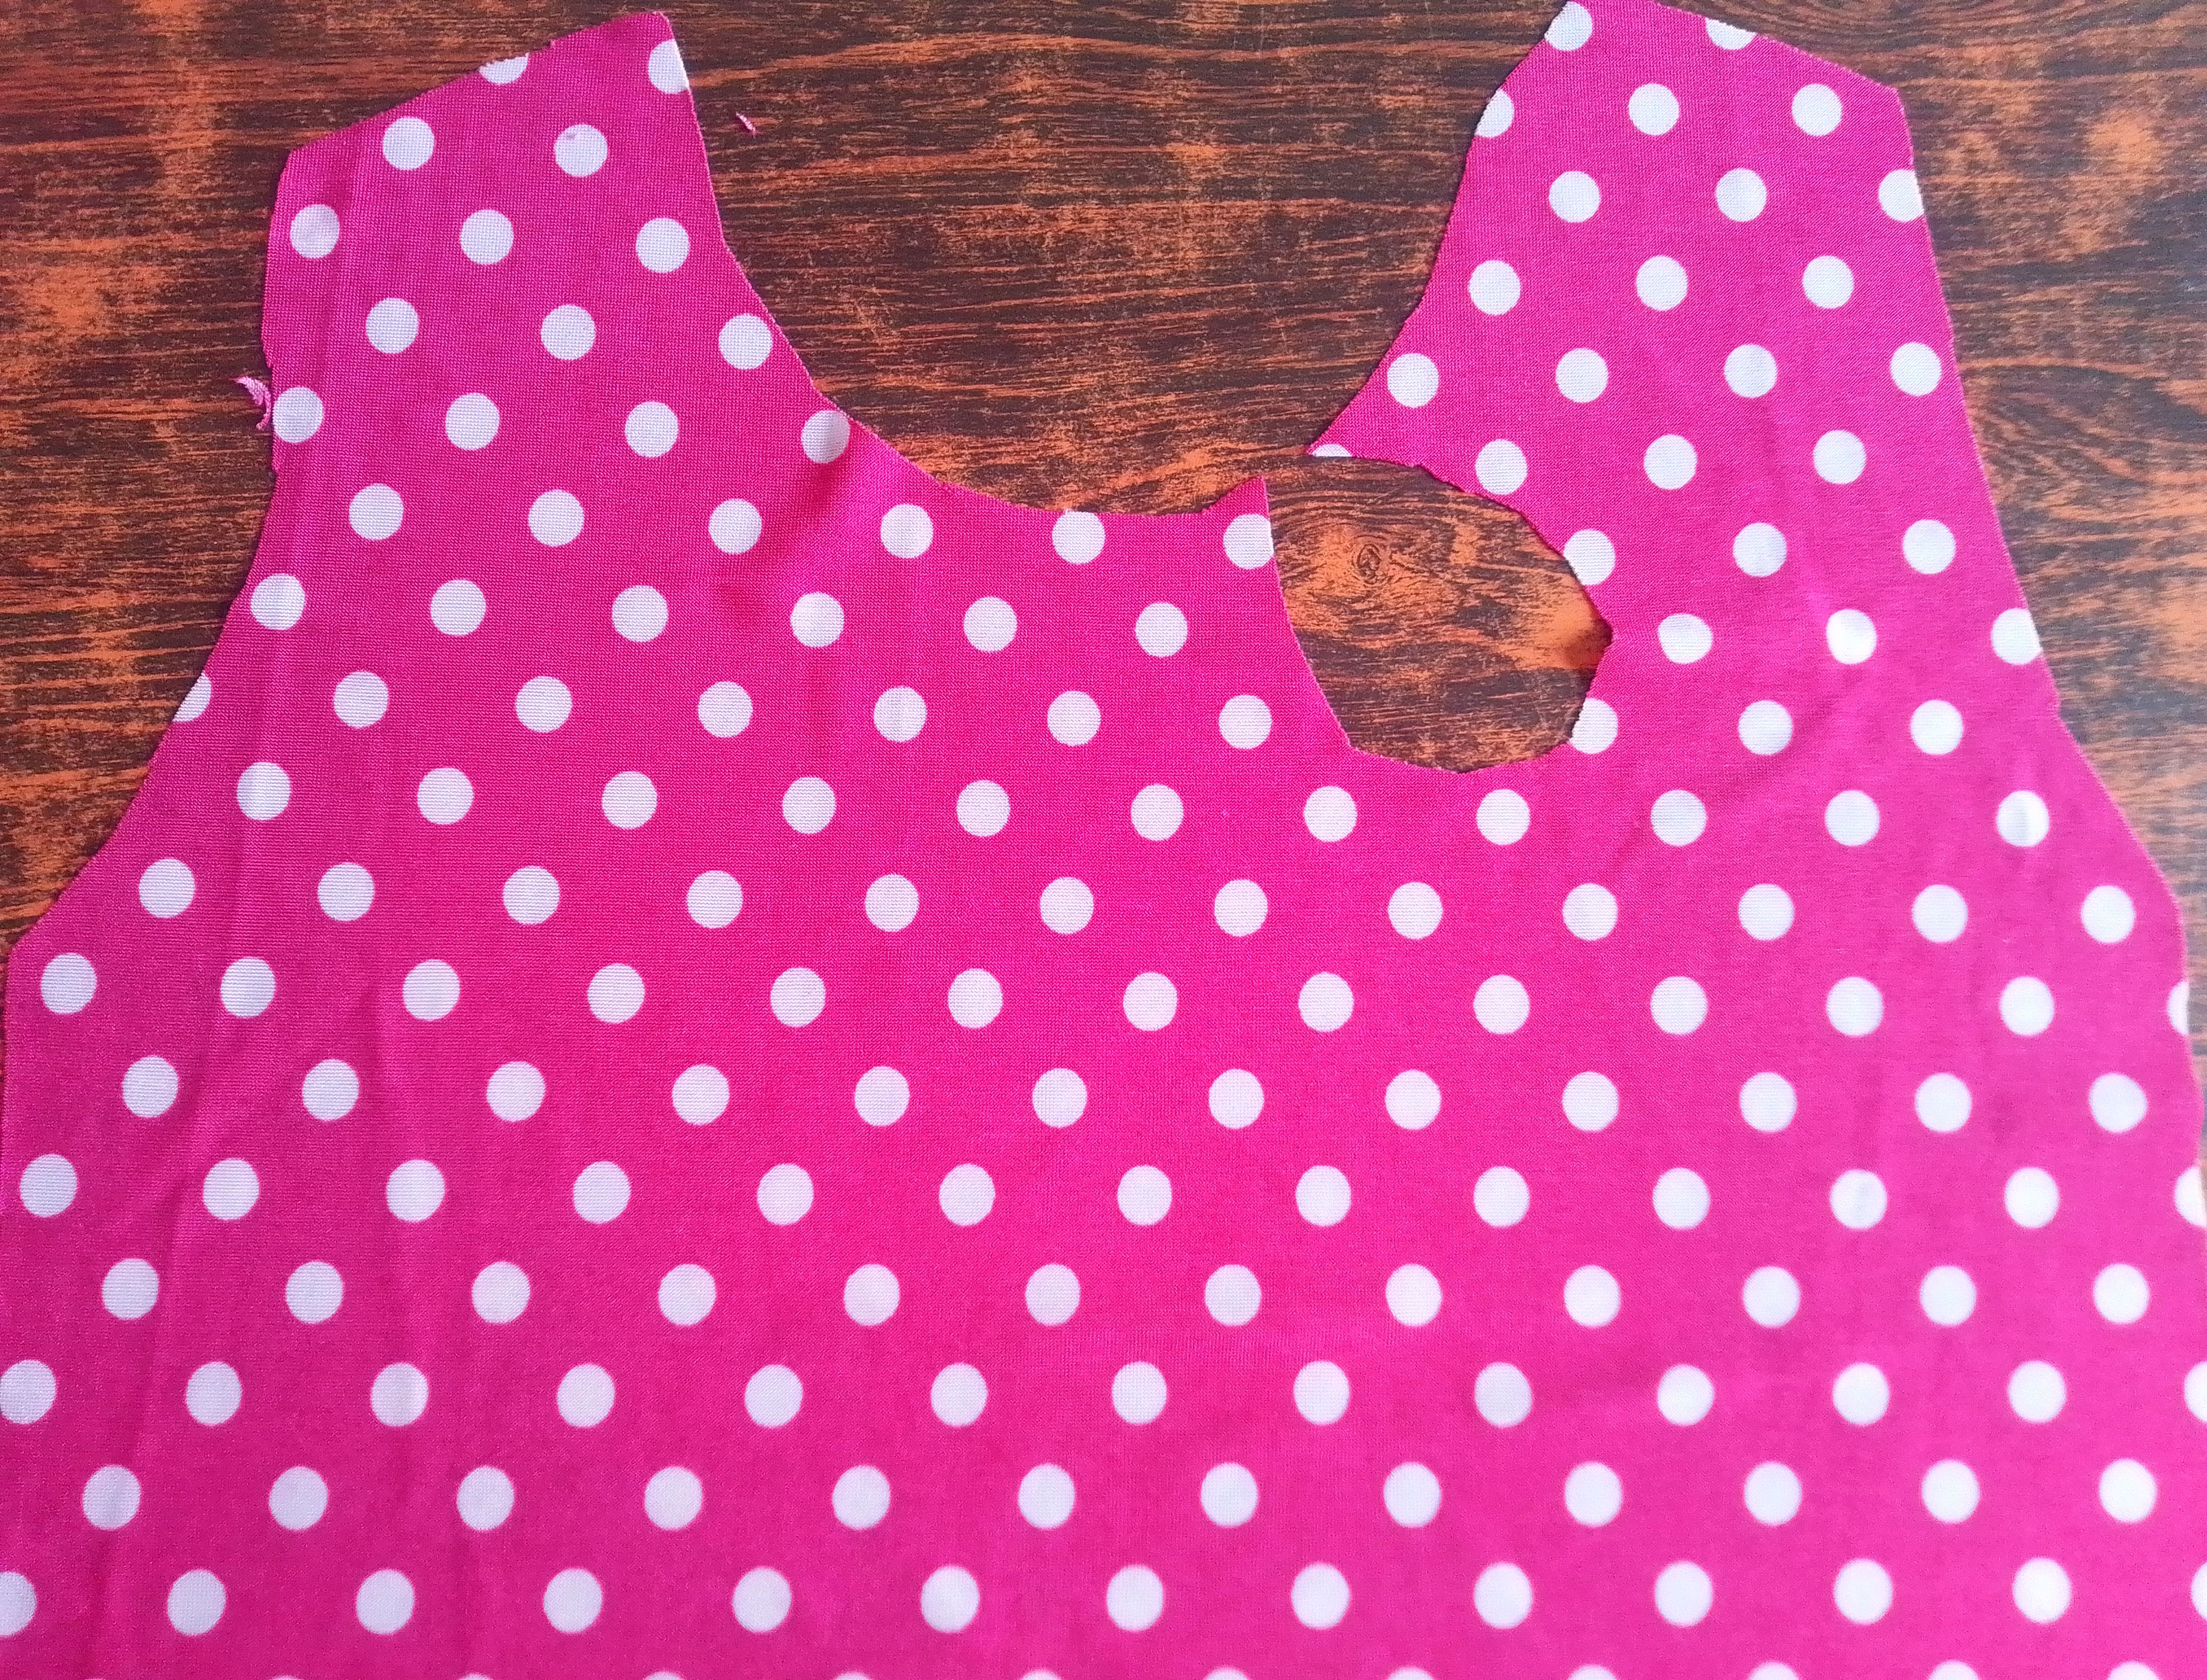
Paso a cortar en forma semicircular la forma del cuello de la blusa. A un lado de este corte ubico 4cm hacia la parte baja y realizo un corte en círculo para el escote de la blusita. Hecho esto corto una tira de tela de algodón de 2cm de ancho en color blanco y la coso alrededor de este corte, doblo para hacer un sesgo y reforzar este detalle.
Step 02
I'm going to cut out the shape of the neck of the blouse in a semicircular shape. On one side of this cut I place 4cm down and make a circular cut for the neckline of the blouse. Once this is done, I cut a strip of cotton fabric 2 cm wide in white and sew it around this cut, I fold it to make a bias bias and reinforce this detail.
Paso 03
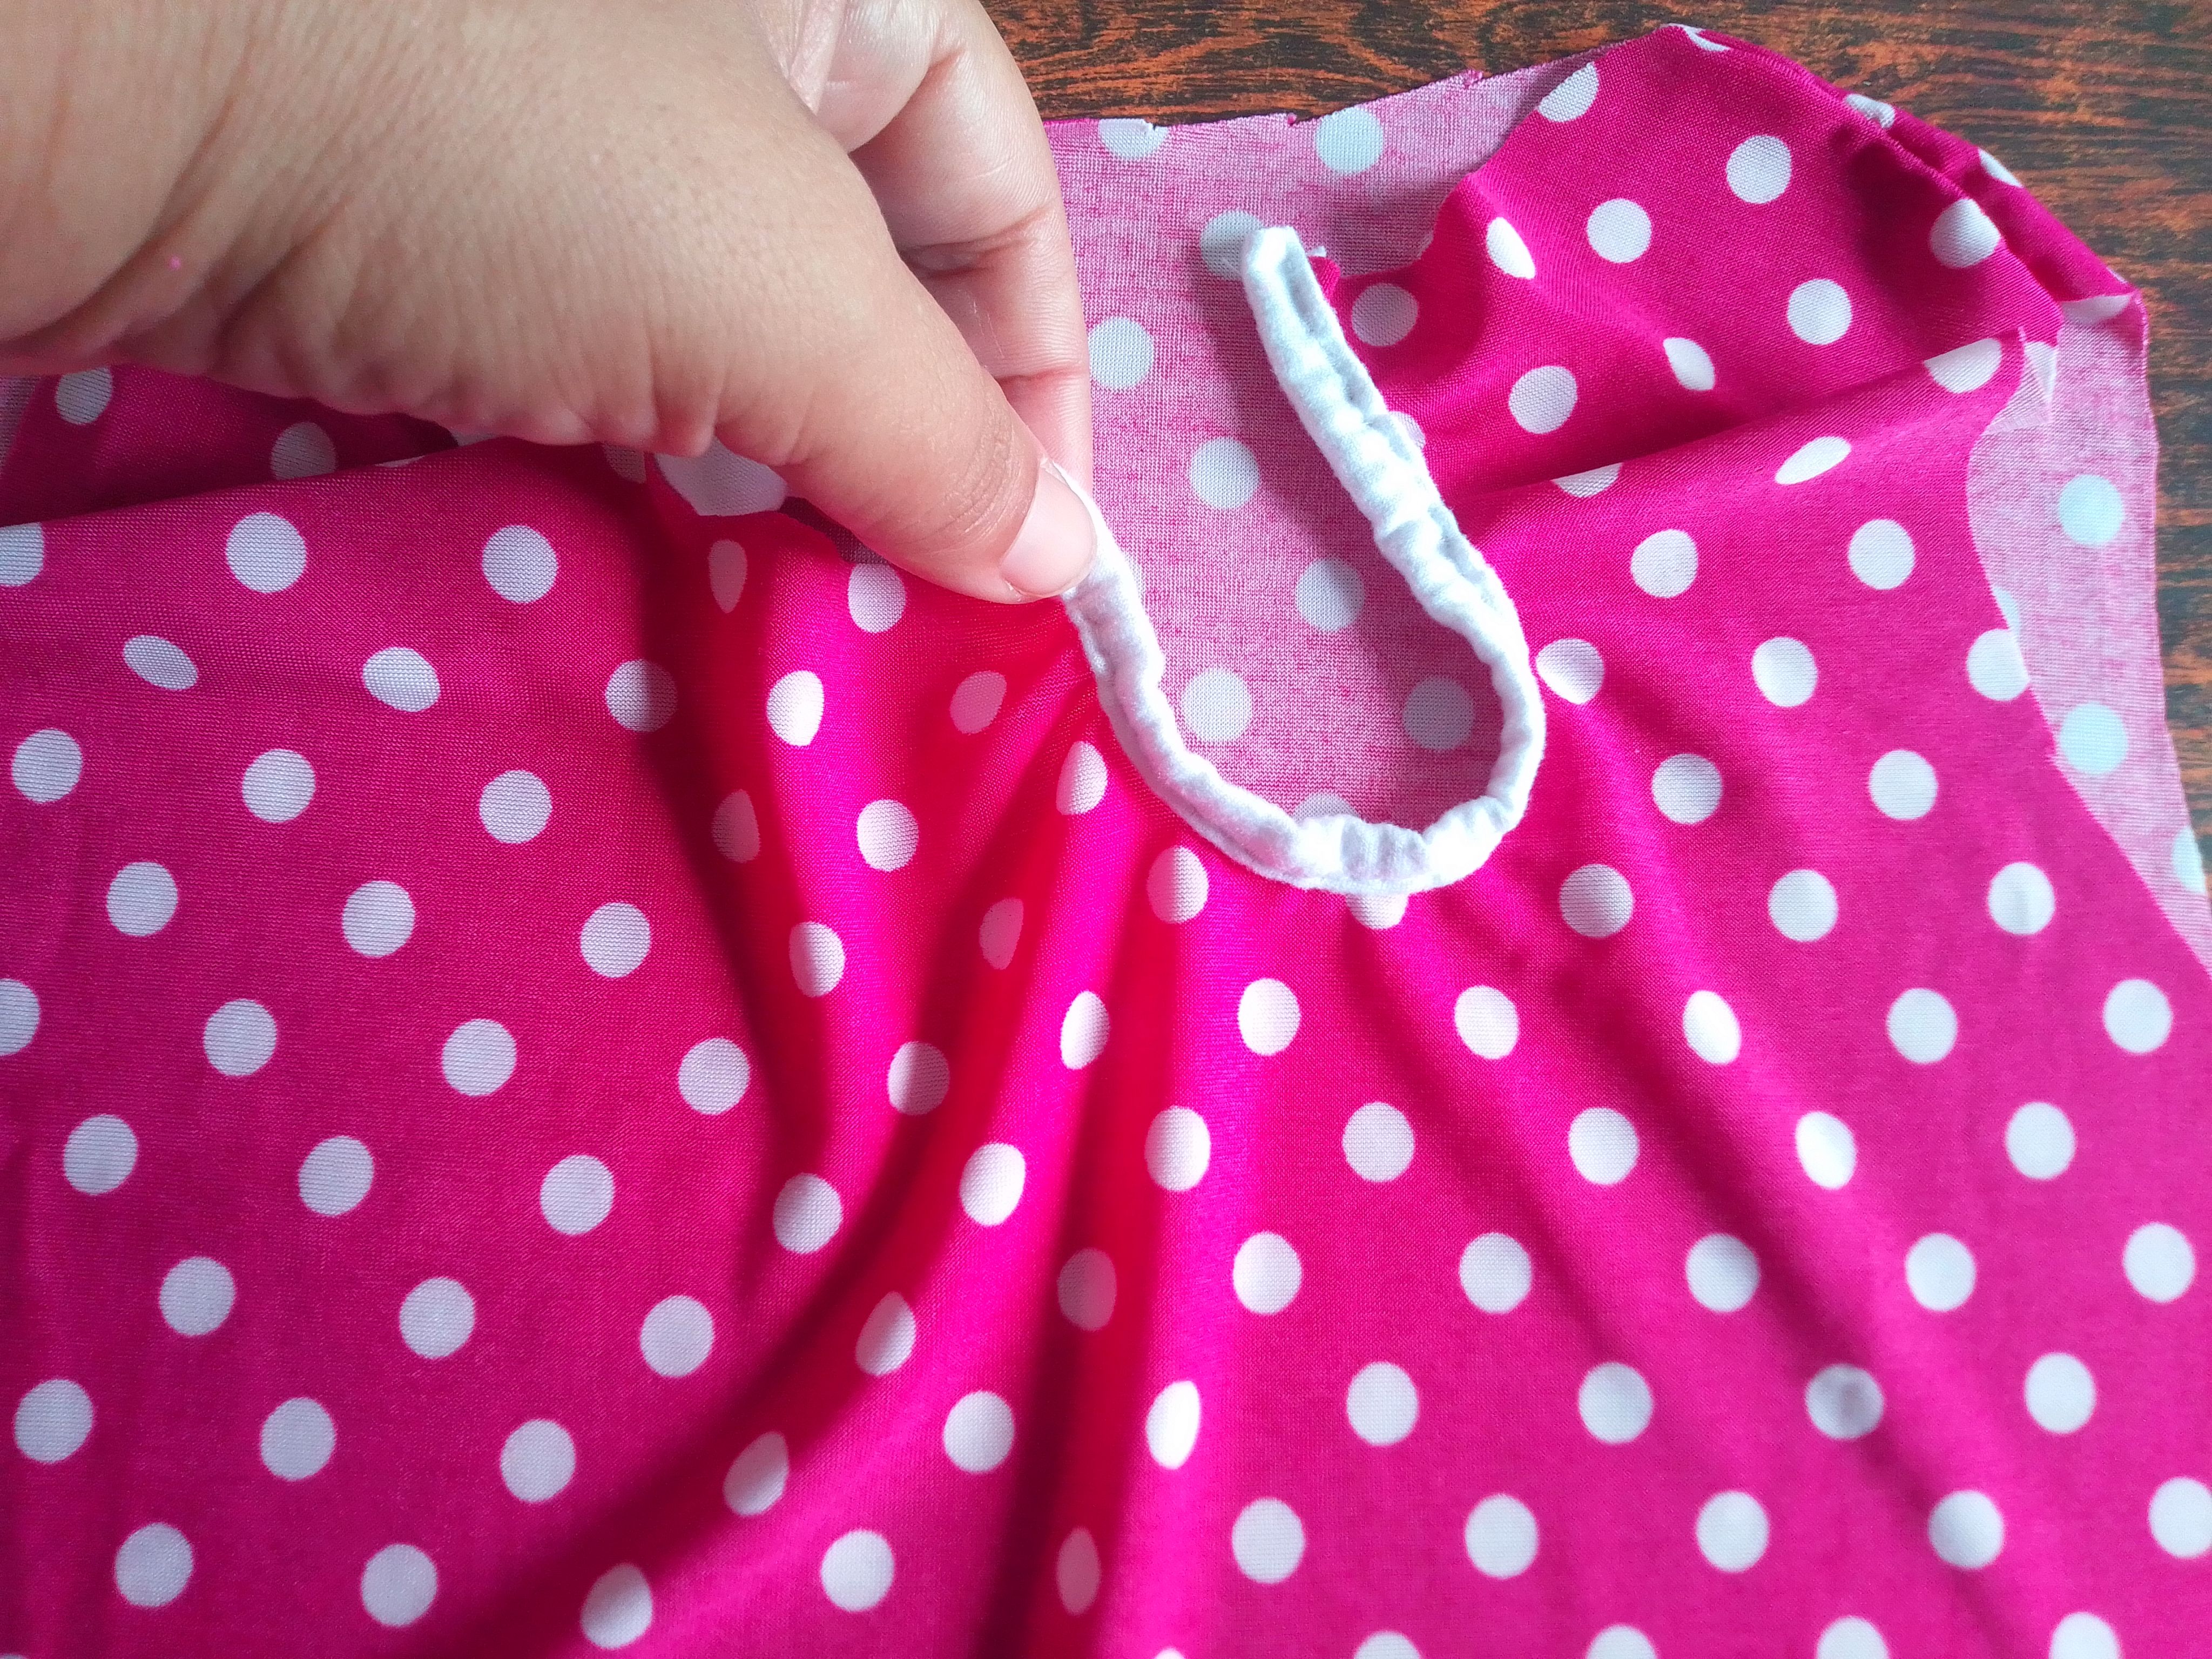
Siento mucho olvidar la fotografía 🤭 pero en este paso unimos con una costura ambos hombros de cada pieza. Procedo a realizar los bordes de cuello, cortando una tira un poco más gruesa, para ser específica de 2cm y medio y me sirve mucho ayuda planchar altes de coser para que tenga mejor manejar y forma, luego paso a coser por todo el contorno del cuello de la blusa uniendo amabas puntas del escote.
Step 03
I'm so sorry to forget the photograph 🤭 but in this step, we sew together both shoulders of each piece. I proceed to make the neck edges, cutting a slightly thicker strip, to be specific, 2 and a half cm and it helps me a lot to iron before sewing so that it has a better handling and shape, then I proceed to sew all around the neckline of the blouse joining both ends of the neckline.
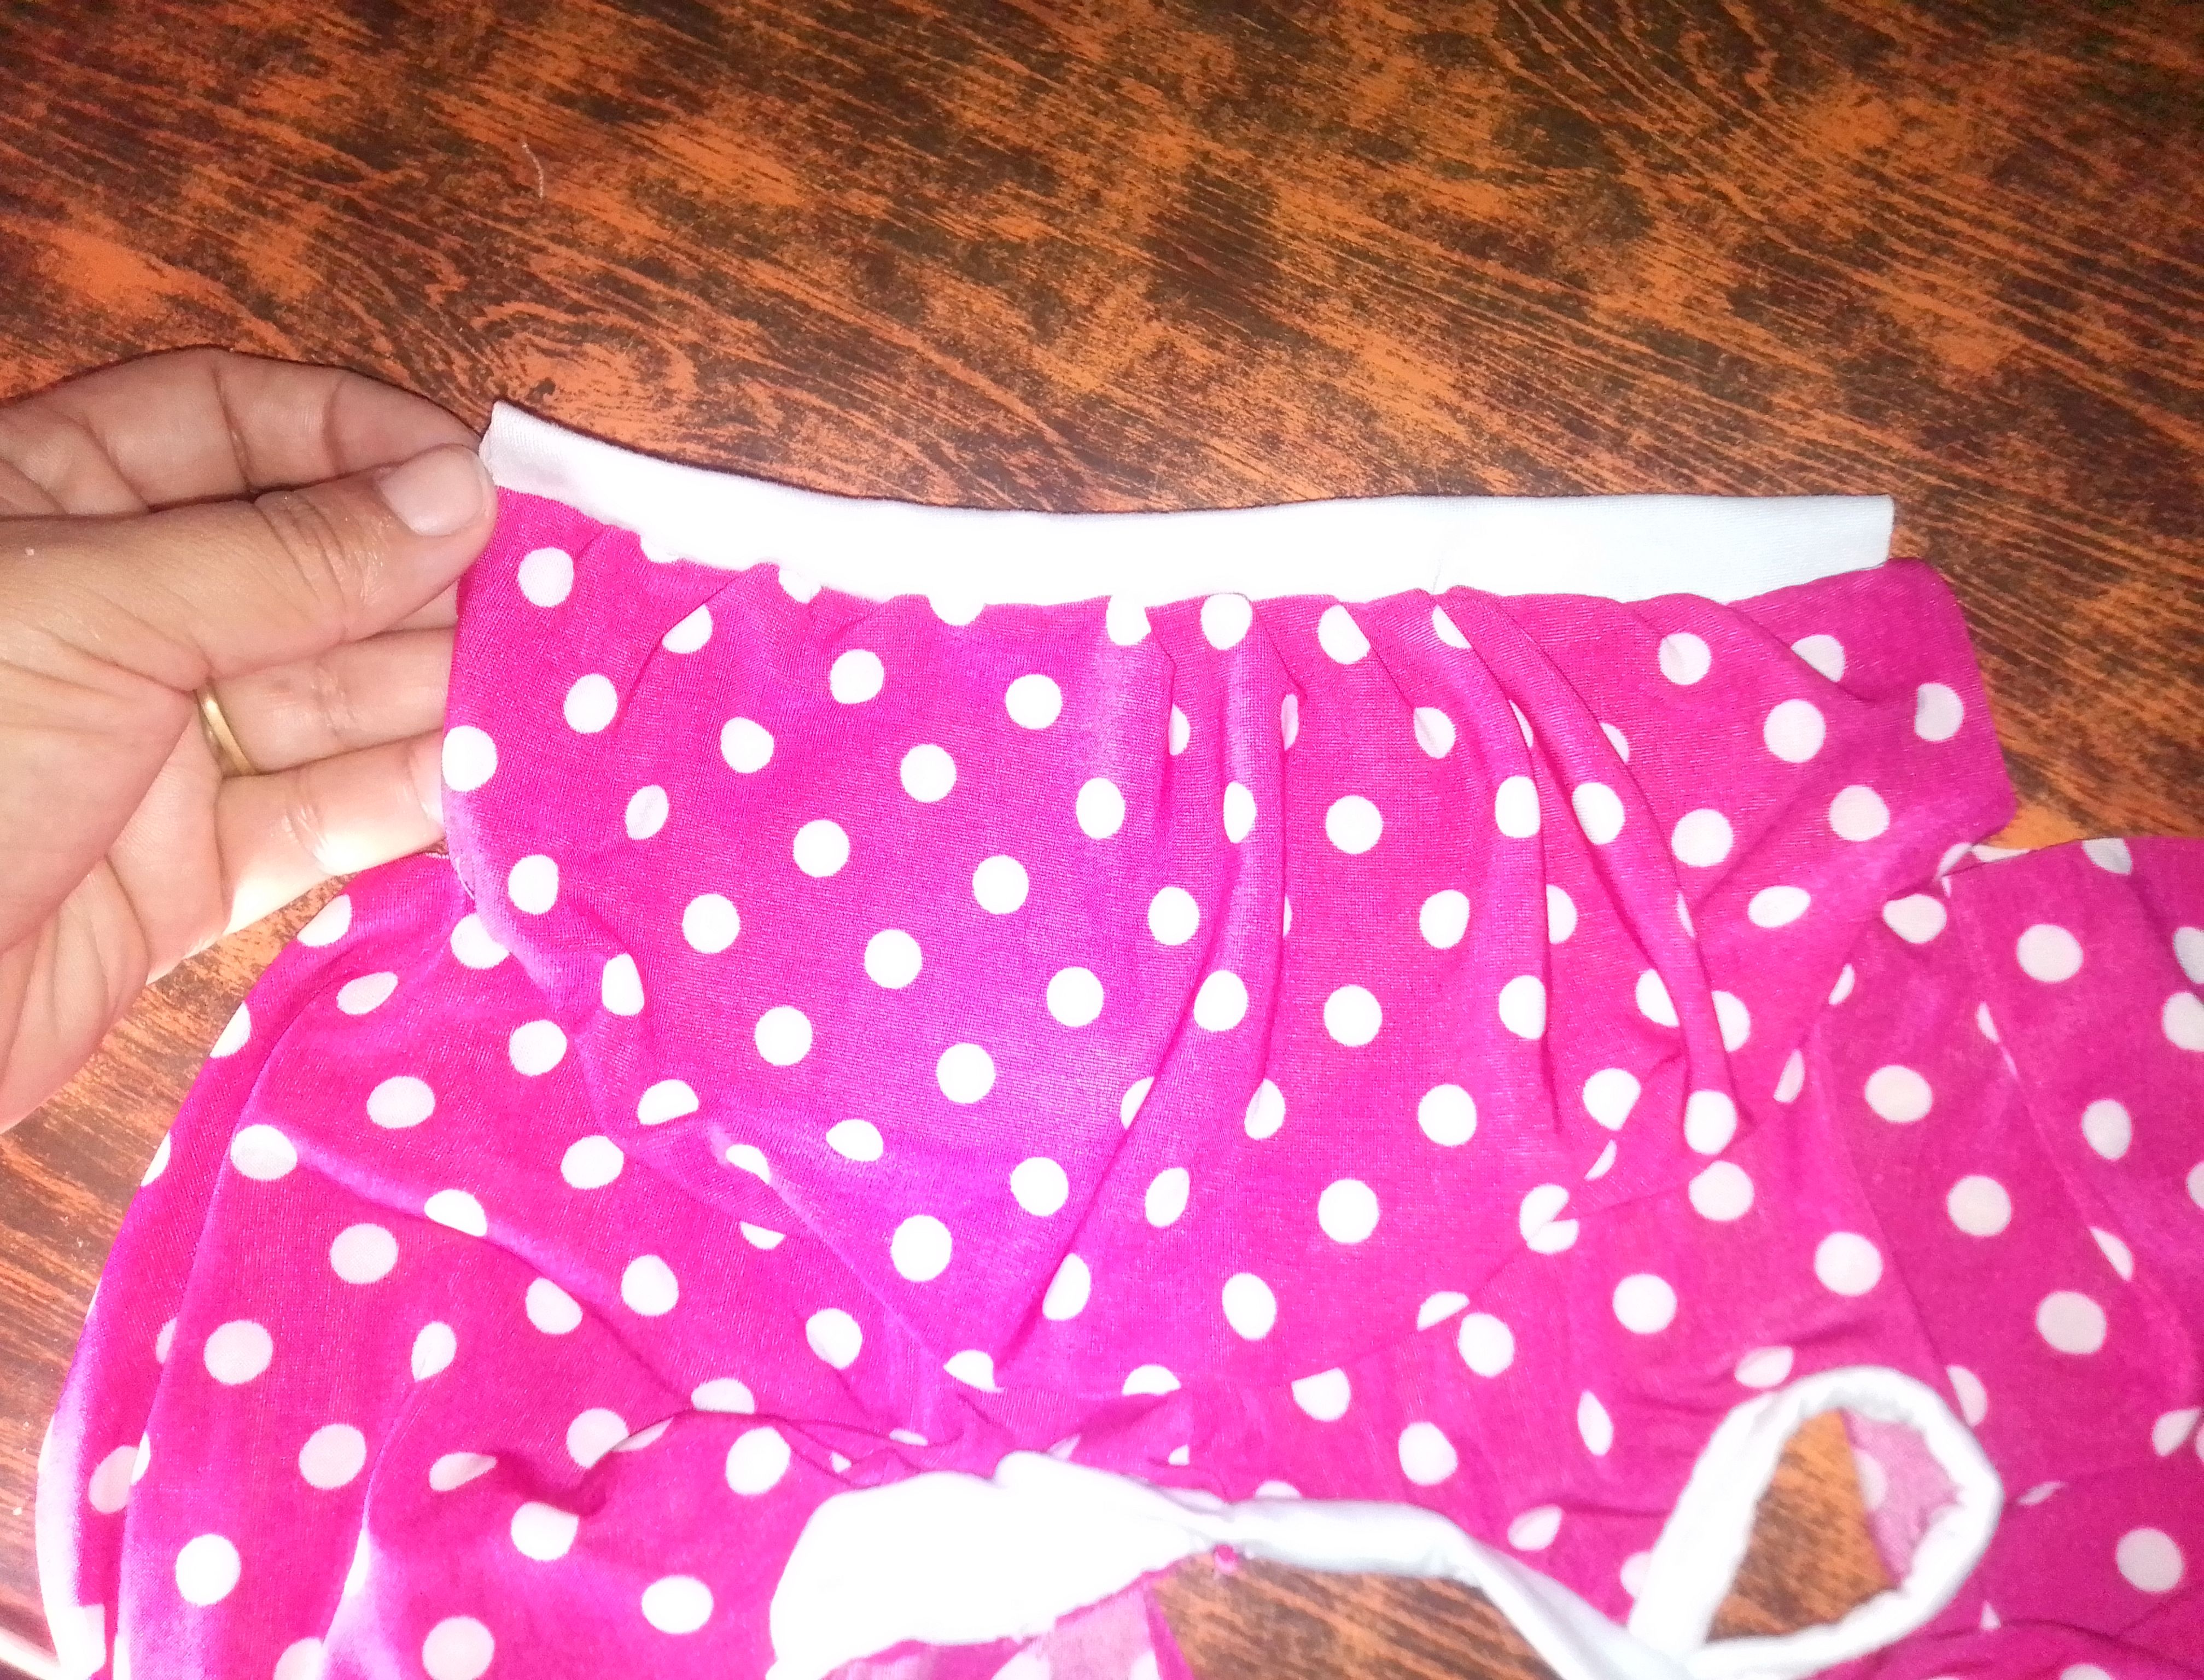
Paso 04
Pasamos a la confeccion de las mangas, así que primero ubicamos el centro o medio de las mangas tomando como guía la esquina de los hombros, sujeto con un punto costura y arruchamos la pieza con una costura hilvanada. Comienzo a coser desde la zona de la axila hasta los hombros. Podemos de la misma manera, coser el borde exterior aplicando un sesgo o cortamos una tira de tela de algodón muy flexible y colocarla doble en el borde e ir estirandola mientras cosemos. Esto nos dará una impresión arruchada igual de bonita.
Step 04
We move on to making the sleeves, so first we locate the center or middle of the sleeves taking the corner of the shoulders as a guide, fastened with a seam stitch and we ruffle the piece with a seam basted I start sewing from the underarm area to the shoulders. We can in the same way, sew the outer edge applying a bias or cut a strip of very flexible cotton fabric and place it double on the edge and stretch it while we sew. This will give us an equally pretty crumpled print.

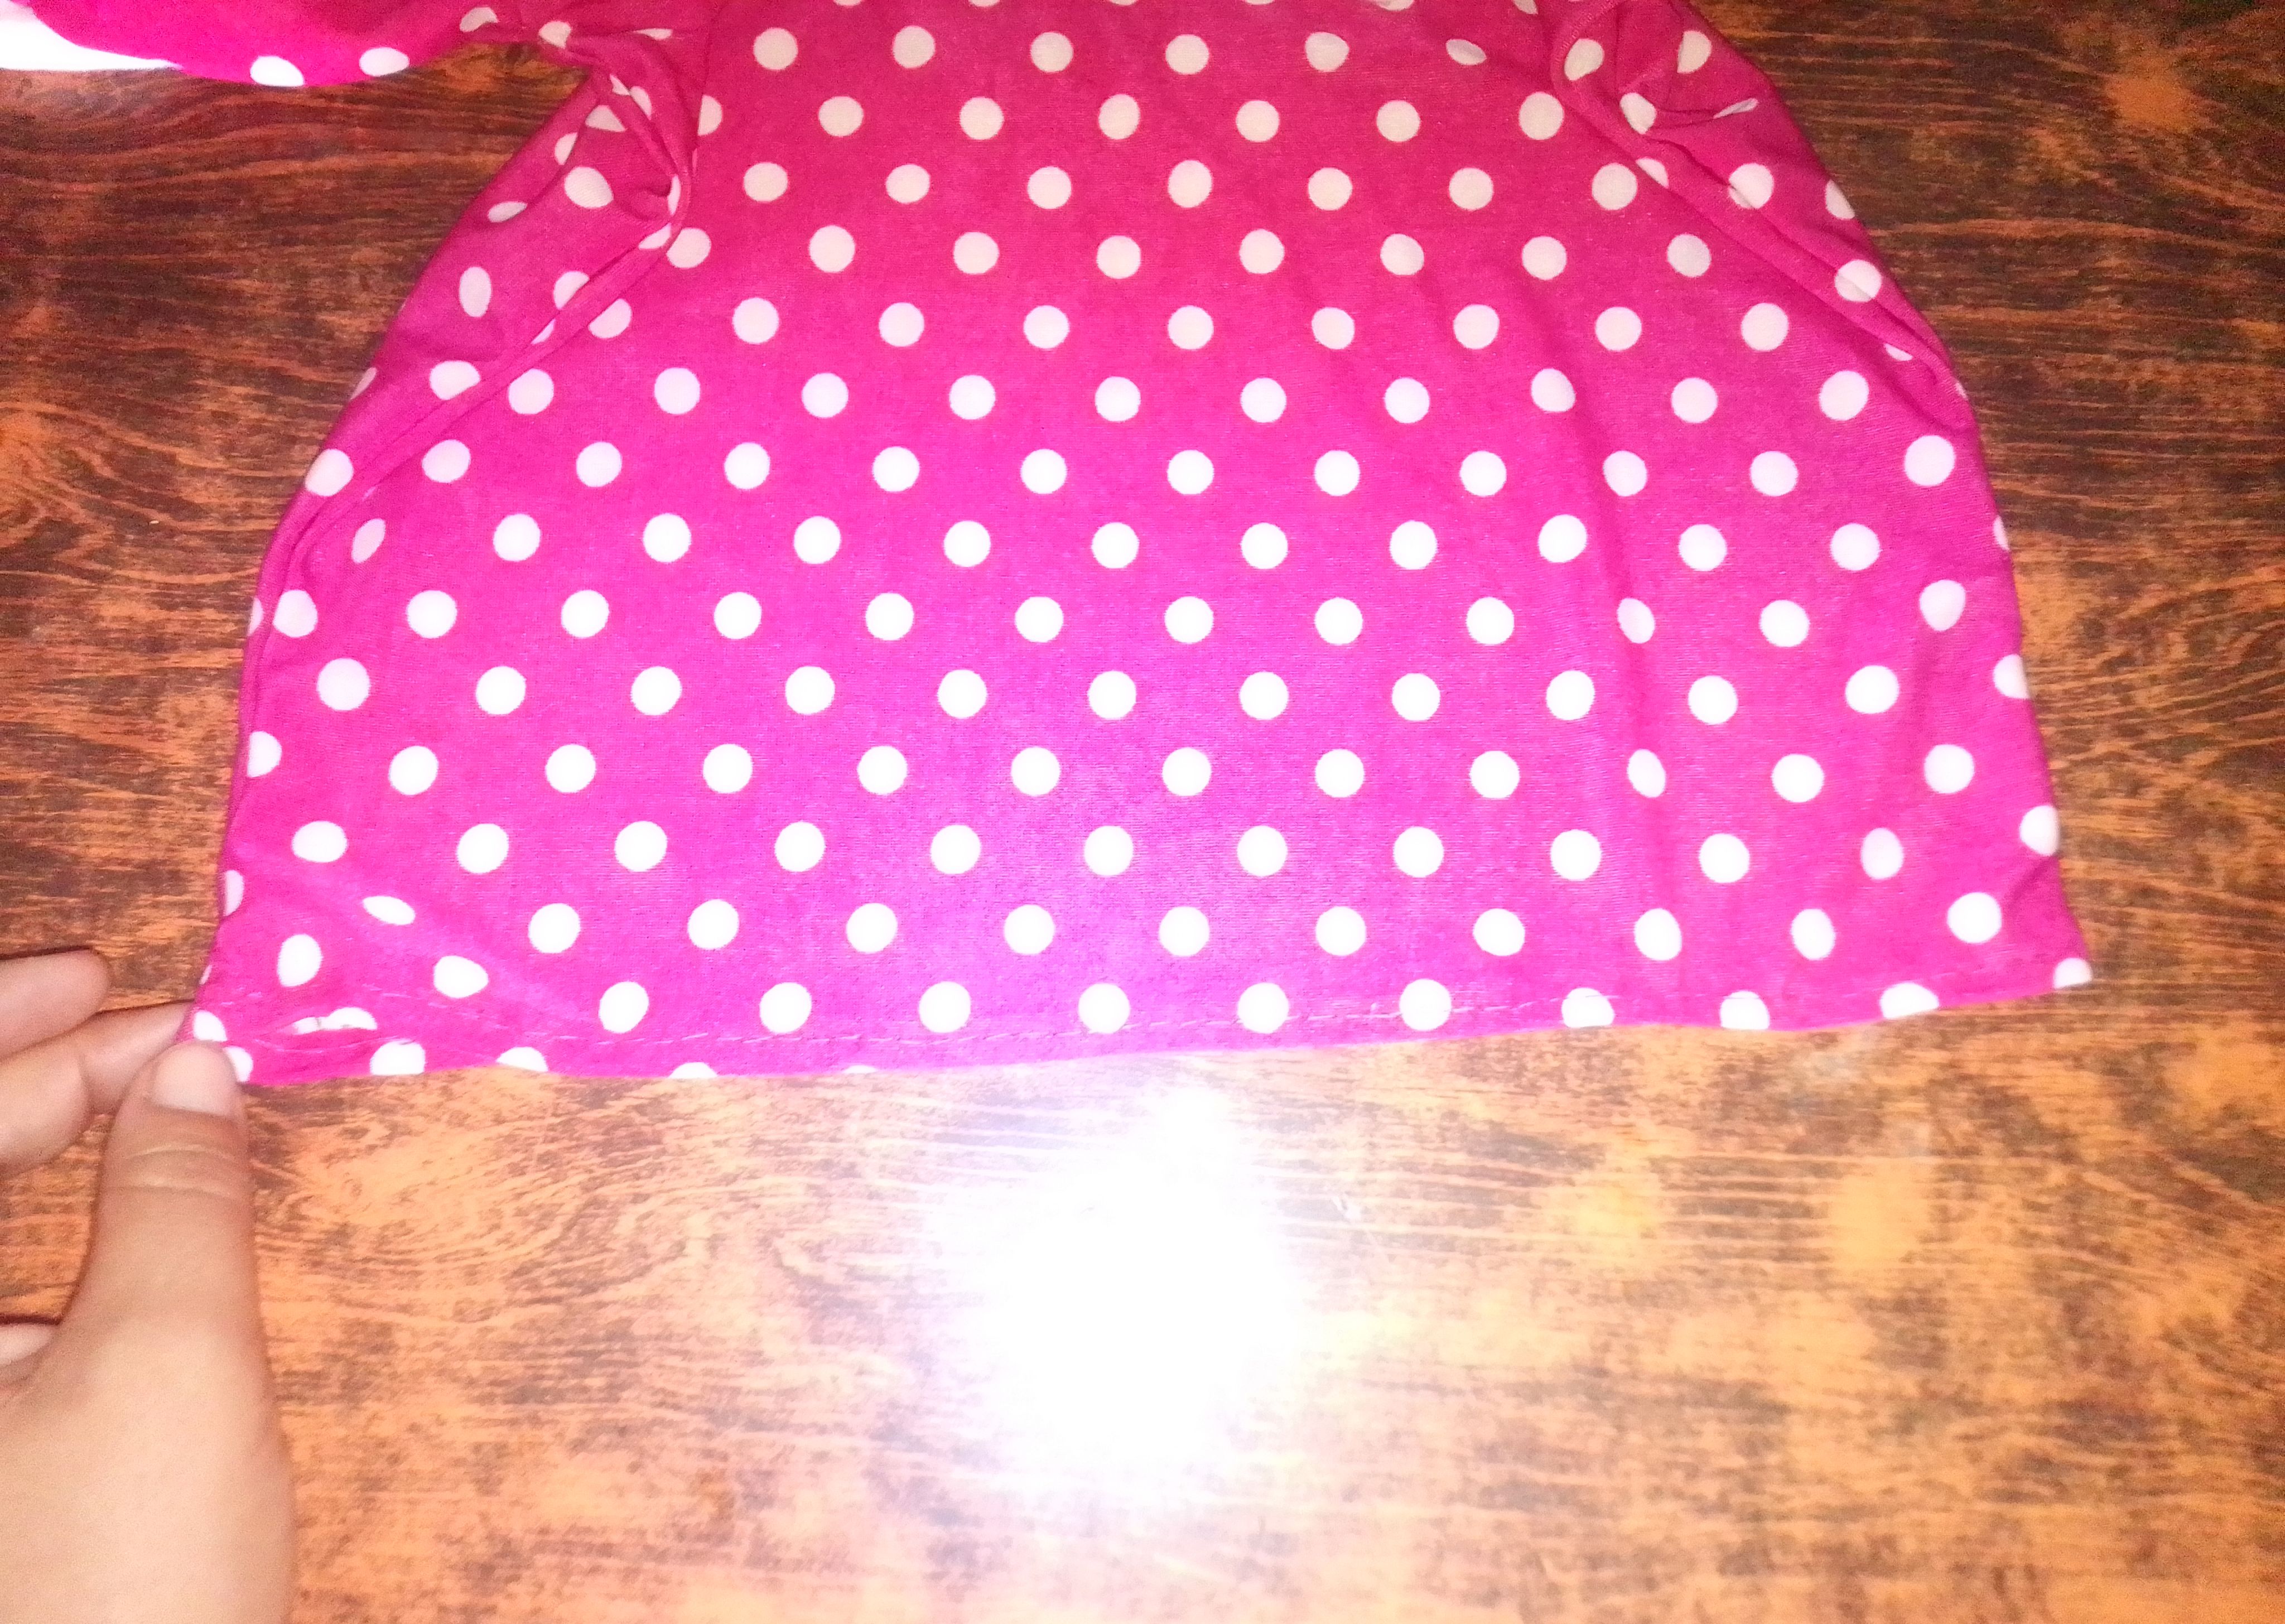
Paso 05
Ya cosidas nuestras mangas ubicamos los lados opuestos de la tela y hacemos la costura de los laterales. También realizo el dobladillo de la parte inferior de la blusa.
Step 05
Once our sleeves are sewn, we place the opposite sides of the fabric and sew the side seams. I also hem the bottom of the blouse.
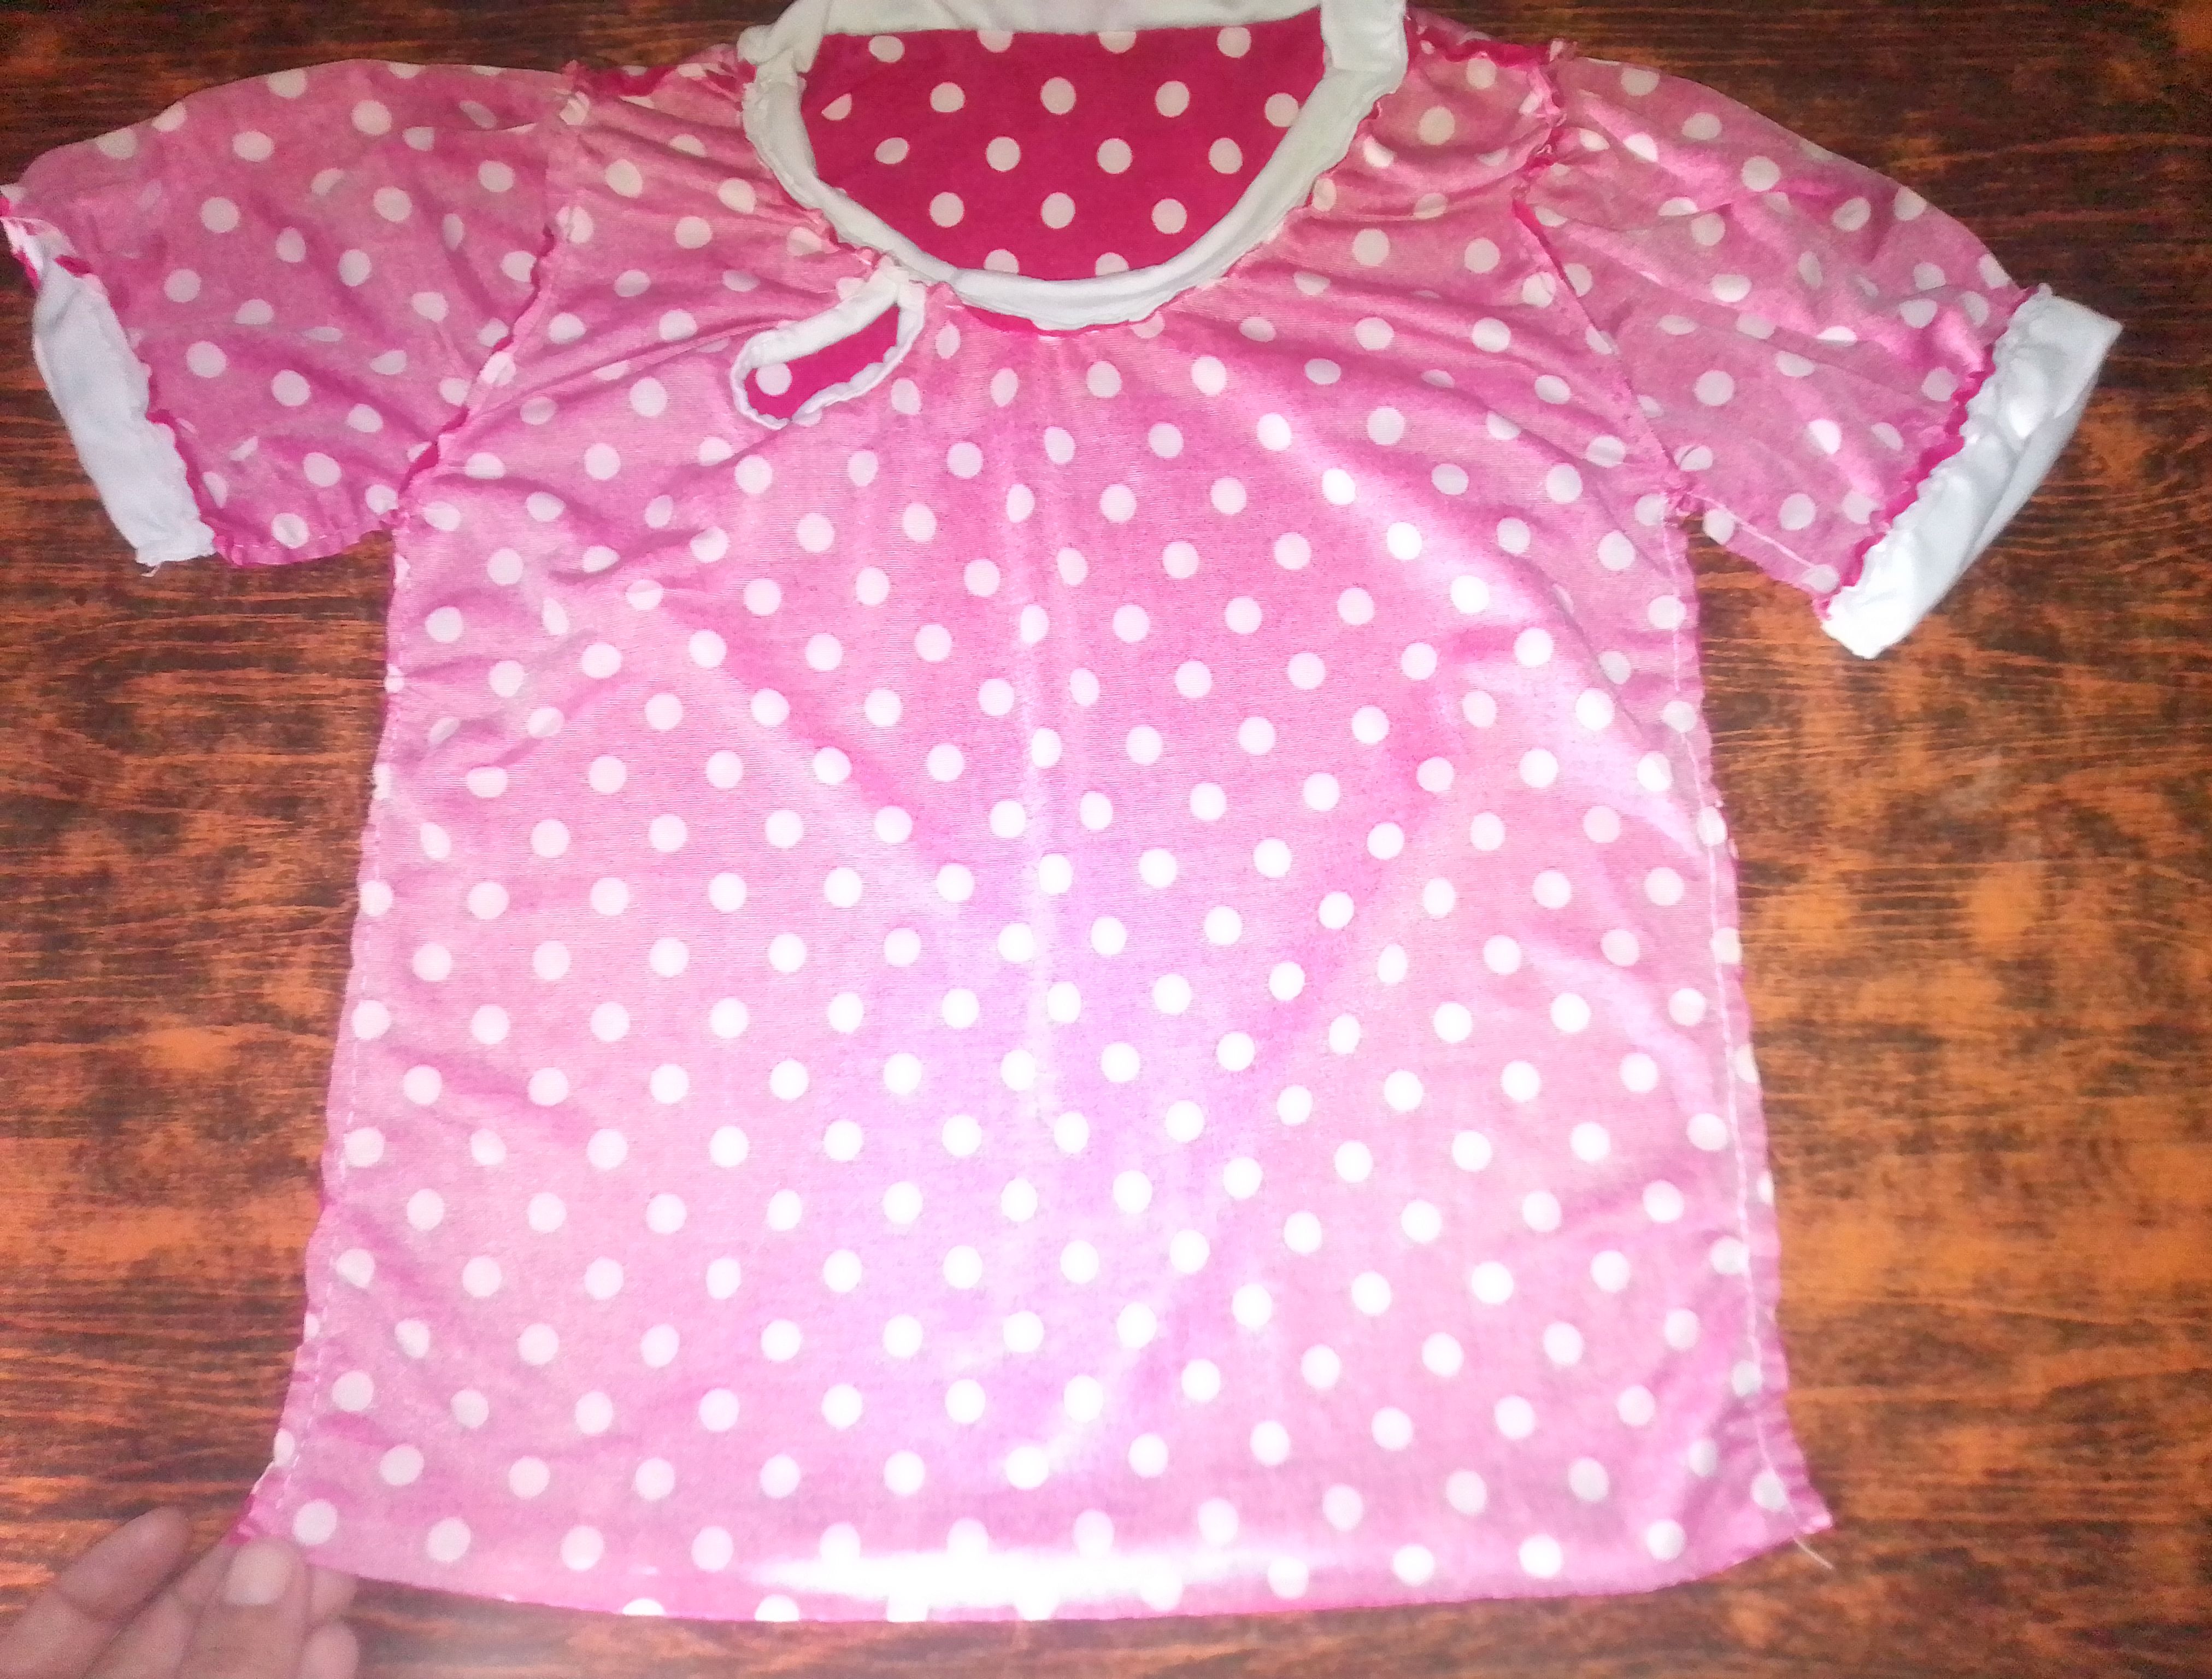
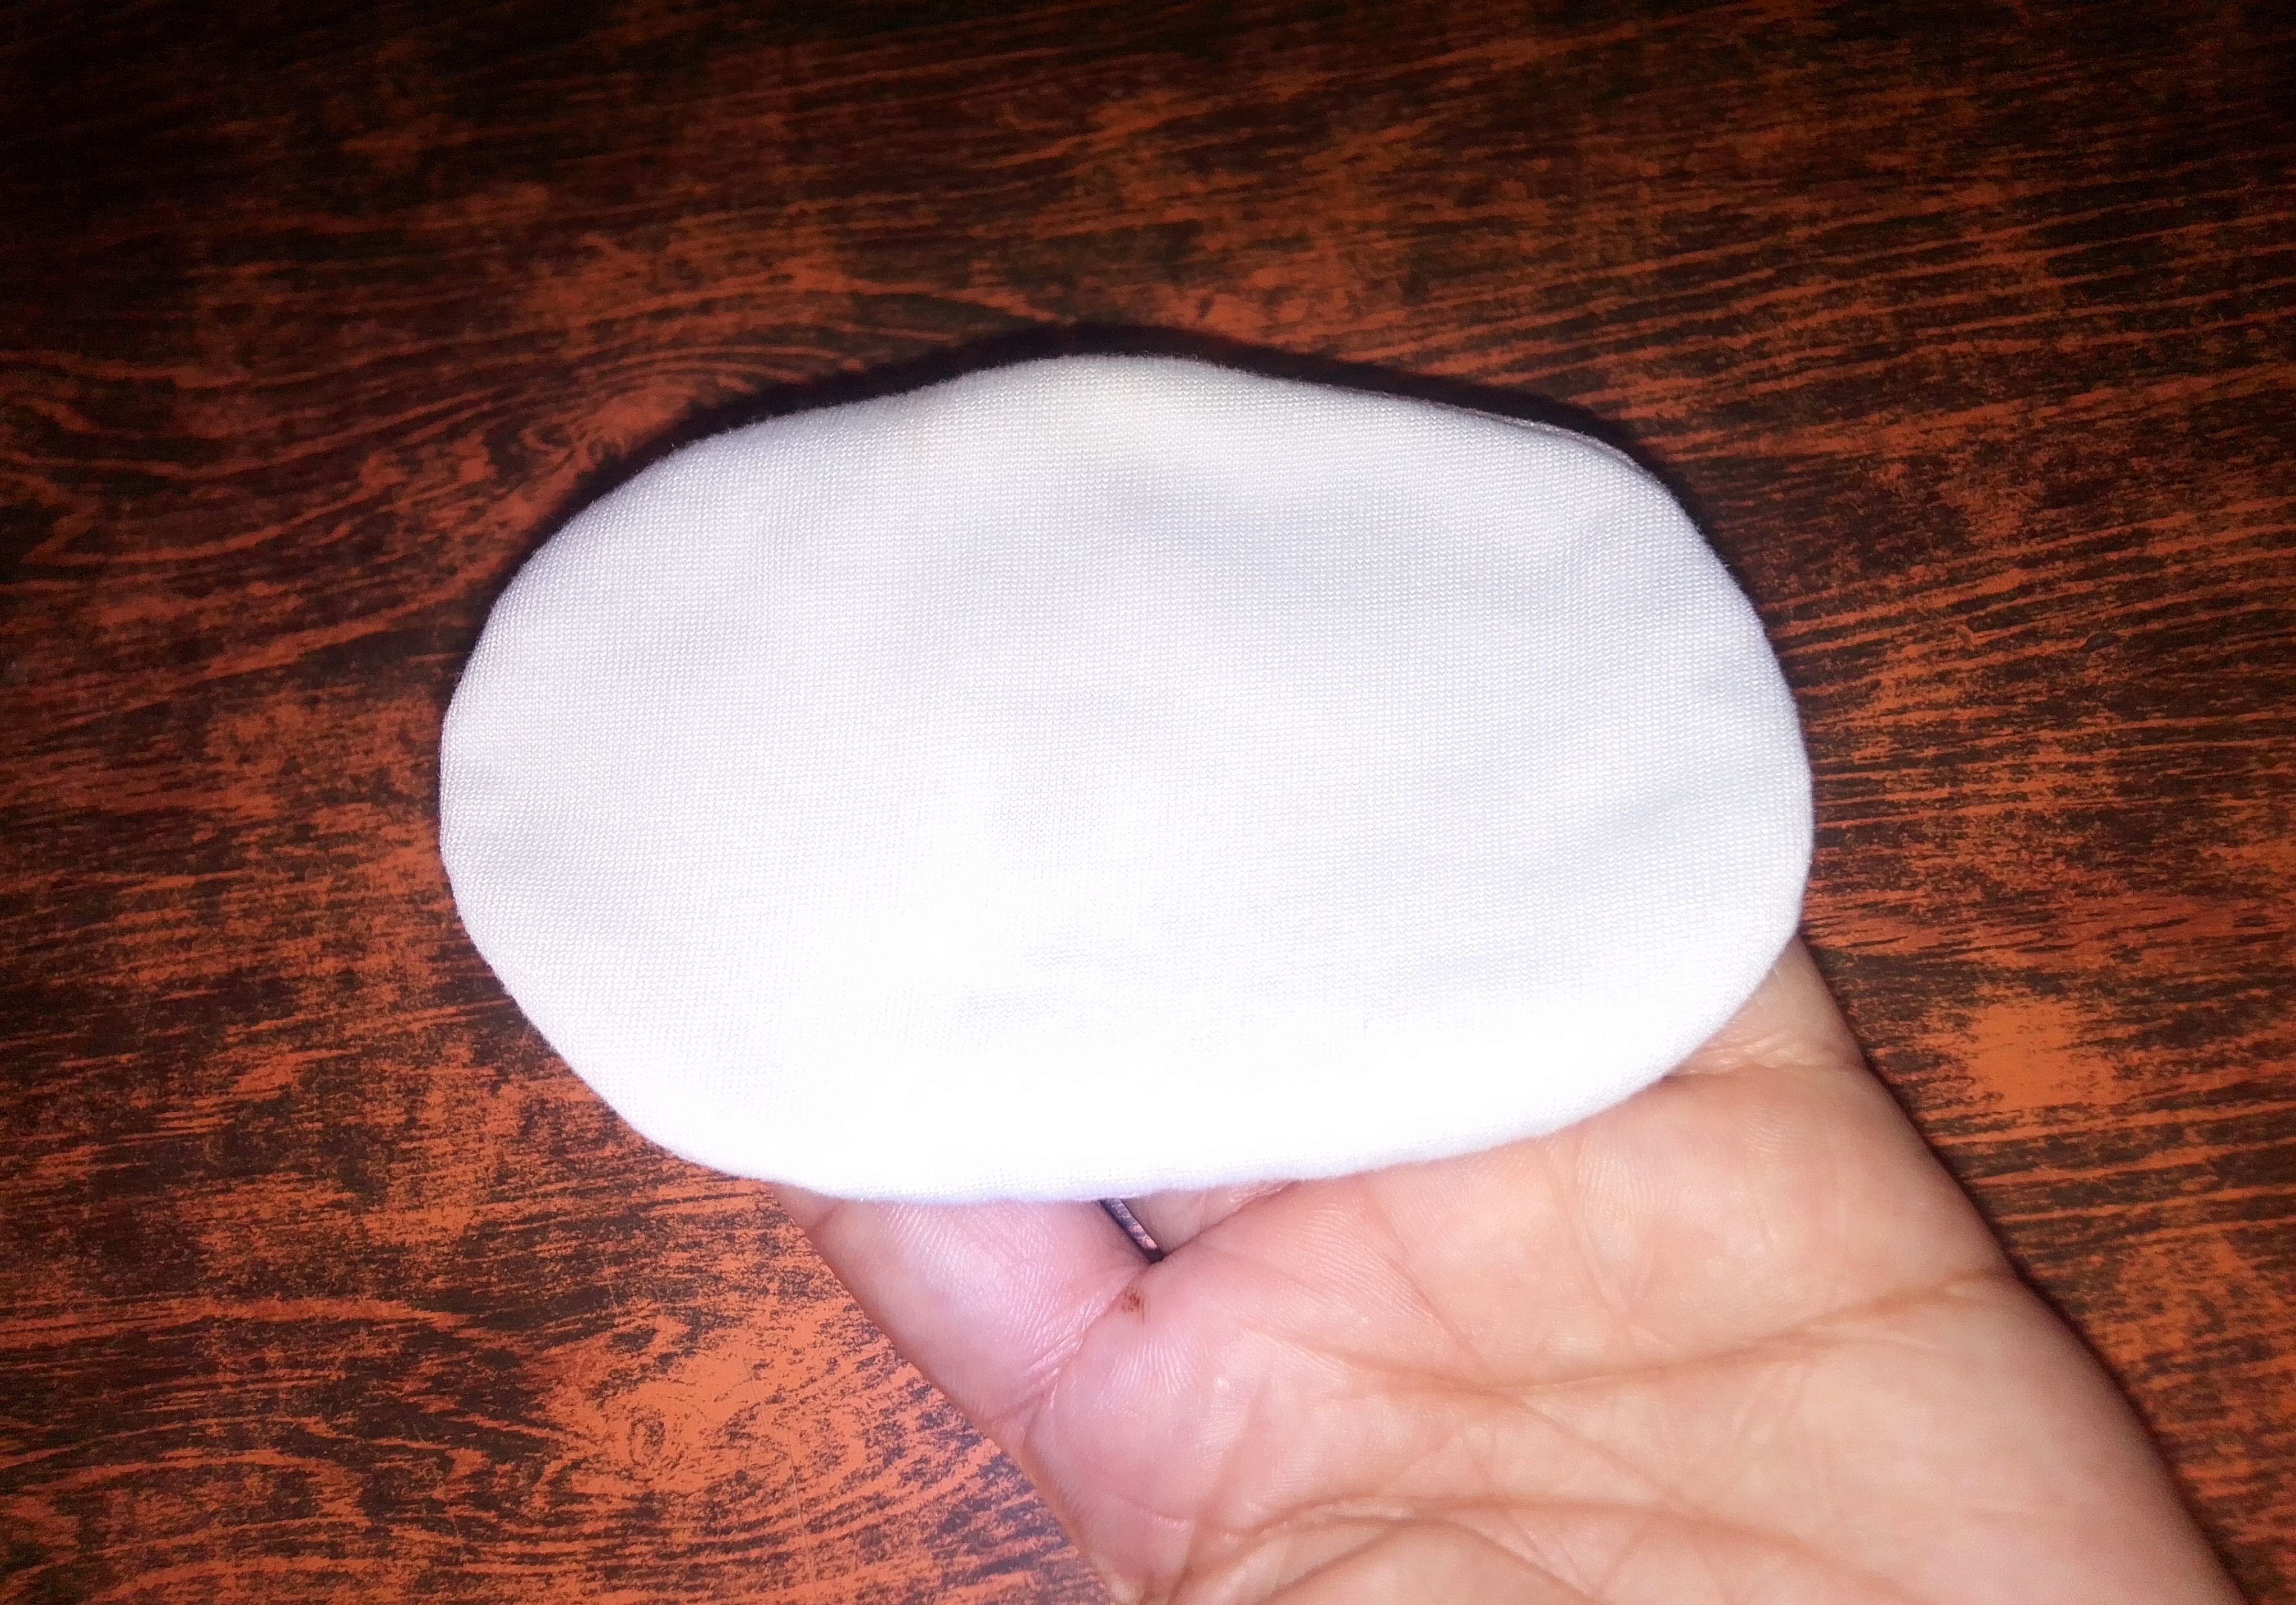
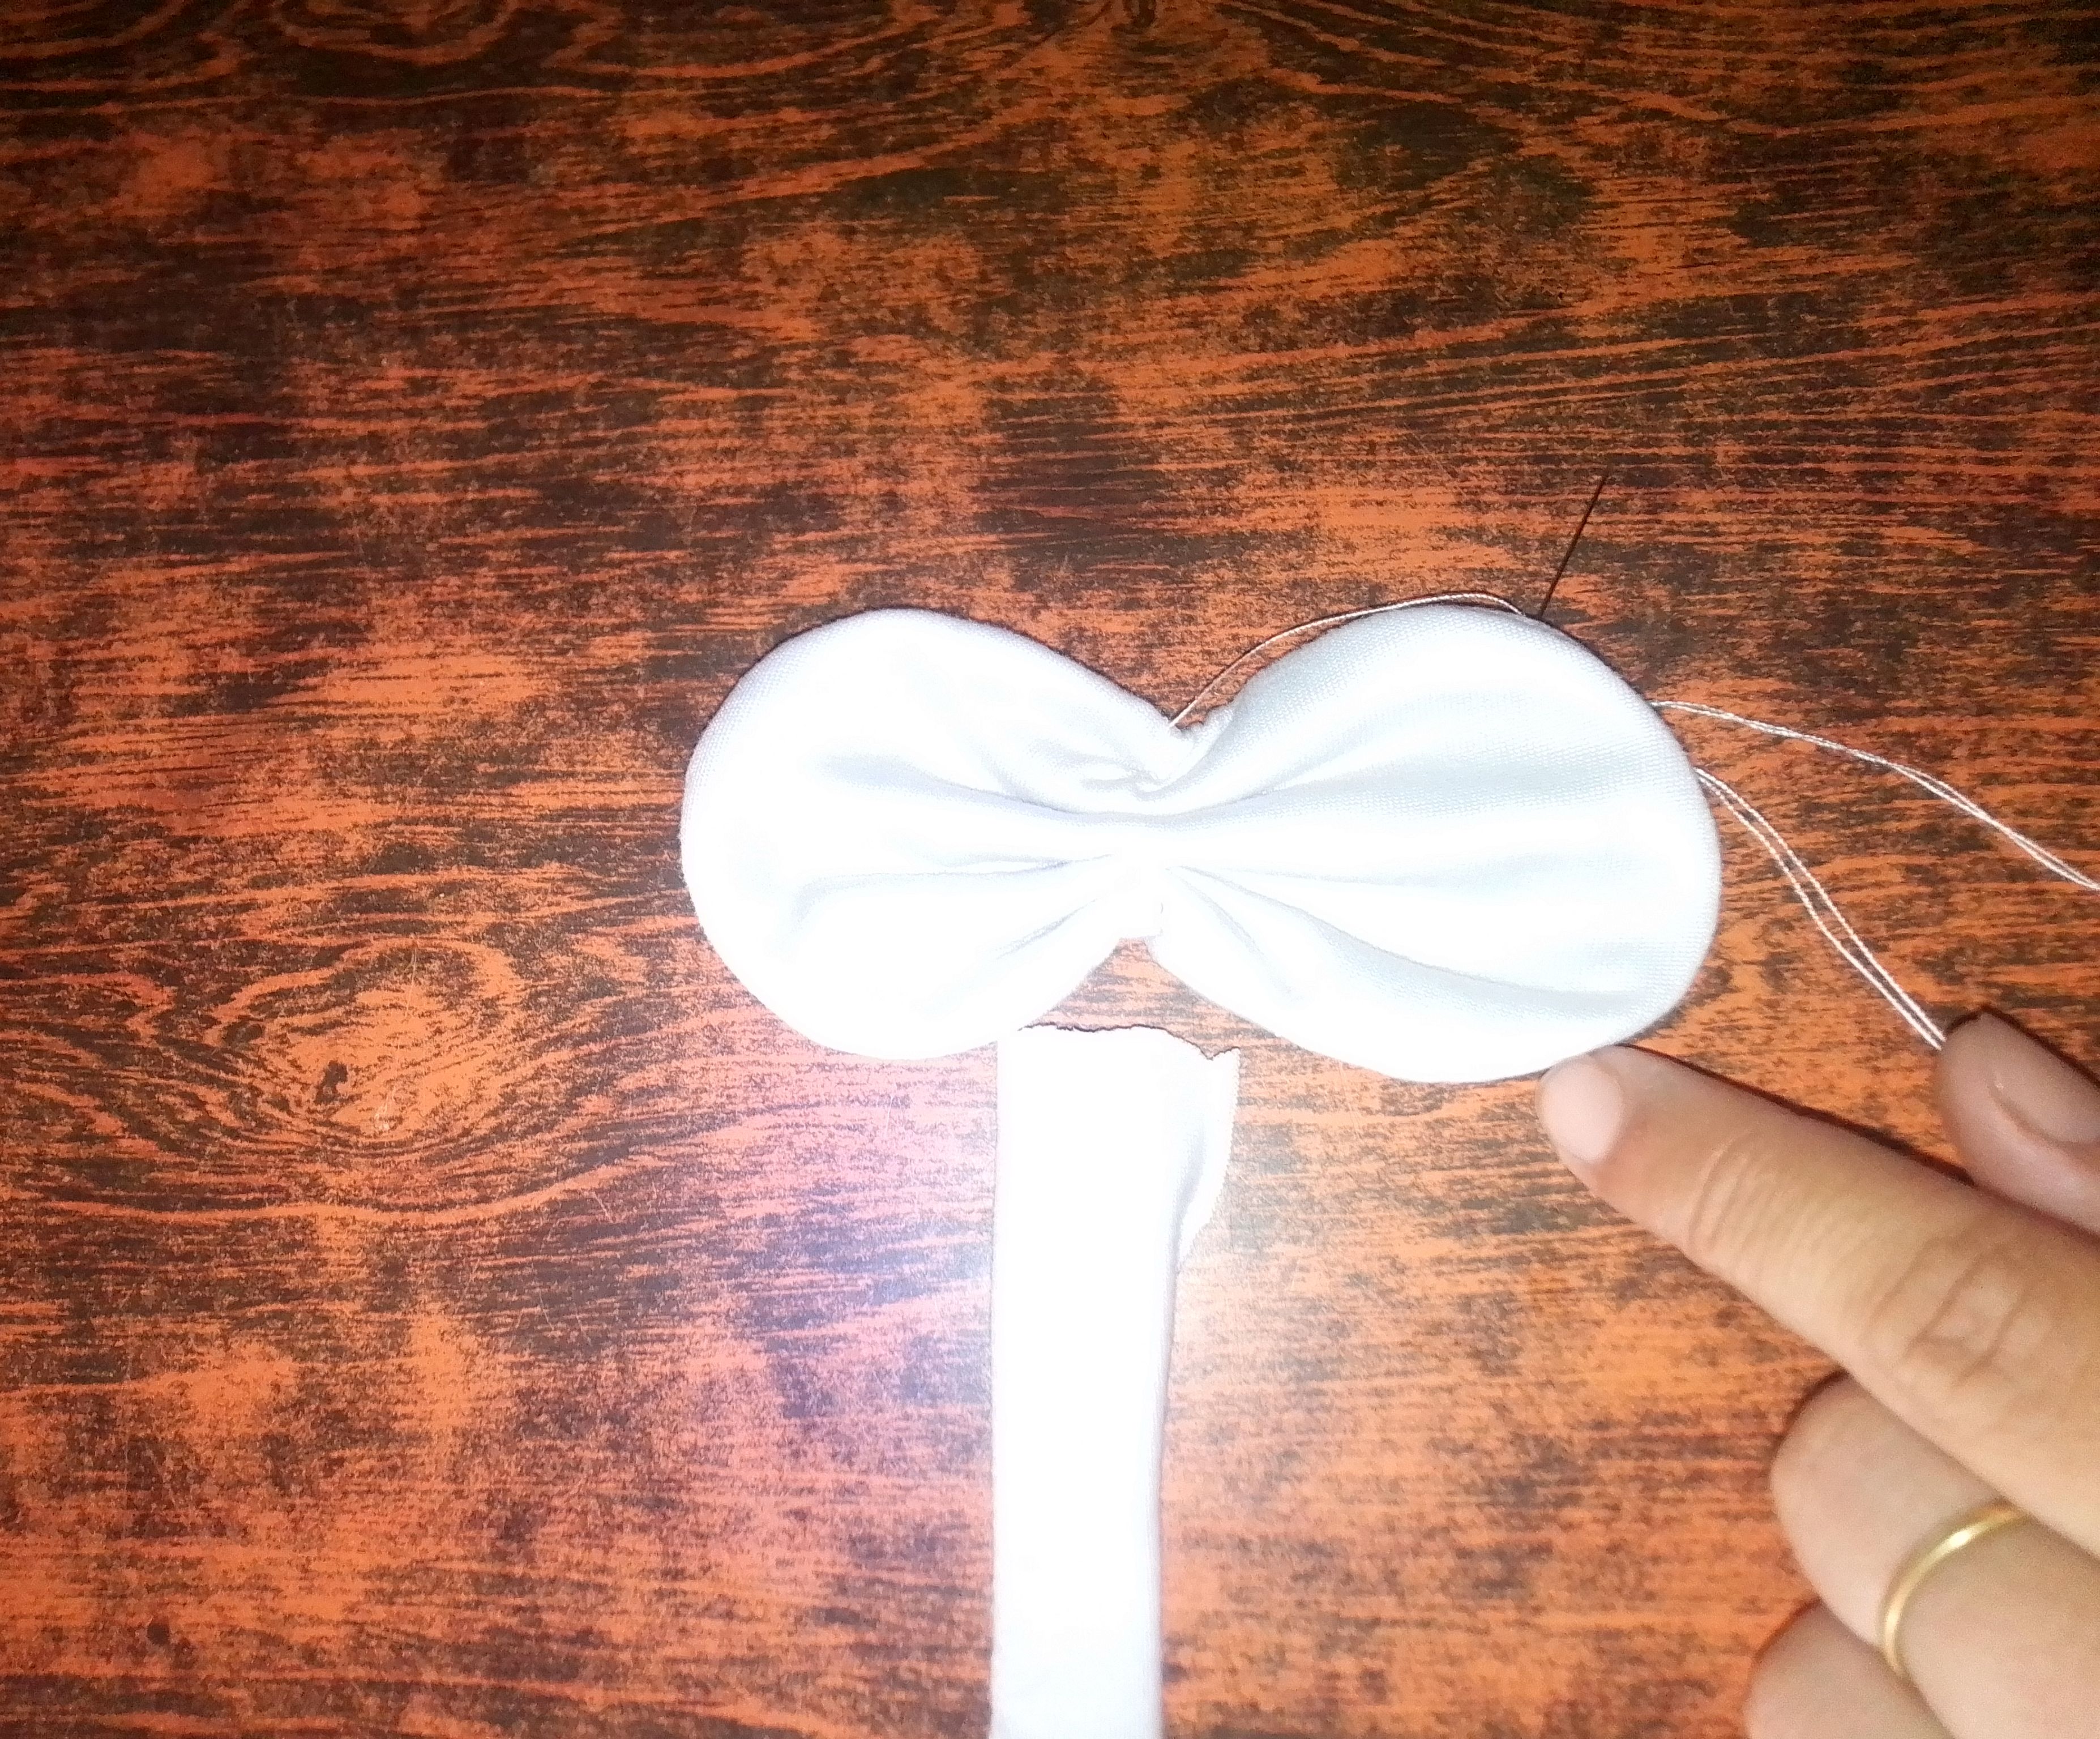
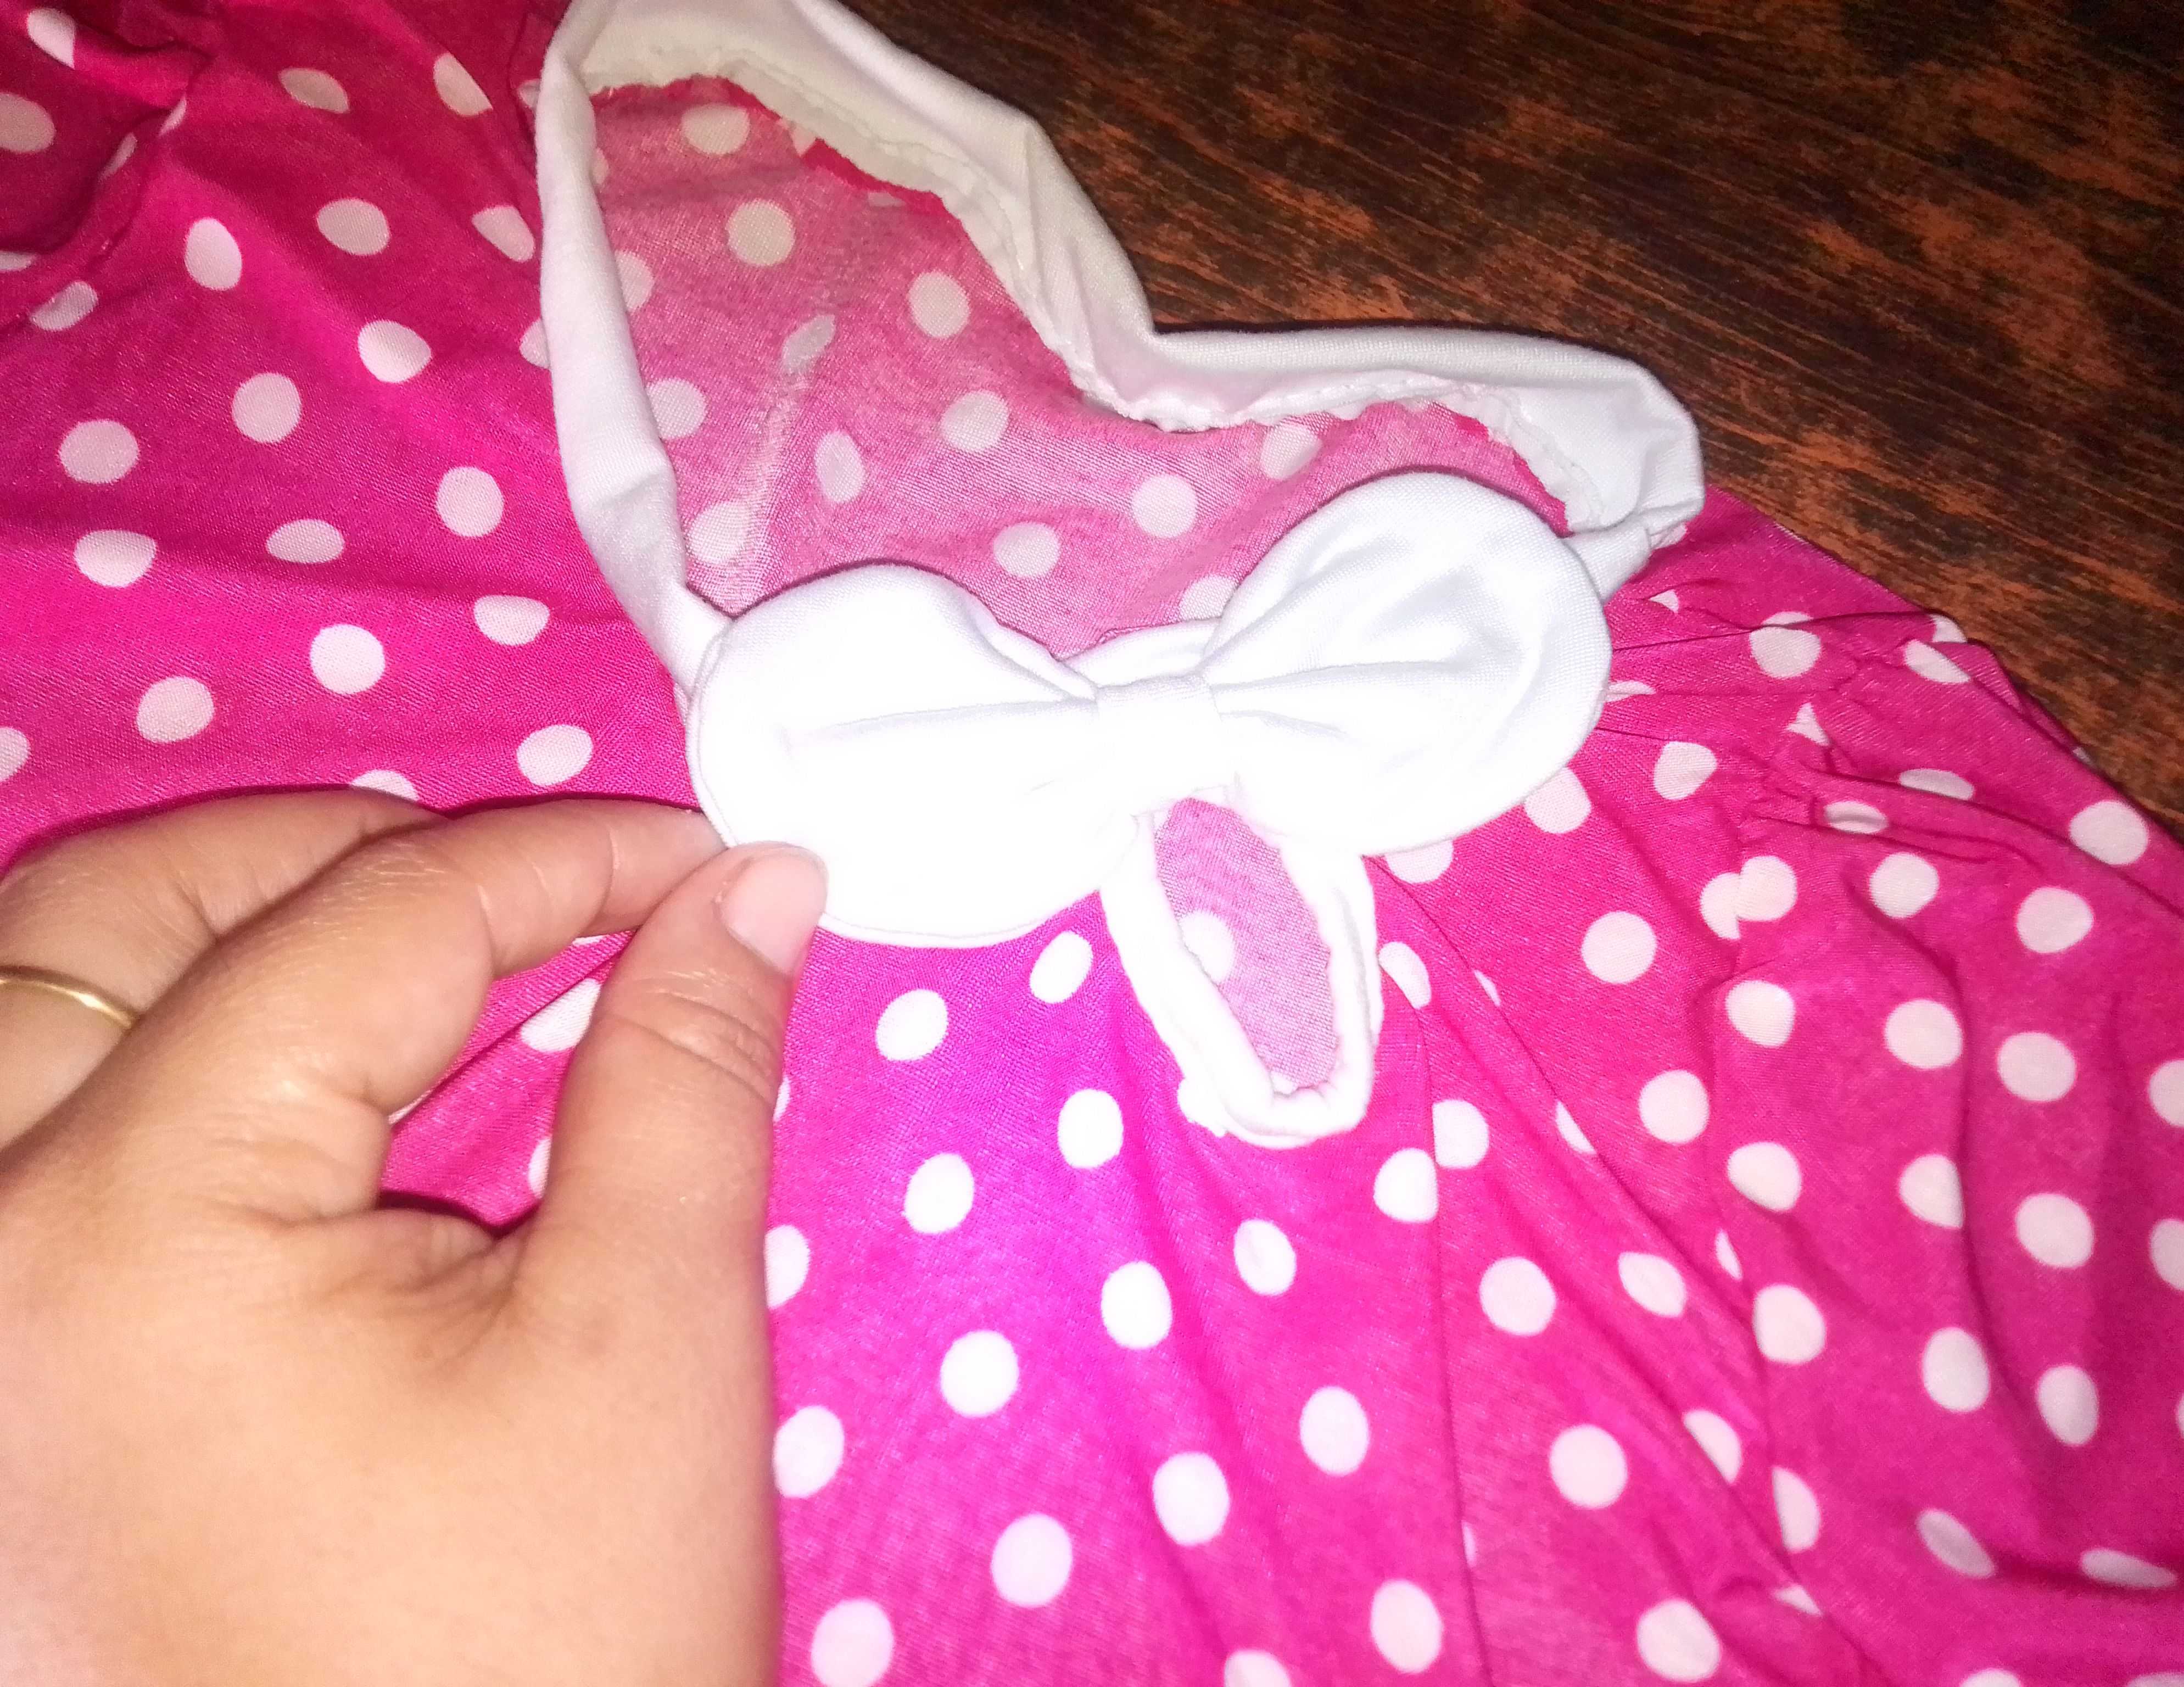
Paso 06
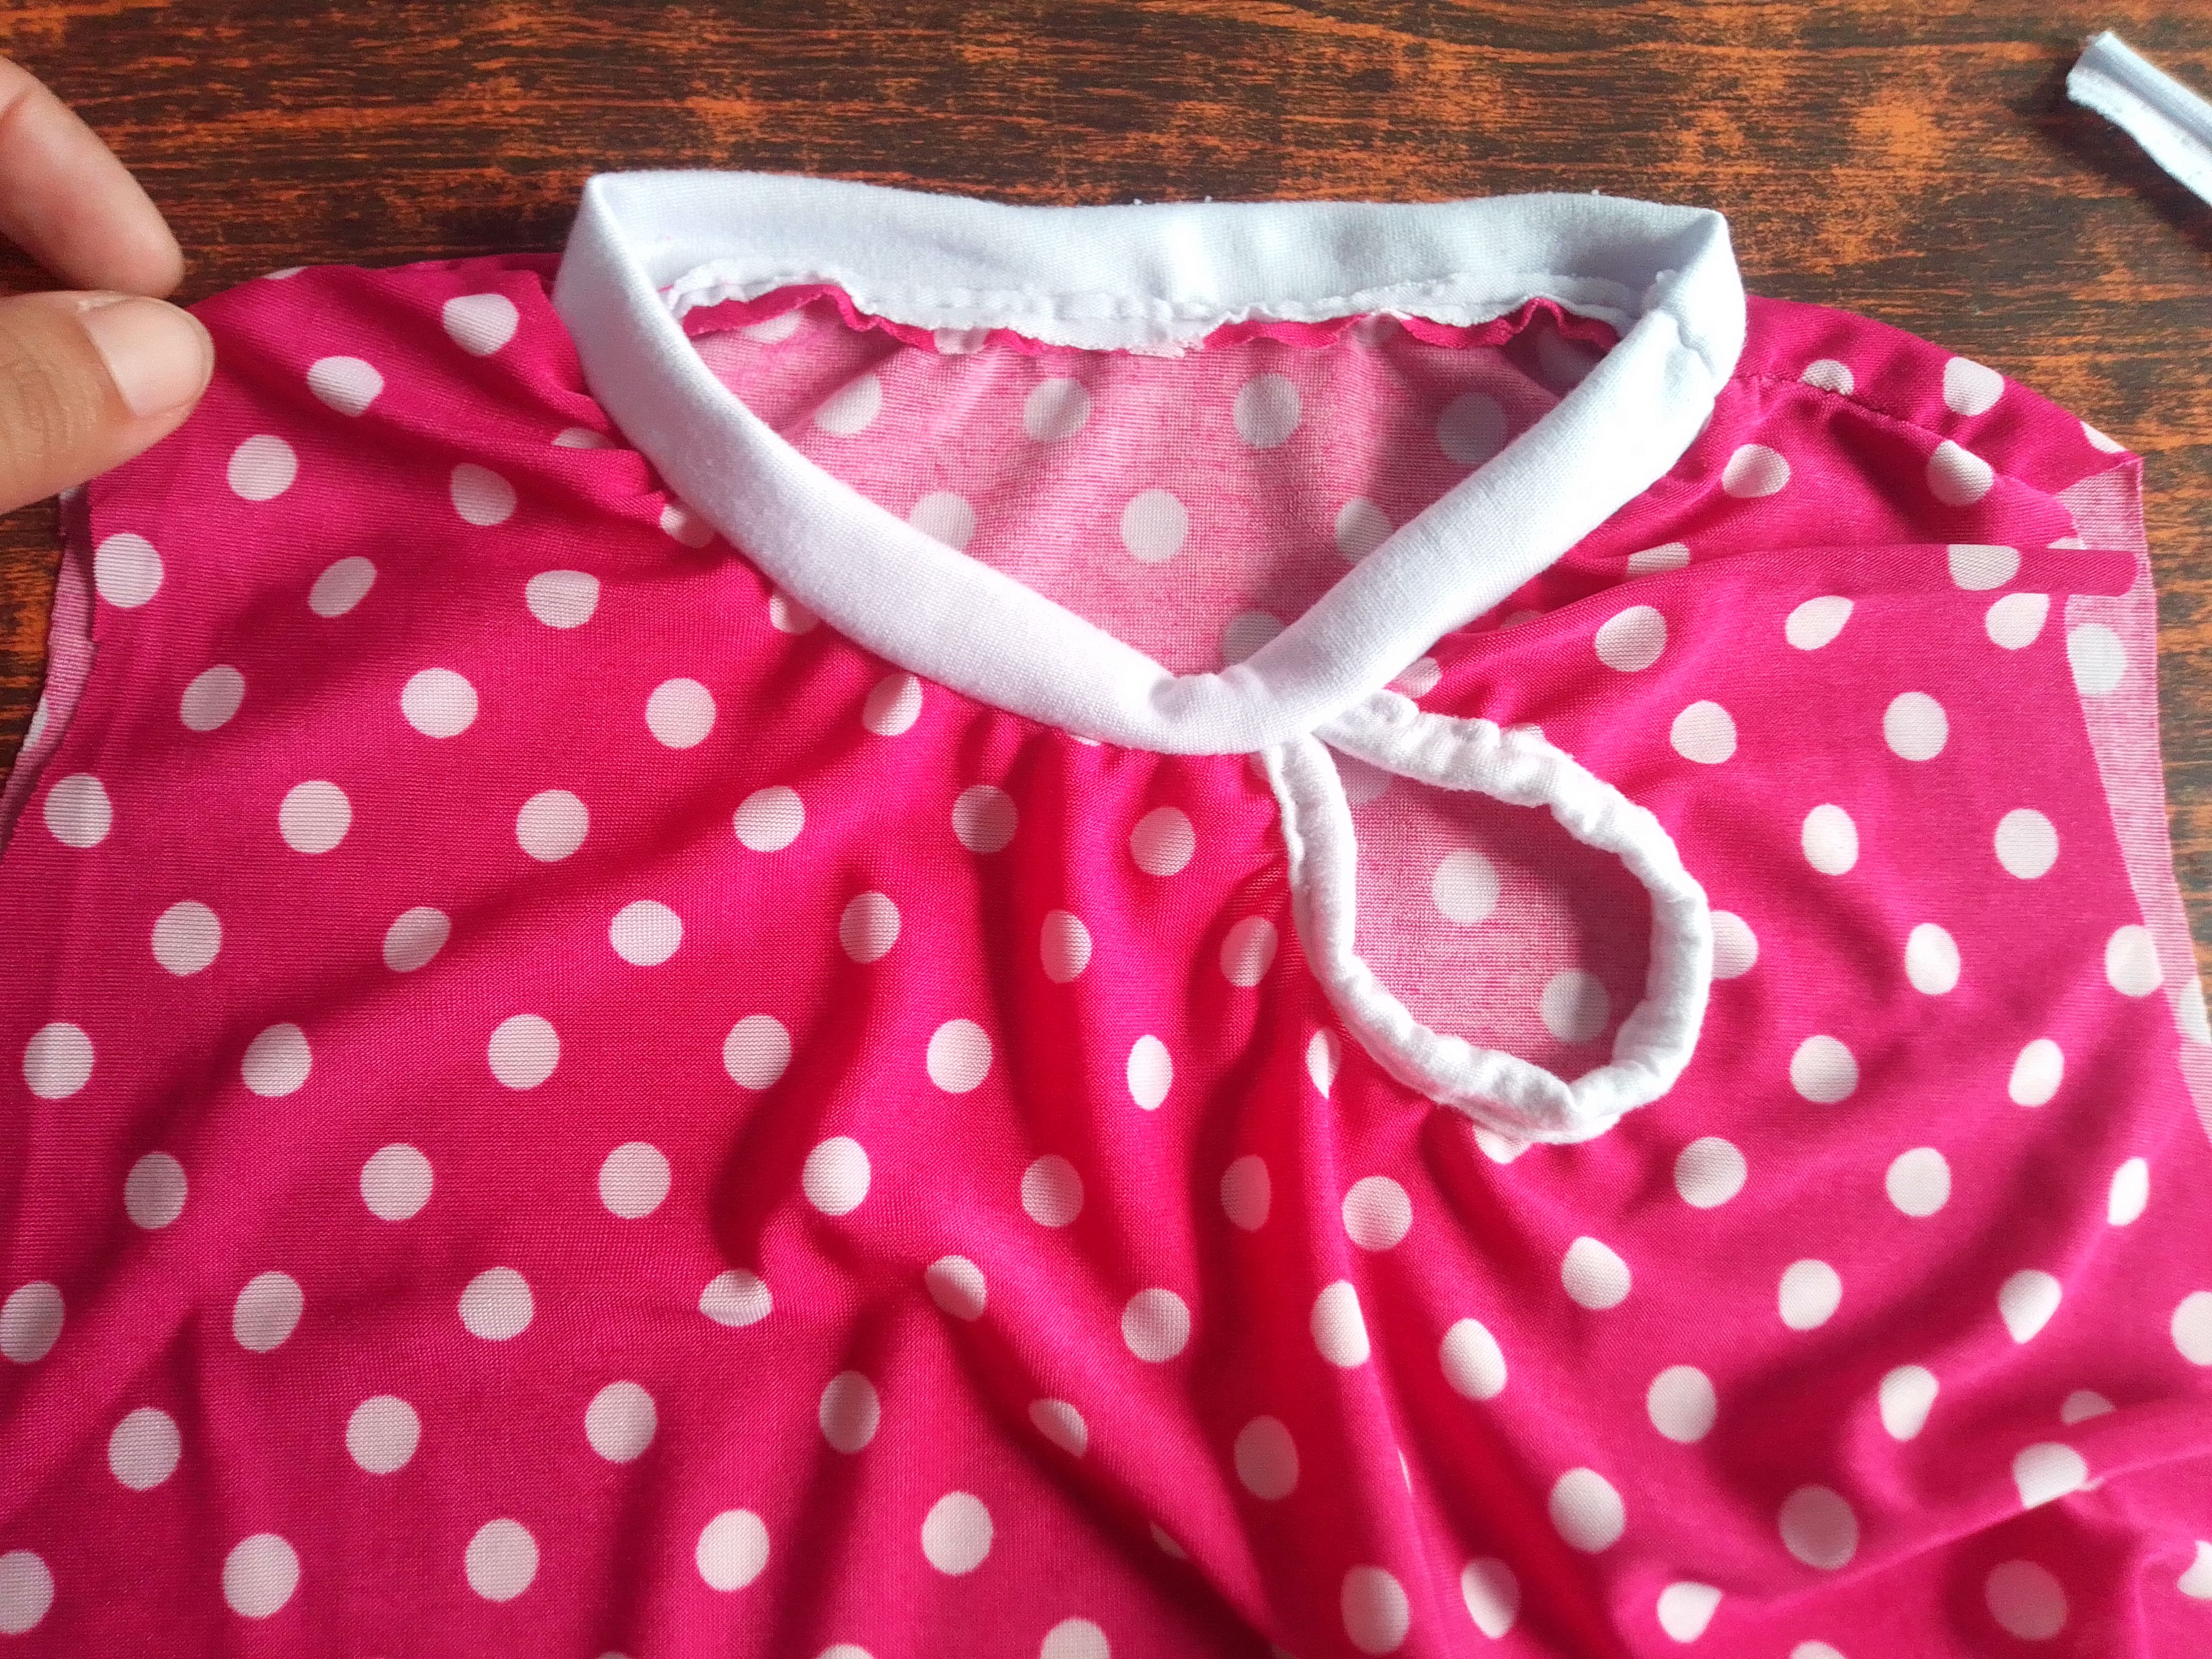
Ahora hago el aplique de la blusita.Corto dos piezas de tela en forma ovalada y unimos con una costura los bordes. Realizo pequeño un corte en el centro de una de las piezas y giramos. Luego arruchamos el centro con una costura y cubrimos está zona con un tira. Luego lo ubicamos en la abertura de la blusa y cosemos.
Step 06
Now I make the applique for the top. I cut two pieces of fabric into oval shapes and sew the edges together. I make a small cut in the center of one of the pieces and we turn. Then we wrinkle the center with a seam and cover this area with a strip. Then we place it in the opening of the blouse and sew.

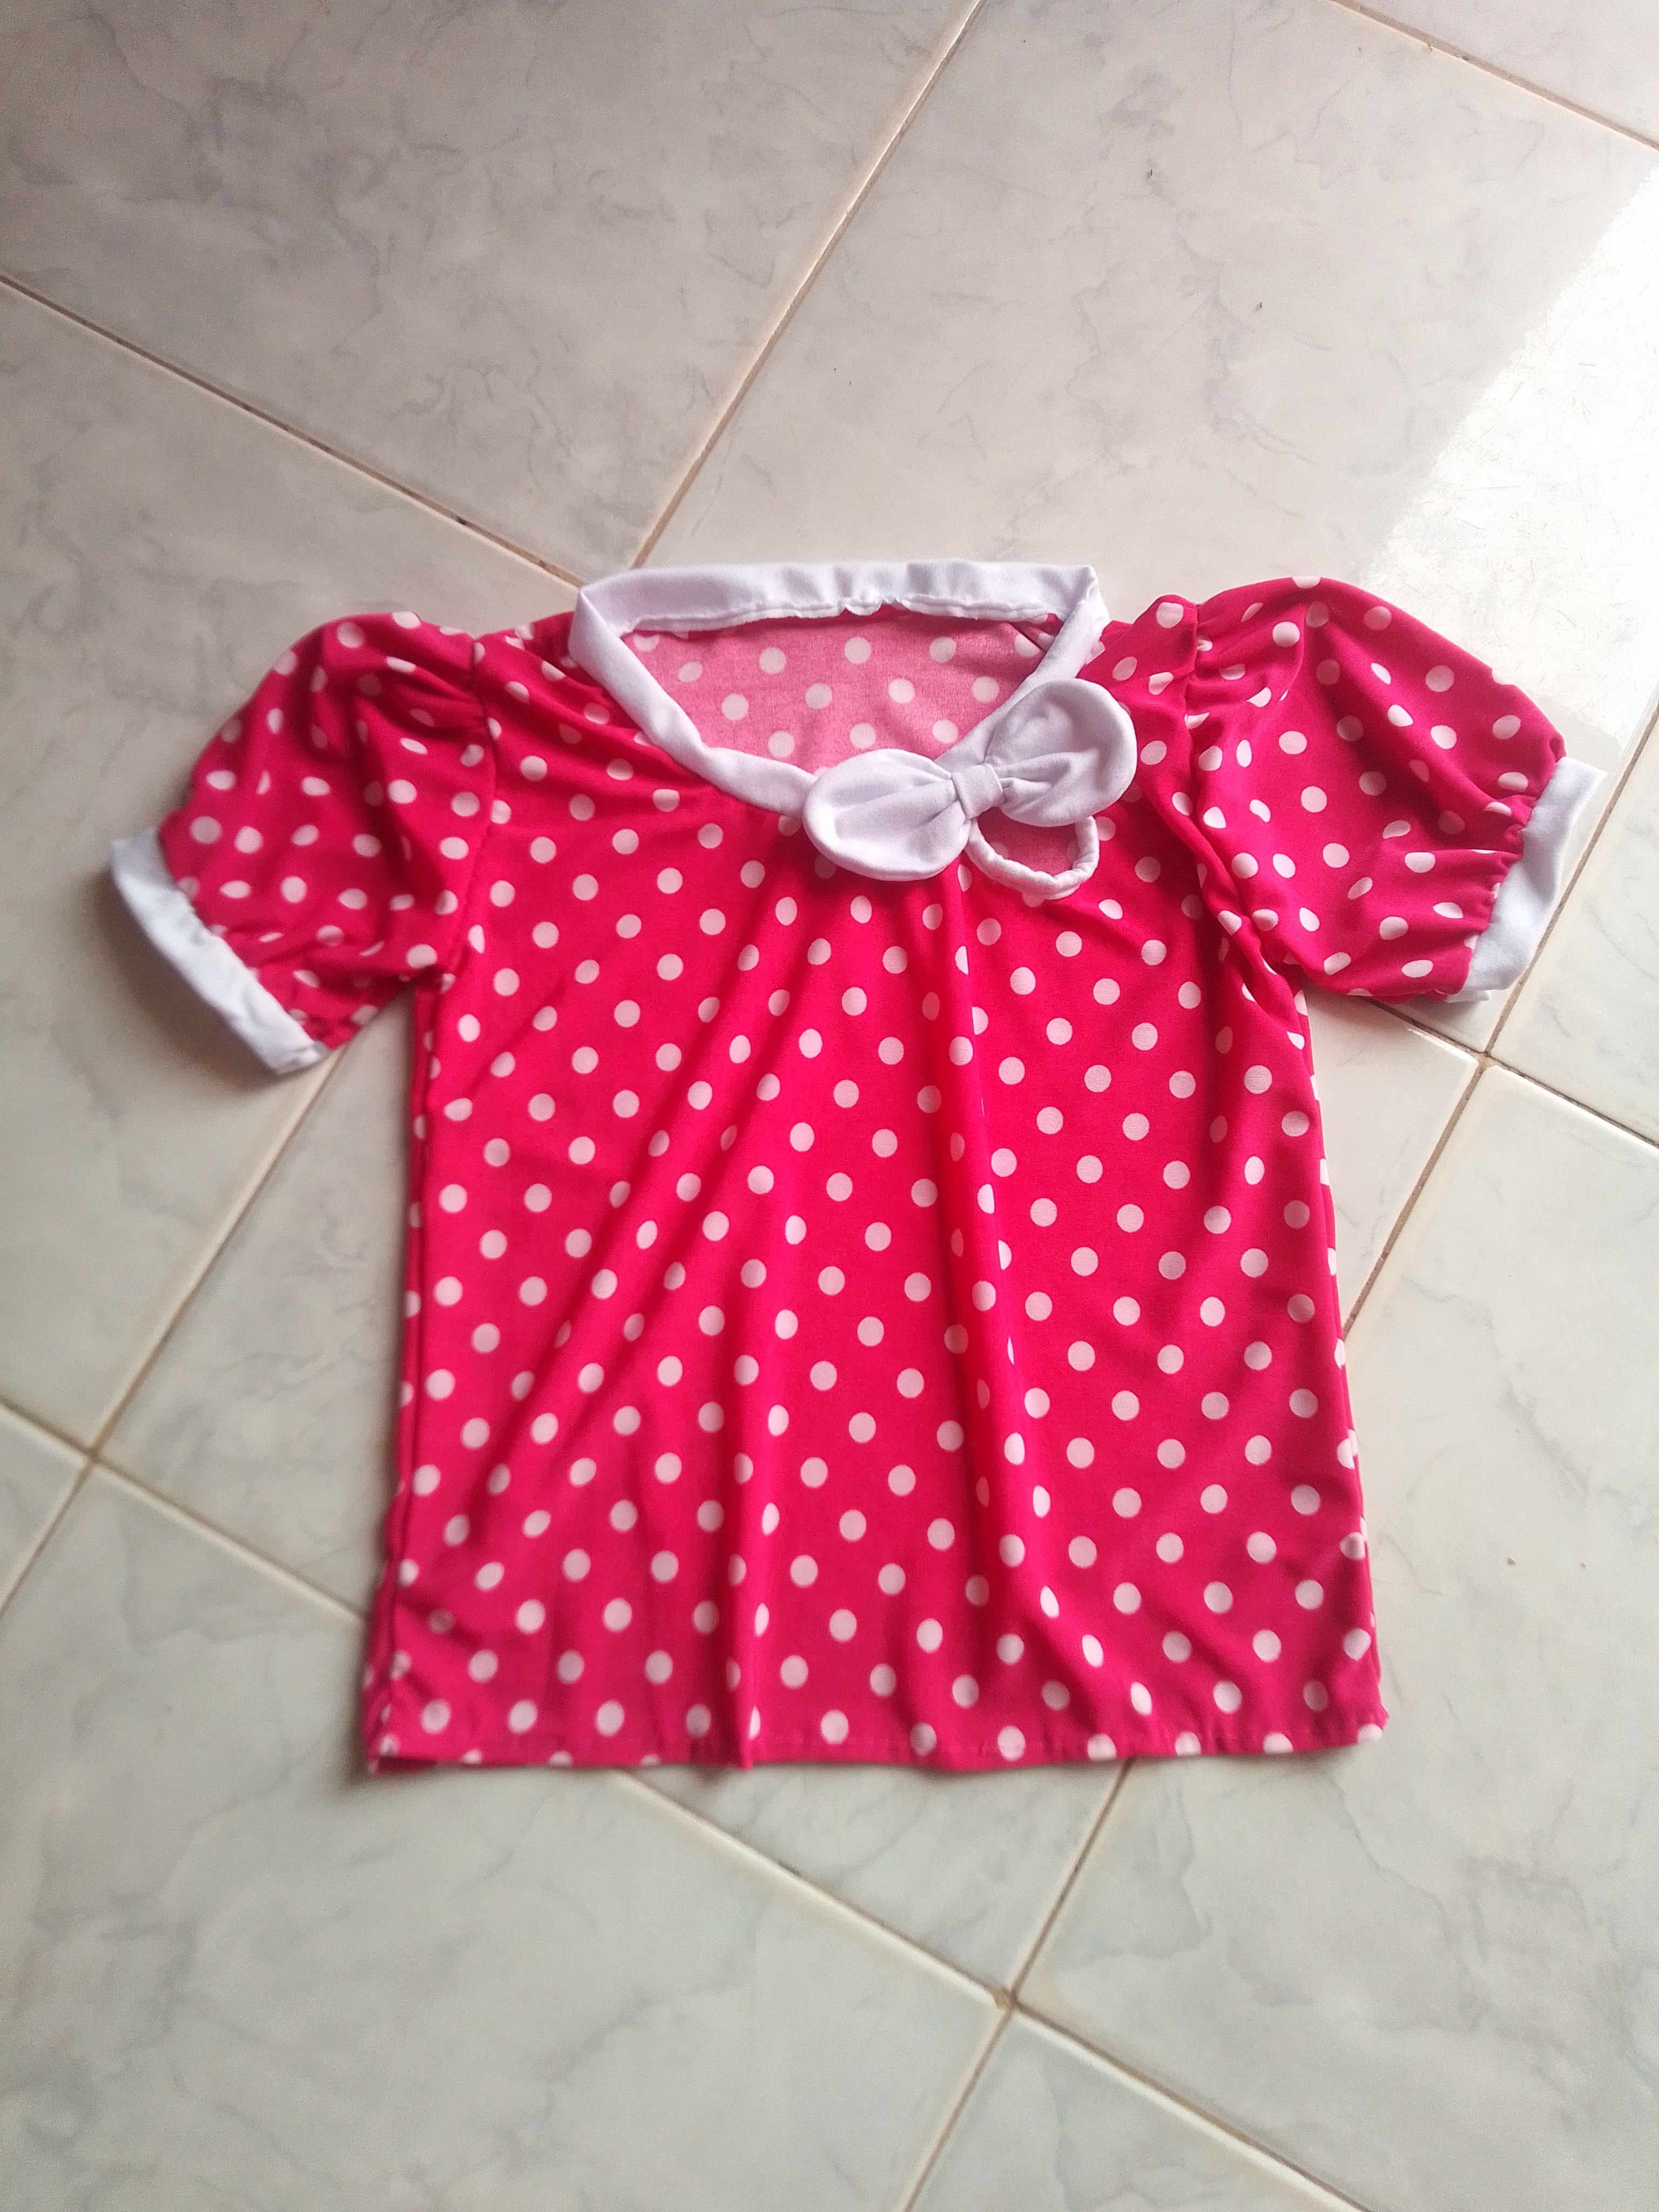
💞Resultado! 💞
Aunque fue toda un dilema para mí en qué podía hacer con esta tela, me encantó muchísimo esta idea. Pienso que luce muy bien este color a mi niña, el resultado es definitivamente muy hermoso y mi niña nuevamente está feliz con su nueva blusa.
Although it was quite a dilemma for me as to what to do with this fabric, I really loved this idea. I think this color looks very good on my girl, the result is definitely very beautiful and my girl is once again happy with her new blouse.


Es así, como hemos llegado al final de este coqueto y alegre tutorial de una blusa para niñas, esperando de todo corazón que les guste. Espero leer sus opiniones a través de su comentario, les mando un fuerte abrazo,🤗 hasta una próxima oportunidad! 🙋
This is how we have reached the end of this flirtatious and cheerful tutorial for a blouse for girls, hoping with all our hearts that you like it. I hope to read your opinions through your comment, I send you a big hug, 🤗 until the next opportunity! 🙋
@razielmorales definitivamente no hay límites a la hora de crear, te quedó muy hermosa, gracias por compartir tu creación, Saludos 🤗
Gracias linda ! Es un placer compartir contenido en esta bella comunidad! Un abrazo grande!
Que trabajo más hermoso y delicado. Me gustó mucho el diseño del cuello. Y la model 😘💜 bendiciones para ella.
!DIY
!LADY
Hola bella! Muchísimas gracias por todo el apoyo.. me hace feliz que le guste.. amén por su bendiciones, Dios le bendiga a usted también! Saludos..
Hola Raziel :) Que bueno ver de nuevo a tu bebé luciendo una de tus lindas creaciones. Me gustó esta blusita y que bueno que podes aprovechar sus prendas para hacerle otras a tu gusto. ¡Te felicito ❤️!
Hola mi estimada amiga Laura 🤗. No imagina el gusto de ver qué le gustó mi más reciente proyecto de costura... Mi niña crece súper rápido y creo que pronto ya estás prendas pasarán a ser el nuevo patrón jeje . Muchísimas gracias por el impulso que me da siempre, sus comentarios son de mucha motivación para mí.. Un fuerte abrazo! 🤗🤗🥰