🍀Si deseas leer este post en Español da click aquí🍀
Hello beautiful and creative people of NeedleWorkMonday, I hope you are well and having a good day ☕🍀. Before I want to tell you that I admit that it took me a little while to bring you the creation of my dear Garu, but many things happened on the way, one of them, the beginning of classes, another reason was that while I was looking for the picture of Pucca and Garu together I couldn't find it since I had deleted it by accident. Anyway, so many things happen on a daily basis that I can't even keep track.

For the elaboration of Garu use the following materials:
- Leather-colored thread.
- Black thread.
- Red thread.
- White thread.
- Scissors
- Number 1 knitting needle
- Stitch marker
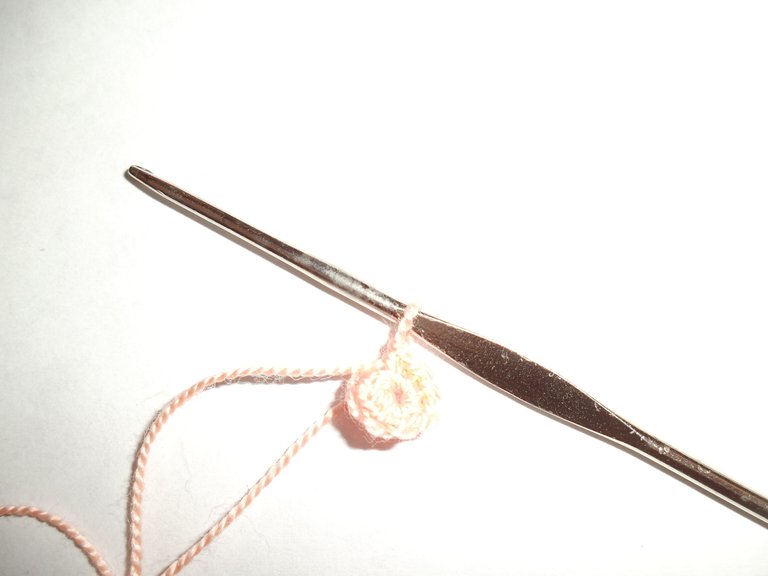
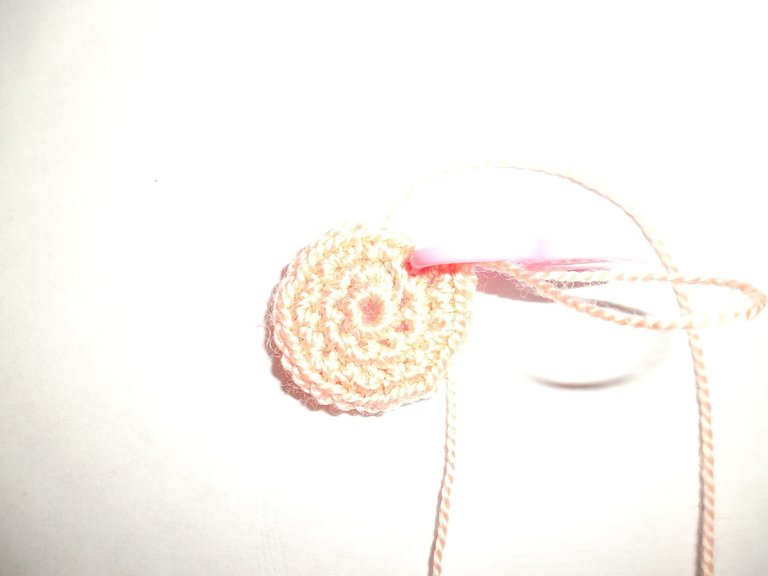
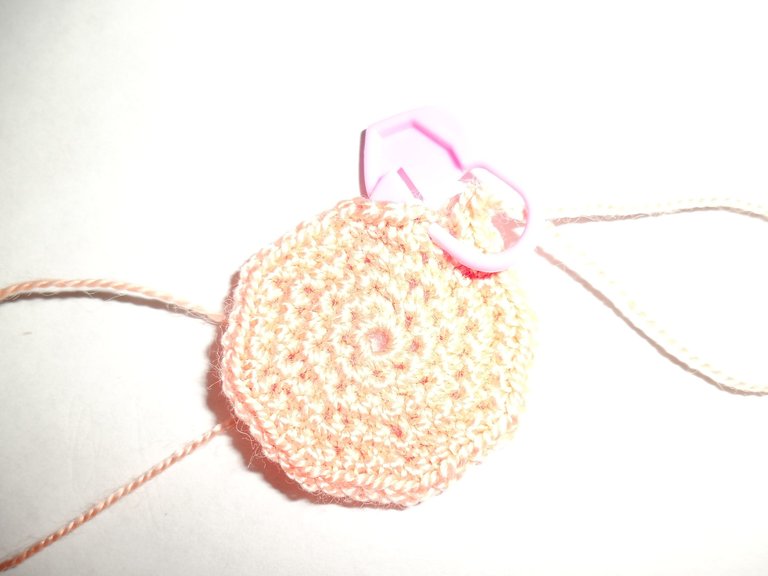
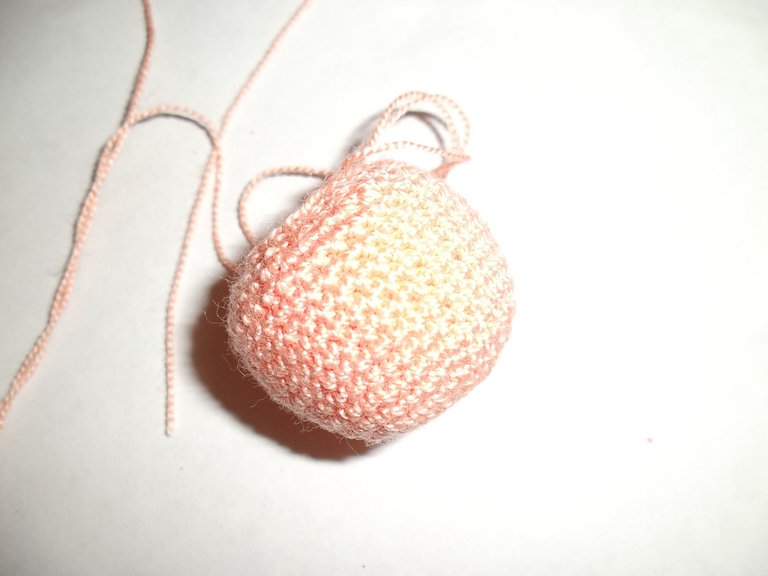
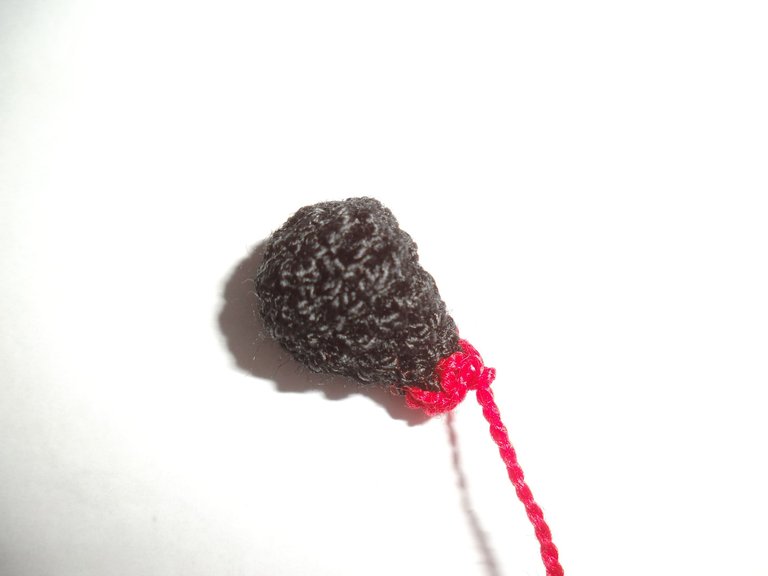
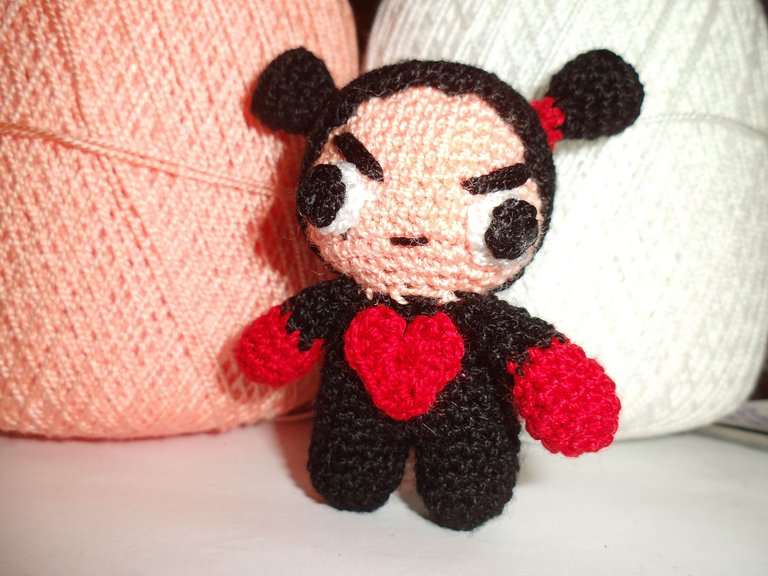
I think Garu was a little easier to make than Pucca, I guess it was because of the time that was a little less than late this time. Starting with the hair I made a magic ring in black color of 8 stitches, then followed with an increase in each stitch for a total of 16 stitches, then I started making 1 low stitch, 1 increase all the way around, then 2 low stitches and 1 increase all the way around. 3 single crochet, 1 increase until the end of the row. Until I got to the part that I find tedious of the whole knitting, knit from row 6 to 14 only single crochet and then start making the decreases.
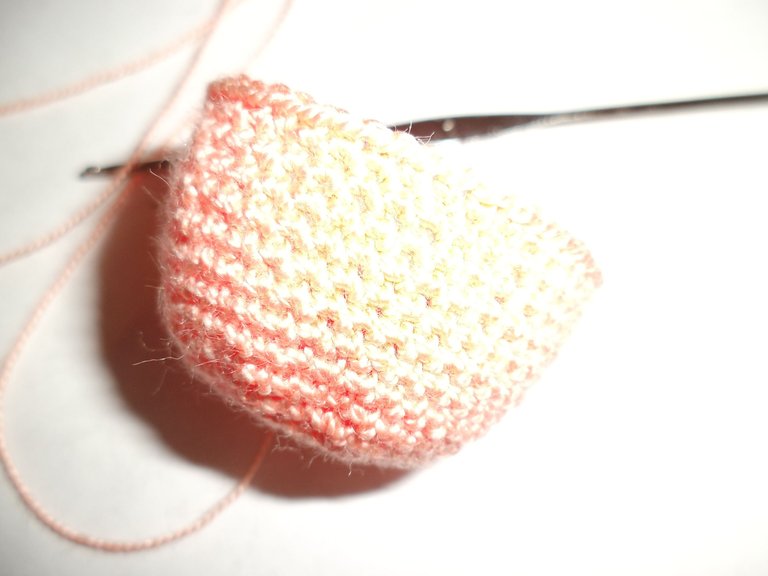
I say that this is the most tedious part for me because I feel that it becomes infinite and I get very anxious to finish haha, plus I strain my eyes a little, it also happens that it ends up hurting my back because I spend a long time concentrating on knitting and I get in an uncomfortable position until I realize the way I am and that I do not take breaks. (⑉・̆⌓・̆⑉)
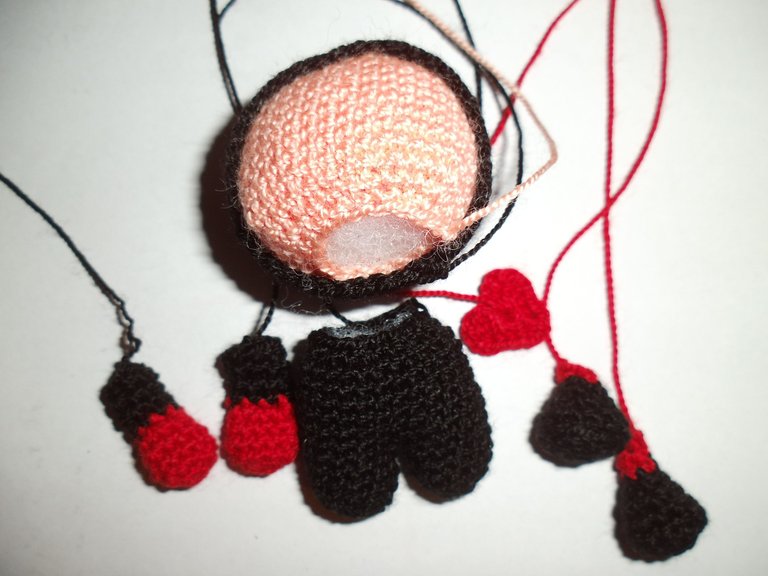
As you will notice I just made a hair in the same way I made Pucca's hair before, this because they are almost the same to make and also because Pucca and Garu have to have the same size.
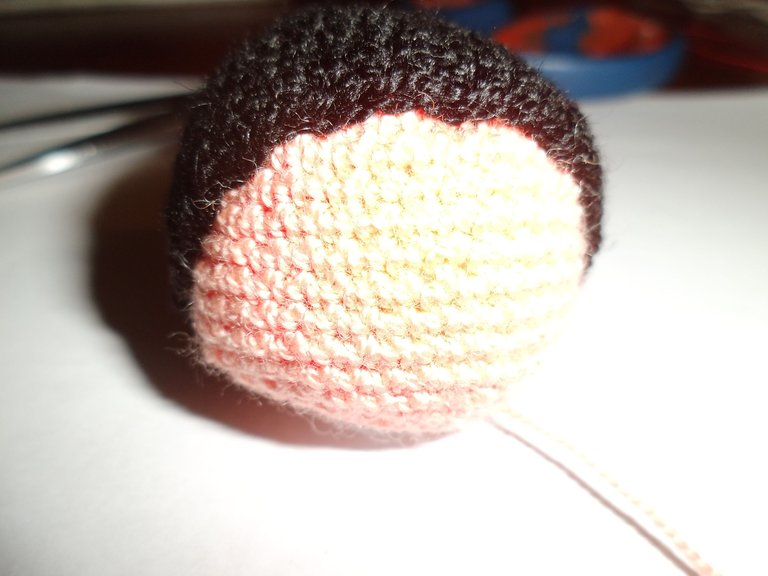
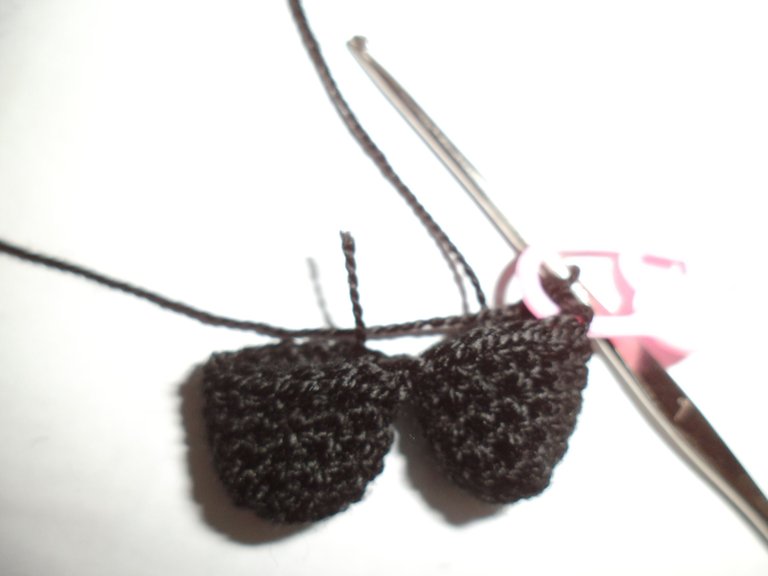
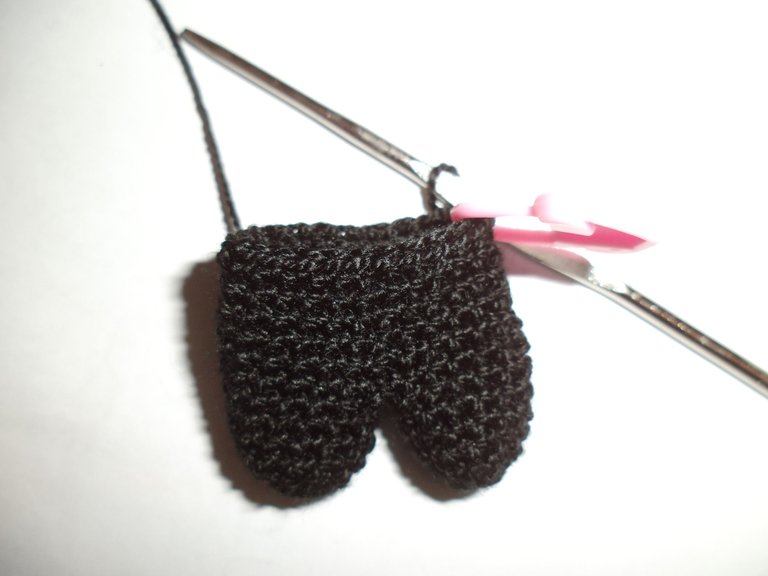
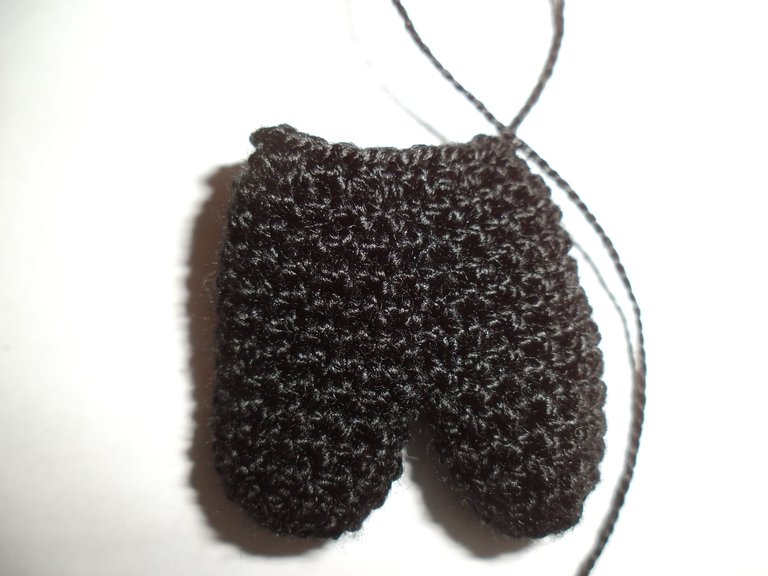
Starting with the legs in black, I made a magic ring of 6 stitches, in the second row I made increases in the whole row, then I knitted only single crochet from row 3 to row 6, then in the part where I had to join the two legs I got complicated and I had to watch the tutorial carefully, until I could understand that the two legs were joined by a row of chains. By the way, I will be leaving the link to the video tutorial I used to make Garu at the end of the post.
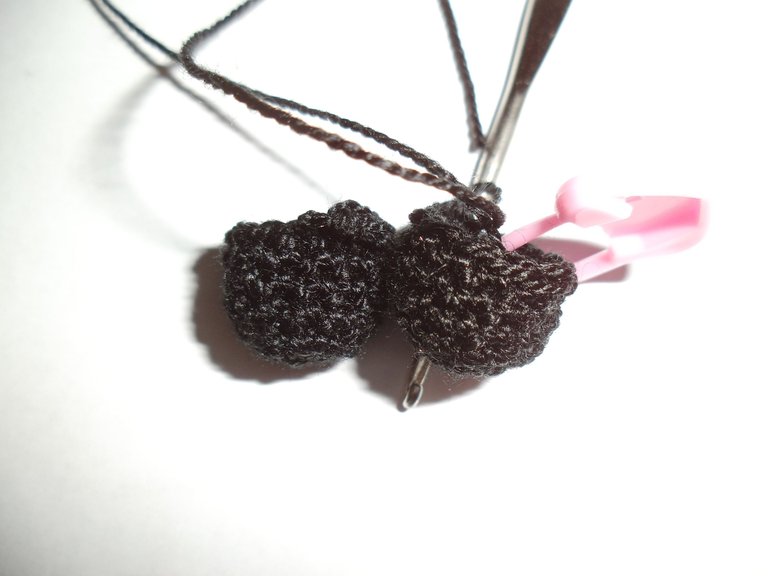
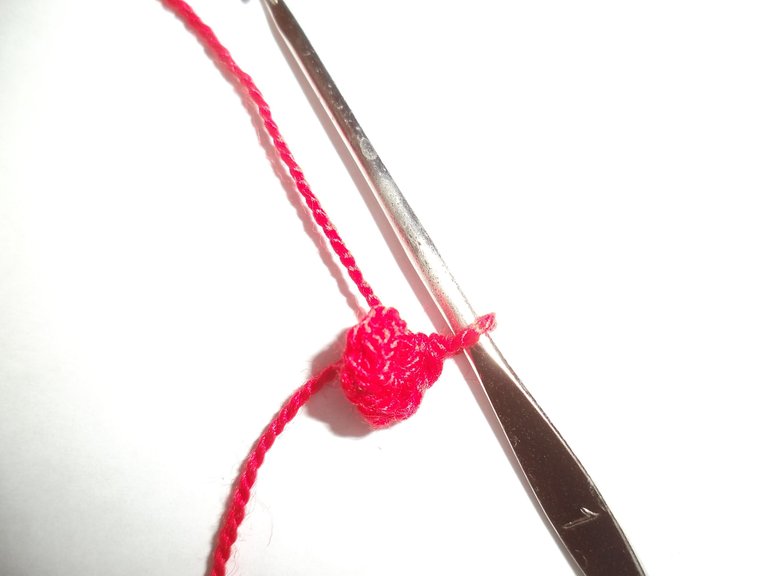
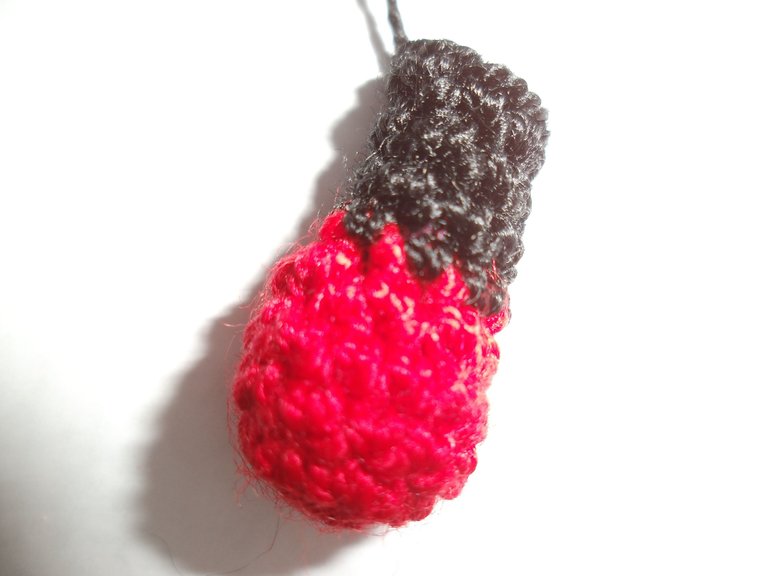
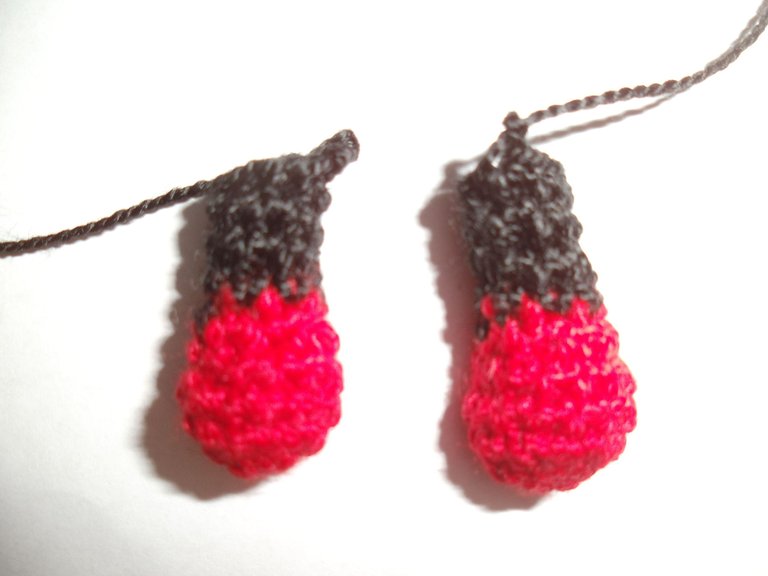
To make the hands, the easiest part of the whole work I would say, I made a magic ring in red color of 6 stitches, then I made increases in the whole row and for the 3rd to the 4th row I only made single crochets, for the 5th row I made a single crochet and a decrease, for the following rows I changed to black color and finished making single crochets from the 6th to the 9th row.
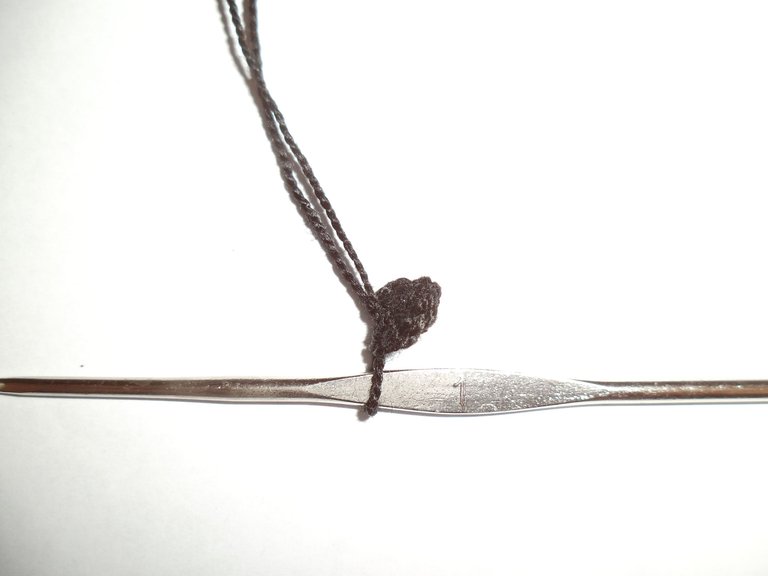
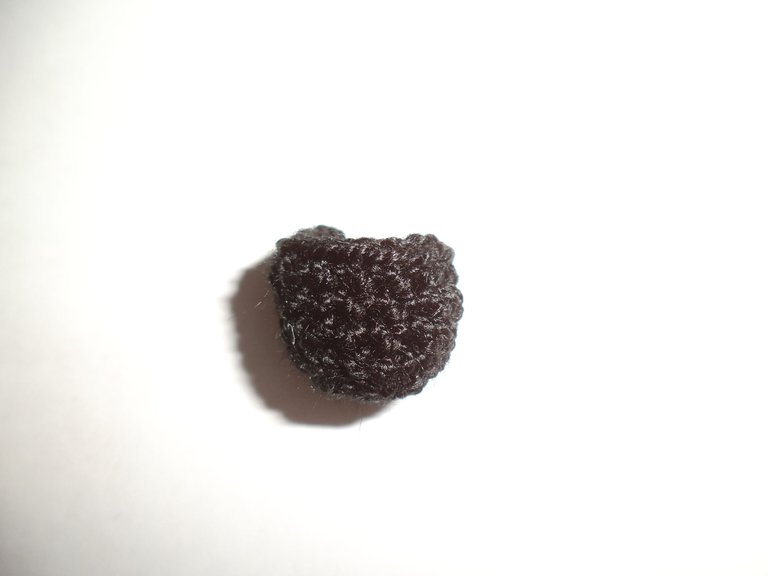
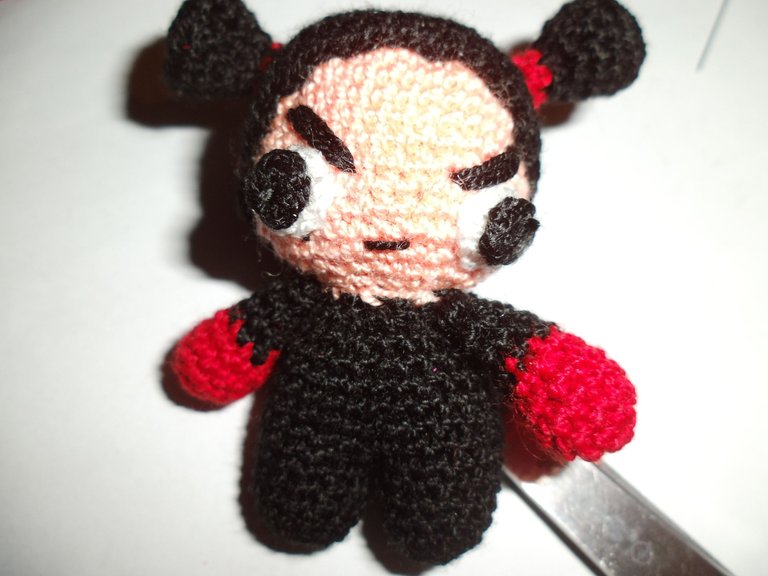
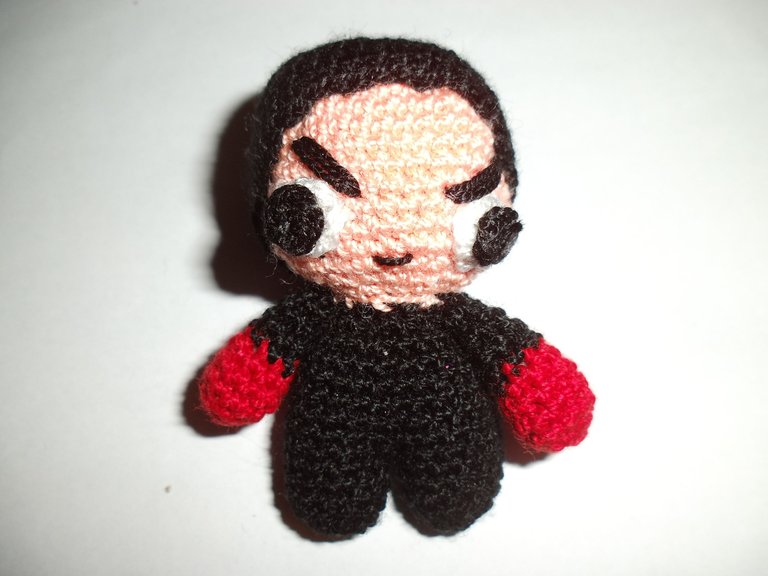
The little bows, the eyes, and the heart on Garu's chest were the easiest and quickest things to make, even though they are small I love this detail that they do in Garu because they are very characteristic of him. I stuffed all the extremities and proceeded to sew all the parts to the body to finish this beautiful stuffed animal.
Sincerely I feel that I have been very well for what I have loved, it is very nice🌼✨, and although it seems to have an eye falling out still retains its essence of tenderness haha, the person to whom I gave it, which was the partner of my aunt, said it looked like a fish that has that kind of very protruding eyes haha, but still she loved her gift. Thanks to this project I did with Pucca and Garu I was able to expand my knowledge and above all my patience when I saw that they were not quite perfect.
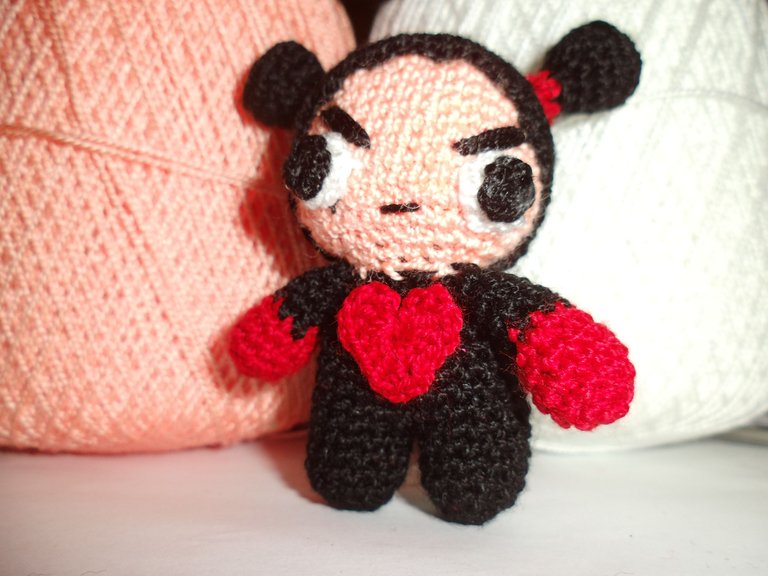
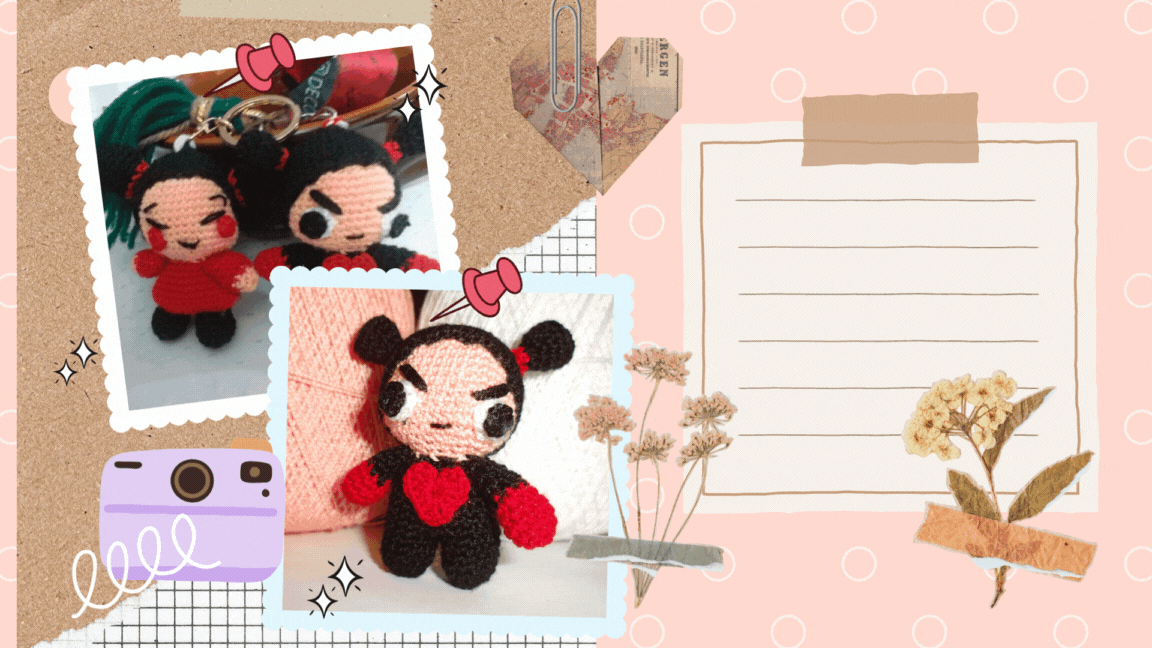
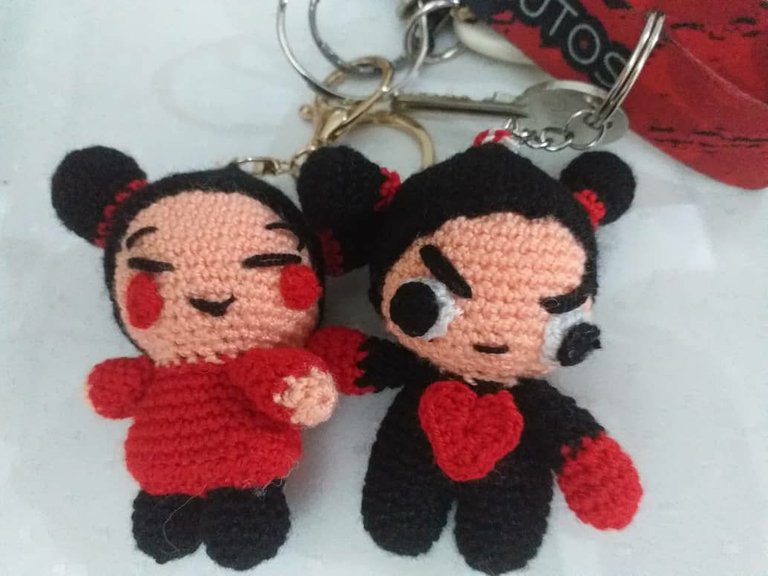
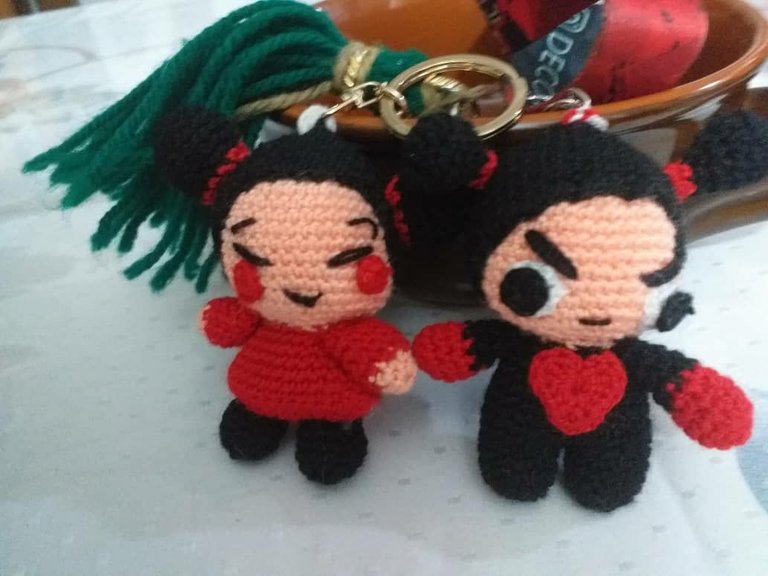
Here are some pictures I took of 💐Pucca and Garu✨ together, they look so cute.
Here is the link to the video tutorial I used as a guide. :3
And well, beautiful people, I hope you liked it as much as I did. What do you think about how Garu looks like? Remember that I'm still learning, so if you have any advice to give me, it would be a great help. The pictures were taken by me while I was knitting, thanks for making it this far, see you next time!!!(。・ω・。)ノ🍓


Hola gente linda y creativa de NeedleWorkMonday, deseo se encuentren bien y estén teniendo un buen día ☕🍀. Antes quiero decirles que admito que me demore un poco en traerles la creación de mi querido Garu, pero sucedieron muchas cosas en el camino, una de ellas, el comienzo de clases, otra razón fue que mientras buscaba la foto de Pucca y Garu juntos no la encontré ya que la había borrado por accidente. En fin, tantas cosas que pasan a diario que no puedo ni llevar la cuenta.
Para la elaboración de Garu utilice los siguientes materiales:
- Hilo Color piel.
- Hilo Color negro.
- Hilo Color rojo.
- Hilo Color blanco.
- Tijera
- Una aguja de Tejer número 1
- Marcador de puntos
Creo que en cuanto a la elaboración de Garu fue un poco más sencillo que Pucca, supongo que fue por el tiempo que fue un poco menos que tarde esta vez. Comenzando por el pelo hice un anillo mágico en color negro de 8 puntos, luego seguí con un aumento en cada punto para lograr un total de 16 puntos, luego empecé a hacer 1 punto bajo, 1 aumento por toda la vuelta, luego 2 puntos bajos y 1 aumento en toda la vuelta. 3 puntos bajos, 1 aumento hasta el final de la vuelta. Hasta que llego la parte que me parece tediosa de todo el tejido, tejer desde la vuelta 6 hasta la 14 solo puntos bajos y luego comenzar a hacer las disminuciones.
Digo que esta es la parte mas tediosa para mí porque siento que se hace infinito y me pongo muy ansiosa por terminar jaja, además que fuerzo un poco la vista, también pasa que termina doliéndome la espalda porque paso un buen rato concentrada tejiendo y me pongo en una posición incomoda hasta que me doy cuenta de la manera en que estoy y que tampoco me tomo descansos. (⑉・̆⌓・̆⑉)
Como se darán cuenta acabo de hacer un pelo de la misma manera en la que le hice el pelo a Pucca anteriormente, esto porque bueno son casi iguales de hacer y además que Pucca y Garu tienen que tener el mismo tamaño.
Comenzando por las piernas en color negro, hice un anillo mágico de 6 puntos, en la segunda vuelta hice aumentos en toda la vuelta, luego tejí solo puntos bajos desde la vuelta 3 hasta la 6, luego en la parte donde tenía que unir las dos patas se me complico la cosa y tuve que ver el tutorial detenidamente, hasta que pude entender que se unían las dos patas por una fila de cadenas. Por cierto les estaré dejando el link del vídeo tutorial del cual me guié para hacer a Garu al final del post.
Para hacer las manos, lo mas fácil de todo el trabajo diría yo, hice un anillo mágico en color rojo de 6 puntos, luego hice aumentos en toda la vuelta y ya para la 3 vuelta hasta la 4 solo hice puntos bajos, para la vuelta 5 hice un punto bajo y una disminución, para las siguientes vueltas cambie a color negro y termine haciendo puntos bajos desde la vuelta 6 hasta la 9.
Lo que son los moñitos, los ojos, y el corazón que lleva Garu en el pecho, fueron las cositas más sencillas y rápidas de hacer, aunque son pequeñas me encantan ese detalle que hacen en Garu ya que son cosas muy características de él. Rellene todas las extremidades y proseguí a coser todas las partes al cuerpo para dar por terminado este hermoso peluchito.
Sinceramente siento que me ha quedado muy bien por lo que me ha encanto, es muy bonito🌼✨, y aunque parece que tiene un ojo cayéndose aun conserva su esencia de ternura jaja, la persona a la cual se la entregue, que fue la pareja de mi tía, dijo que parecía un pescado que tiene ese tipo de ojos muy salientes jaja, pero aun así le ha encantado su regalo. Gracias a este proyecto que hice de Pucca y Garu pude ampliar más mis conocimientos y sobre todo mi paciencia al ver que no me quedaban del todo perfectos.
Por acá les dejare fotitos que les tome a 💐Pucca y Garu✨ juntos, se ven tan lindos.
Por acá les dejo el link del vídeo tutorial del cual me guié :3
Y bueno gente linda hasta aquí hemos llegado, espero les haya gustado tanto como a mí. ¿Qué opinan ustedes sobre como se ve Garu? recuerda que aun estoy aprendiendo, así que si tienes algún consejo que darme me serviría de gran ayuda. Las fotos fueron tomadas por mí mientras tejía.¡¡Gracias por a ver llegado hasta aquí, nos vemos la próxima!!(。・ω・。)ノ🍓
¡Adoro como quedaron! Pucca era de mis series animadas favoritas, me encantaría tener ese llavero con ambos jajaaj
Buen post 🖤
También era una de mis series favoritas, de hecho aun lo es :3
Y claro que puedes tenerlos, solo has tu pedido correee jajaja. También puedes hacerlos tu misma apuesto a quedaran muy lindos también uwu
Quisiera correr a hacer mi pedido pero soy pobre jajaja.
Me quedarían lindos de tener tu talento, haces un trabajo hermoso :3
No te preocupes chica que con practica podrás tener mucho mas talento que yo, animos!
Awww, gracias por los ánimos 🖤
Pucca y Garu son personajes iconicos para muchos que dejan buenos recuerdos, me gusta como se ve este llavero !hiqvote
Muy cierto yo amo esos dos personajes son tan cutes uwu
!PGM
BUY AND STAKE THE PGM TO SEND A LOT OF TOKENS!
The tokens that the command sends are: 0.1 PGM-0.1 LVL-0.1 THGAMING-0.05 DEC-15 SBT-1 STARBITS-[0.00000001 BTC (SWAP.BTC) only if you have 2500 PGM in stake or more ]
5000 PGM IN STAKE = 2x rewards!
Discord
Support the curation account @ pgm-curator with a delegation 10 HP - 50 HP - 100 HP - 500 HP - 1000 HP
Get potential votes from @ pgm-curator by paying in PGM, here is a guide
I'm a bot, if you want a hand ask @ zottone444
@zonadigital21, the HiQ Smart Bot has recognized your request (2/2) but the daily limit has been reached or the mana is too low. Try again later.
As a consolation, @wuildariablox gets !LOL from @hiq.redaktion.
For further questions, check out https://hiq-hive.com or join our Discord. And don't forget to vote HiQs fucking Witness! 😻
quedaron super lindos, todo es dificil cuando hay que ir a clases jajaja pero de a poco siempre se puede avanzar
oye siiiii es verdad jajaja, gracias por tu lindo comentario XD
Muy lindo llavero. Me recordé de mi hija cuando era niña. Saludos.
Aaw muchas gracias por pasarse por aquí :'3
Congratulations @wuildariablox! You have completed the following achievement on the Hive blockchain And have been rewarded with New badge(s)
Your next target is to reach 100 posts.
You can view your badges on your board and compare yourself to others in the Ranking
If you no longer want to receive notifications, reply to this comment with the word
STOPTo support your work, I also upvoted your post!
Check out our last posts:
Support the HiveBuzz project. Vote for our proposal!