
Hello hello, my creative people from the hive diy community, in today's tutorial I am going to show you how to make a macramé cross keychain with the basic flat knot, it is extremely simple and looks very beautiful.
Hola hola, mi gente creativa de la comunidad de hive diy, en el tutorial de hoy les voy a mostrar como hacer un llavero de cruz en macramé con el nudo básico plano, es sumamente sencillo y queda muy bonito.
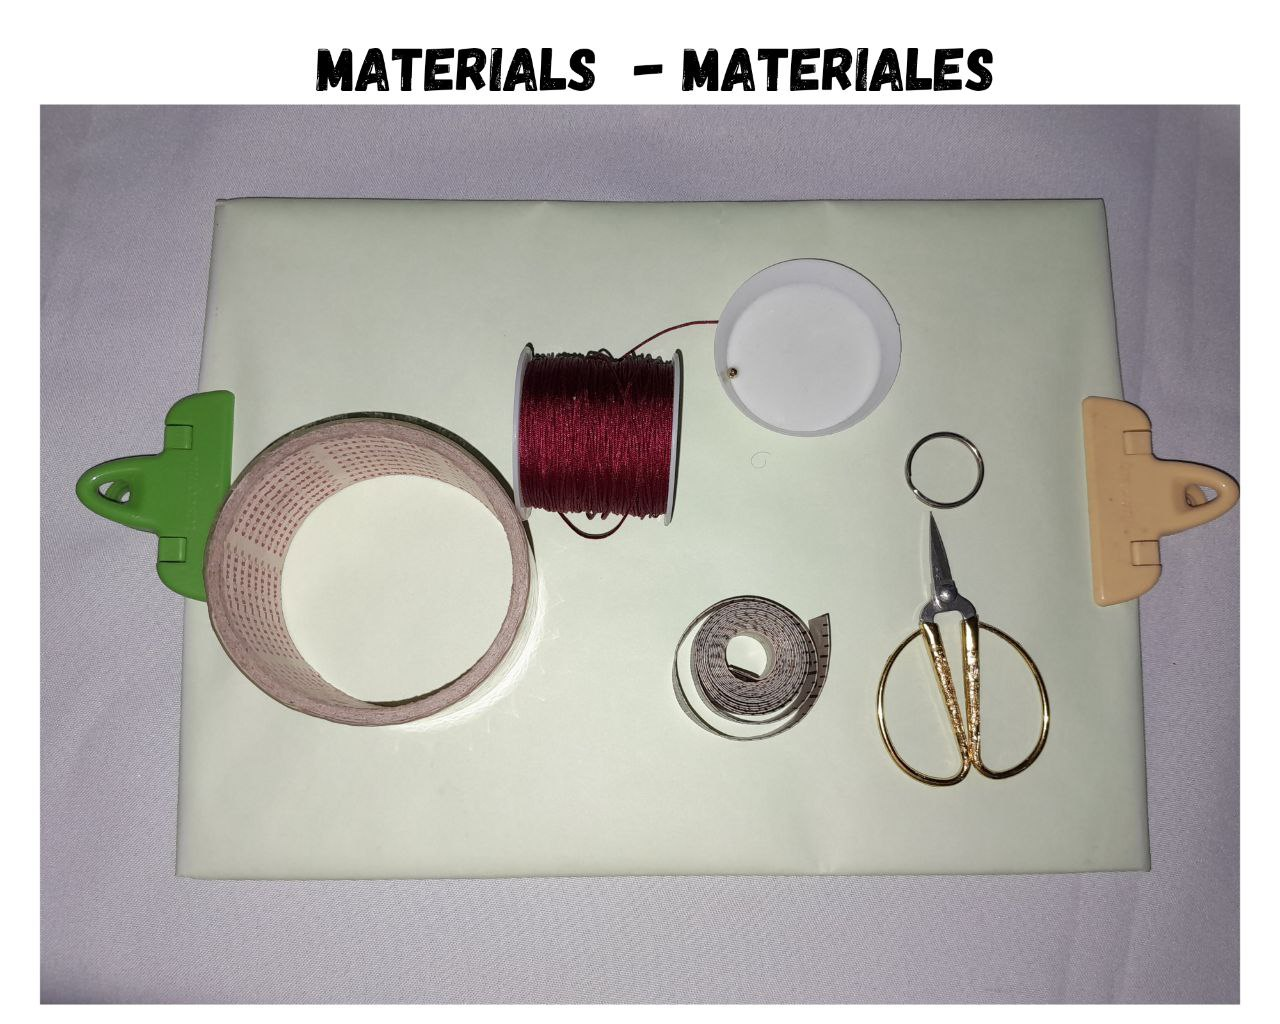
Materials:
- 2 meters of Chinese thread, or any thread of your preference.
- A balin or golden bead.
- Keychain ring.
- Lighter.
- Meter.
- Scissors.
- Adhesive tape or knitting board.
Materiales:
- 2 metros de hilo chino, o cualquier hilo de su preferencia.
- Un balin o cuenta dorada.
- Aro para llavero.
- Encendedor.
- Metro.
- Tijera.
- Cinta adhesiva o tabla para tejer.
Step by Step:
Paso a paso:

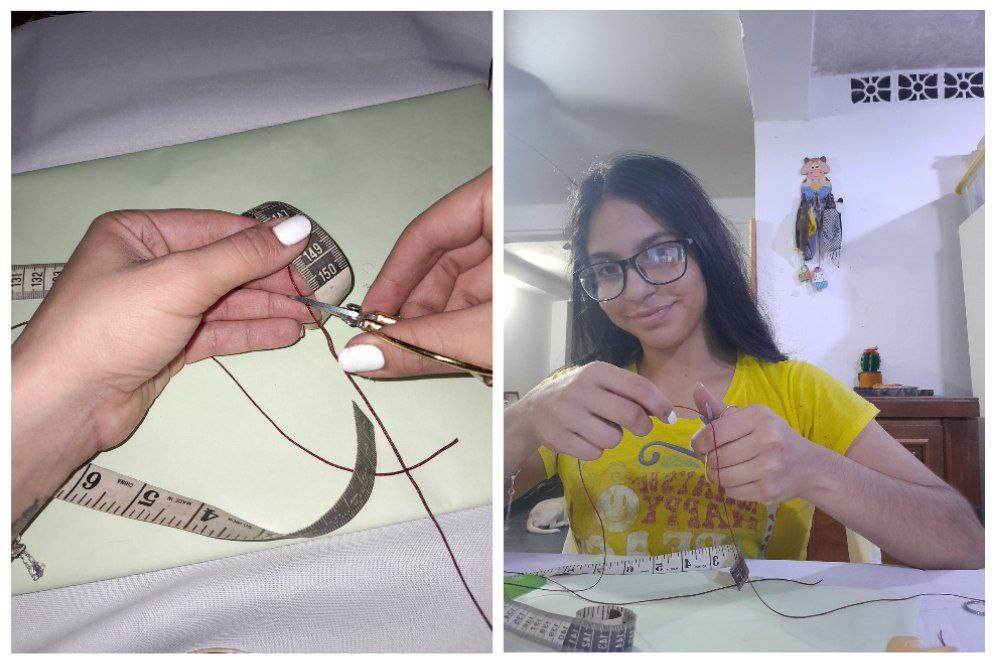
1.- We will take the thread that we are going to use and we are going to cut one with a length of 50cm and another of 1.50 cm.
1.- Tomaremos el hilo que vamos a utilizar y vamos a cortar uno con un largo de 50cm y otro de 1,50 cm.

2.- Now I am going to take the 50cm thread and fold it in half and I am going to adjust it to my work table with a piece of adhesive tape or in my case to my work table.
2.- Ahora voy a tomar el hilo de 50cm y lo doblo por la mitad y lo voy a ajustar a mi mesa de trabajo con un trozo de cinta adhesiva o en mi caso a mi tabla de trabajo.
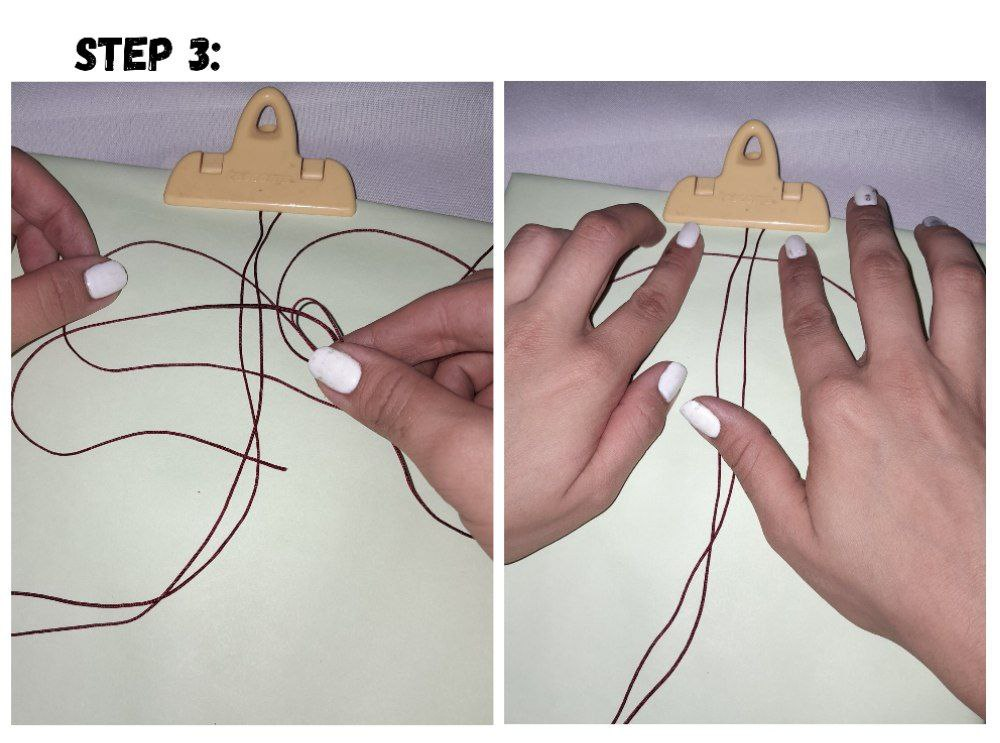
3.- I am going to take the 1.50cm thread and place half of it below the 50cm base thread.
3.- Voy a tomar el hilo de 1.50cm y ubicare la mitad de este por debajo del hilo base de 50cm.

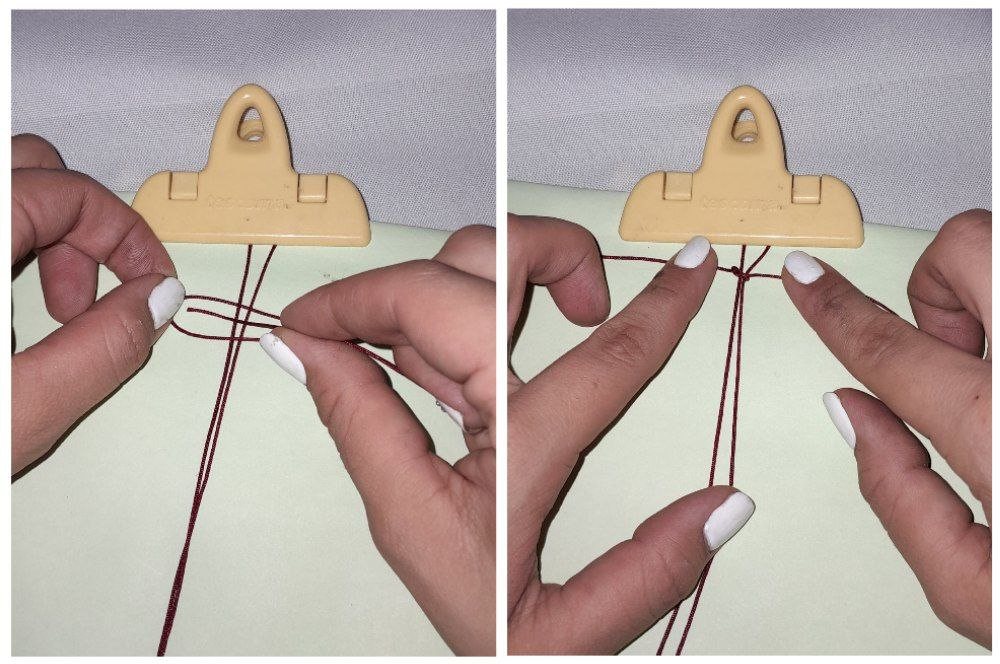
4.- I will pass the left side under the center thread, leaving a little ear on the left side and I will leave the thread above the thread on the right side. I take the end of the thread on the right side and I am going to pass it through the center of the ear that we left on the left side and press to adjust the thread, leaving a space of one centimeter from where the base thread begins.
4.- Pasaré el lado izquierdo por debajo del hilo del centro dejando una orejita del lado izquierdo y dejaré el hilo por encima del hilo del lado derecho. Tomo el extremo del hilo del lado derecho y voy a pasarlo por el centro la orejita qué dejamos del lado izquierdo y apretamos para ajustar el hilo dejando un espacio de un centímetro de donde comienza el hilo base.
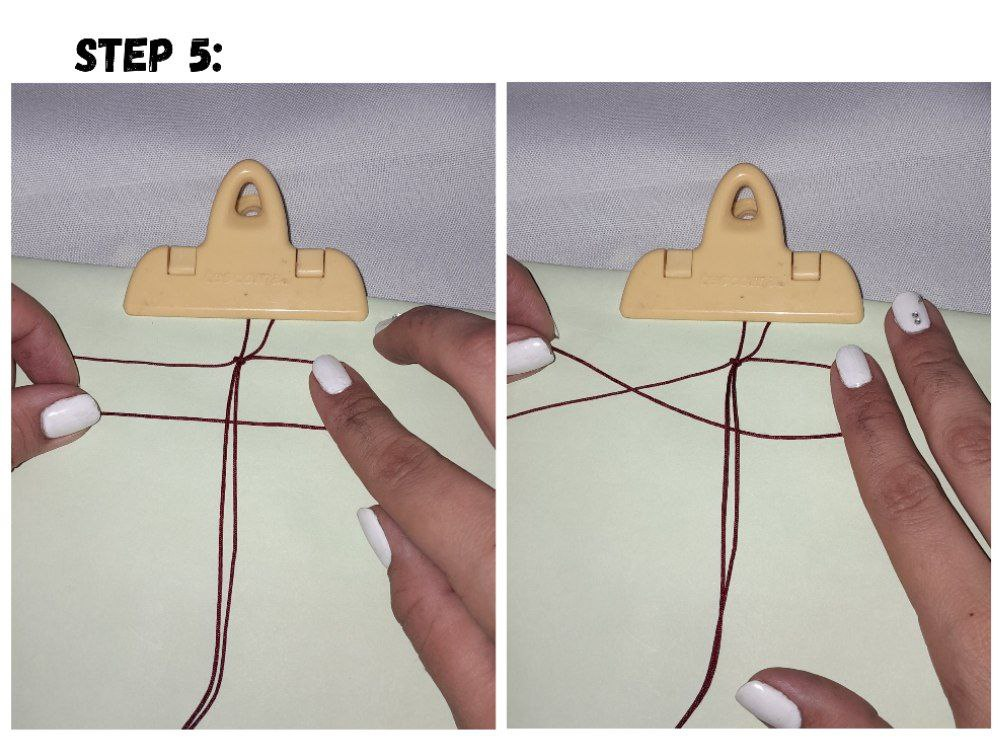
5.- I will do the same but now on the right side I am going to take the thread from the right side and I am going to pass it under the center threads, leaving it above the thread from the left side, take the end of the thread from the left side and I will go through the center of the ear on the right side, we tighten and we have our second knot.
5.- Haré lo mismo pero ahora del lado derecho voy a tomar el hilo del lado derecho y lo voy a pasar por debajo de los hilos del centro dejándolo por encima del hilo del del lado izquierdo tomar el extremo del hilo del lado izquierdo y lo pasaré por el centro de la orejita del lado derecho, apretamos y tenemos nuestro segundo nudo.
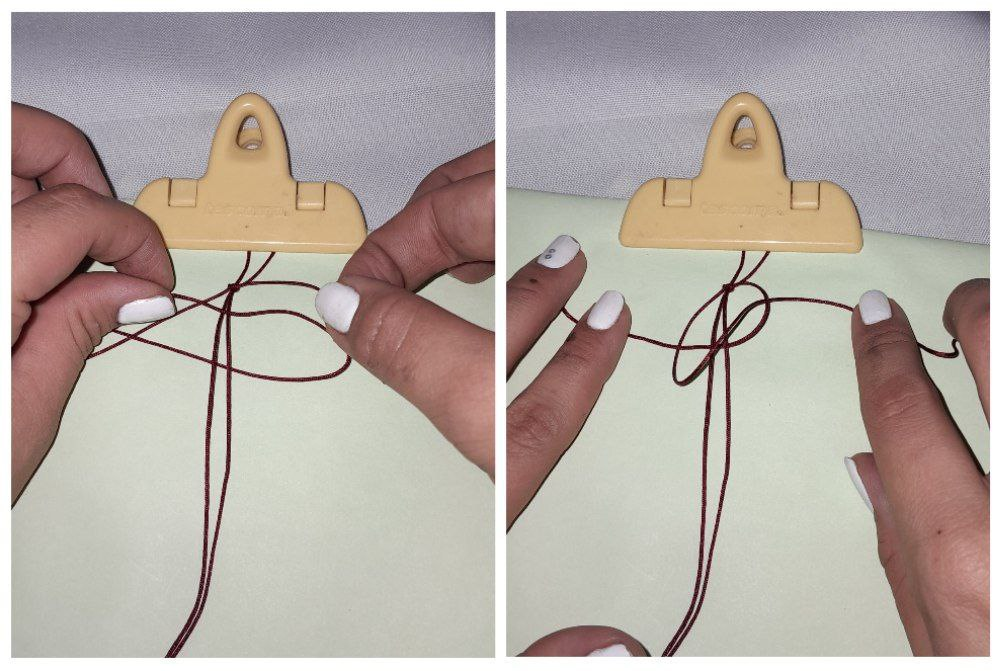
6.- I am going to repeat the same procedure on the left side, I take the thread and I am going to pass it under the middle threads and leaving it above the thread on the right side and I take the thread on the right side and I pass it through the center of the left side thread.
6.- Voy a repetir el mismo procedimiento del lado izquierdo tomo el hilo y lo voy a pasar por debajo de los hilos del medio y dejándolo por encima del hilo del lado derecho y tomo el hilo del lado derecho y le paso por el centro del hilo del lado izquierdo.
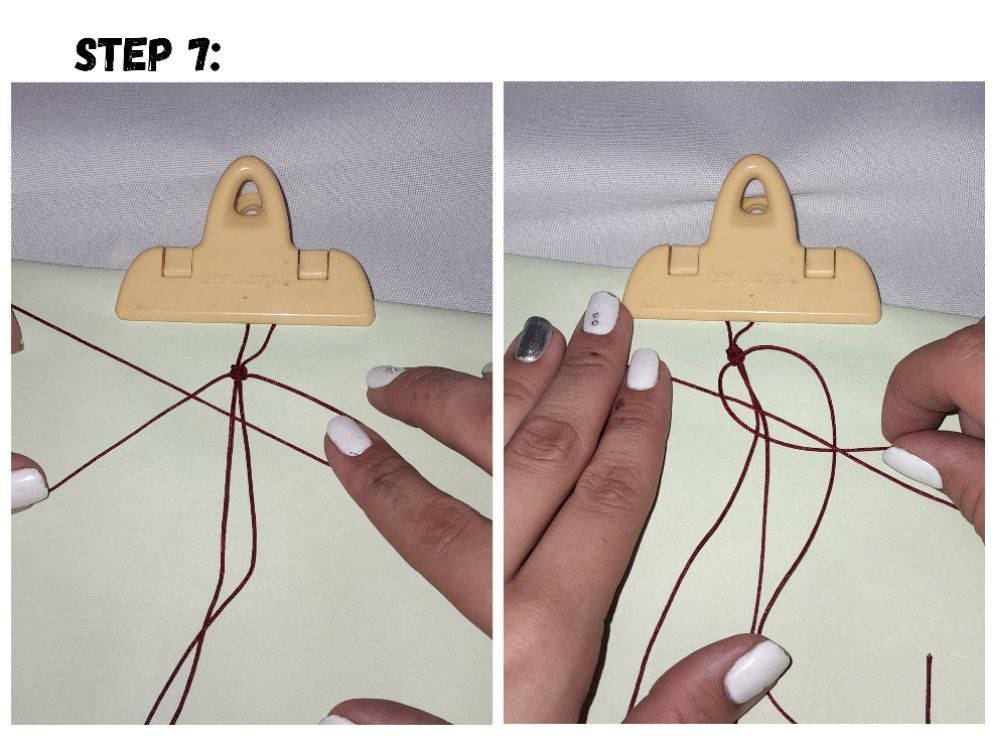

7.- I will do the same again on the right side and so on until I have 1cm of fabric. The flat knot is about that, alternating sides, first I tie a knot on one side and then the other.
7.- Haré lo mismo nuevamente del lado derecho y así sucesivamente hasta tener 1cm de tejido. El nudo plano se trata de eso, de ir intercalando de lados, primero hago un nudo de un lado y luego del otro.
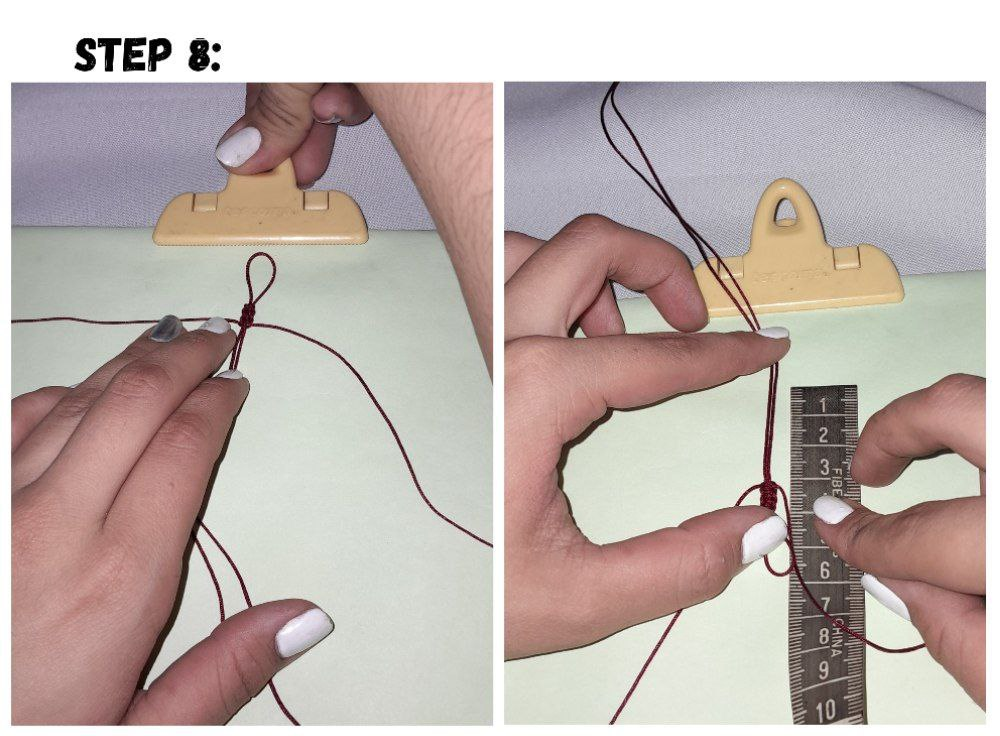
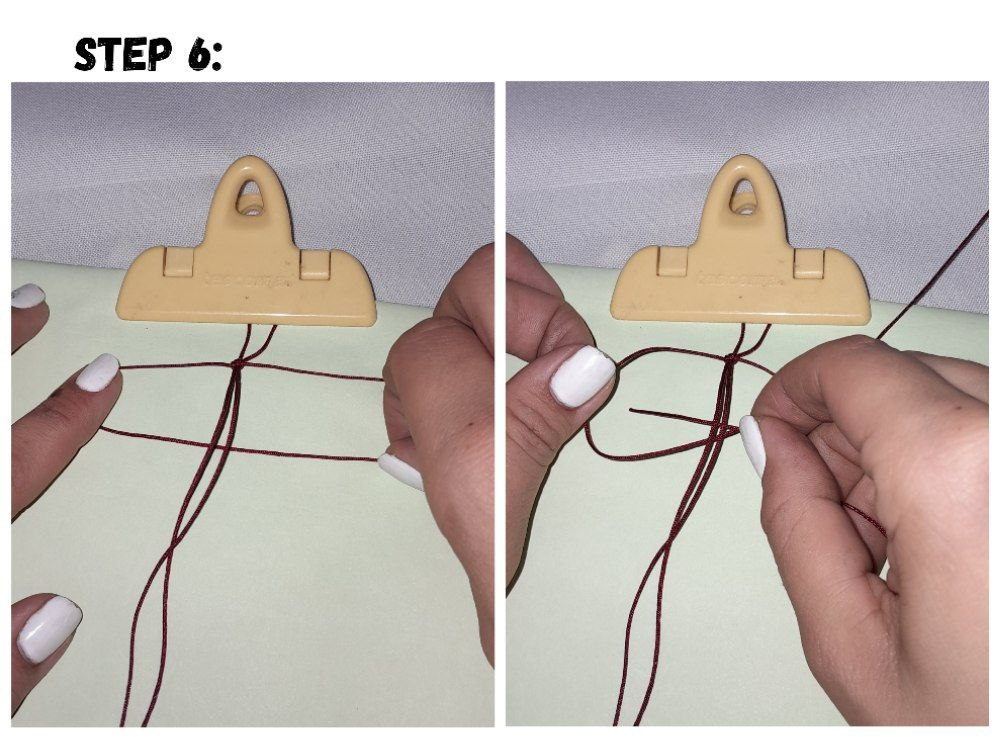
8.- Once finished, I will release the thread and I will turn what I have done, and I will leave a space of about 3cm.
8.- Una vez terminado por a soltar el hilo y voy a girar lo que he hecho, y dejaré un espacio de unos 3cm.
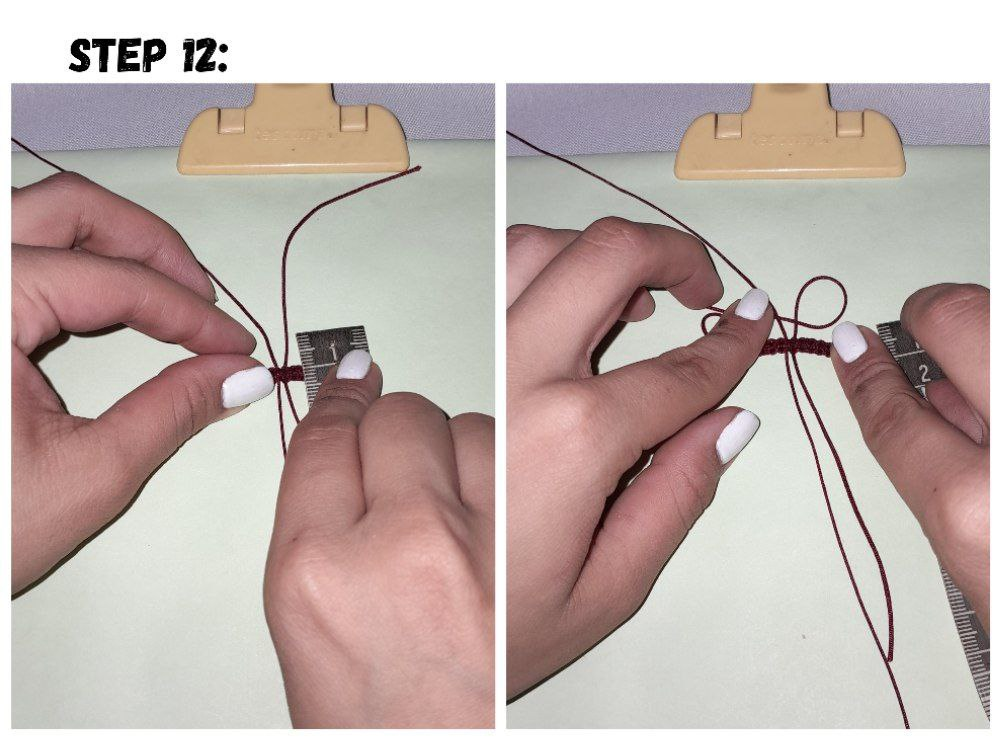
9.- Now we will work with our central threads, making the same knot that we did at the beginning. The right thread passes under the center threads making a kind of "C", and we leave it above the left thread making a kind of "X". I'm going to take the end of the thread on the left side and pass it through the center of the right side. I'm going to tighten making sure to leave 3cm space on the center threads.
9.- Ahora trabajaremos con nuestros hilos centrales haciendo el mismo nudo que hicimos en el inicio. El hilo de la derecha pasa por debajo del los hilos del centro haciendo una especie de "C", y lo dejamos por encima del hilo de la izquierda haciendo una especie de "X" . Voy a tomar el extremo del hilo de lado izquierdo y lo paso por el centro de lado derecho. Voy a apretar asegurándome de dejar el espacio de 3cm en los hilos del centro.
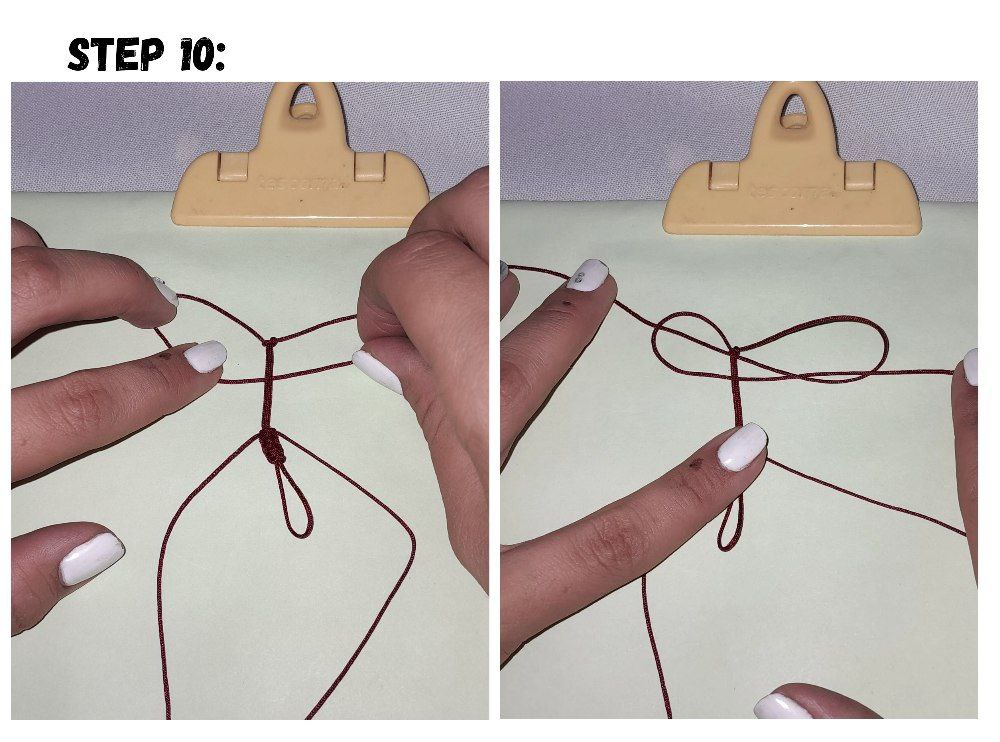
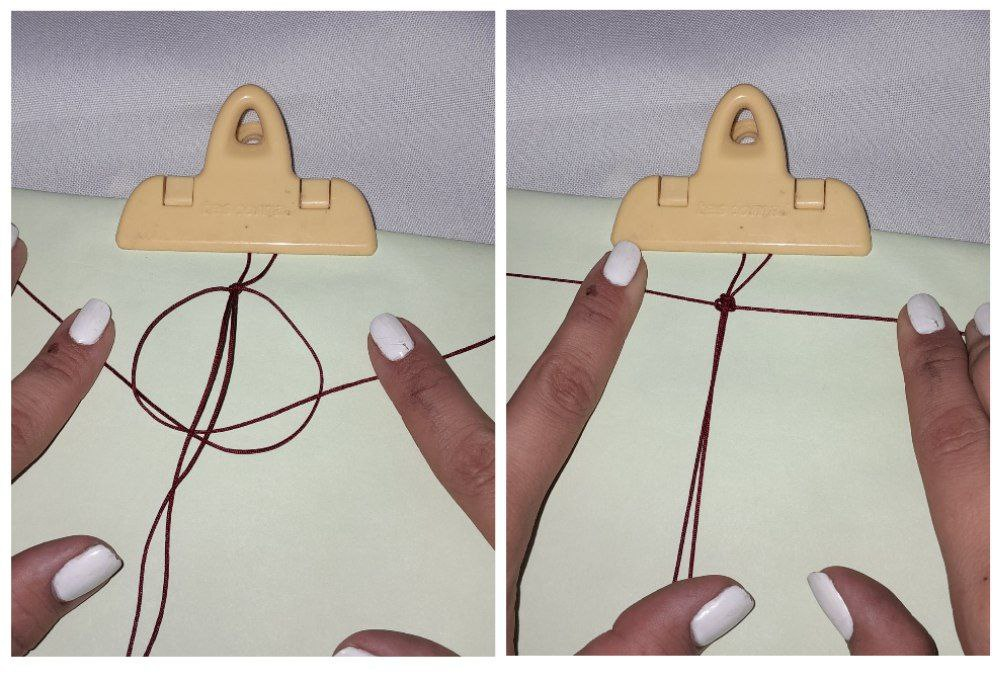
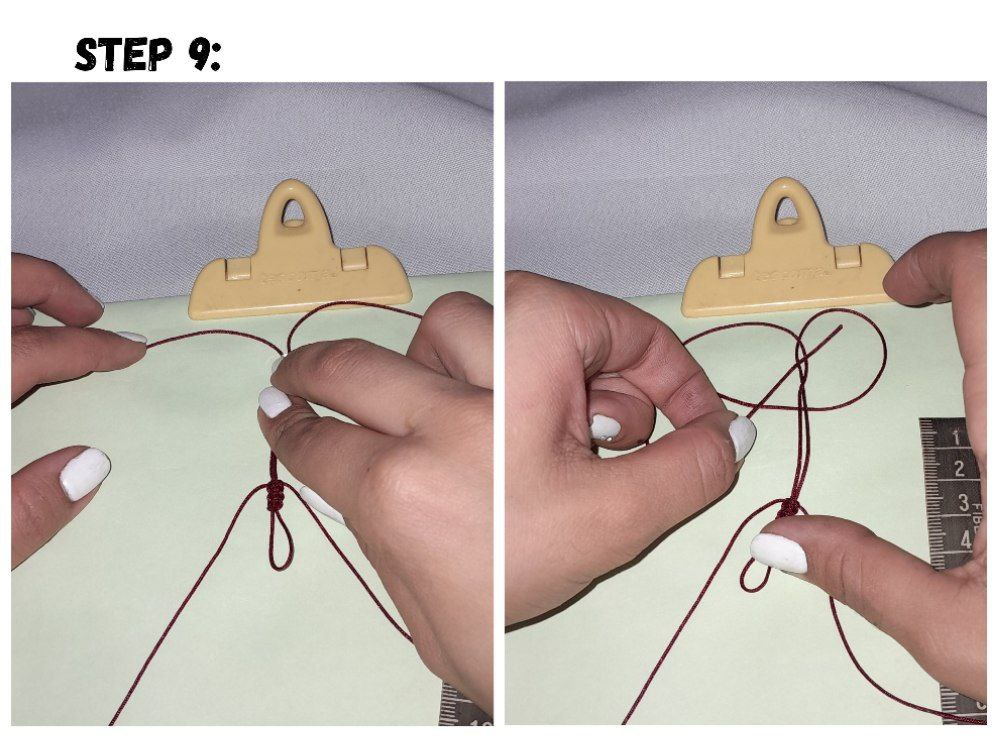
10.- I do the same thing again on the left side.
10.- Vuelvo a hacer lo mismo del lado izquierdo.
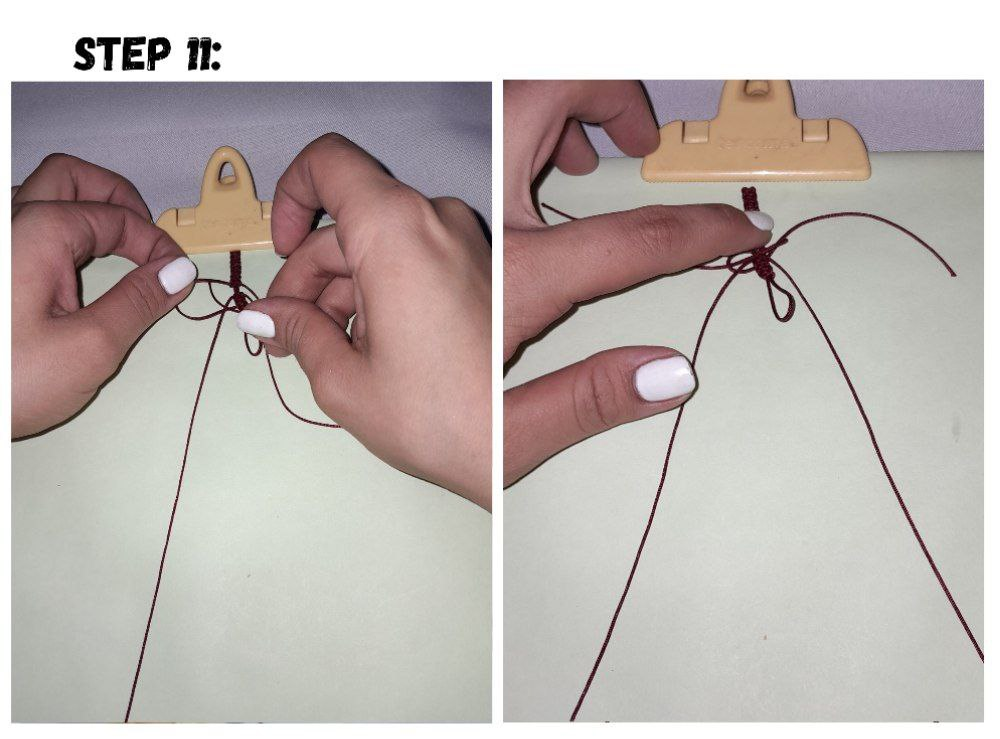
11.- Again I do that whole procedure of tying a knot on one side and then the other until there is no space left with the previous fabric.
11.- Nuevamente hago todo ese procedimiento de hacer un nudo de un lado y luego del otro hasta que ni quede ningún espacio con el tejido anterior.
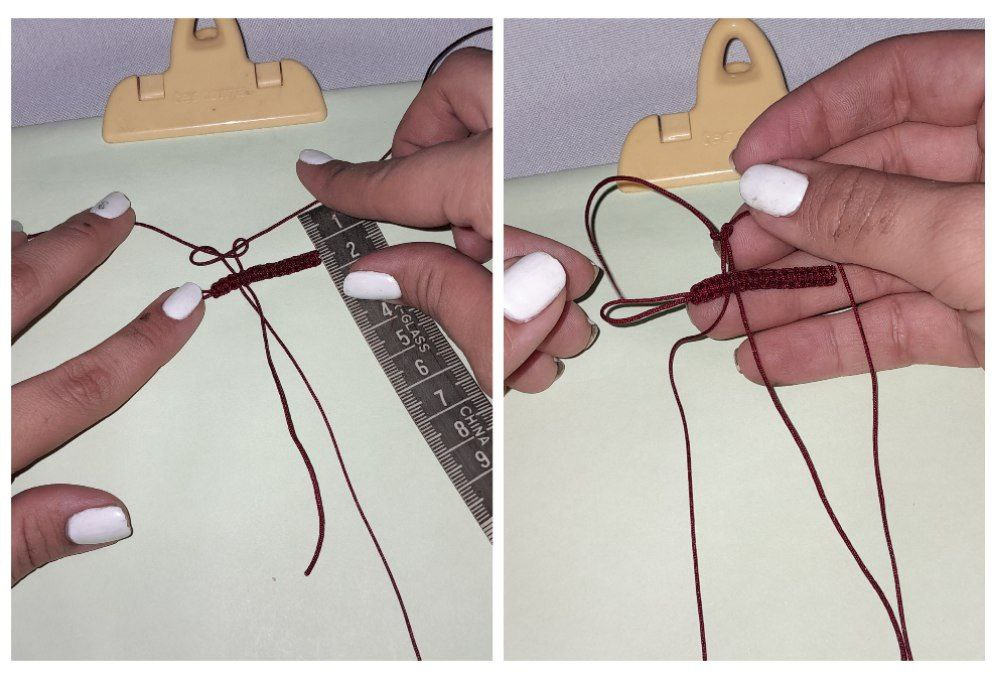
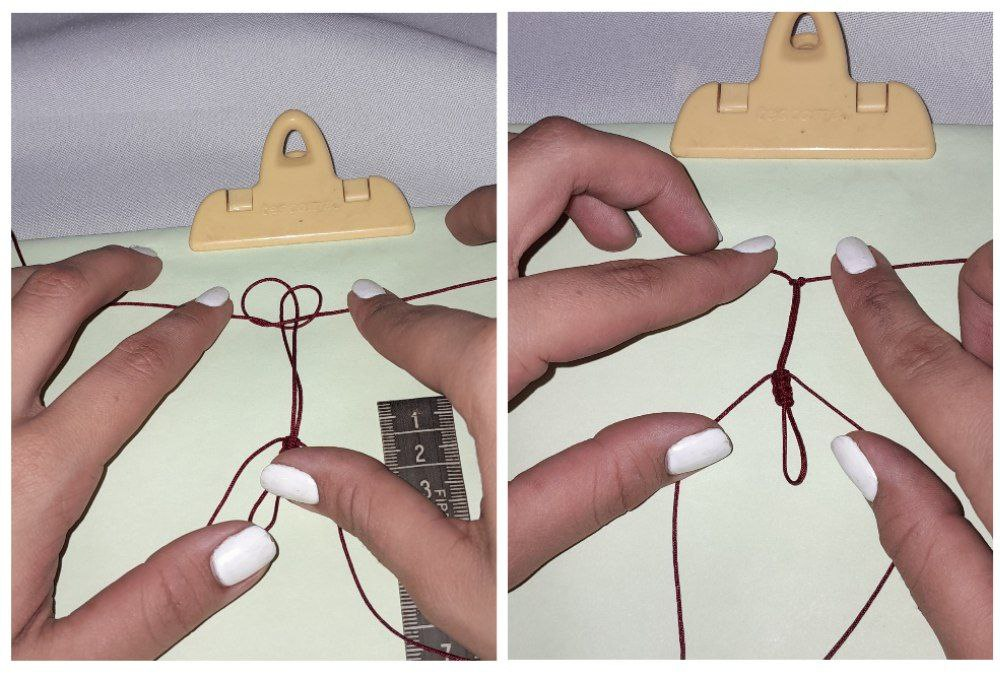
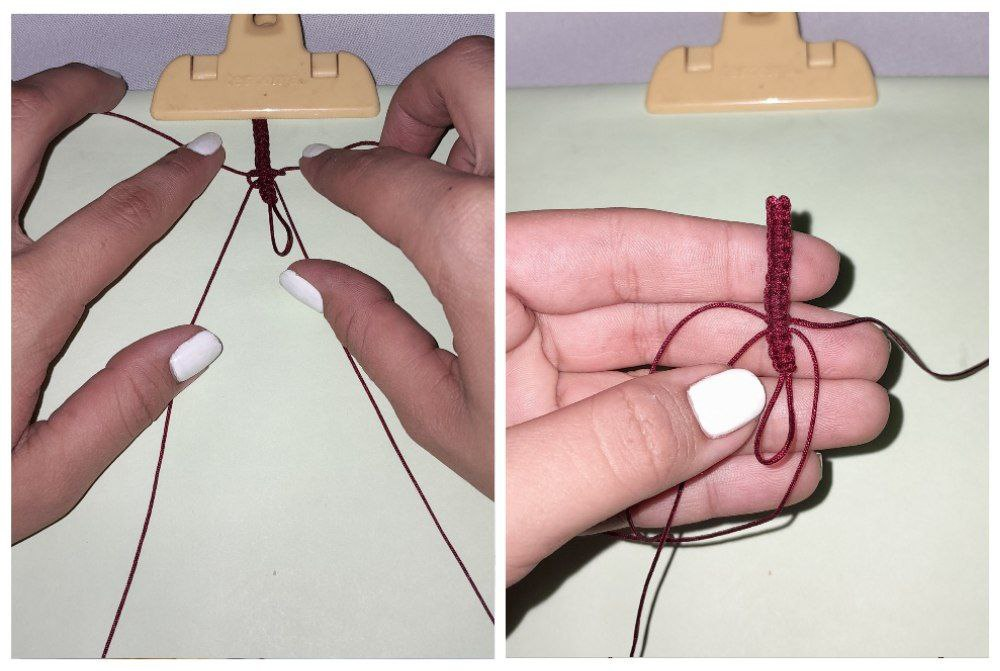
12.- When we reach the end we will have two cords left on the right and two cords on the left, so we rotate the figure and we are going to start working with two cords. I'm going to leave approximately 1cm and I'm going to make the same flat knot working with these two cords, exactly the same as we did at the bottom of the Cross.
12.- Cuando lleguemos al final nos van a quedar dos cordones a la derecha y dos cordones en la izquierda pues giramos la figura y vamos a empezar a trabajar con dos cordones. Voy a dejar aproximadamente 1cm y voy a hacer el mismo nudo plano trabajando con estos dos cordones, exactamente igual como hemos hecho en la parte inferior de la Cruz.

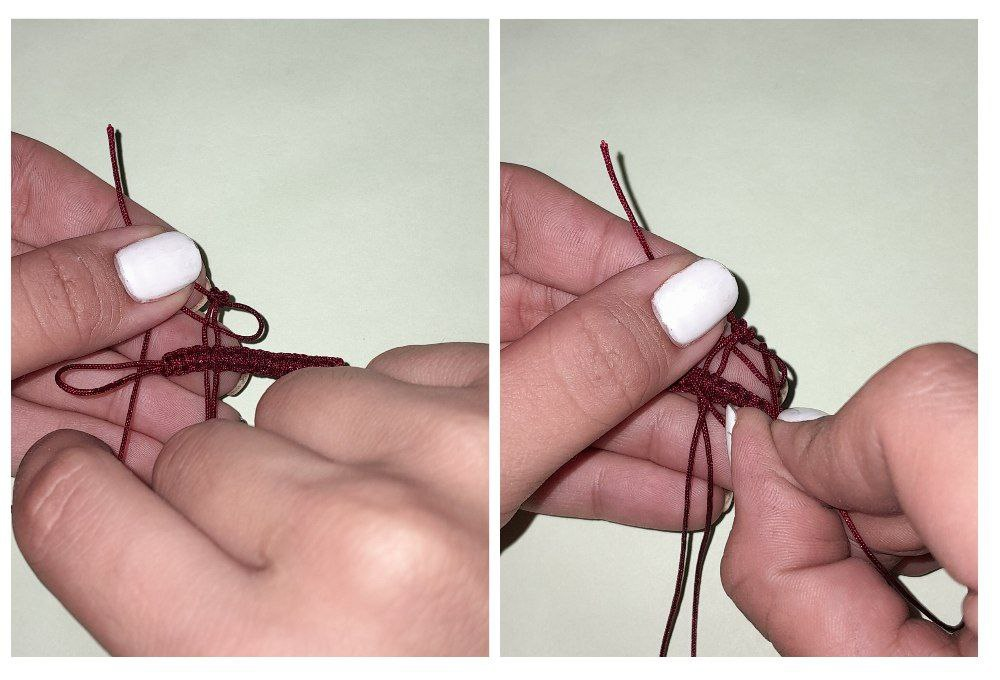
13.- I alternate from sides until I reach the end of the previous fabrics.
13.- Voy intercalando de lados hasta llegar al final de los tejidos anteriores.
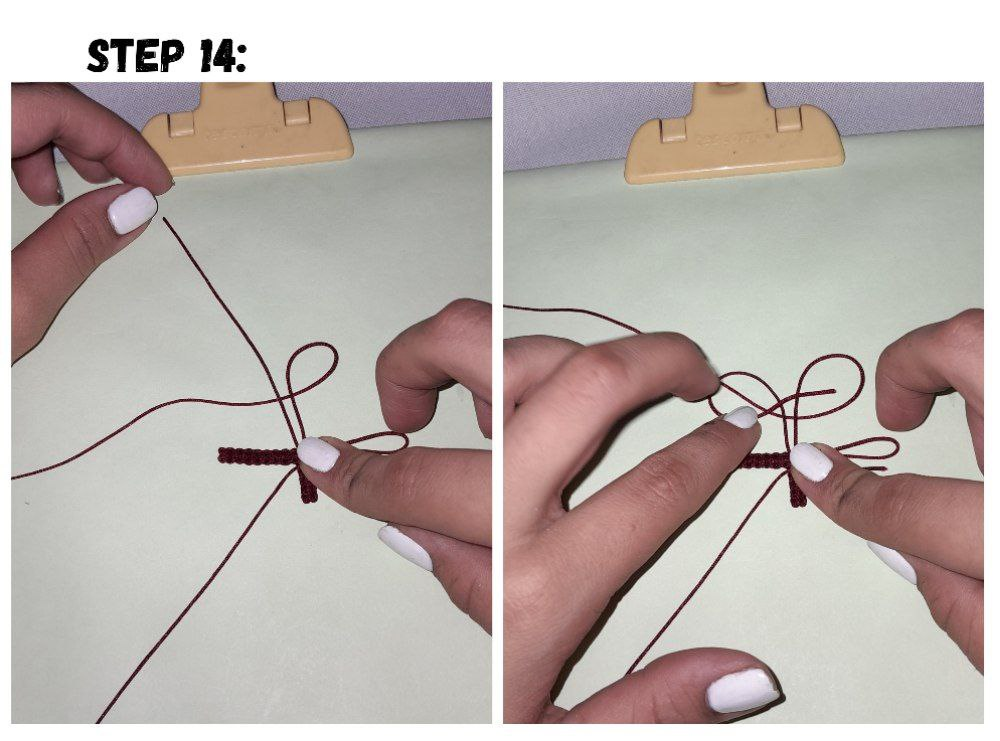
14.- Once finished, we turn the figure and work with the other side with the two cords that we have left. Leaving the same space as on the lateral side of the cross of 1cm.
14.- Una vez terminado giramos la figura y trabajamos con el otro lado con los dos cordones que nos quedan. Dejando el mismo espacio que del lado lateral de la cruz de 1cm.
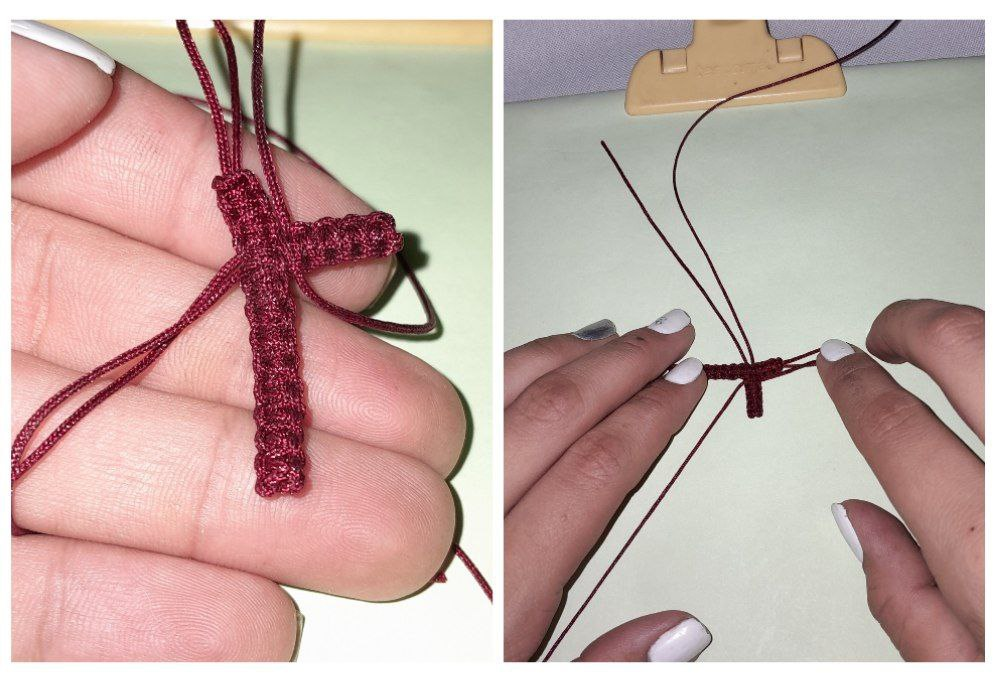
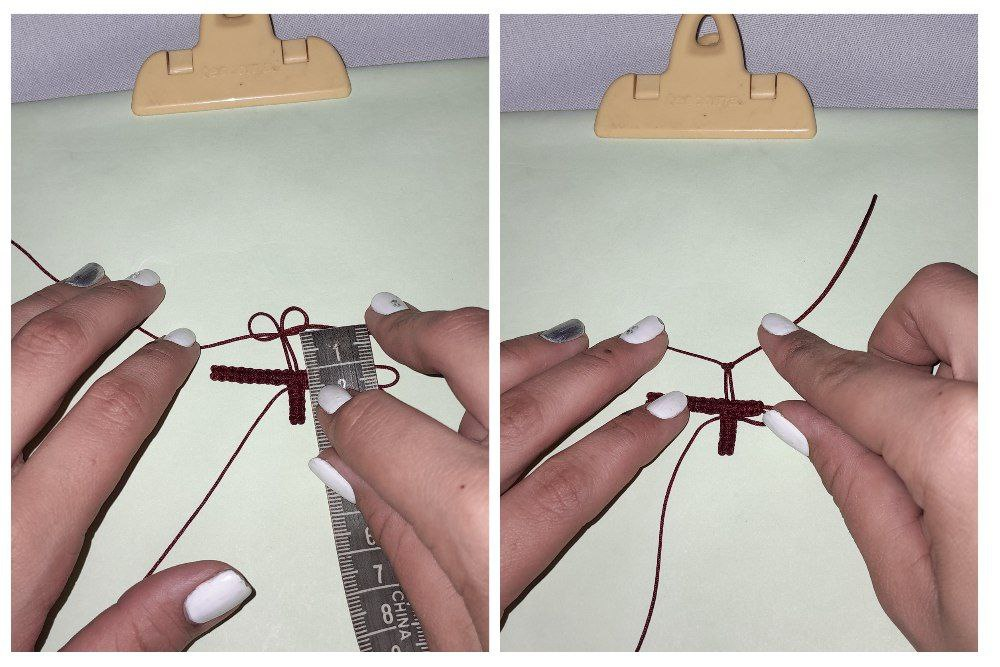
15.- We tie the same knots we did previously over and over again until we reach the center of the cross.
15.- Hacemos los mismos nudos que hicimos anteriormente uno y otra vez hasta llegar al centro de la cruz.
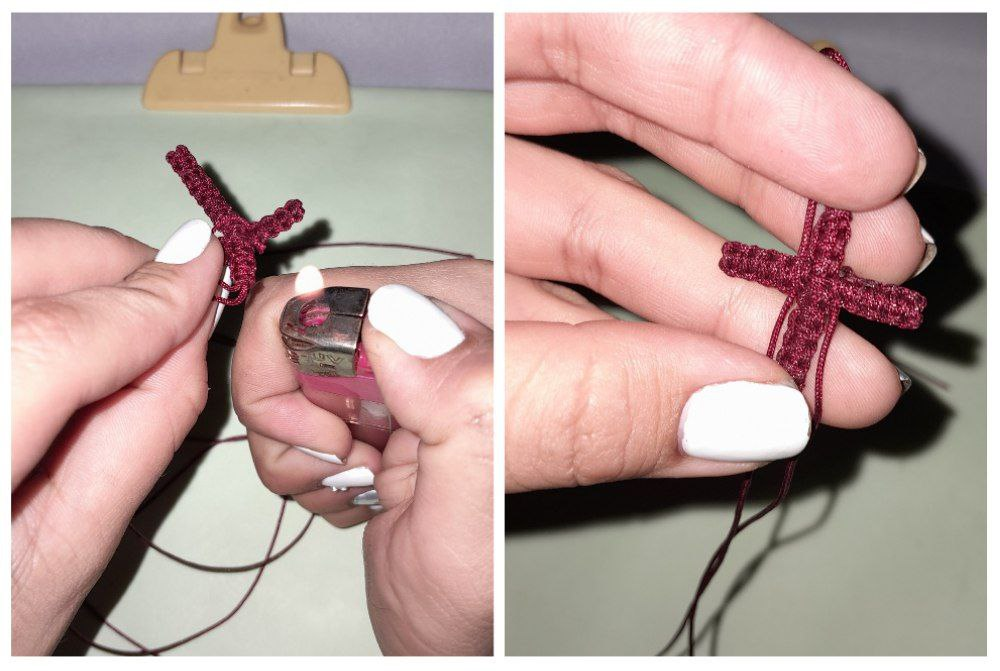
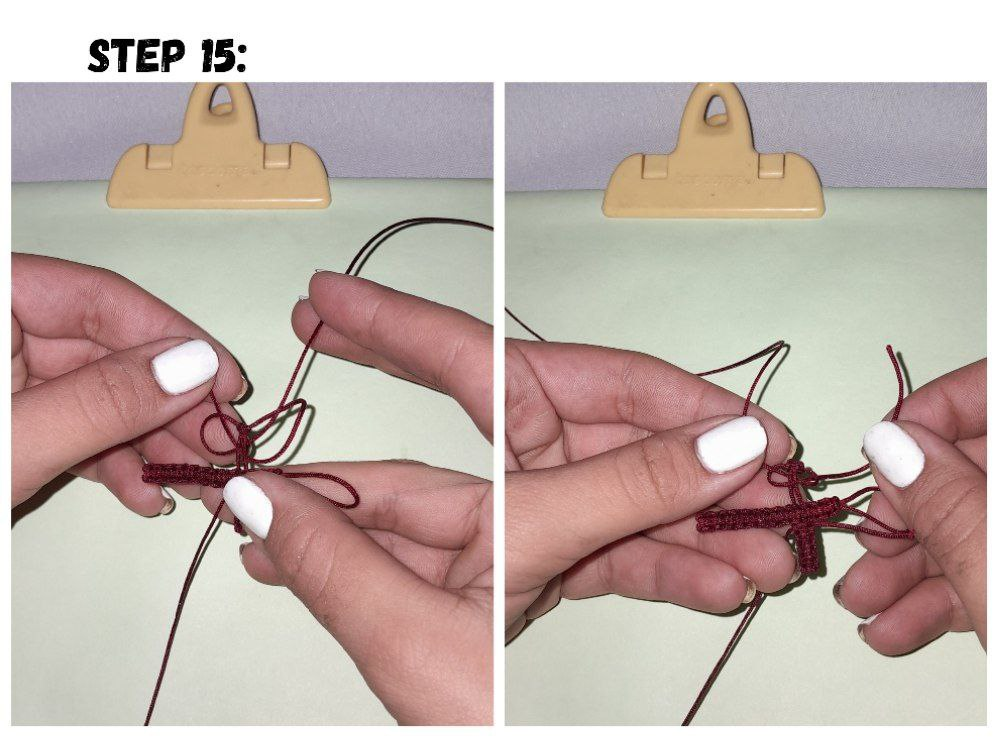
16.- Once finished I am going to proceed to cut the remaining threads and with the lighter.
16.- Una vez terminado voy a proceder a cortar los hilos restantes y con el encendedor.
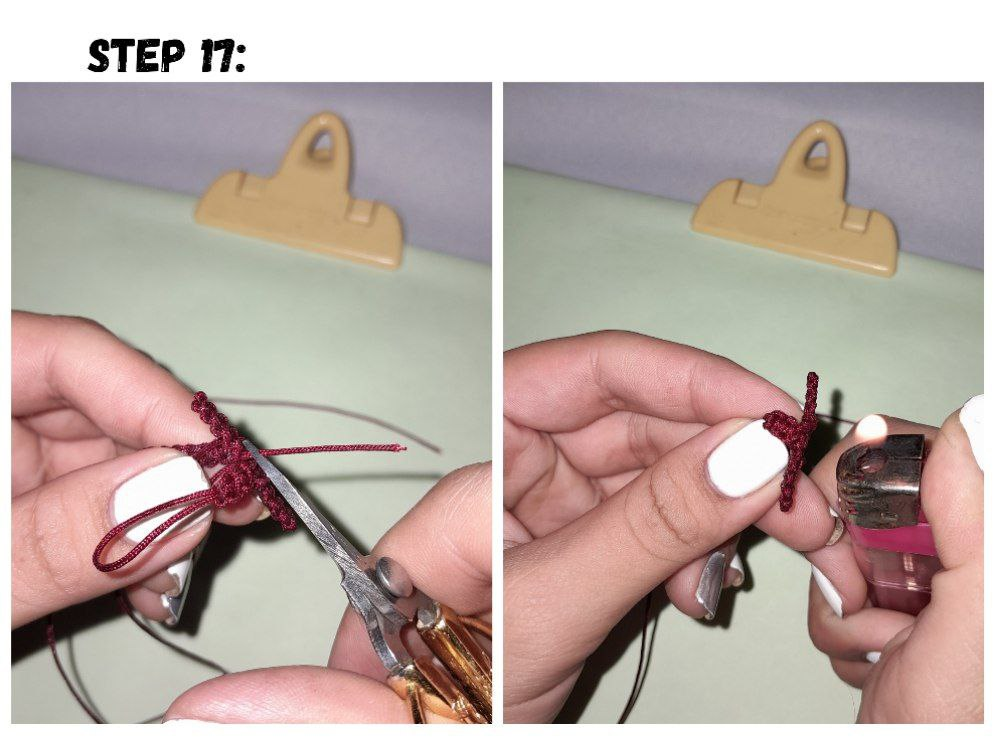
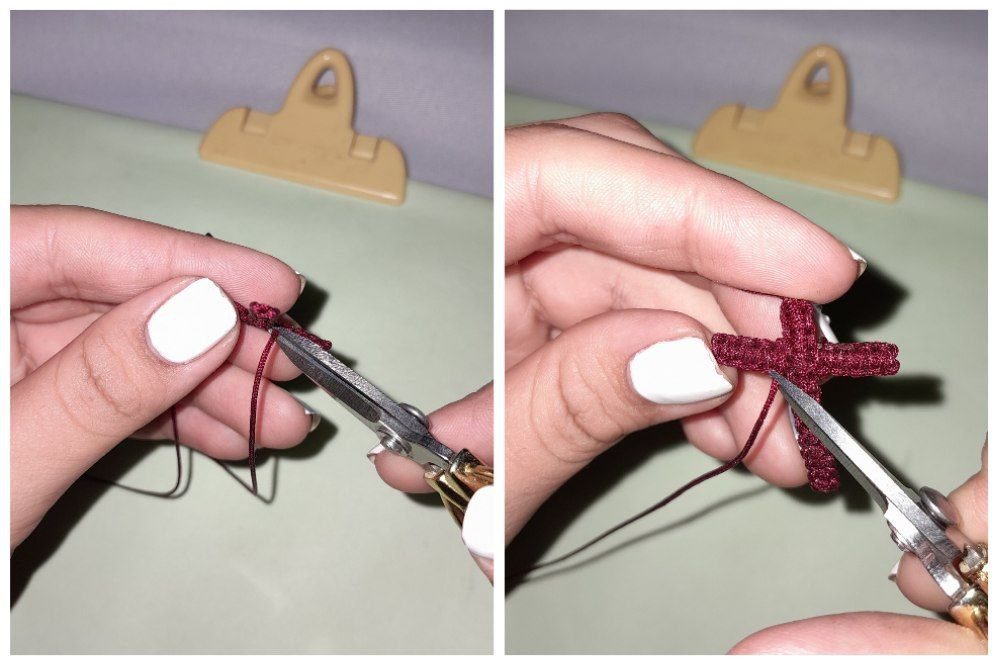
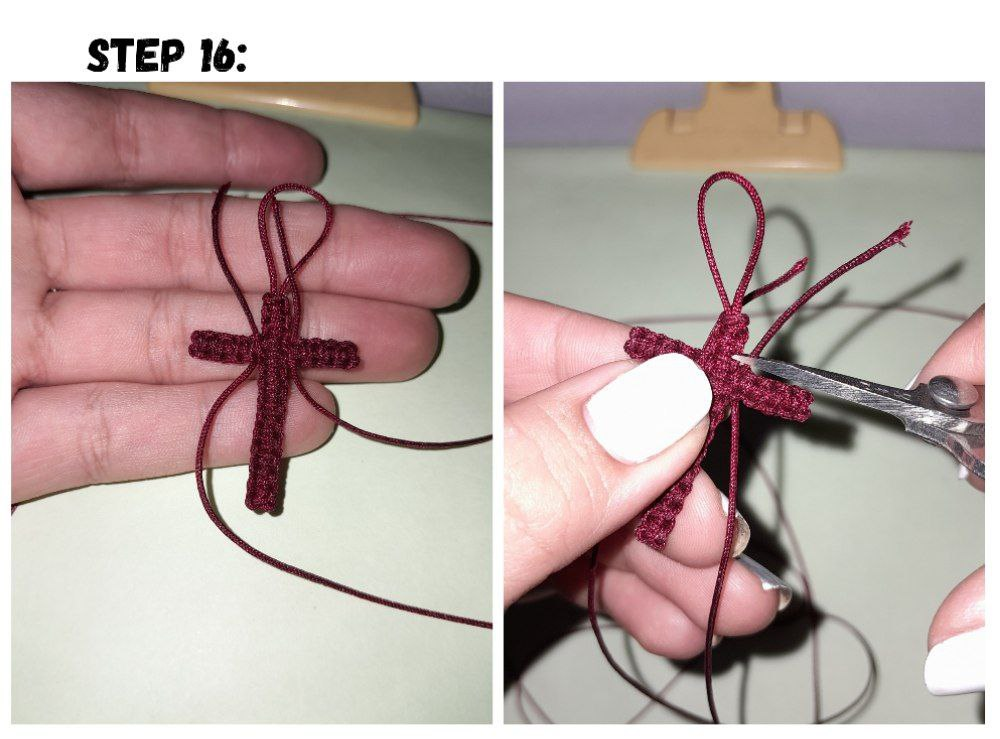
17.- I will do the same with the threads on the other side, cut and burn to make sure that they remain fixed and the fabric does not come apart.
17.- Haré lo mismo con los hilos del otro lado, corto y quemo para asegurarme de que queden fijos y no se desarme el tejido.
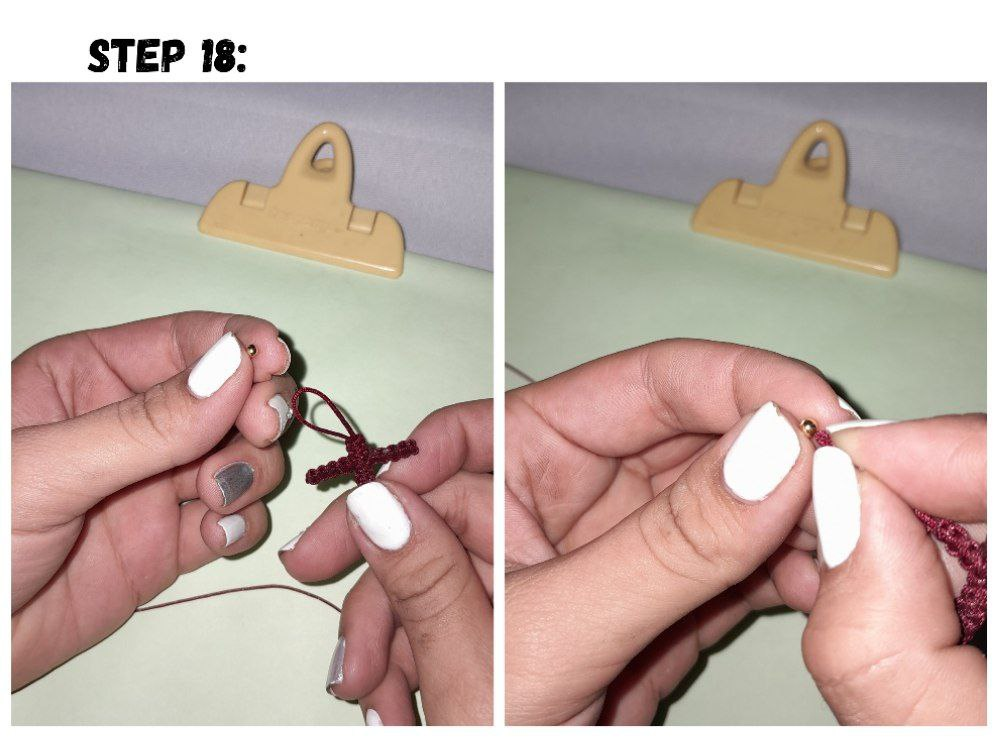
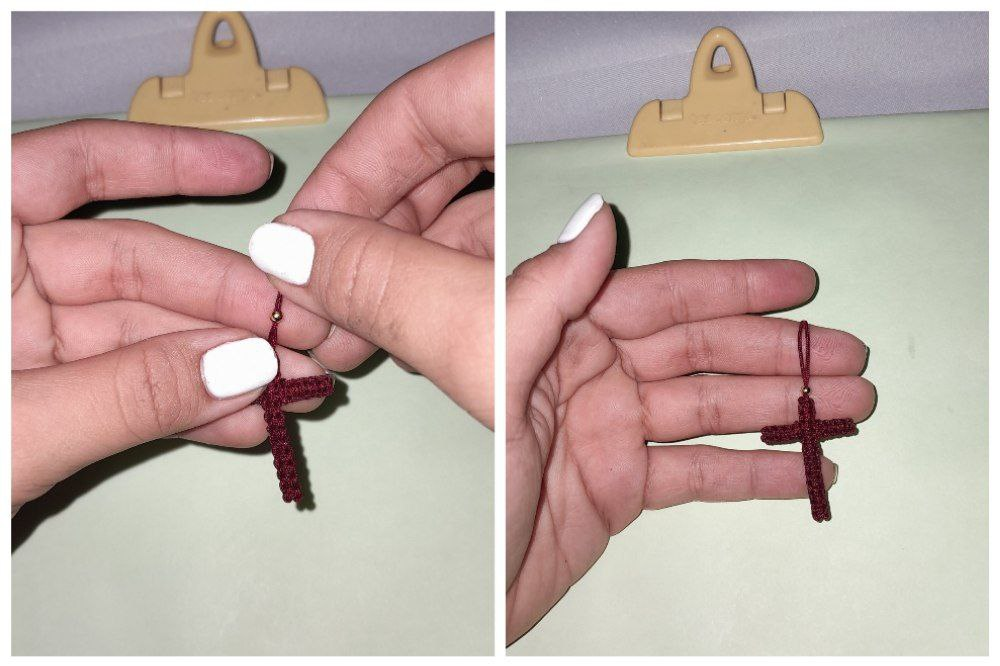
18.- Now I will take the ball and pass it through the ring that we left at the base of the thread, joining both threads so that it enters the hole in the ball.
18.- Ahora tomare el balin y lo voy a pasar por la argolla que dejamos en la base del hilo juntando ambos hilos para que entre por el agujero del balin.
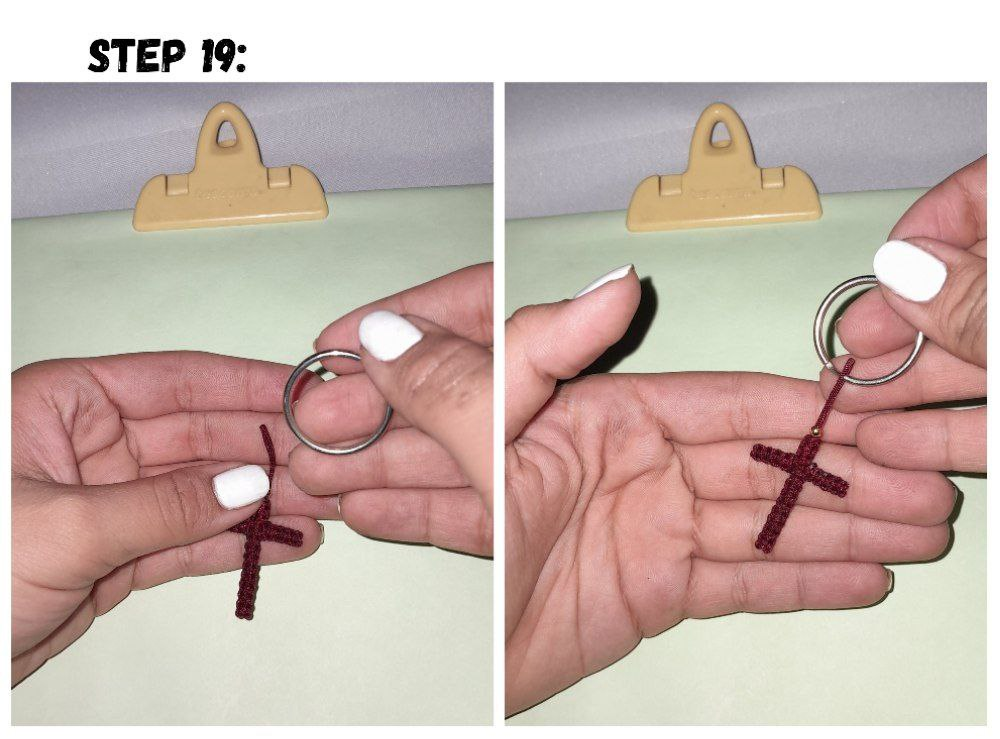
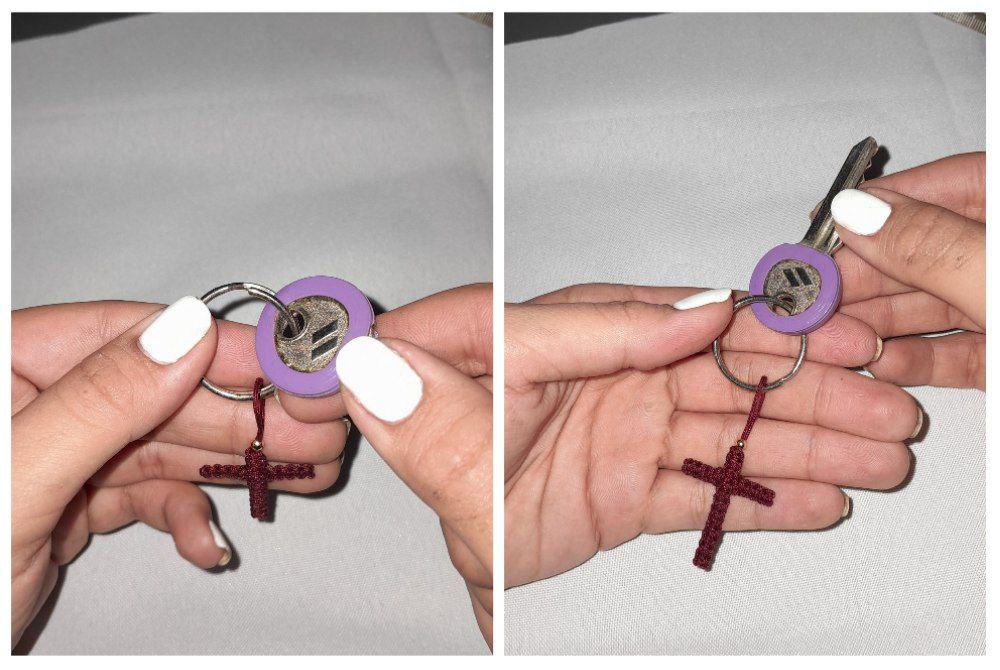
19.- Finally, I am going to insert our ready-made cross through the ring where we are going to insert the key. And so our keychain is ready.
19.- Por último, voy a introducir nuestra cruz ya lista por el aro por donde vamos a introducir la llave. Y así queda listo nuestro llavero.
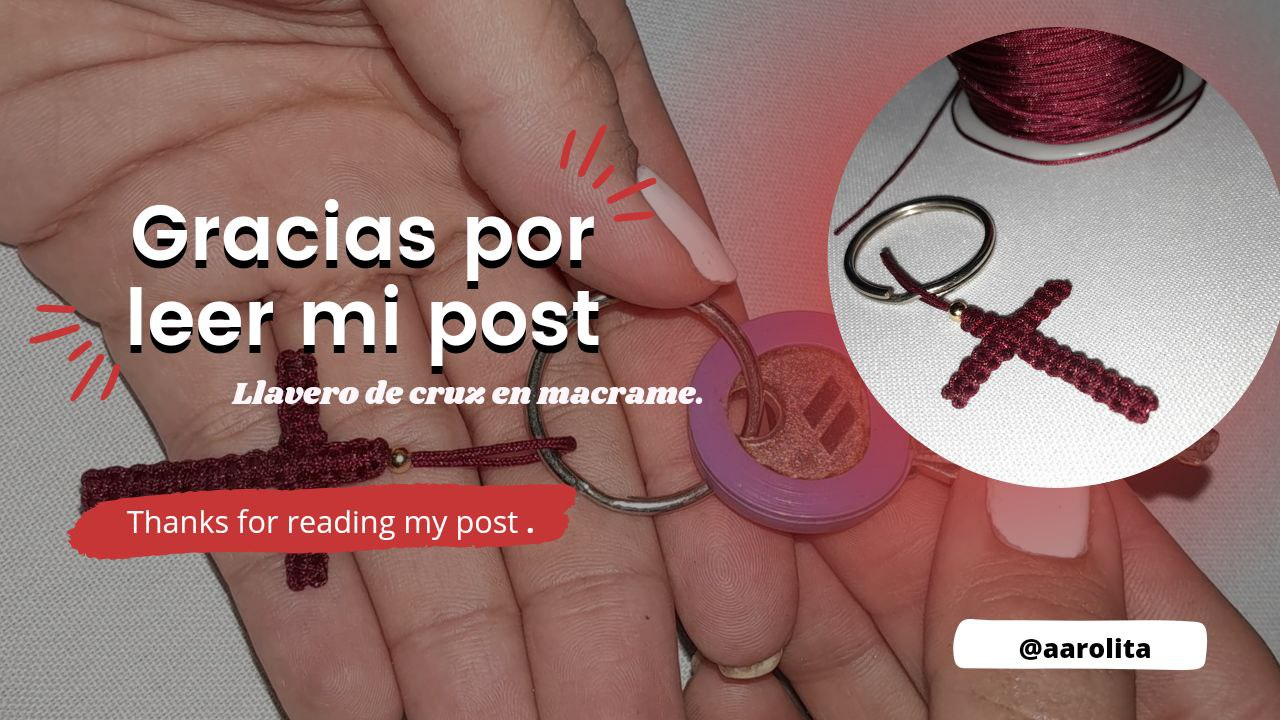
All photos were taken from my Samsung a14 phone, and edited in canva.
Congratulations @aarolita! You have completed the following achievement on the Hive blockchain And have been rewarded with New badge(s)
Your next target is to reach 400 replies.
You can view your badges on your board and compare yourself to others in the Ranking
If you no longer want to receive notifications, reply to this comment with the word
STOPCheck out our last posts:
¡¡¡Buen trabajo!!! Gracias por publicar tu excelente contenido en Hive Diy, impresionante manera de explicar cada paso para poder realizar esta hermosa cruz en macramé, una técnica que no es nada fácil de dominar.
Tu comunidad artesana ahora es testigo
