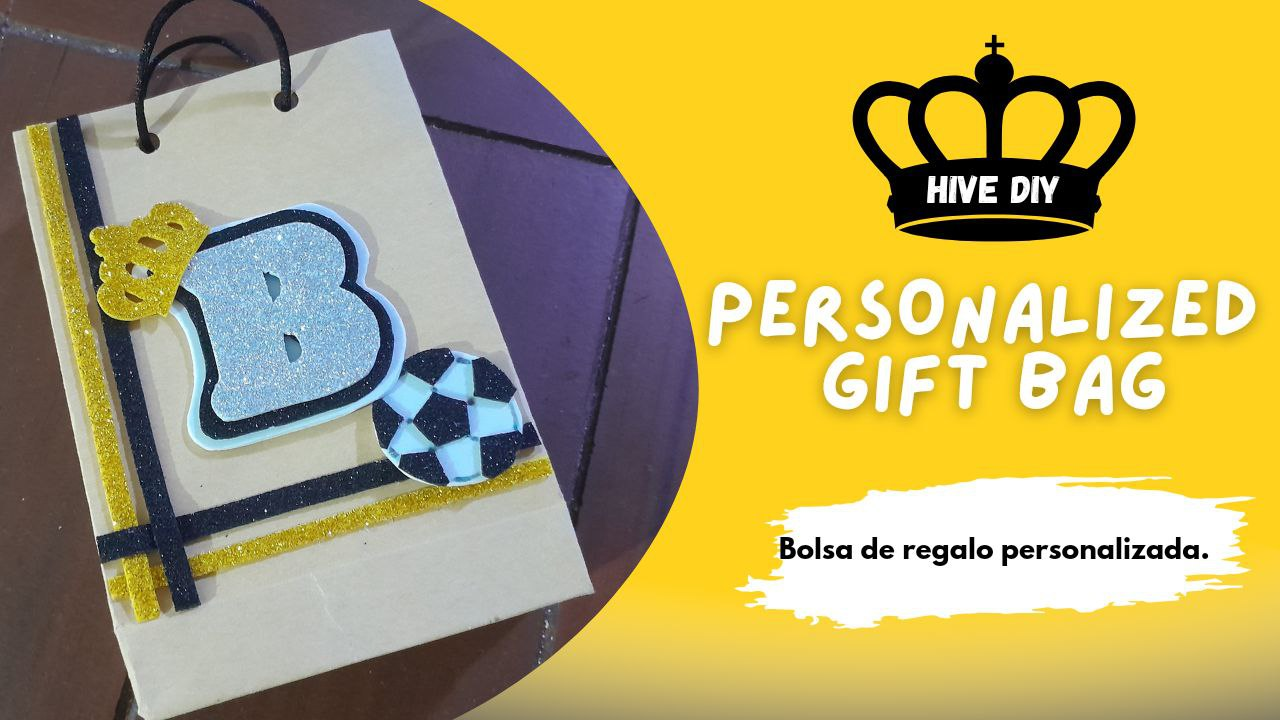
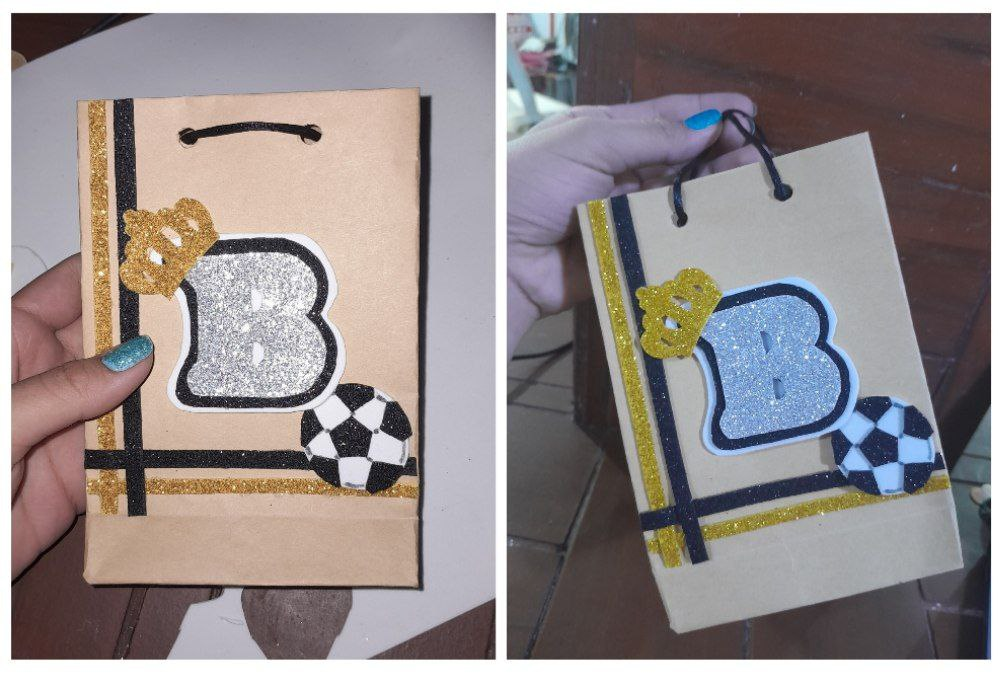
Hello hello, creatives from the hive diy community. It is a pleasure to stop by here again to show you my new creation, this time I have to make a personalized gift bag to give a special gift to my boyfriend, so I decorated it with his initial and a soccer ball, which is what what do you like. I hope you like it and stay to see the step by step.
Hola hola, creativos de la comunidad de hive diy. Es un placer pasar nuevamente por aquí para mostrarles mi nueva creación, en esta ocasión me toco hacer una bolsita de regalo personalizada para hacerle un regalo especial a mi novio, por lo que la decore con su inicial y con un balón de fútbol que es lo que le gusta. Espero que les guste y se queden a ver el paso a paso.
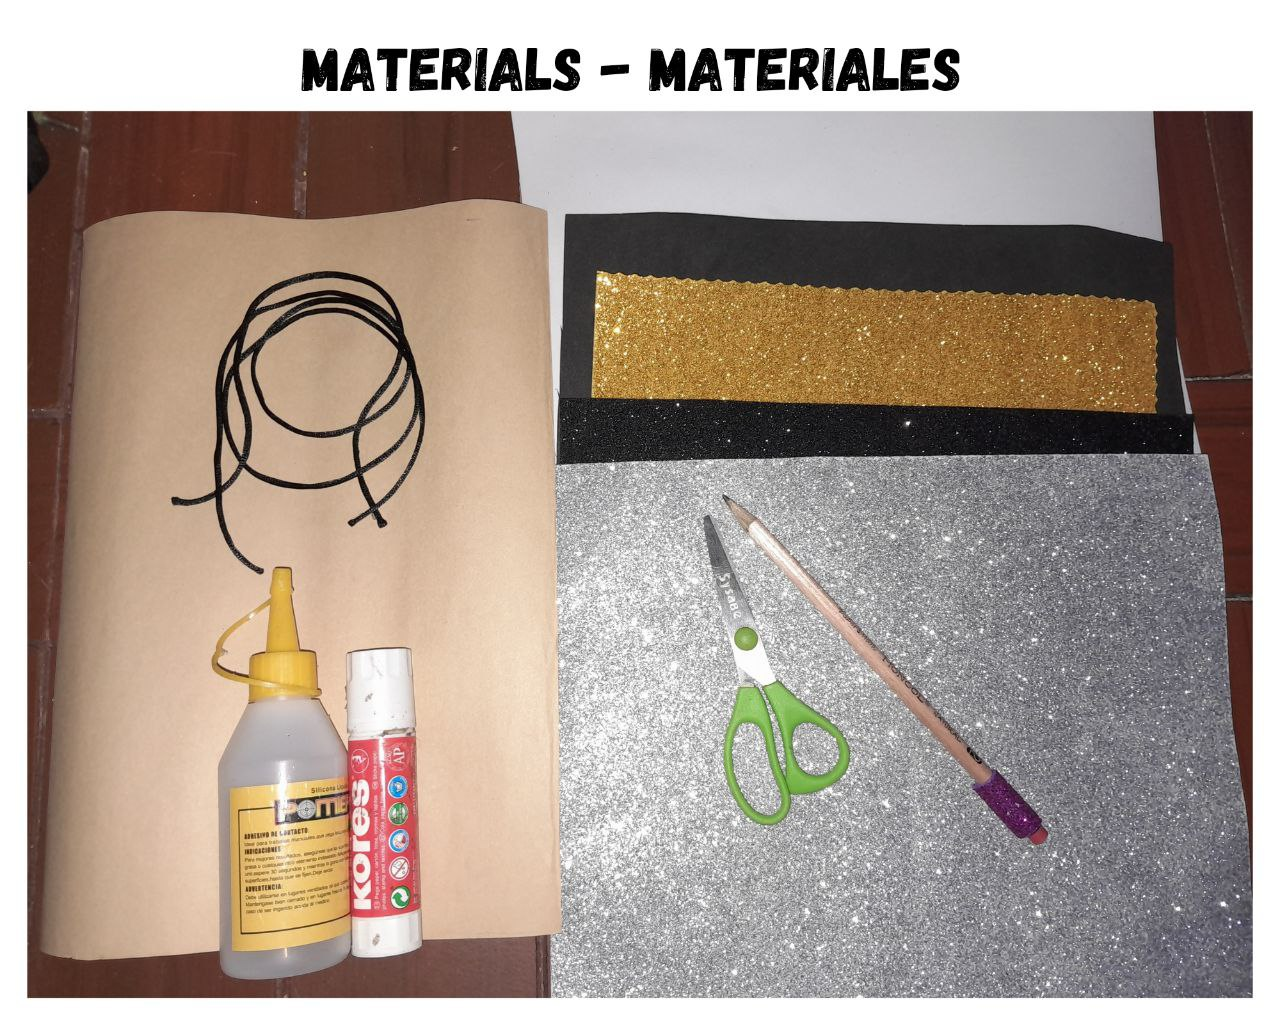
Materials:
- Craft paper.
- Cold sylicon.
- Paste on a stick.
- Scissors.
- Pencil.
- Ruler.
- Cord.
- Foami to decorate.
Materiales:
- Papel craft.
- Silicón frio.
- Pega en barra.
- Tijera.
- Lápiz.
- Regla.
- Cordón.
- Foami para decorar.
Step or step:
Paso o paso:
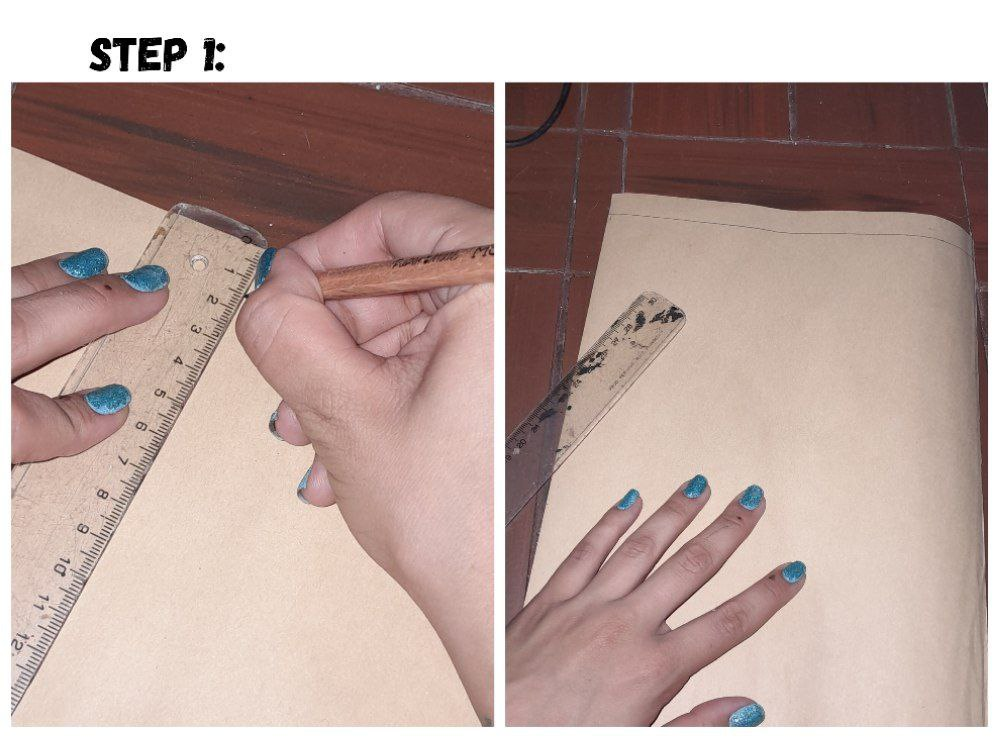
1.- To start the gift bag I will take a sheet of A4 size craft paper, an A4 size sheet measures 21 x 29.7 cm. At the 21 cm end I am going to draw a 1.50 cm horizontal line.
1.- Para iniciar la bolsa de regalo tomaré una hoja de papel craft de tamaño A4, una hoja de tamaño A4 mide 21 x 29,7 cm. En el extremo de 21 cm voy a dibujar una línea horizontal de 1,50 cm.
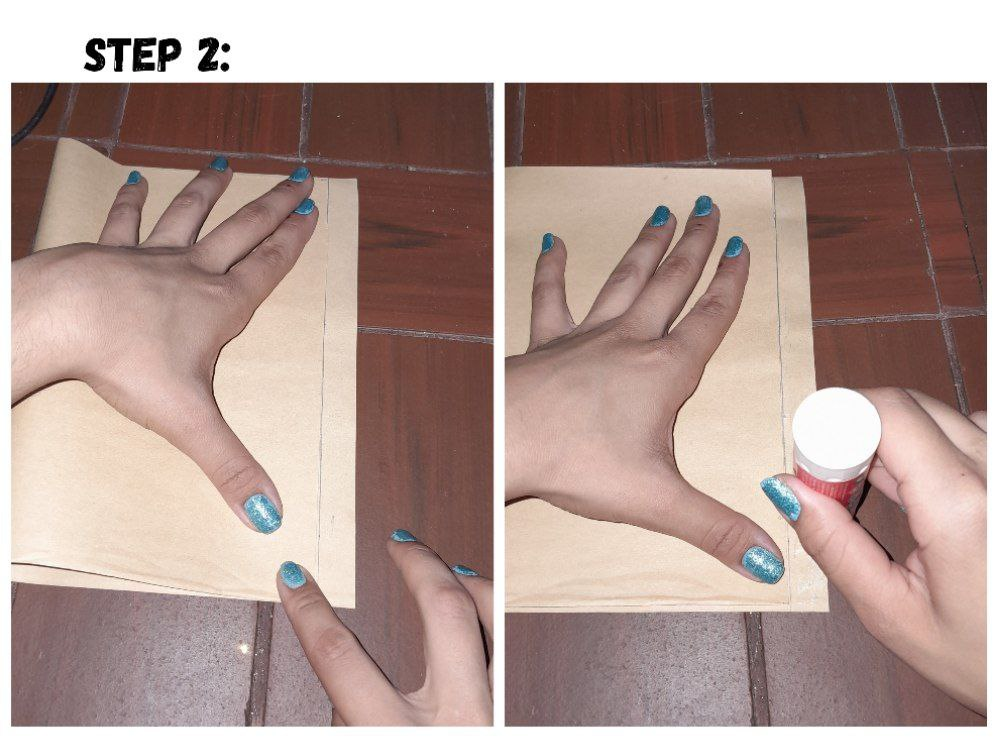

2.- I will take the other end and bring it below the line just drawn, folding the sheet. I'm going to add a little bit of glue to the top end and I'm going to fold it in and glue it to the other end of the sheet.
2.- Tomaré el otro extremo y lo voy a llevar hasta por debajo de la línea recién dibujada, doblando la hoja. Voy a añadir un poco de pegamento en el extremo superior y voy a doblar hacia adentro y pegarlo al otro extremo de la hoja.
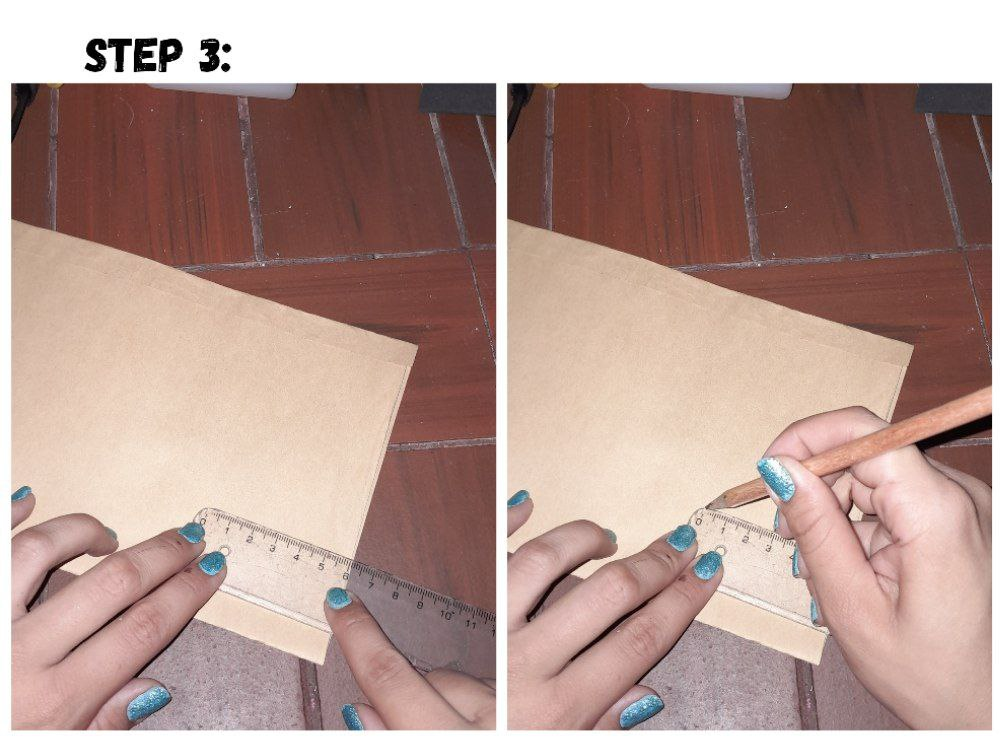
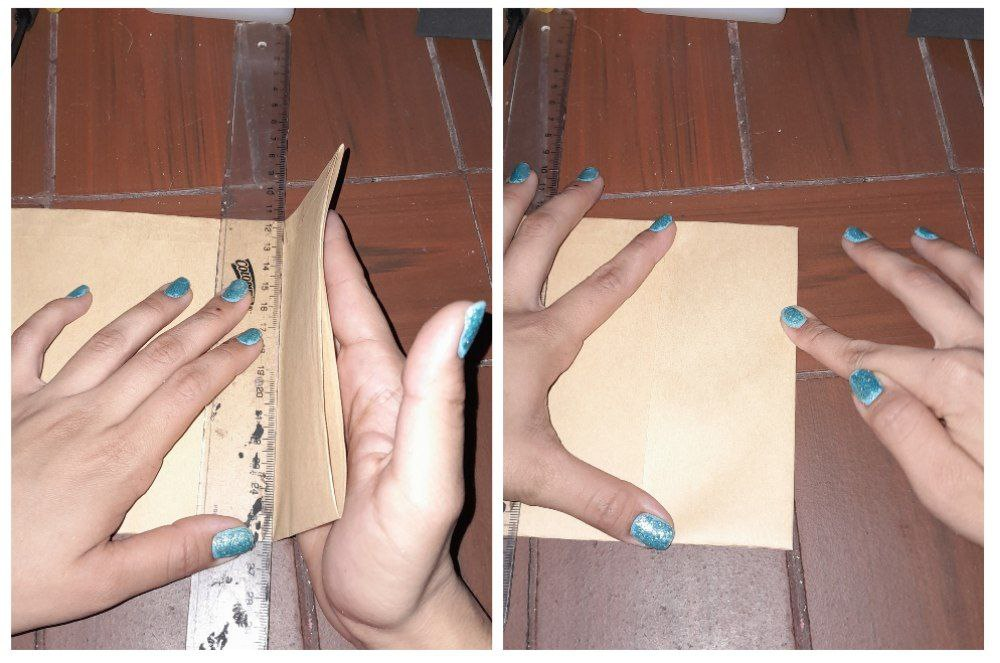
3.- Now at one of the ends I am going to measure a space of 6cm and I am going to fold and unfold it to leave the double mark.
3.- Ahora en uno de los extremos voy a medir un espacio de 6cm y lo voy a doblar y desdoblar para dejar la marca del dobles.
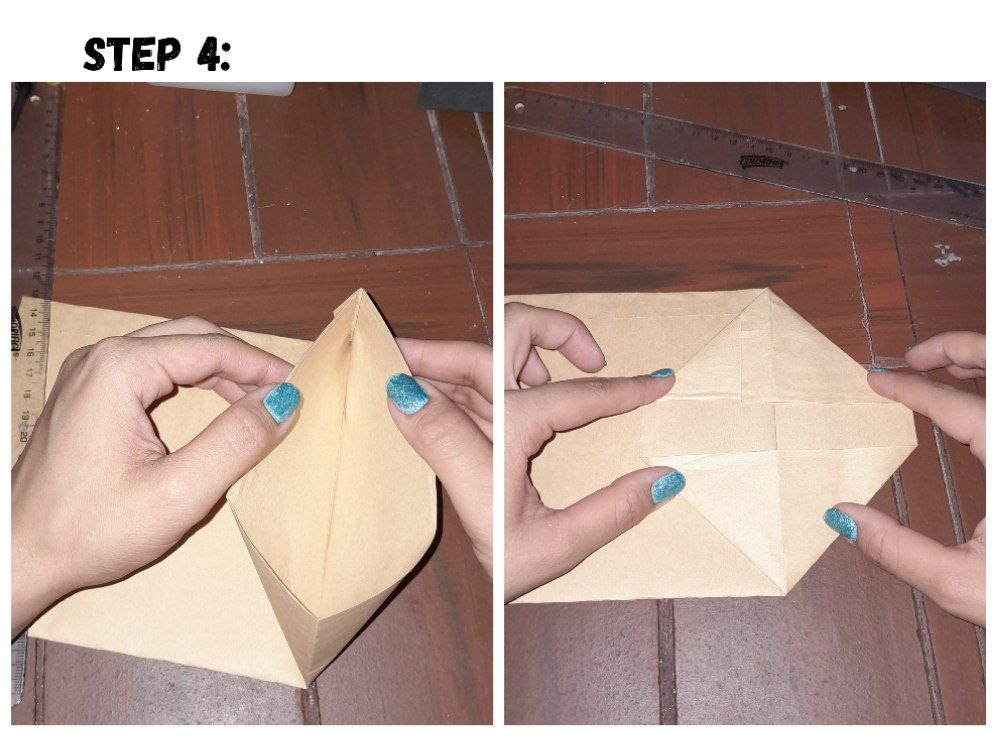
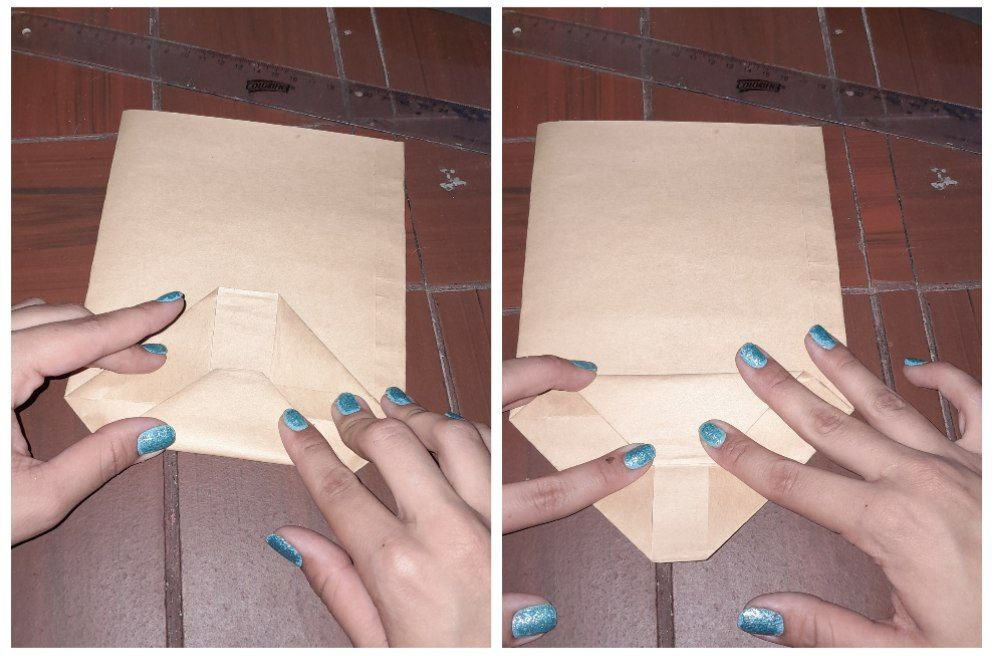
4.- Then I am going to make a double by opening the ends of the end up to the 6cm mark that we made previously, making a kind of two triangles. I'm going to fold both ends of the triangles towards the center.
4.- Luego voy a hacer un dobles abriendo las puntas del extremo hasta la marca de 6cm que hicimos anteriormente, haciendo una especie de dos triángulos. Voy a doblar ambos extremos de los triángulos hacia el centro.
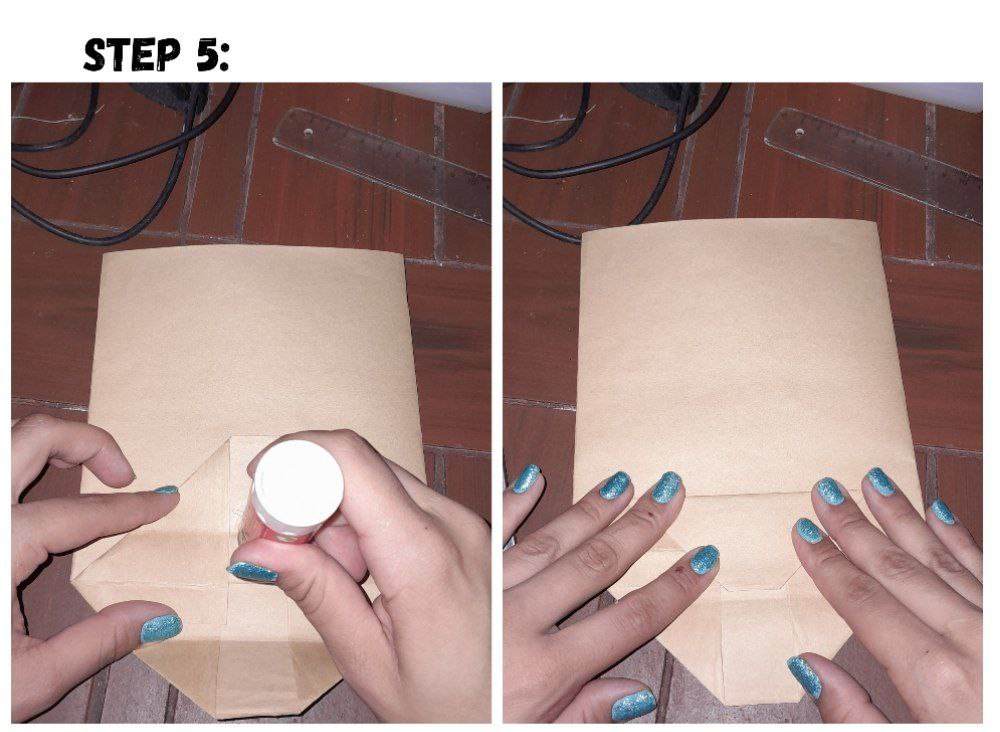
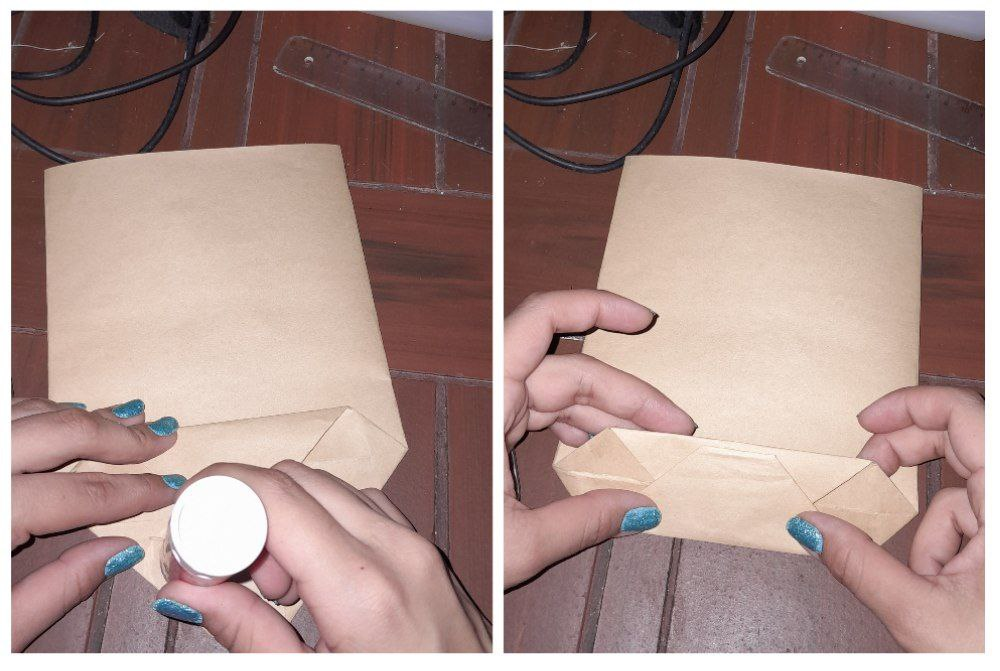
5.- I am going to place a little glue in the center and glue one of the ends and then glue the other one on top of it.
5.- Voy a colocar un poco de pega en el centro y pego uno de los extremos y luego pego el otro por encima de este.
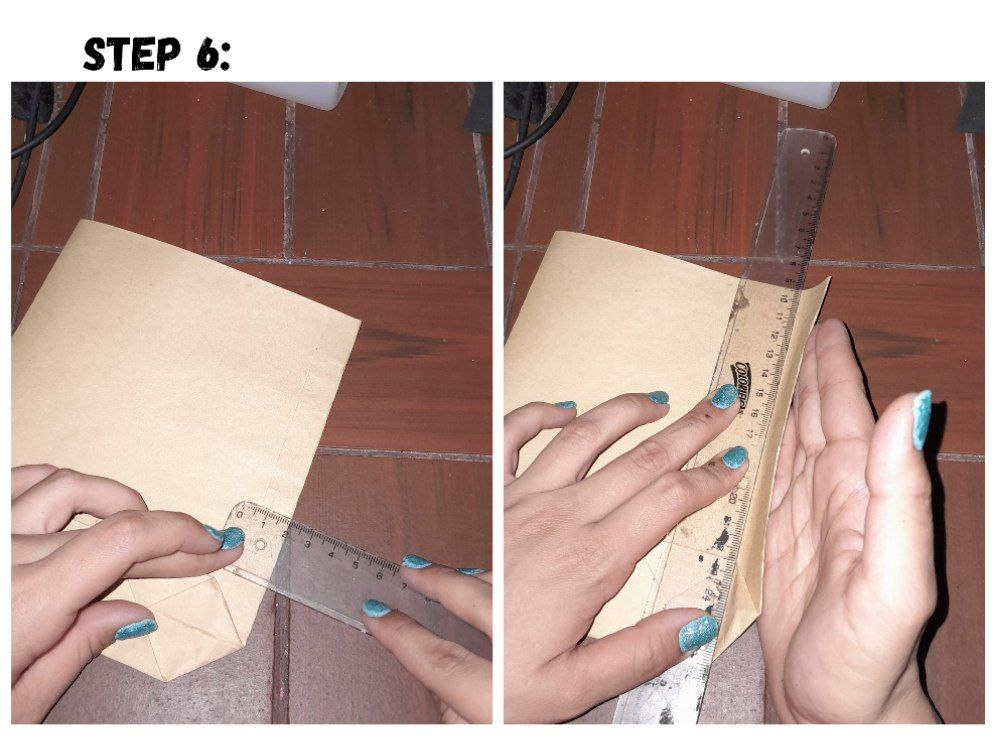
6.- I am going to proceed to make a double on each side of the bag. I measure 2cm and with the help of the ruler I make a double from the outside to the inside, vertically.
6.- Voy a proceder a hacer un dobles en cada lateral de la bolsa. Mido 2cm y con ayuda de la regla hago un dobles de afuera hacia adentro, en vertical.
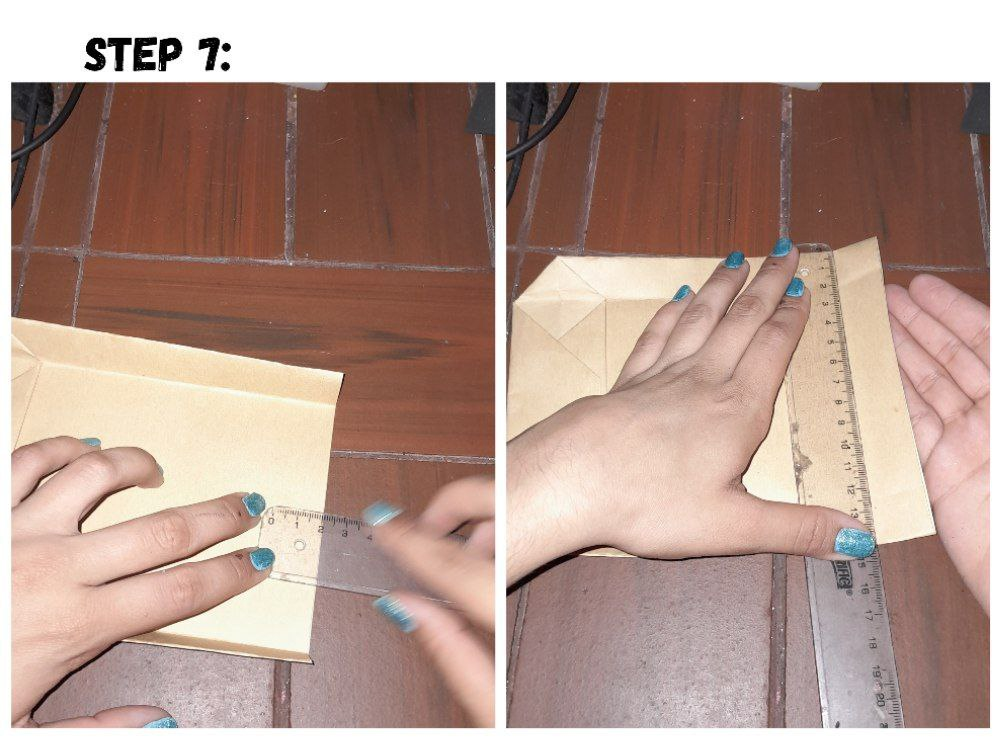
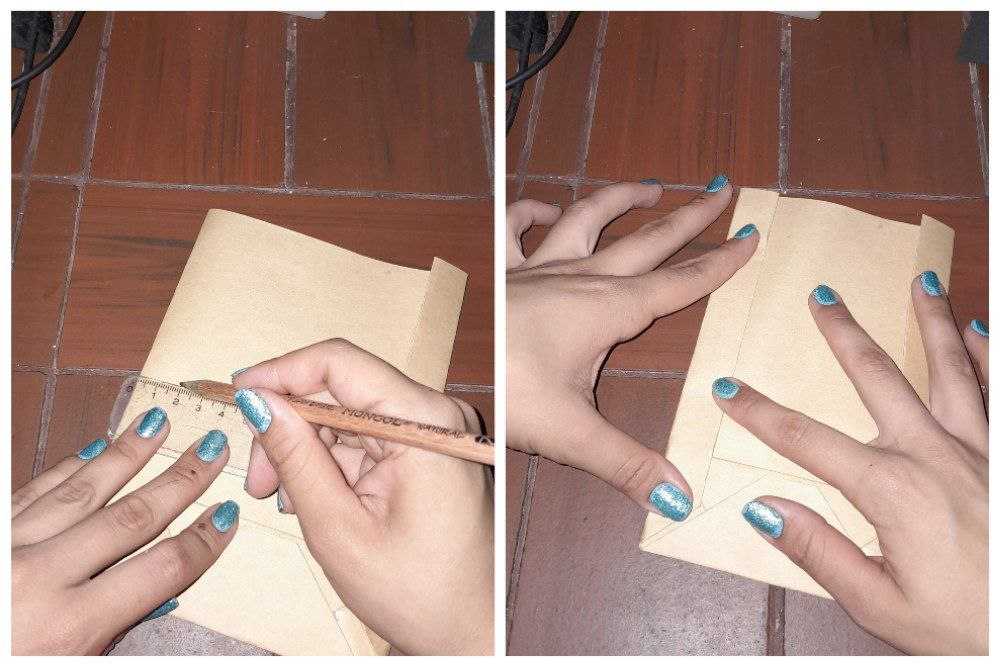
7.- At the top end I am going to mark a 2cm double in the same way as we did on the sides.
7.- En el extremo superior voy a marcar un dobles de 2cm de igual forma que hicimos en los laterales.
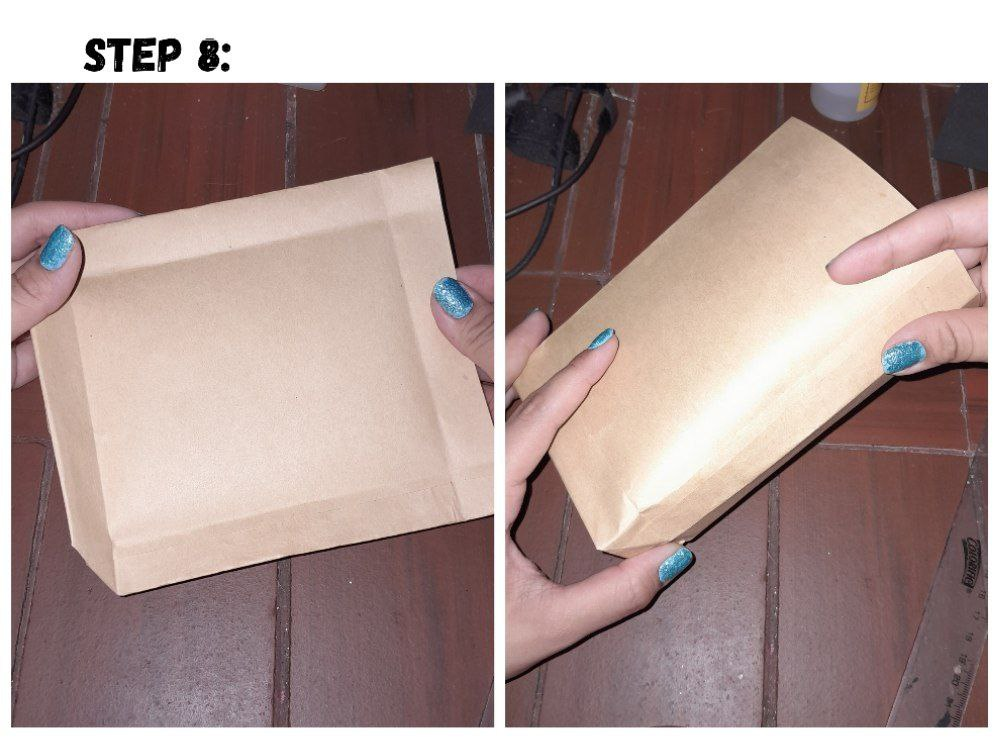
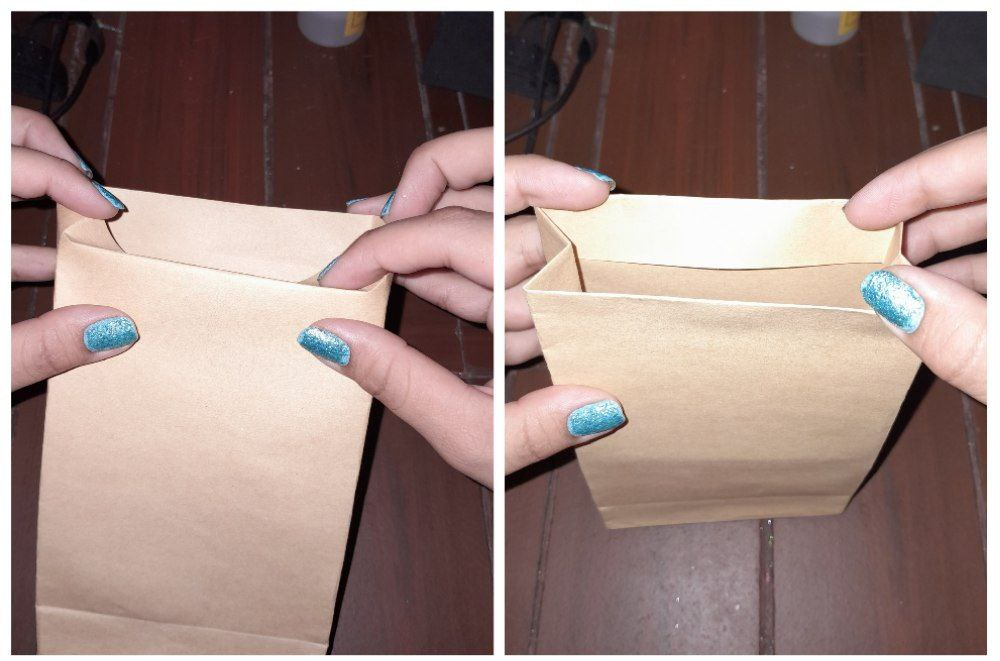
8.- I am going to open the bag and shape all the folds. I'm going to tuck the top end 2cm inward.
8.- Voy a abrir la bolsa y a darle forma a todos los dobleces. Voy a meter el extremo superior de 2cm hacia adentro.
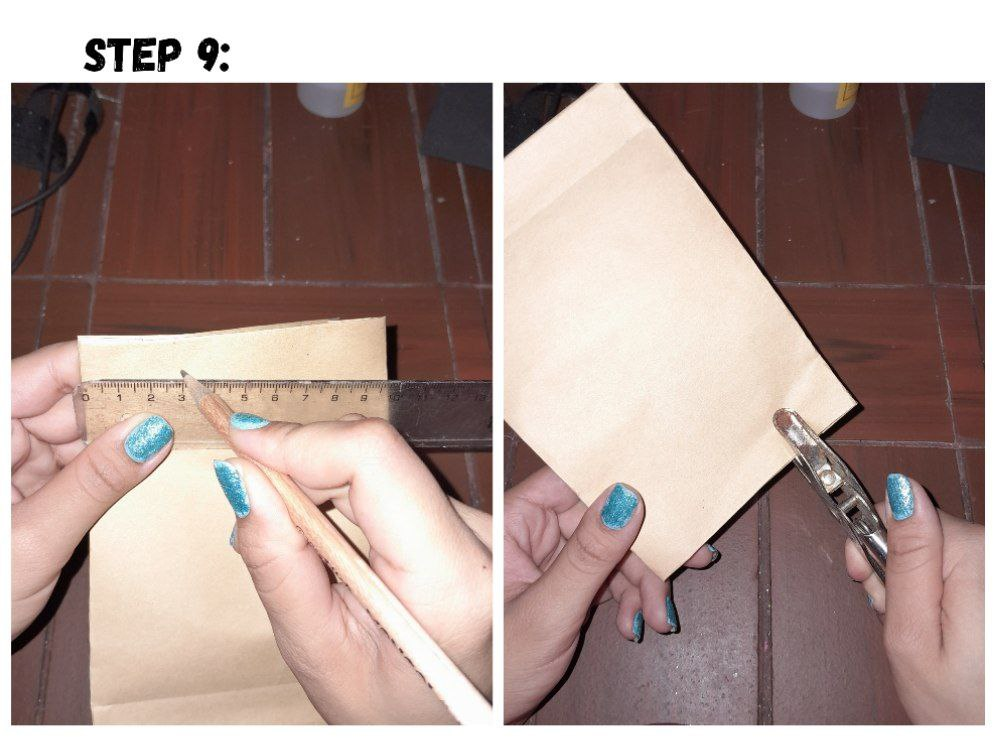
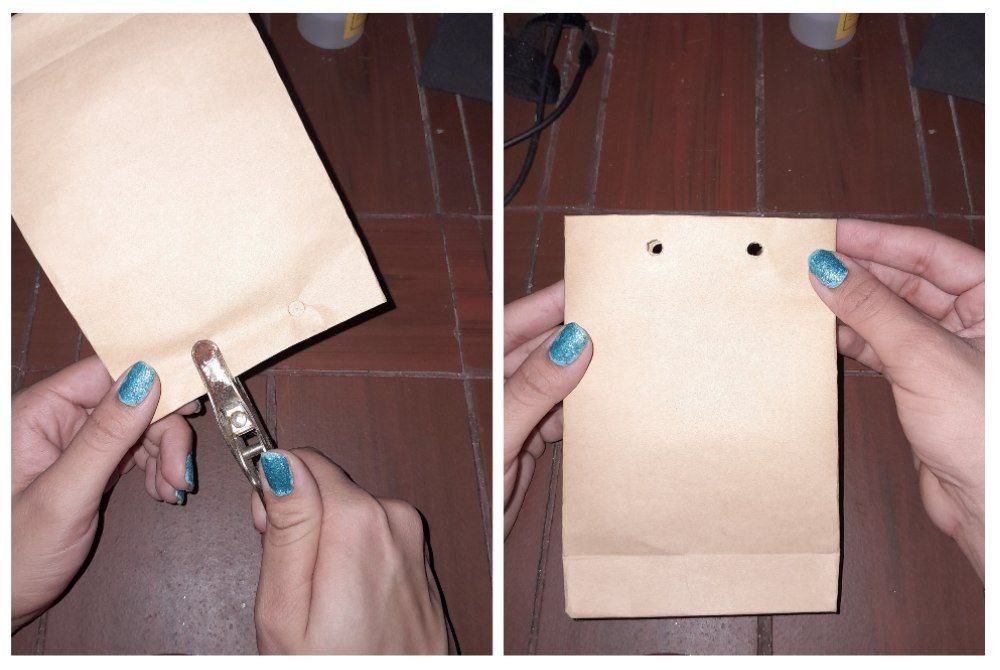
9.- I am going to mark two points, leaving a space of 3cm from the sides to the center and then open two holes with a hole opener at the marked points.
9.- Voy a marcar dos puntos dejando un espacio de 3cm desde los laterales hacia el centro para luego abrir dos agujeros con un abre hueco en los puntos marcados.
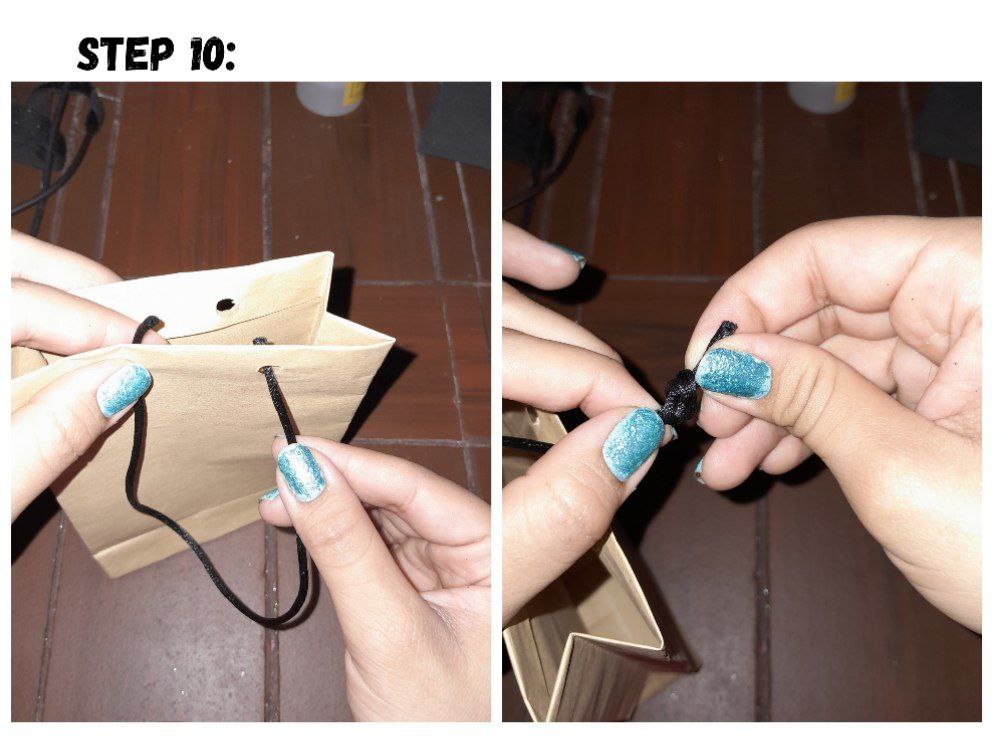
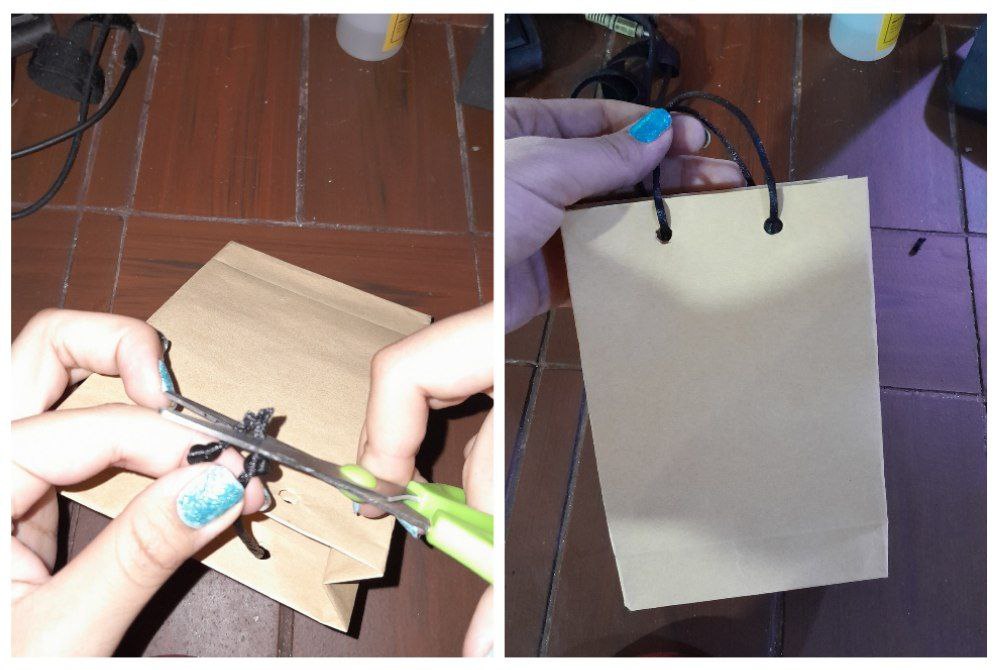
10.- I am going to take two strips of cord, one for each side, to make the handles of the bag. I'm going to take the ends of the cords and put them through the holes, tying a knot at both ends so they don't come out, trimming the excess thread.
10.- Voy a tomar dos tiras de un cordón, una para cada lado, para hacer las asas de la bolsa. Voy a tomar los extremos de los cordones y los voy a meter por los agujeros haciendo un nudo en ambos extremos para que no se salgan, recortando el hilo excedente.
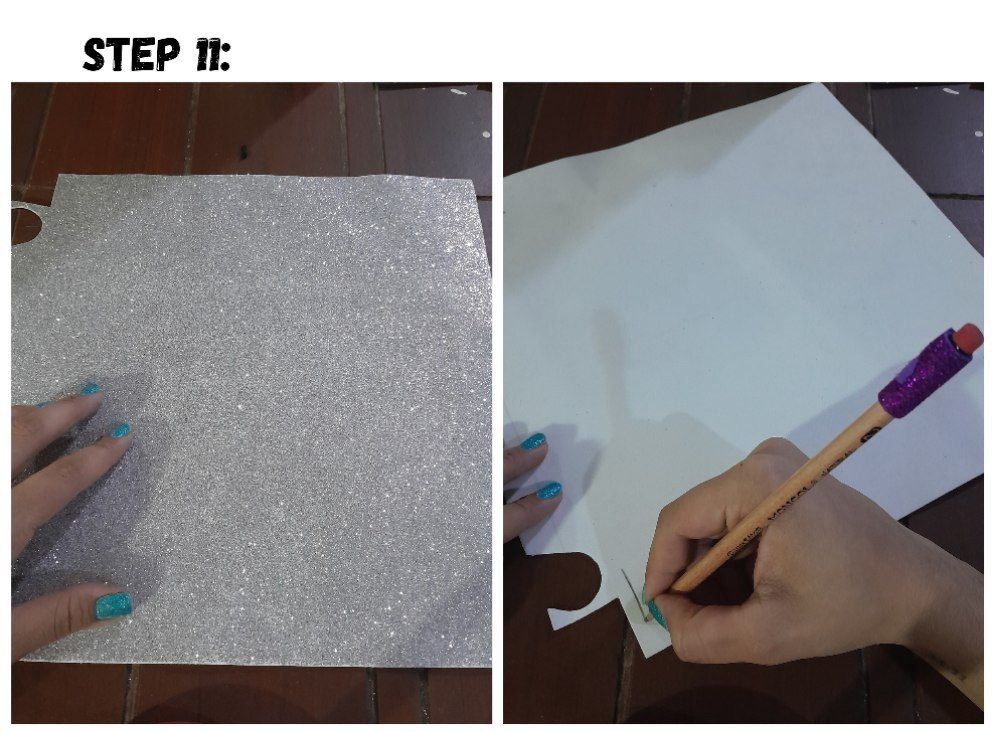
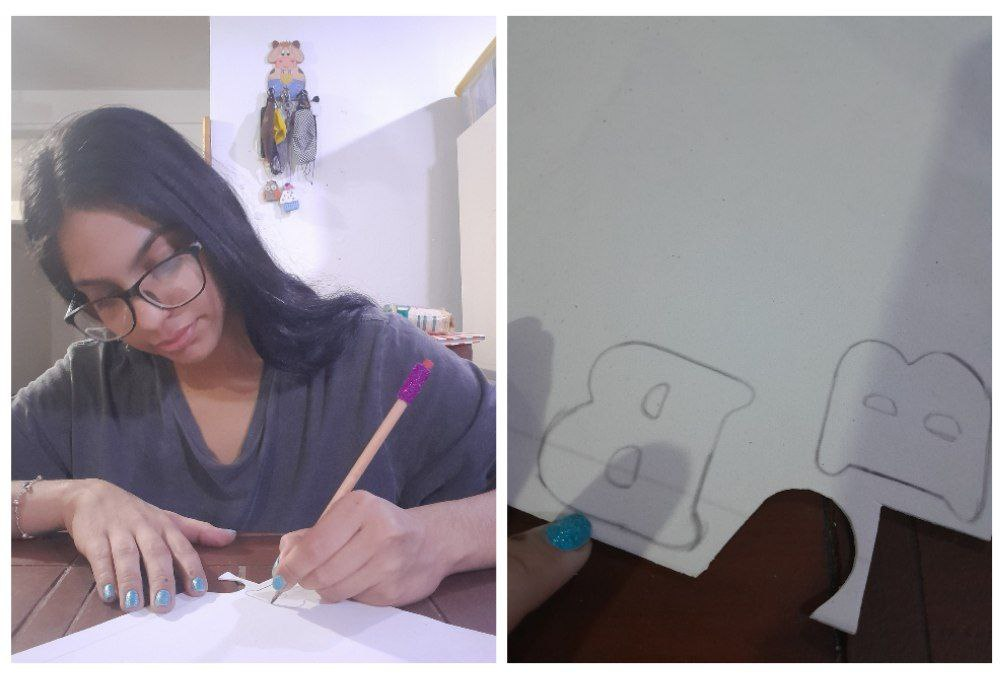
11.- To decorate the bag I am going to take a frosted silver foam and I am going to mark the letter B on the back, I marked it first right side up forgetting the small detail that when I turned it over it would be upside down so I had to draw it again but in mirror mode.
11.- Para la decoración de la bolsa voy a tomar un foami plateado escarchado y voy a marcar por la parte trasera una letra B, yo la marque primero al derecho olvidando el pequeño detalle que al voltearla estaria al revés por lo que me tocó dibujarla de nuevo pero en modo espejo.
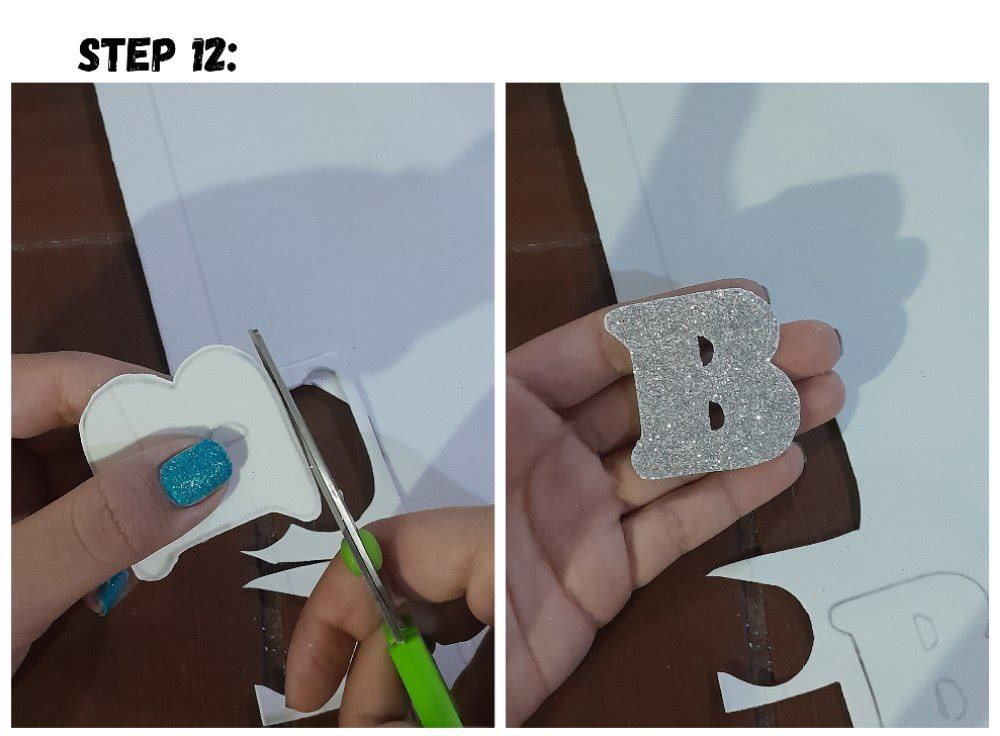
12.- I'm going to take the scissors and cut out the "B".
12.- Voy a tomar las tijeras y recortar la "B".
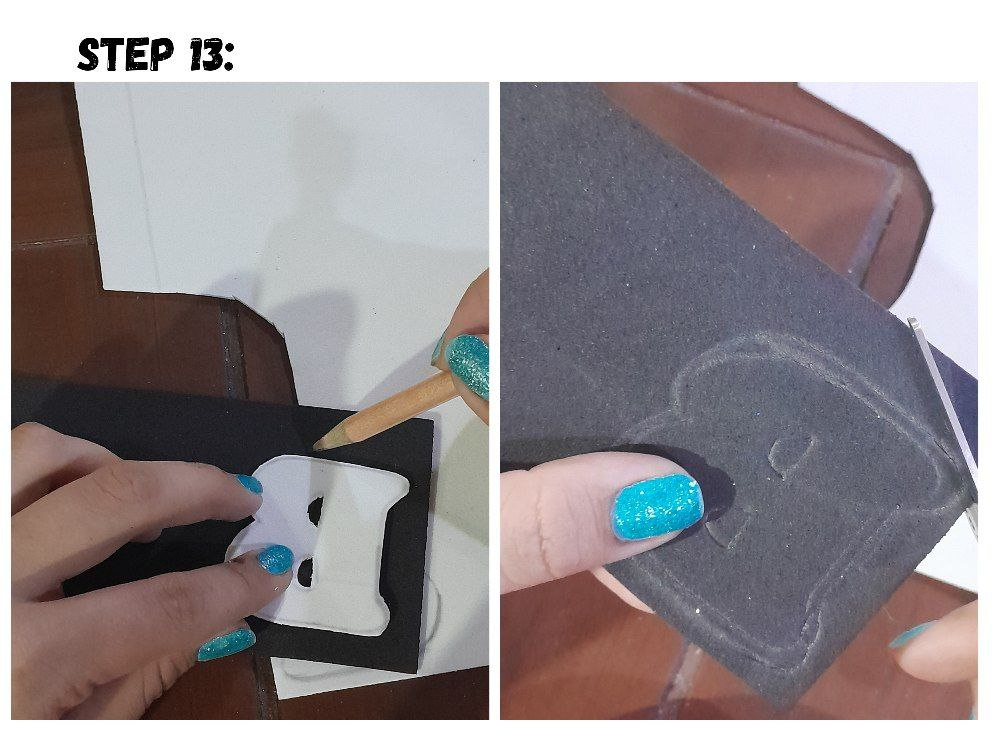
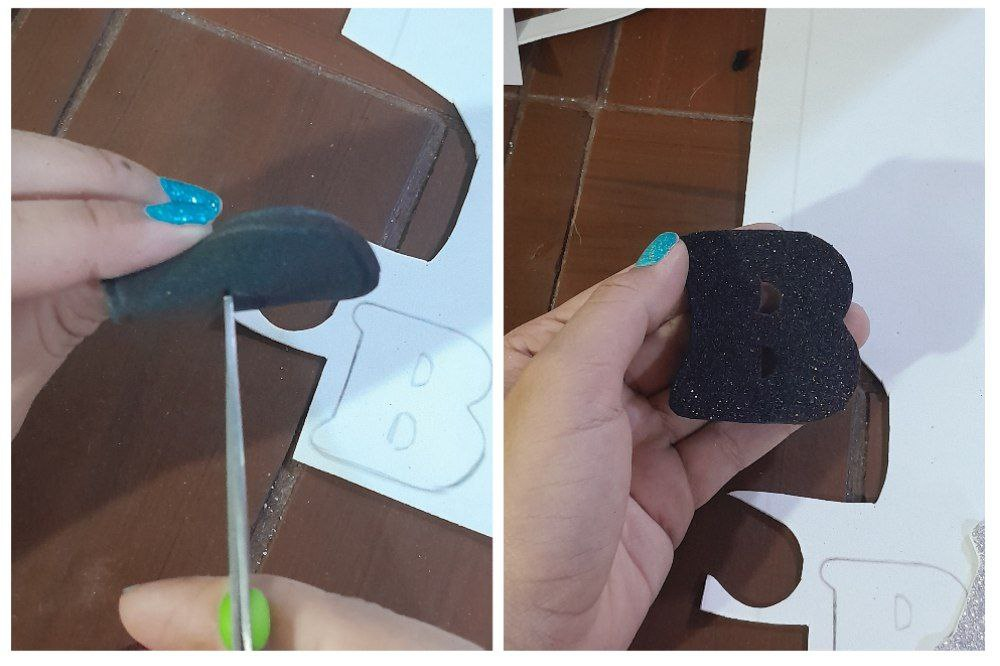
13.- Now I will take a black frosted foam and I will mark the letter B that we made before and making the edges wider than the original and then cut it out.
13.- Ahora tomare un foami escarchado negro y voy a marcar la letra B que hicimos antes y haciéndole unos bordes más anchos que la original para luego recortarla.
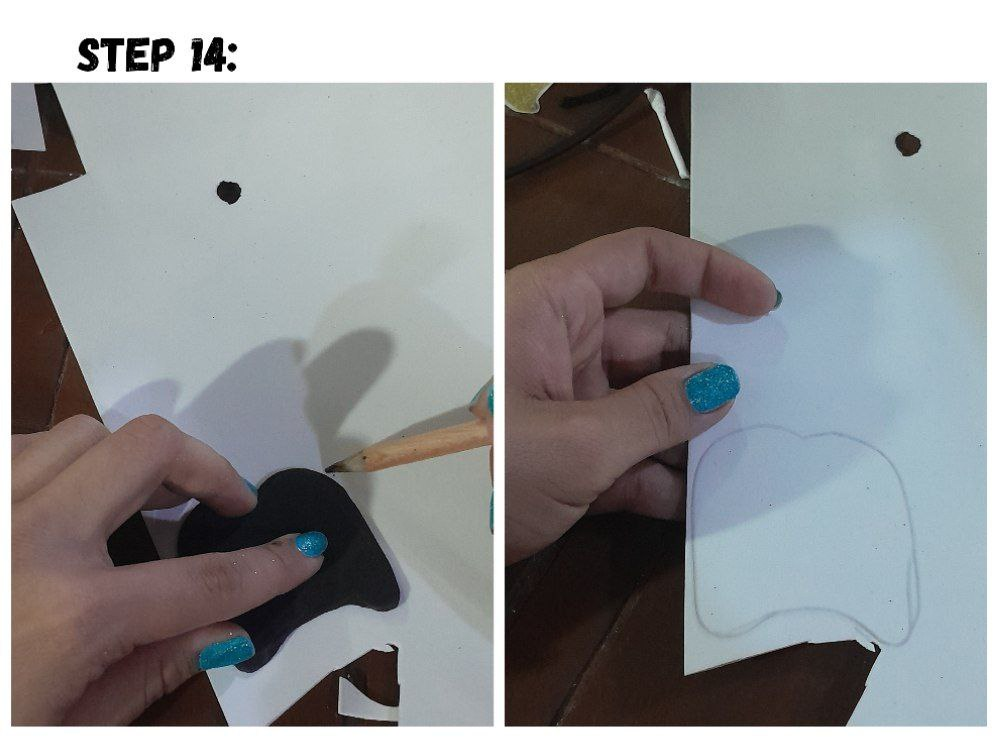
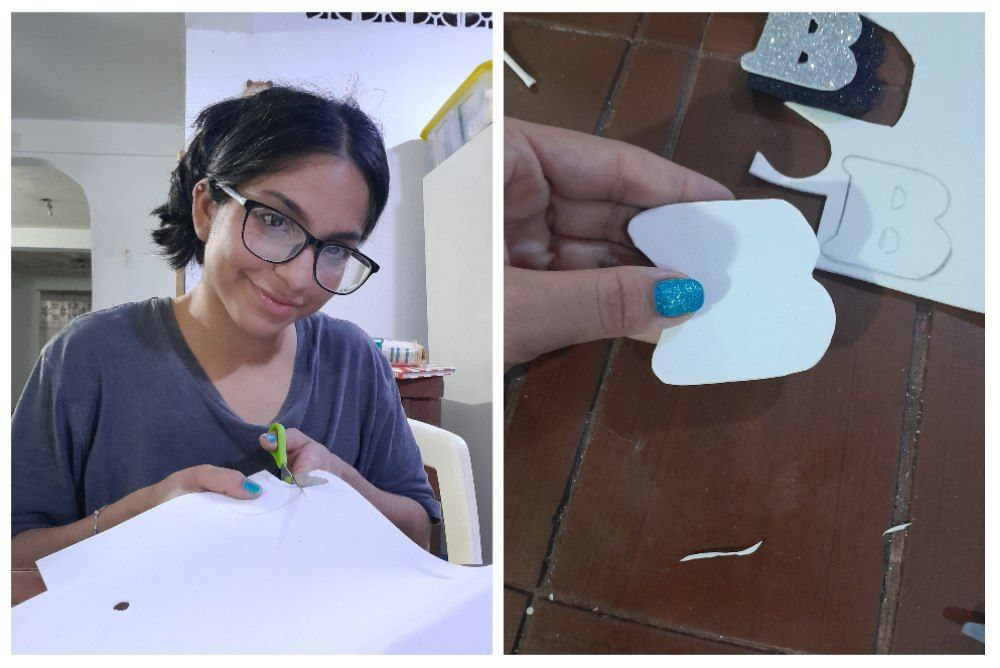
14.- Now I am going to mark an edge above the black letter on a white foam and proceed to cut it out.
14.- Ahora voy a marcar un borde por encima de la letra negra en un foami blanco y paso a recortarlo.
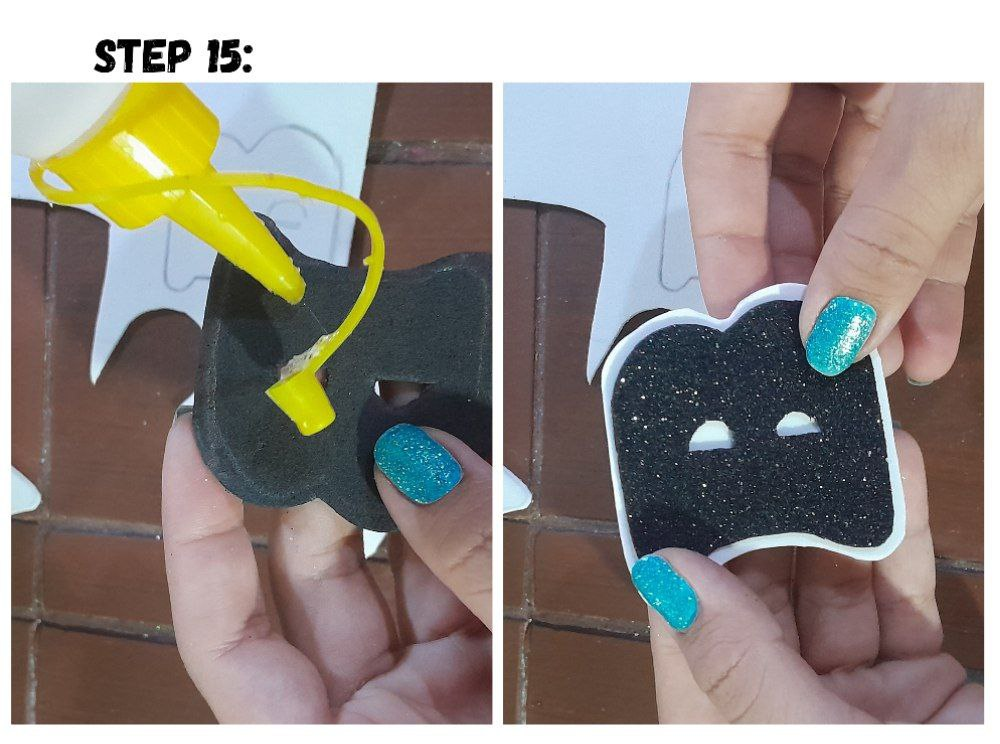

15.- I am going to glue the three parts starting by placing a little cold silicone on the black foam to stick it in the center of the white foam. Then I put a little silicone on the silver foam to stick it in the center of the black foam.
15.- Voy a pegar las tres partes comenzando por colocar un poco de silicón frío en el foami negro para pegarlo en el centro del foami blanco. Luego coloco un poco de silicon en el foami plateado para pegarlo en el centro del foami negro.
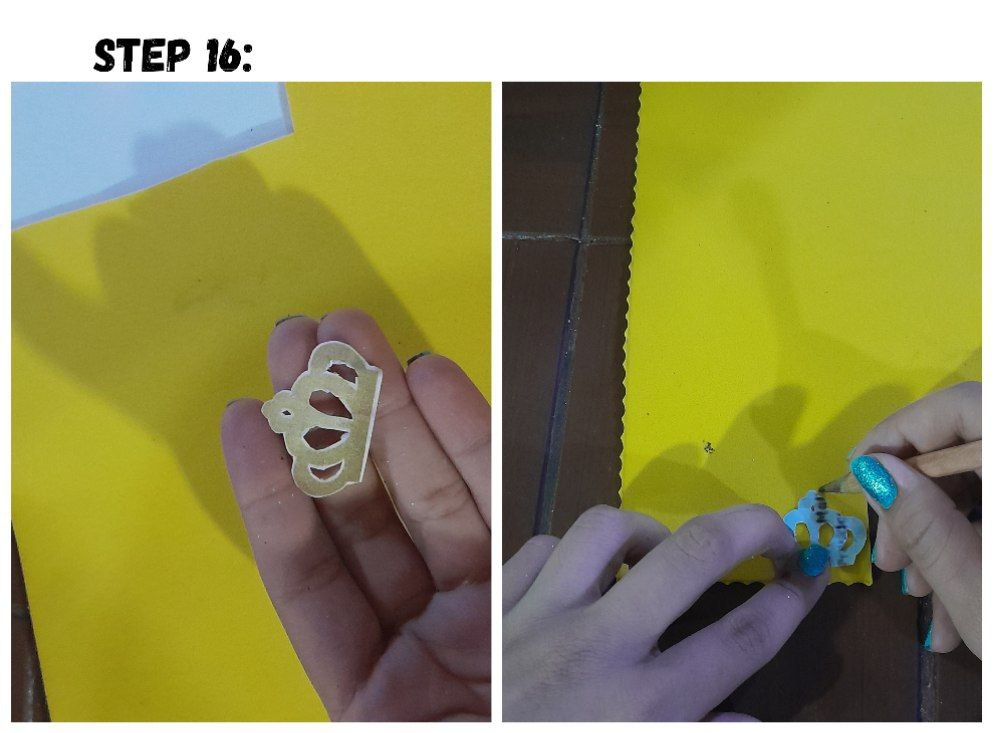
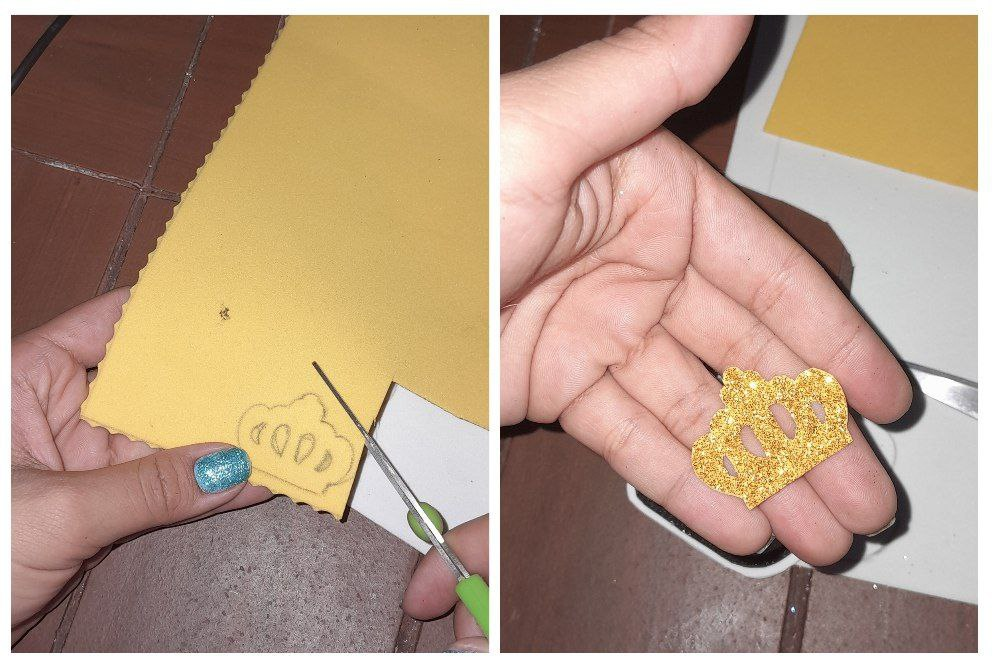
16.- Now I am going to take a pattern of a small crown and I am going to draw it on the back in frosty gold foam and then cut it out.
16.- Ahora voy a tomar un patrón de una pequeña corona y lo voy a dibujar al reverso en un foami dorado escarchado para luego pasar a recortarlo.
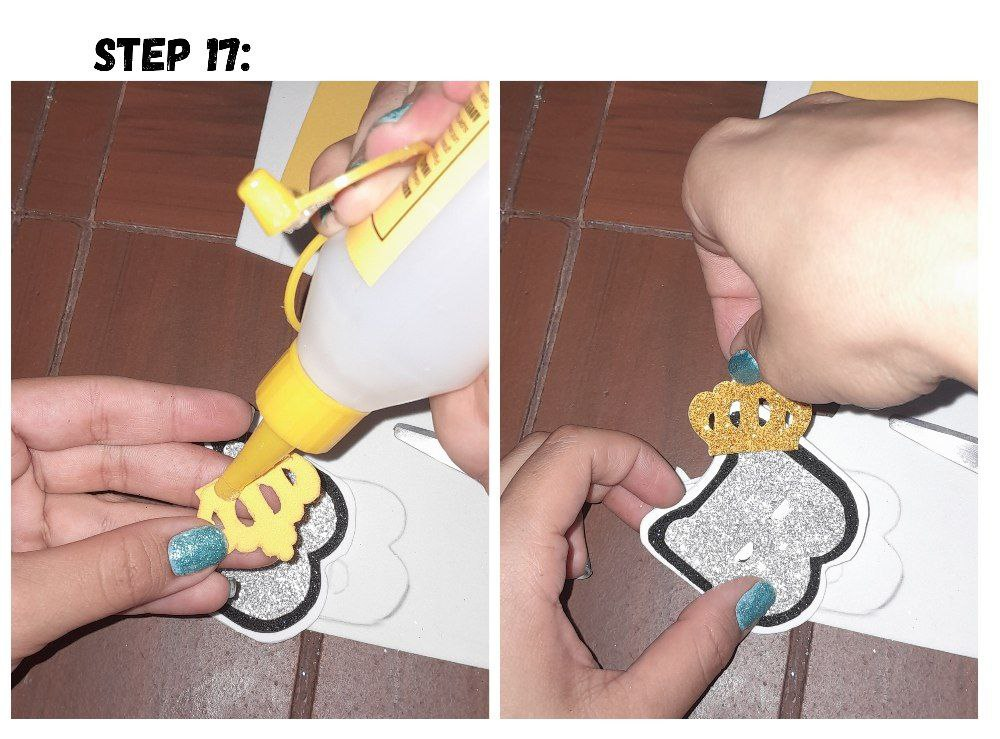
17.- I'm going to put some silicone on it and I'm going to stick it in the corner of the letter "B".
17.- Voy a colocarle un poco de silicon y lo voy a pegar en la esquina de la letra "B".
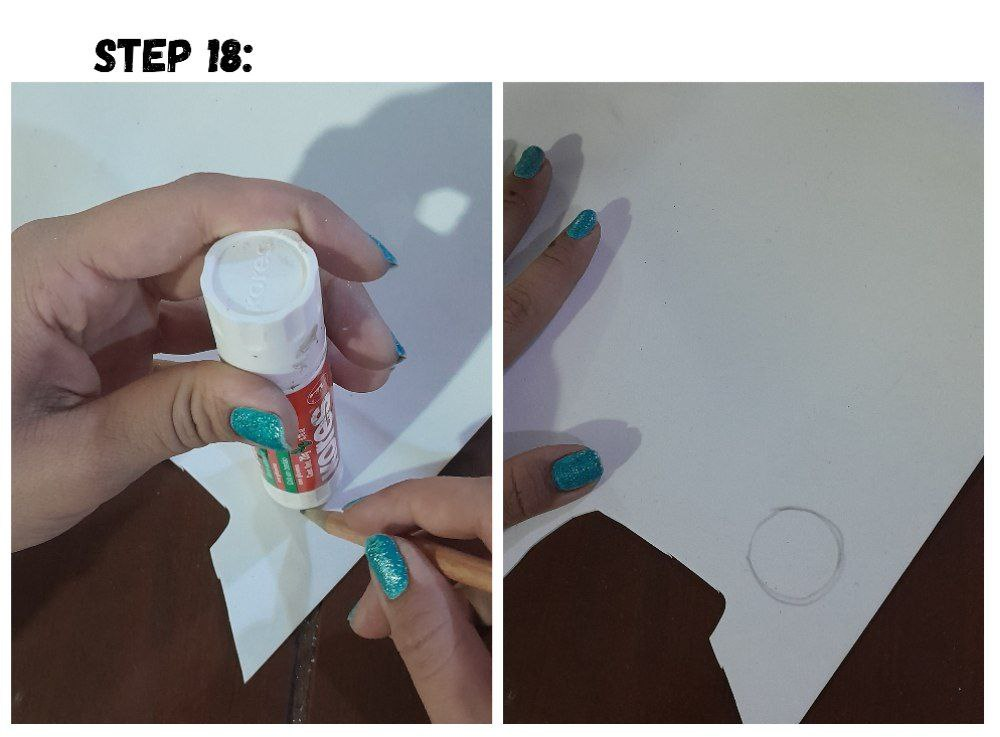
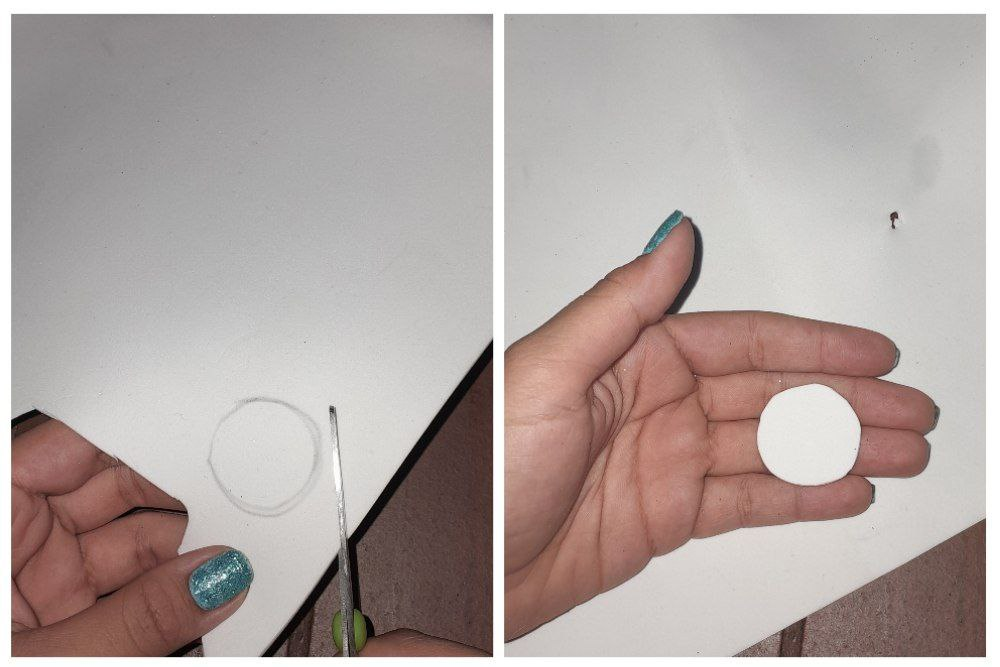
18.- I am going to take a circular object and mark it on white foam to make a soccer ball.
18.- Voy a tomar un objeto circular y voy a marcarlo en un foami blanco para hacer un balón de fútbol.
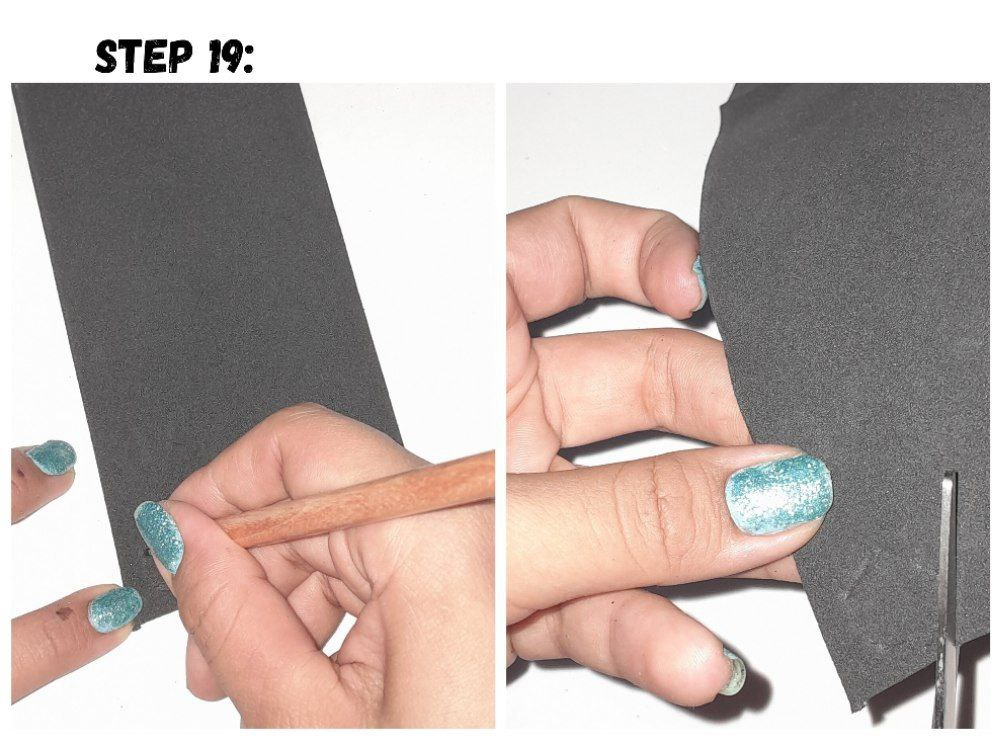
19.- On black foam I am going to draw six pentagons and I am going to cut out each of them.
19.- En un foami negro voy a dibujar seis pentágonos y voy a recortarlo cada uno de ellos.
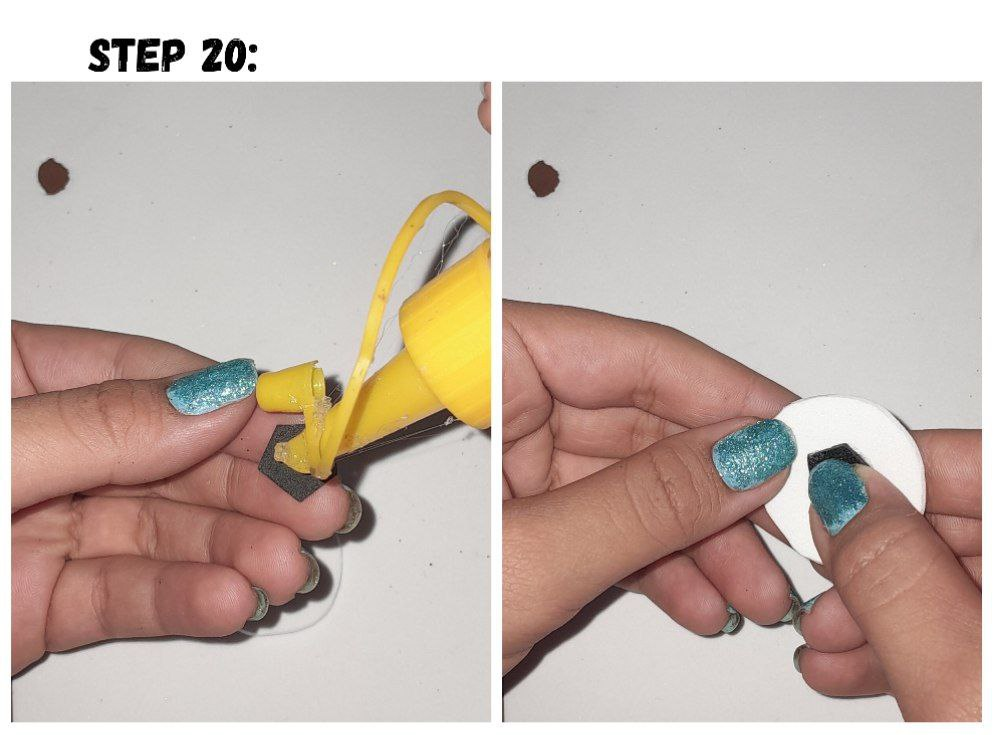

20.- I will glue one in the center and a part of the others on the edges, and with the scissors I will cut the excellent ones so that it is round.
20.- Pegaré uno en el centro y una parte de los otros en los bordes, y con la tijera voy a cortas los excelentes para que quede redondo.
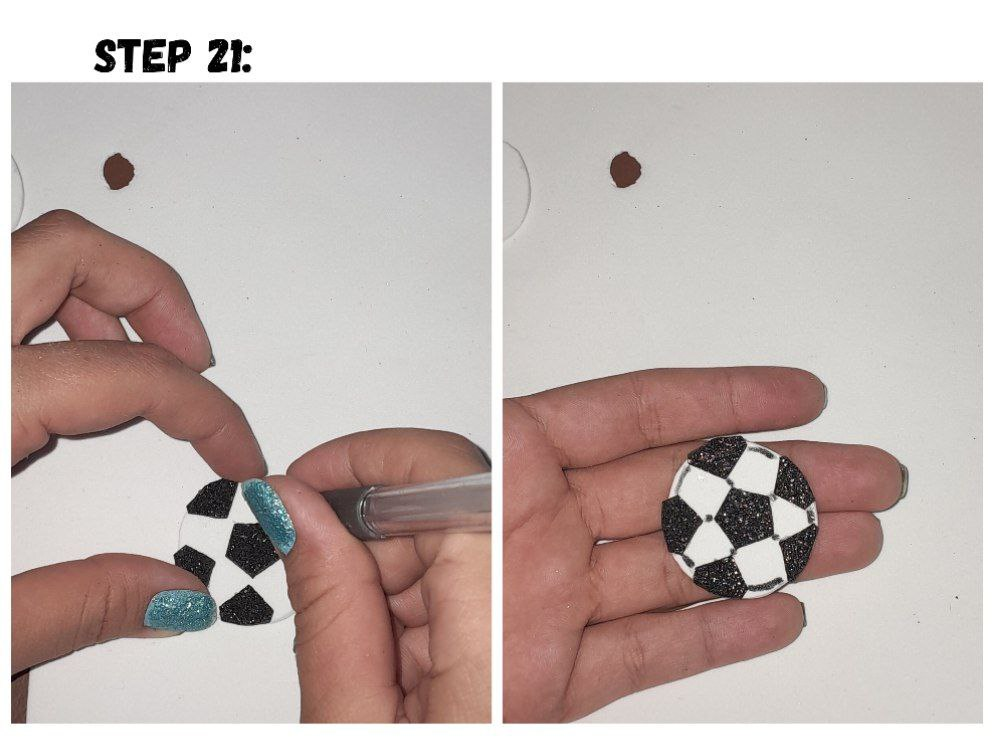
21.- With a black pencil I am going to draw the connection between the pentagons of the ball.
21.- Con un lápiz de color negro voy a dibujar la conexión entre los pentágono del balón.
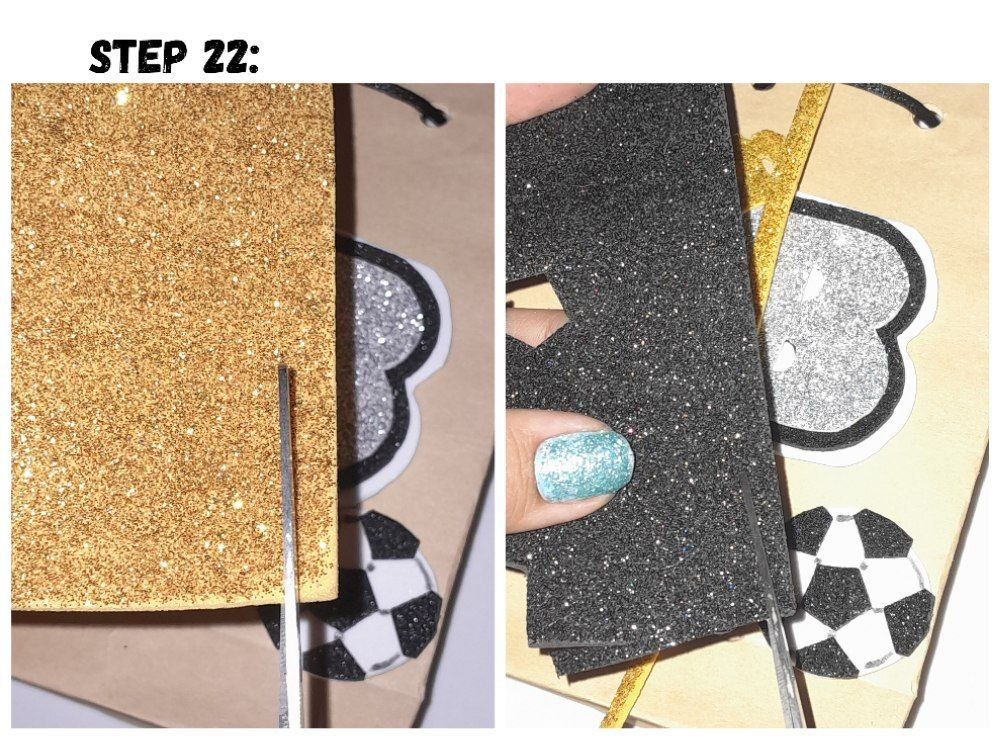
22.- Now I am going to cut some strips of black and frosty gold foam.
22.- Ahora voy a cortar unas tiras de foami negro y dorado escarchado.
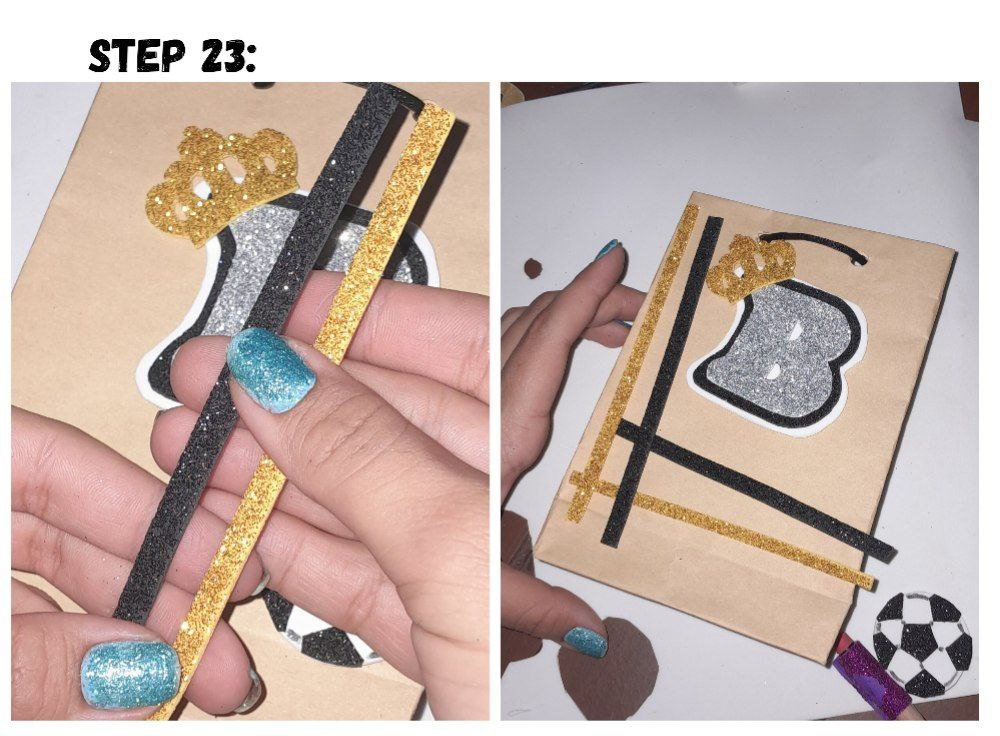
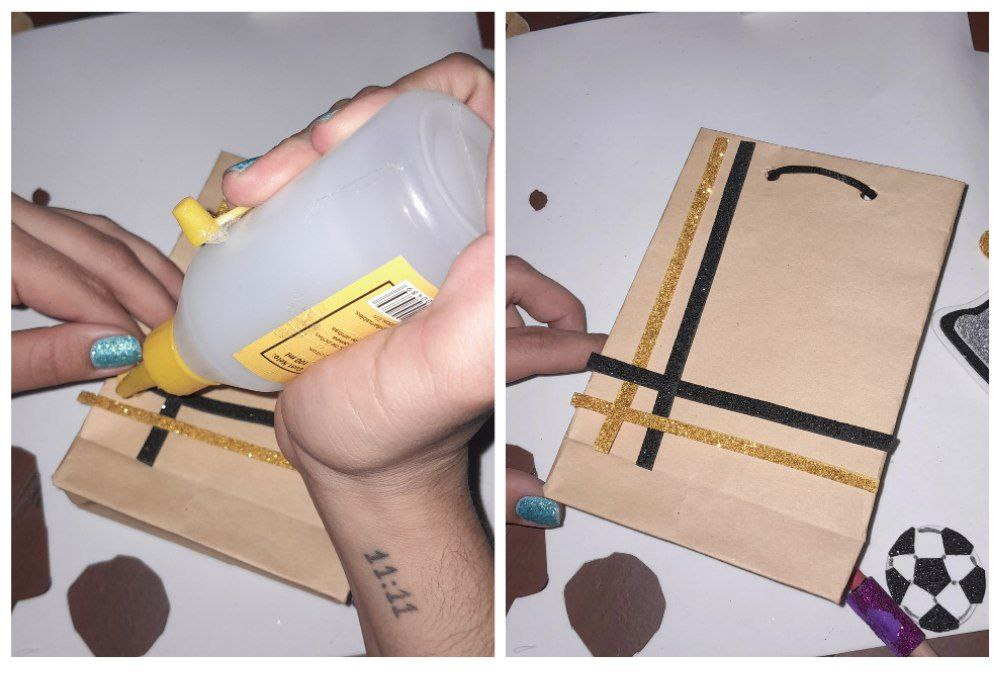
23.- I am going to place the strips on the edges of the bag creating a kind of frame. Once I have the place where I want them, I will start gluing them.
23.- Voy a colocar las tiras en los bordes de la bolsa creando una especie de marco. Una vez tenga el sitio en donde los quiero pasaré a pegarlos.
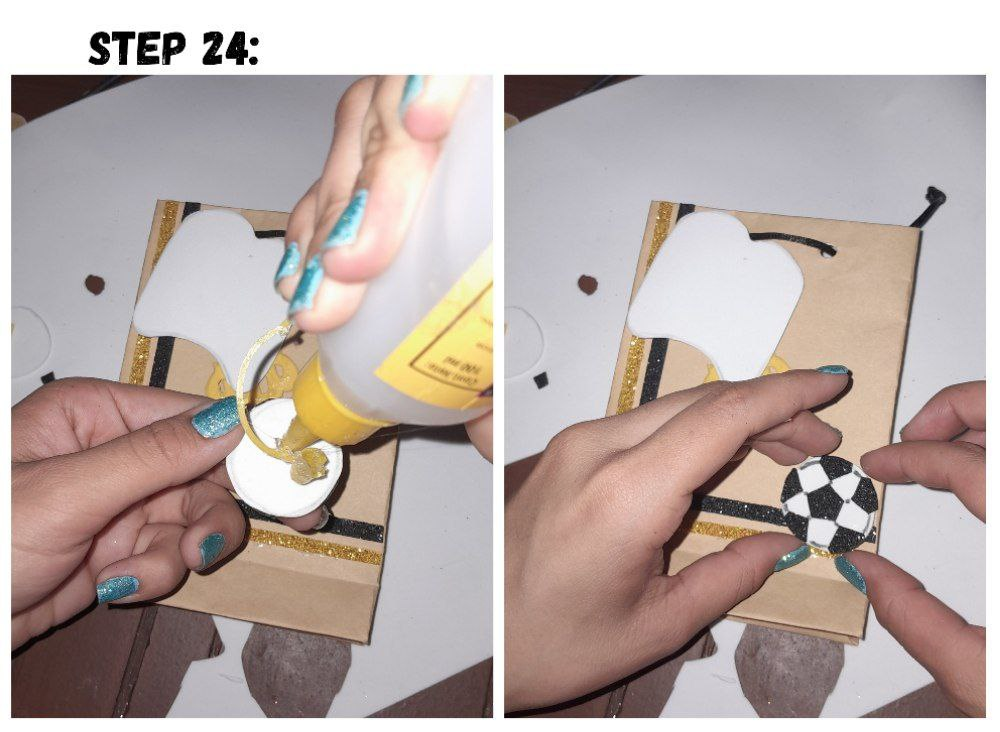
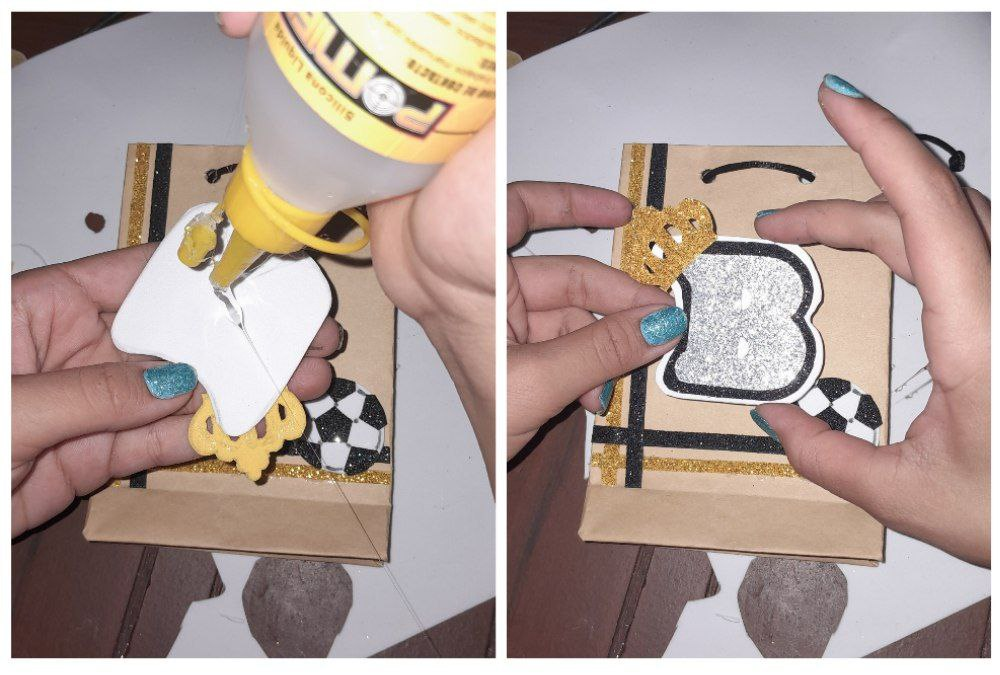
24.- I am going to stick the ball in one corner of the bag and the letter B in the center. And the bag is ready as soon as you put the filling in.
24.- Voy a pegar el balón en una esquina de la bolsa y la letra B en el centro. Y ya ha quedado lista la bolsa nada más de meter el relleno.
Hola.
Esta bolsita vale oro. Tu novio estará muy feliz de recibir obsequios en una bolsa tan bonita y especial. Lindo trabajo.
Amazing! Looks pretty good
La bolsita te quedo verdaderamente preciosa, esta muy cuchi y se ve que la hiciste con mucho amor para esa persona especial en tu vida, se va a sentir feliz cuando reciba tan bello obsequio.
Gracias por regalarnos tu proceso creativo.
!DIY
From Venezuela, our witness drives decentralization and the adoption of Web3 technology, creating opportunities for the local community and contributing to the global ecosystem. // Desde Venezuela, nuestro testigo impulsa la descentralización y la adopción de la tecnología Web3, generando oportunidades para la comunidad local y contribuyendo al ecosistema global.
Sigue, contacta y se parte del testigo en: // Follow, contact and be part of the witness in:
You can query your personal balance by
!DIYSTATS!discovery 30
This post was shared and voted inside the discord by the curators team of discovery-it
Join our Community and follow our Curation Trail
Discovery-it is also a Witness, vote for us here
Delegate to us for passive income. Check our 80% fee-back Program
a community encouraging first-hand content, and each individual living their best life.
Congratulations @aarolita! You have completed the following achievement on the Hive blockchain And have been rewarded with New badge(s)
Your next payout target is 1000 HP.
The unit is Hive Power equivalent because post and comment rewards can be split into HP and HBD
You can view your badges on your board and compare yourself to others in the Ranking
If you no longer want to receive notifications, reply to this comment with the word
STOPCheck out our last posts: