English
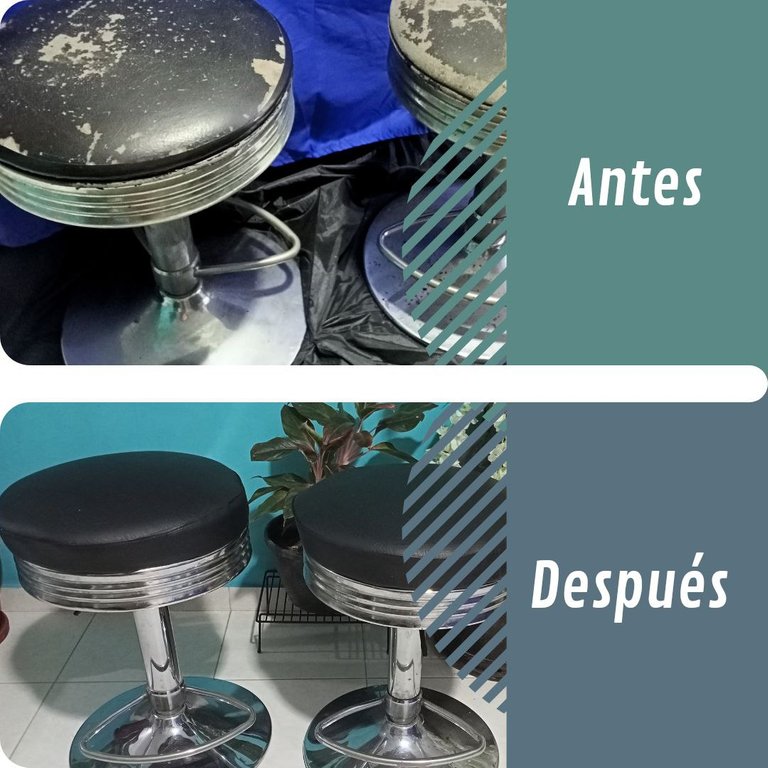
Good afternoon, beautiful Hive family, this afternoon I want to share with you the restoration of these two round hairdressing chairs. They were given to me by a neighbor who no longer wanted to have them and thought about throwing them away, although he remembered in time that I I do restorations and I ask if he wanted to leave them for me, so let's get to work to give him a new chance at life.
Spanish
Buenas tardes hermosa familia hive, en esta tarde quiero compartir con ustedes la restauración de estas dos sillas redondas de peluquería, estas me las regalo un vecino que ya no las quería tener mas y las pensó tirar a la basura, aunque recordó a tiempo que yo hago restauraciones y pregunto que si quería dejarlas ´para mi, así que manos a la obra a darle una nueva oportunidad de vida.

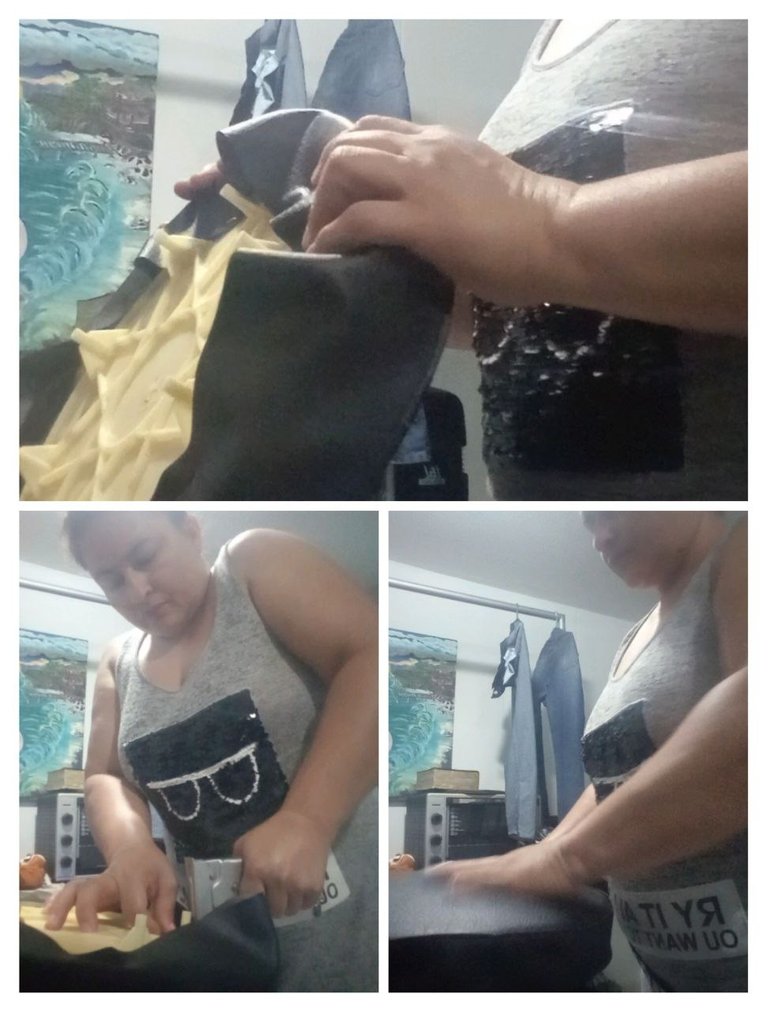
Como pueden observar los cojines están en malas condiciones y se desboronan cada vez que se sientan en ellos.
As you can see the cushions are in poor condition and crumble every time you sit on them.
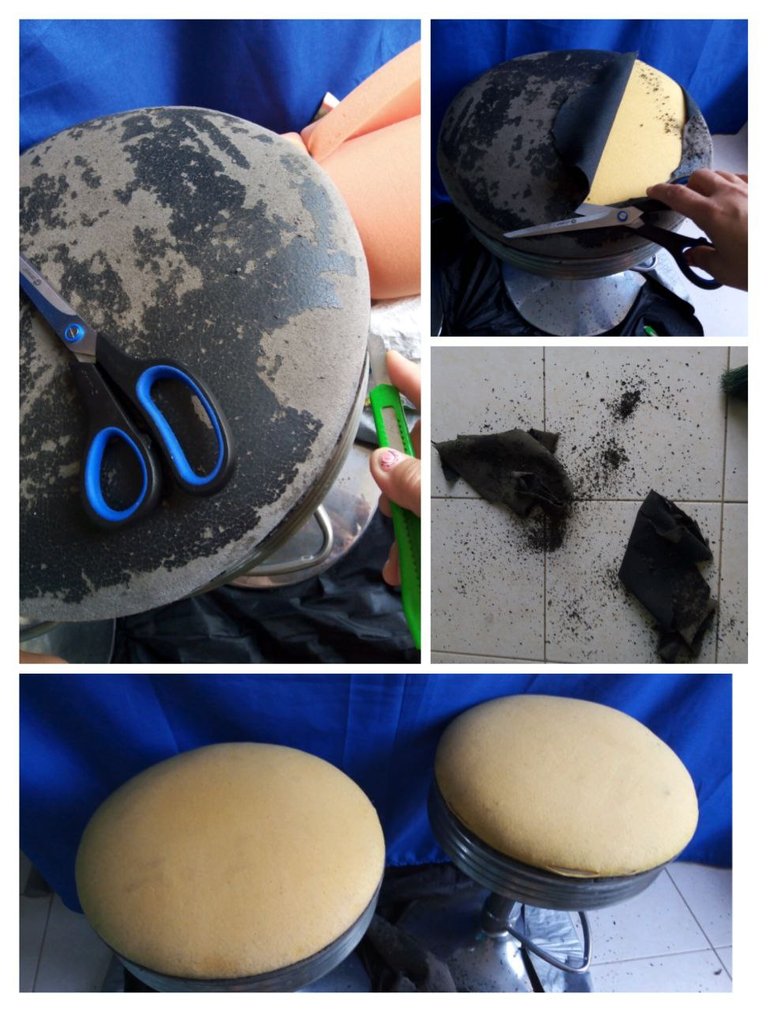
Con ayuda de las tijeras y el bisturí inicio a retirar el forro
realmente mucho residuo que suelta ,mi piso lo había limpiado ayayay ....

With the help of the scissors and the scalpel, I begin to remove the lining.
really a lot of residue that it releases, my floor had been cleaned ayayay ....
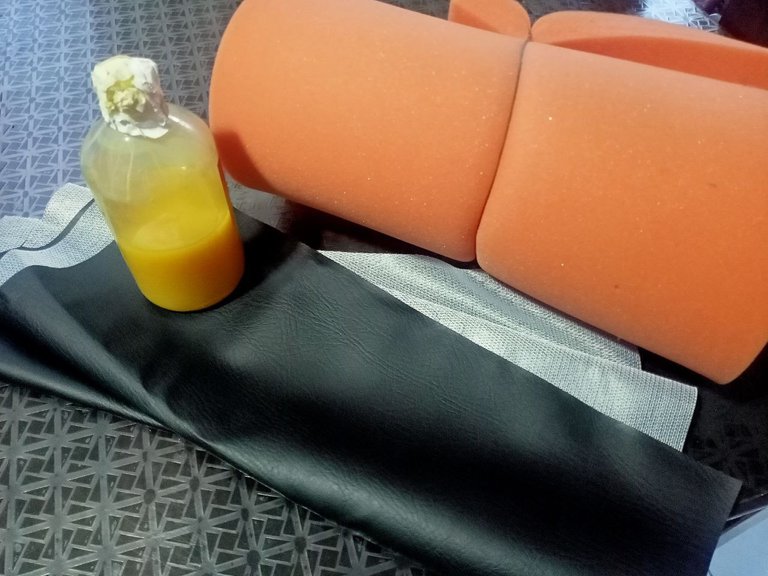
Para restaurarlos utilice cuerina, espuma, pegante amarillo, pistola de ganchos.
To restore them use leather, foam, yellow glue, hook gun.
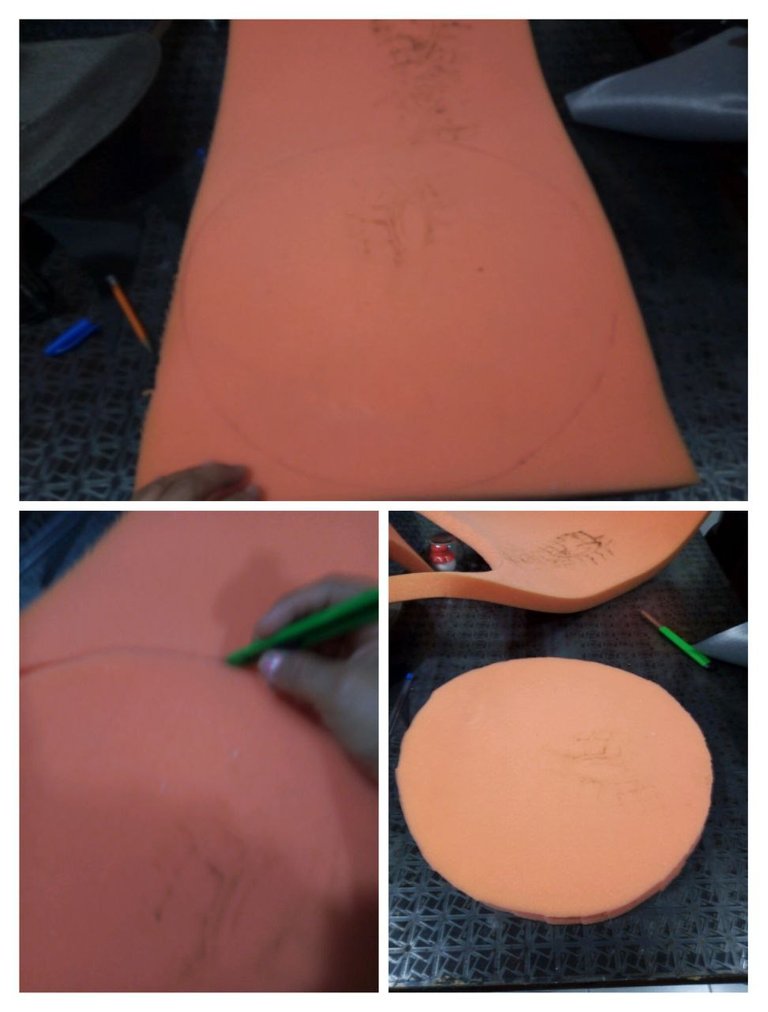
Sobre la espuma dibujamos el tamaño de la base, recortamos con mucho cuidad con el bisturí.
On the foam we draw the size of the base, we cut very carefully with the scalpel.
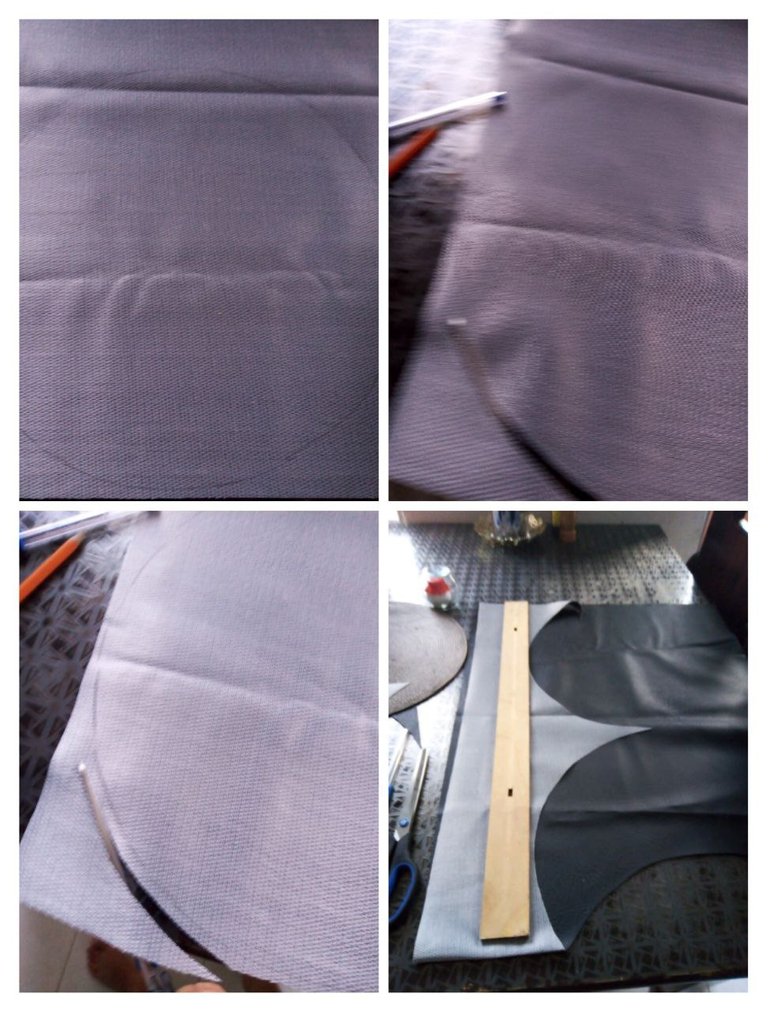
En la cuerina hacemos lo mismo dibujamos la base de las sillas, cortamos con la tijera dejando 1 centímetro para realizar la costura, con una regla cortamos las tiras que irán en los laterales del forro del cojín.
In the horn we do the same, we draw the base of the chairs, we cut with the scissors leaving 1 centimeter to make the seam, with a ruler we cut the strips that will go on the sides of the cushion lining.
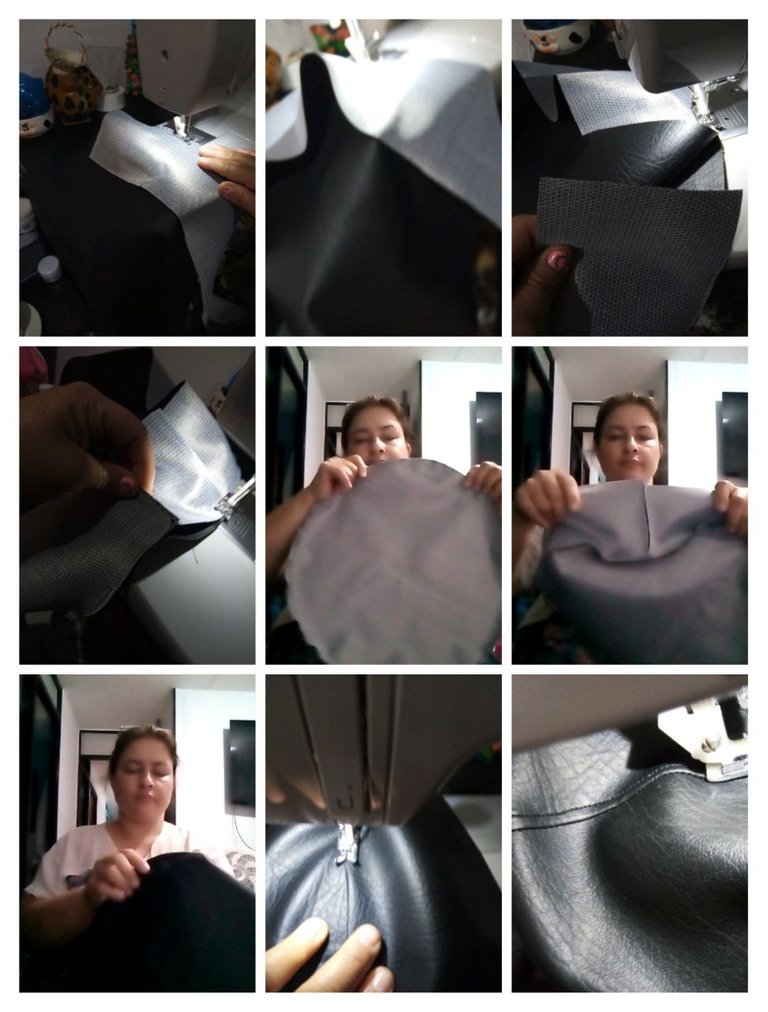
Ya teniendo a mano todas las piezas cortadas procedemos a realizar la costura en la maquina de coser, inicialmente tomamos un circulo y le pegamos la tira al lateral con puntada recta unimos los bordes de este como muestro en la foto, volteamos al derecho y reforzamos la puntada que acabamos de hacer teniendo en cuenta que la costura quede pisada con la nueva puntada recta que haremos por la parte derecha de la cuerina.
Having all the cut pieces at hand, we proceed to sew on the sewing machine, initially we take a circle and we glue the strip to the side with a straight stitch, we join the edges of this as I show in the photo, we turn to the right and reinforce the stitch that we have just made taking into account that the seam is trampled with the new straight stitch that we will make on the right side of the horn.

Ya teniendo los forros confeccionados pasamos a lo siguiente.
Already having the linings made, we move on to the following.
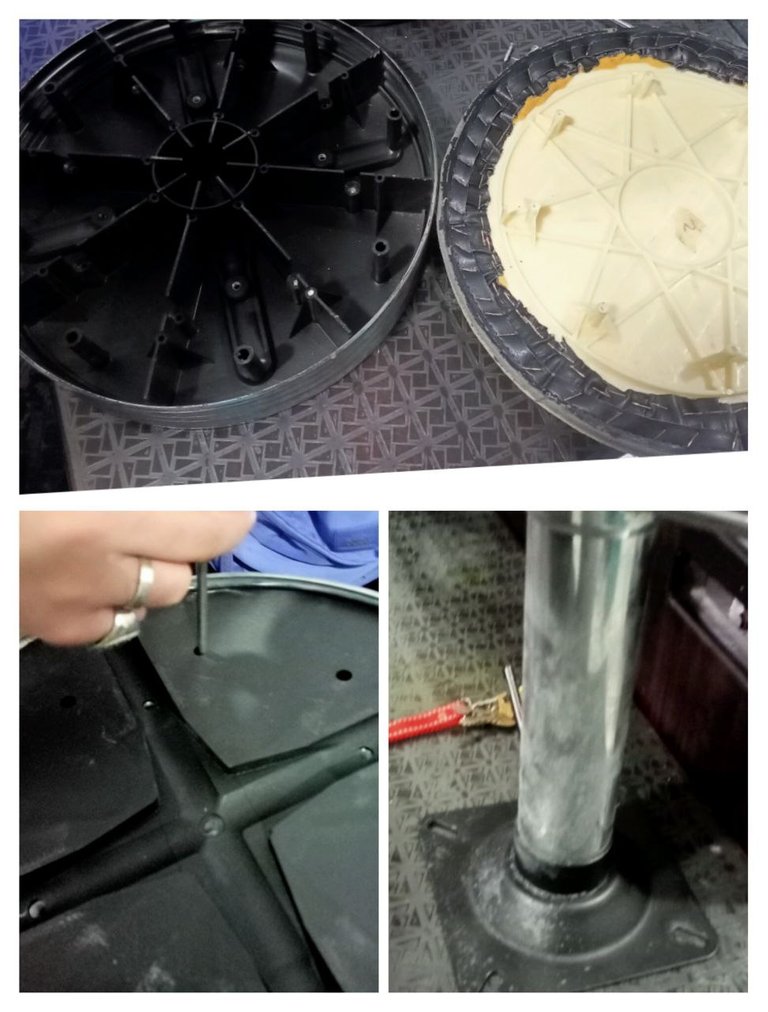
Tomamos un destornillador de estrella y retiramos la base hidráulica yo necesite ayuda de mi hijo porque estaban muy duro de sacar.
We took a Phillips screwdriver and removed the hydraulic base. I needed help from my son because they were very hard to remove.
El forro que confeccionamos en la maquina le colocamos la espuma aplicándole una cantidad considerable de pegante amarillo, hacemos buena presión y empezamos a colocar los ganchos primero en los cuatro extremos y paso a paso uno cerca del otro hasta completar el contorno completo.
We put the foam on the lining that we make in the machine, applying a considerable amount of yellow glue, we apply good pressure and we begin to place the hooks first at the four ends and step by step one close to the other until completing the entire contour.
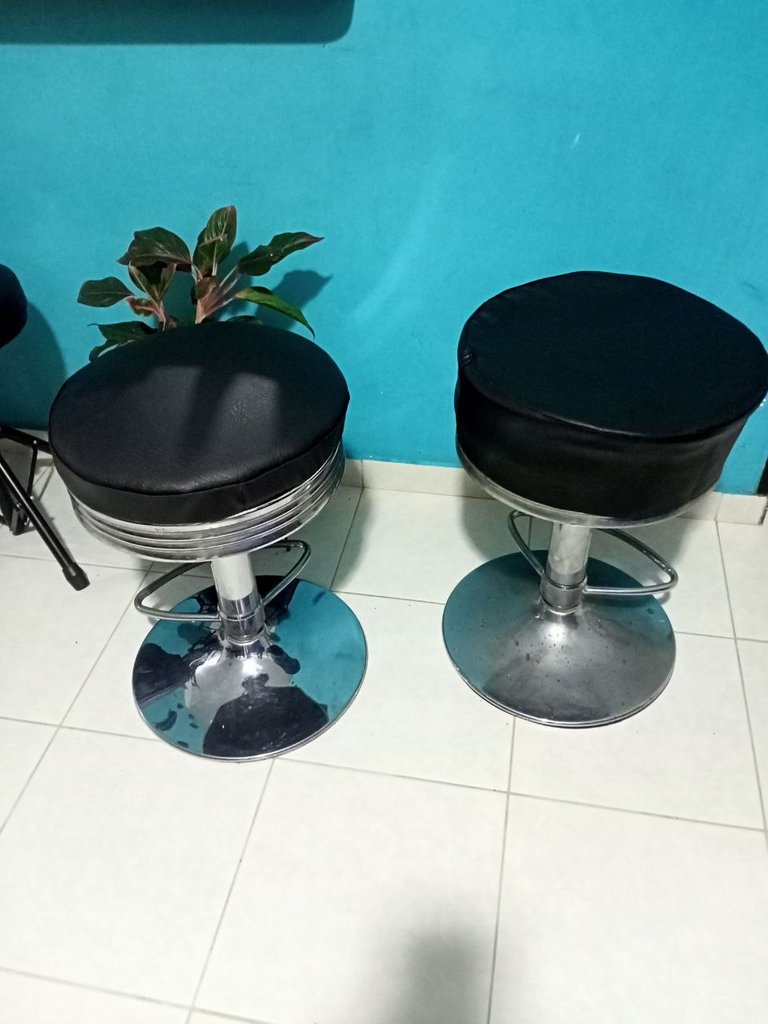
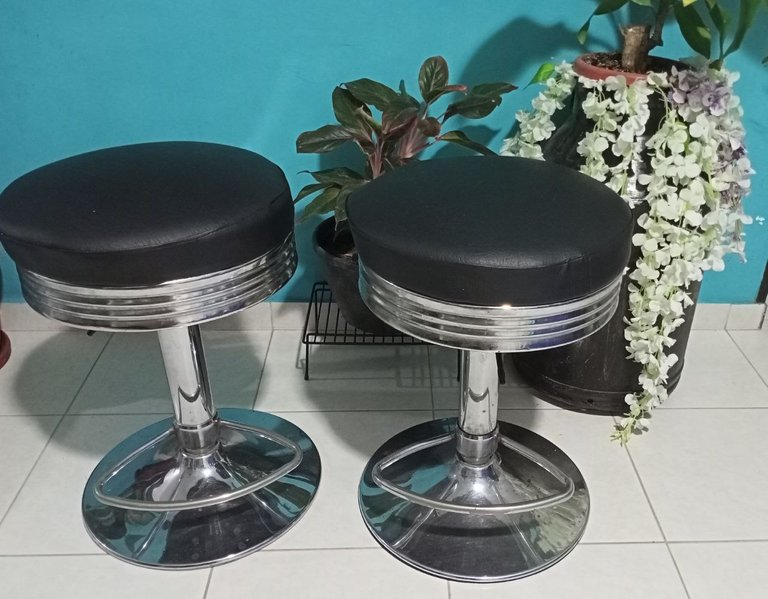
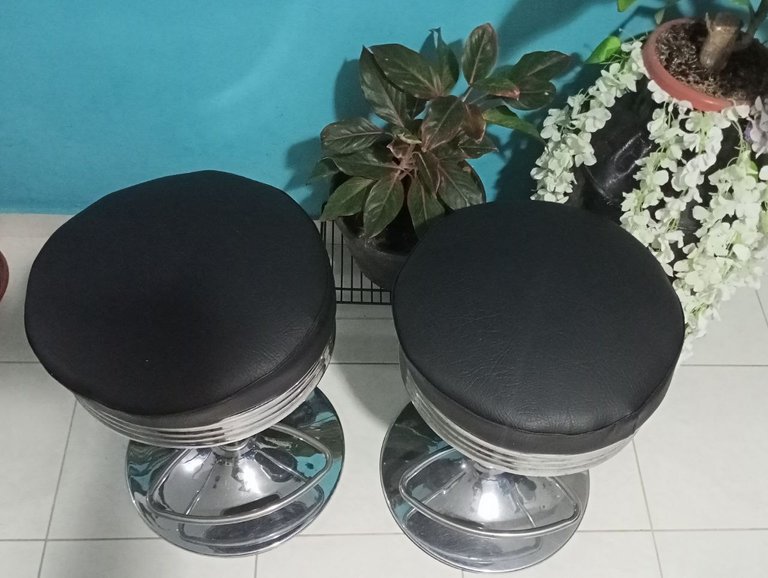
After finishing gluing the lining with the stapler, assemble and screw to the position, go on to clean the metal base with aluminum foil and water, in the photo you can see a finished chair with its cushion secured and very shiny, now to repeat the steps previous assembly steps with the other chair.
Después de terminar de pegar el forro con la grapadora se ensambla y tornillos al puesto, pase a limpiar la base metálica con papel aluminio y agua, en la foto pueden apreciar una silla ya terminada con su cojín asegurado y muy brillante ,ahora a repetir los paso anteriores de ensamble con la otra silla.
It is really very satisfying to be able to make useful an article that went directly to the trash is to focus on the objective of giving a new life to these and contributing to the improvement of the environment, especially by using materials that we have at home, particularly in this arrangement that I did need a little help from my son to loosen and replace the screws. I recommend that when handling the stapler we should use gloves because the constant pounding against my hand gave me a blister. Thank you very much for seeing my post. I took the photos with my realme c3 cell phone and the cover was made with the canva program.
Realmente es de mucha satisfacción lograr hacer útil un articulo que iba directo a la basura es enfocar el objetivo de dar una nueva vida a estos y contribuir a la mejora del medio ambiente, especialmente por utilizar materiales que tenemos en casa, particularmente en este arreglo que hice necesite un poco de ayuda de mi hijo para soltar y colocar nuevamente los tornillos, aconsejo que al manipular la grapadora debemos utilizar guantes por que el constante golpeteo contra mi mano me saco ampolla, muchas gracias por ver mi post, las fotos las tome con mi celular realme c3 y la portada la hice con el programa canva.
 -
- 
#hivediy #diy #manualidades #crafts #handmade #tutorial #art #spanish #english
Qué gran trabajo! Te ha quedado profesional, me encantó los detalles de costura, quedaron estupendos, he quedado maravillada, me recuerdan viejos tiempos, usar esa grapadora requiere de fuerza, ya mis manitos no me dejan por la artritis, admiro tu trabajo!
Muy buenas noches ,muchas gracias por tus palabras, me hace muy feliz saber que te parece un gran trabajo, es verdad que se requiere de mucha fuerza en nuestras manos para manipular esa grapadora es recomendado utilizar guantes porque aun me están doliendo las ampollas que me salieron usándola, Dios te bendiga y tengas un agradable descanso, un abrazo.