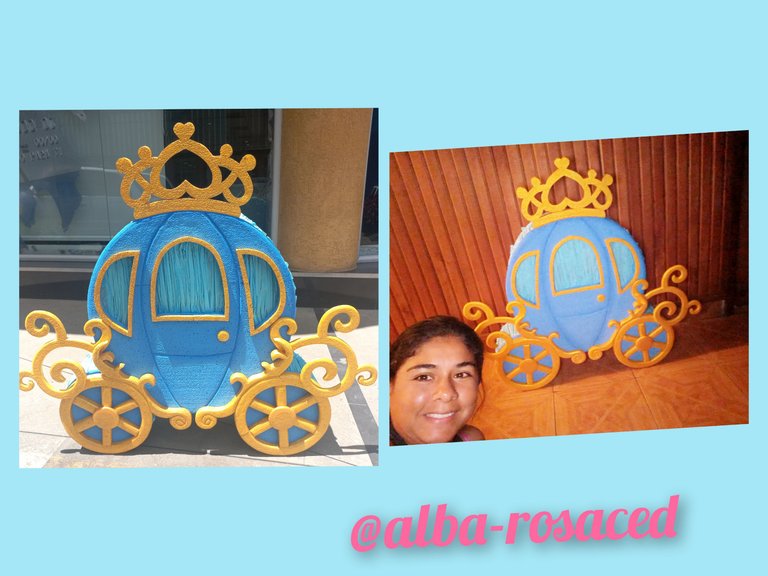
Hello my friends of this wonderful community of @hivediy, I hope you are well with your family. Today I want to share with you this beautiful theme of Cinderella a movie that despite so many years that the allan given remains unforgettable for so many anecdotes that provides this film, many emotions for those who have seen it, so join me to see the realization of this cute piñata pumpkin Cinderella, is super easy just have to sit down to devote time and patience. Everything we do for our little ones, most of the time they like it.
hola mis amigos de esta maravillosa comunidad de @hivediy, espero estén bien al lado de su familia. Hoy quiero compartir con ustedes este bella temática de la cenicienta una película que a pesar de tantos años que la allan dado sigue siendo inolvidable por tantas anécdotas que brinda esta película, de muchas emociones para quien la a visto, así que acompañenme a ver la realización de esta linda piñata de la calabaza de la cenicienta, es super fácil solo hay que sentarse a dedicarle tiempo y paciencia. Todo lo que hacemos por nuestros pequeñ@s darle la mayoría de las veces sus gusto.
Materials to be used:
-Anime.
-Anime cut.
-scissors.
-blue and gold cold paints.
-blue crepe paper.
-cold silicon.
-cardboard.
-staples.
-pencil.
-paper bon.
-tape.
Materiales a utilizar:
-Anime.
-corta Anime.
-tijera.
-pinturas al frío azul y Dorada.
-papel crepe azul.
-silicon frío.
-cartón.
-grapas.
-lápiz.
-papel bon.
-cinta.
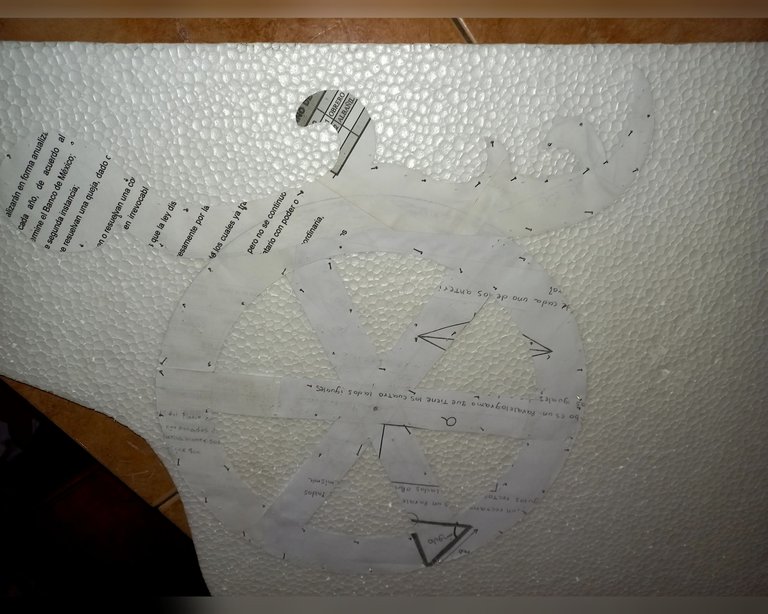
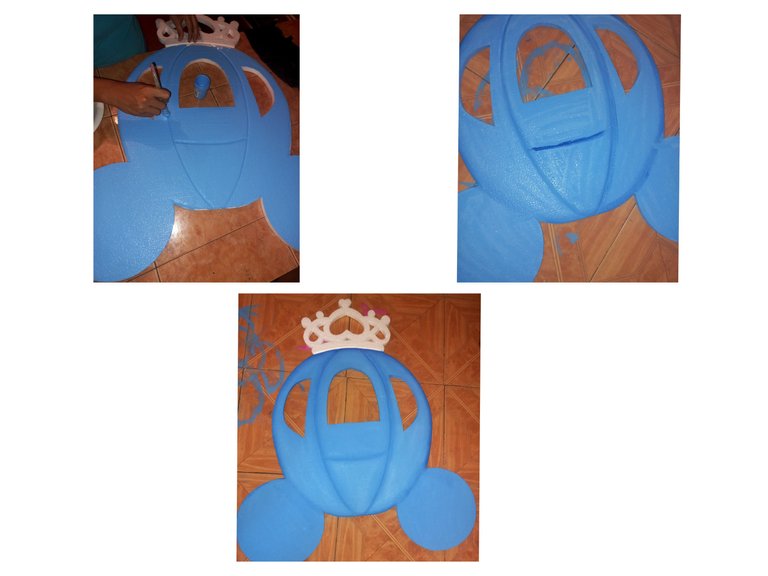
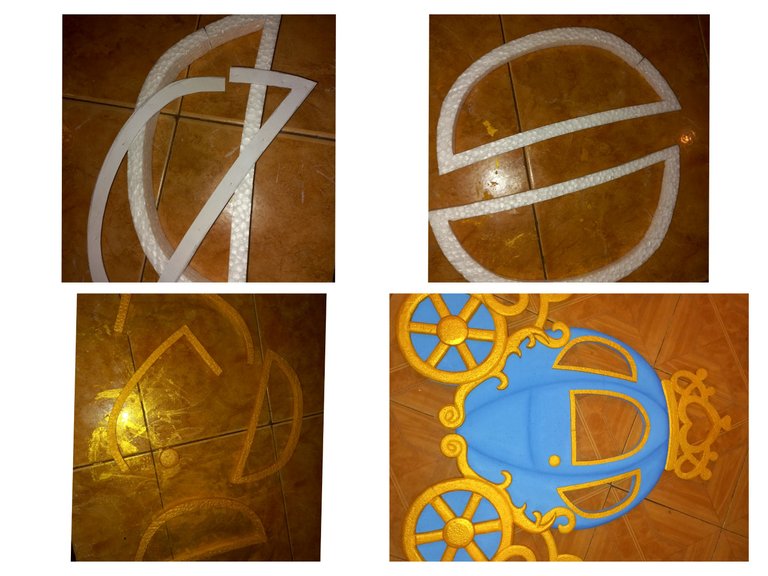
Step 1
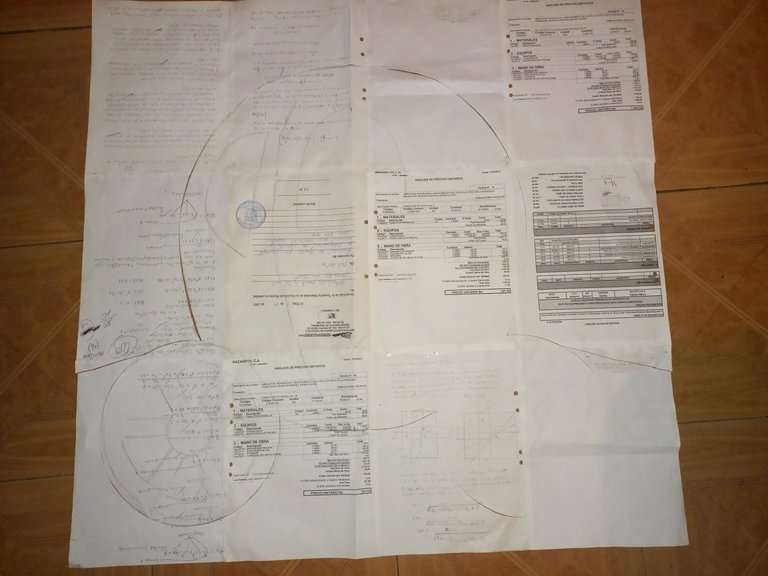
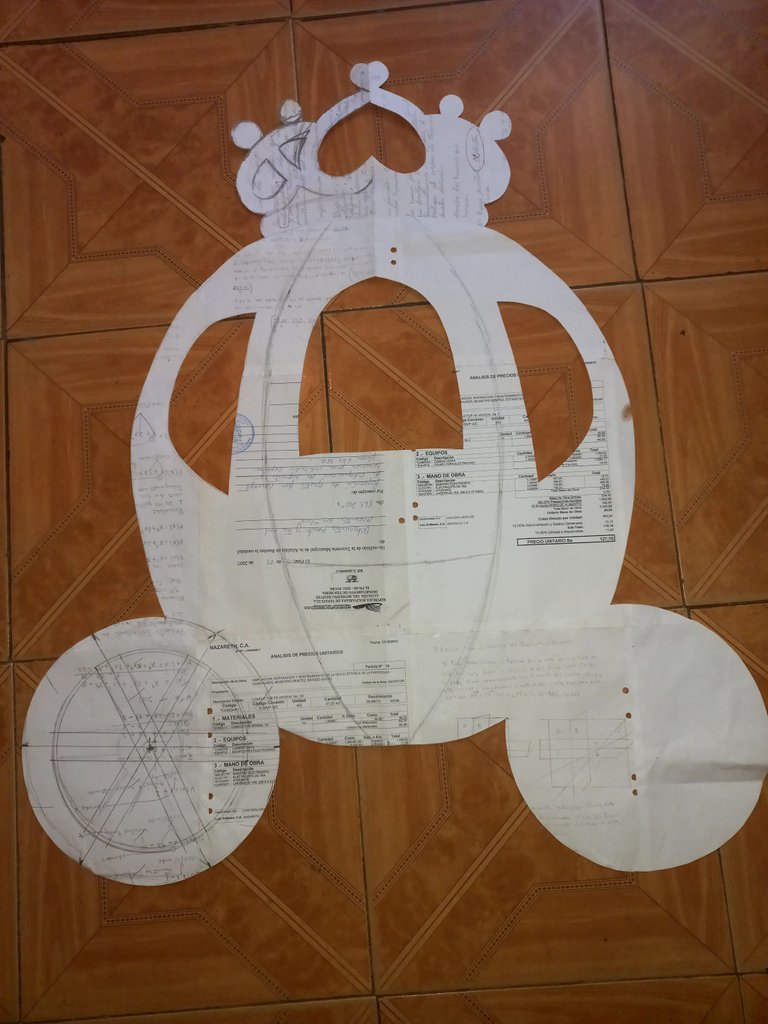
First we paint our pumpkin on the bon paper, which is the tactic to make sure that the image we paint looks good, since that is where everything depends on to make it look nice.
Paso 1
Primero Pintamos nuestras calabaza en el papel bon, cual es la táctica que nos quede bien la imagen que Pintamos ya que es de allí donde depende todo para que quede lindo.
Step 2
Continue cutting around and inside the pumpkin to get the shape.
Paso 2
Seguimos cortando alrededor y adentro de la calabaza para agarrar la forma .
Step 3
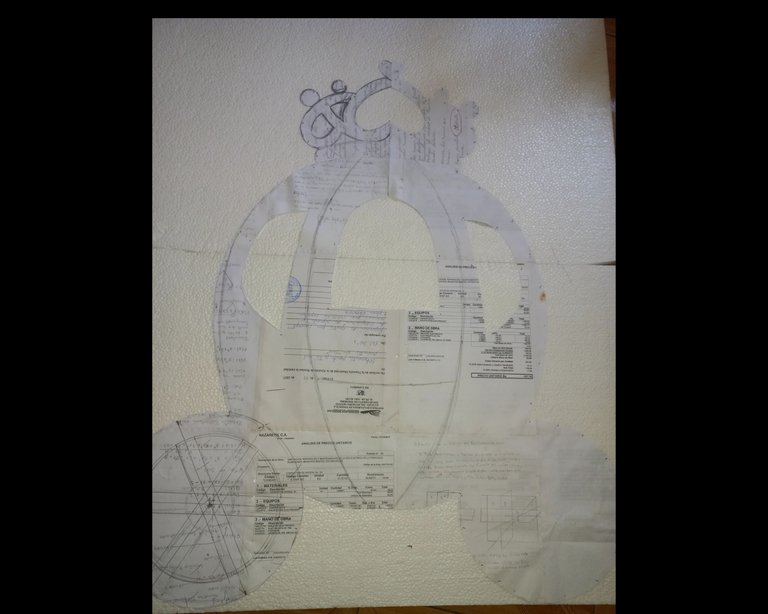
Glue the pumpkin with some pins on the Anime. Make sure it is very tight to the Anime because if it moves we can spoil the Anime.
Paso 3
Pegamos la calabaza con unos alfileres en el Anime. Que quede muy bien apretado al Anime ya que si se mueve podemos echar a perder el Anime .
Step 4
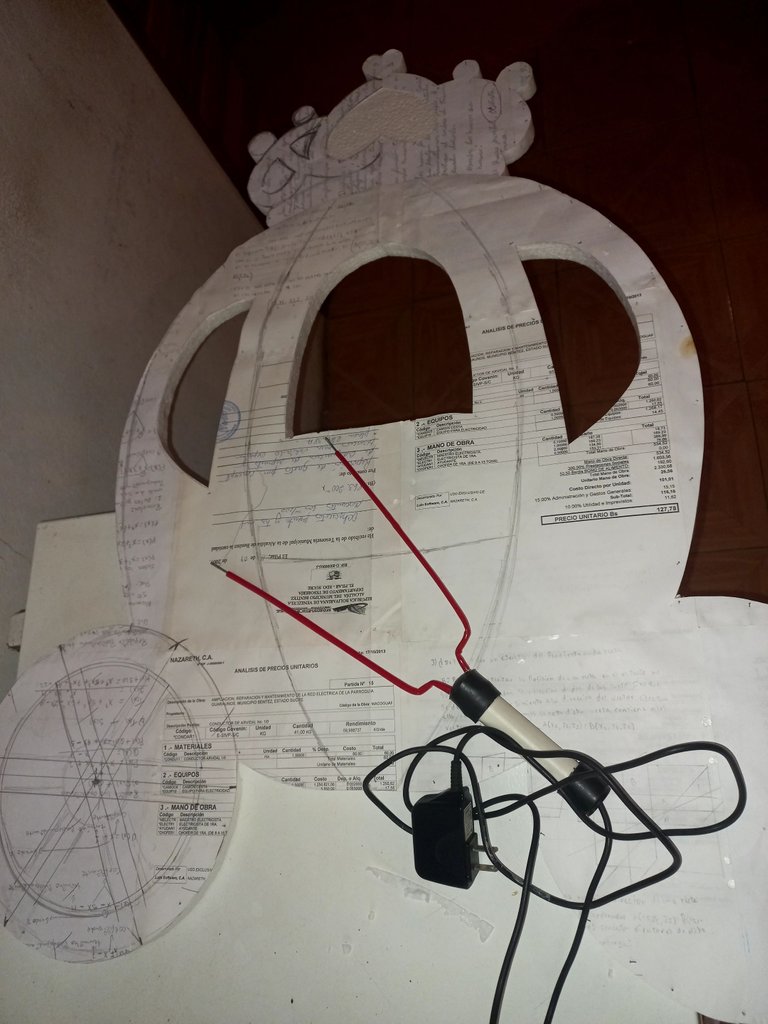
We take the Anime cutter and cut our figure that we have pasted on the Anime, we also cut the windows of our pumpkin.
Paso 4
Tomamos el corta Anime y cortamos nuestra figura que tenemos pegada en el Anime, también picamos las ventanas de nuestra calabaza.
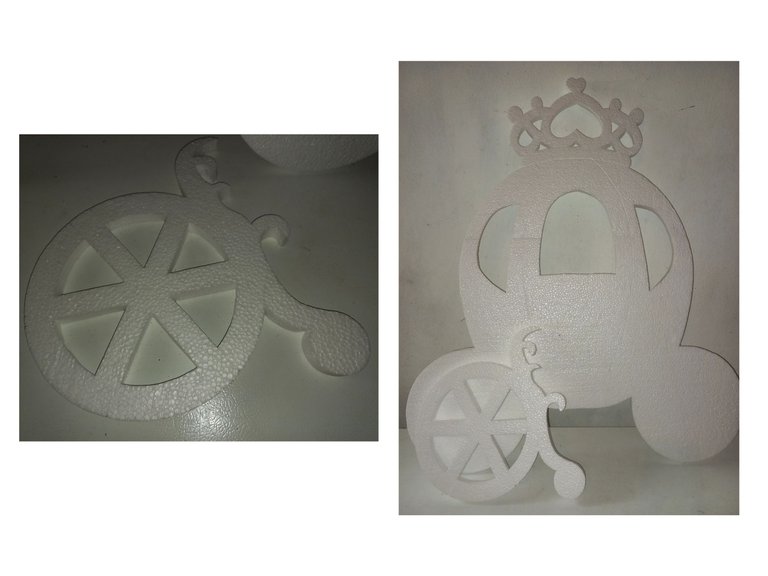
Step 5
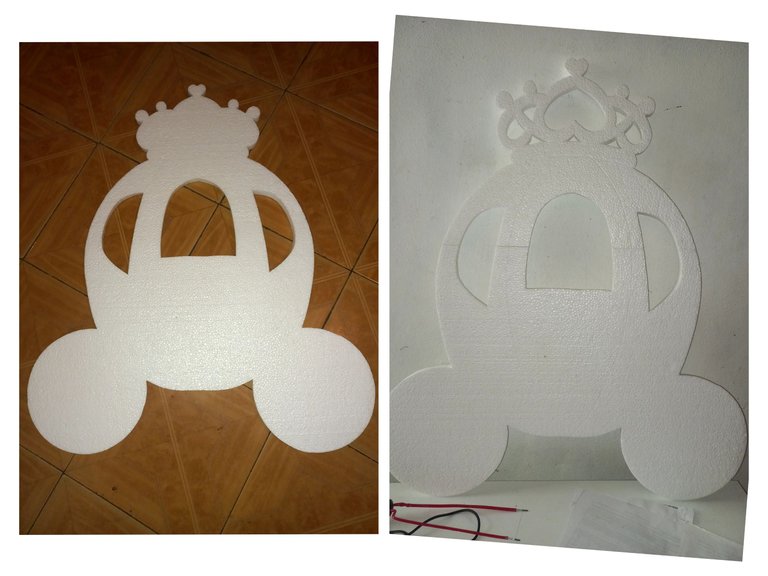
Here we see how our pumpkin looks like, ready to continue working.
Paso 5
Aquí vemos como quedó nuestra calabaza, lista para seguir trabajando.
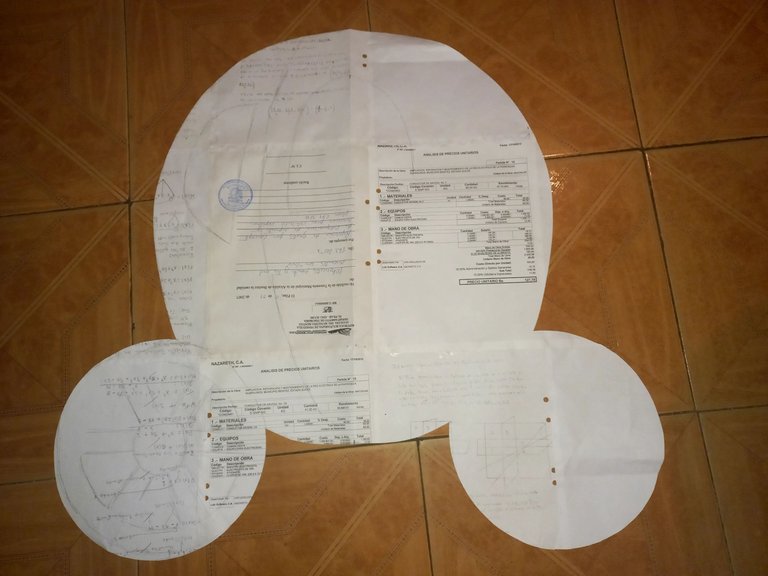
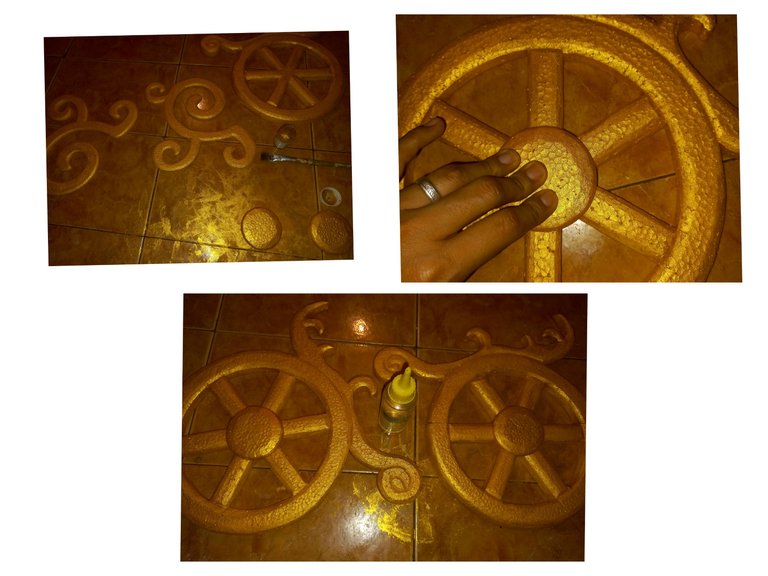
Step 6
We paint the wheel, place it on the Anime and cut two that go on top of the pumpkin that we have already cut in the previous step.
Paso 6
Pintamos la rueda, lo colocamos en el Anime y cortamos dos que van arriba de la calabaza que ya tenemos cortada en el paso anterior .
Step 7
Here we can see that we have the pumpkin and all the parts of the wheels that go on top of the pumpkin with a 3D shape. A charm as you can see my friends.
Paso 7
Aquí podemos ver que tenemos a la calabaza y todas las partes de las ruedas que van arriba de la calabaza con una forma 3D. Un encanto como pueden observar mis amigos.
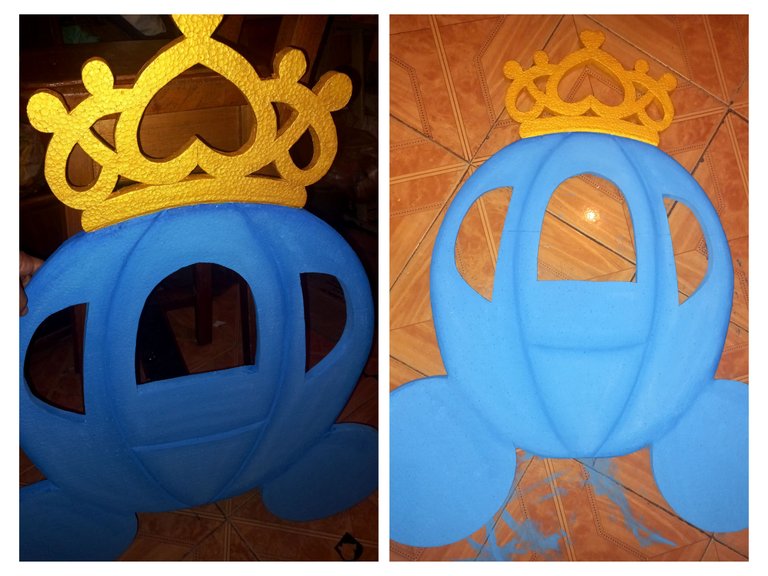
Step 8
We start painting with the blue paint on the pumpkin slowly from the same direction so we will not have ugly paint.
Paso 8
Empezamos a pintar con la pintura azul en la calabaza despacio de una misma dirección y así no nos quedará la pintura fea.
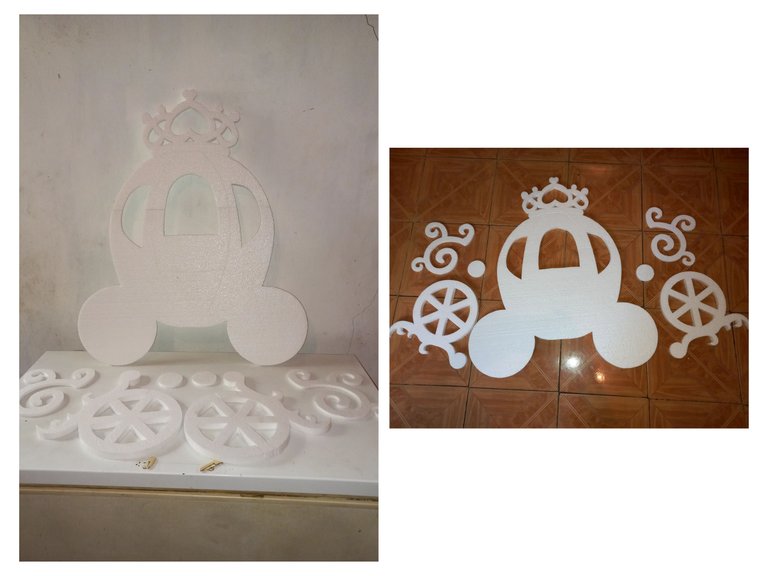
Step 9
Now we begin to paint with the shiny gold color that we see there all the pieces that have that color, just by seeing that color we know that things will look beautiful.
Paso 9
Ahora comenzamos a pintar con el color dorado brillante que vemos allí todas las piezas que tiene ese color, nada más con ver ese color sabemos que las cosas quedarán bellísimas..

Step 10
We finish painting the pieces with gold and start gluing the circle on the wheels, then the big wheels on the pumpkin little by little without haste, because it has to look good, we know that Anime is delicate and can be broken.
Paso 10
Terminamos de pintar las piezas con dorado y empezamos a pegar el círculo en las ruedas, después las ruedas grandes en la calabaza poco a poco sin apuro, ya que tiene que quedar bien, sabemos que el Anime es delicado y se puede partir.
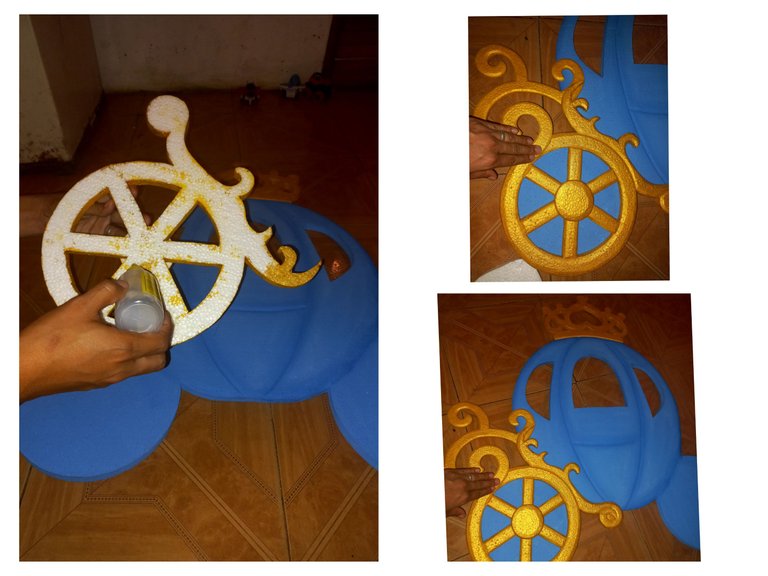
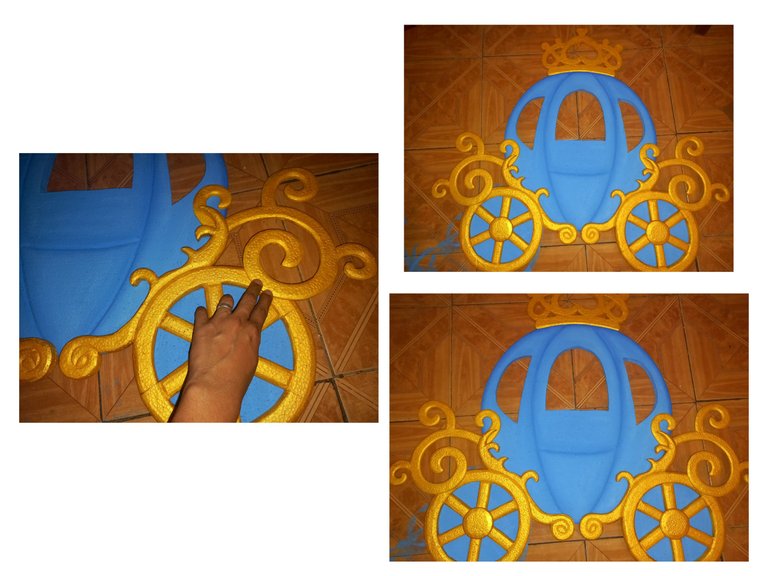
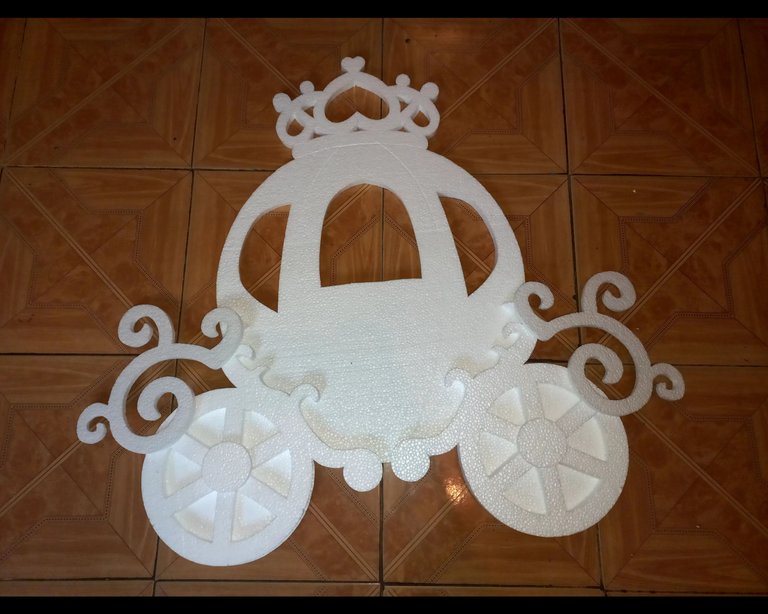
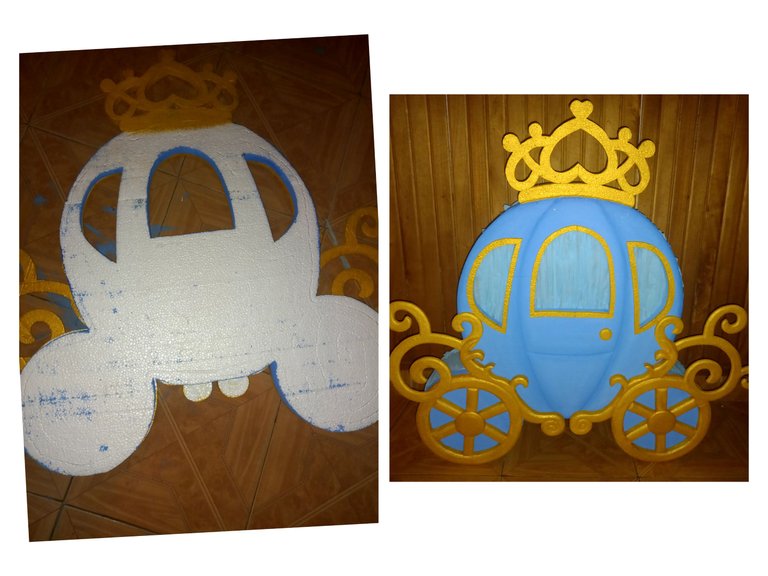
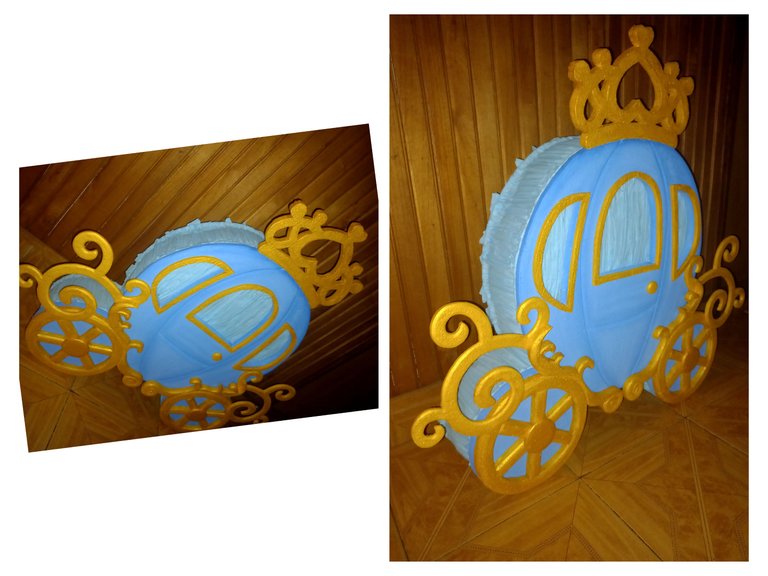
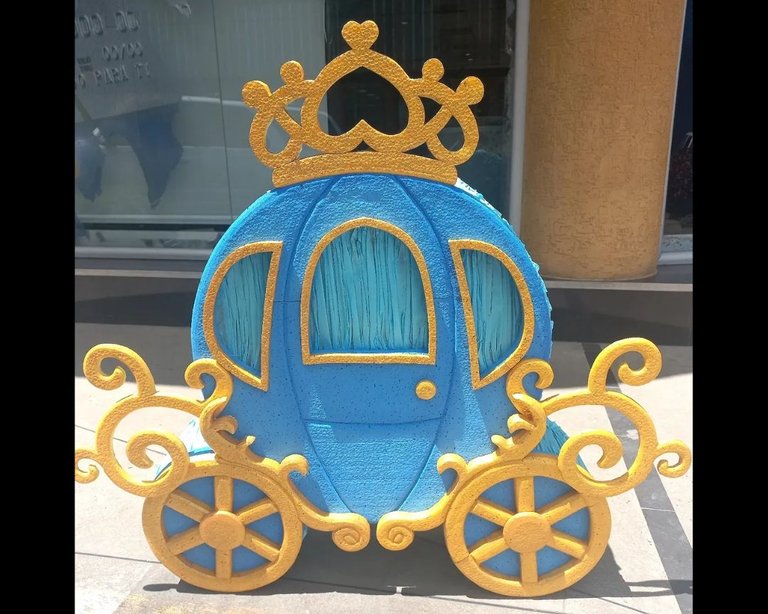
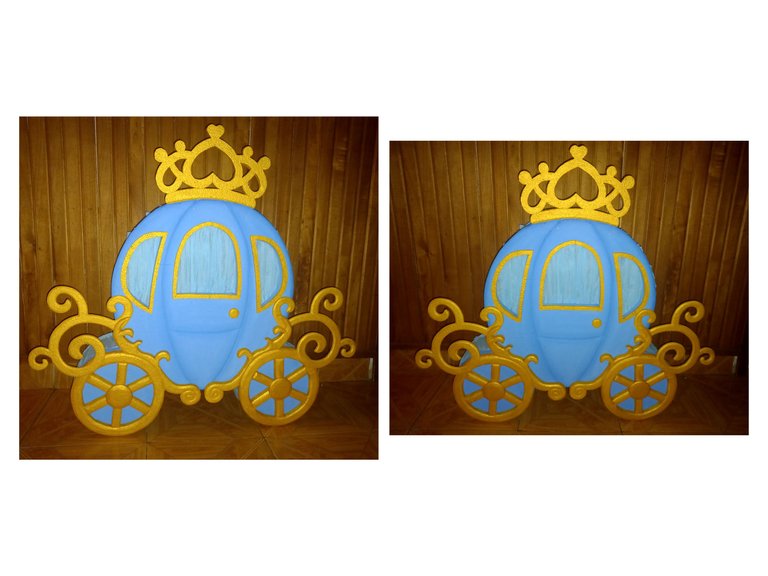
Step 11
Now we continue with the windows that are glued on the pumpkin, cut it, paint it and then glue them. Finally we can see here in the photos that this is how beautiful Cinderella's pumpkin samples are. A unique dream for any princess.
Paso 11
Ahora seguimos con las ventanas que van pegadas en la calabaza, la cortamos, Pintamos y después se pegan. Finalmente podemos ver aquí en las fotos que así de bella quedo muestras calabaza de la cenicienta. Un sueño único para cualquier princesa.

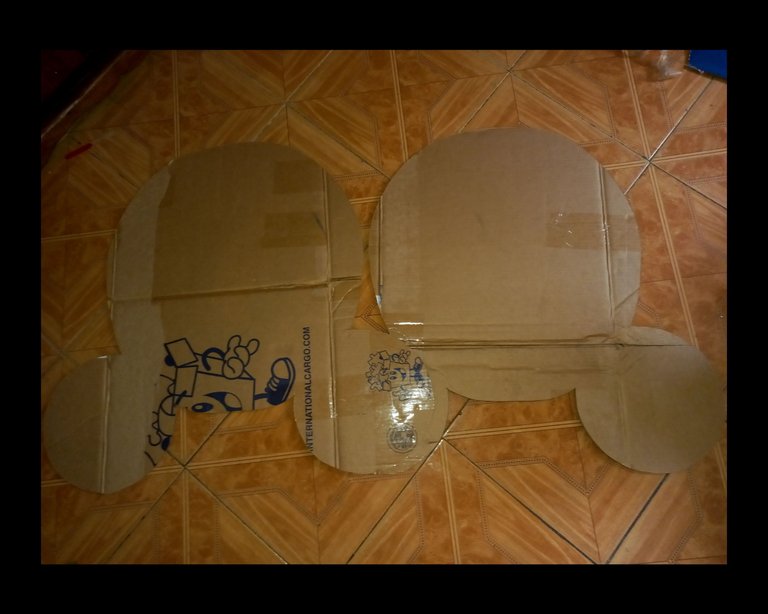
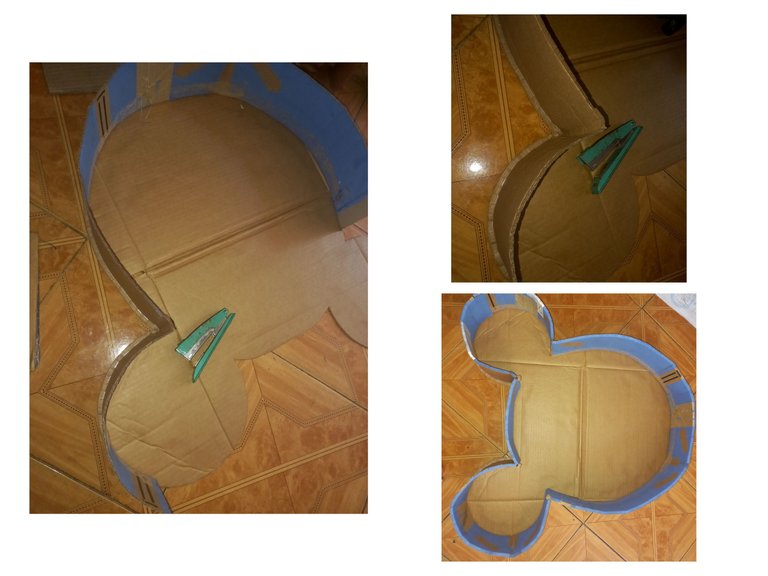
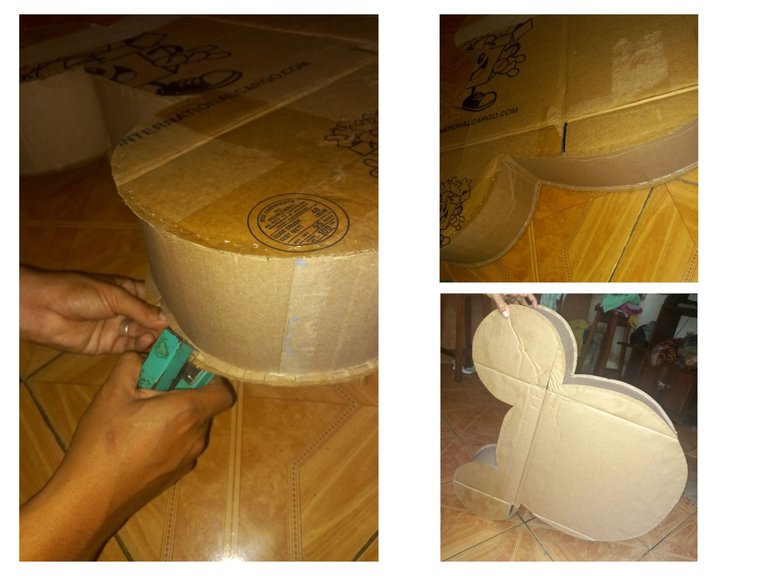
Step 12
We continue working now with the piñata, we use the cardboard and glue our pumpkin to make the shape and cut it.
Paso 12
Continuamos trabajando ahora con la piñata, utilizamos el cartón y pegamos nuetras calabaza para hacerle la forma y la cortamos .
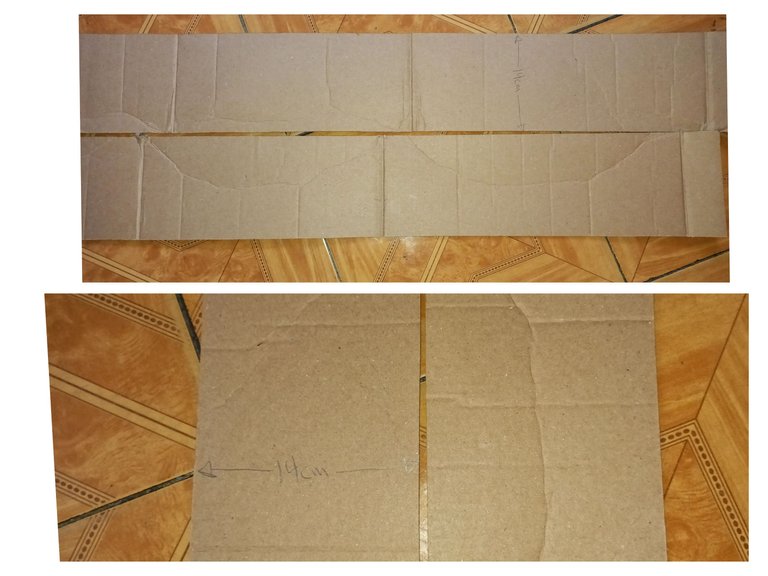
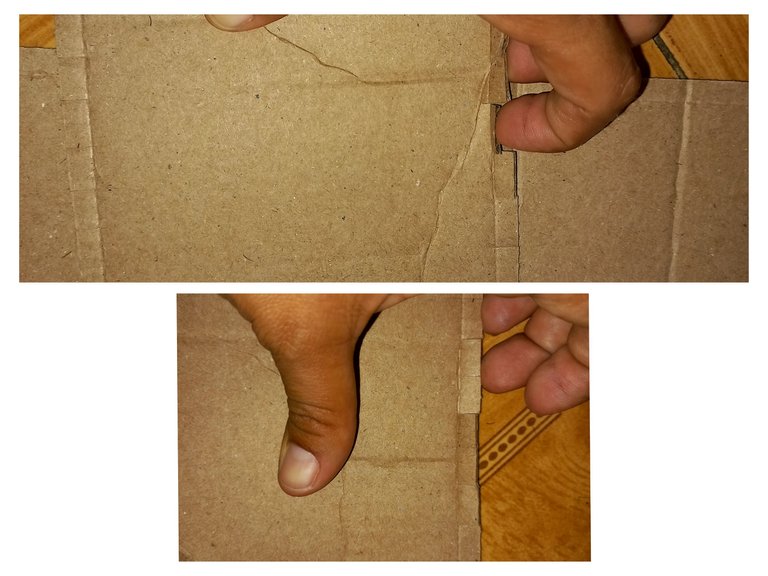
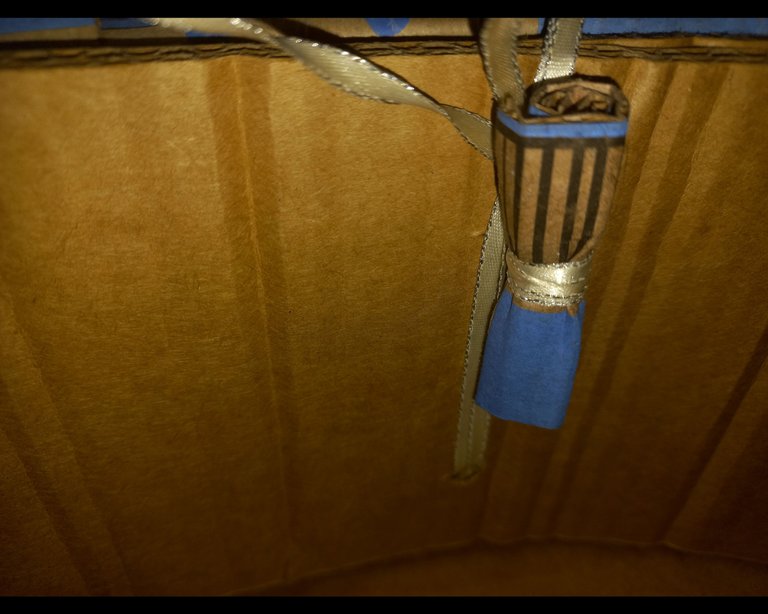
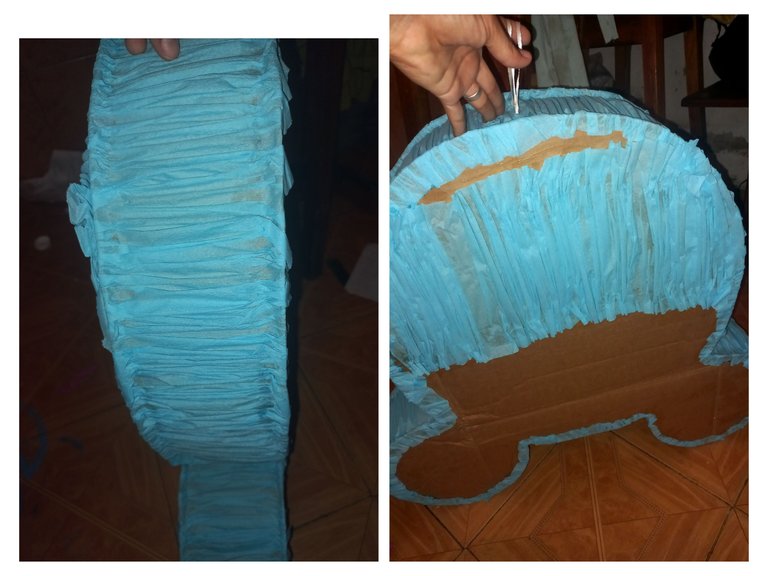
Step 13
Then we cut the strips with a width of 14cm. is cut around the strips and it is from there where it will be folded, begin to staple one side of the piñata as you see there in the pictures. Now we put a tape with a thick folded cardboard so that it stays inside the piñata and holds the weight that can be placed there. To finish the piñata part of the piñata, we glue the other cover and start stapling until it is completely stapled.
Paso 13
Después cortamos las tiras con un ancho de 14cm. se corta alrededor de las tiras y es de allí donde se va a doblar, comenzar a grapar todo un lado de la piñata como ven allí en las fotos. Ahora se mete una cinta con un cartón doblado grueso para que quede dentro de la piñata y aguante el peso que le puedan colocar allí.para culminar la parte de la piñata entamborada se pega la otra tapa y se comienza a grapar hasta quedar totalmente grapada.
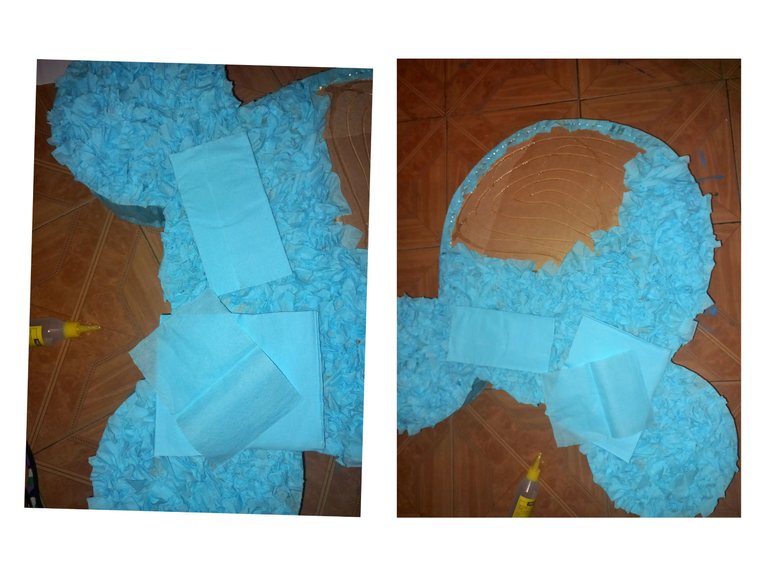
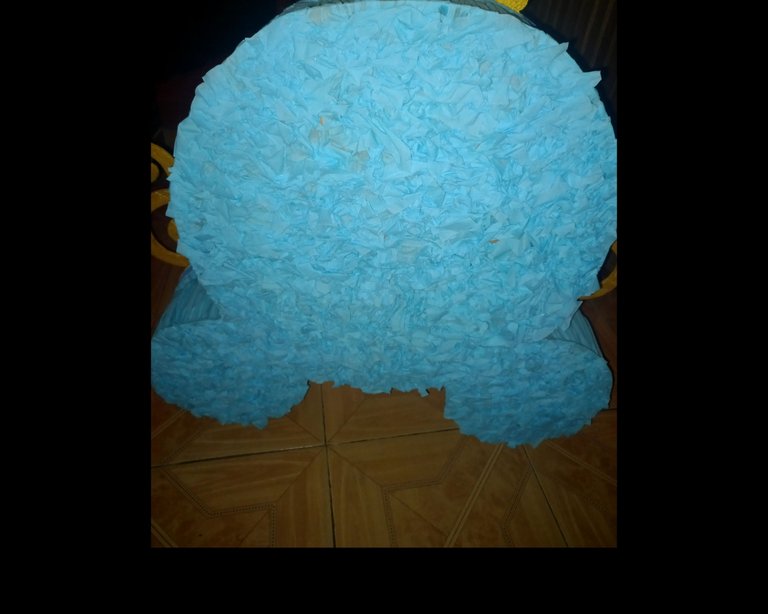
Step 14
Here we start working with the blue crepe paper, first where the ribbons will be, second the front where the pumpkin will be glued, you can see there that I only put the paper where the windows are, last glue on the back and that's it.
Paso 14
Aquí comenzamos a trabajar con el papel crepe azul primero donde van esta los listones, segundo el frente donde irá pegado la calabaza pueden observar allí que solo se le coloco el papel donde están las ventanas,último pegar en la parte de atrás y listo.

Step 15
Finally we put cold silicone on the back of the pumpkin, we glue it on the piñata and half squeeze it for a while to make it stick. Here we have our beautiful piñata of Cinderella... totally satisfied with the results... I hope it is to the liking of all my friends of this wonderful platform.
Paso 15
Finalmente echamos en la parte de atrás de la calabaza silicon frío, pegamos eso en la piñata y se medio aprieta un ratico para que pegue. Aquí tenemos nuestra bella piñata de cenicienta.. totalmente satisfecha por los resultados.. espero que sea de agrado para todos mis amigos de esta maravillosa plataforma.
RESOURCES USED / RECURSOS UTILIZADOS
• Incollage/ para unir y reducir las fotos.
• Photos taken by Samsung A32. / Fotos tomadas por Samsung A32.
• The translator is used www.Deepl.com / Se utiliza el traductor www.Deepl.com
Your content has been voted as a part of Encouragement program. Keep up the good work!
Use Ecency daily to boost your growth on platform!
Support Ecency
Vote for new Proposal
Delegate HP and earn more
Wow, es un mundo de trabajo hacer esa piñata pero valió la pena quedó muy linda. Me imagino que la cumpleañera quedó feliz al verla, lástima que termine destruida! 😆 Saludos!