Mi versión español.

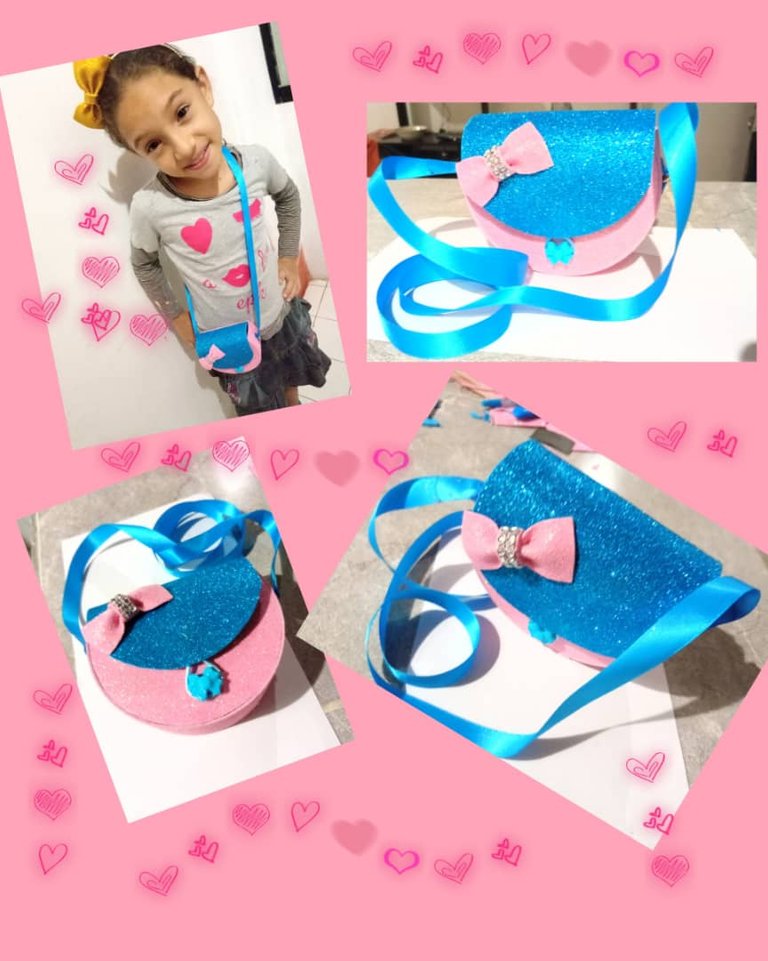
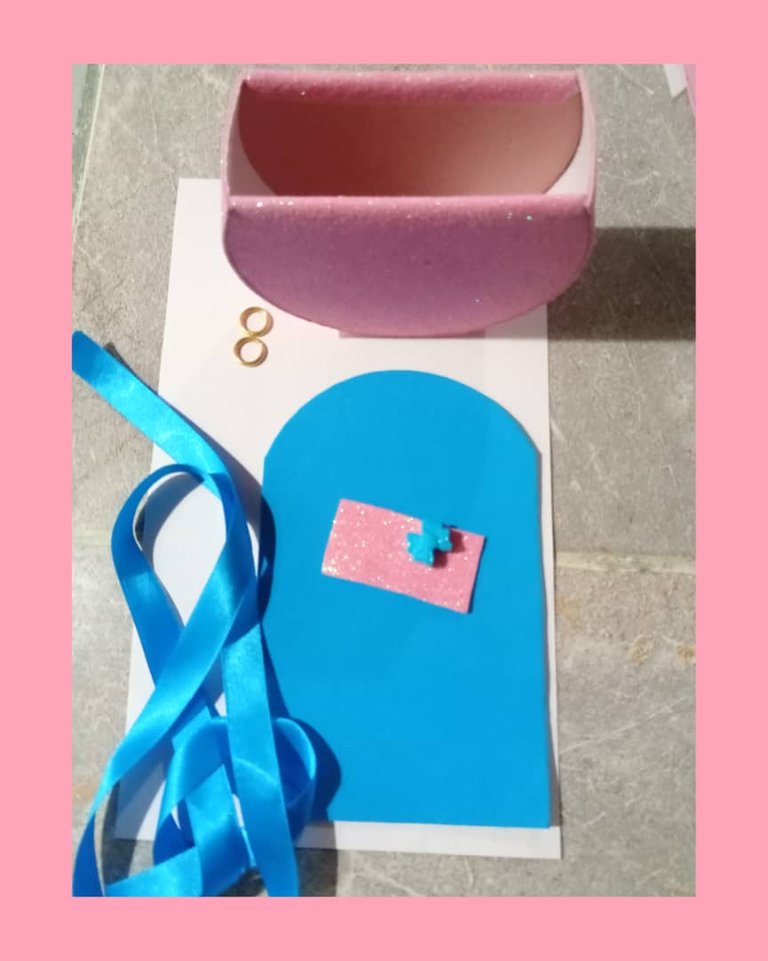
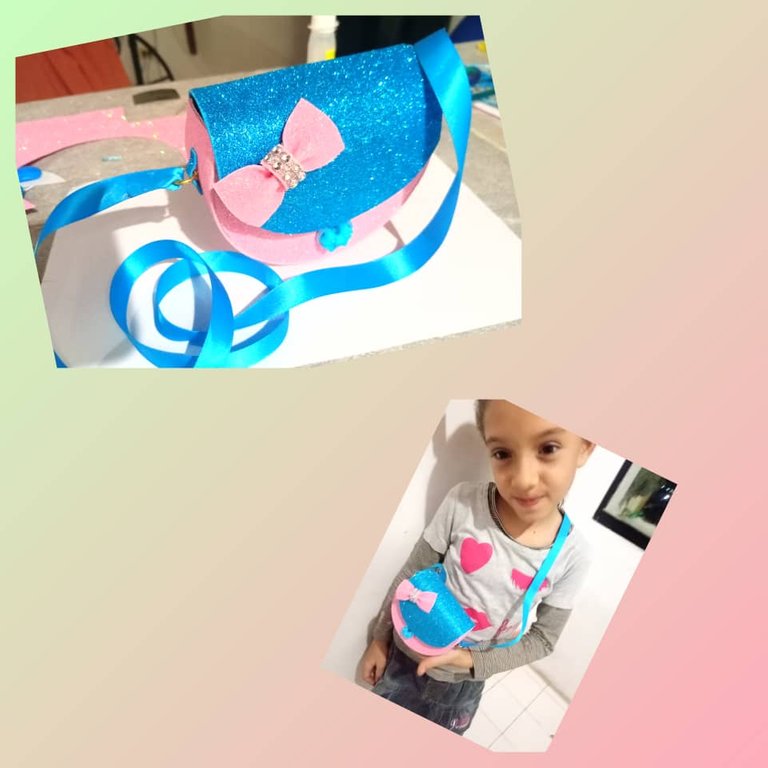
Hola a toda mi gente de esta comunidad, @HIVE DIY. Hoy le traigo otra de mi creatividad y compartirla en este grupo, en esta ocasión le comparto una hermosa carterita hecha con CD y foamy para las princesas de la casa, está linda carterita se elaboro con CD reciclado, foami de color rosado y azul, cartulina, con cinta de raso, dos argollas y silicón, son ideales para las consentidas de la casa que la puede y lucir muy coqueta, la llevar para su escuela, para un parque o también para una fiesta, también sirve para cotillones y regalos especiales de una sobrina o ahijada, además son linda y fácil de hacer sobre todo son muy económica en cuanto a los materiales.
Aquí le dejo los materiales a utilizar y el paso a paso.
Materiales.
- 2 CD viejo que use.
- Dos foami de color rosado y azul oscuro.
- 2 cartulina de color rosada y blanca.
- 1 metro de cinta de raso color azul.
- 1 regla.
- 2 argolla.
- 1 botón de laso.
- 1 exalto
- 2 tijeras.
- 1 lápiz.
- 1 silicón.

Paso.
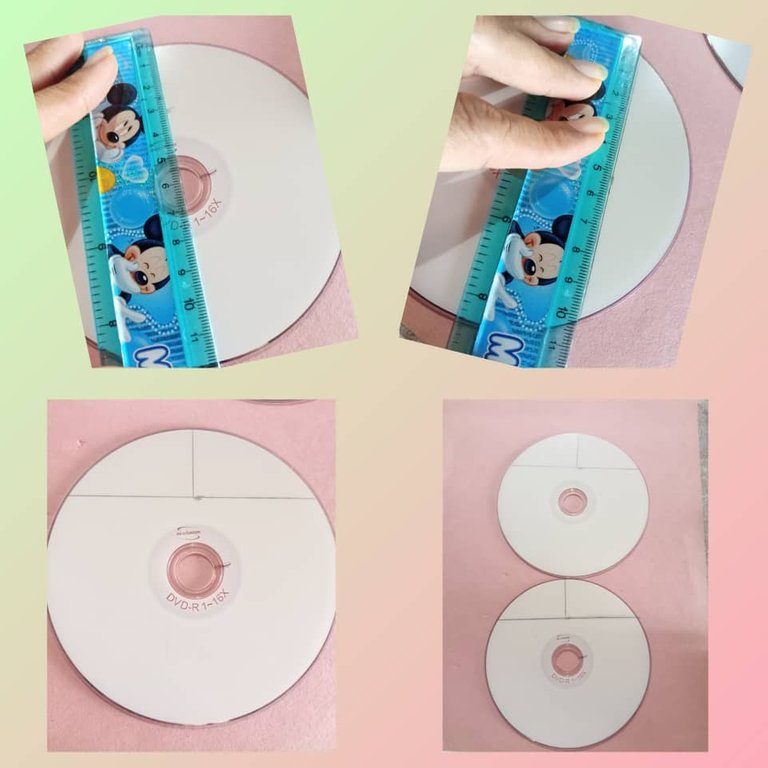
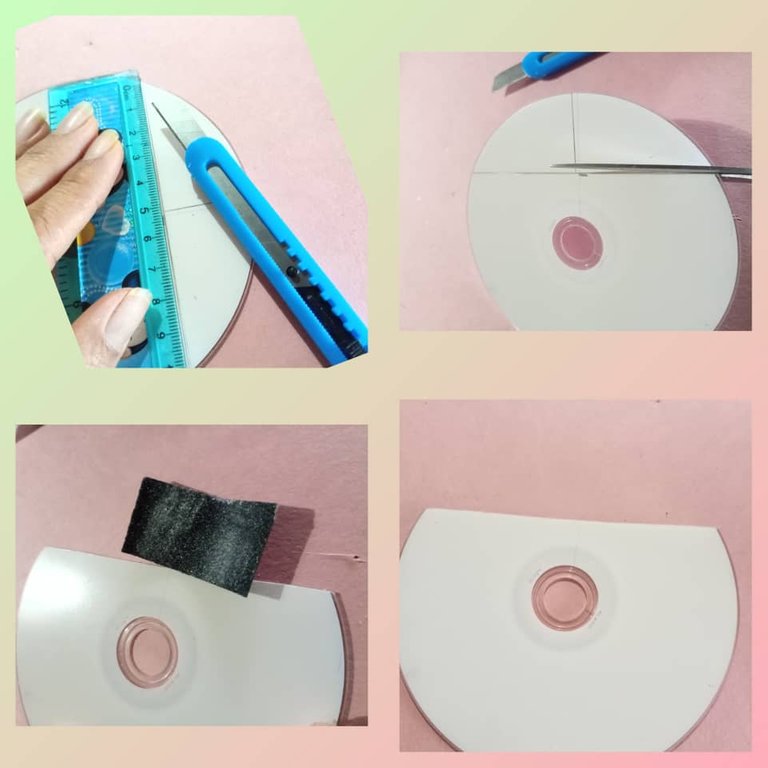
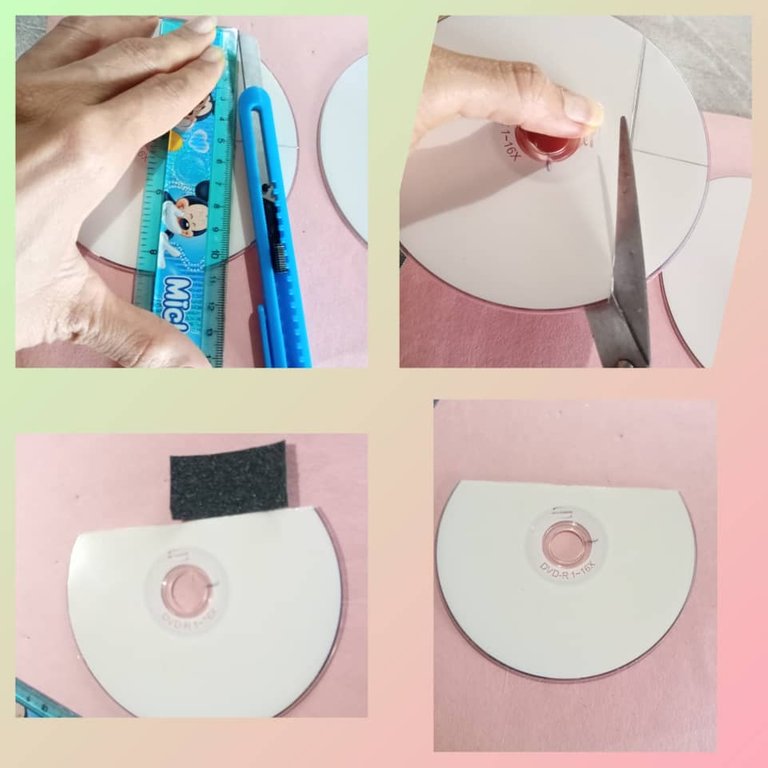
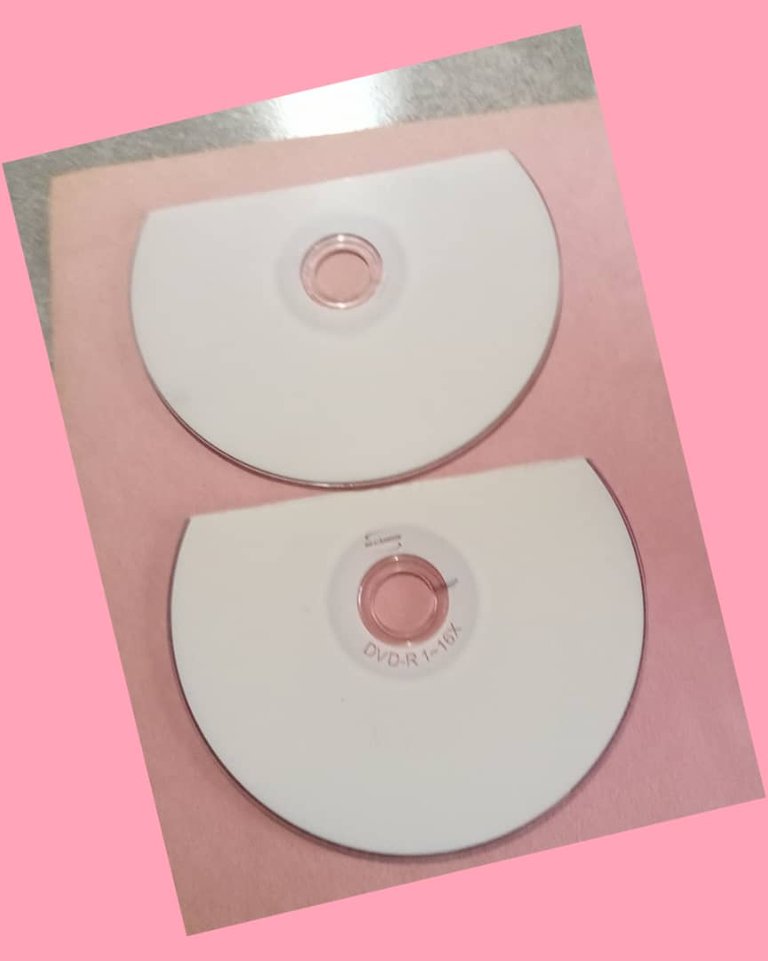
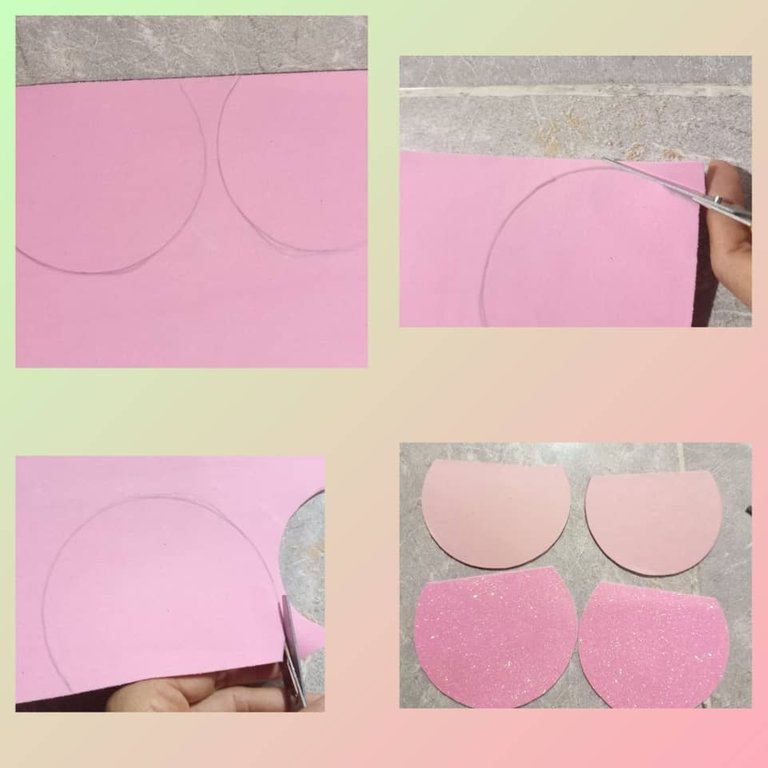
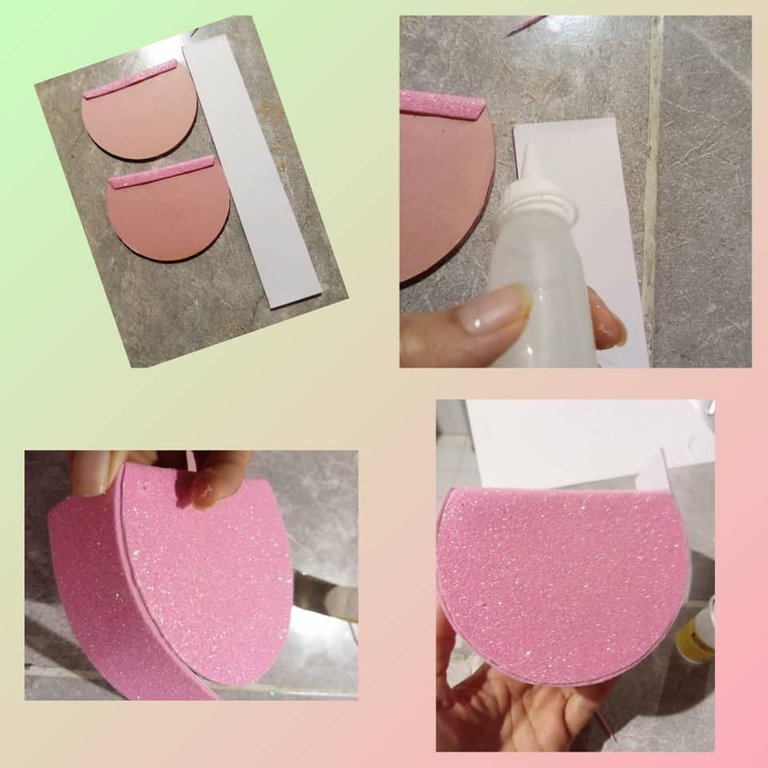
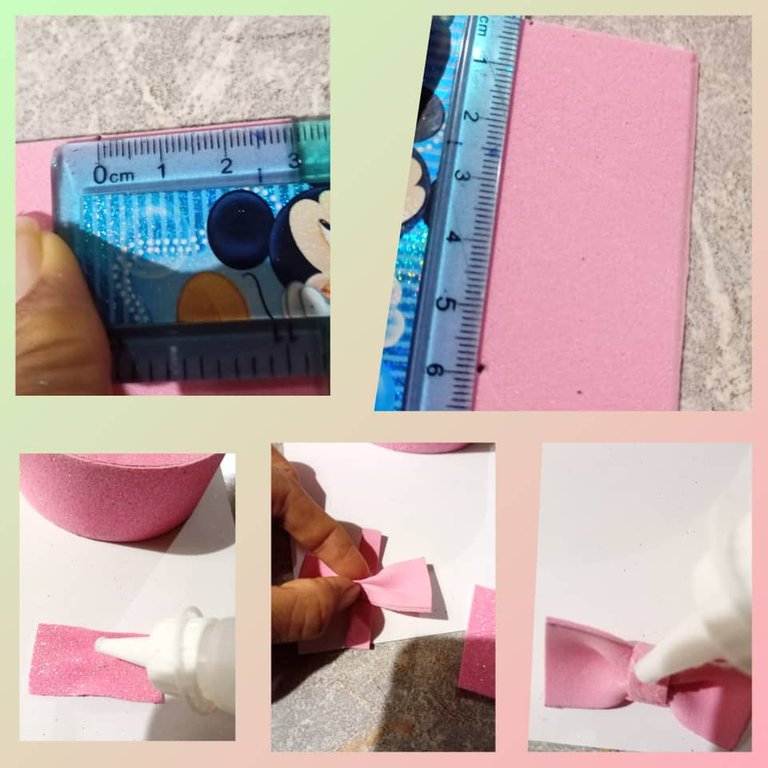
- Tomo la regla y mido el C por el medio midiendo 3 centímetro de largo y marco 10 de ancho lo que tiene el CD marcamos pasamos un exalto y recortamos con una tijera grande lo lijamos las orillas, ya tengo mi dos CD cortado.
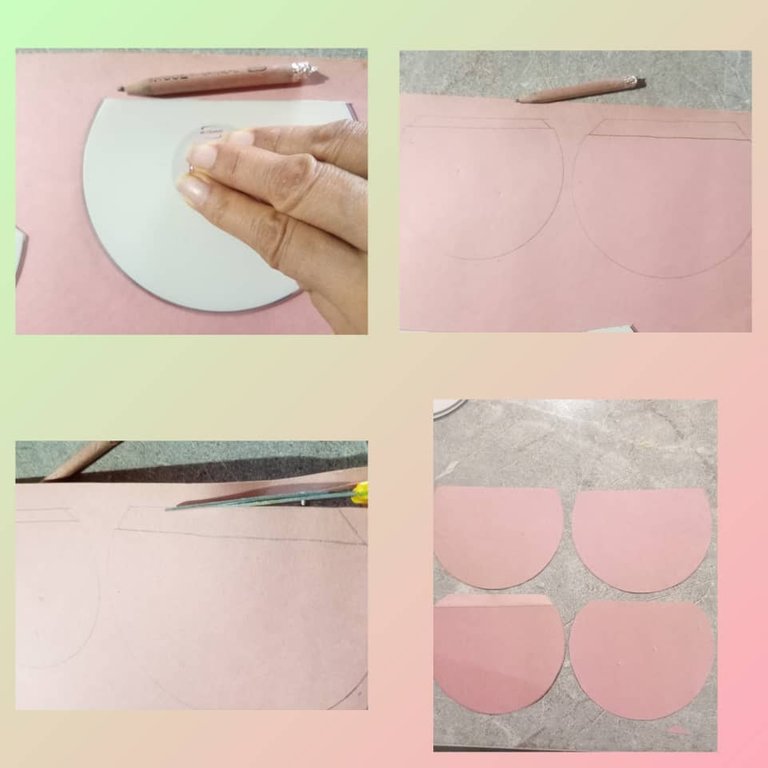
- Marcamos con un lápiz los dos CD por ambos lado en la cartulina de color rosado, luego recortamos con la tijera y tenemos las 4 cara de los dos, luego le agregamos silicón y lo pegamos por ambas cara.
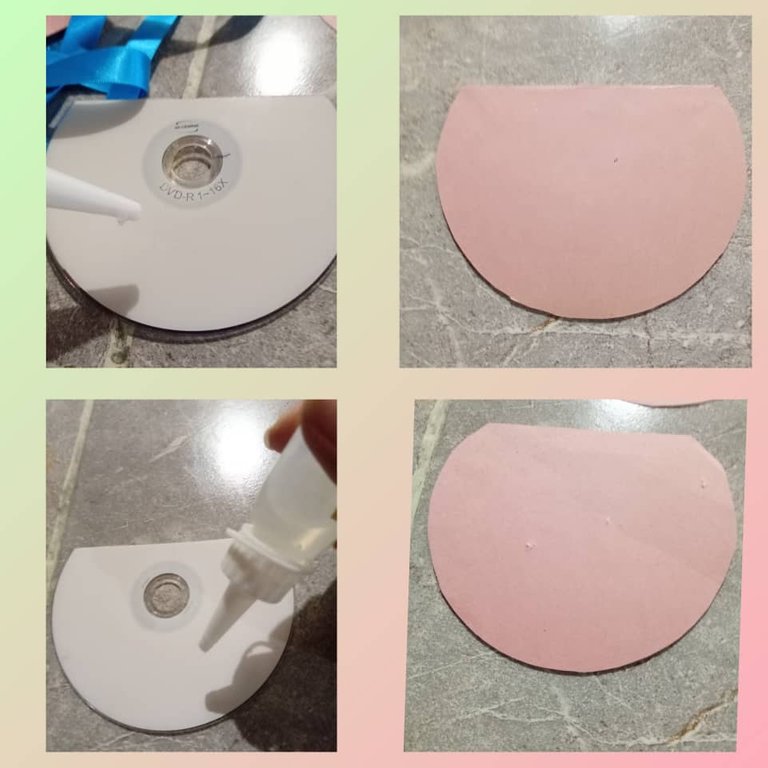
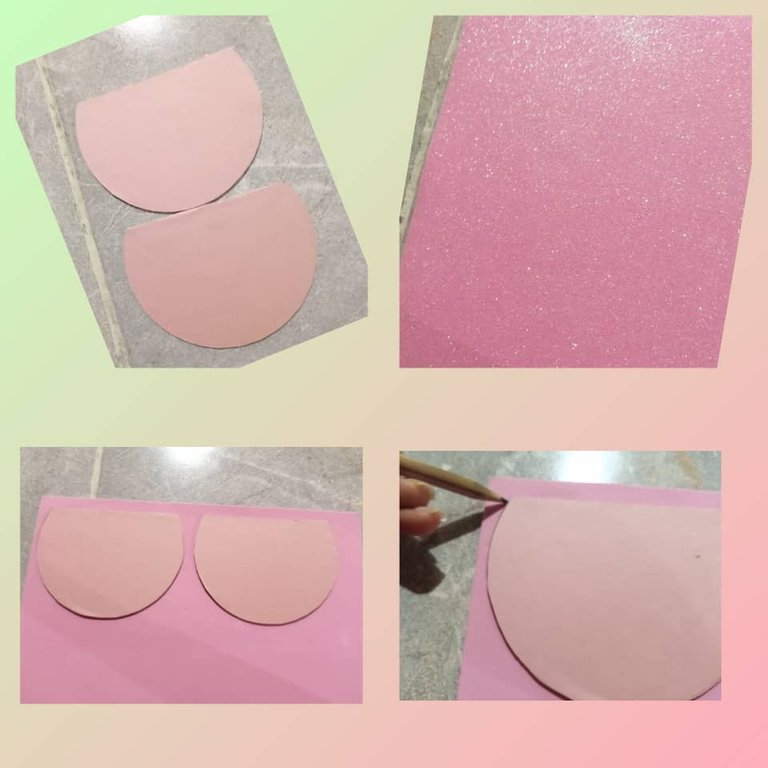
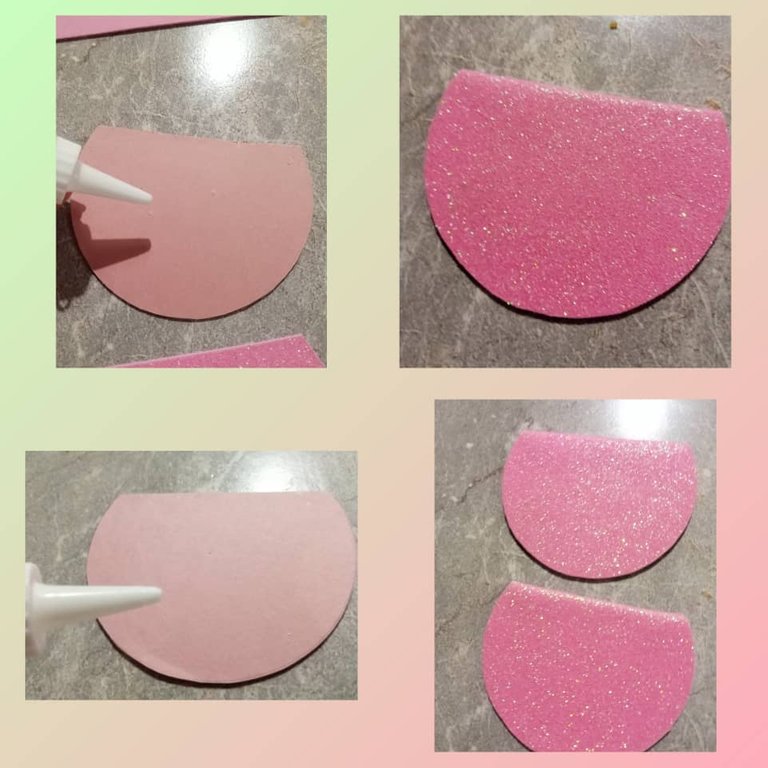
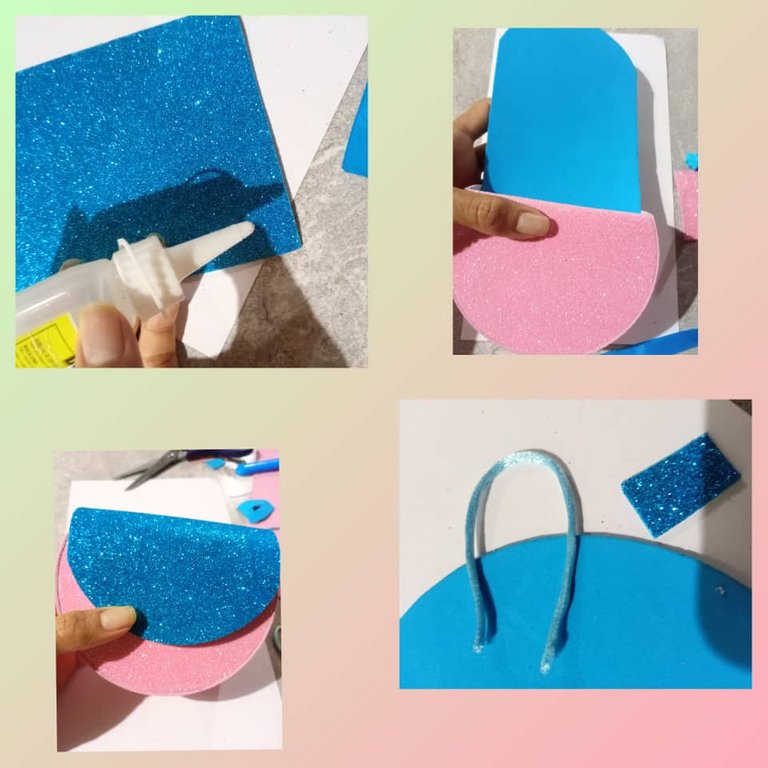
- Ya tengo los dos CD forrado empezamos a forrar la cara principal del CD con el foami escarchado lo marcamos y luego recortamos dos cara que va hacer la base de la carterita, pegamos el foami de color rosado en el CD. Ya tengo las dos caras de la carterita lista.
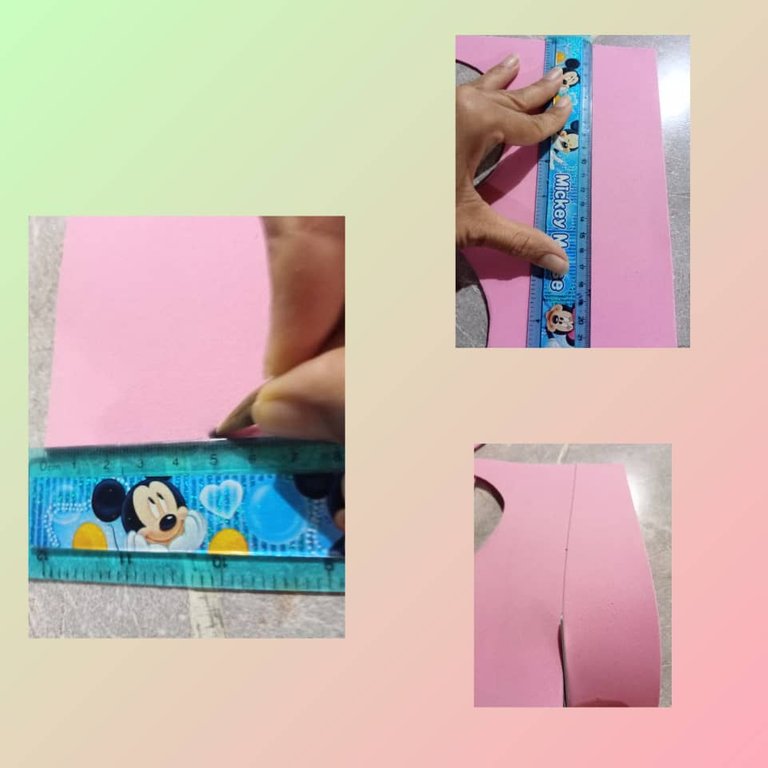
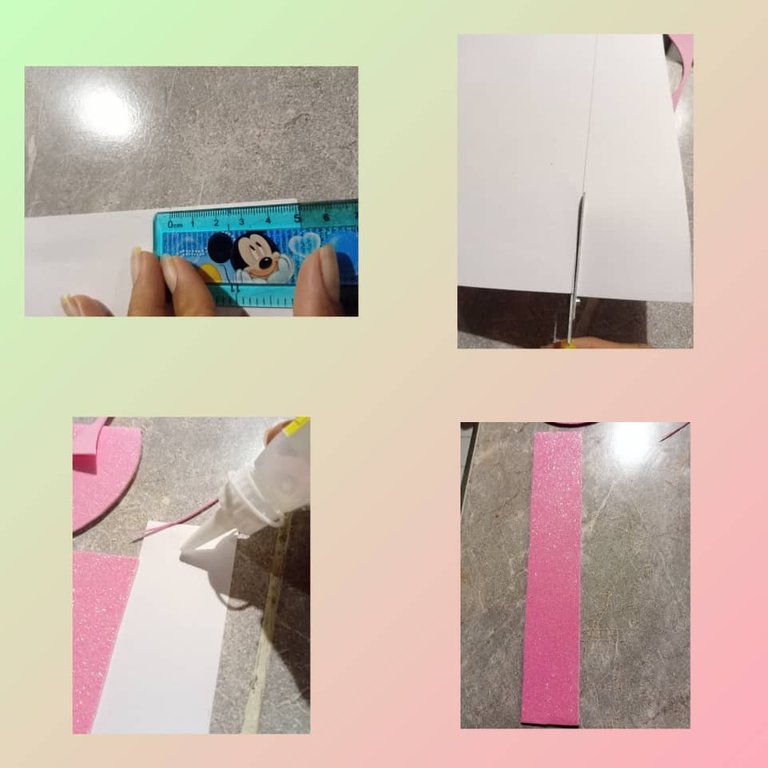
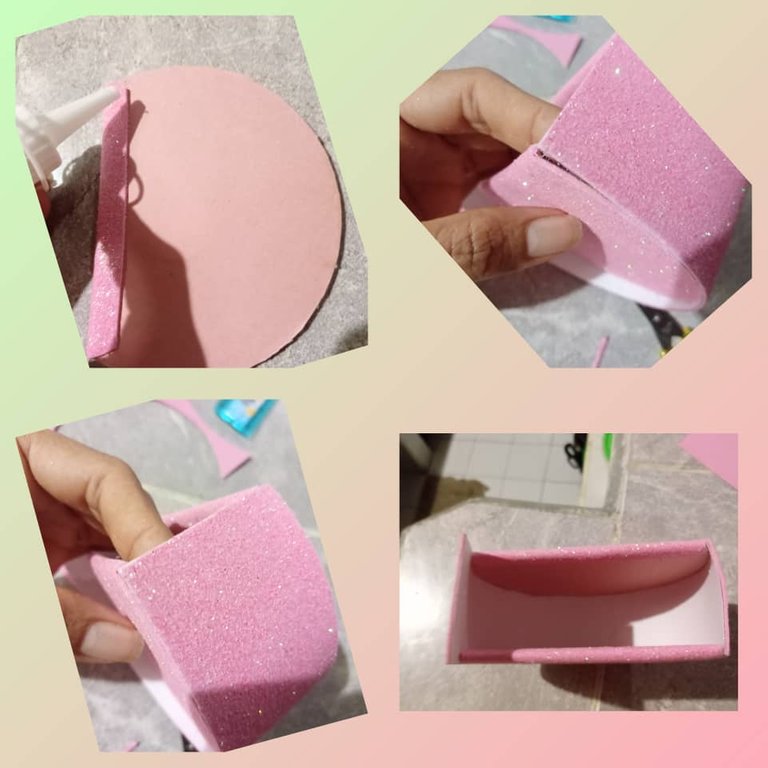
Marcamos dos tira de 5 centímetros de ancho y de 19 centímetro de largo en el foami de color rosado y la cartulina de color blanca la recortamos y la pegamos con silicón.
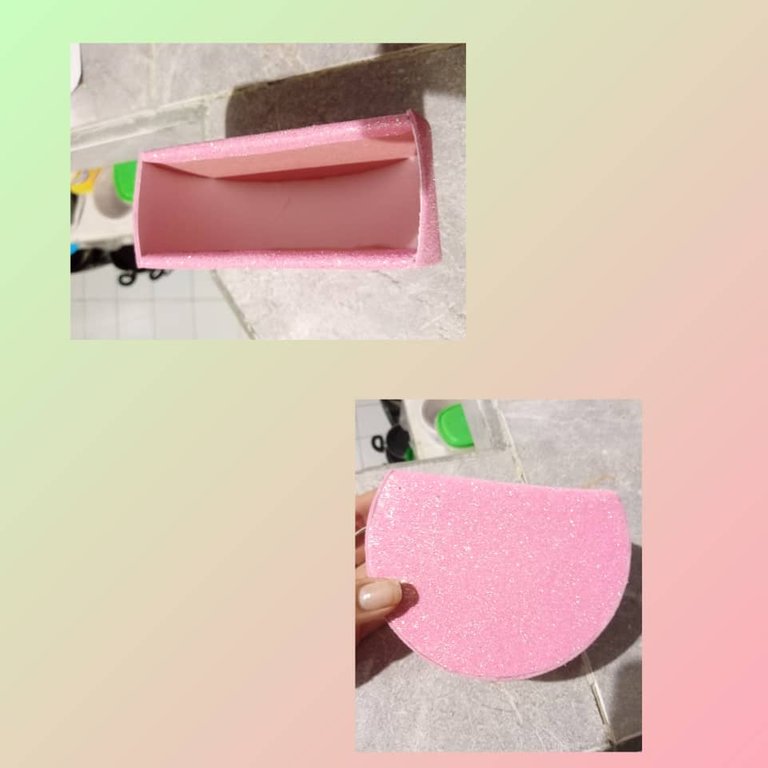
Pegamos la tira al contorno del CD poco a poco vamos agregando silicón por todas las orillas hasta pegar ambas cara. Vea que va agarrando forma la carterita
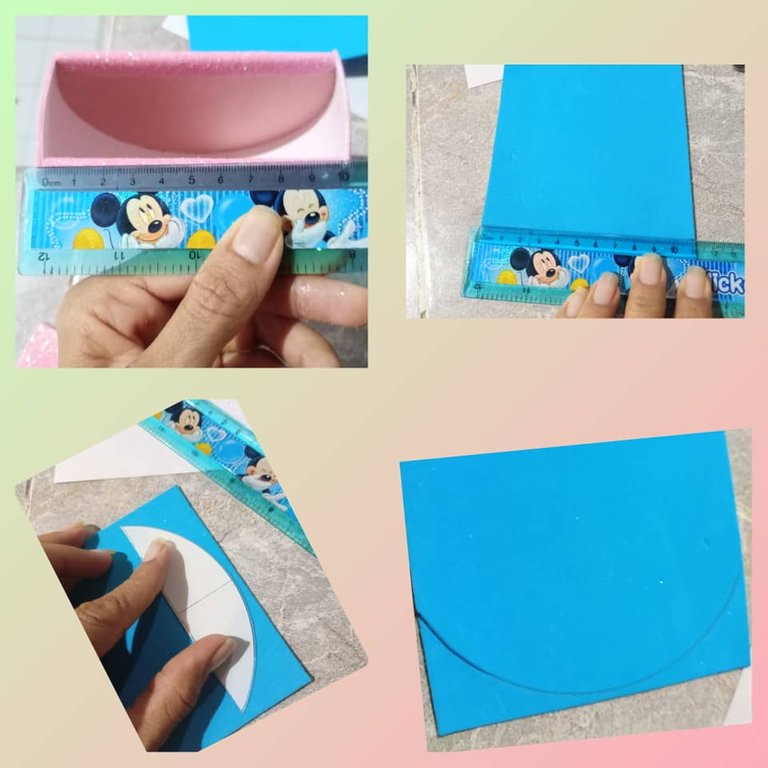
Medimos la cartera para corta la tapa, agarro en foami de color azul y mido 10 centímetro de ancho por 16 de largo le recortamos la punta para darle forma ovalada con la ayuda del CD. Ya tengo todo listo y empezamos arma la cartera.
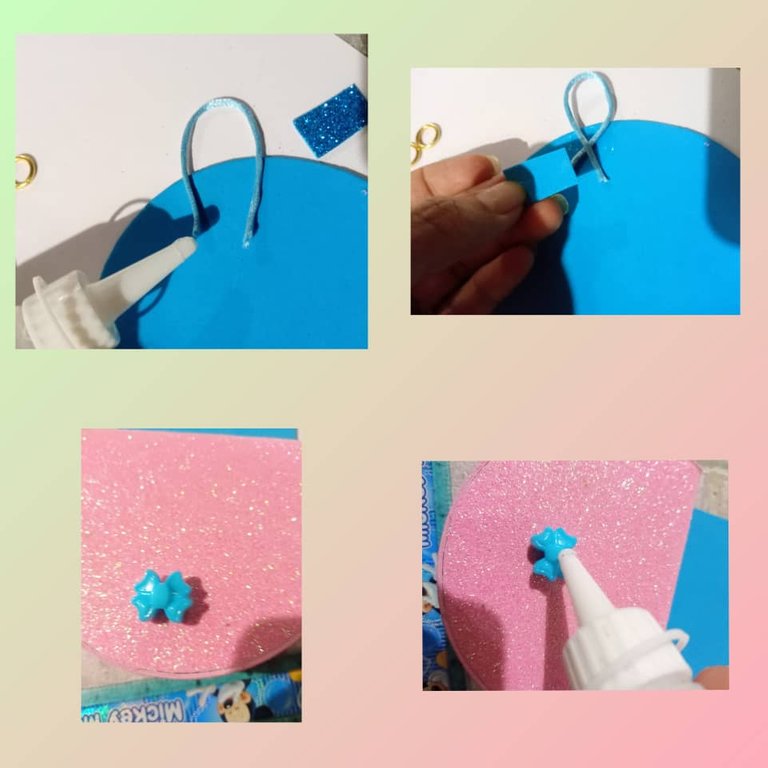
Pego el foami azul en la parte de adentro la de carterita con una profundidad de 6 centímetro dejando 10 centímetro afuera para la tapa de la cartera, lo ajustamos hasta que se pegue muy bien, para cerrar la cartera le coloque 10 centímetro de hilo de cola de ratón de forma ovalada lo pego con silicón mido donde va el botón de lazo en la cartera le añado silicona y pegamos y ya mi carterita se puede cerrar.
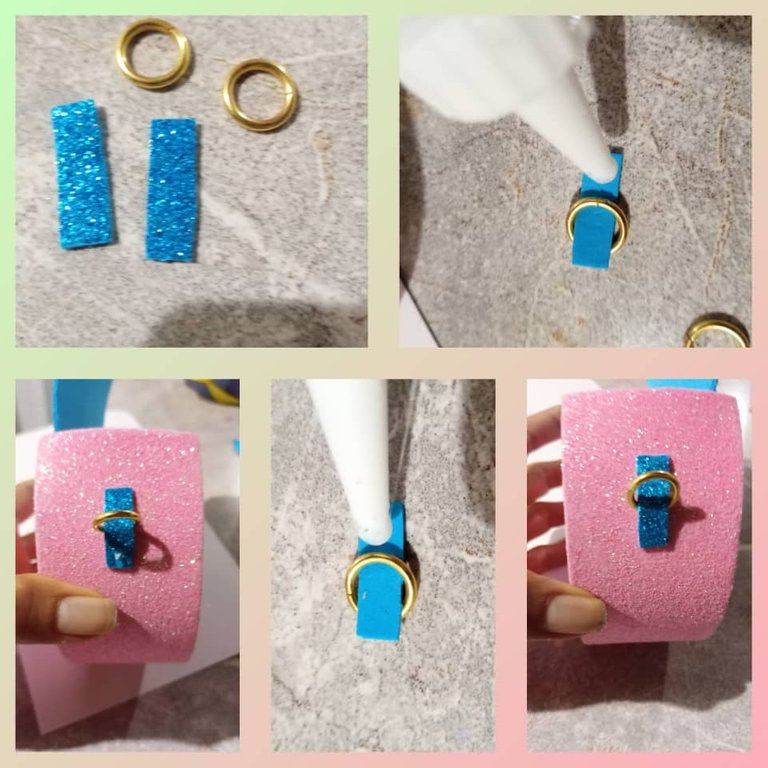
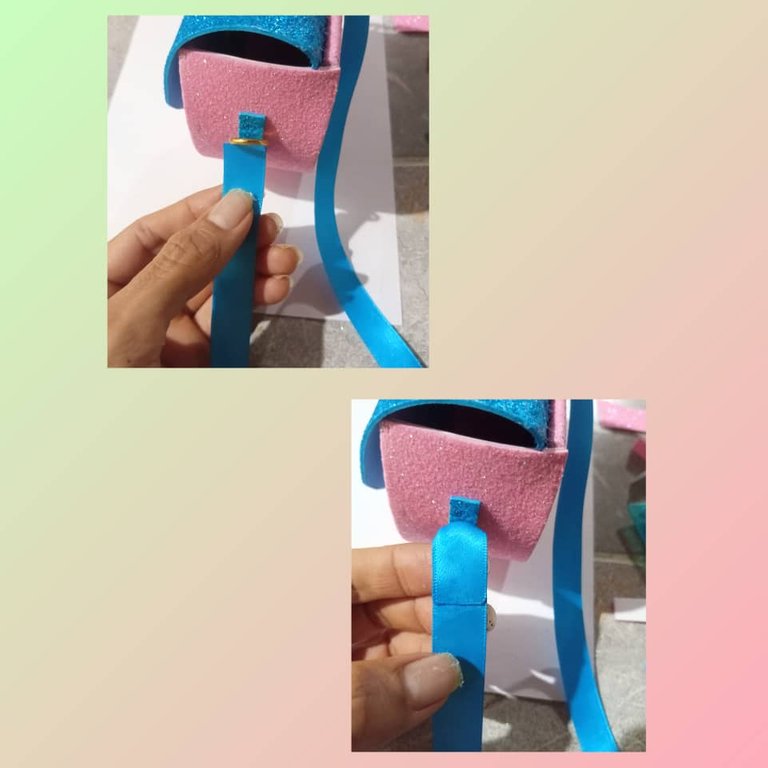
Cortamos unas tira de 2,5 centímetro y pegamos en la parte de los lados de la carterita y le añado una argolla pequeña para guindar la cartera, con la cinta de raso de color azul le añado silicón a las puntas de la cinta y la introdujo en las argollas la pegamos.
Luego hacemos un lazo para decorar la carterita mido 3 centímetro de ancho por 6 centímetro de largo lo recortamos tomo por medio y le añado silicón y lo pegamos y formamos el lazo le pongo una cinta por el medio lo ajustamos bien y le decoro con diamantina para que sea vea mas coqueto. Vea que esta lista la cartera.
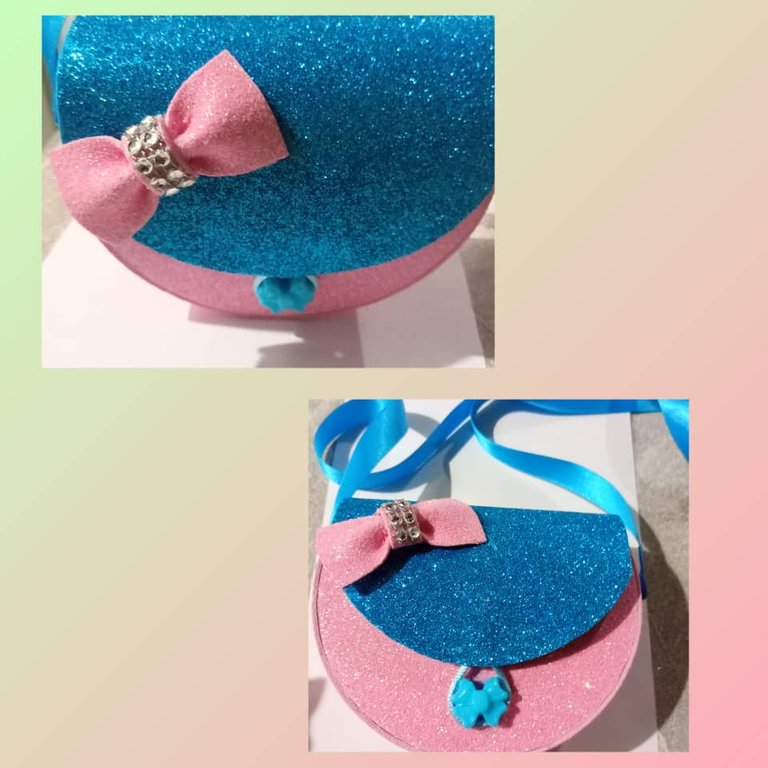
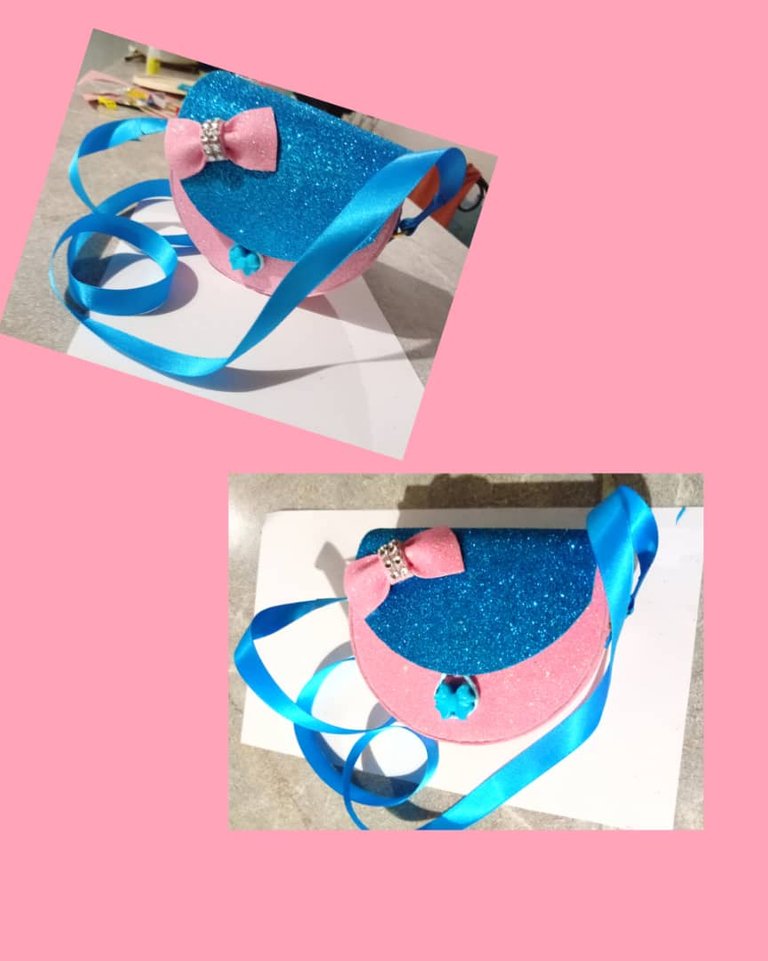
Vea lo linda que quedo y muy coqueta para disfrutarla donde ella quiera salir.
Espero que les haya gustado esta publicación que tenga un feliz días y bendecidos para todos muchas gracias por leer mi post.
Las fotos son mías, tomadas con teléfono alcatel , editadas con incollage y traducidas con Deepl.
Mi versión ingles.
Hello to all my people of this community, @HIVE DIY. Today I bring you another of my creativity and share it in this group, this time I share with you a beautiful little cardcase made with CD and foami for the princesses of the house, this cute little cardcase was made with recycled CD, pink and blue foami, cardboard, satin ribbon, two rings and silicone, are ideal for the spoiled of the house that can and look very flirty, take it to school, for a park or for a party, also serves for cotillions and special gifts for a niece or goddaughter, they are also cute and easy to do especially are very economical in terms of materials.
Here I leave you the materials to use and the step by step.
Materials.
- 2 old CD's that I used.
- Two pink and dark blue foami.
- 2 pink and white colored cardboard.
- 1 meter of blue satin ribbon.
- 1 ruler.
- 2 rings.
- 1 laso button.
- 1 exalt
- 2 scissors.
- 1 pencil.
- 1 silicone.
Step.
- I take the ruler and measure the C in the middle measuring 3 centimeter long and 10 centimeter wide frame what the CD has we mark we pass an exalt and cut with a large scissors we sand the edges, I already have my two CD cut.
- We mark with a pencil the two CDs on both sides on the pink cardboard, then we cut with the scissors and we have the 4 sides of the two, then we add silicone and glue it on both sides.
- Now I have the two CD's lined, we start lining the main side of the CD with the frosted foami, we mark it and then we cut out two sides that will make the base of the cardboard, we glue the pink foami on the CD. Now I have the two sides of the cardboard ready.
We mark two strips of 5 centimeters wide and 19 centimeters long on the pink foami and the white cardboard we cut out and glue it with silicone.
We glue the strip to the outline of the CD little by little adding silicone on all the edges until we glue both sides. See that the cardboard is taking shape.
We measure the wallet to cut the cover, I take blue foami and measure 10 centimeters wide and 16 centimeters long, we cut the tip to give it an oval shape with the help of the CD. Now I have everything ready and we start assembling the wallet.
I glue the blue foami on the inside of the wallet with a depth of 6 centimeters leaving 10 centimeters outside for the lid of the wallet, we adjust it until it sticks very well, to close the wallet I put 10 centimeters of mouse glue thread oval shape I glue it with silicone I measure where the loop button goes in the wallet I add silicone and glue and now my wallet can be closed.
We cut a strip of 2.5 centimeters and glue on the sides of the wallet and add a small ring to hang the wallet, with the blue satin ribbon I add silicone to the ends of the ribbon and inserted it into the rings and glue it.
Then we make a bow to decorate the wallet I measure 3 centimeters wide by 6 centimeters long I cut it in the middle and add silicone and glue it and form the bow I put a ribbon in the middle I adjust it well and decorate it with diamantine to make it look more flirtatious. See that the wallet is ready.
See how cute she looks and very flirtatious to enjoy wherever she wants to go out.
I hope you liked this post have a happy day and blessed to all thank you very much for reading my post.
The photos are mine, taken with alcatel phone , edited with incollage and translated with Deepl.
Ainsss quedo muy linda la carterita, y cualquier princesita quedara feliz con una como esa. Gracias por mostrarnos tu proceso creativo. Éxitos amiga @anacarolina2022 💕
Gracias amiga por tu comentario y me alegra que te guste la más pequeña de la casa quedan muy emociona con sus carterita.. Saludos y feliz dia.
The rewards earned on this comment will go directly to the people( @dayadam ) sharing the post on Twitter as long as they are registered with @poshtoken. Sign up at https://hiveposh.com.
https://leofinance.io/threads/@dayadam/re-leothreads-2alixaljm
The rewards earned on this comment will go directly to the people ( dayadam ) sharing the post on LeoThreads,LikeTu,dBuzz.
gracias por su apoyo
Congratulations @anacarolina2022! You have completed the following achievement on the Hive blockchain And have been rewarded with New badge(s)
Your next target is to reach 600 comments.
You can view your badges on your board and compare yourself to others in the Ranking
If you no longer want to receive notifications, reply to this comment with the word
STOPTo support your work, I also upvoted your post!
Check out our last posts:
Support the HiveBuzz project. Vote for our proposal!
Gracias por su apoyo.
¡Eso es genial @anacarolina2022! ¡Estamos encantados con tu progreso en Hive! ¡No te detengas ahora para lograr este nuevo objetivo!
Te quedó muy linda original para las princesas de la casa le va gustar mucho de hecho
HOLA AMIGA @leidys01 GRACIAS POR TU COMENTARIO SI ME QUEDO MUY LINDA Y A LA PRINCESA DE LA CASA LE ENCANTA. Saludos.