
Hola a todos!
Espero se encuentren bien, en esta ocasión continuamos con el tutorial sobre como hacer gatos con arte geométrico.
Hello everyone!
I hope you are well, this time we continue with the tutorial on how to make cats with geometric art.
Procedimiento - Procedure
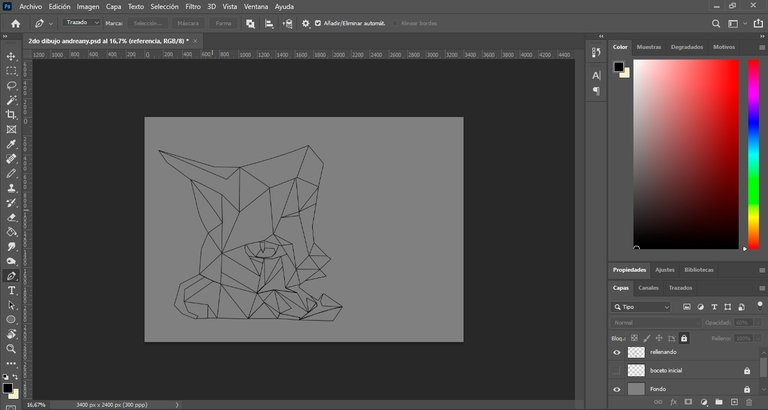
Paso 1: se crea el formato de la hoja de nuestra preferencia, el primer paso será colocar el fondo gris y asegurarnos de bloquear esta capa para no trabajar en ella y no perder nuestro progreso.
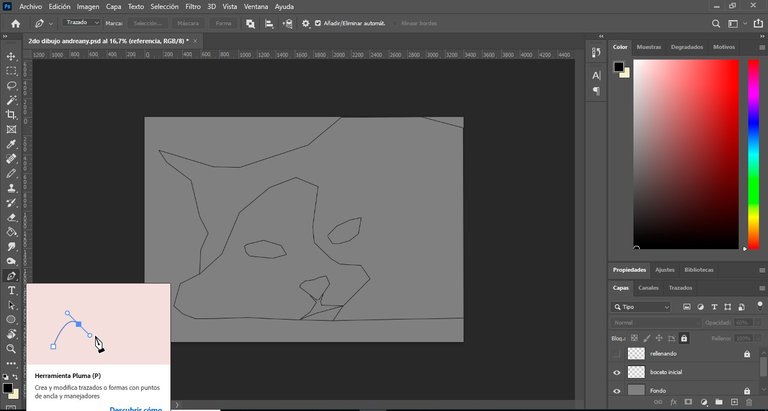
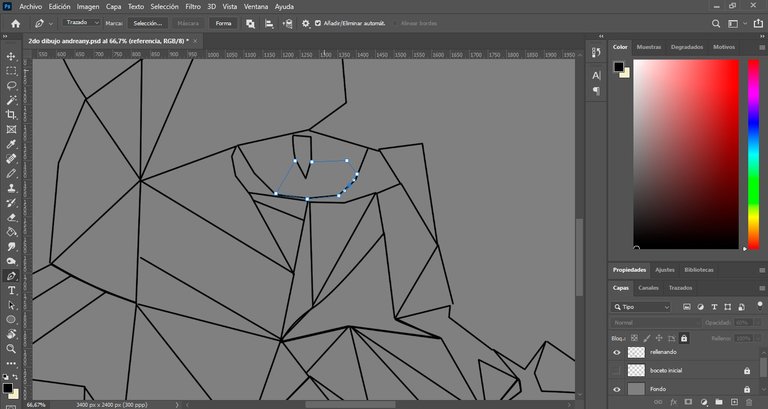
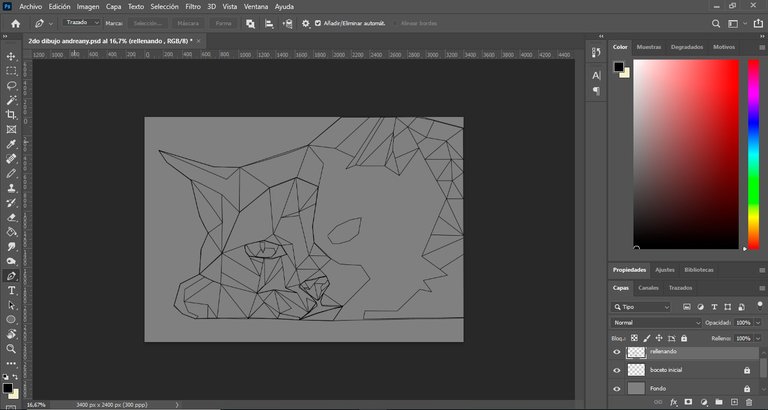
Luego, haremos un boceto inicial para delimitar los bordes de nuestro dibujo, procedemos a crear una segunda capa con el nombre de relleno, que es en donde comienza el detalle del boceto guiándonos de las líneas que limitan en la primera capa de boceto.
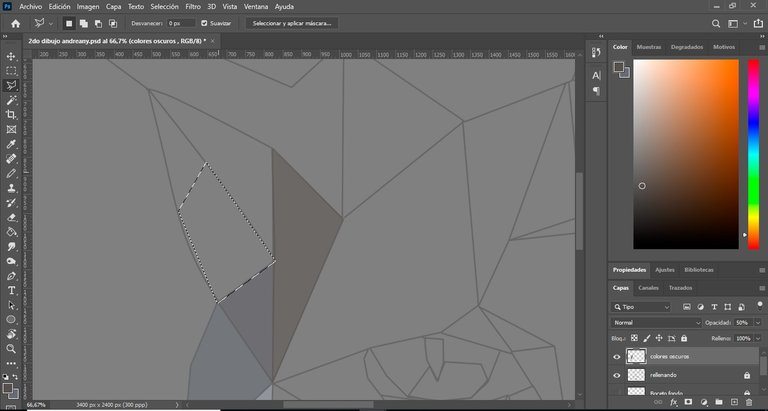
Para crear todo el boceto utilizamos la herramienta pluma tal y como lo vemos en la tercera imagen al hacer un trazado, es más cómodo para mi crear los trazado de afuera hacia adentro, pero la manera en que se realiza este paso es opcional y totalmente creativo.
Step 1: we create the sheet format of our preference, the first step will be to place the gray background and make sure to lock this layer to not work on it and not lose our progress.
Then, we will make an initial sketch to delimit the edges of our drawing, we proceed to create a second layer with the name of fill, which is where the detail of the sketch begins guiding us of the lines that limit in the first layer of sketch.
To create the whole sketch we use the pen tool as we see in the third image to make a drawing, it is more comfortable for me to create the drawing from the outside to the inside, but the way this step is done is optional and totally creative.
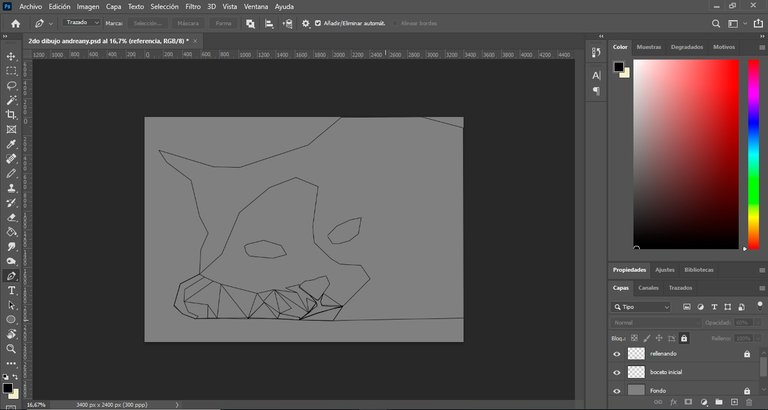

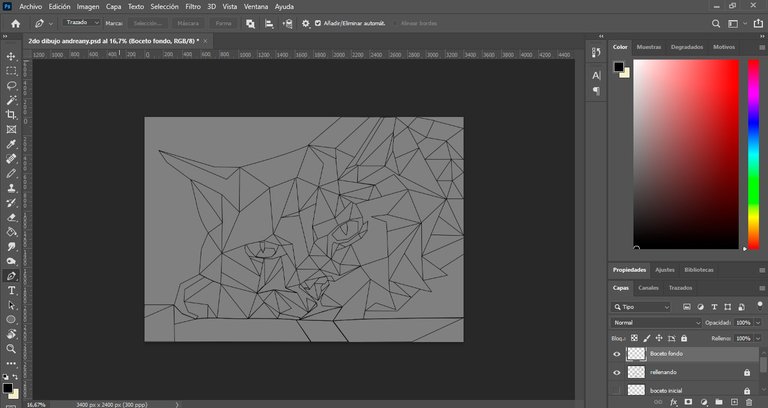
Paso 2: Luego de tener listo el boceto del gato se crea el boceto del fondo en una capa aparte, y se bloquea para no trabajar sobre esta ya que será usada más adelante.
Step 2: After having the cat sketch ready, create the background sketch in a separate layer, and lock it so as not to work on it since it will be used later.
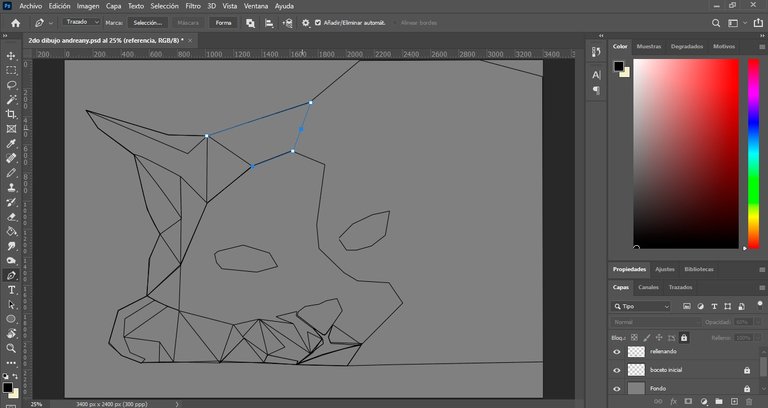
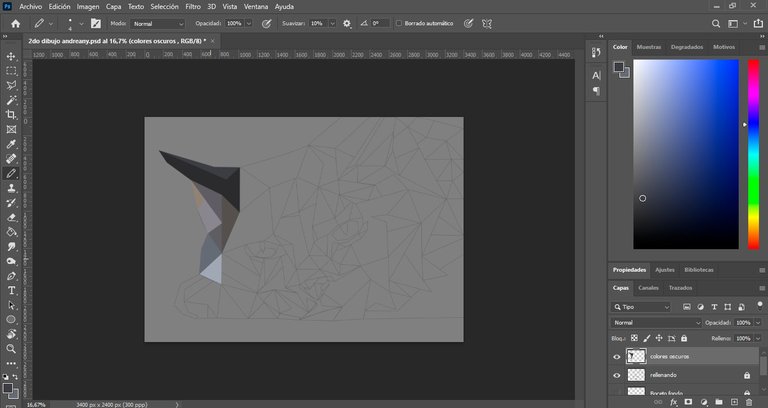
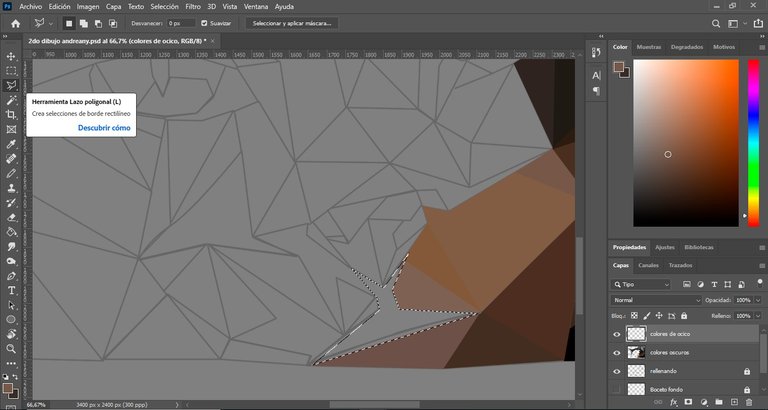
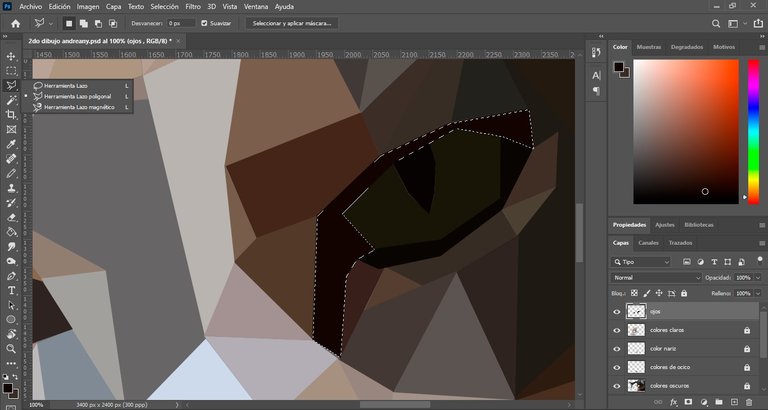
Paso 3: Terminado el boceto en su totalidad, bloquearemos esas capas y crearemos otra en donde buscaremos los colores más fríos u oscuros para comenzar aplicar a nuestro gato, esto lo haremos con la ayuda de la herramienta poligonal, el cuentagotas y nuestro boceto con una baja opacidad.
Step 3: Once the sketch is finished in its entirety, we will lock those layers and create another one where we will look for cooler or darker colors to start applying to our cat, we will do this with the help of the polygonal tool, the eyedropper and our sketch with a low opacity.
Paso 4: Abrimos otra capa para comenzar a trabajar los colores del hocico, esto por si acaso más adelante decidimos cambiar estos tonos.
Step 4: We open another layer to start working on the colors of the muzzle, just in case we decide to change these tones later on.
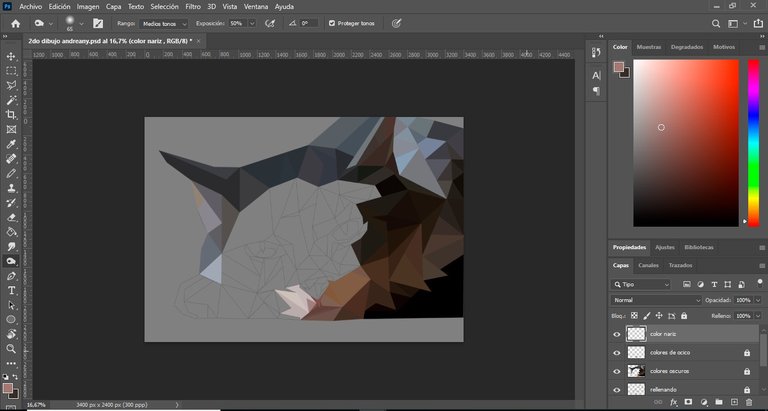
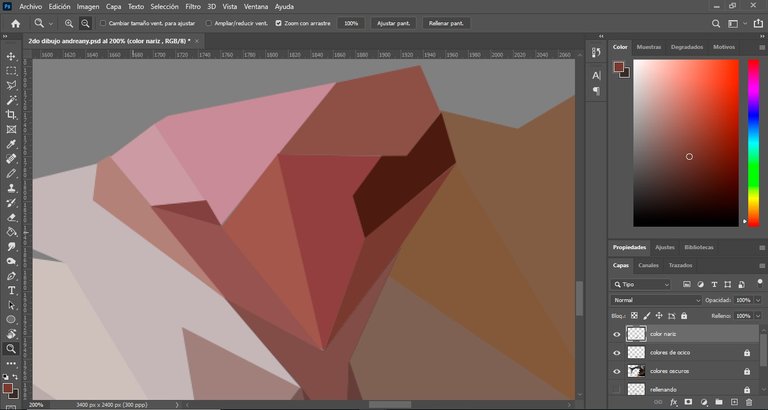
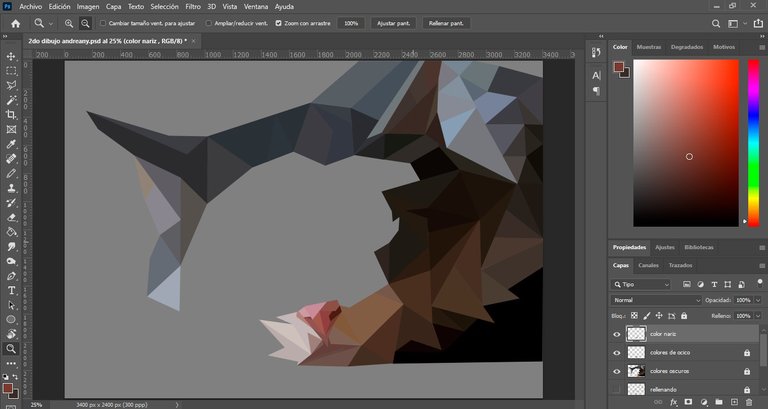
Paso 5: Al terminar esta parte del dibujo (el hocico) repetiremos el paso anterior, abriremos otra capa para trabajar los tonos rosados de la nariz del gato.
Step 5: After finishing this part of the drawing (the muzzle) we repeat the previous step, opening another layer to work on the pink tones of the cat's nose.
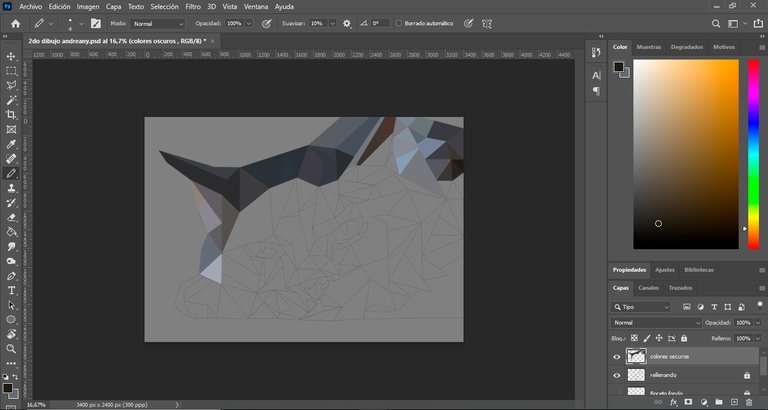
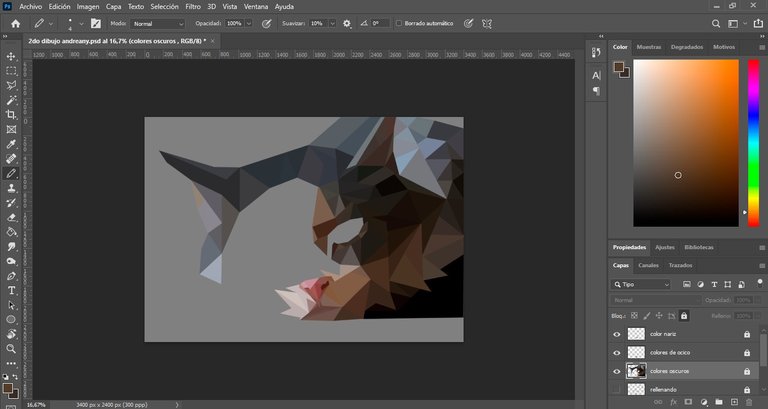
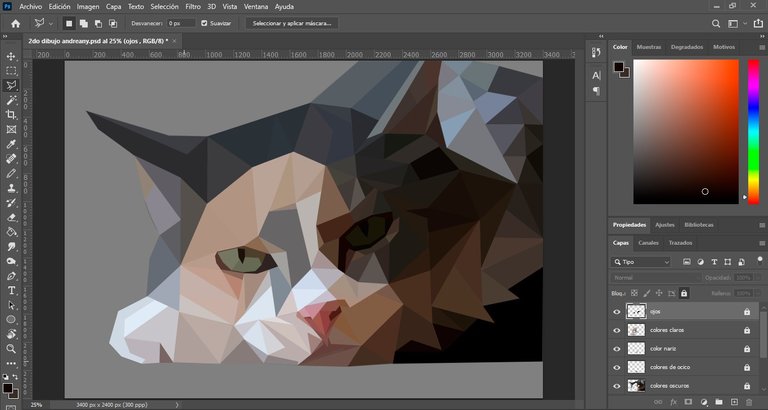
Paso 6: Terminada la capa de la nariz, procedo a terminar de colocar los colores oscuros que forman parte de la sombra.
Step 6: Once the nose layer is finished, I proceed to finish placing the dark colors that are part of the shadow.
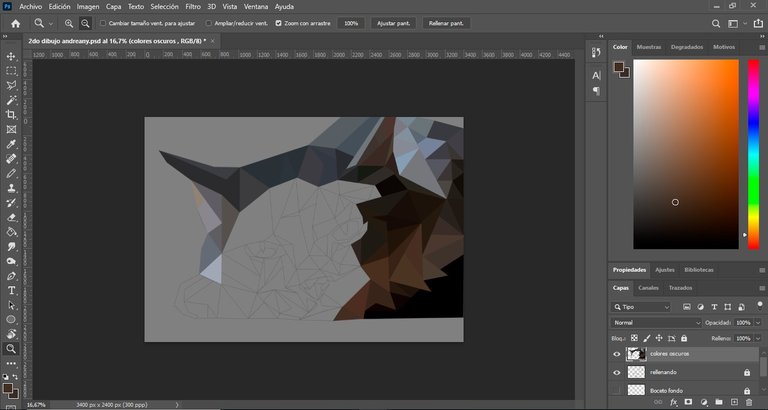
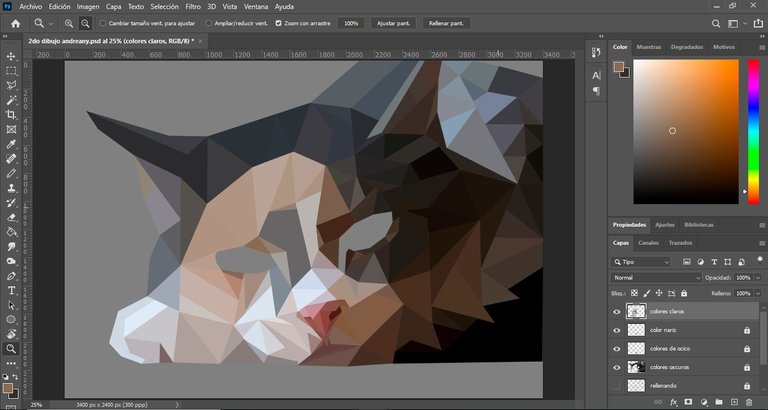
Paso 7: Ahora trabajaremos los colores claros que son parte de la luz.
Step 7: Now we will work on the light colors that are part of the light.

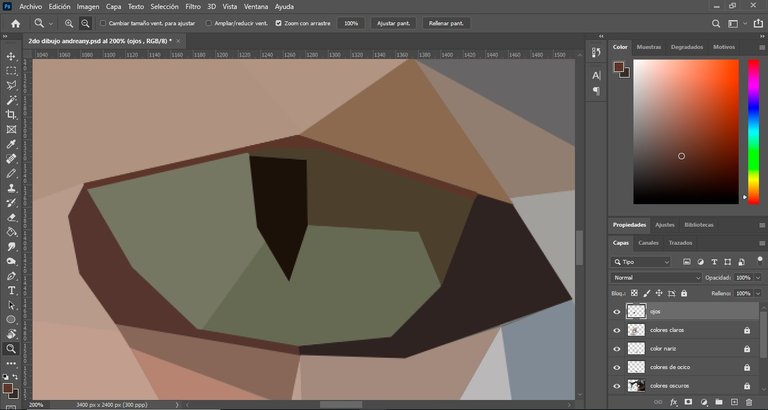
Paso 8: Se trabajarán los ojos.
Step 8: The eyes will be worked on.
Paso 9: Para finalizar trabajaremos el fondo.
Step 9: Finally we will work on the background.
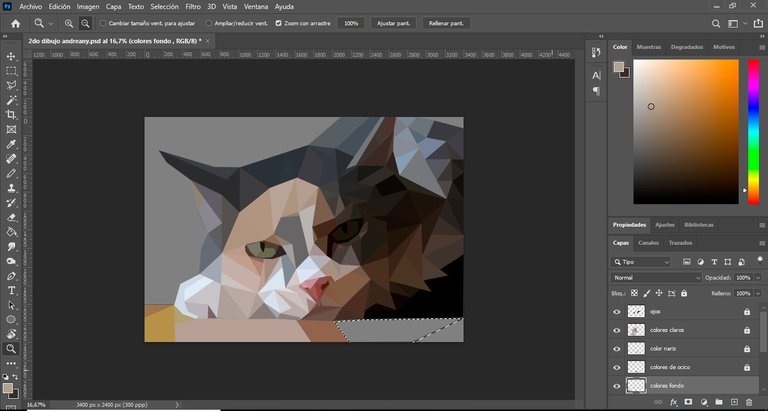
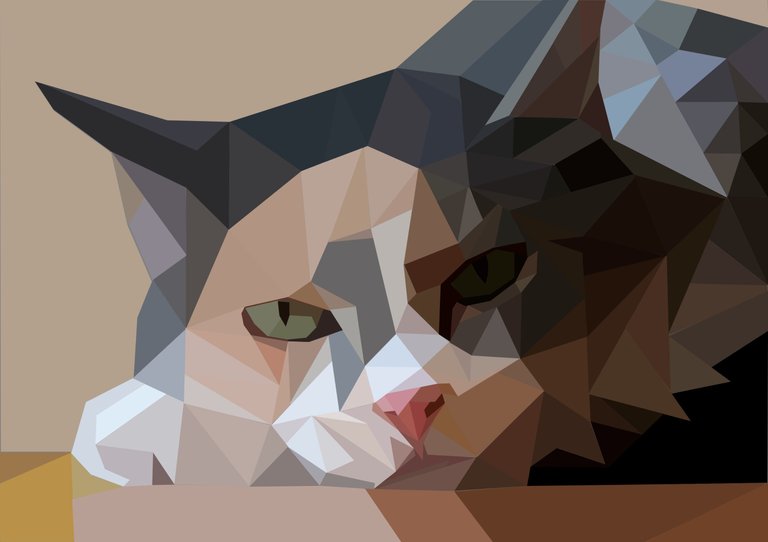
Y este sería nuestro resultado final.
And this would be our final result.
Espero les sea de utilidad este paso a paso sobre como hacer este tipo de dibujo, a modo de resumen nuestras herramientas para trabajar dentro de la aplicación son: pluma, lazo poligonal y el cuentagotas.
Estuve aproximadamente 1 día realizando este dibujo, claramente no en su totalidad porque tenía mis momentos de descanso ante el computador recordando que cada obra amerita tiempo, paciencia y mucho detalle.
Espero les guste, muchas gracias por su apoyo y hasta la próxima!
I hope this step by step guide on how to make this type of drawing is useful, as a summary our tools to work within the application are: pen, polygonal lasso and the eyedropper.
I spent approximately 1 day making this drawing, clearly not in its entirety because I had my moments of rest in front of the computer remembering that each work deserves time, patience and a lot of detail.
I hope you like it, thank you very much for your support and see you next time!

- Laptop hp I3
- Mouse
- Programa Adobe Photoshop 2021
- Las imágenes aquí publicadas son contenido original.
- La referencia utilizada, se tomo de https://www.pinterest.es
- Mi lengua materna es el español, el traductor utilizado para la versión en ingles es: https://www.deepl.com
- Los banners de bienvenida y despedida son de mi creación con la ayuda de la página web https://www.canva.com
- La estructuración del post se realizo con el Tutorial de Markdown: https://peakd.com/hive-174578/@victoriabsb/tutorial-de-markdown-completo-or-traduccion-autorizada?fbclid=IwAR1K4xyC4hIjZeRCVsXDFOjPWEdxioDKZcrDO5PQ-U9WqFrXnh8QbcGzxkQ
- Laptop hp I3
- Mouse
- Programa Adobe Photoshop 2021
- The images published here are original content.
- The reference used was taken from https://www.pinterest.es.
- My native language is Spanish, the translator used for the English version is: https://www.deepl.com
- The welcome and farewell banners were created by me with the help of the website https://www.canva.com.
- The structuring of the post was done with the Markdown Tutorial: https://peakd.com/hive-174578/@victoriabsb/tutorial-de-markdown-completo-or-traduccion-autorizada?fbclid=IwAR1K4xyC4hIjZeRCVsXDFOjPWEdxioDKZcrDO5PQ-U9WqFrXnh8QbcGzxkQ
Congratulations @andreany! You have completed the following achievement on the Hive blockchain and have been rewarded with new badge(s):
Your next target is to reach 300 upvotes.
Your next target is to reach 50 comments.
You can view your badges on your board and compare yourself to others in the Ranking
If you no longer want to receive notifications, reply to this comment with the word
STOPTo support your work, I also upvoted your post!
Support the HiveBuzz project. Vote for our proposal!
Felicidades por tu buen trabajo amiga, me gusta mucho el estilo geométrico y la perspectiva que le da.
gracias por tu apoyo @valthy !