
Hola a todos !
En este primer contenido estaré compartiendo con ustedes un paso a paso sobre como dibujar un gato realizado con arte geométrico espero que sea de su agrado y les incentive a realizar estas prácticas tan bonitas y relajantes sobre todo a los amantes de los gatos y el dibujo jeje 😊.
Hello everybody !
In this first content I will be sharing with you a step by step on how to draw a cat made with geometric art I hope you like it and encourage you to perform these practices so nice and relaxing especially to lovers of cats and drawing hehe 😊.
Procedimiento - Procedure
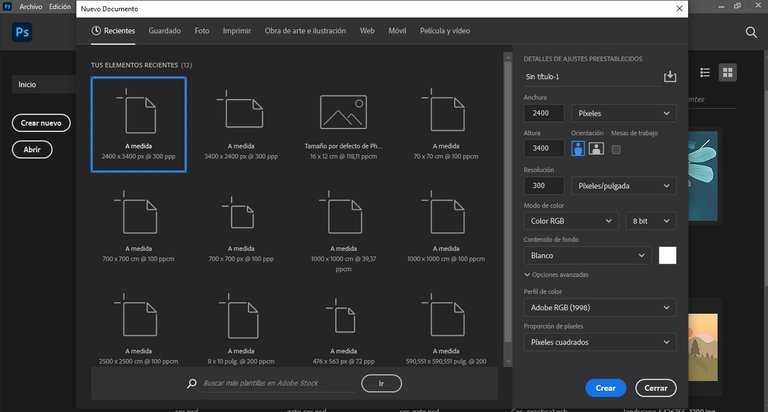
Paso 1: abrir photoshop y crear el formato de hoja, en este caso es Anchura 2400, altura 3400, resolución 300 y por último la hoja en vertical. (estas medidas son opcionales).
Step 1: open photoshop and create the sheet format, in this case it is Width 2400, height 3400, resolution 300 and finally the sheet in vertical. (these measures are optional).
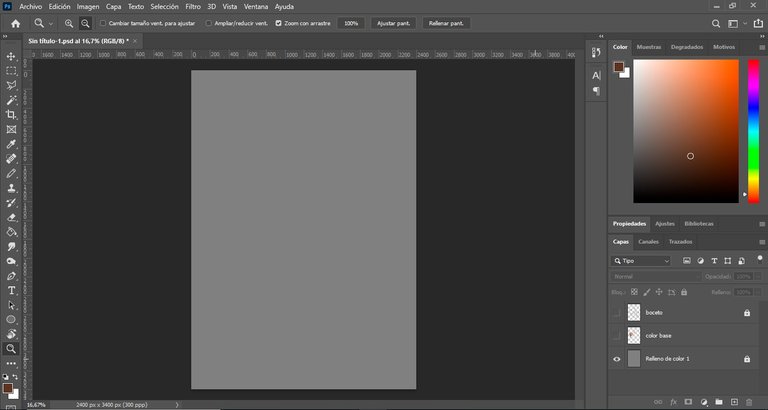
Paso 2: colocar el fondo gris para que no dañe y canse nuestra vista tan rápido y colocarle candado para no trabajar en esta capa.
Step 2: place the gray background so that it does not damage and tire our eyes so quickly and place a lock to avoid working on this layer.
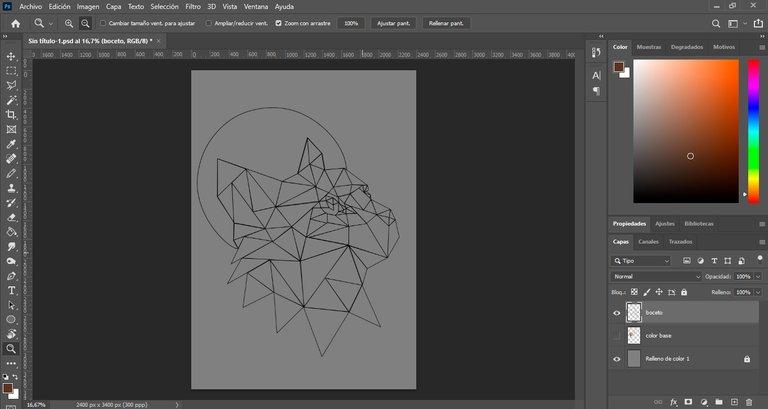
Paso 3: crear otra capa para crear el boceto guiándonos de la referencia, nuestra herramienta estrella en este momento será la pluma, al terminar este paso bloqueamos la capa. (disculpen no colocar de forma más detallada este paso, no estoy acostumbrada a registrar continuamente los movimientos que hago).
Step 3: create another layer to create the sketch guided by the reference, our star tool at this time will be the pen, at the end of this step we lock the layer (sorry for not putting more detail in this step, I'm not used to continuously record the movements I make).
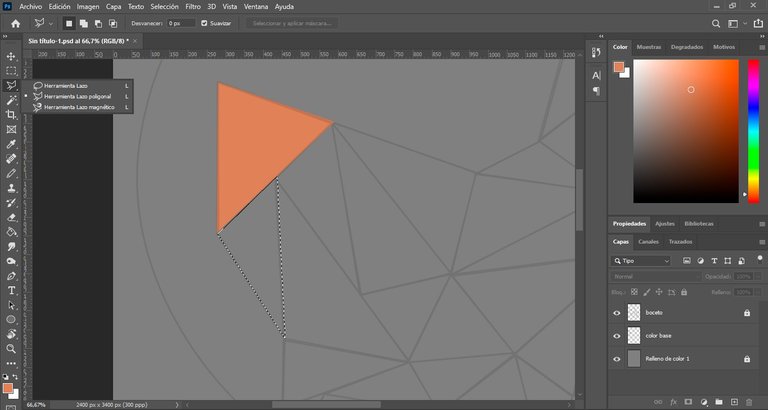
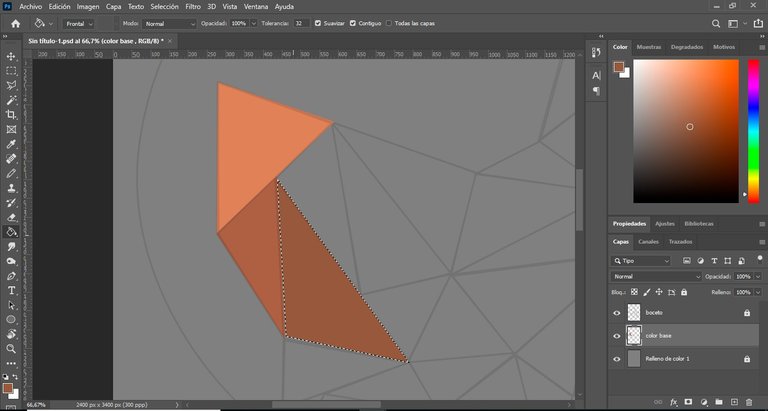
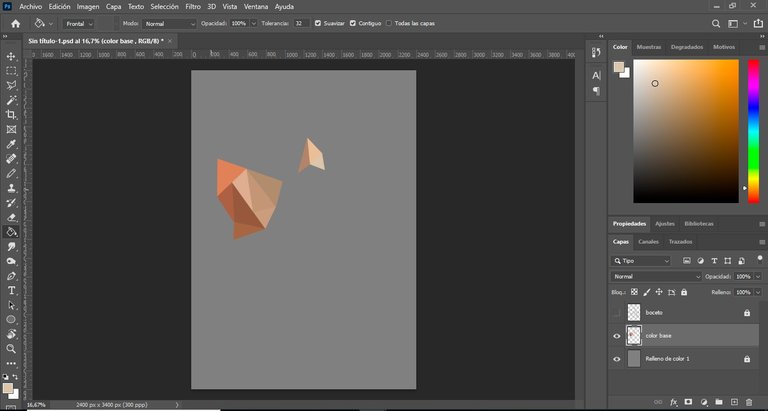
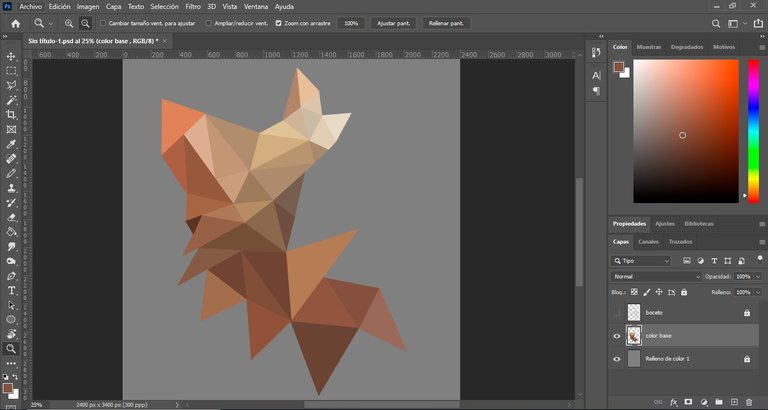
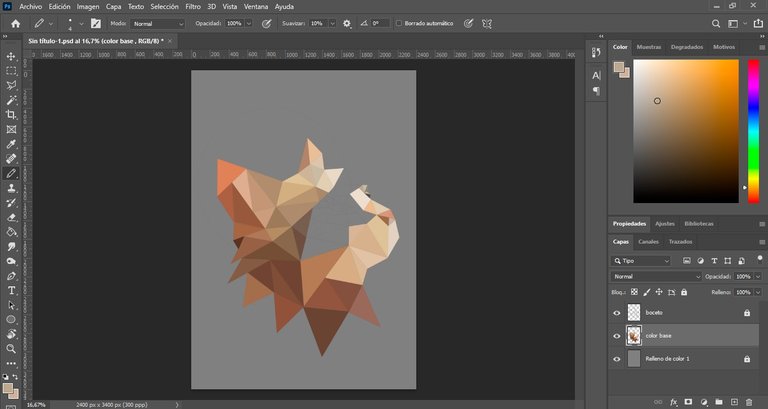
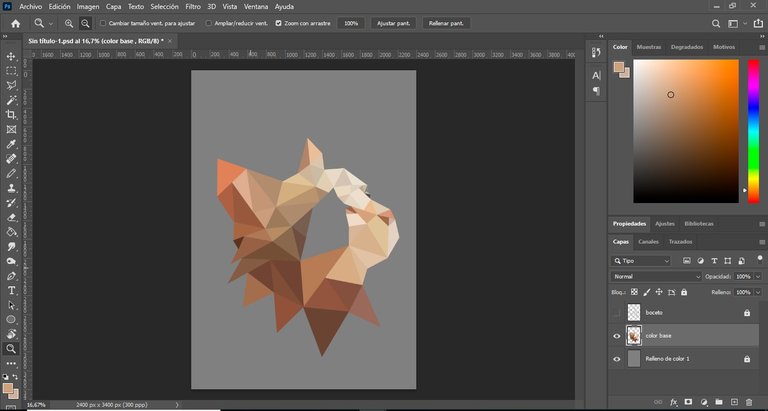
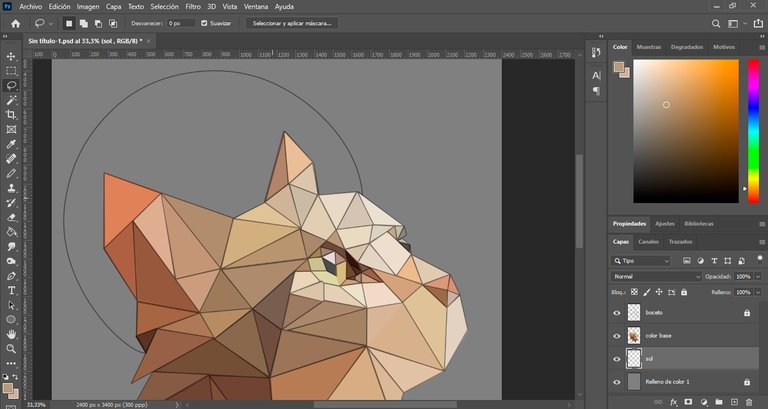
Paso 4: creamos otra capa en donde se colocará color a la imagen, en este paso nos guiaremos de nuestro boceto al cual le bajaremos la opacidad y bloquearemos la capa del boceto para no trabajar en ella, comenzando por separar por partes el dibujo comenzando con las orejas.
Para poder colorear las partes que queremos utilizaremos la herramienta lazo poligonal y pasando por encima de las líneas guías del boceto le iremos dando la misma forma para luego con el cuentagotas buscar el color más parecido a nuestra referencia y con la herramienta bote de pintura terminamos de aplicar el color en la zona delimitada, este proceso se repetirá a lo largo del dibujo.
Step 4: we create another layer where we will color the image, in this step we will be guided by our sketch to which we will lower the opacity and we will lock the sketch layer to not work on it, starting by separating by parts the drawing starting with the ears.
To color the parts we want we will use the polygonal lasso tool and passing over the guide lines of the sketch we will give the same shape and then with the eyedropper we will look for the color closest to our reference and with the paint can tool we will finish applying the color in the delimited area, this process will be repeated throughout the drawing.
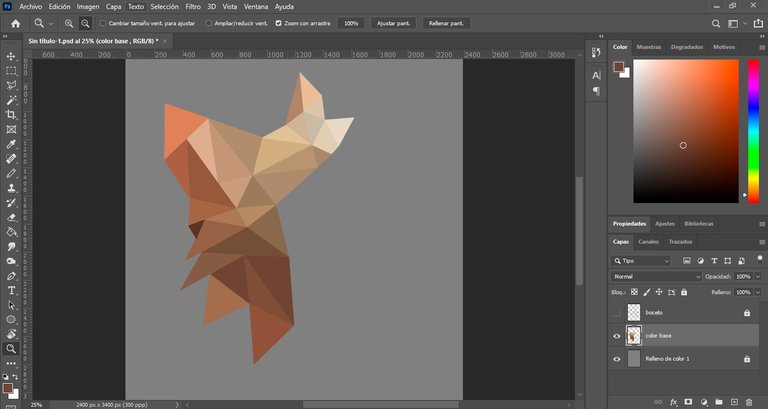
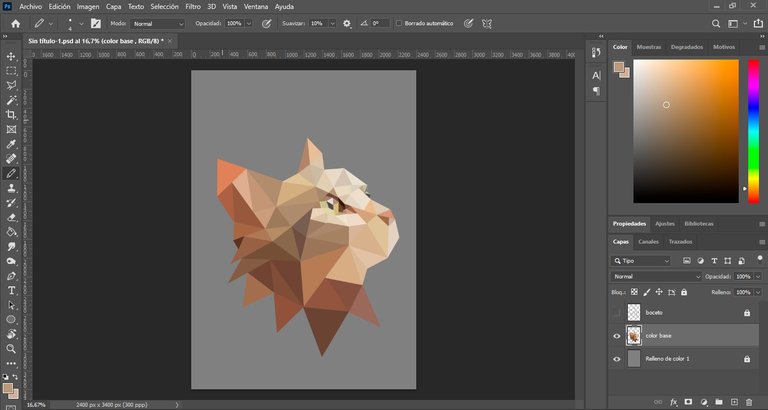
Paso 5: Una vez realizado el gato, reactivamos otra vez la capa de boceto para guiarnos y ver el siguiente paso que sería el sol, luego creamos otra capa para trabajar este próximo paso nada más, bloqueando el resto de las capas para evitar trabajar en ellas y así no dañar los pasos que llevamos listos.
Step 5: Once the cat is done, we reactivate again the sketch layer to guide us and see the next step which would be the sun, then we create another layer to work this next step only, blocking the rest of the layers to avoid working on them and thus not damage the steps that we have ready.
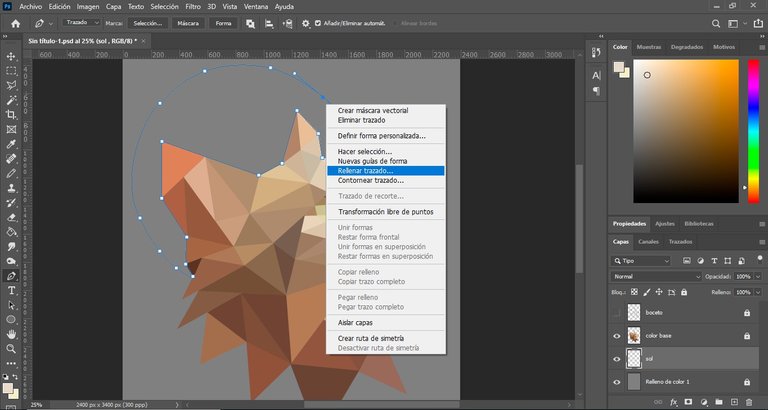
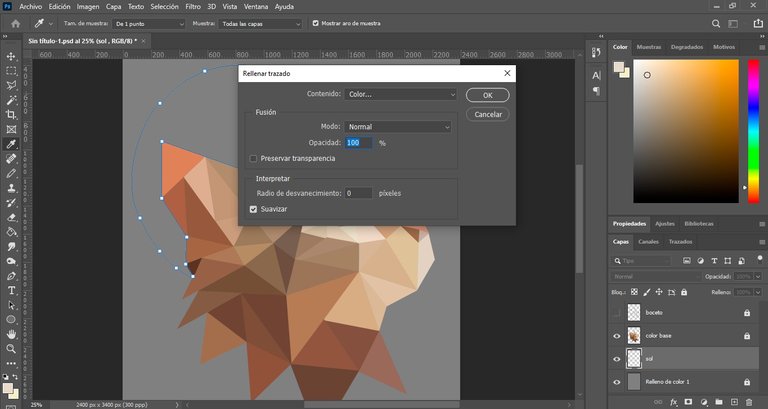
Paso 6: Para esta ocasión utilizaremos la herramienta pluma y con la ayuda de nuestro boceto, nos guiaremos para colocar los nodos en donde corresponde y poder darle forma al sol detrás del gato, una vez listo el trazado con el botón derecho seleccionaremos Rellenar trazado y buscaremos el color deseado luego nos aparecerá otra pestaña con los ajustes del color y aceptaremos.
Step 6: For this occasion we will use the pen tool and with the help of our sketch, we will guide us to place the nodes where it corresponds and to be able to give shape to the sun behind the cat, once the tracing is ready with the right button we will select Fill tracing and we will look for the desired color then another tab will appear with the color settings and we will accept.
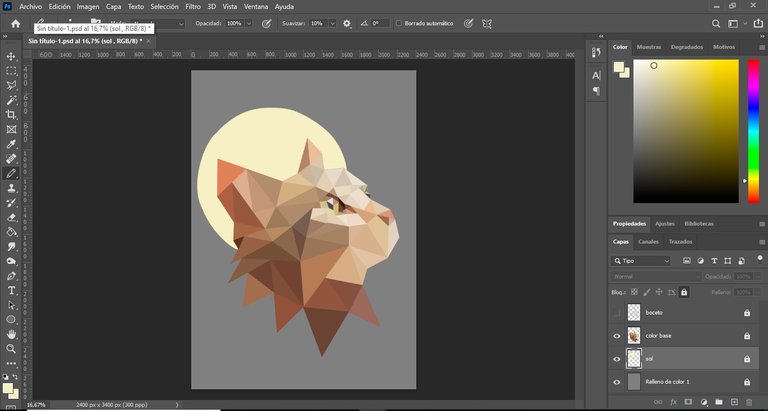
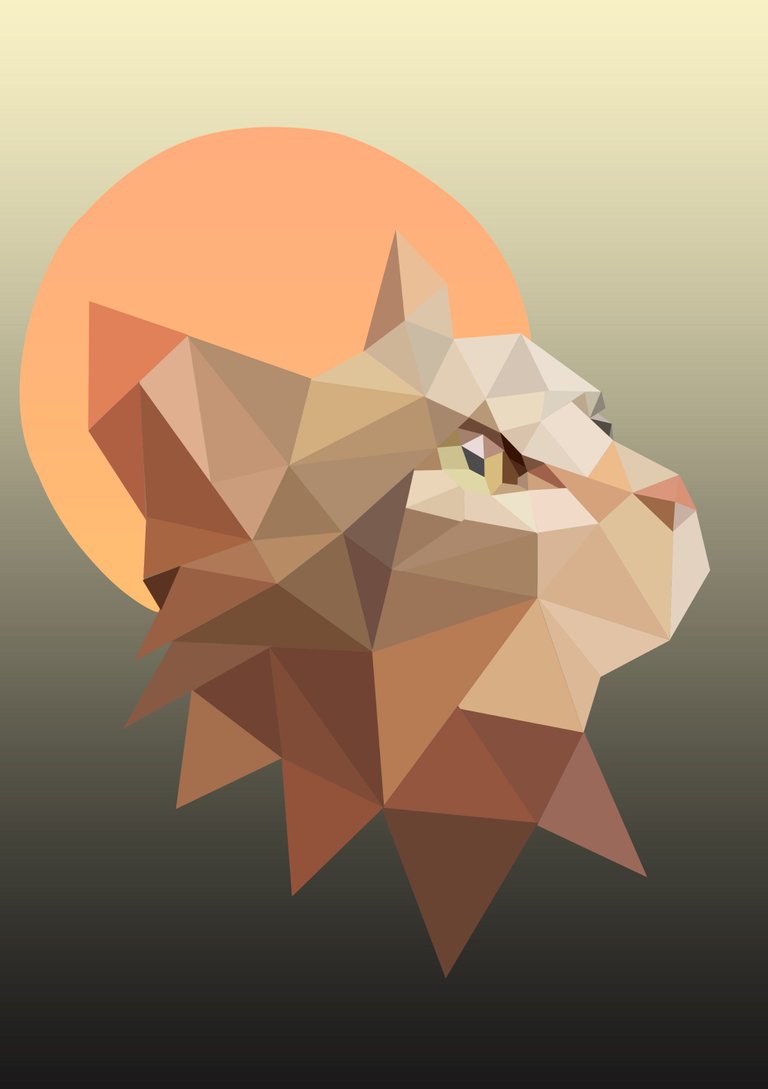
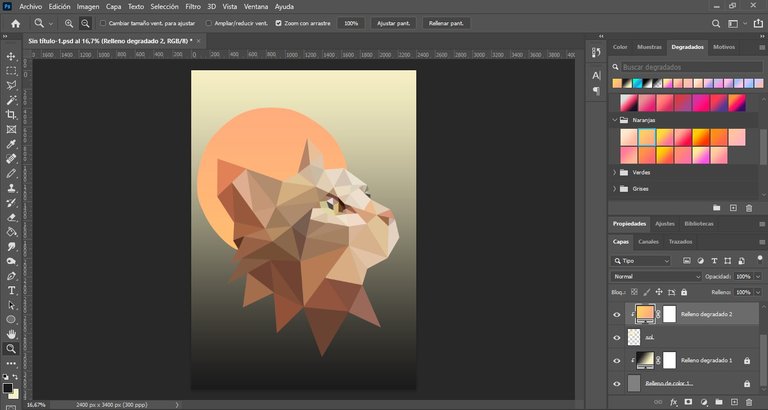
Paso 7: Para finalizar busque entre la carpeta de colores, en degradados, para cambiar un poco el color de la sol y el fondo, y este sería el resultado final.
Step 7: Finally, look in the color folder, in gradients, to change a little the color of the sun and the background, and this would be the final result.
Me alegra poder compartir este contenido, y aunque me siento satisfecha con el resultado, no lo estoy tanto con como lo plasme, ya que al hacer esta actividad entro en un estado casi total de tranquilidad y concentración, por ende sé que olvide mostrar algunos detalles sobre todo en la creación del boceto cuestión que trataré de mejorar en las próximas publicaciones.
I am happy to share this content, and although I am satisfied with the result, I am not so satisfied with how I did it, because when I do this activity I enter into an almost total state of tranquility and concentration, therefore I know that I forgot to show some details, especially in the creation of the sketch, an issue that I will try to improve in future publications.
Agradecida con su visita y apoyo!
Thank you for your visit and support!

- Laptop hp I3
- Mouse
- Programa Adobe Photoshop 2021
- Las imágenes aquí publicadas son contenido original.
- La referencia utilizada, se tomo de https://www.pinterest.es
- Los banners de bienvenida y despedida son de mi creación con la ayuda de la página web https://www.canva.com
- La estructuración del post se realizo con el Tutorial de Markdown facilitado por @victoriabsb https://peakd.com/hive-174578/@victoriabsb/tutorial-de-markdown-completo-or-traduccion-autorizada?fbclid=IwAR1K4xyC4hIjZeRCVsXDFOjPWEdxioDKZcrDO5PQ-U9WqFrXnh8QbcGzxkQ
- Laptop hp I3
- Mouse
- Programa Adobe Photoshop 2021
- The images published here are original content.
- The reference used was taken from https://www.pinterest.es.
- The welcome and farewell banners were created by me with the help of the website https://www.canva.com.
- The structuring of the post was done with the Markdown Tutorial provided by @victoriabsb: https://peakd.com/hive-174578/@victoriabsb/tutorial-de-markdown-completo-or-traduccion-autorizada?fbclid=IwAR1K4xyC4hIjZeRCVsXDFOjPWEdxioDKZcrDO5PQ-U9WqFrXnh8QbcGzxkQ
Wow amiga eso se ve un poco complicado y aparte que debe llevar algo de tiempo sobre todo si no se tiene experiencia, pero se nota que lo haces muy bien, los colores que empleaste se ven lindos!
Saludos!
Hola, muchas gracias por visitarme, no es tan complicado pero sí lleva su tiempo, lo bueno es que al ser algo de mi interés el tiempo no me pesa casi jeje. Saludos!
Muy bonito amiga, me gusto mucho los colores que empleaste y que formaste con figuras geométricas al gatico
Gracias, este tipo de arte es uno de mis favoritos!! Saludos!
Congratulations @andreany! You have completed the following achievement on the Hive blockchain and have been rewarded with new badge(s):
Your next target is to reach 50 replies.
You can view your badges on your board and compare yourself to others in the Ranking
If you no longer want to receive notifications, reply to this comment with the word
STOPCheck out the last post from @hivebuzz:
Support the HiveBuzz project. Vote for our proposal!
Simplemente hermoso. Me encantó. Felicidades por tu arte.
Gracias por pasar y apoyar ! 😄