
Hola a todos!
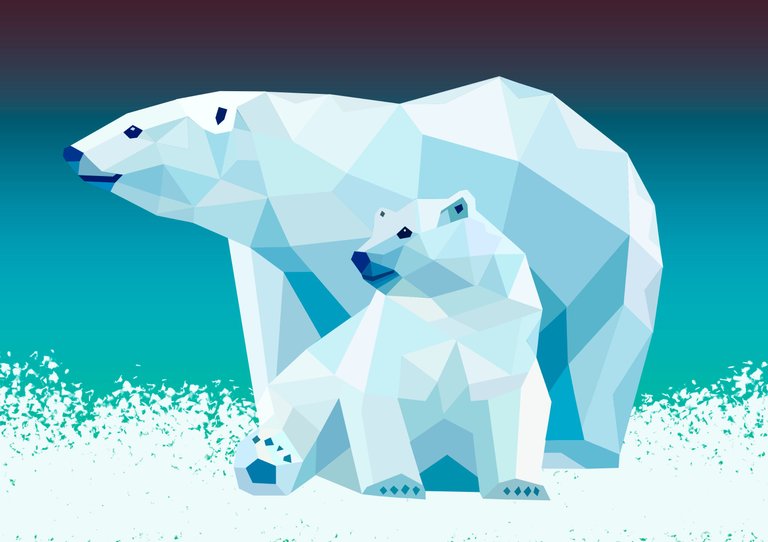
En este post, les explico como realizar una imagen de dos osos polares con arte geométrico.
Hello everyone!
In this post, I explain how to make an image of two polar bears with geometric art.
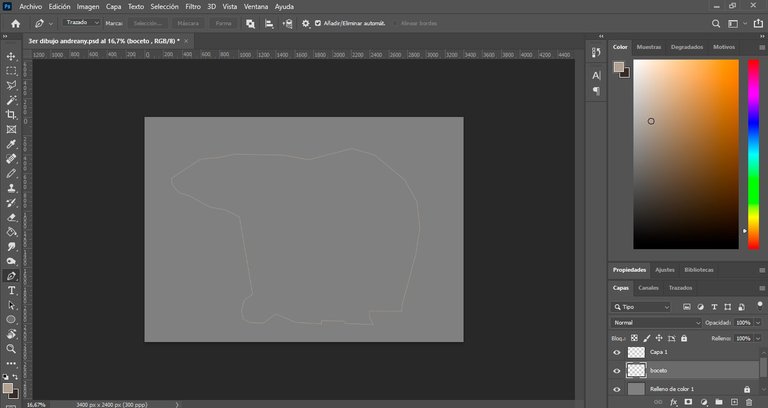
El primer paso, como en las anteriores publicaciones es colocar el formato de la hoja que mejor nos parece, y colocar el fondo de color gris, estos dos primeros pasos son a gusto del dibujante.
Para comenzar el boceto se crea una capa aparte del fondo, debemos cuidar no trabajar en el fondo porque corremos el riesgo de perder nuestro trabajo, para evitar esto bloqueamos la capa de fondo.
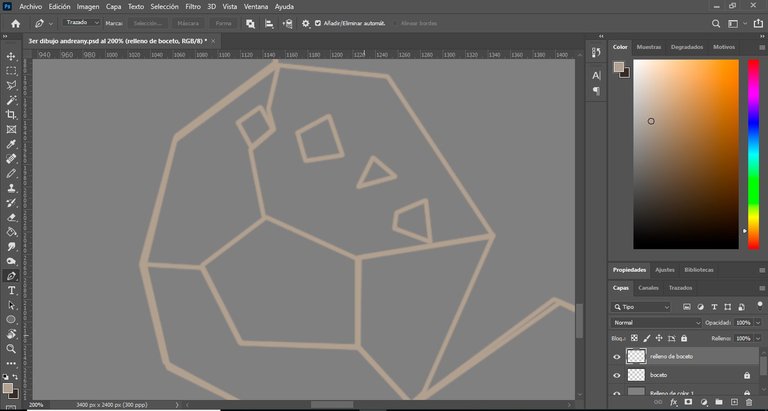
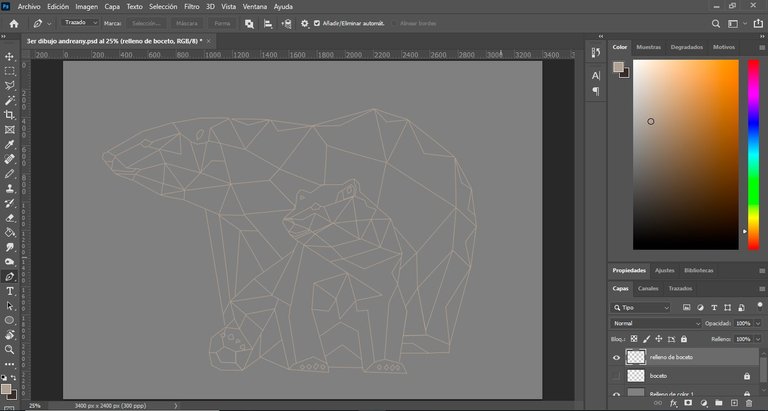
Luego continuamos con delimitar las zonas en donde estarán nuestros dos osos usando la herramienta pluma, este sería un boceto inicial que sirve de guía para poder realizar el resto del dibujo.
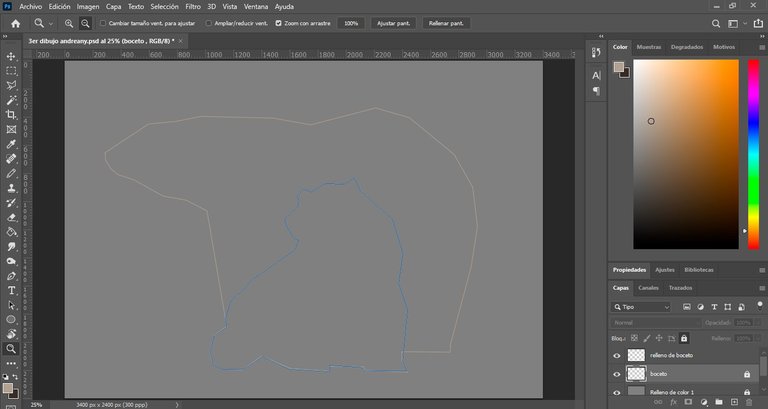
En lo personal, creo otra capa con el nombre de "relleno de boceto" y es cuando comienzo a trazar las formas adentro de los límites que ya hice en el boceto inicial.
The first step, as in the previous publications is to place the sheet format that best suits us, and place the gray background, these first two steps are to taste of the draftsman.
To start the sketch we create a separate layer from the background, we must be careful not to work on the background because we run the risk of losing our work, to avoid this we lock the background layer.
Then we continue with delimiting the areas where our two bears will be using the pen tool, this would be an initial sketch that serves as a guide to be able to make the rest of the drawing.
Personally, I create another layer with the name "fill sketch" and that's when I start to draw the shapes inside the limits that I already made in the initial sketch.
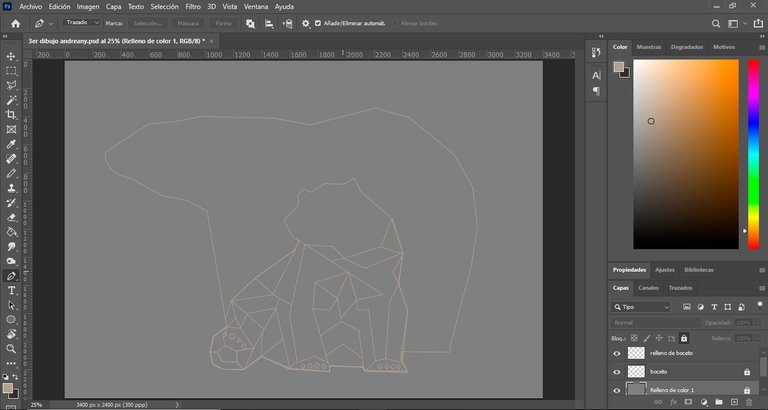
En esta segunda imagen, delimité las líneas del boceto del oso pequeño, pero no me percate en el momento que el color azul para el contorno del trazado no se ve claramente.
In this second image, I delimited the lines of the small bear sketch, but I did not notice at the time that the blue color for the outline of the outline is not clearly visible.
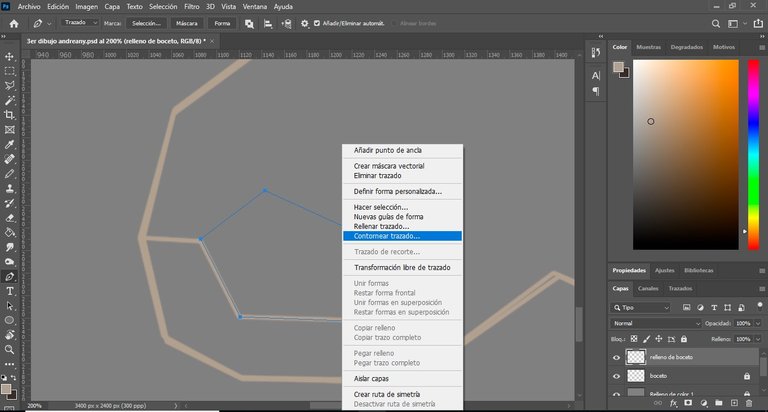
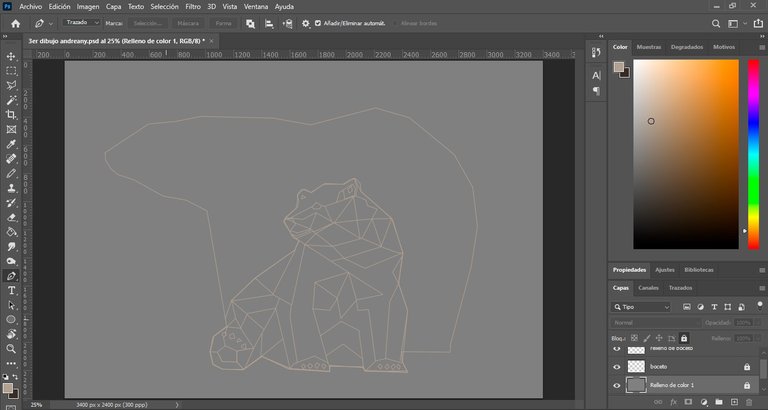
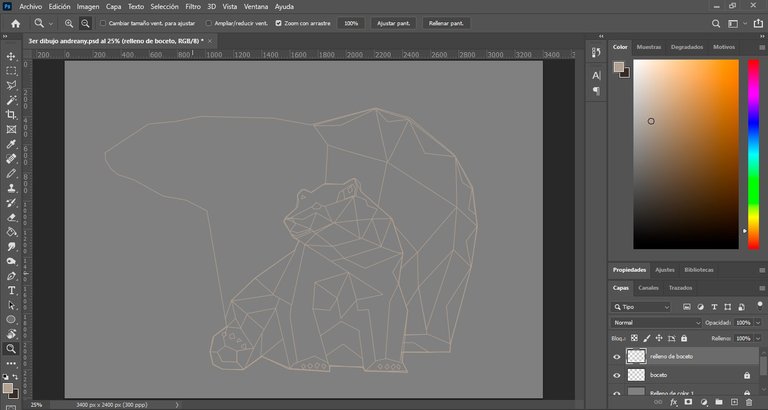
En esta imagen ya comenzamos a realizar los trazos adentro de las líneas guías del boceto inicial.
In this image we have already started to draw the strokes inside the guide lines of the initial sketch.

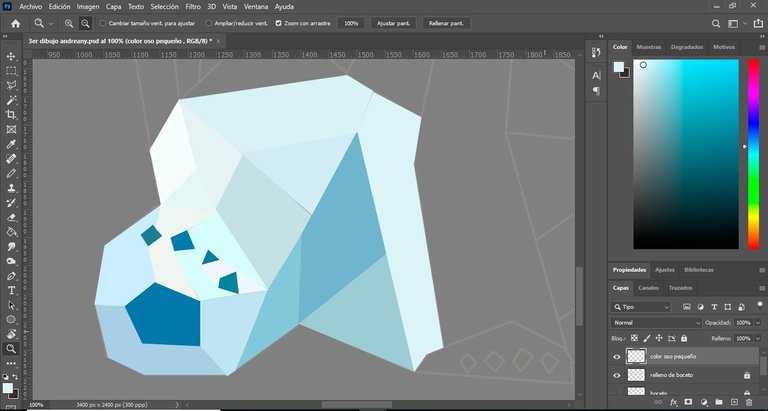
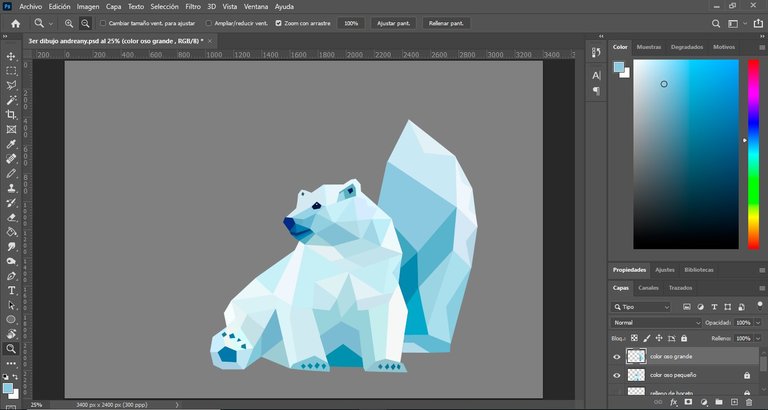
Una vez terminado el boceto, aplicamos los colores, para esto también creamos una capa diferente y bloqueamos las anteriores.
Recordando que usaremos la herramienta lazo poligonal para esta segunda parte del proceso.
En primer lugar voy a colorear el oso pequeño.
Once the sketch is finished, we apply the colors, for this we also create a different layer and lock the previous ones.
Remembering that we will use the polygonal lasso tool for this second part of the process.
First I am going to color the little bear.

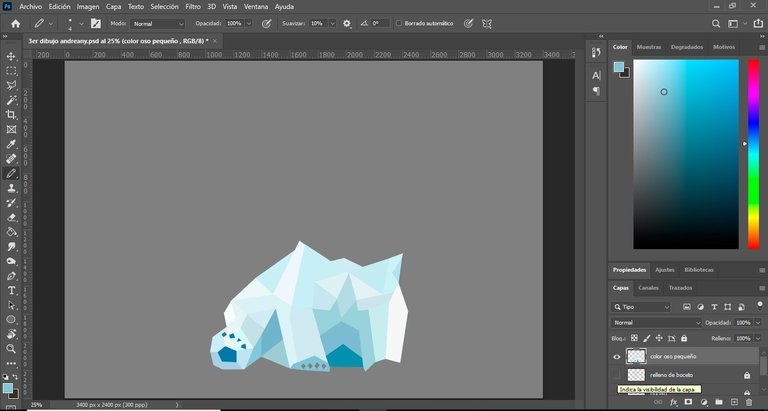
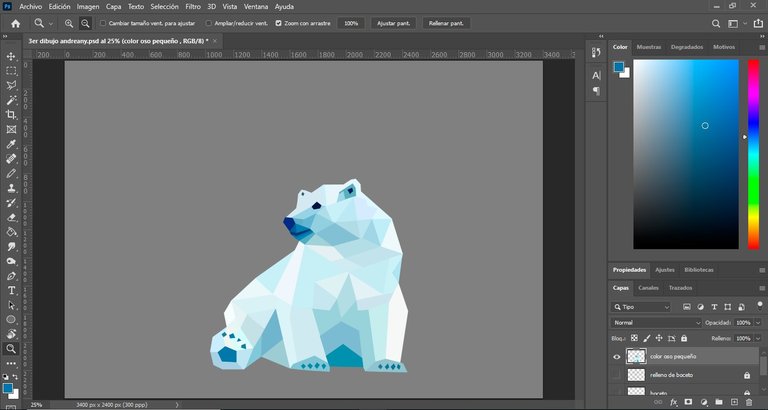
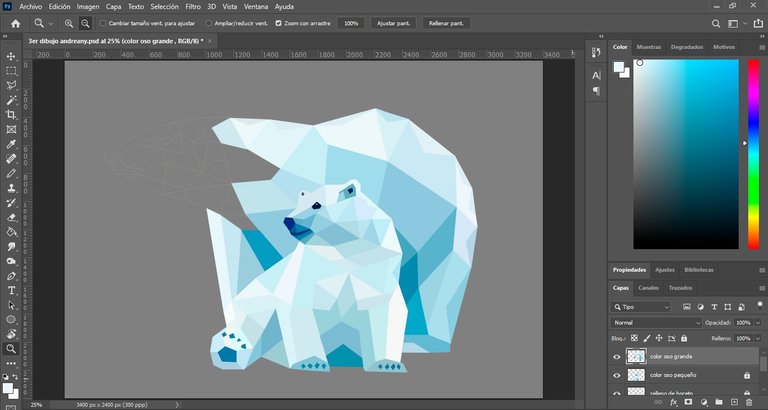
Una vez finalizado el color al pequeño oso, pasaremos a bloquear esta capa y crear otra para darle color al oso más grande.
Once we have finished coloring the small bear, we will lock this layer and create another one to color the bigger bear.
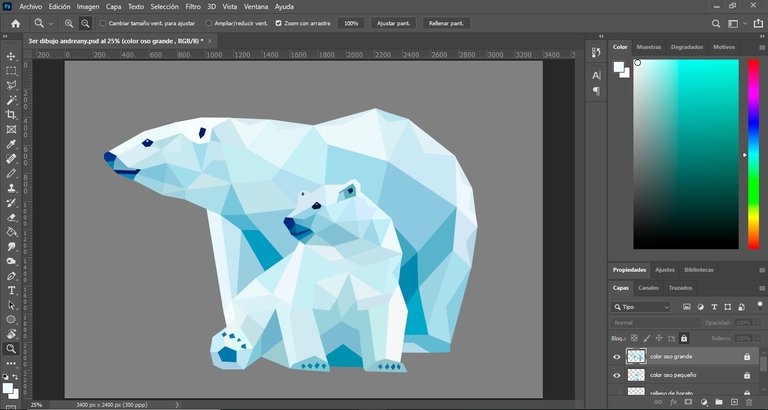
Una vez finalizado el oso más grande, bloqueamos la capa y creamos otra con el fin de crear nosotros un fondo, ya que la imagen original no tiene uno colorido, buscaremos entre nuestros colores y efectos el que mejor nos parezca, en mi caso elegí un fondo con colores azul degradados y con un pincel con textura agregue lo que sería nieve. Siendo éste el resultado final.
Once the bigger bear is finished, we lock the layer and create another one in order to create a background, since the original image does not have a colorful one, we will look for among our colors and effects the one we like the best, in my case I chose a background with blue gradient colors and with a textured brush I added what would be snow. This is the final result.
Espero les sea de utilidad este paso a paso sobre como hacer este tipo de dibujo, a modo de resumen nuestras herramientas para trabajar dentro de la aplicación son: pluma, lazo poligonal y el cuentagotas, vale acotar que la creación de capaz es opcional, esto lo hago porque si al final del dibujo quisiera cambiar algo que se encuentra en el principio lo puedo cambiar fácilmente sin regresar todos los pasos.
Estuve aproximadamente 1 día realizando este dibujo, claramente no en su totalidad porque tenía mis momentos de descanso ante el computador recordando que cada obra amerita tiempo, paciencia y mucho detalle.
Espero les guste, muchas gracias por su apoyo y hasta la próxima!
I hope you find useful this step by step on how to make this type of drawing, as a summary our tools to work within the application are: pen, polygonal lasso and the eyedropper, it is worth noting that the creation of capable is optional, I do this because if at the end of the drawing I want to change something that is at the beginning I can easily change it without returning all the steps.
I was approximately 1 day making this drawing, clearly not in its totality because I had my moments of rest in front of the computer remembering that each work deserves time, patience and a lot of detail.
I hope you like it, thank you very much for your support and see you next time!

- Laptop hp I3
- Mouse
- Programa Adobe Photoshop 2021
- Las imágenes aquí publicadas son contenido original.
- La referencia utilizada, se tomo de https://www.pinterest.es
- Mi lengua materna es el español, el traductor utilizado para la versión en ingles es: https://www.deepl.com
- Los banners de bienvenida y despedida son de mi creación con la ayuda de la página web https://www.canva.com
- La estructuración del post se realizo con el Tutorial de Markdown: https://peakd.com/hive-174578/@victoriabsb/tutorial-de-markdown-completo-or-traduccion-autorizada?fbclid=IwAR1K4xyC4hIjZeRCVsXDFOjPWEdxioDKZcrDO5PQ-U9WqFrXnh8QbcGzxkQ
- Laptop hp I3
- Mouse
- Programa Adobe Photoshop 2021
- The images published here are original content.
- The reference used was taken from https://www.pinterest.es.
- My native language is Spanish, the translator used for the English version is: https://www.deepl.com
- The welcome and farewell banners were created by me with the help of the website https://www.canva.com.
- The structuring of the post was done with the Markdown Tutorial: https://peakd.com/hive-174578/@victoriabsb/tutorial-de-markdown-completo-or-traduccion-autorizada?fbclid=IwAR1K4xyC4hIjZeRCVsXDFOjPWEdxioDKZcrDO5PQ-U9WqFrXnh8QbcGzxkQ
Congratulations @andreany! You have completed the following achievement on the Hive blockchain and have been rewarded with new badge(s):
Your next target is to reach 50 upvotes.
You can view your badges on your board and compare yourself to others in the Ranking
If you no longer want to receive notifications, reply to this comment with the word
STOPTo support your work, I also upvoted your post!
Support the HiveBuzz project. Vote for our proposal!