
Hello my creative people of Hive diy, many greetings and blessings to all I am going to teach you how to make some Christmas balls with foami to decorate the tree, it's quick and easy to do.
Español:
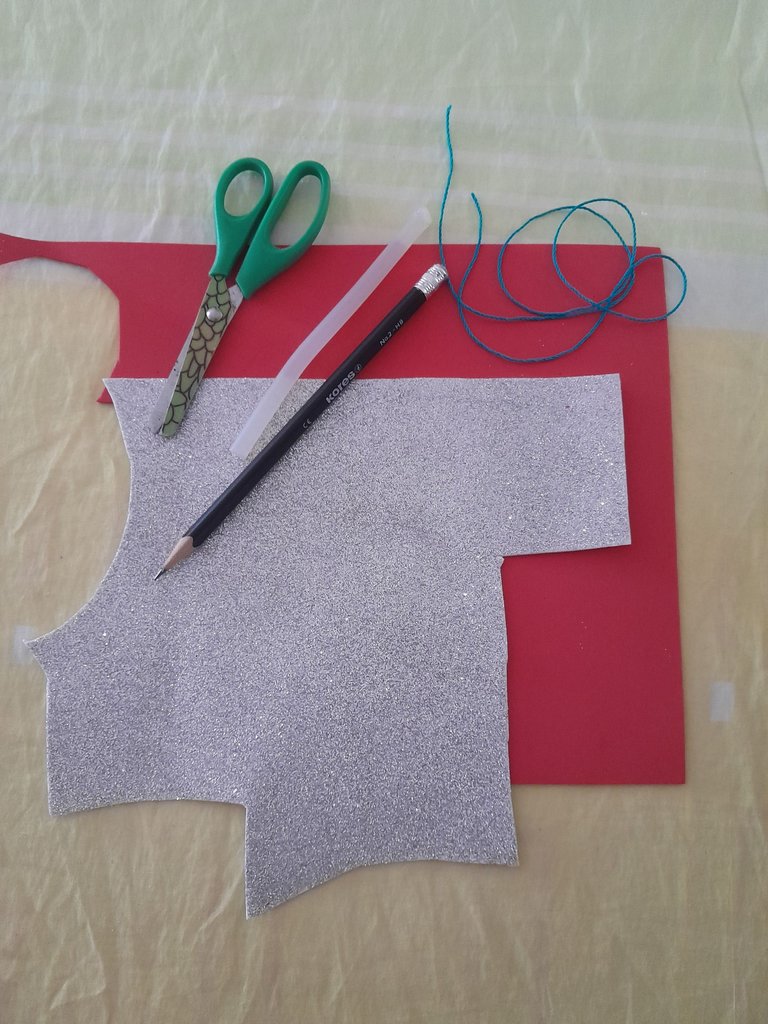
Materiales:
- foami, rojo y plateado.
- Cuerda o naylon.
- 1 barra de silicon.
- Lápiz.
- Tijera.
English:
Materials:
- foami, red and silver.
- Rope or naylon.
- 1 silicon stick.
- Pencil.
- Scissors.

Español:
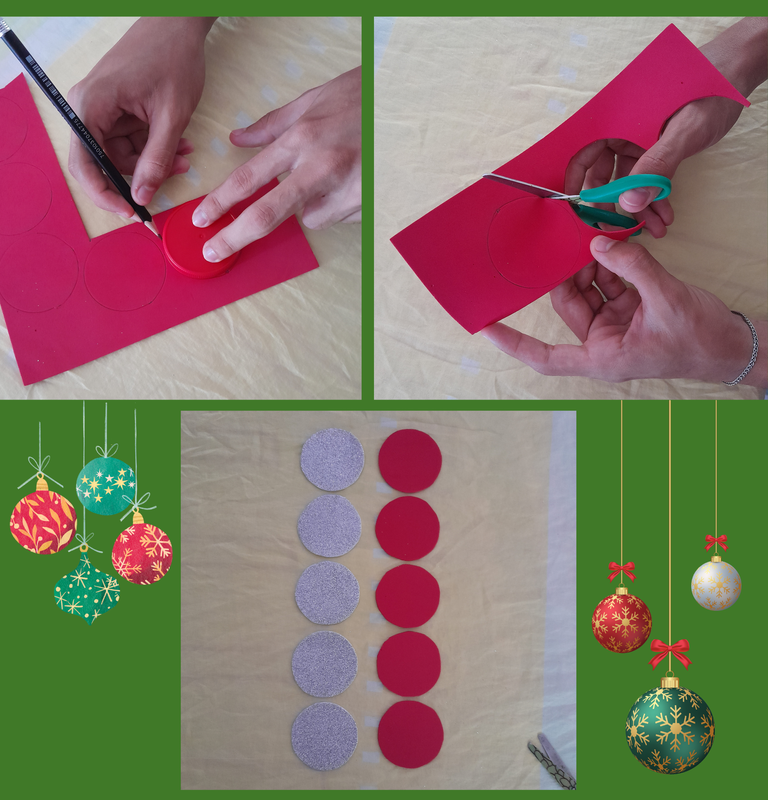
Paso 1:
- Con la ayuda de una tapa de 5 cm de diámetro, marcamos con el lápiz en el foami 10 círculos, 5 rojos y 5 plateados, luego lo recortamos con la tijera.
English:
Step 1:
- With the help of a 5 cm diameter lid, we mark 10 circles on the foami with a pencil, 5 red and 5 silver circles, then we cut them out with the scissors.
Español:
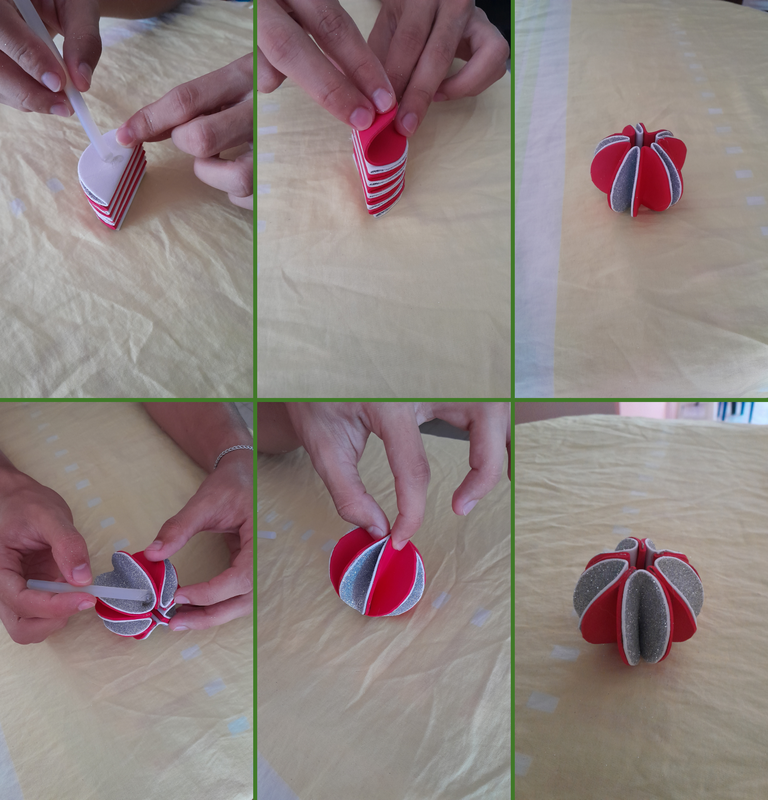
Paso 2:
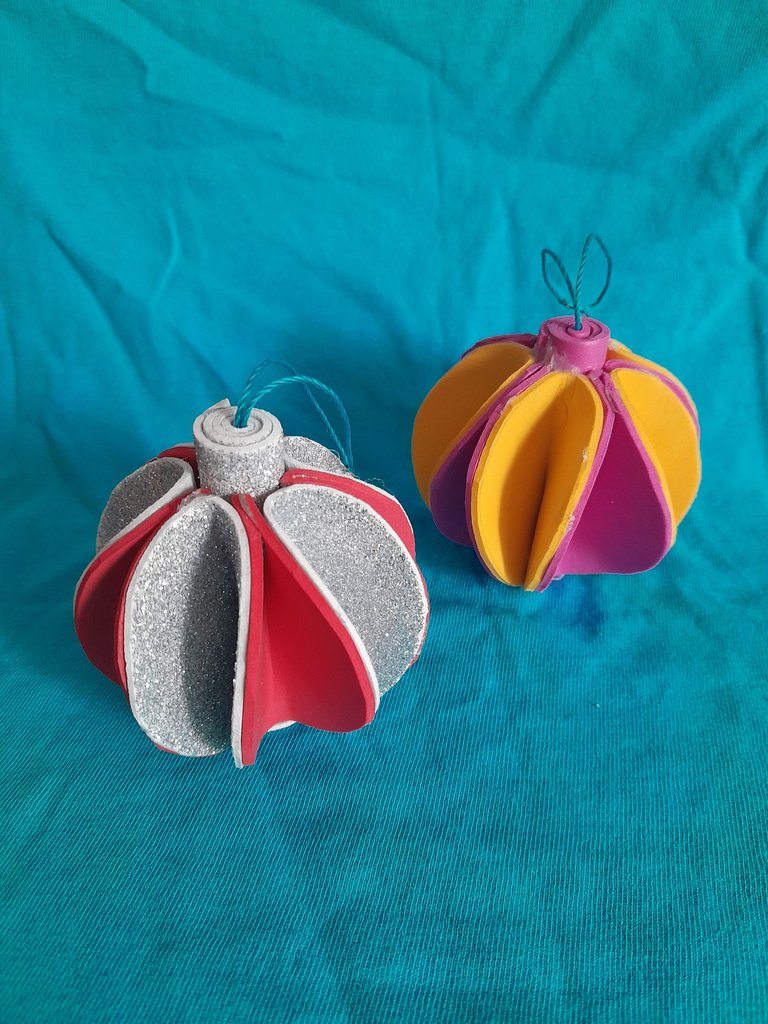
- Aquí tomamos los círculos y vamos doblando en 2 y pegando con silicon caliente uno encima del otro, intercalando los dos colores hasta pegar los 10 círculos, terminando de pegar el ultimo con el primero quedando en forma de esfera. Continuo pegando en la punta hacia dentro del dobles, uno arriba y el otro abajo, quedando de la manera que muestro en la foto.
English:
Step 2:
- Here we take the circles and we fold them in 2 and glue with hot silicone one on top of the other, alternating the two colors until we glue the 10 circles, finishing gluing the last one with the first one in the shape of a sphere. I continue gluing in the tip towards the inside of the doubles, one on top and the other on the bottom, remaining the way I show in the photo.
Español:
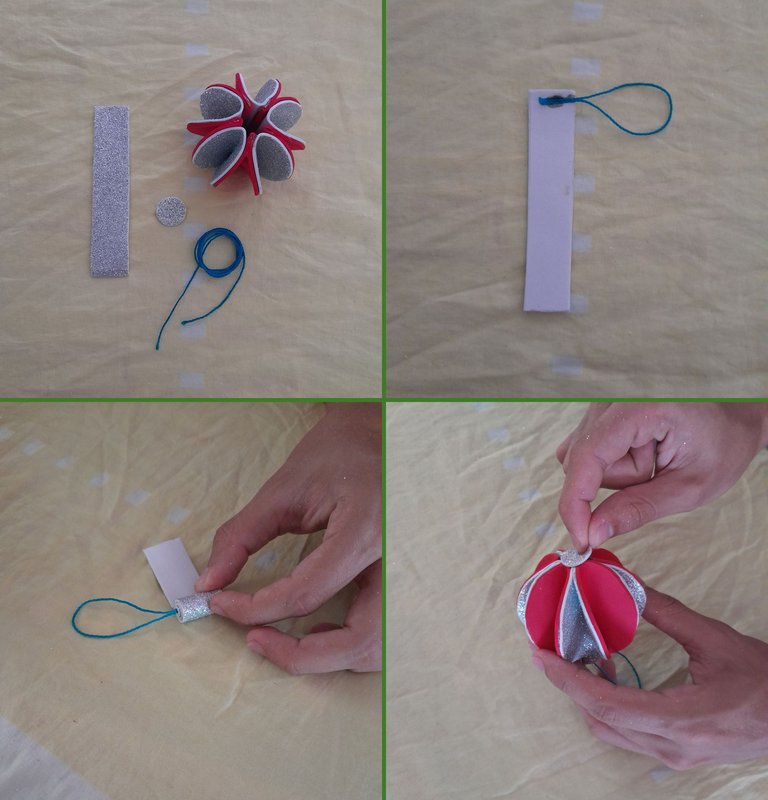
Paso 3:
- Ahora procedo a recortar 1 tira de foami plateado de 2 x 9 cm, y 1 circulo pequeño, luego en la tira de foami pego un pedacito de cuerda en la punta y voy enrollando poco a poco hasta el final de la tira, donde pegamos en el espacio del centro de la bola 1cm hacia dentro con el silicon y el otro centímetro queda hacia afuera con la cuerda, luego pegamos el circulo en la parte de abajo, terminando así nuestra bella bola de navidad para decorar.
English:
Step 3:
- Now I proceed to cut 1 strip of silver foami of 2 x 9 cm, and 1 small circle, then in the strip of foami I stick a little piece of string at the tip and I roll little by little until the end of the strip, where we stick in the space in the center of the ball 1cm inward with the silicone and the other centimeter is out with the string, then we stick the circle at the bottom, thus finishing our beautiful Christmas ball to decorate.
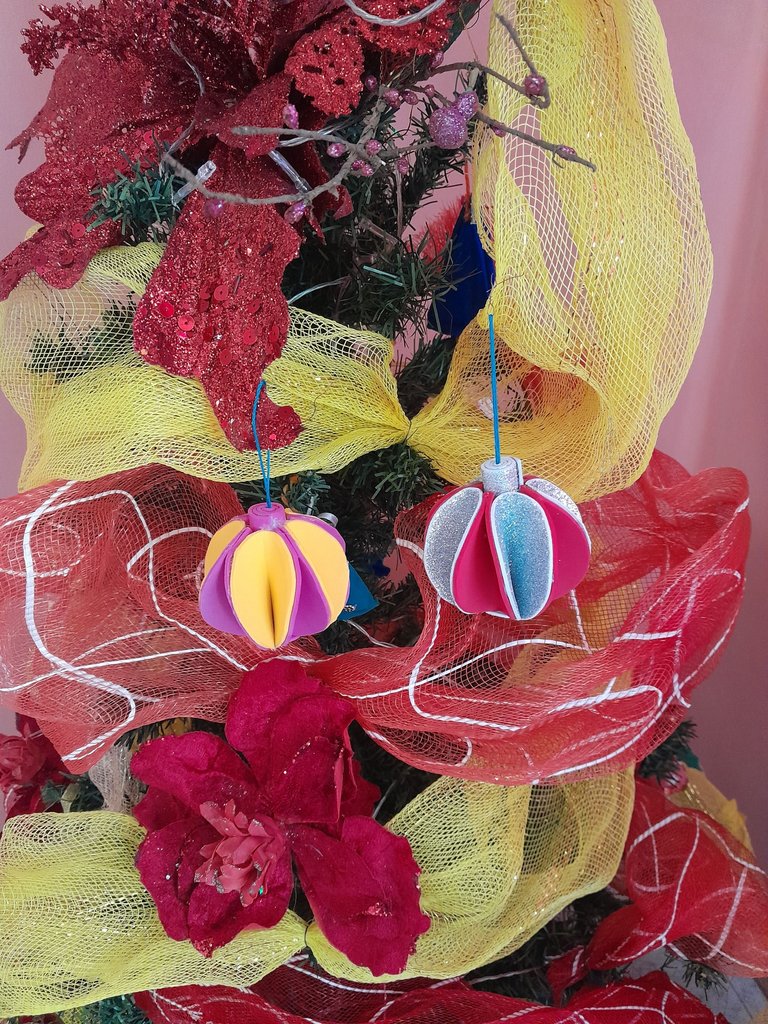
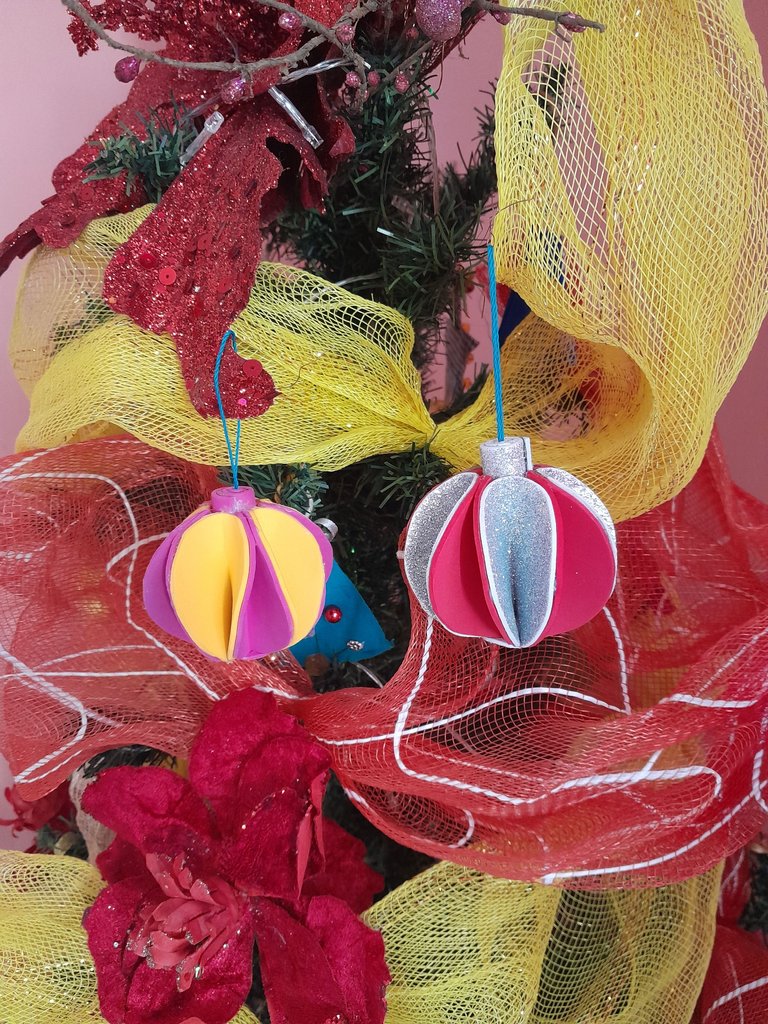
Mi resultado final, espero les haya gustado, que pasen un excelente dia.
My final result, I hope you liked it, have a great day.

Todas las fotos son de mi autoría y editadas con Canva.
All the photos were taken by me and edited with Canva.
!DIY
!discovery 27
This post was shared and voted inside the discord by the curators team of discovery-it
Join our Community and follow our Curation Trail
Discovery-it is also a Witness, vote for us here
Delegate to us for passive income. Check our 80% fee-back Program
You can query your personal balance by
!DIYSTATSWOW! It is so beautiful. Impressive design. Great job! Keep it up!