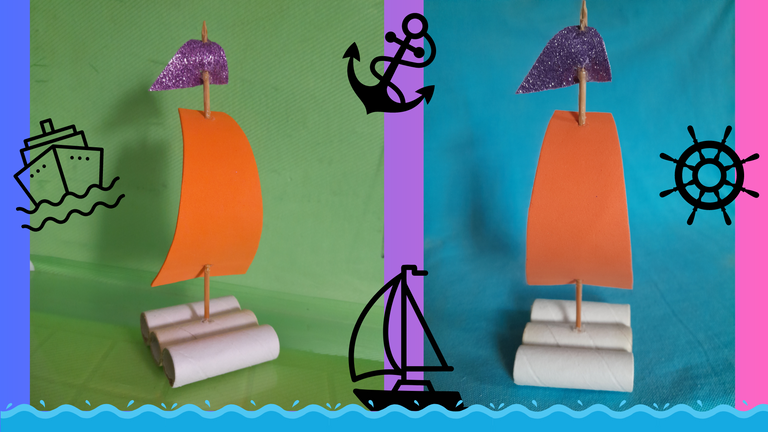
Welcome to my blog, happy and blessed day my creative people of Hive diy, I hope you are well full of life and health. Today I am pleased to share with you a cute little boat with very simple to make and with little material, this little boat apart from decorating any empty space, children will love to play.
Español:
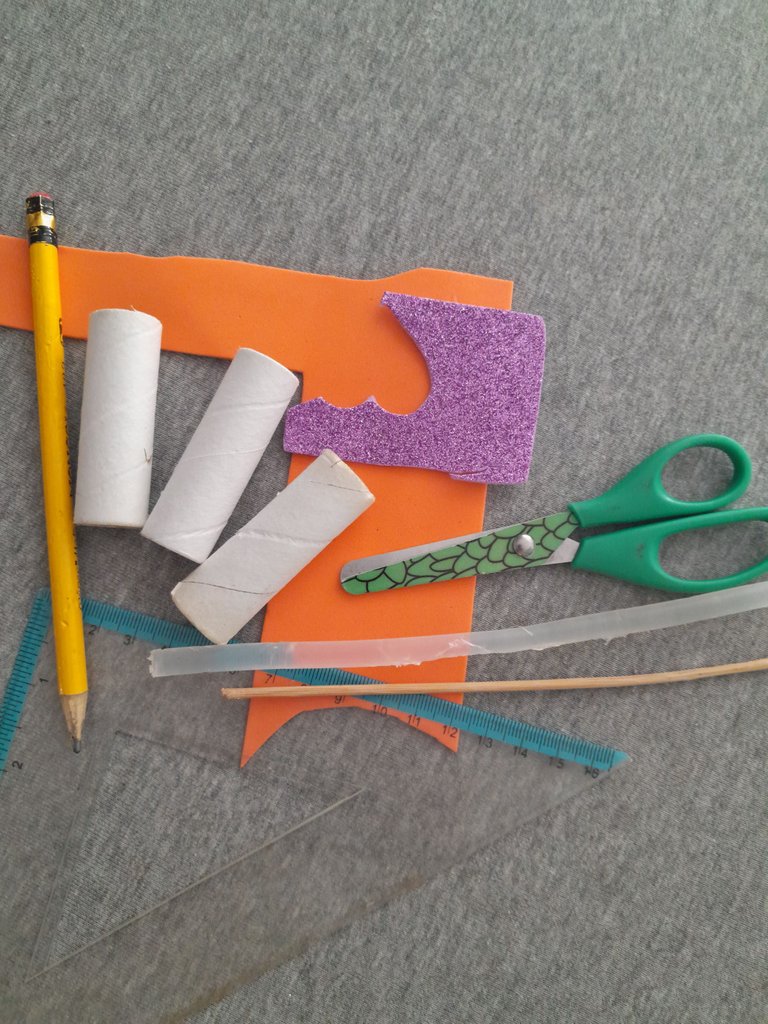
Materiales:
- Foami color que prefieras.
- 3 tubitos de cartón, de los rollos de hilos de coser.
- 1 palillo de altura.
- Tijera.
- Silicon.
- Regla.
- Lápiz.
English:
Materials:
- Foami in the color of your choice.
- 3 cardboard tubes, from the rolls of sewing threads.
- 1 stick of height.
- Scissors.
- Silicone.
- Ruler.
- Pencil.

Español:
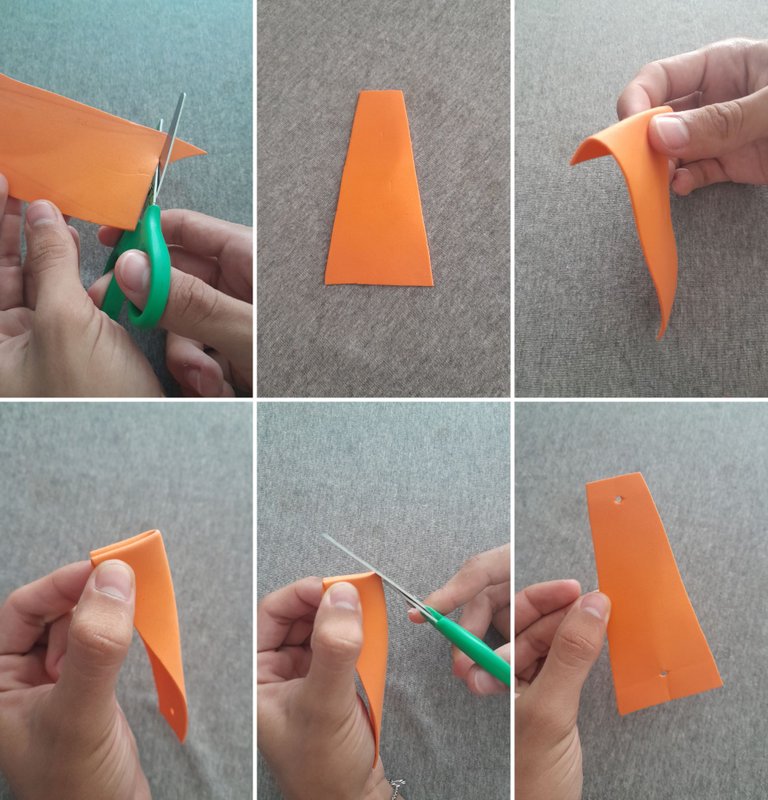
Paso 1:
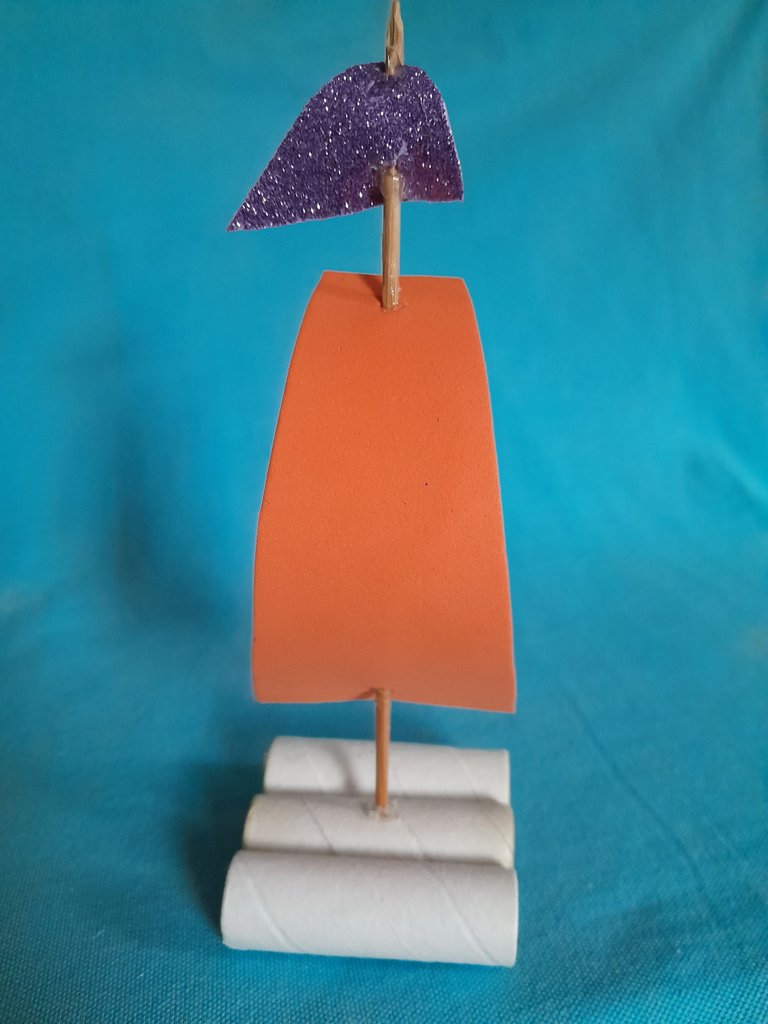
- Marco y recorto en el foami naranjado una figura en forma de triangulo con 4 lados, con 13 cm de altura, 4 cm en la parte superior, y 7 cm en la parte inferior.
- Luego hacemos un dobles a la altura de 1 cm y medio en ambos lados arriba y abajo, después realizo otro dobles quedando a la mitad del primer dobles, y así con mucho cuidado hacemos un pequeño corte con la tijera en la punta del dobles, haciendo dos huecos tomando en cuenta el grosor del palillo de altura.
English:
Step 1:
- I mark and cut in the orange foami a figure in the shape of a triangle with 4 sides, with 13 cm of height, 4 cm in the upper part, and 7 cm in the lower part.
- Then we make a double at the height of 1 cm and a half on both sides at the top and bottom, then I make another double at the middle of the first double, and so carefully make a small cut with the scissors at the tip of the double, making two holes taking into account the thickness of the height stick.
Español:
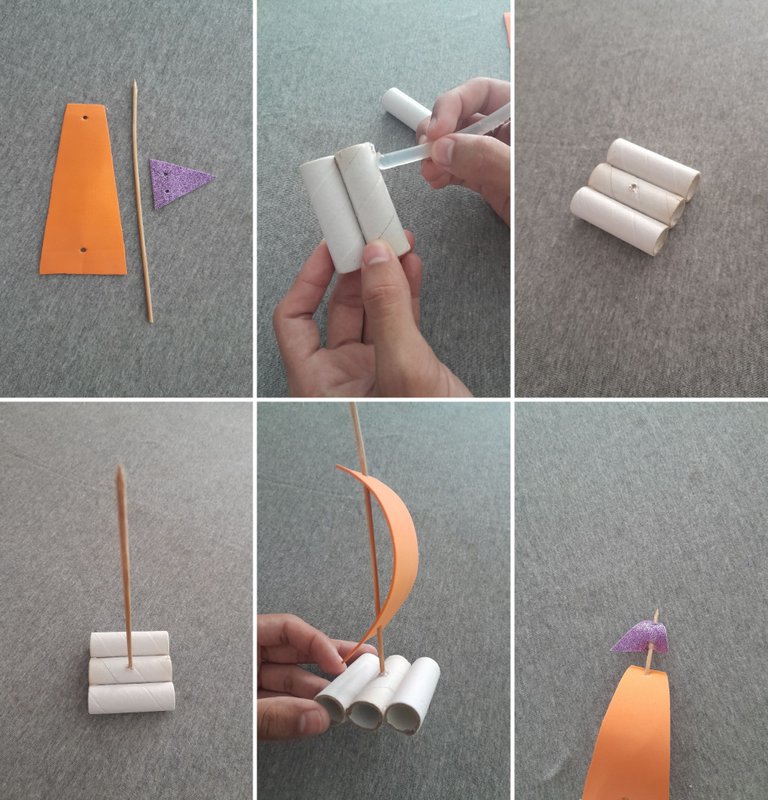
Paso 2:
- Aquí continuo dibujando y recortando en un pedacito de foami morado un triangulo más pequeño con la base de 4 cm y los lados de 3 cm, luego con el mismo procedimiento anterior realizo los 2 huecos, primero haciendo el dobles para uno luego para el otro.
- Ahora procedo a pegar con el silicon caliente los 3 tubitos de cartón uno al lado del otro, después abrimos un agujero en el centro del tubo del medio, lo podemos hacer con lo que se nos haga mas fácil, puede ser con la ayuda de un clavito o lo que tenga a mano,
es ese agujero colocamos un poquito de silicon e introducimos el palillo de altura recortado anteriormente con 16 cm de altura. - Introducimos el palillo en los 2 hueco del foami anaranjado, colocamos un poquito de silicon para que quede fijo, después introducimos el otro foami a 2 cm mas arriba. Obteniendo así un hermoso barco.
English:
Step 2:
- Here I continue drawing and cutting a smaller triangle with a base of 4 cm and sides of 3 cm in a piece of purple foami, then with the same procedure I make the 2 holes, first making the double for one and then for the other.
- Now I proceed to glue with hot silicone the 3 cardboard tubes side by side, then open a hole in the center of the middle tube, we can do it with whatever makes it easier, it can be with the help of a nail or whatever you have at hand,
In this hole we place a little bit of silicone and introduce the stick of height previously cut with 16 cm of height. - Insert the toothpick in the 2 holes of the orange foami, put a little bit of silicone to fix it, then insert the other foami 2 cm higher. Thus obtaining a beautiful boat.
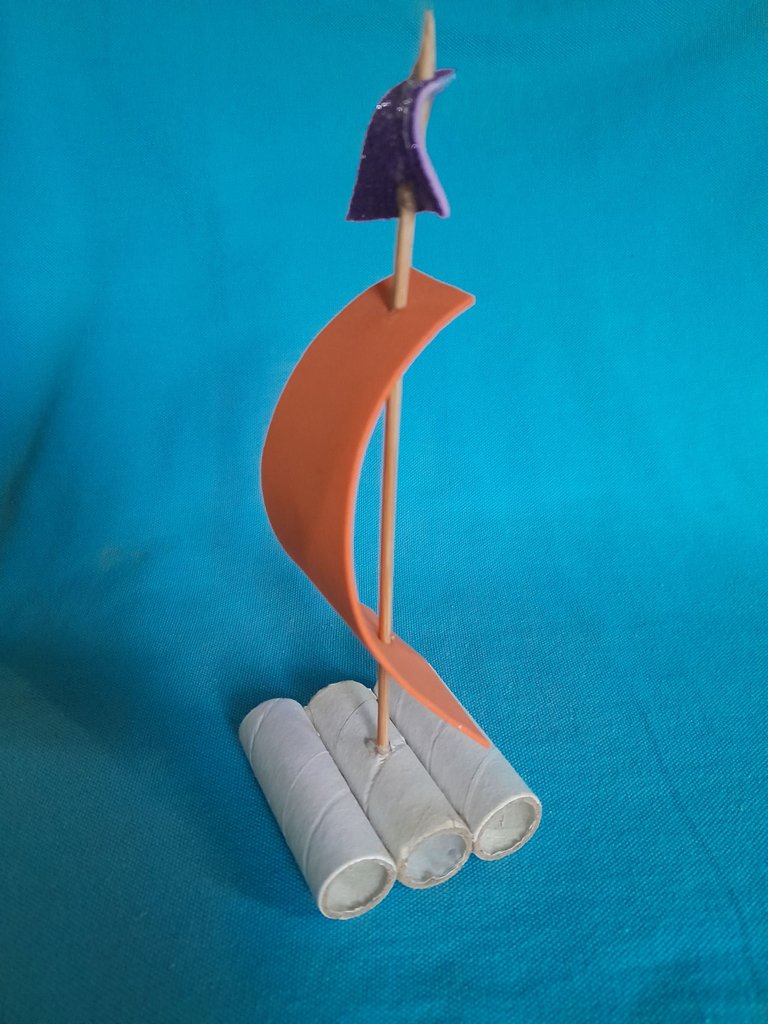
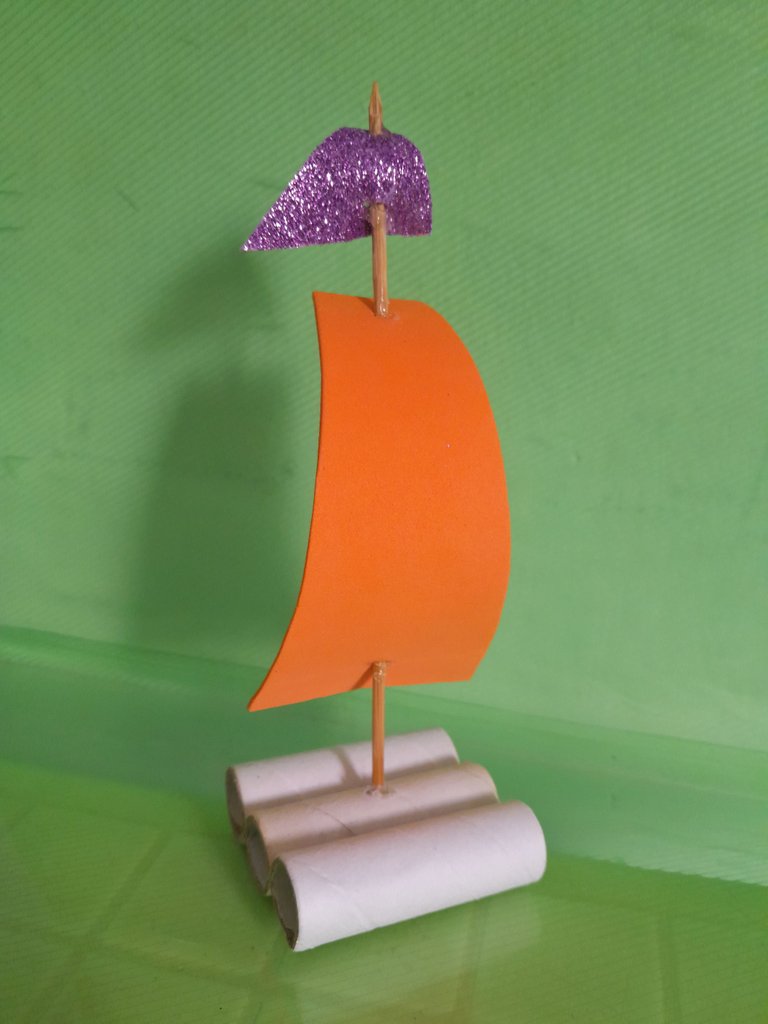
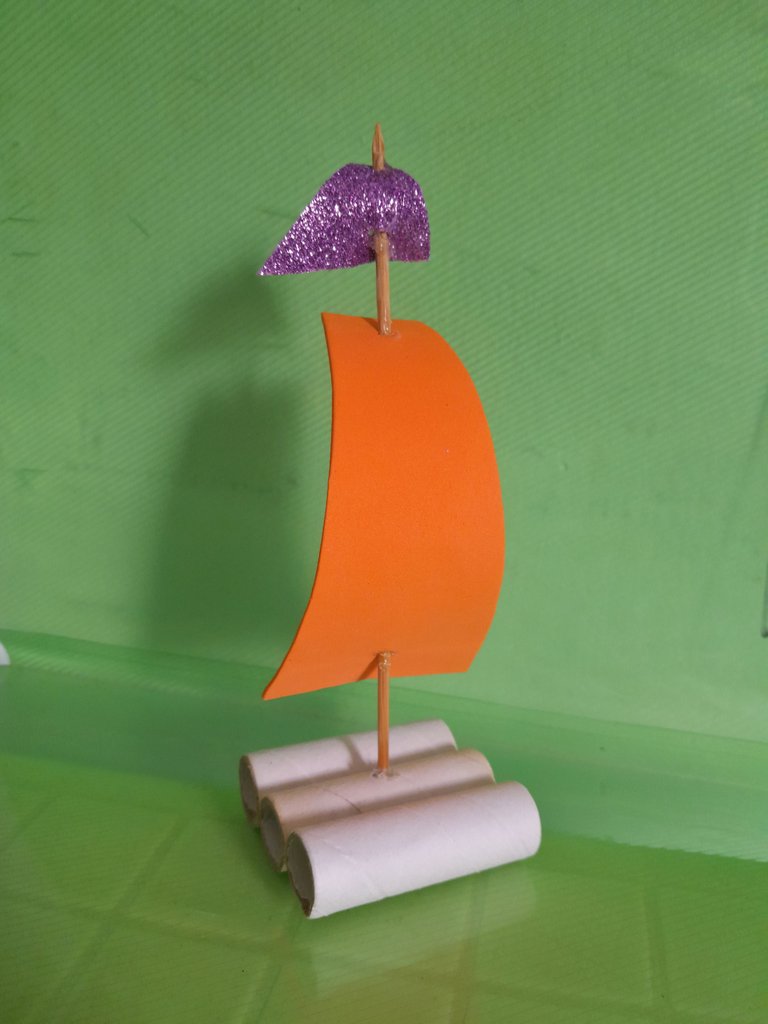
Aquí les dejo el resultado final, gracias por visitar mi blog.
Here is the final result, thanks for visiting my blog.
Todas las fotos son de mi autoria y editadas con Canva.
Traductor: DeepL Traslate.
All photos are my own and edited with Canva. Translator: DeepL Traslate.

Traductor: DeepL Traslate.
All photos are my own and edited with Canva. Translator: DeepL Traslate.