Greetings friends who love handicrafts! Welcome once again to my Bricolaje DC workshop. This time I join the InLeo's initiative and I would like to make a papercut flower fan. Join me to see the step by step of this beautiful work.
Saludos amigos amantes de las artes manuales! Sean bienvenidos una vez más a mi taller Bricolaje DC. En esta oportunidad me sumo a la iniciativa de InLeo y me gustaría realizar un abanico de flor en papercut. Acompáñenme a ver el paso a paso de este bonito trabajo.
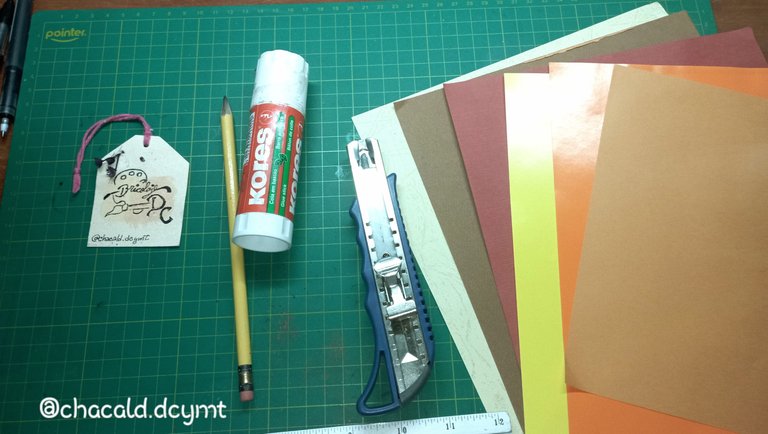
Materials:
Colored paper: yellow, orange, brown, green.
Glue stick
Scissors
Cutter
Aluminum ruler
Cutting board
Pencil
2 thin height sticks
Materiales:
Papel de colores: amarillo, naranja, marron, verde
Pegamento en barra
Tijera
Cutter
Regla de aluminio
Tabla de corte
Lápiz
2 palitos de altura finos
Elaboration:
We start by cutting the paper in stripes to make a gradient. The base will be yellow paper, I used the size of a legal size sheet.
Elaboración:
Comenzamos cortando el papel por franjas para hacer un degradado. La base será el papel amarillo, yo utilice el tamaño de una hoja tipo oficio.
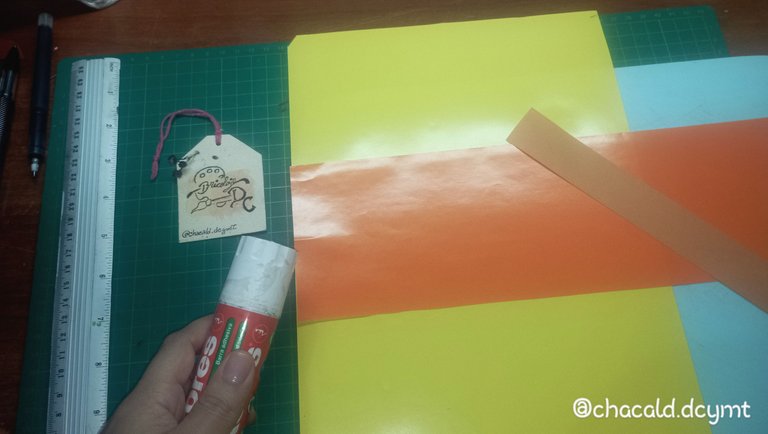
Then cut a strip of orange paper that runs vertically through the middle of the yellow base. And then a strip of darker orange paper that will be located in the middle of the bright orange strip.
We glue with enough glue stick, especially covering the corners of each strip of paper well.
Luego corte una franja de papel anaranjado que atraviesa de forma vertical la mitad de la base amarilla. Y luego una franja de papel naranja más oscuro que estará ubicada en la mitad de la franja naranja brillante.
Pegamos con suficiente pegamento de barra, sobre todo cubriendo bien las esquinas de cada franja de papel.

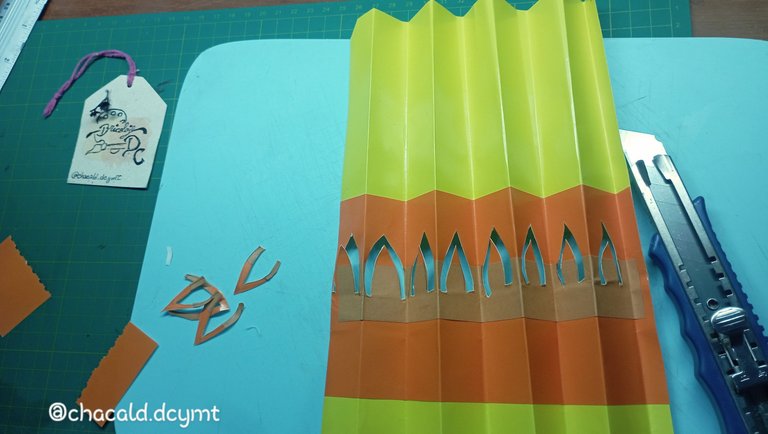
Once we have the paper glued, we are going to make the folds that will give the fan shape. We try to leave a tab to join our fan.
Una vez que tenemos el papel pegado, vamos a hacer los dobles que le darán la forma de abanico. Tratamos de dejar una pestaña para unir nuestro abanico.
 |  |
|---|
Then we open the paper again and we will have the lines of the doubles. On each strip of the fan we will draw a petal with the pencil. Then we will cut it with the cutter.
Luego abrimos nuevamente el papel y ya tendremos las líneas del dobles. En cada franja del abanico dibujaremos con el lápiz un pétalo. Luego lo cortaremos con el cutter.

To make the cut visible and give us the effect we need to open the fan, we will use 2 types of cut in the Papercut technique:
Cut silhouette: which consists of cutting the paper so that the figure is marked, in this case the petal of the flower on the orange paper.
Para que el corte sea visible y nos de el efecto que necesitamos al abrir el abanico, vamos a utilizar 2 tipos de corte en la técnica de Papercut:
Silueta calada: que consiste en cortar el papel para que quede la figura marcada, en este caso el petalo de la flor en el papel naranja.
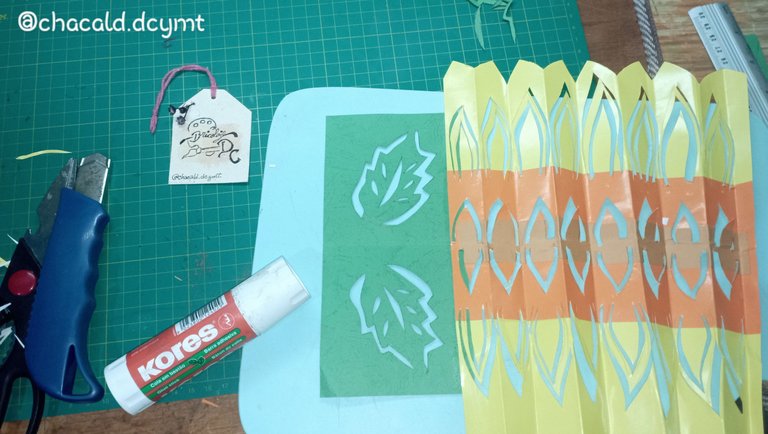
Cutting in positive and negative: this is achieved with an internal cut that marks the figure and an external cut that gives a negative space to the figure to be formed. In this case the petal on the yellow paper.
Corte en positivo y negativo: esto se logra con un corte interno que marca la figura y un corte externo que le da un espacio negativo a la figura para que se forme. En este caso el pétalo en el papel amarillo.
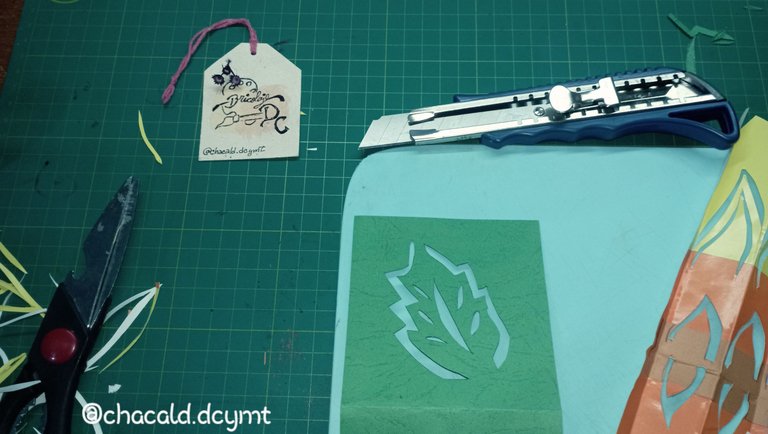
To finish closing the flower and make the fan complete, we need to make a couple of leaves at the bottom. We take a piece of green paper and we are going to make negative leaves on both sides.
Para terminas de cerrar la flor y que se arme completo el abanico, necesitamos hacer un par de hojas en la parte inferior. Tomamos un trozo de papel de color verde y vamos a hacer en negativo unas hojas en ambos lados.
Glue the green paper with enough glue stick and fold the same as the yellow and orange part of the flower.
Pegamos el papel verde con suficiente pegamento en barra y doblamos igual que la parte amarilla y naranja de la flor.
On the final edge of the green paper, we are going to glue the height sticks to be the fastener of our fan.
En el borde final del papel verde, vamos a pegar los palitos de altura para que sean el sujetador de nuestro abanico.

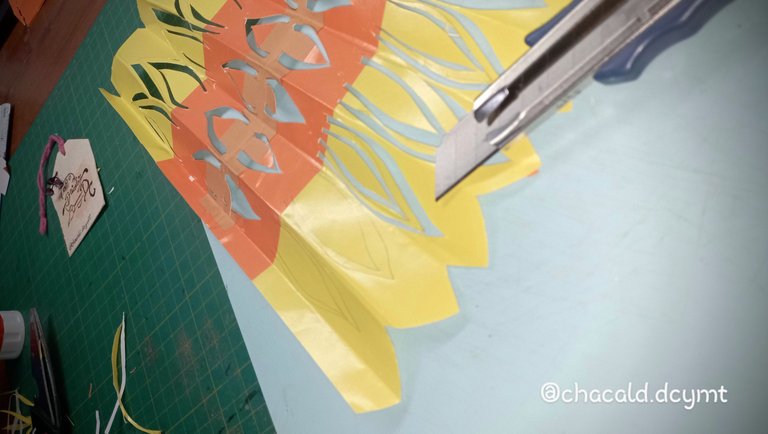
Once we finish making the cuts of our whole design, in this case I made 2 rows of petals, then we will proceed and glue the edges of the fan so that the flower part is ready.
Una vez que terminamos de hacer los cortes de todo nuestro diseño, en este caso hice 2 filas de pétalos, entonces vamos a proceder y pegamos los bordes del abanico para que la parte de la flor quede lista.
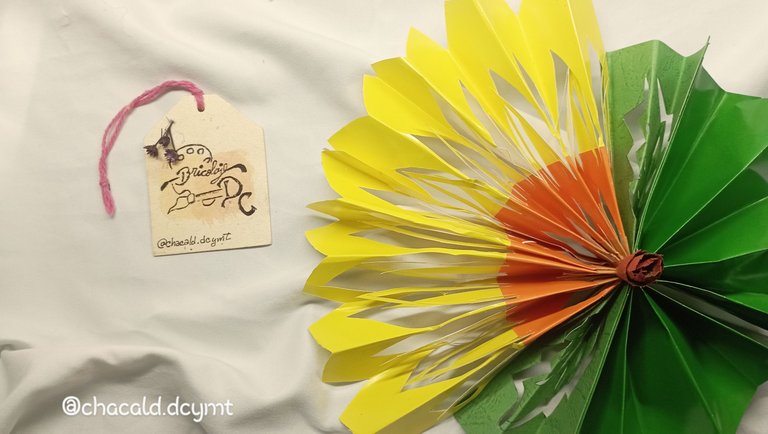
And this is how our papercut flower fan looks like. A delicate, elegant and very fun to make. I invite you to follow this step by step and have your own fan. See you next time. Bye!
Y así es como queda nuestro abanico de flor en papercut. Un trabajo delicado, elegante y muy divertido de realizar. Los invito a seguir este paso a paso y tener su propio abanico. Nos vemos en una próxima oportunidad. Chao!

Original content by the author.
Resources: App: Canva / Giphy / Inshot
📷 Redmi 10 Smartphone
Translation done with Deepl.com
✿ All Rights Reserved || © @chacald.dcymt 2024✿
💌 Discord: chacald.dcymt#3549
X: @chacald1
Reddit: chacald
_
Contenido original del autor.
Recursos: App: Canva / Giphy / Inshot
📷 Redmi 10 Smartphone
Traducido con Deepl.com
✿ Todos los Derechos Reservados || © @chacald.dcymt 2024✿
💌 Discord: chacald.dcymt#3549
X: @chacald1
Reddit: chacald
Posted Using InLeo Alpha
Oh amiga qué lindo quedó el abanico, me gusta mucho el diseño y los colores que empleaste 🤩🤗
Muchas gracias... que alegría me da que te guste mi trabajo. Me divertí mucho en este proceso creativo y quedó perfecto para refrescarme en las tardes calurosas.... gracias por el apoyo.
!HUG
I sent 1.0 HUG on behalf of @chacald.dcymt.
(1/3)
Muy bonito abanico, tiene unos colores preciosos, éxito en el concurso. Feliz tarde 🌹🌷🌻🪷🪻💐🥀🌺🌸💮🌼☘️
Very beautiful fan, it has beautiful colors, success in the contest. Happy afternoon 🌹🌷🌻🪷🪻💐🥀🌺🌸💮🌼☘️
Me alegra que te guste amiga...un abrazo infinito 😘💜
Gracias por apoyar mi publicación
🌹
Gracias por el apoyo 😊👍🏽
gracias por el apoyo 💕😘
Top hand crafted work @chacald.dcymt!
!discovery 35
!VSC
@jlinaresp has sent VSC to @chacald.dcymt
This post was rewarded with 0.1 VSC to support your work.
Join our photography communityVisual Shots
Check here to view or trade VSC Tokens
Be part of our Curation Trail
@jlinaresp ha enviado VSC a @chacald.dcymt
Éste post fue recompensado con 0.1 VSC para apoyar tu trabajo.
Únete a nuestra comunidad de fotografía Visual Shots
Consulte aquí para ver o intercambiar VSC Tokens
Se parte de nuestro Trail de Curación
thank you very much friend.... thank you for your support...
This post was shared and voted inside the discord by the curators team of discovery-it
Join our Community and follow our Curation Trail
Discovery-it is also a Witness, vote for us here
Delegate to us for passive income. Check our 80% fee-back Program
thanks for your support
Préstame ese abanico para refrescarme del calor tan grande que hace aquí. Un abanico muy bonito con unos colores muy hermosos. Me gustó mucho!
🤭🤭... Te voy a mandar uno. La verdad es muy sencillo de realizar y puede ser un proyecto ideal para trabajar con los niños.
Gracias por apoyar mi publicación hermosa...feliz fin de semana.