¡Hola querida comunidad de Hive! Cuando llega la fecha del cumpleaños de nuestros familiares o amigos queremos regalarles un detalle especial, y algo que no puede faltar es una tarjeta para felicitarlos. Hoy les mostraré un paso a paso de una tarjeta original para sorprender a esa persona especial. ¡Comencemos!
Hello dear Hive community! When the birthday of our family or friends arrives, we want to give them a special detail, and something that cannot be missing is a card to congratulate them. Today I will show you a step by step of an original card to surprise that special person. Let's get started!
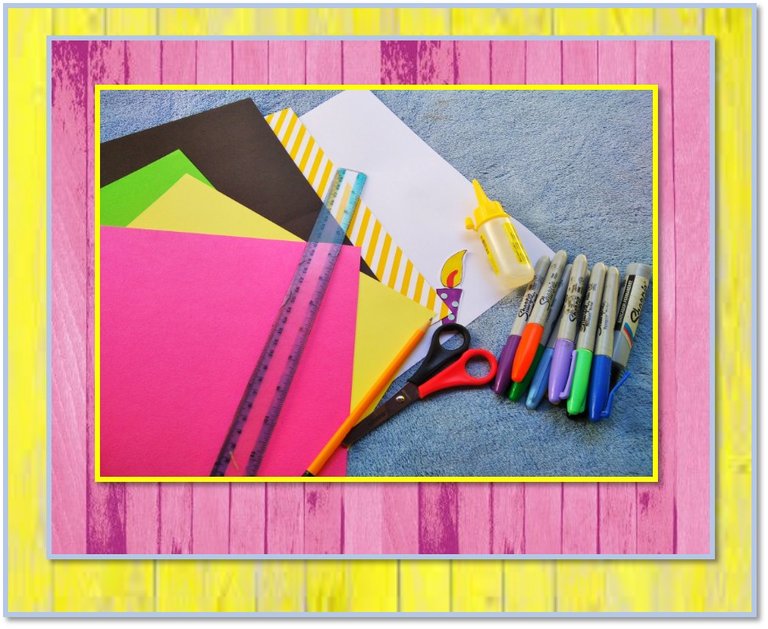
Materiales a utilizar:
• 2 hojas blanca
• Cartulinas (negra, verde, amarilla, fucsia, de rayas amarillas)
• Aplique de vela
• Lápiz
• Marcadores
• Tijera
• Silicon
• Regla
Materials to use:
• 2 white sheets
• Cardboards (black, green, yellow, fuchsia, yellow and white striped)
• Candle sticker
• Pencil
• Markers
• Scissor
• Silicon
• Rule
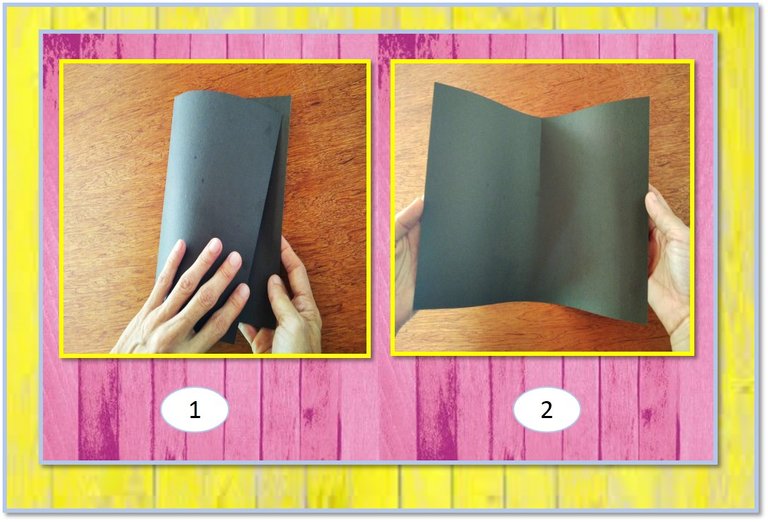
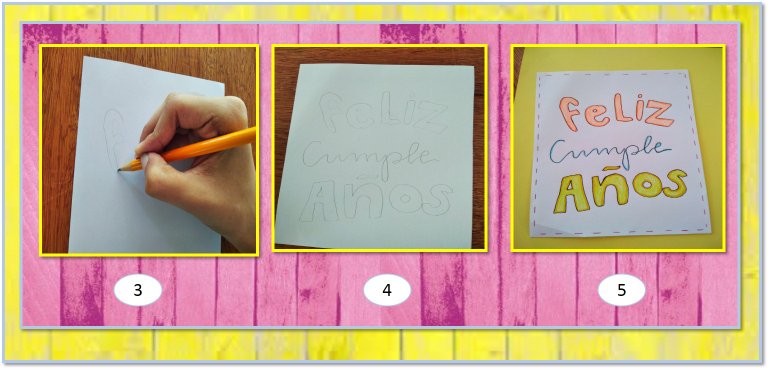
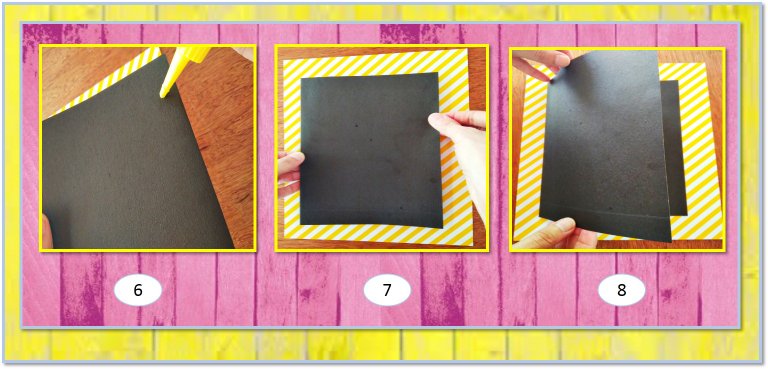
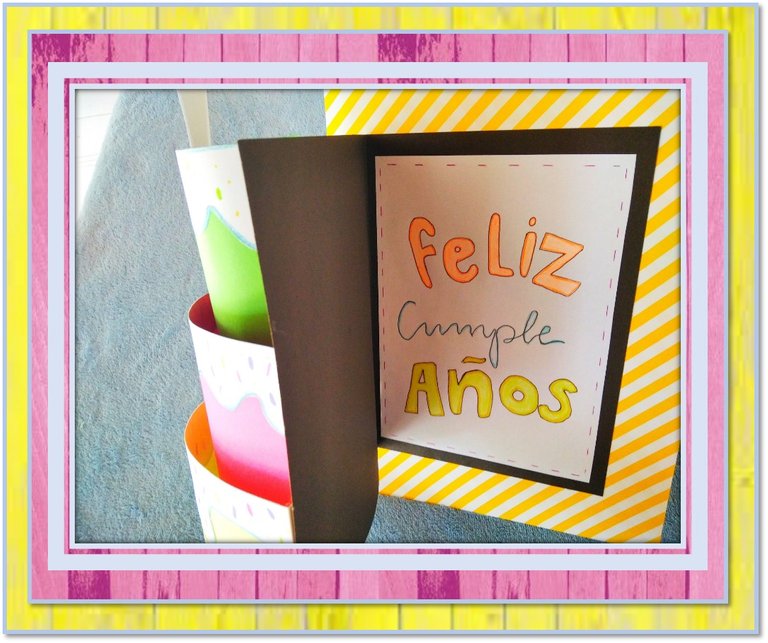
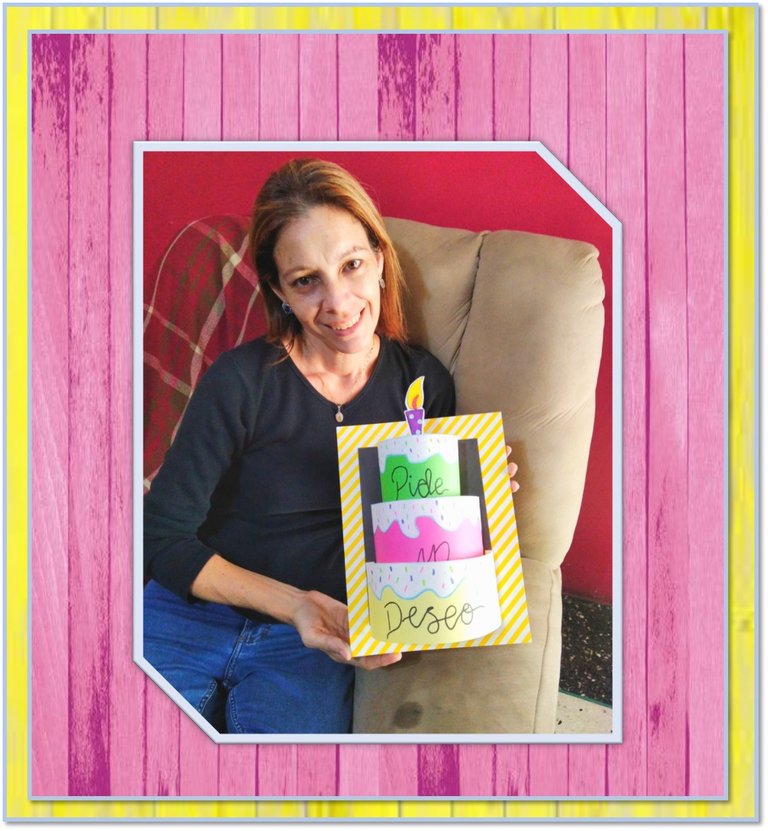
Paso 1:
Doblamos la cartulina negra a la mitad. Luego en una hoja blanca (14x19cm) dibujamos con marcadores la frase feliz cumpleaños.
Step 1:
We fold the black cardboard in half. Then on a white sheet (14x19cm) we draw the phrase Happy Birthday with markers.
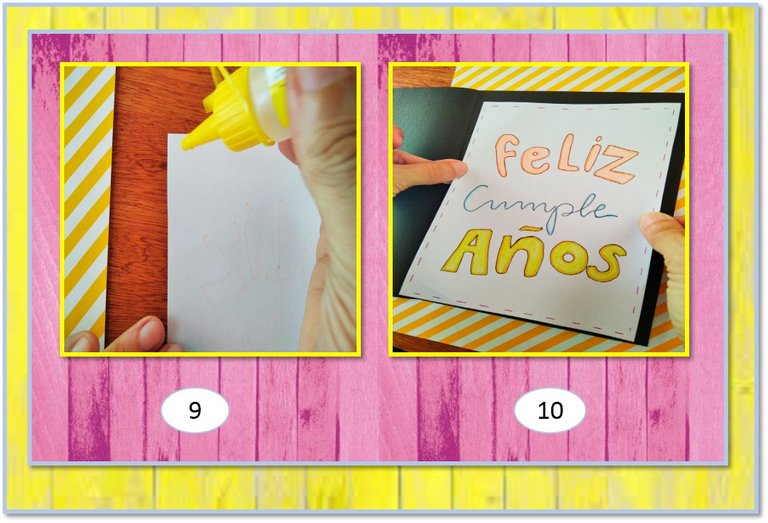
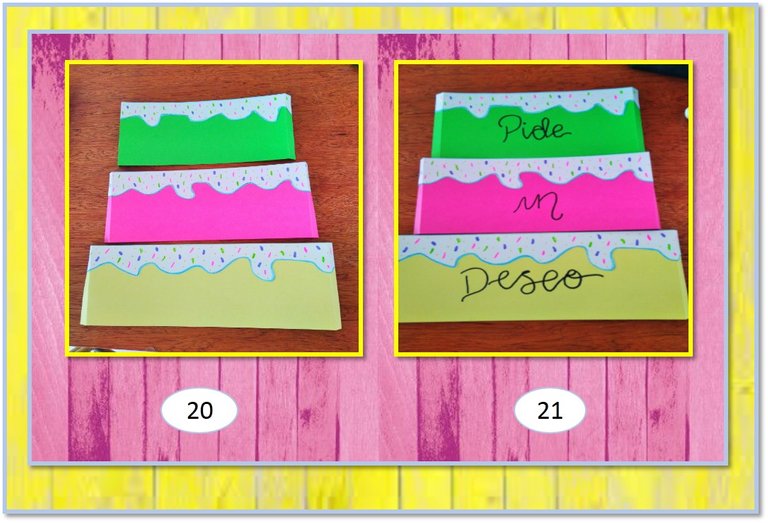
Paso 2:
En el centro de la cartulina de rayas amarillas y blancas pegamos la cartulina negra, que hemos doblado. Seguidamente pegamos la hoja con la frase Feliz Cumpleaños. Luego cortamos rectángulos de color verde (23x10cm), fucsia (26 x10cm) y amarillo (29 x10cm).
Step 2:
In the center of the yellow and white striped cardboard we glue the black cardboard, which we have folded. Then we paste the sheet with the phrase Happy Birthday. Then we cut green (23x10cm), fuchsia (26 x10cm) and yellow (29 x10cm) rectangles.
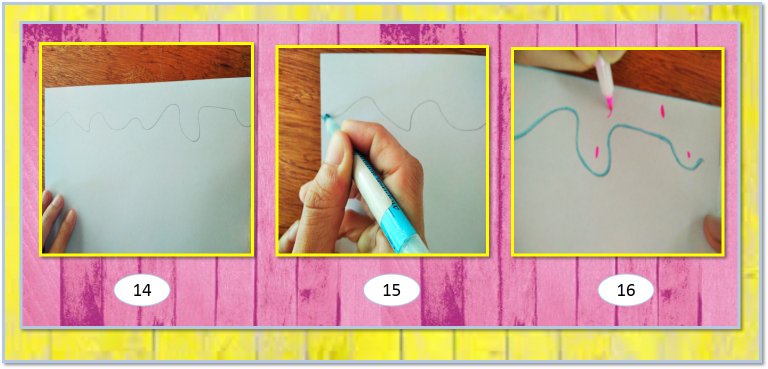
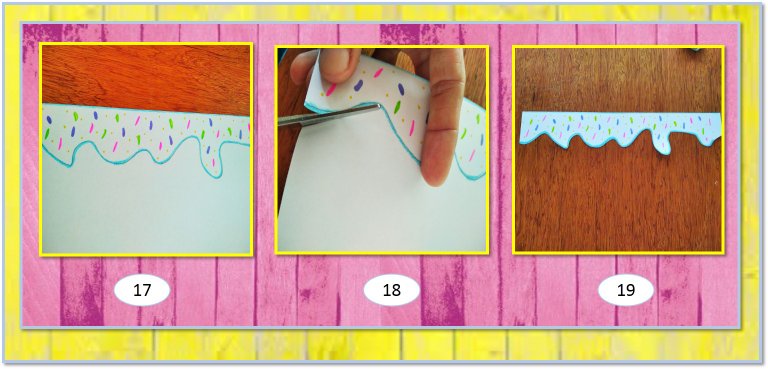
Paso 3:
En una hoja blanca dibujamos la que será la crema, luego la recortamos y pintamos el confeti con marcadores de colores y pegamos a cada uno de los rectángulos de cartulinas. Seguidamente, escribimos en la parte central de cada uno la frase “Pide un deseo”.
Step 3:
On a white sheet we draw what will be the cream, then we cut it out and paint the confetti with colored markers and glue to each of the cardboard rectangles. Next, we write in the central part of each one the phrase "Make a wish”.
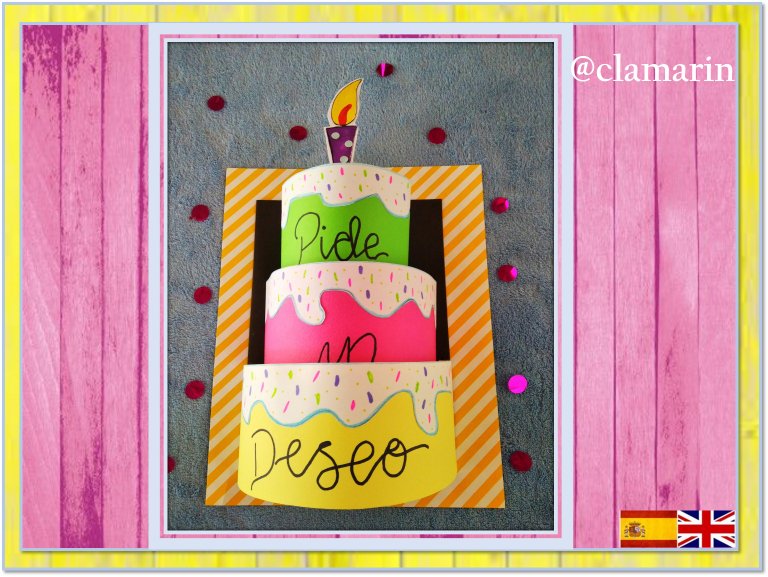
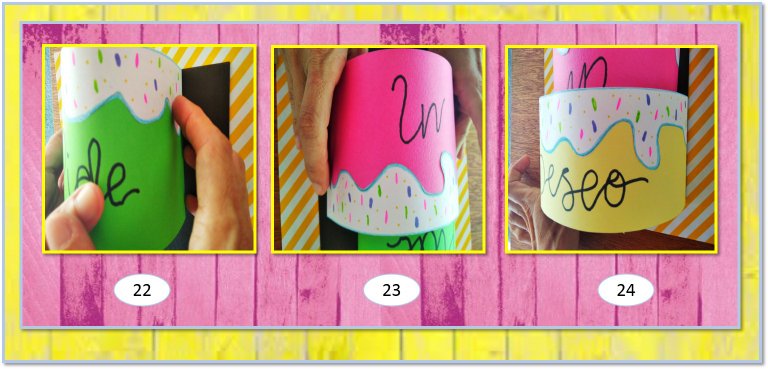
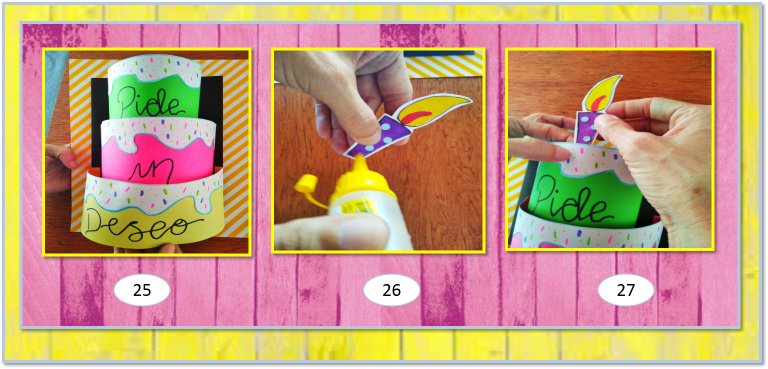
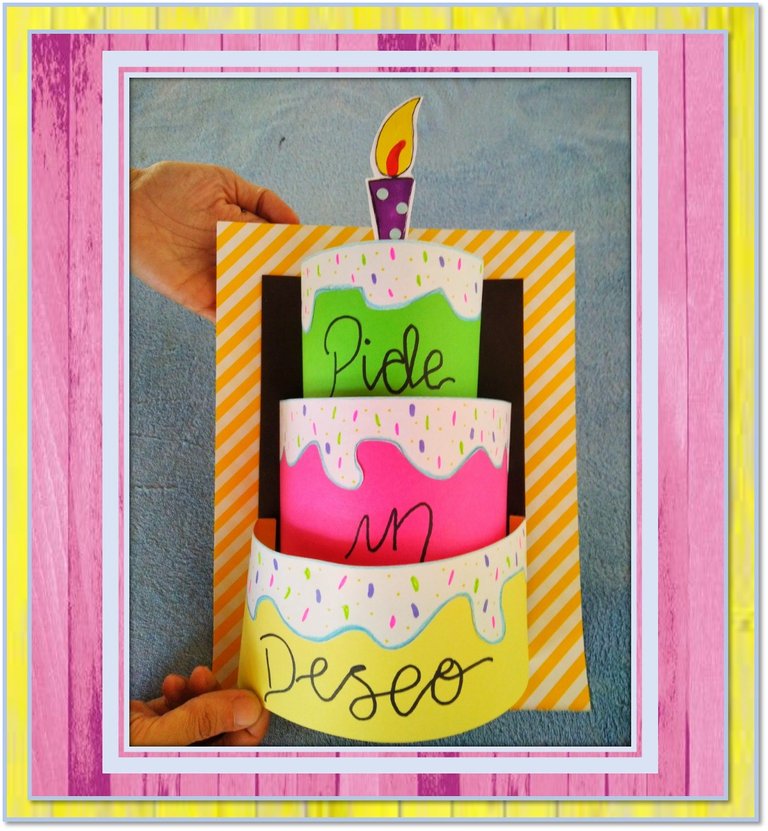
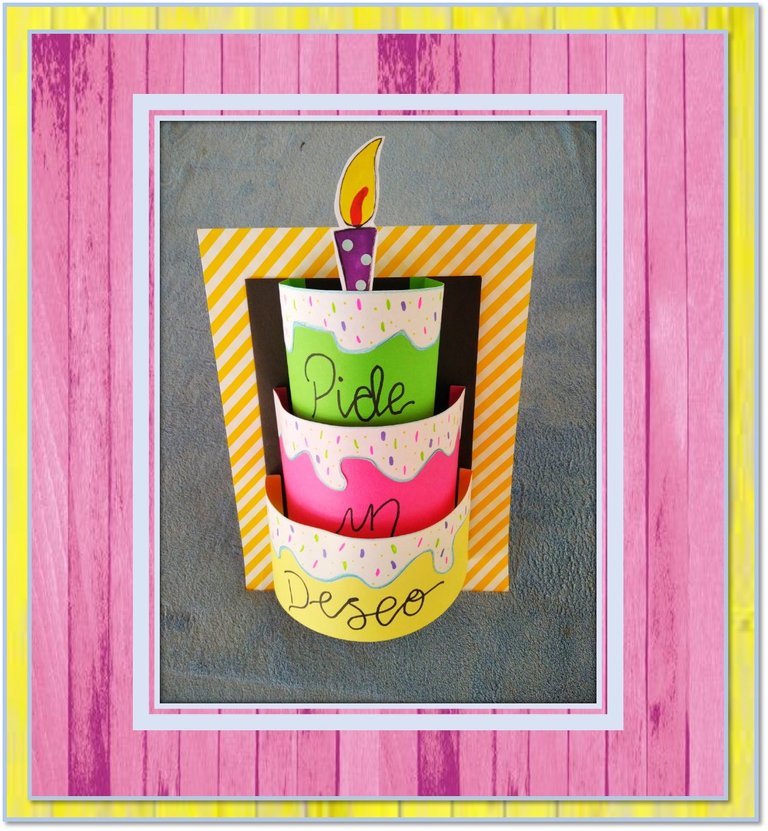
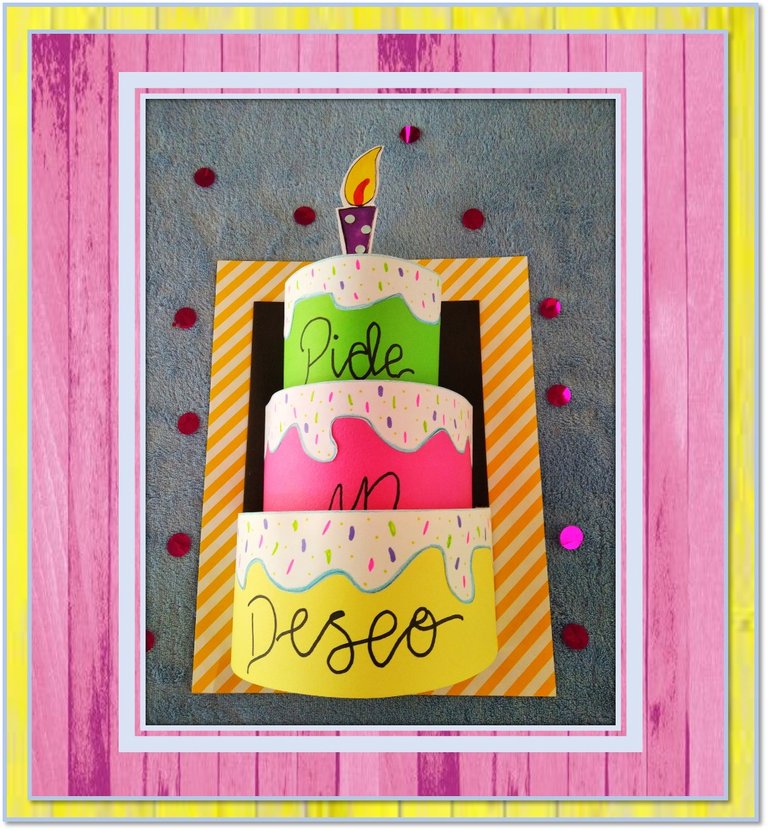
Paso 4:
Ahora, pegamos encima de la cartulina negra el rectángulo verde, luego el fucsia y el amarillo. Por último, colocamos la vela.
Step 4:
Now, we glue the green rectangle on top of the black cardboard, then the fuchsia and the yellow one. Finally, we place the candle sticker.
Espero les haya gustado esta tarjeta y puedan sorprender a esa persona especial. ¡Hasta una próxima oportunidad!
I hope you liked this card and can surprise that special person. See you soon!

¡Felicidades! Esta publicación obtuvo upvote y fue compartido por @la-colmena, un proyecto de Curación Manual para la comunidad hispana de Hive que cuenta con el respaldo de @curie.
Si te gusta el trabajo que hacemos, te invitamos a darle tu voto a este comentario y a votar como testigo por Curie.
Si quieres saber más sobre nuestro proyecto, acompáñanos en Discord: La Colmena.