Hola amigos. Espero que estén muy bien. Muchísimas felicidades a todas las MUJERES del mundo hoy en nuestro DÍA. En honor a nosotras he amanecido muy inspirada, buscando la mejor idea para crear y compartirles. Sucede que este día llegó muy rápido, no estaba preparada y por lo tanto no tengo obsequios para todas las maravillosas mujeres que forman parte de mi vida. Sin embargo aún hay tiempo para prepararles una sorpresa, algo verdaderamente rápido de hacer, muy práctico y además hermoso. Veamos.
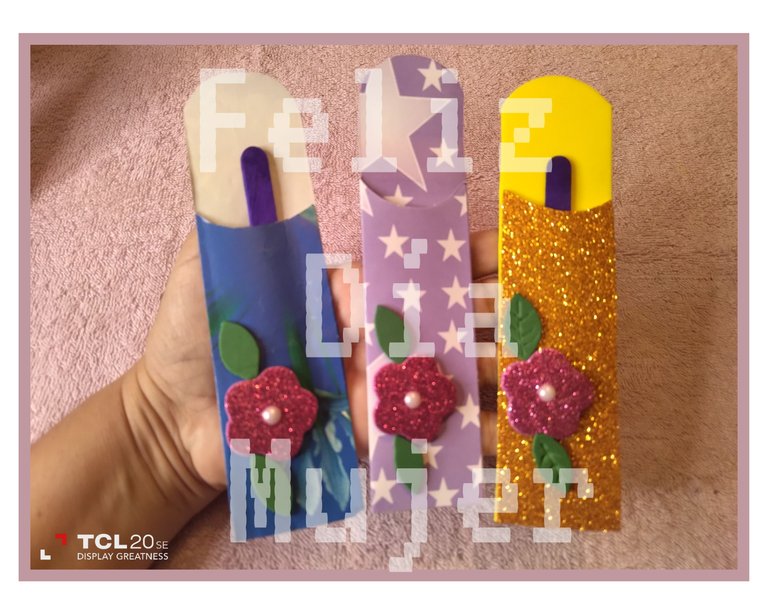
Para todas aquellas mujeres creadoras quienes cada día están ideando un nuevo proyecto con el cual satisfacer las necesidades propias de un adorno, un regalo o cualquier otra manualidad que las ayude a tener tiempo libre y de calidad sin descuidar a su familia y seres queridos. Para ustedes es este proyecto. Vamos a realizar, rapidito, un estuche porta limas para regalar a todas nuestras mujeres especiales. ¡Hey caballero! tú también puedes poner manos a la obra y hacer unos cuantos estuches para obsequiar.
MATERIALES.
- Foami, cartulina y papel de regalo.
- Reglas
- Lápiz de grafito.
- Tijeras.
- Pegamento.
- Media perla color blanco.
PROCEDIMIENTO.
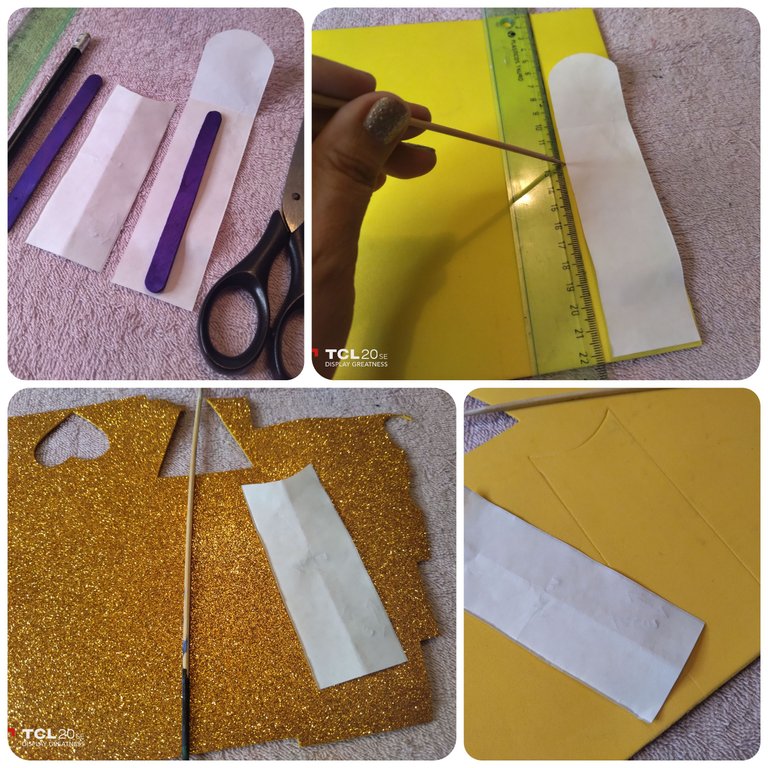
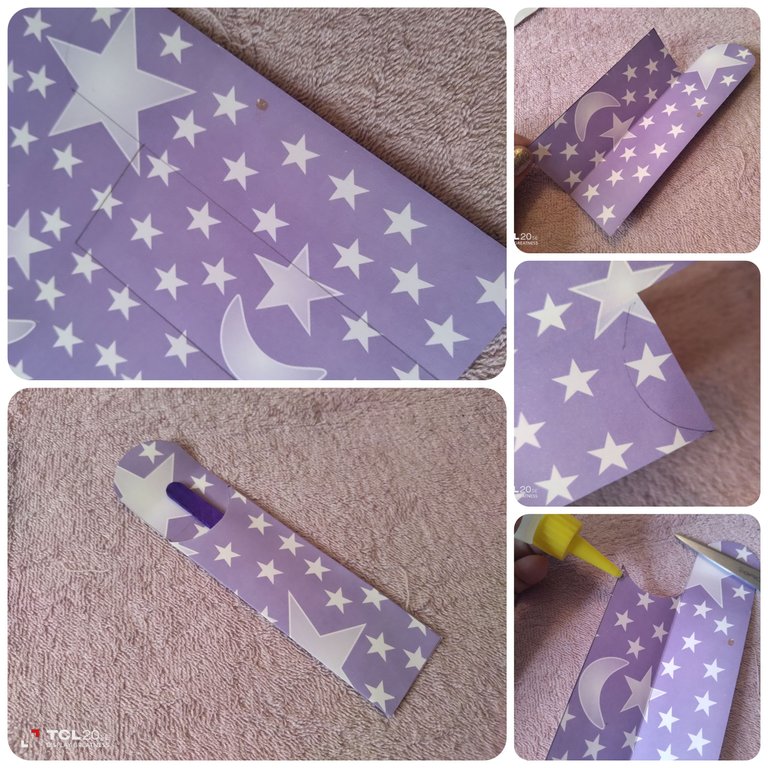
- Empezamos tomando la medida de la lima que vamos a meter en el estuche. Con esa medida vamos a considerar hacer toda la tapa de atrás del estuche y la tapa de enfrente. Como pueden ver en la fotografía una es más larga que la otra. A una le dibujaremos un semicírculo y luego recortaremos. En la otra lo recortaremos al revés.

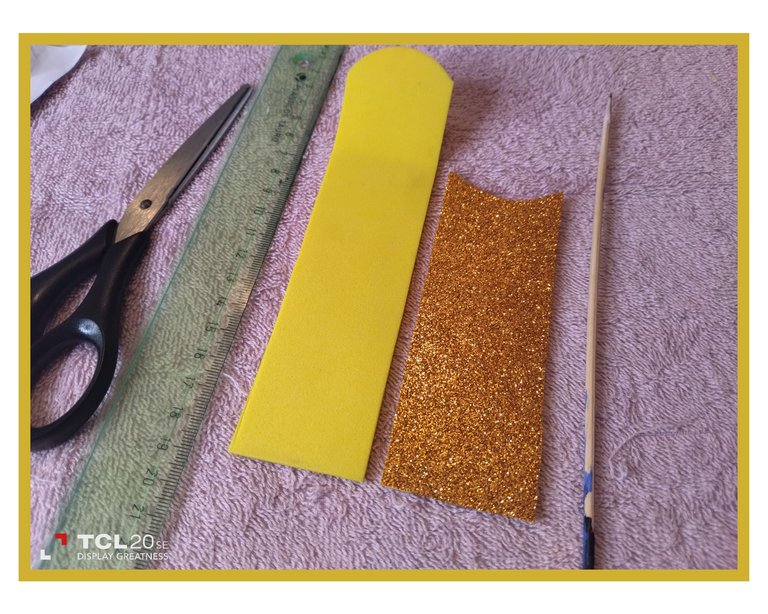
- Este patrón que hicimos en papel lo vamos a traspasar sobre el foami. Primero sobre el foami amarillo liso marcaremos la tapa de atrás, la más larga. Sobre el foami amarillo escarchado marcamos la tapa de enfrente. Luego recortamos.
- Cada estuche los vamos a decorar con una flor. Buscamos un molde, medimos y nos aseguramos que entre en el espacio de la tapa de enfrente del estuche. Marcamos y cortamos. Igualmente, haremos dos hojas en foami verde para cada flor.

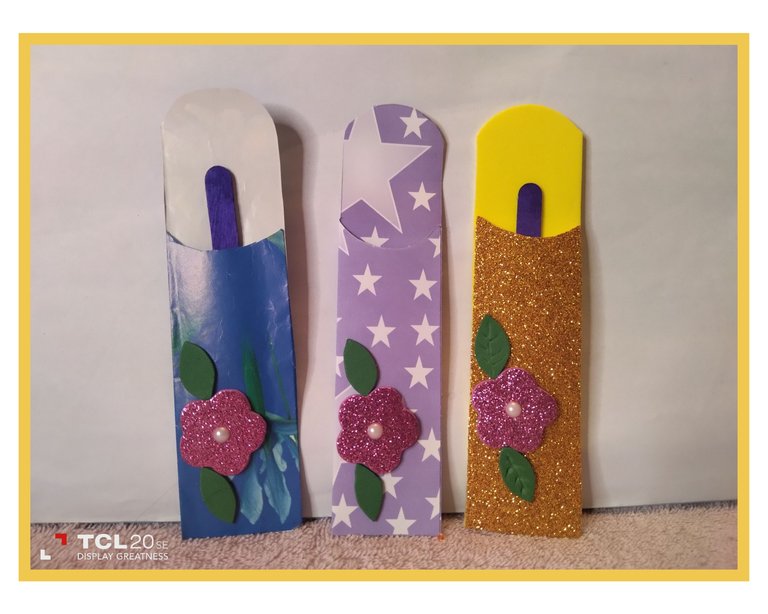
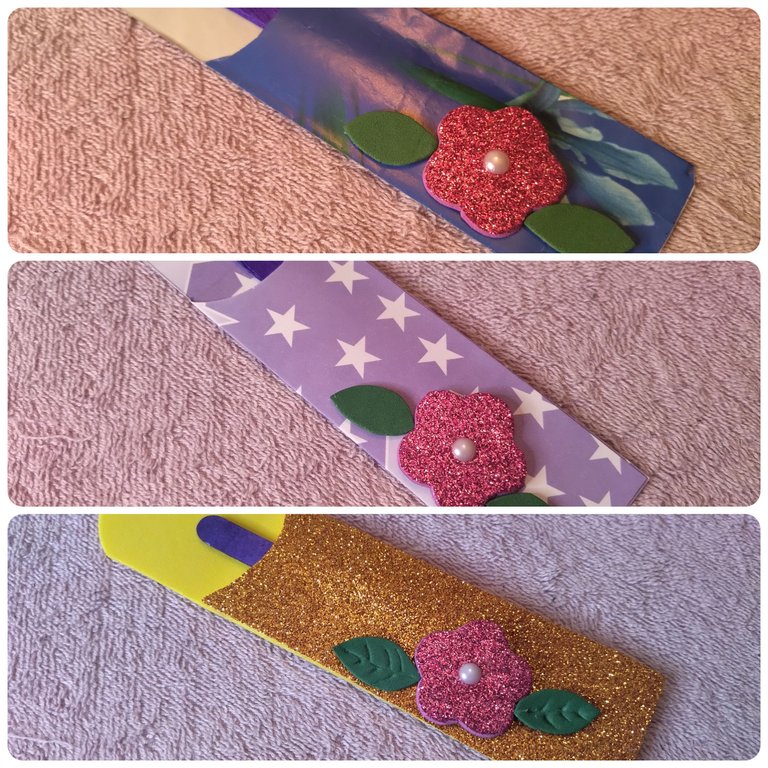
- Procedemos ahora a unir las tapas para formar el estuche elaborado con foami. Ponemos un poco de pegamento solo por las orillas de la tapa de enfrente, los dos laterales y la base. Pegamos sobre la tapa trasera del estuche. Seguidamente pegamos la flor y las dos hojas para decorarlo. ¡Se ve muy lindo! Y esto se hace en un santiamén ☺️

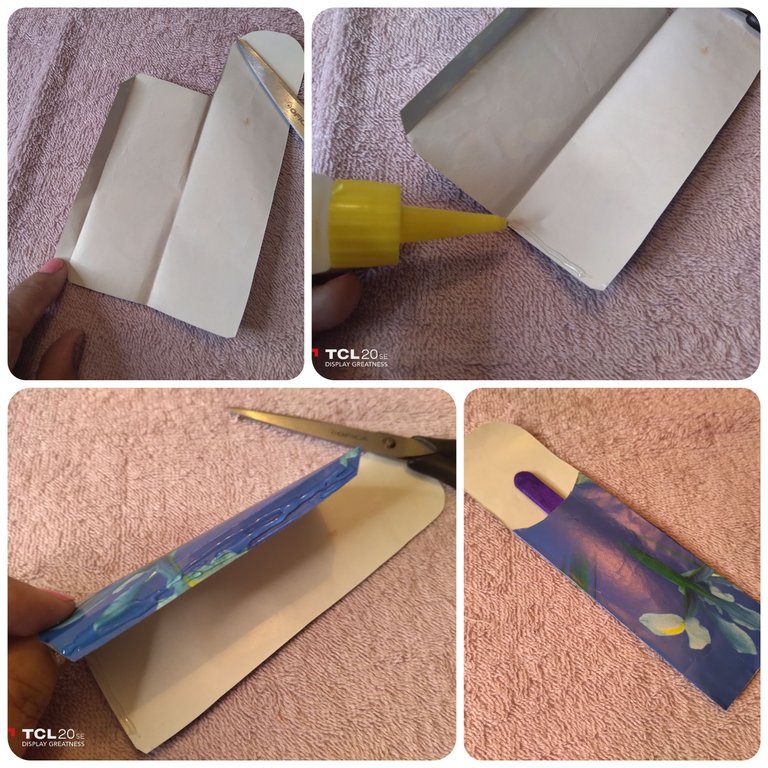
- Para que agilices y hagas muchos mira esta otra forma de hacerlo: colocas el molde sobre un trozo de cartulina estampada, uno al lado del otro y dibujas su forma. Luego lo recortas, lo doblas y a cada tapa le das la forma ovalada según corresponda. Luego pones pegamento solo en un lateral y la base. Decora con una flor.
- Si solo tienes papel de regalo, repite el procedimiento anterior agregando 1cm de más a la tapa de enfrente, parte de afuera para hacerle una pestaña que permitirá pegarla más fácilmente. Decora con una flor.
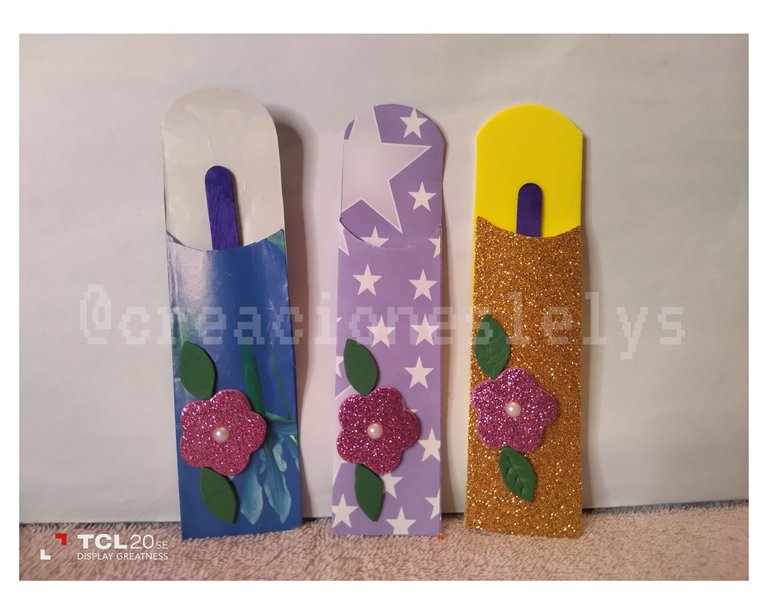
Como ves, no hay excusa. Pon a volar tu imaginación y ocupa esos papeles y cartulinas lindos que tienes en casa. Haz estuches para todas.
- En la bodega venden limas para uñas muy económicas y es una herramienta de belleza que todas llevamos en la cartera. ¿Te gustó esta idea? A mí también.
Muchísimas gracias por tu apoyo. Todas las fotos son de mi propiedad. Edité con Polish. Usé el traductor de Deepl. Feliz día mujeres de #hive. Abrazos.
English.
Hello friends. I hope you are doing very well. Many congratulations to all the WOMEN in the world today on our DAY. In honor of us I woke up very inspired, looking for the best idea to create and share with you. It happens that this day came very fast, I was not prepared and therefore I have no gifts for all the wonderful women who are part of my life. However, there is still time to prepare a surprise for them, something really quick to make, very practical and beautiful. Let's see.
For all those creative women who every day are devising a new project with which to satisfy their own needs for an ornament, a gift or any other craft that helps them to have free and quality time without neglecting their family and loved ones. This project is for you. We are going to make, quickly, a file case to give as a gift to all our special women. Hey gentlemen! you too can get to work and make a few cases to give as a gift.
MATERIALS.
- Foami, cardboard and wrapping paper.
- Rulers
- Graphite pencil.
- Scissors.
- Glue.
- White half-pearl.
PROCEDURE.
- We start by taking the size of the file that we are going to put in the case. With that measurement we are going to consider making the whole back cover of the case and the front cover. As you can see in the picture one is longer than the other. On one we will draw a semicircle and then cut it out. On the other we will cut it out upside down.
- We are going to transfer this pattern we made on paper onto the foami. First on the plain yellow foami we will mark the back cover, the longest one. On the frosted yellow foami we mark the front cover. Then we cut it out.
- Each case we are going to decorate with a flower. We find a mold, measure and make sure it fits in the space of the front lid of the case. Mark and cut. In the same way, we will make two green foami leaves for each flower.
- We proceed now to join the lids to form the case made with foami. We put a little glue only on the edges of the front cover, the two sides and the base. We glue on the back cover of the case. Then we glue the flower and the two leaves to decorate it, it looks very nice! And this can be done in a jiffy ☺️
- To make it quicker and make lots of them look at this other way to do it: you place the mold on a piece of patterned cardboard, side by side and draw their shape. Then you cut it out, fold it and give each lid an oval shape accordingly. Then put glue only on one side and the base. Decorate with a flower.
- If you only have wrapping paper, repeat the above procedure adding 1cm more to the front, outside cover to make a flap that will allow it to stick more easily. Decorate with a flower.
As you can see, there is no excuse. Let your imagination run wild and use those cute papers and cardboard you have at home. Make cases for all of them.
- At the bodega they sell very inexpensive nail files and it's a beauty tool we all carry in our wallets. Did you like this idea? Me too.
Thank you very much for your support. All photos are my property. I edited with Polish. I used Deepl translator. Happy #hive women's day. Hugs.
~~~ embed:1633881231963336705 twitter metadata:MTI2ODQxNjE2ODUwMDUyNzEwNHx8aHR0cHM6Ly90d2l0dGVyLmNvbS8xMjY4NDE2MTY4NTAwNTI3MTA0L3N0YXR1cy8xNjMzODgxMjMxOTYzMzM2NzA1fA== ~~~
The rewards earned on this comment will go directly to the people( @creacioneslelys, @chacald.dcymt ) sharing the post on Twitter as long as they are registered with @poshtoken. Sign up at https://hiveposh.com.
Están lindos sus estuches amiga, me gustó como los decoro, el sacabocado da una forma muy linda, gracias por compartir, feliz día 🤗
Hola. Me alegra saber que te gustaron. Muchas gracias.
Me gustaron mucho @creacioneslelys , los estuches, es una idea genia, para un regalo.🌹🌷🌺🌻🌼🌸💐🍀
Que bueno que te gustaron. Son lindos y prácticos. Saludos.
Muy muy útil y están super delicados y hasta con brillos. Me encanta Lelys, tenés muy buen gusto.😀
Hola. Muchas gracias. Lo mejor de este proyecto es que podemos usar cualquier material para hacerlos, incluso tela.
Bendiciones para ti 🙏
😊✨
Lindos y prácticos!
Gracias por compartir tu trabajo!
A ti por pasar por mi blog. Muchas gracias.
Yay! 🤗
Your content has been boosted with Ecency Points, by @creacioneslelys.
Use Ecency daily to boost your growth on platform!
Support Ecency
Vote for new Proposal
Delegate HP and earn more
Este estuche es de gran utilidad y queda precioso ... Me llevo tu idea amiga ☺️ un abrazote.
🎆🎇🎉🎊🌧️💐✨🌾🌱🌹🌙🌿🍃🥀⚡🌺☘️🍀🌈🌷⭐🪴🌵🌸🌟💮🌴🌳💫☀️💮☔🌲🌳🌍🌌🌠☄️🏵️🐝🌻🌼🍄🐞🦋💙☕💜🍍🎆🎇🎉🎊
!PIZZA
Muchas gracias 😁 me encanta saber que te gustó.
PIZZA Holders sent $PIZZA tips in this post's comments:
@chacald.dcymt(2/5) tipped @creacioneslelys (x1)
Please vote for pizza.witness!
hola, están geniales los estuches para resguardar las limas, quedaron muy bonitos. Un abrazo.
Hola @josief27 muchas gracias! Me alegra saber que te gustan.