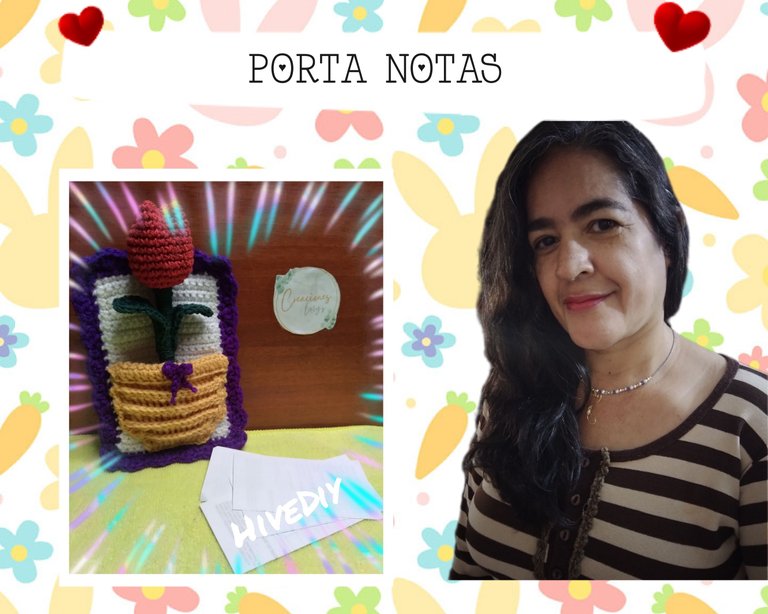
Hola amigos, deseo que estén muy bien hoy. Como siempre paso a compartirles mi más reciente creación. Esta me gustó mucho porque sé que será de mucha utilidad en el hogar y también en la oficina o negocio.
Para darle uso a las madejas de hilo de estambre que tengo disponibles decidí realizar un lindísimo porta notas 🗒️ el cual puedes usar para otros fines, dependiendo de tu necesidad el proyecto se adapta a lo que realmente lo vayas a utilizar. En mi caso lo quiero para poner mi lapicero junto con algunas hojas de notas. Yo utilizo muchísimo los lapiceros y las hojas de notas, siempre ando escribiendo algo para no olvidarlo. Ahora estoy colocando algunas cosas en la pared de mi espacio creativo y buscaba algo lindo dónde colocar mi lapicero. Así que este fue el diseño que elegí y paso a compartirlo con ustedes.
Hello friends, I hope you are very well today. As always I am going to share with you my latest creation. I really liked this one because I know it will be very useful at home and also in the office or business.
To make use of the skeins of worsted yarn I have available I decided to make a very nice note holder 🗒️ which you can use for other purposes, depending on your needs the project adapts to what you are really going to use it for. In my case I want it to put my pencil along with some sheets of notes. I use pens and notepads a lot, I'm always writing something down so I don't forget it. Now I am putting some things on the wall of my creative space and I was looking for something nice to put my pencil. So this was the design I chose and I am going to share it with you.
PORTA NOTAS Y LAPICERO.
NOTE HOLDER AND PENCIL.
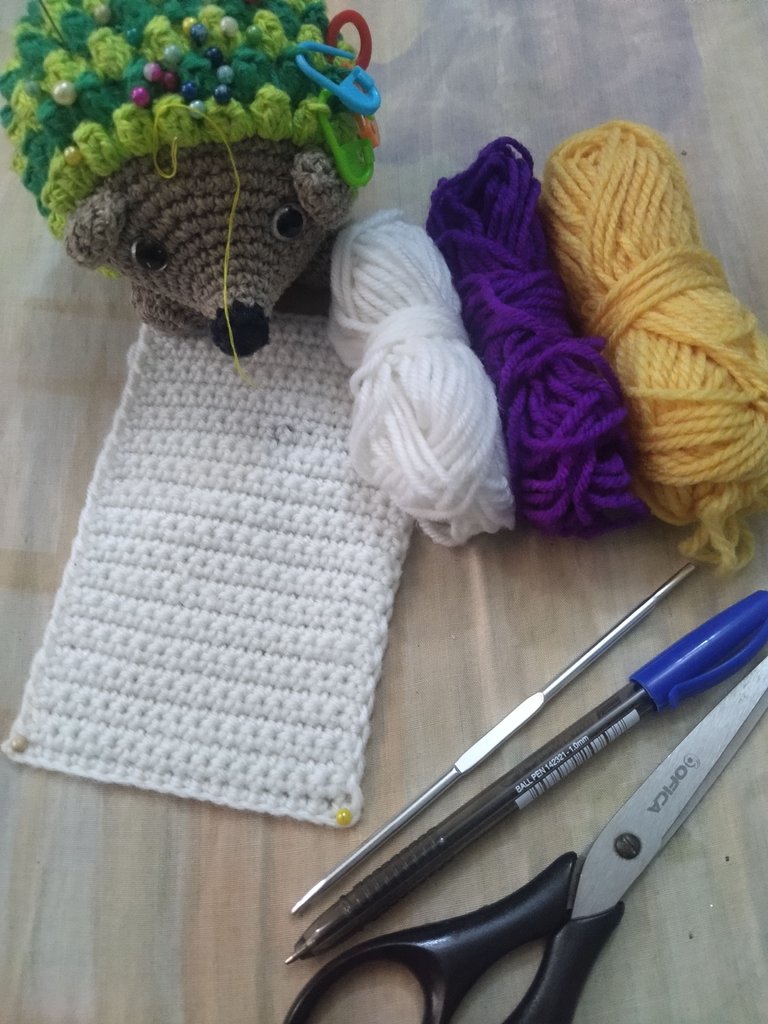
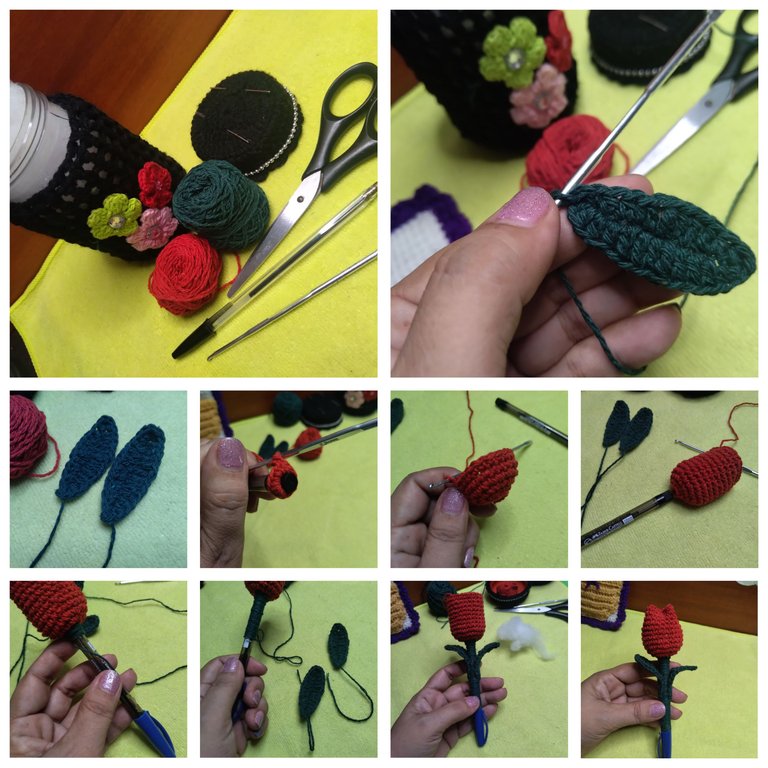
La elaboración de este proyecto se me dió muy fácil, imaginé más o menos el tamaño y empecé a tejer. Al principio pensé que el hilo no sería suficiente ya que estas madejas apenas tienen 15 gramos lo máximo. Los materiales que usé son:
🖊️ Madejas de hilo de estambres. Usé color blanco, morado, verde y ocre.
🖊️ Aguja de crochet de 2,25mm.
🖊️ Aguja lanera.
🖊️ Tijeras.
🖊️ Lapicero.
🖊️ Hilos pabilos para elaborar la flor de tulipán 🌷 y las hojas.
🖊️ Pegamento.
🖊️ Alfileres de cabeza.
The elaboration of this project was very easy for me, I imagined more or less the size and I started to knit. At first I thought that the yarn would not be enough since these skeins are only 15 grams maximum. The materials I used are:
🖊️ skeins of stamen yarn. I used white, purple, green and ochre.
🖊️ Crochet needle of 2.25mm.
🖊️ Wool needle.
🖊️ Scissors.
🖊️ Pencil.
🖊️ Thread wicks to make the tulip flower 🌷 and the leaves.
🖊️ Glue.
🖊️ Head pins.
Me encanta cuando me imagino un proyecto y de inmediato puedo hacerlo. Ya les conté que hace demasiada calor en la ciudad y yo prácticamente vivo en mi cuarto pegada al ventilador. Entonces para aprovechar el tiempo me pongo a tejer. Además estoy organizando algunas cosas en mi espacio de trabajo y necesito tener un lugar fijo para mí lapicero. Tengo muchos en todos lados e increíblemente cuando quiero usarlo mientras trabajo no lo consigo 😁 pero es porque tengo mis preferidos y los roto. Ahora dejaré uno fijo cerca de mi mesa. Para ello elaboré este porta notas 🗒️ en el que además voy a colocar mi lapicero.
I love it when I imagine a project and I can immediately do it. I already told you that it's too hot in the city and I practically live in my room glued to the fan. So to make the most of the time I start knitting. I am also organizing some things in my work space and I need to have a fixed place for my pencil. I have many everywhere and unbelievably when I want to use it while working I don't get it 😁 but that's because I have my favorites and I rotate them. Now I will keep a fixed one near my desk. For that I made this note holder 🗒️ in which I am also going to place my pencil holder.
🖊️ Para empezar decidí hacer la base o el cuerpo/soporte del porta notas de una medida de 8 cm de ancho, aproximadamente. Para ello tejí una cadena de 20 puntos con el hilo estambre colo blanco.
🖊️ Luego tejí hacia arriba vueltas de solo puntos bajos hasta alcanzar la medida justa en la que entre el lapicero. En mi caso fueron 13 cm. En total tejí 34 vueltas de puntos bajos en color blanco.
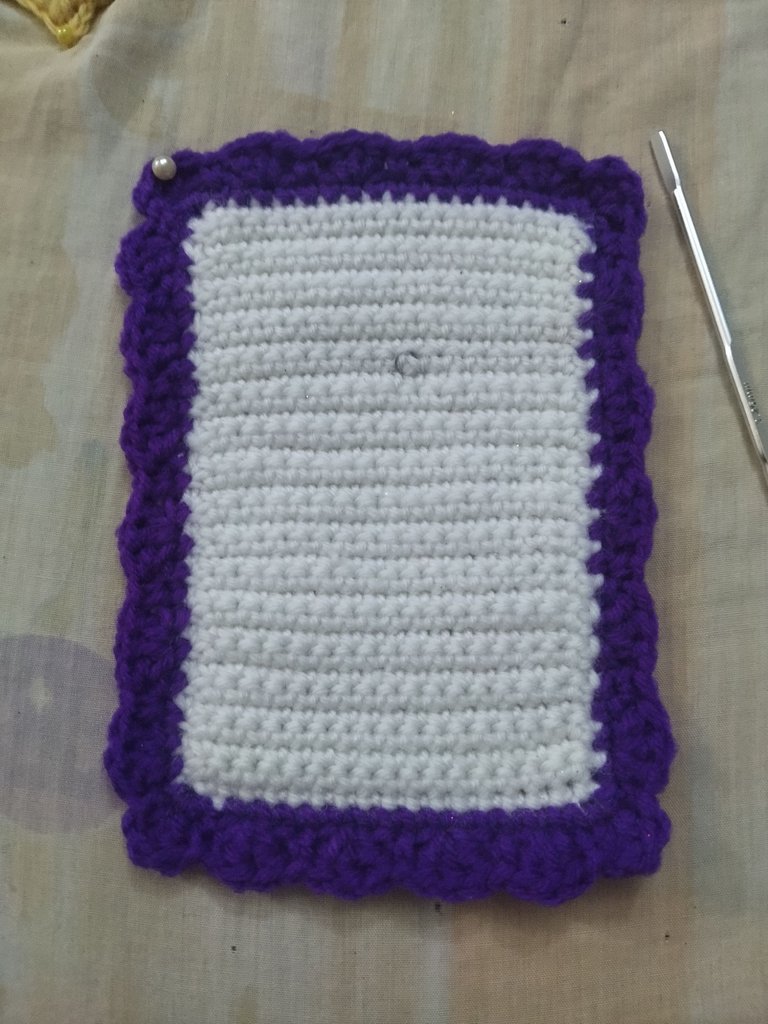
🖊️ Con el hilo estambre color morado le realicé un borde decorativo. Empecé tejiendo una cadena, un punto bajo en una de las esquinas de la base. Luego tejí dejando un punto de la base sin trabajar, tres puntos altos en un mismo punto, uno sin trabajar, un punto bajo en el que sigue y dejé un punto sin trabajar en la base y de nuevo tres puntos altos juntos. Así tejí todo el borde del soporte. Al finalizar cerré con punto deslizado, corté el hilo y escondí la hebra.
🖊️ To begin with, I decided to make the base or the body/support of the note holder approximately 8 cm wide. To do this I knitted a chain of 20 stitches with white worsted yarn.
🖊️ Then I knitted upwards rounds of single crochet until I reached the right size to fit the pencil. In my case it was 13 cm. In total I knitted 34 rows of single crochet in white color.
🖊️ With the purple worsted yarn I made a decorative border. I started by knitting a chain, a single crochet in one of the corners of the base. Then I knitted leaving one stitch of the base unworked, three double crochets in the same stitch, one unworked, one single crochet in the next one and left one stitch unworked in the base and again three double crochets together. In this way I knitted the entire edge of the stand. At the end I closed with a slip stitch, cut the yarn and hid the yarn.
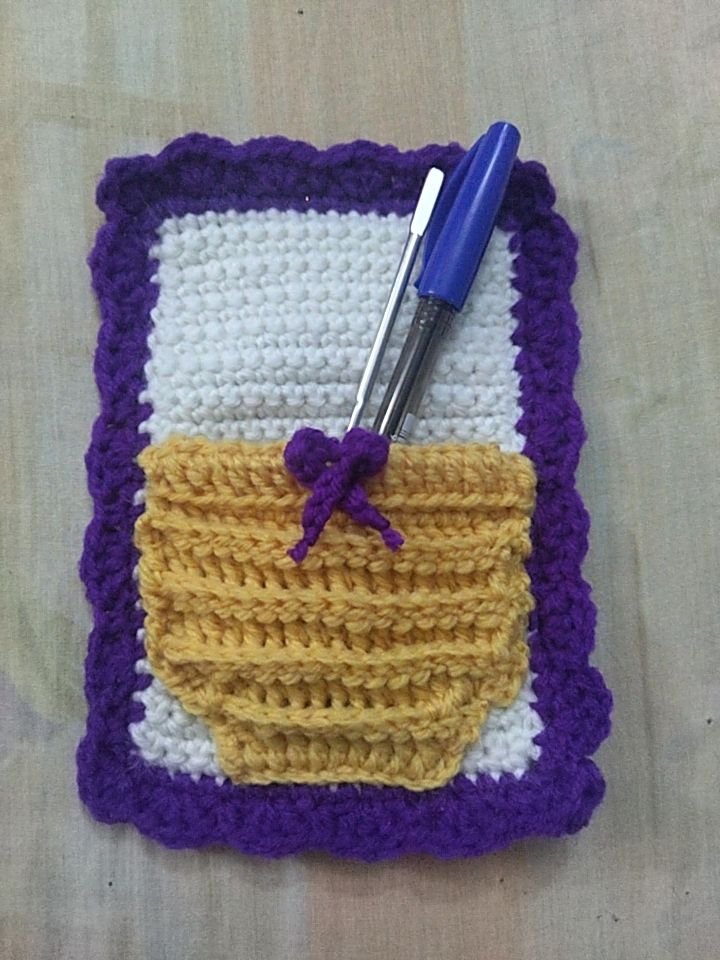
🖊️ Con el hilo estambre color ocre, dorado u oro tejí 13 cadenas. En esas cadenas levanté puntos altos. Para las próximas vueltas tejí con puntos altos en relieves siempre tomándolo hacia adentro y haciendo un aumento de punto alto normal al inicio y final de la vuelta. Así tejí las primeras tres vueltas.
🖊️ En las próximas vueltas tejí puntos altos en relieve sin hacer aumentos. Así tejí hasta lograr el alto deseado.
🖊️ Para finalizar tejí tres vueltas de puntos altos normal.
🖊️ La última vuelta la doblé y cosí por la linea de la primera vuelta de puntos altos de estas tres que tejí. La idea es hacer un borde más grueso ya que quiero simular la forma de una maceta. 👆🏻 Allí en la imagen ya pueden ver qué el lapicero queda al ras del tejido 👍🏻
🖊️ With the ochre, gold or gold-colored worsted yarn I knit 13 chains. In those chains I knitted high stitches. For the next rows, I knitted with raised crochet stitches in relief, always taking it to the inside and making a normal raised stitch increase at the beginning and end of the row. This is how I knitted the first three rows.
🖊️ In the next rows, I knitted in relief without making increases. This is how I knitted until I reached the desired height.
🖊️ To finish, I knit three rows of normal stockinette stitch.
🖊️ The last row I doubled and sewed along the line of the first row of the three loops I knitted. The idea is to make a thicker border since I want to simulate the shape of a flower pot. 👆🏻 There in the picture you can see that the pencil is flush with the fabric 👍🏻
🗒️ Ahora les muestro cómo se ve el lapicero ya decorado dándole la forma de flor de tulipán. La verdad es que esta idea me gustó mucho. Si pueden notarlo el diseño del porta notas es de un tulipán en maceta. Elaboración del tulipán.
🌷 Primero tejí las dos hojas. Inicié con una cadena de 15 puntos, sobre ella tejí por ambos lados la siguiente secuencia: 1pb-3pma-3pa-1pad-3pa-3pma-1pb.
🌷 Luego tejí el TULIPÁN. Inicié con un anillo mágico que no cerré. Tejí 6puntos bajos. Después 6aumentos de pb. Luego una vuelta de 1pb-1aum. Tejí diez vueltas de solo pb. Cerré la vuelta con pd, corté el hilo dejando la hebra larga.
🌷 Coloqué un poco de pegamento en la parte superior del lapicero. Lo ingresé por el anillo mágico del tulipán. Cerré el anillo. Aprovechando el pegamento que quedó en la parte de abajo del a flor empecé a pegar el hilo verde para forrar el lapicero y fui incorporando las dos hojas. Al finalizar coloqué un punto de pegamento y corté el hilo.
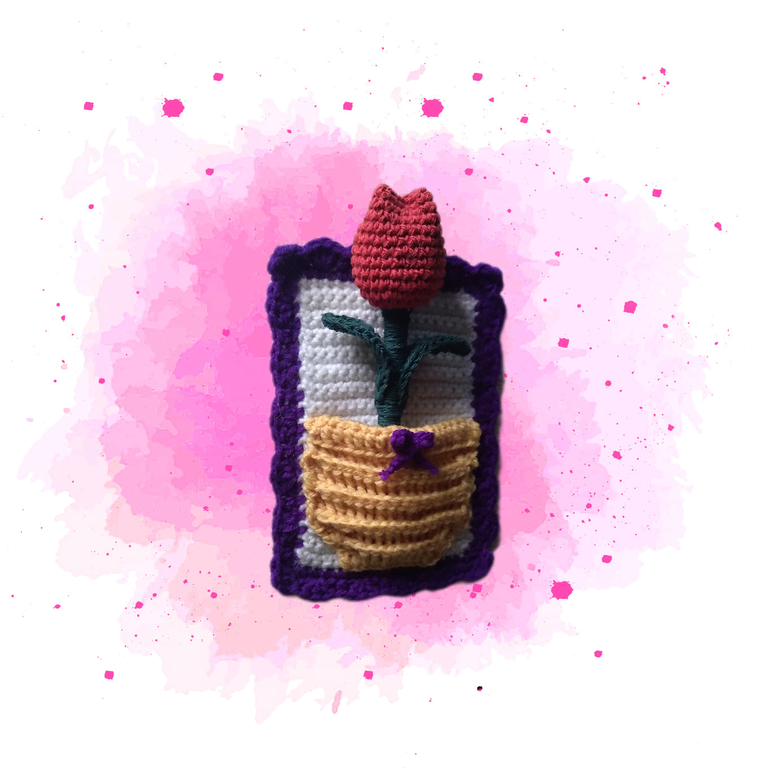
🗒️ Now I show you how the pencil looks like when decorated in the shape of a tulip flower. The truth is that I really liked this idea. If you can notice, the design of the note holder is of a potted tulip. Making the tulip.
🌷 First I knitted the two leaves. I started with a chain of 15 stitches, over it I knitted on both sides the following sequence: 1pb-3pma-3pa-3pa-1pad-3pa-3pma-1pb.
🌷 Then I knit the TULIP. I started with a magic ring that I did not close. I knit 6bp low stitches. Then 6bp increases. Then a round of 1pb-1aum. I knit ten rows of single crochet. I closed the round with pd, cut the yarn leaving the long strand.
🌷 I placed some glue on the top of the pencil. I entered it through the magic ring of the tulip. I closed the ring. Taking advantage of the glue that remained on the bottom of the flower, I began to glue the green thread to line the pencil and incorporated the two leaves. At the end I placed a dot of glue and cut the hiit.
🗒️🖊️🌷 Así se ve.
🗒️🖊️🌷 This is what it looks like.
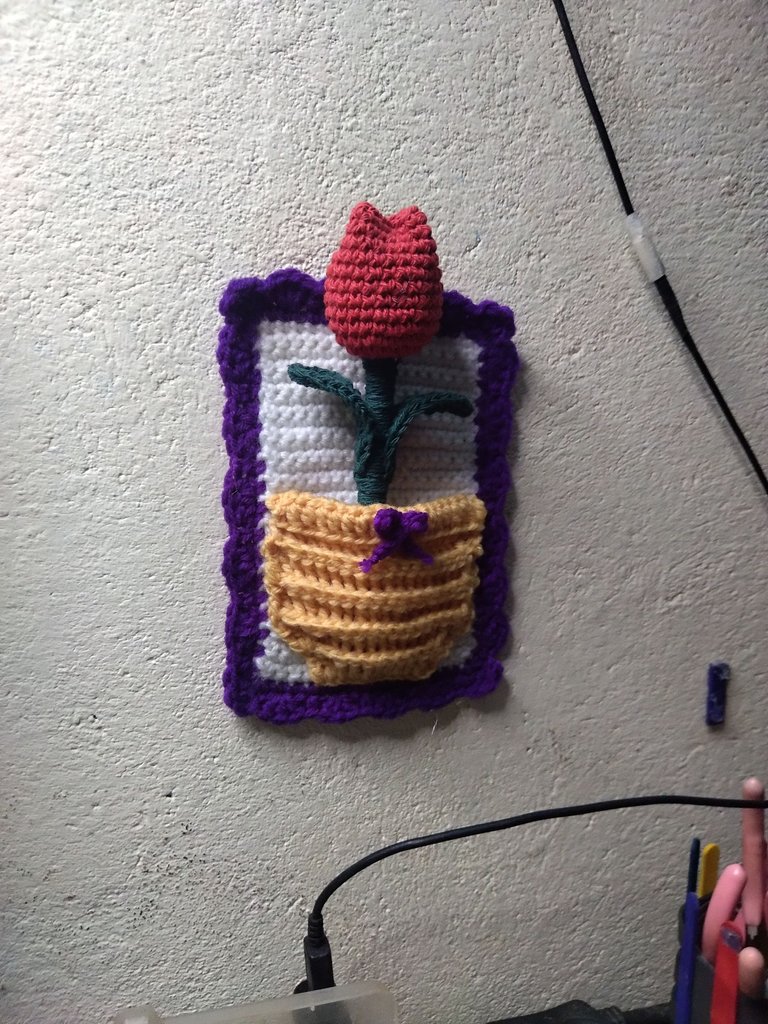
Si lo desean pueden tejerle una asa para colgar o pegarle atrás algunos imanes. Yo solo le coloqué unos puntos de pegamento y los fijé en la pared muy cerca de mi mesa de trabajo. De esta manera doy por concluido mi proyecto. Muchas gracias por el apoyo. Todas las fotos son de mi propiedad. Edité con Polish. Usé el traductor de Deelp. Hasta pronto.
If you wish, you can weave a handle for hanging or glue some magnets on the back. I just put some glue dots on it and attached it to the wall very close to my work table. This is the end of my project. Thank you very much for your support. All photos are my property. I edited with Polish. I used Deelp translator. See you soon.
Has sido votado por
PROYECTO ENLACE
'Conectando Ideas y Comunidades'
PROYECTO ENLACE es un proyecto de curación de habla hispana enfocado en recompensar contenido de calidad y apoyar autores en su proceso de crecimiento en HIVE.
Creemos y apostamos por el futuro de esta gran plataforma, y estamos muy emocionados de poder hacerla crecer junto a esta comunidad. Así que te invitamos a publicar en nuestra COMUNIDAD y estar atento a todas las actividades que tenemos preparadas y que estaremos publicando en breve.
¿QUIERES AUTOMATIZAR TUS GANANCIAS DE CURACIÓN? SE PARTE DEL PROYECTO ENLACE APOYANDO A NUESTRO TRAIL EN HIVE.VOTE INGRESA AQUÍ PARA CONOCER LOS DETALLES.
¿QUIERES INVERTIR ENLACE? DESCUBRE COMO HACERLO Y GENERAR INGRESOS DE FORMA SEMANAL MEDIANTE TU DELEGACIÓN DE HP AQUÍ TE EXPLICAMOS COMO.
Te invitamos a participar en nuestro servidor de Discord: https://discord.gg/3S9y7BbWfS
Atentamente
EQUIPO ENLACE 2024
Muchas gracias por el apoyo 😊
Ese tulipán! Que belleza!! Y el porta lapicero aun más, mucha creatividad Lelys. Que tengas un día maravilloso!😃
Hola. Muchas gracias. Igualmente, que tengas un lindo día. 🌷🙋🏻♀️☝🏻
¡Gracias!
😘
Nuuu que lindo es 😍 pracrtico y muy comodo de hecho jeje ademas de decorativo, otra excelente creacion 🦉❤️
-Con permiso Buhito se va a meter alli- ok no jaja
Hola. Me alegra que te guste. 😁 Buhito y sus tremenduras, pero creo que no cabe en mi nueva maceta ☺️
Que lindo trabajo.
Gracias por compartir esos tejidos hermosos.
Hola amiga. Feliz día. Que bueno ver tu rostro ☺️ Muchas gracias por tu comentario 🙋🏻♀️☝🏻😁
Una preciosidad, me encantan las cosas que realizas porque son super lindas. Es un encantador porta notas, decorativo para cualquier lugar o espacio. Gracias por compartir tan creativo proyecto. Bendiciones amiga, espero el calor pase un poco en tu ciudad y vengan tiempos más frescos.
Hola. Que bonito tu comentario. Muchas gracias 🫂
wow that looks so beautiful, you are amazing. keep up the good work.
Hello. I love knowing that you liked it ☺️ thank you very much 🙋
Hola querida está muy bonita tu creación. excelente idea.
Hola. Muchas gracias 😊
No, pero qué hermosura este porta notas está de ensueño, lo quieroooo, amiga siempre te luces con tus tejidos, los adoro, te felicito que belleza.😘💘 gracias por compartir.
Muchas gracias 🫂
Wow, está espectacular!
Hola linda. Muchas gracias 🫂
Que hermoso te quedó, siempre e admirado a las personas que tejen, por qué es algo con suma precaución y paciencia, siempre e querido aprender pero no e tenido la oportunidad de tener a alguien en mi entorno que lo haga y me enseñé, y muero por un bolsito tejido de gatito que ví por internet 😍. Me encanto el resultado que obtuviste.
Hola. Me da gusto saber que este proyecto te gustó.
Estoy muy segura que puedes aprender viendo tutoriales amiga. Cómo bien dices, solo hay que tener paciencia y ganas de hacerlo. 🫂