Hace algunas semanas, mientras organizaba algunos materiales que tenía guardados, encontré varios rollos de hilos y comencé a pensar en qué podía hacer con ellos. Siempre me ha llamado la atención el tejido, pero hasta ahora nunca había tenido la oportunidad de intentarlo, ya fuera por falta de materiales o tiempo. Sin embargo, en esta ocasión, con unos días libres por delante, decidí embarcarme en un nuevo proyecto: tejer un bolso completamente hecho por mí.
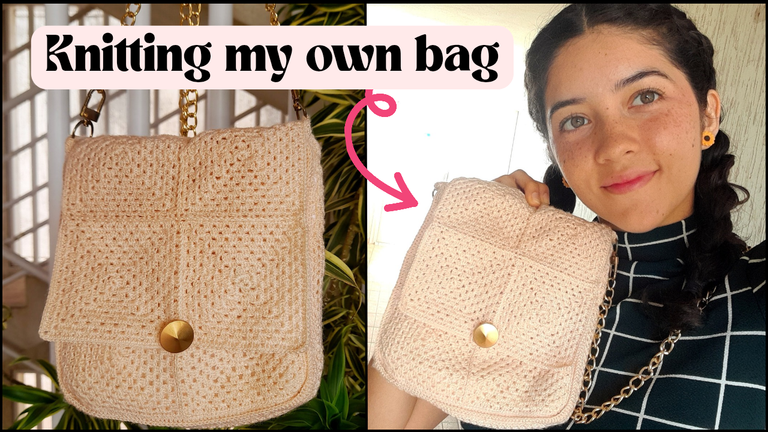
Desde el primer momento, la idea me emocionó muchísimo, pues me parecía una excelente oportunidad para aprender y experimentar con nuevas técnicas. Además, me encantaba la posibilidad de crear un accesorio único, que pudiera combinar con distintos outfits y reflejara mi creatividad. Aunque al principio no sabía exactamente cómo sería el proceso, estaba decidida a intentarlo y disfrutar cada paso.
Materiales y planificación
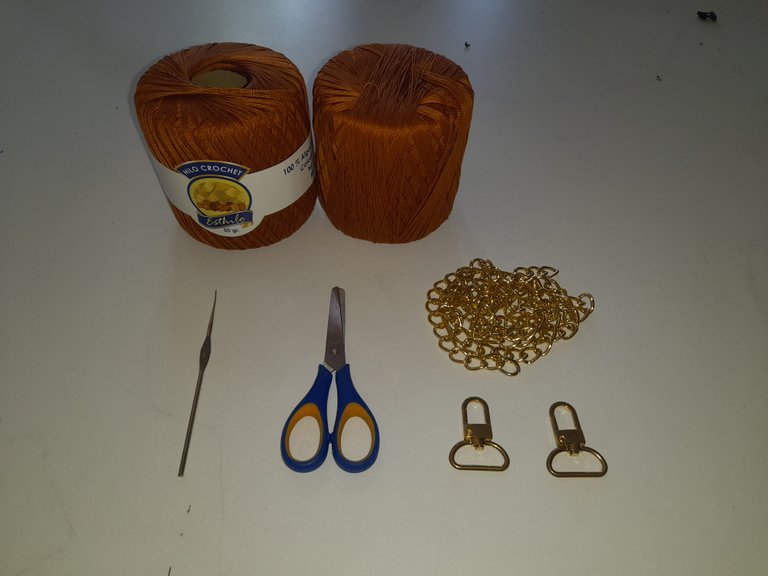
Para llevar a cabo este proyecto, reuní algunos materiales esenciales. Utilicé dos rollos de hilo de un grosor que me pareció adecuado para lograr un bolso resistente pero flexible. También encontré en casa una aguja para tejer, lo cual me ahorró la búsqueda de herramientas adicionales. A esto sumé unas tijeras para cortar el hilo cuando fuera necesario, un botón decorativo, una cadena de 110 cm y dos mosquetones para unir las cadenas al bolso.
Antes de comenzar a tejer, investigué algunas técnicas y decidí trabajar con granny squares, una forma versátil y tradicional de tejido que me permitiría construir mi bolso en secciones.
El proceso de tejido
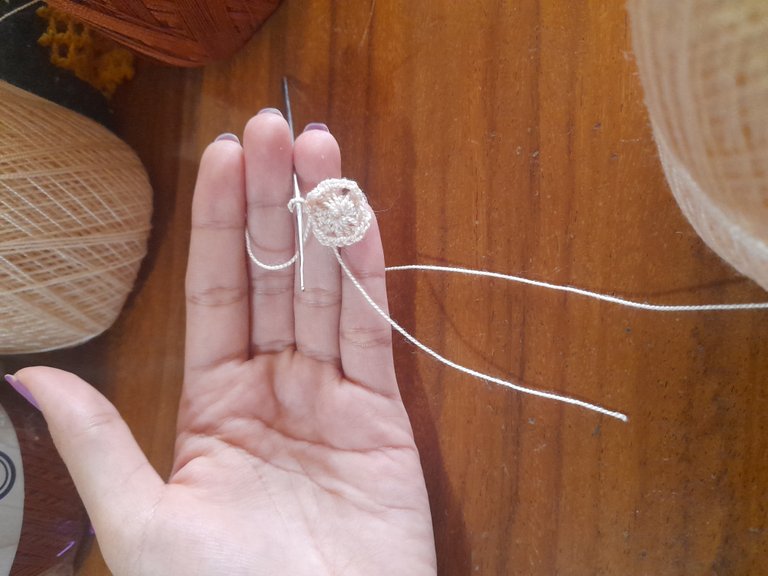
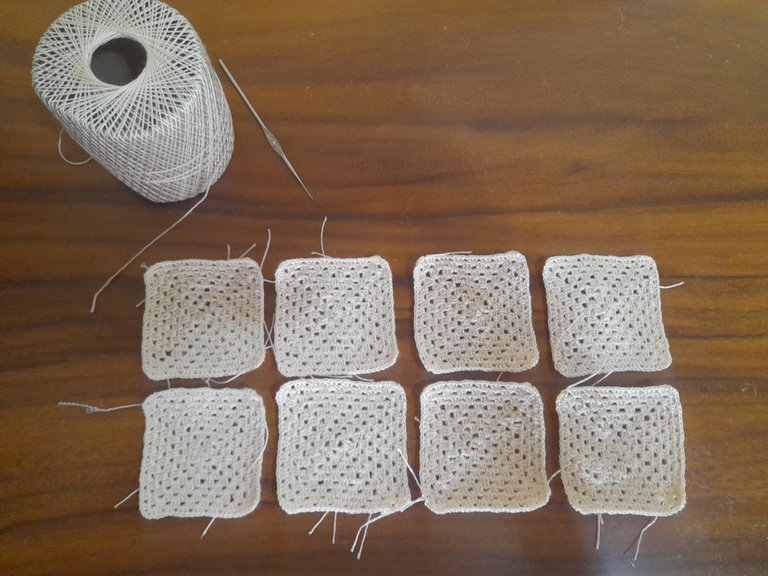
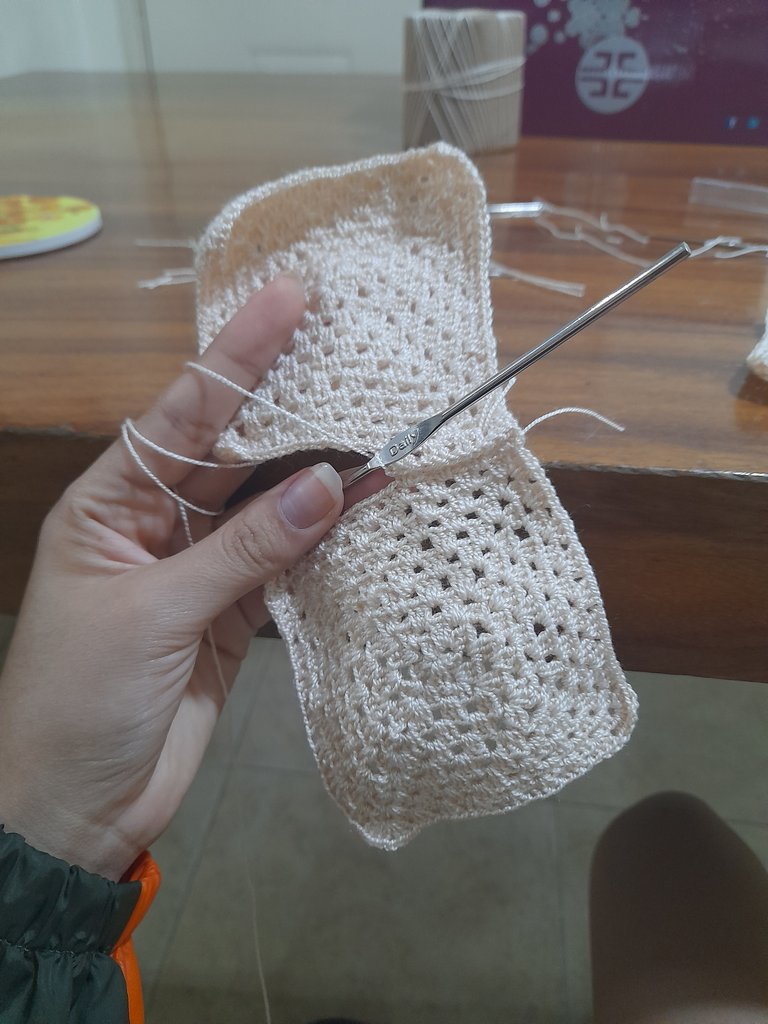
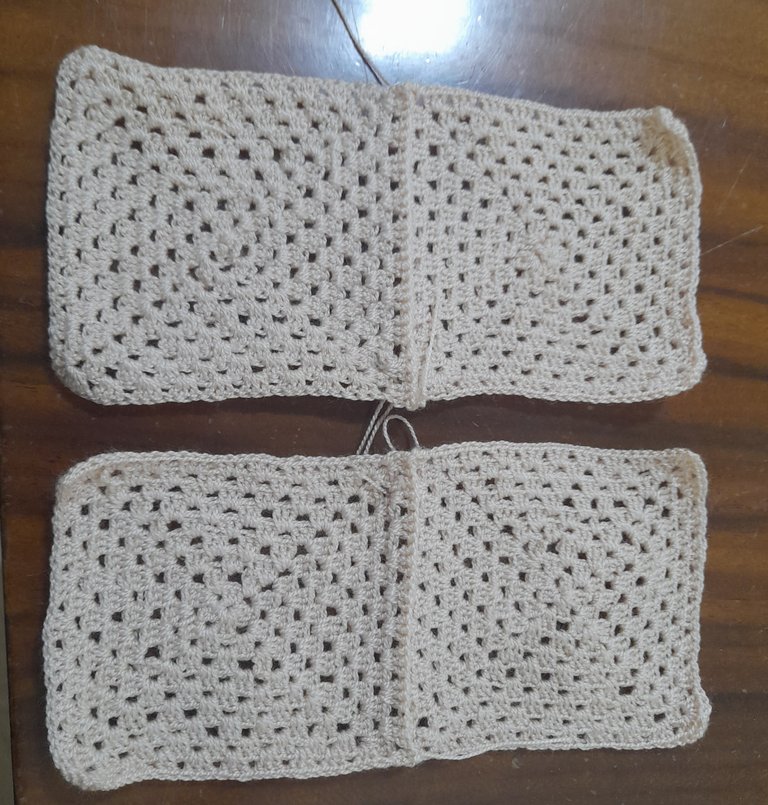
El primer paso fue tejer los granny squares. Por el tamaño que quería para mi bolso y el grosor del hilo, necesité tejer ocho grannys en total: cuatro para la parte delantera y cuatro para la trasera. Una vez listos, comencé a unirlos en pares, asegurándome de que los puntos quedaran firmes y alineados.
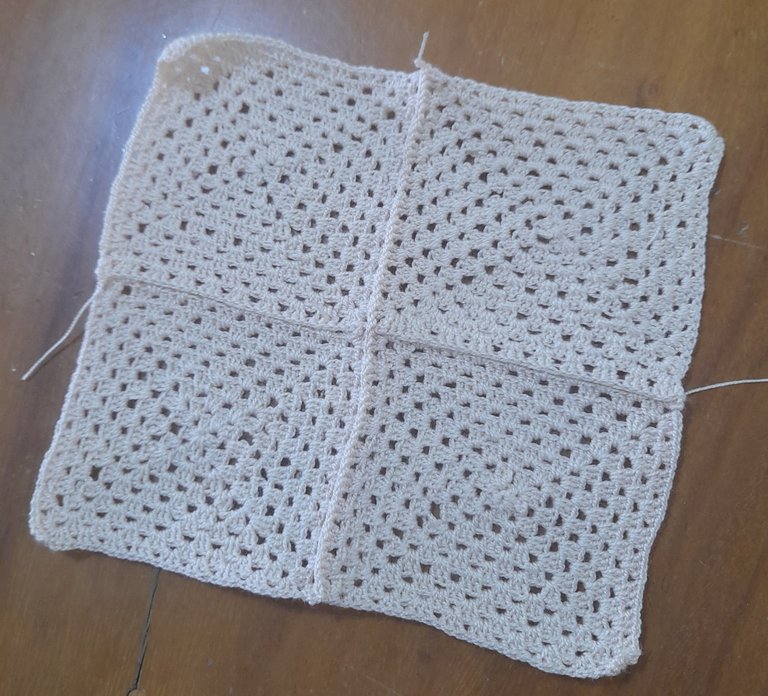

Después, uní cada par con otro hasta formar dos cuadrados grandes, cada uno compuesto por cuatro grannys. Luego, para darle profundidad al bolso, tejí una franja alrededor de uno de los cuadrados, dejando un lado libre para facilitar la unión posterior. Al finalizar esta sección, añadí el segundo cuadro, cerrando completamente la estructura.
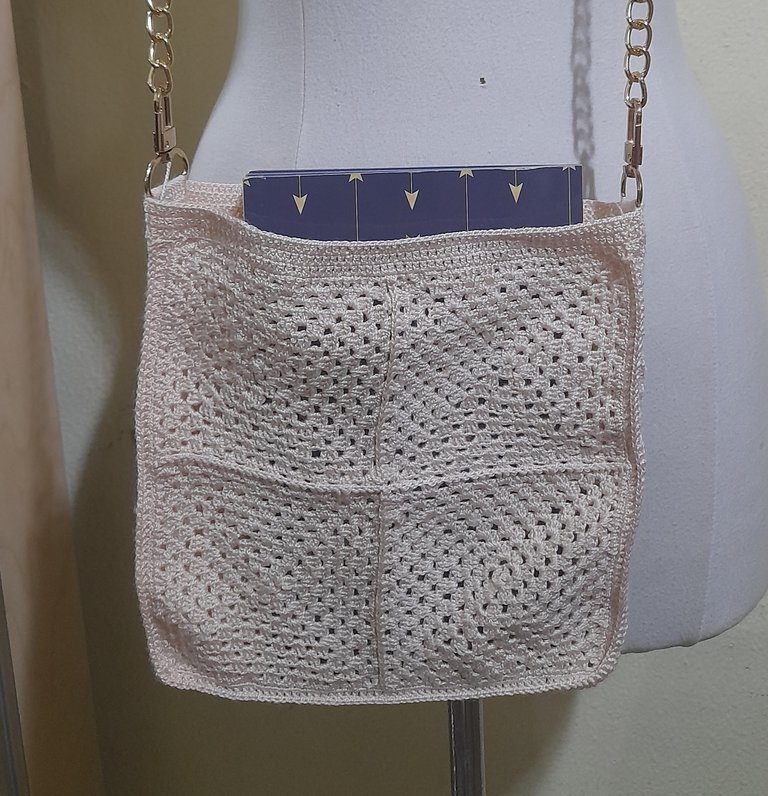
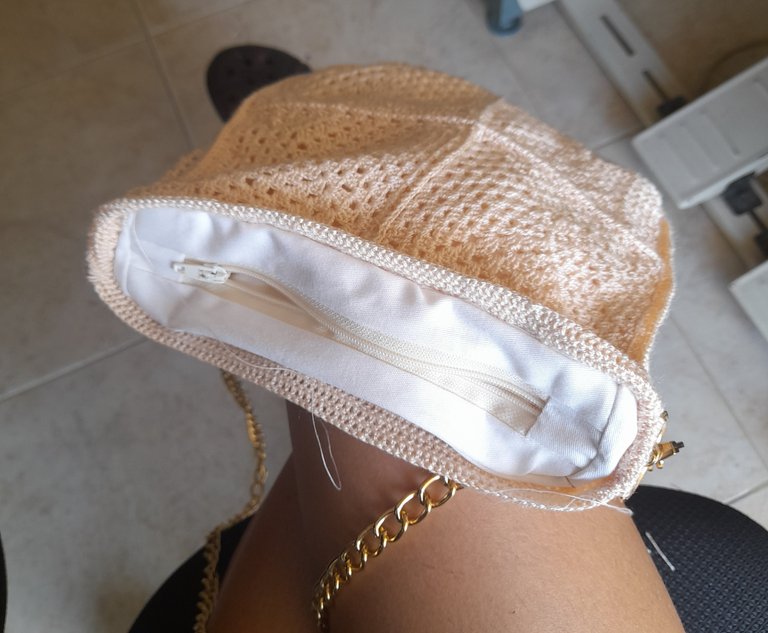
Para los detalles finales, tejí un borde superior, donde incorporé los mosquetones. Decidí también confeccionar un forro de tela con cierre, que cosí al interior del bolso con aguja e hilo. Aunque este paso era opcional, me pareció una buena idea para darle un acabado más prolijo y evitar que se vieran los objetos dentro.
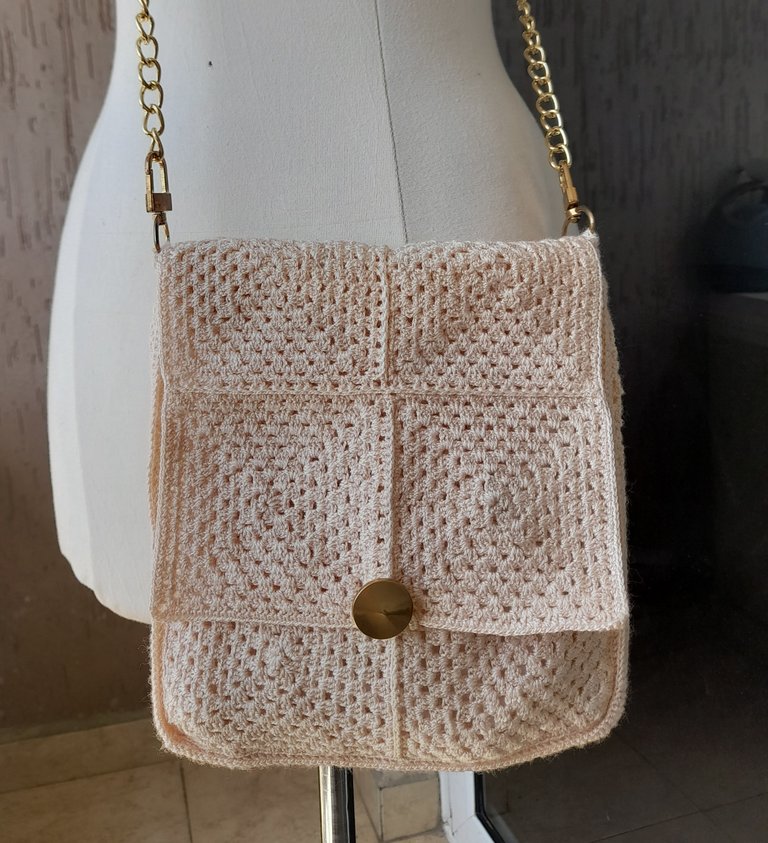
Finalmente, para completar el diseño, tejí seis grannys adicionales que formarían la solapa del bolso. Después de unirlos y ajustar la forma, añadí un botón como cierre, dándole el toque final.
Mi experiencia y resultado final
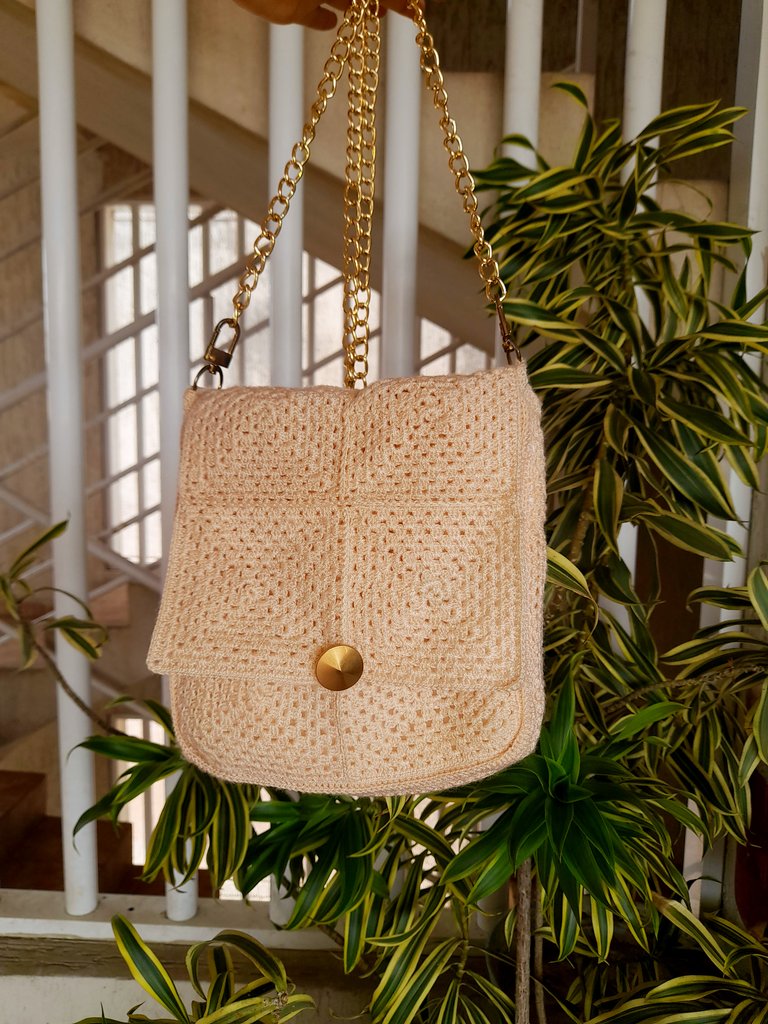
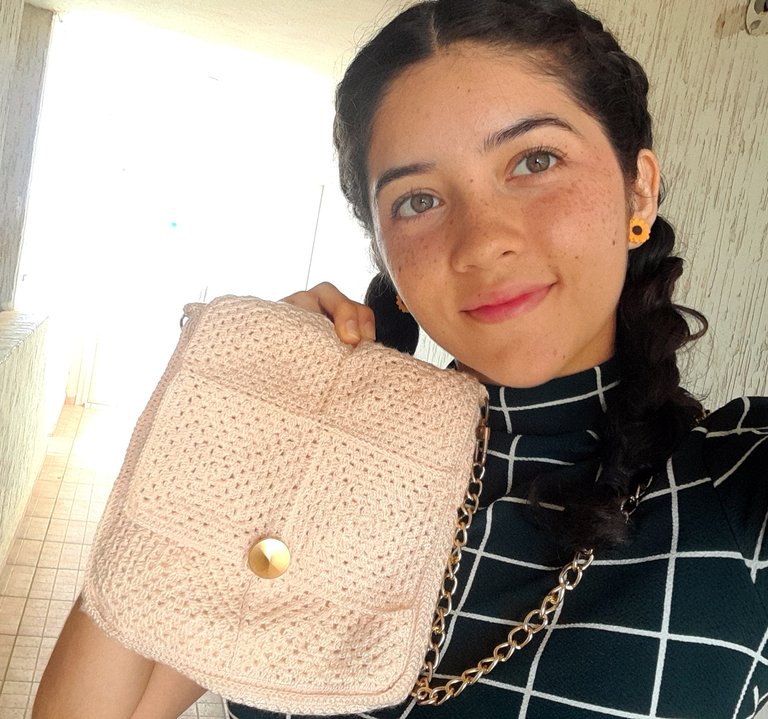
Me tomó dos semanas completar el bolso, pero cada día fue una experiencia de aprendizaje. Para ser mi primer intento en tejido, quedé fascinada con el resultado. Lo mejor de todo es que ahora tengo un bolso único, hecho con mis propias manos, que he usado en múltiples ocasiones y que complementa perfectamente diferentes outfits.
¡Espero que les haya gustado este proyecto tanto como yo disfruté haciéndolo! Hasta la próxima.


A few weeks ago, while organizing some materials I had stored away, I found several rolls of thread and started thinking about what I could make with them. I have always been fascinated by knitting, but I had never had the opportunity to try it, either due to a lack of materials or time. However, this time, with a few free days ahead, I decided to embark on a new project: knitting a bag entirely by myself.
From the very beginning, the idea excited me tremendously. It seemed like the perfect chance to learn and experiment with new techniques. Additionally, I loved the possibility of creating a unique accessory that could complement different outfits and reflect my creativity. Although I wasn’t entirely sure how the process would unfold, I was determined to enjoy every step.
Materials and Planning
To complete this project, I gathered a few essential materials. I used two rolls of thread with a thickness that I found suitable for making a sturdy yet flexible bag. Fortunately, I also had a knitting needle at home, which saved me the trouble of searching for additional tools. Along with these, I included scissors for cutting the thread as needed, a decorative button, a 110 cm chain, and two carabiners to attach the bag’s handles.
Before starting, I researched some techniques and decided to work with granny squares, a versatile and traditional knitting method that would allow me to assemble my bag in sections.
Knitting Process
The first step was creating the granny squares. Given the desired size of my bag and the thickness of the thread, I needed to knit eight squares in total: four for the front and four for the back. Once finished, I began joining them in pairs, ensuring that the stitches were firm and properly aligned.
Next, I connected each pair to another until I had two large squares, each composed of four granny squares. To add depth to the bag, I knitted a strip around one of the squares, leaving one side open to facilitate the next step. Once this section was complete, I attached the second square, fully closing the structure.
For the finishing details, I knitted a top border, where I incorporated the handles using the chain and carabiners. I also decided to sew an inner fabric lining with a zipper, securing it inside the bag with a needle and thread. Although this step was optional, I thought it would give the piece a neater finish and prevent objects inside from being visible.
Lastly, to finalize the design, I knitted six additional granny squares for the bag’s flap. Once assembled and shaped, I added a button as a closure, completing the final look.
My Experience and Final Thoughts
It took me two weeks to finish the bag, but each day was a learning experience. For my first time knitting, I was delighted with the result. The best part is that now I have a one-of-a-kind bag, made entirely with my own hands, that I’ve been able to use on many occasions and that pairs wonderfully with different outfits.
I hope you enjoyed reading about this project as much as I enjoyed creating it! Until next time.
Posted Using INLEO
Bellísimo, me gusta mucho todo el estilo aparte usar algo creado por ti es realmente genial. @aurodivys mira esta idea para qie le hagas a Sofi!
Es un trabajo hermoso y dedicado, te felicito @danielaserena. Yo que amo tejer he encontrado inspiración aquí, gracias a mi querida Rosita por la recomendación. Seguro que le hago uno a Sofi, amiga. Un abrazo 🤗
Justo por eso te etiquete! Abrazos amiga linda
Gracias Rosa🥰
Congratulations @danielaserena! You have completed the following achievement on the Hive blockchain And have been rewarded with New badge(s)
Your next target is to reach 1000 upvotes.
You can view your badges on your board and compare yourself to others in the Ranking
If you no longer want to receive notifications, reply to this comment with the word
STOPCheck out our last posts:
Me ha encantado, fue un proceso largo pero el resultado valió la pena amiga, quedó hermoso, original, y estoy segura que veremos muchos más 🤗
Holis,..No se mucho de carteras para damas pero lo que si se es que le quedo muy lindo.,el apoyo mutuo en las comunidades es muy importante y mas aka en esta plataforma de Hive
It feels great when you knit your own bag and use it. You can make the design the way you like. And it is always satisfying. Love its design. Great work!
selected by @rezoanulvibes
¡Hermoso!
¡Gracias!😊
Está hermoso en cuanto a diseño y factura. Has hecho una obra increíble. Te felicito por ese talento que nos compartes y agradezco 🙏🏻🌻
Very beautiful, neat and aesthetic. The details of the rope chain add a luxurious impression. Cool👍