Hello everyone...✨
Hello to my dear Hivers and the dear community of artists #HiveDIY, as always very pleased and excited to be here again, showing you my work made with love and especially for you.
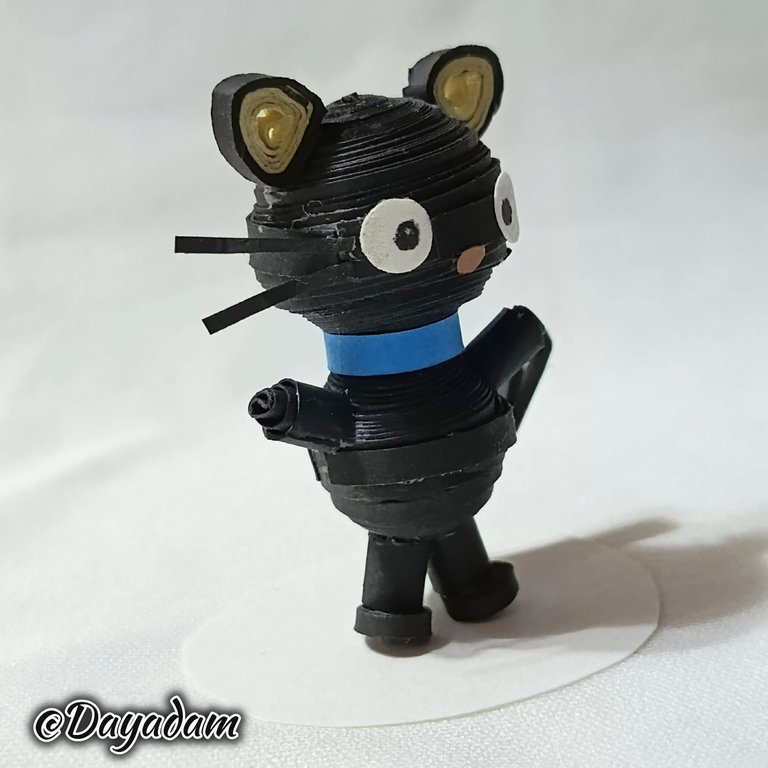
As you have seen in my past posts, I am making a collection of SANRIO characters, this time I continued with the beautiful kitty Chococat, of which I made a 3D decorative figure in the quilling technique.
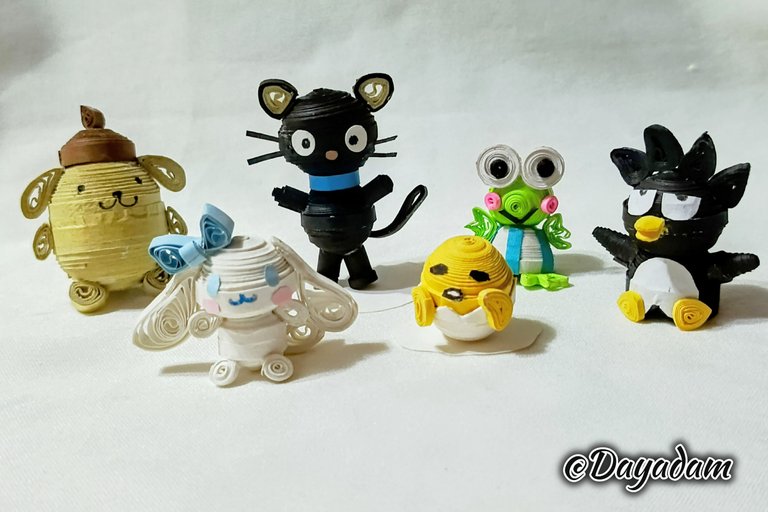
Here are the other figures that I have been making in case you are interested in making your own collection:
Keroppi: https://peakd.com/hive-130560/@dayadam/keroppi-in-3d-quilling-technique
Pompurin:https://peakd.com/hive-130560/@dayadam/pompurin-3d-decorative-quilling-technique-engesp-5nh
Cinnamoroll: https://peakd.com/hive-130560/@dayadam/cinnamoroll-3d-decorative-figure-quilling
Badtz Maru: https://peakd.com/hive-130560/@dayadam/badtz-maru-3d-decorative-figure
Gudetama: https://peakd.com/hive-130560/@dayadam/gudetama-3d-decorative-figure-quilling-technique-engesp--9ss
Hoping you like it, I leave you my creative process:
Let's get started:😃

Hola a Todos...✨
Hola a mis queridos Hivers y a la querida comunidad de artistas #HiveDIY, como siempre muy complacida y emocionada de encontrarme por acá nuevamente, mostrándole mi trabajo hecho con mucho amor y especialmente para ustedes.
Como han podido apreciar en mis pasados post, estoy realizando una colección de los personajes de SANRIO, esta vez continuó con el hermoso gatito Chococat, de cuál realicé una figura decorativa en 3D en la técnica de quilling.
Por acá les dejo las otras figuras que he ido elaborando por si están interesados en realizar su propia colección:
Keroppi: https://peakd.com/hive-130560/@dayadam/keroppi-in-3d-quilling-technique
Pompurin:https://peakd.com/hive-130560/@dayadam/pompurin-3d-decorative-quilling-technique-engesp-5nh
Cinnamoroll: https://peakd.com/hive-130560/@dayadam/cinnamoroll-3d-decorative-figure-quilling
Badtz Maru: https://peakd.com/hive-130560/@dayadam/badtz-maru-3d-decorative-figure
Gudetama: https://peakd.com/hive-130560/@dayadam/gudetama-3d-decorative-figure-quilling-technique-engesp--9ss
Esperando que sea de su agrado, les dejo mi proceso creativo:
Comencemos:😃
 |
 |

• Cartulinas.
• Guillotina para cortar papel.
• Hoja blanca.
• Lápiz de color negro.
• Cintas de quilling.
• Aguja de quilling.
• Cono para moldear círculos.
• Pega blanca extra fuerte (de carpintería).
• Tijera.
- Cardboard.
- Guillotine to cut paper.
- White sheet.
- Black pencil.
- Quilling ribbons.
- Quilling needle.
- Cone to mold circles.
- Extra strong white glue (carpentry glue).
- Scissors.

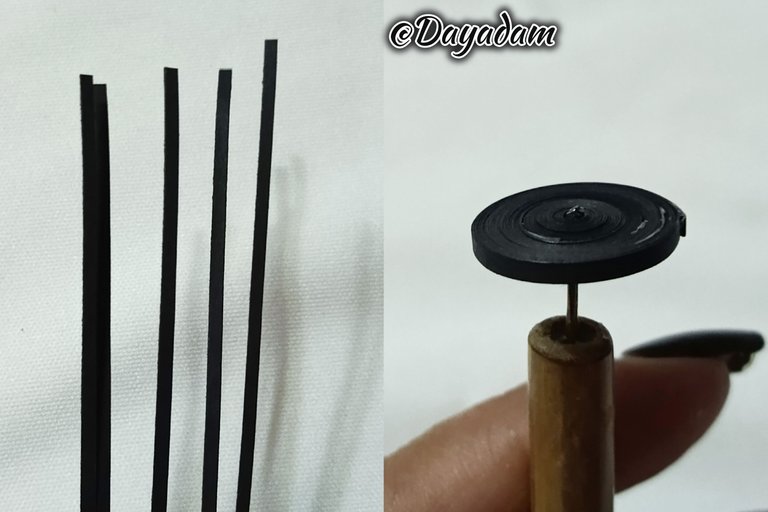
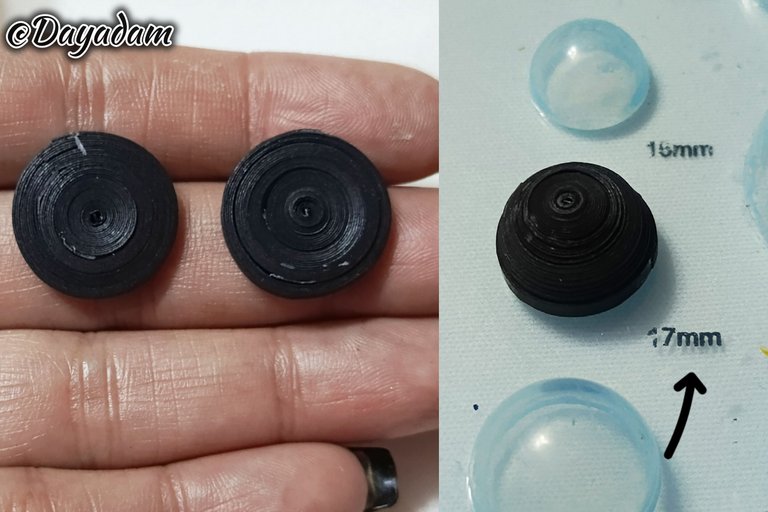
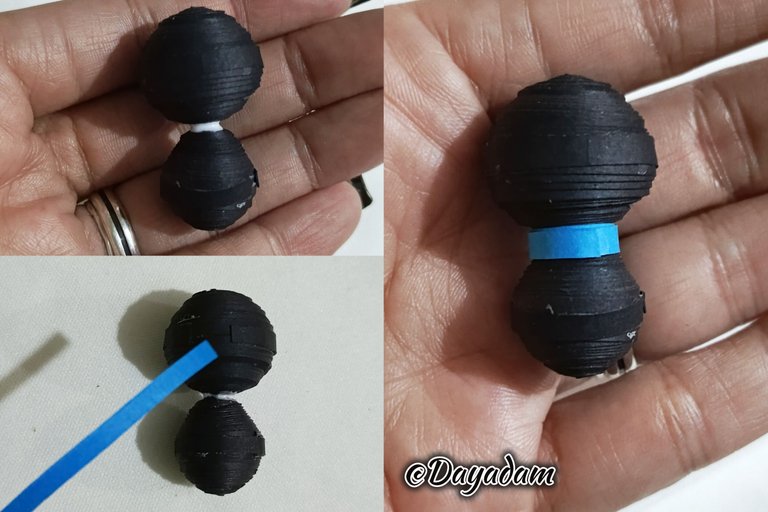
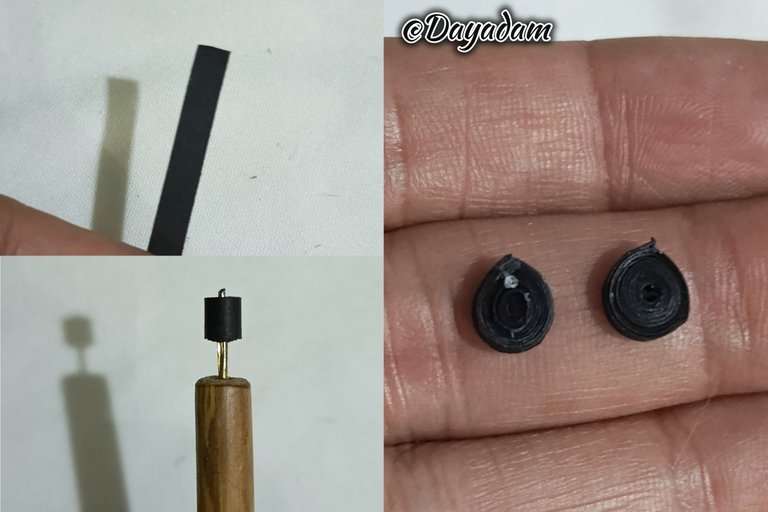
- I started by taking quilling ribbons, 3 mm wide, with the needle to roll up all the tape until the end of the same seal with extra strong white glue, I pulled out of the needle, to get a closed circle, we will need two equal.
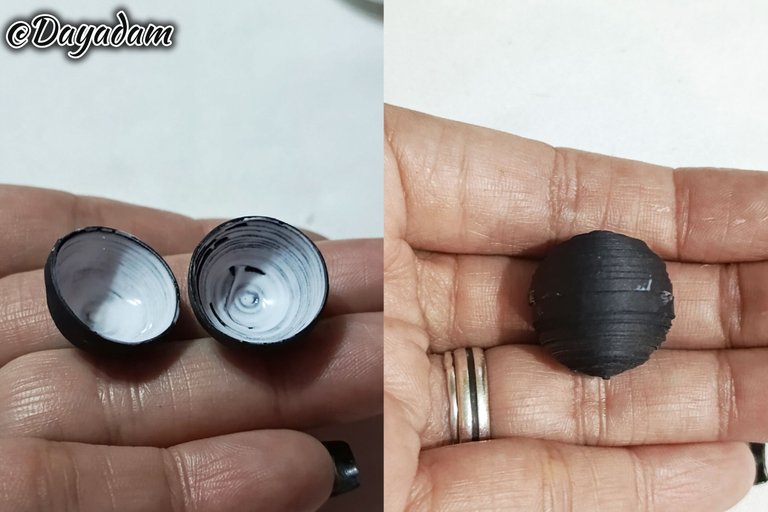
- Both circles are molded in a mold for circles in the measure number 17 mm, I took out of the mold applied extra strong white glue on the inside to prevent deformation, let dry very well, and joined the two to form the head of the character.
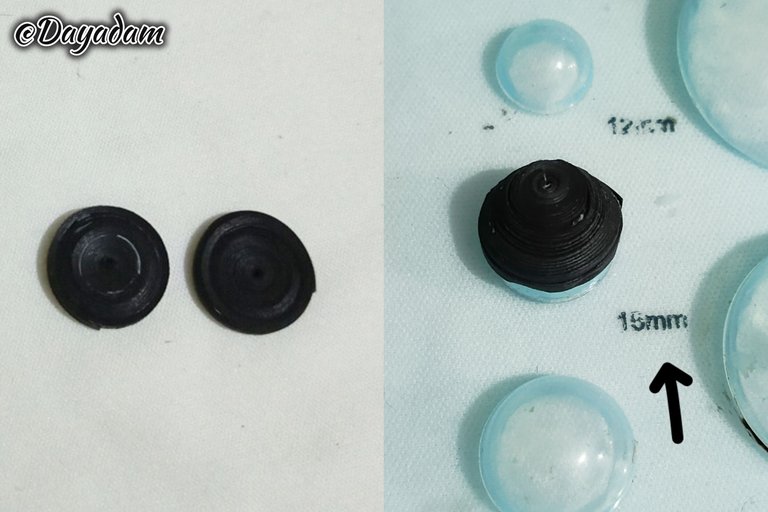
- To make the body I made two closed circles smaller than the previous ones, this time we molded them in the 15 mm size, we joined both pieces.

• Comencé tomando cintas para quilling, de 3 mm de ancho, con la aguja para que le enrolle toda la cinta hasta llegar al final de la misma selle con pega blanca extra fuerte, saqué de la aguja, para obtener un círculo cerrado, vamos a necesitar dos iguales.
• Ambos círculos los molde en un molde para círculos en la medida número 17 mm, saqué del molde apliqué pega blanca extra fuerte por su parte interna para evitar que se deformen, deje secar muy bien, y uní ambos para formar la cabeza del personaje.
• Para realizar el cuerpo lleve a cabo dos círculos cerrados más pequeños que los anteriores, moldeamos esta vez en la medida número 15 mm, unimos ambas piezas.
 |  |  |
 | 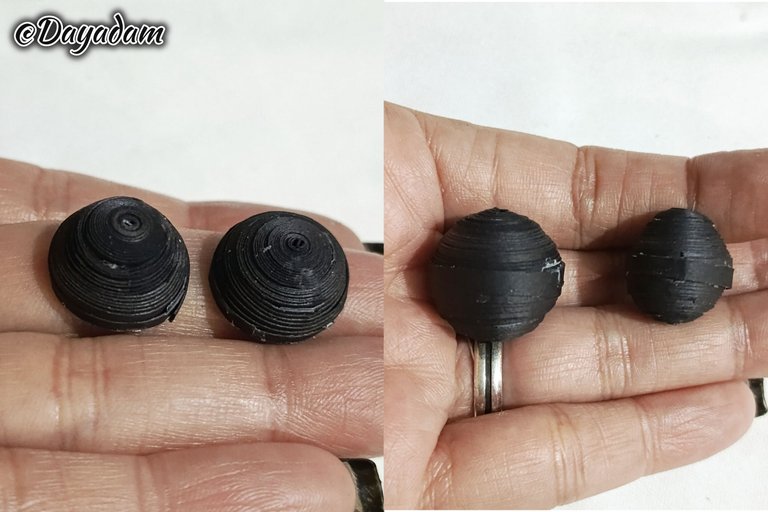 |
- We will join head and body with extra strong white glue, in the part of the neck I passed a piece of 3 mm wide blue ribbon to make the necklace.
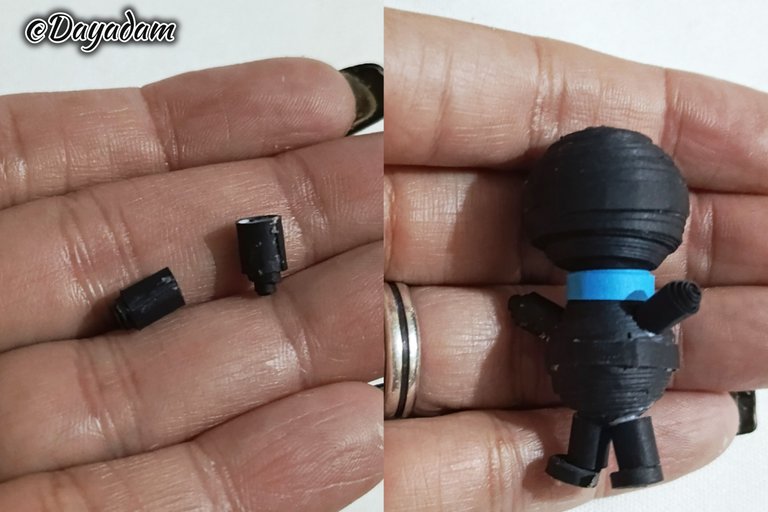
- To make the legs I made two closed circles with 4 mm wide tape, then I made two more circles with one millimeter wide tape, I joined both pieces.
- For the arms I made two more circles with 4 mm wide tape. Then I proceeded to glue the pieces in the corresponding places.
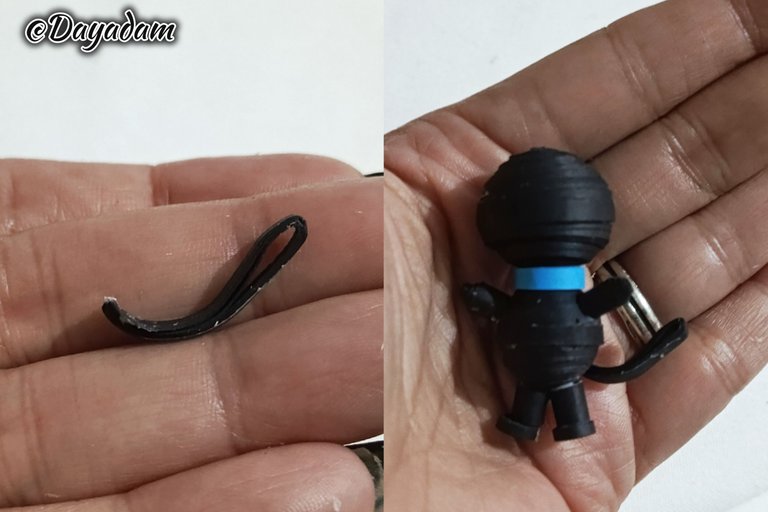
- I made the tail by folding a piece of 3 mm wide tape, then molded it into a curved shape, and glued it to the lower part of the character's body.
• Uniremos cabeza y cuerpo con pega blanca extra fuerte, en la parte del cuello pasé un trozo de cinta de 3 mm de ancho color azul para realizar el collar.
• Para regresar las patas realicé dos círculos cerrados con cinta de 4 mm de ancho, luego realicé dos círculos más con cinta de un milímetro de ancho, uní ambas piezas.
• Para los brazos realicé dos círculos más con cinta de 4 mm de ancho. Luego procedí a pegar las piezas en los lugares correspondientes.
• Realicé la cola doblando un trozo de cinta de 3 mm de ancho, luego moldee haciéndole una forma curva, pegué de la parte baja del cuerpo del personaje.
 |  |
 |  |
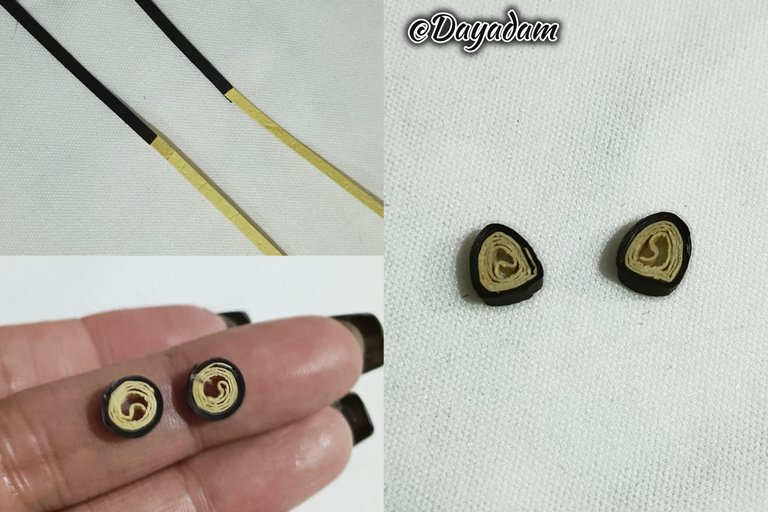
- I made the ears by carrying out two half-open circles with black and beige tape, I molded them as a kind of cones, I glued them to the head of the character.
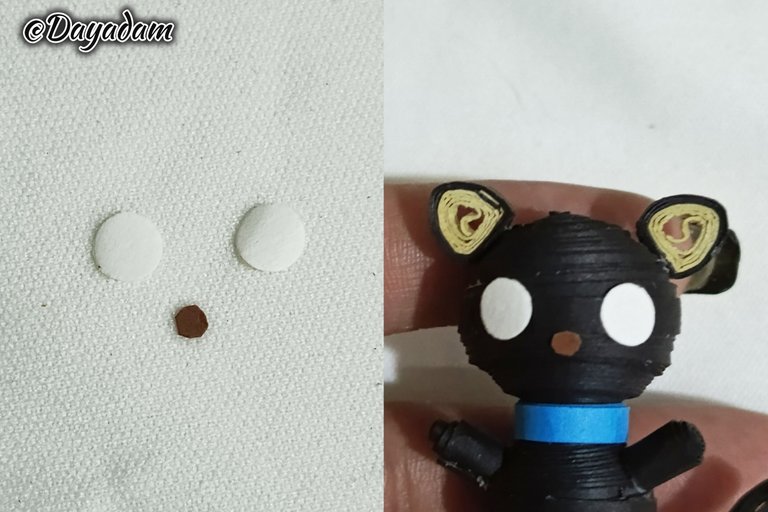
- To finish I cut two circles from a piece of white cardboard, and a smaller circle from a brown cardboard, I glued them to the face of the kitten and with a black pencil I made two points to finish with the eyes.
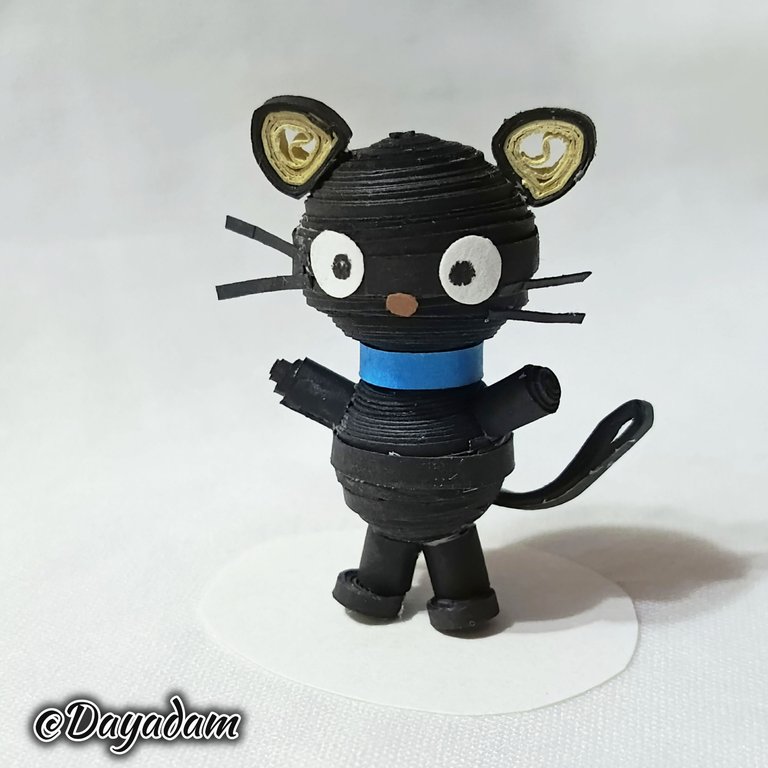
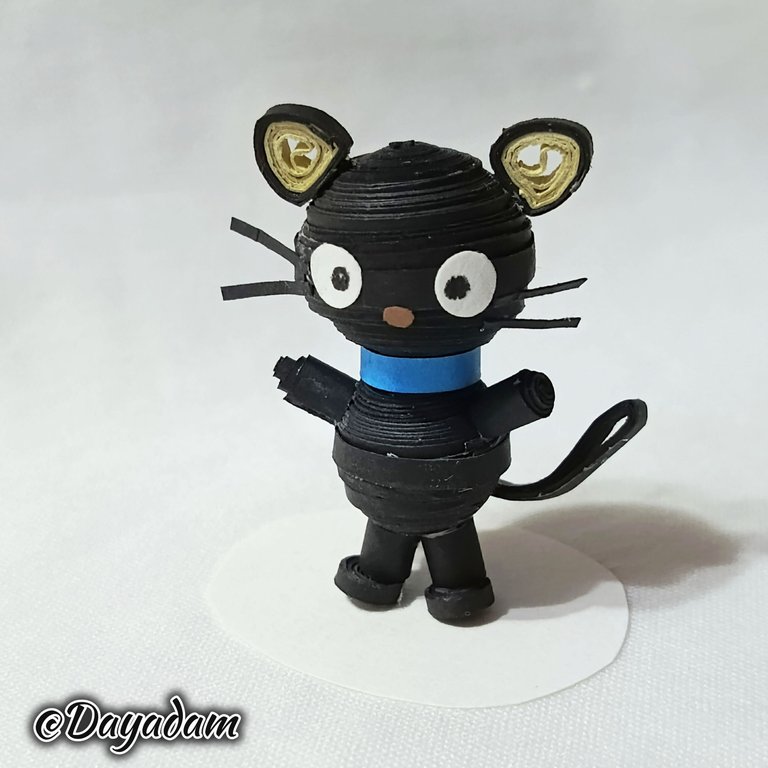
In this way I finished this 3D decorative figure of Chococat, in the quilling technique.
• Realicé las orejas llevando a cabo dos círculos semiabiertos con cinta de color negro y beige, los moldee como una especie de conos, pegué de la cabeza del personaje.
• Para finalizar recorte dos círculos de un trozo de cartulina blanca, y un círculo más pequeño de una cartulina marrón, pegué a la cara del gatito y con un lápiz de color negro hice dos puntos para culminar con los ojos.
De esta manera finalice esta figura decorativa en 3D de Chococat, en la técnica de técnica de quilling.
 |  |

 |
 |
 |
 |
 |
 |
 |
What did you think, did you like it?
I hope you did, I hope you liked my explanation, procedure and photos, I made them with love for you.
"Let out that muse that inspires you, and let your imagination fly".
Thank you all, see you next time ✨.
¿Que les pareció, les gustó?
Espero que sí, que les haya gustado mi explicación, procedimiento y fotos, los hice con mucho cariño por y para ustedes.
"Deja salir esa musa que te inspira, y deja volar tu imaginación".
Gracias a todos, nos vemos en la próxima✨

Posted Using INLEO
Que ternura. Quedó muy lindo. No conocía esta técnica, me parece muy práctica e interesante. Estaré atenta a tus creaciones.
Gracias por tus palabras me gratifican mucho me alegra que te haya gustado el trabajo.
Tengo más de 3 años mostrando Esta técnica, eres bienvenida a mi blog cuando quieras para que puedas ver la diversidad que he venido realizando en la misma.
Que tengas bello día.
!LADY
Que cosita mas cuchis, esta con las patitas abiertas pidiendo un abracito, me muero 😍 te quedo muy adorable ❤️
Gracias hermosa agradezco mucho tus palabras, y si, está con los bracitos abiertos esperando por buhito para darle un caluroso abracito.
Saludos mi linda, un gusto verte por aquí 💖
!LADY
of course i like it, he is very cute. those big bulging eyes are adorable. the color choice is also very appropriate, black and his neck is blue which gives a very sweet contrast.
How lovely! Thank you so much. It really gratifies me to see you constantly appreciating and valuing my work. Thank you so much for that 💞
!LUV
!PIZZA
@reachdreams, @dayadam(1/3) sent you LUV. | tools | discord | community | HiveWiki | <>< daily
@dayadam, sorry! You need more to stake more $PIZZA to use this command.
The minimum requirement is 20.0 PIZZA staked.
More $PIZZA is available from Hive-Engine or Tribaldex
You're welcome, your work is worthy of appreciation. keep up the good work♥️
Aaaaww que cuchitura, como siempre un lindo trabajo, gracias por compartir.
Muchísimas gracias mi corazón por tu visita y por tus gratificantes palabras. Saluditos 😊
Impressive and nicely done, bravo and great job
Thank you so much. Your visit and your appreciation of my work are greatly appreciated. Have a nice day 🌻
Amiga, @dayadam, qué belleza de trabajo. Me encanta la técnica de quilling
Gracias mi linda me gratifica mucho que te guste la técnica que utilizo y el resultado final que les doy con muchísimo cariño.
Que tengas un bello día 🌈🌻
!HUG
Impropio para ti. Que no falte el sol
No conocía esa técnica para crear figuras, el personaje del gato luce muy simpático, se ve bien hecho.